

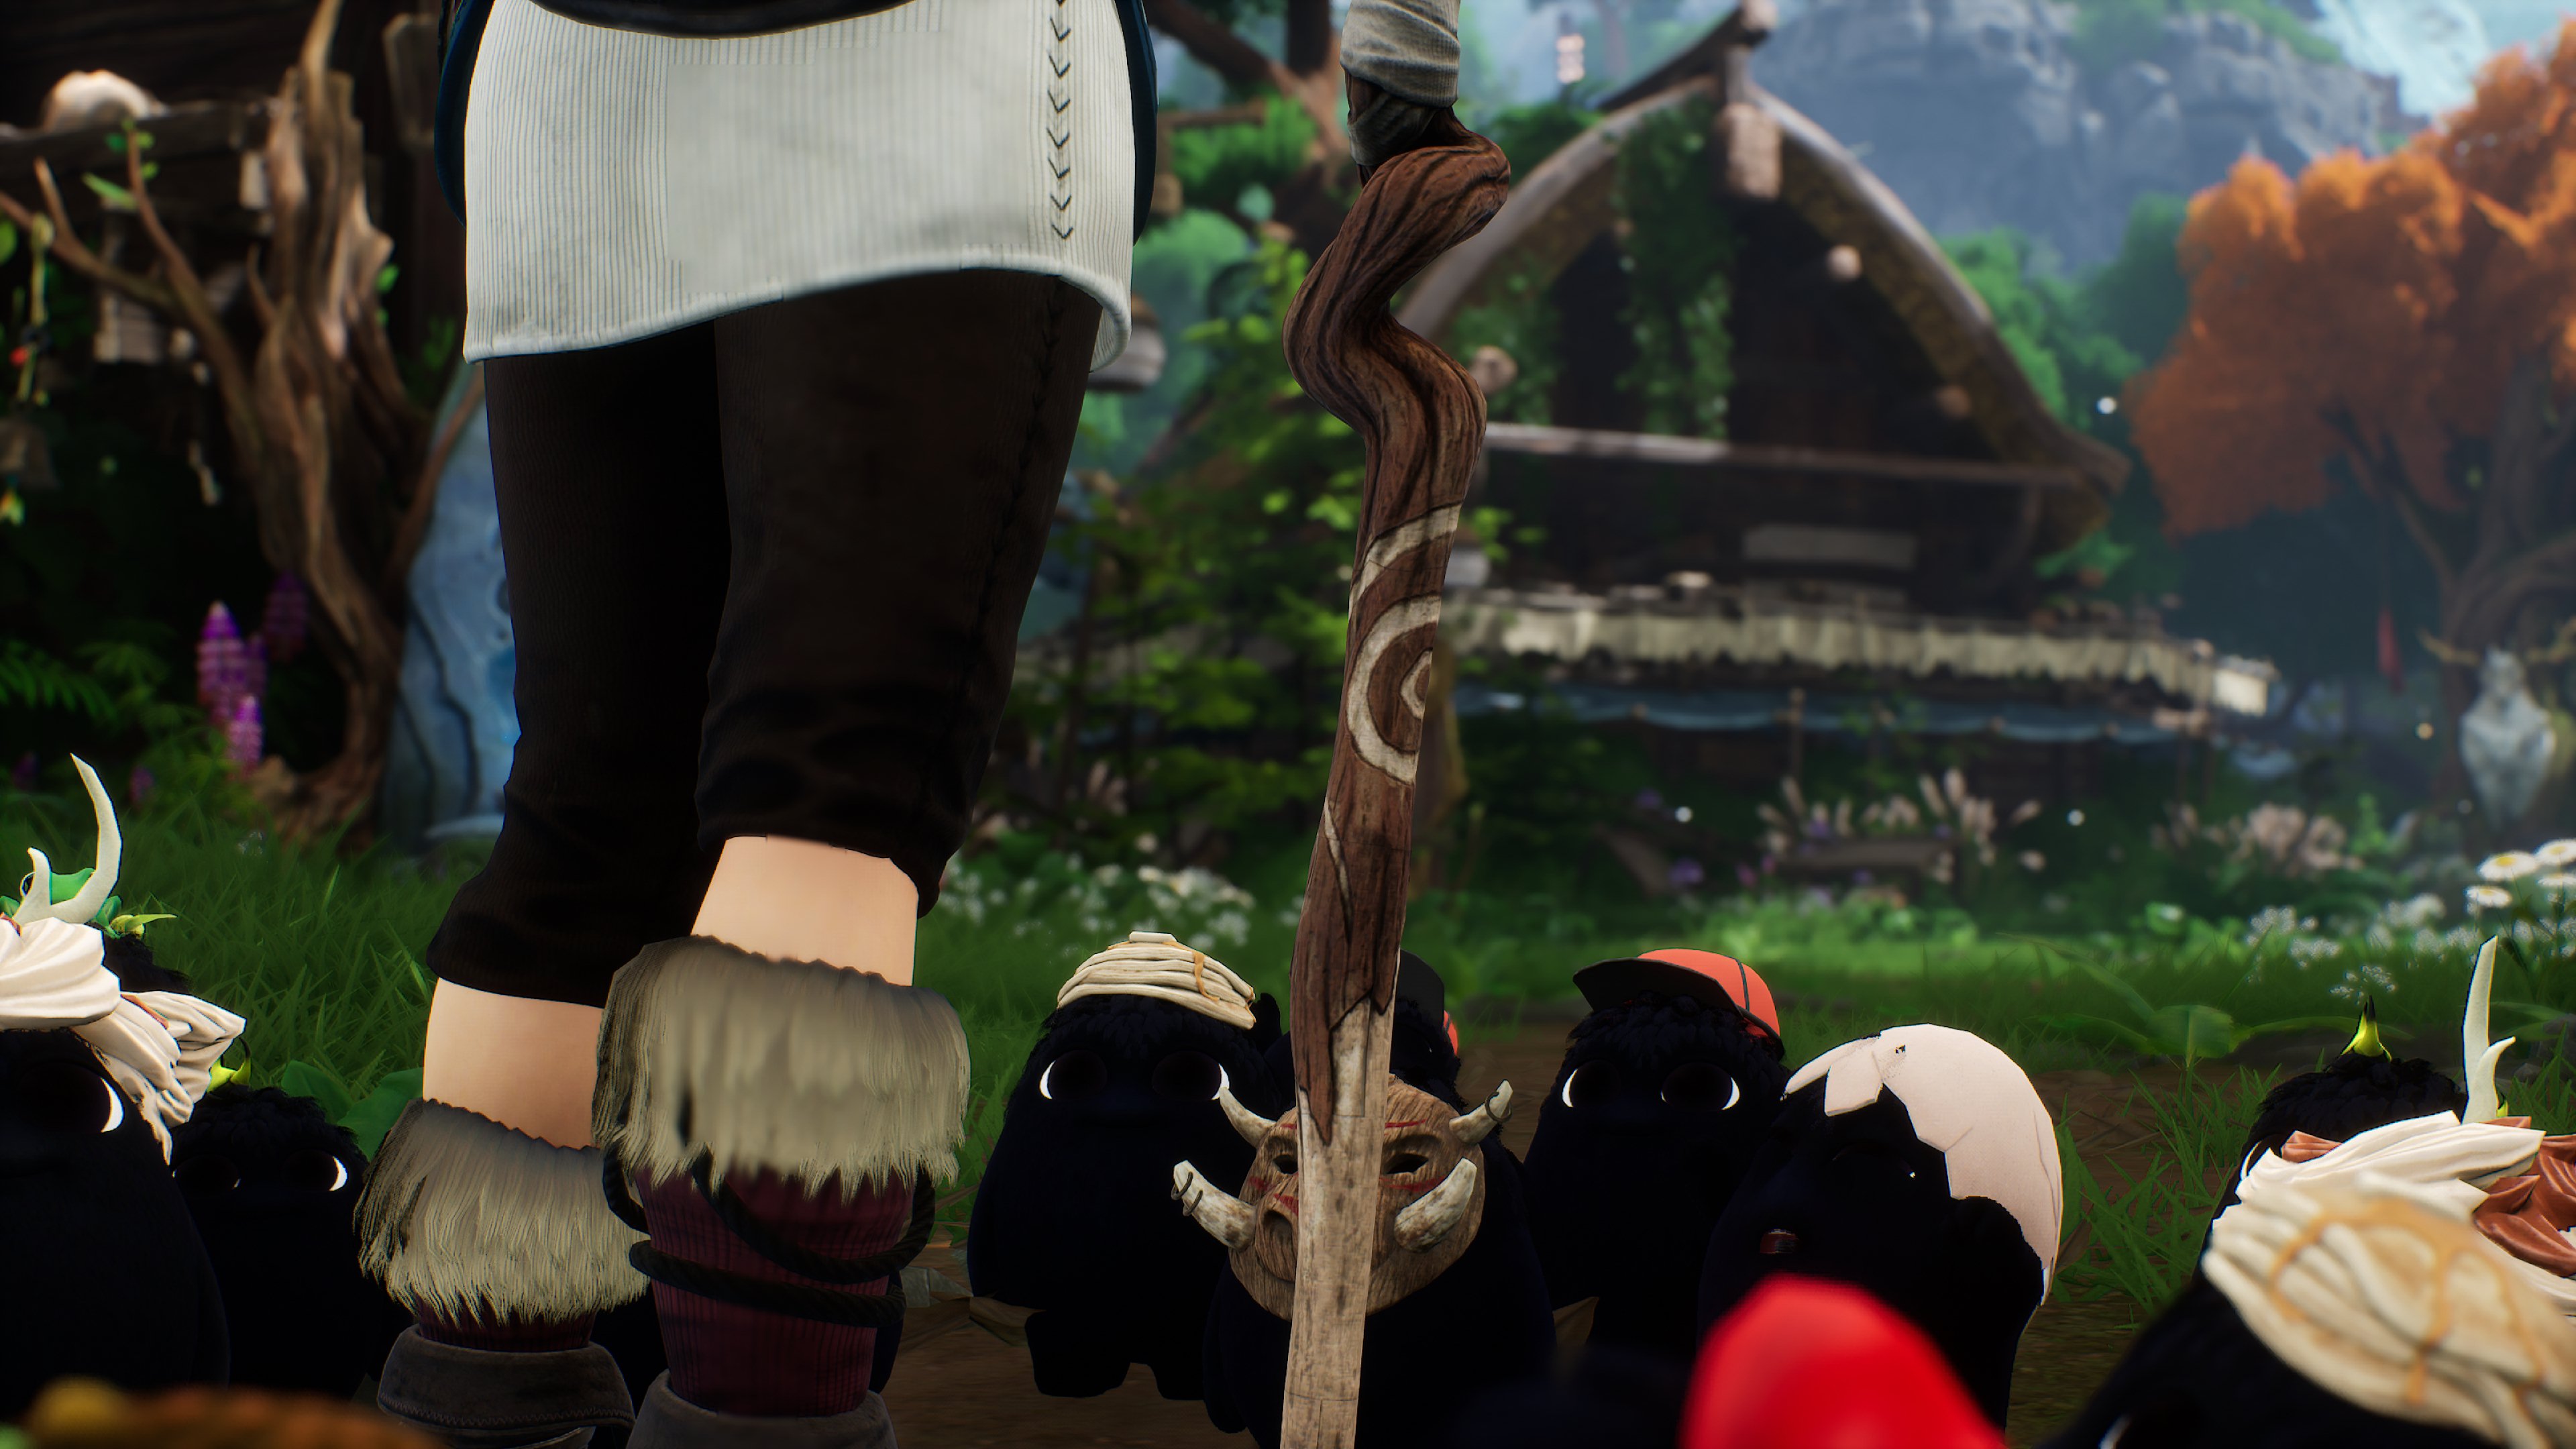
I split my Kena build into two posts because I ended up taking a bit of a break from Kena to work on Sailor Neptune and prep for ComfyCozyCon. I didn’t want to wait to publish the first part, so I went ahead and did that knowing that I would make a second part for the remaining cosplay pieces. So here’s the conclusion to my Kena cosplay!


Items I Bought
- Necklace crystal gem commission (Fairchild cosplay)
- Necklace chain (Joann’s)
- 16 gauge copper wire (Joann’s)
- Paper Lantern Lights (Amazon)
- Holographic blue vinyl
What I Already Had
- Foam clay (TNT Cosplay Supply)
- 8 gauge aluminum wire
- PETG
- Scotch tape
- Kobracast
- Plastazote
- Lots of hot glue
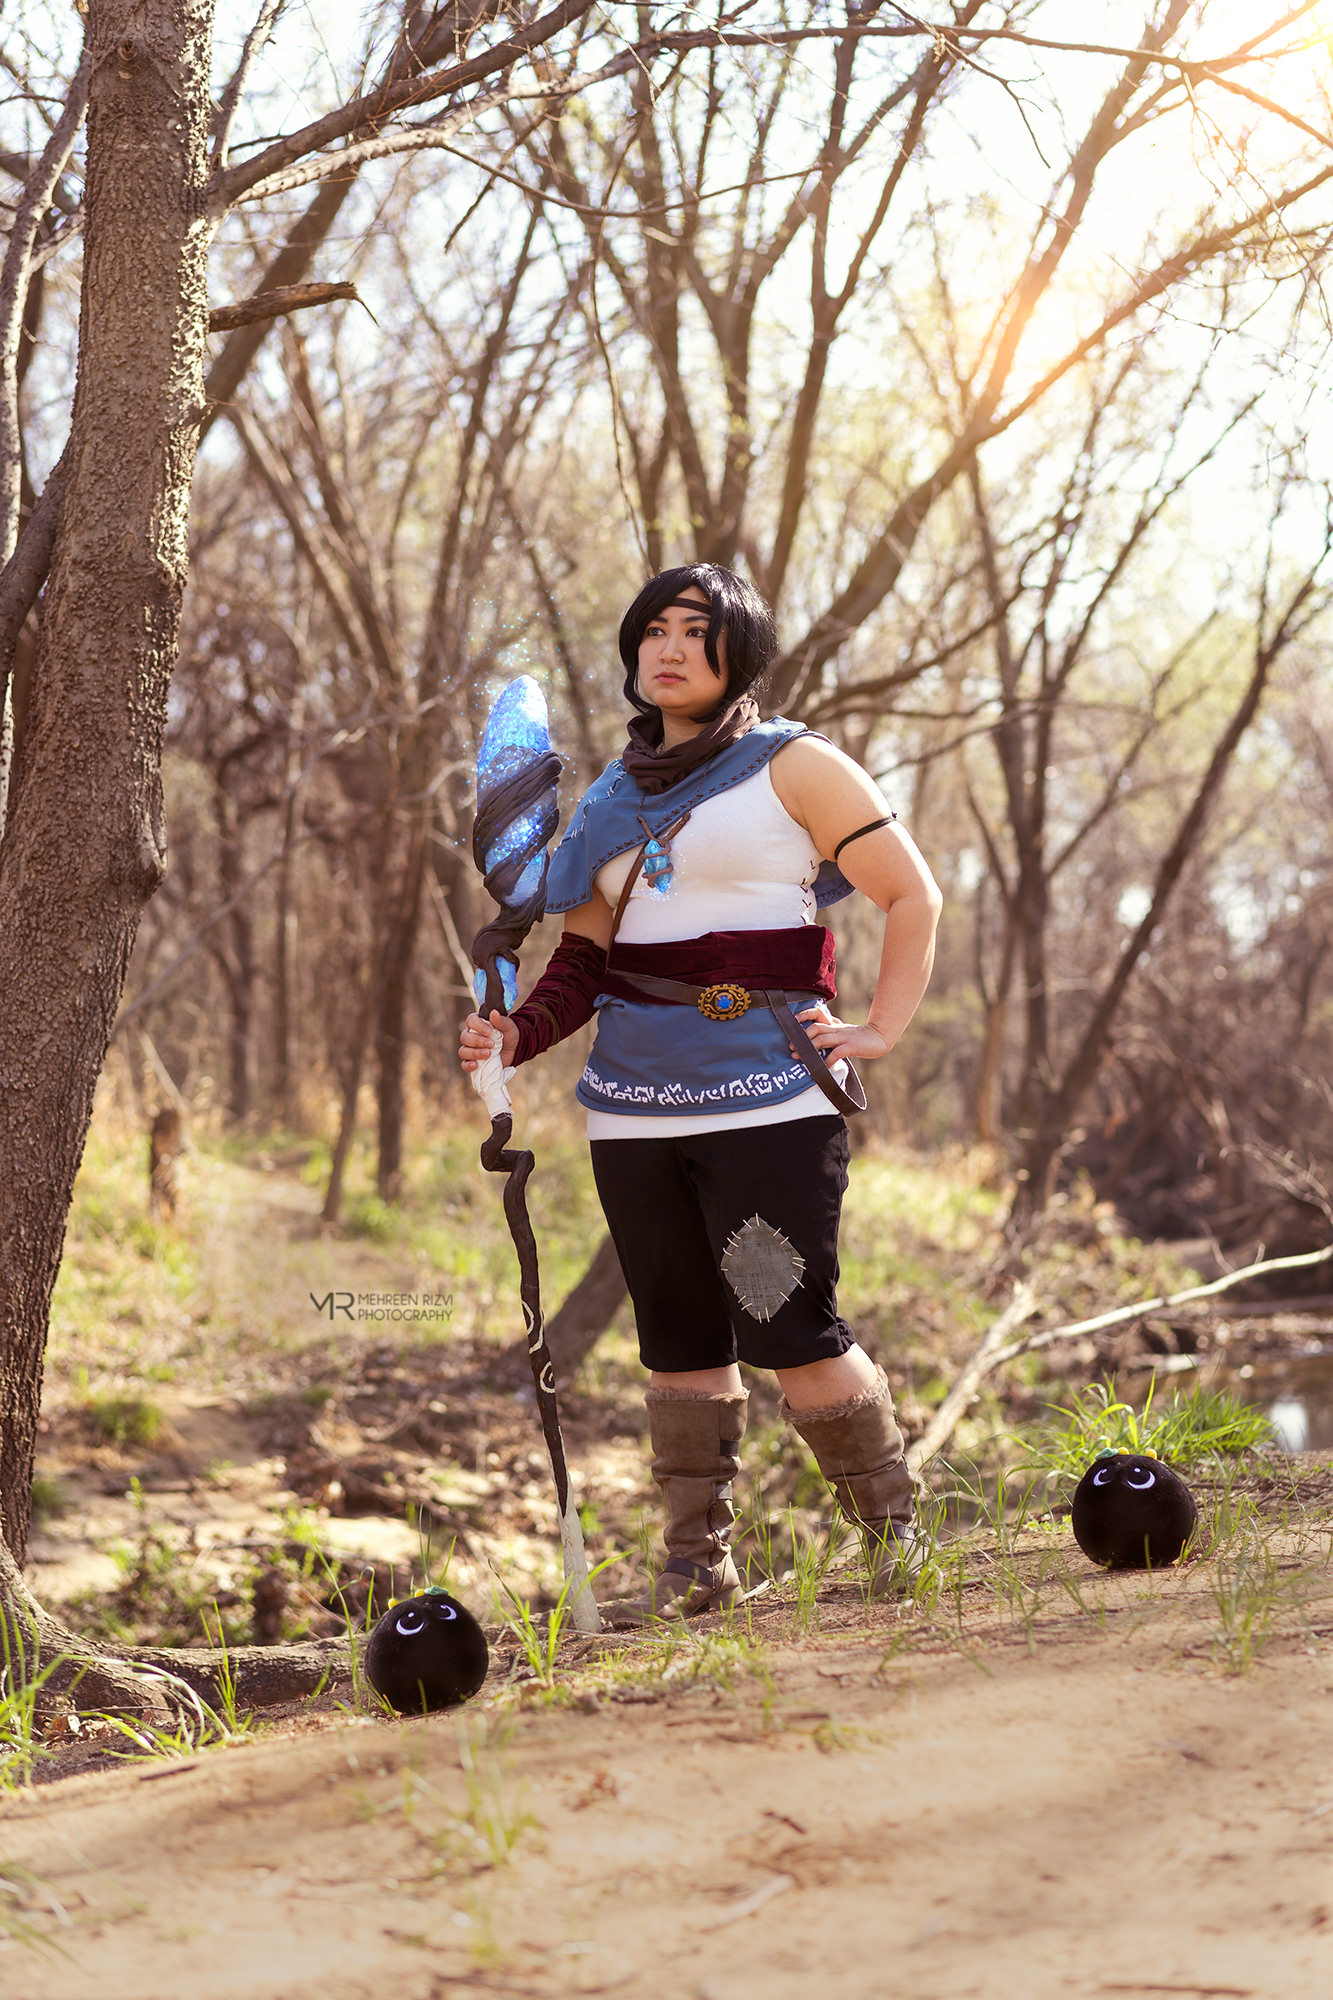
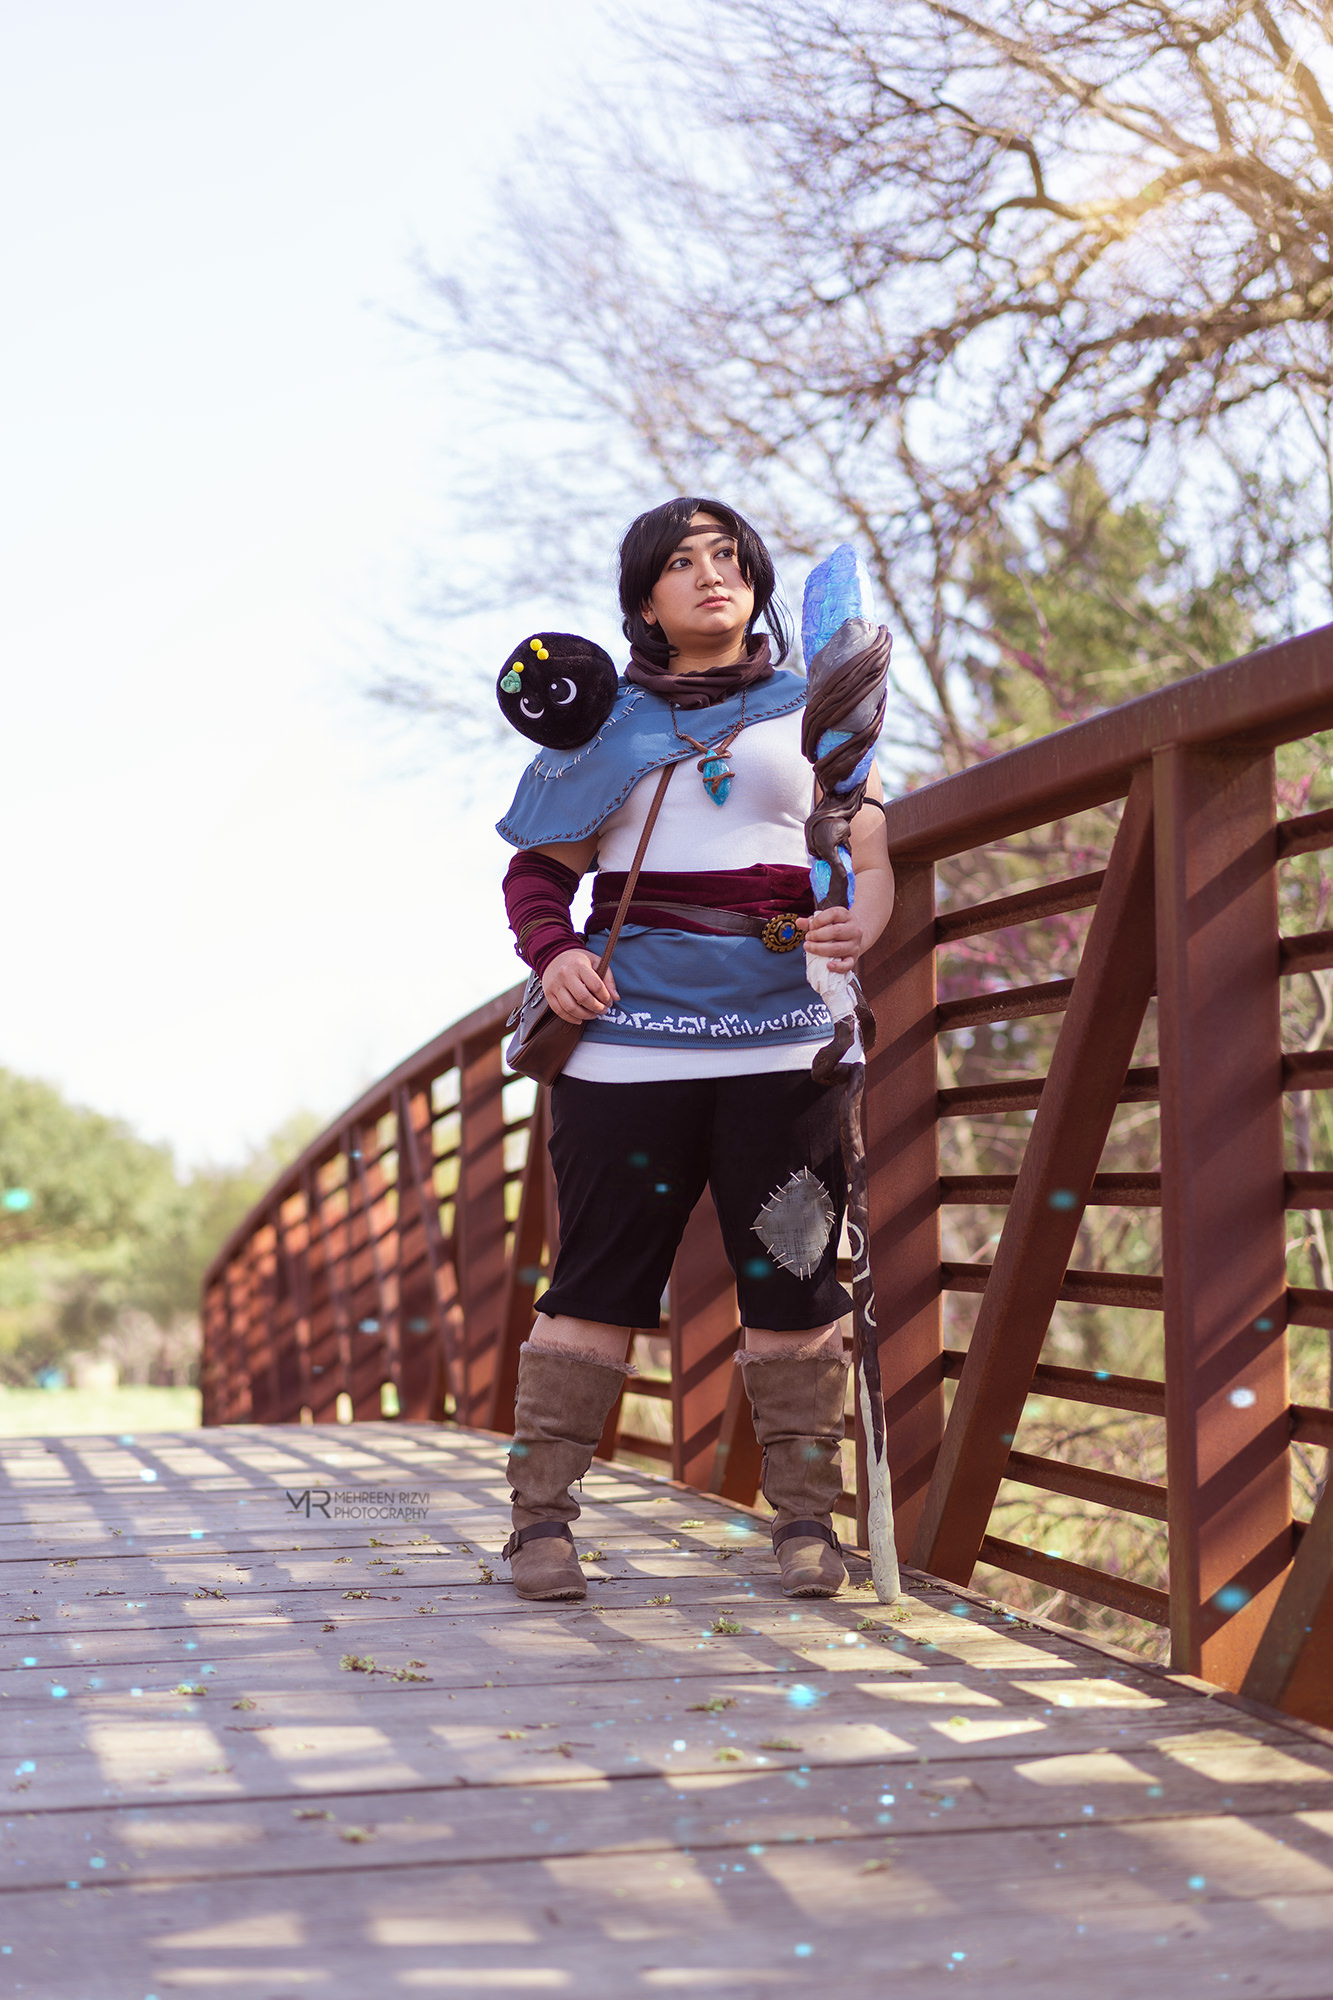
Necklace
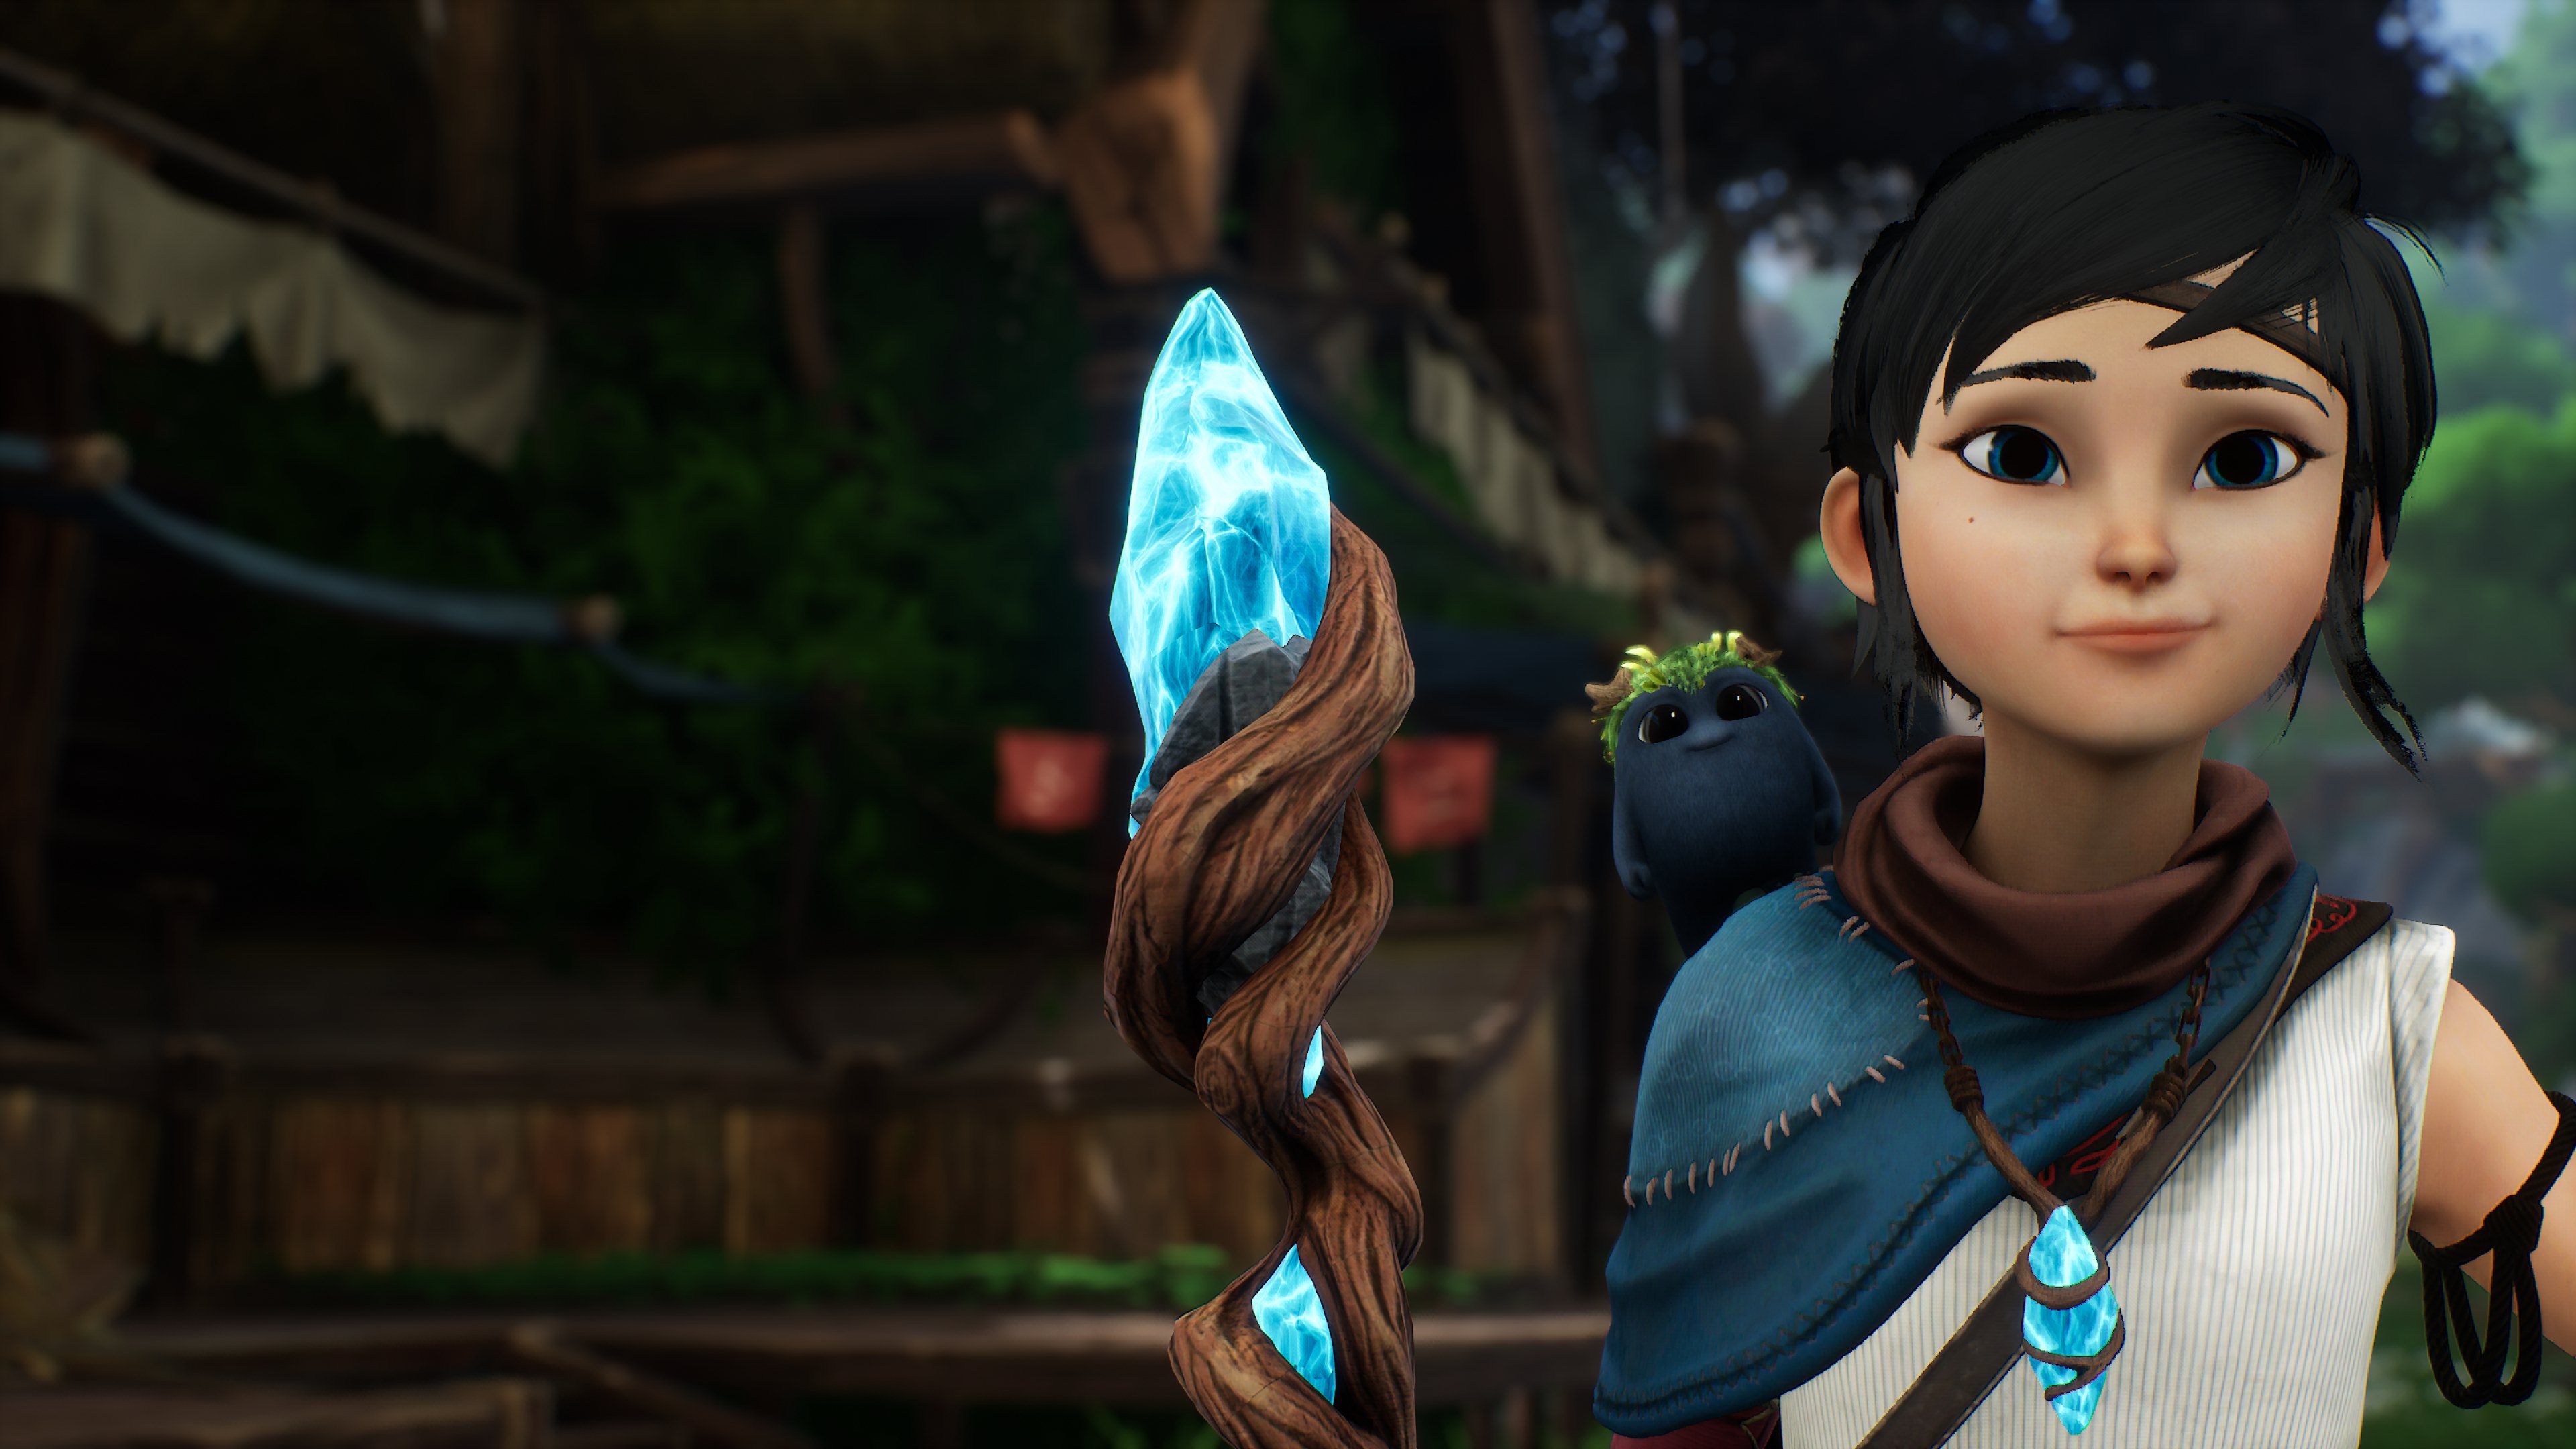
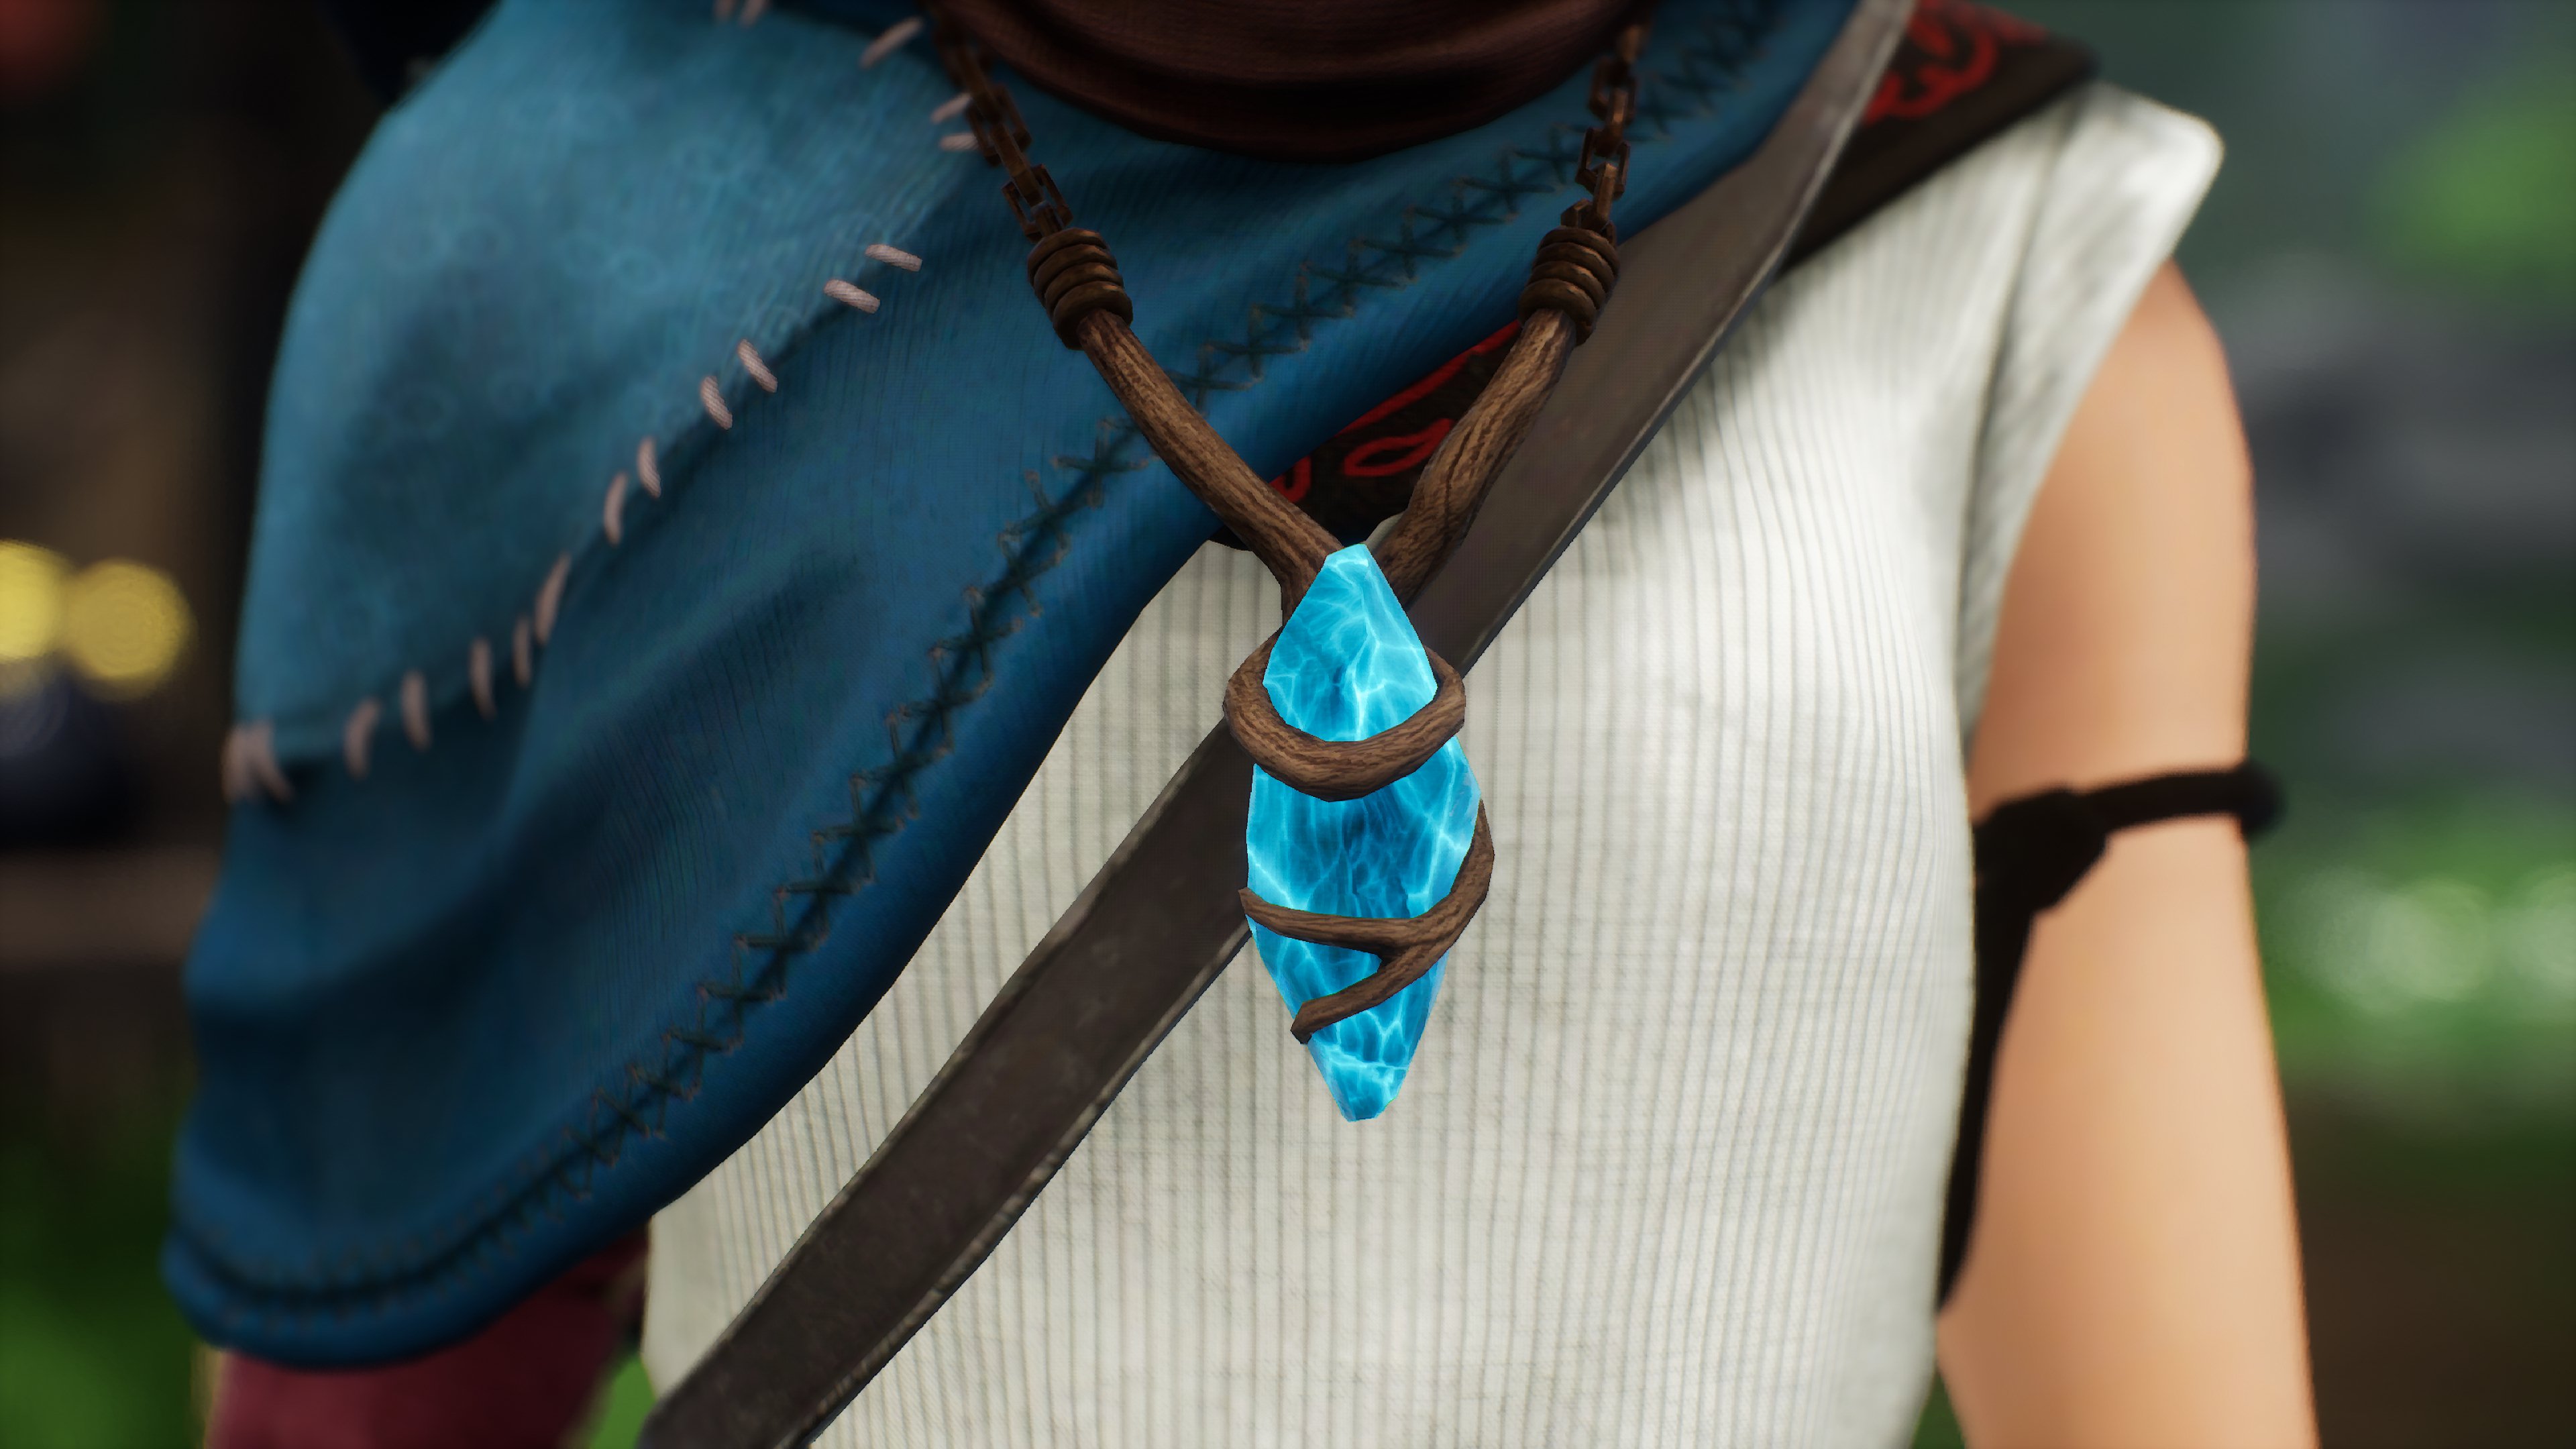
The necklace’s centerpiece is the crystal, which I commissioned from Fairchild Cosplay, without this, it wouldn’t be Kena’s necklace! If you’re interested in getting something similar, I definitely recommend her work!
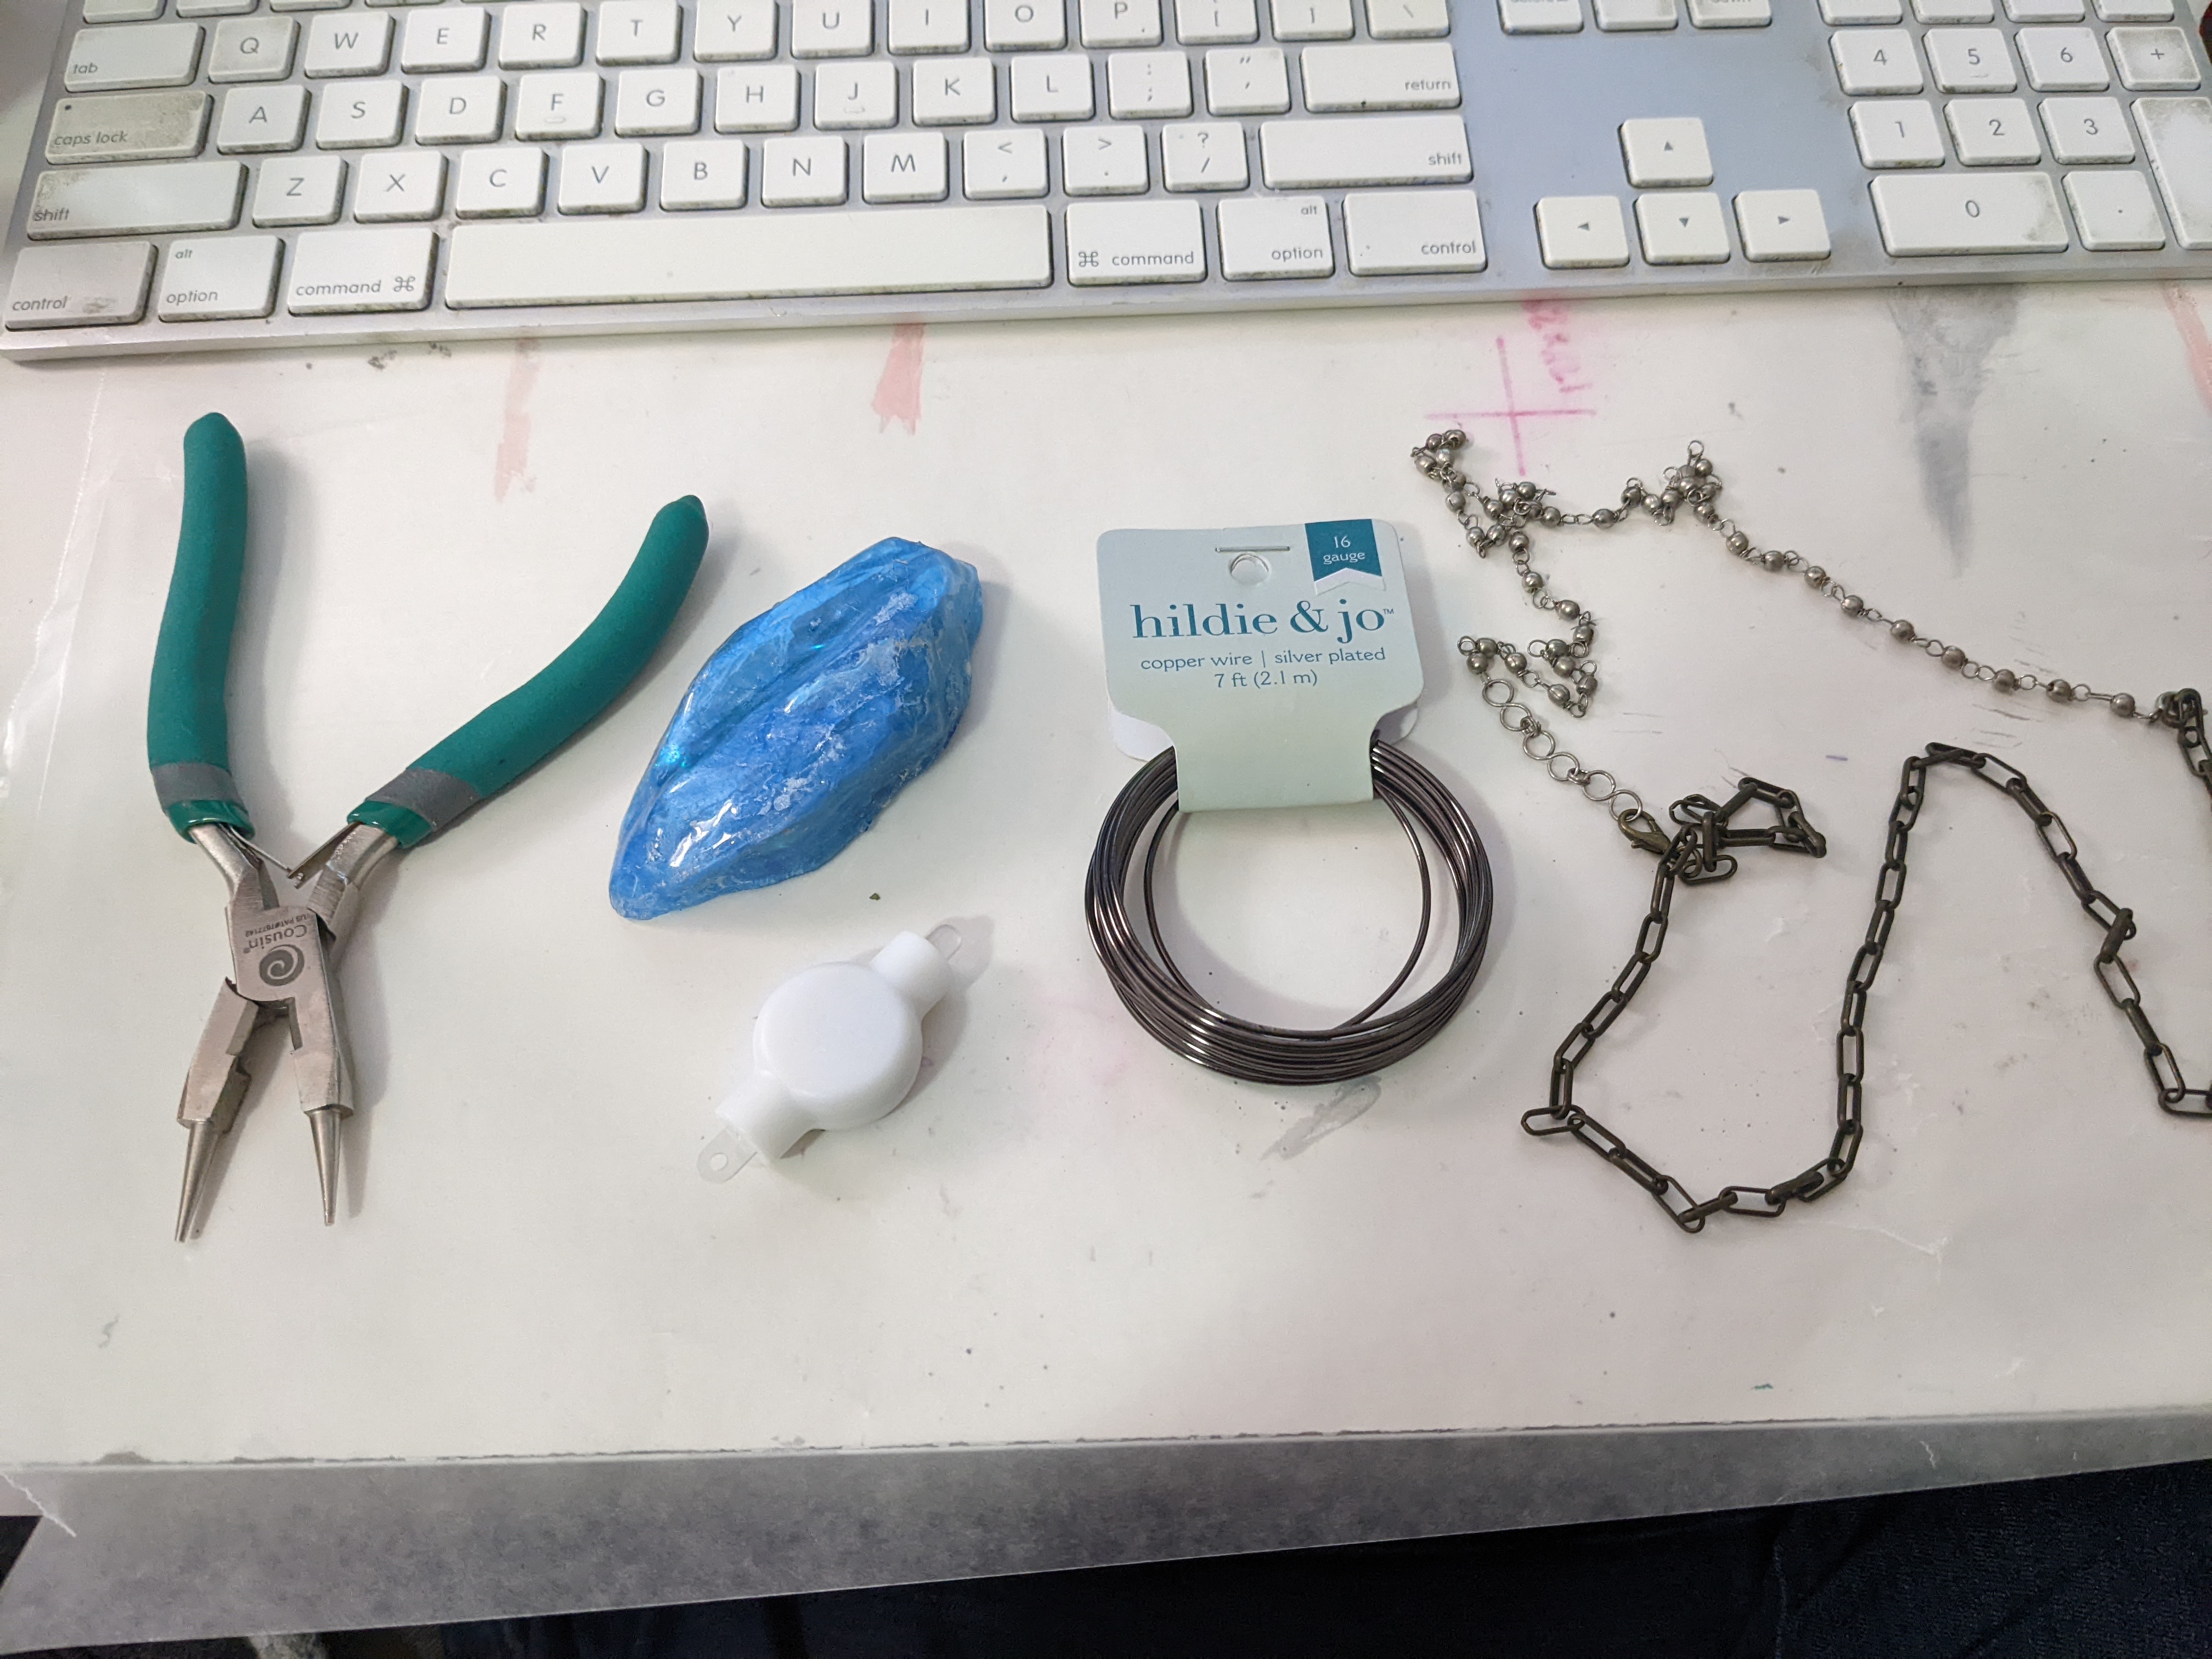
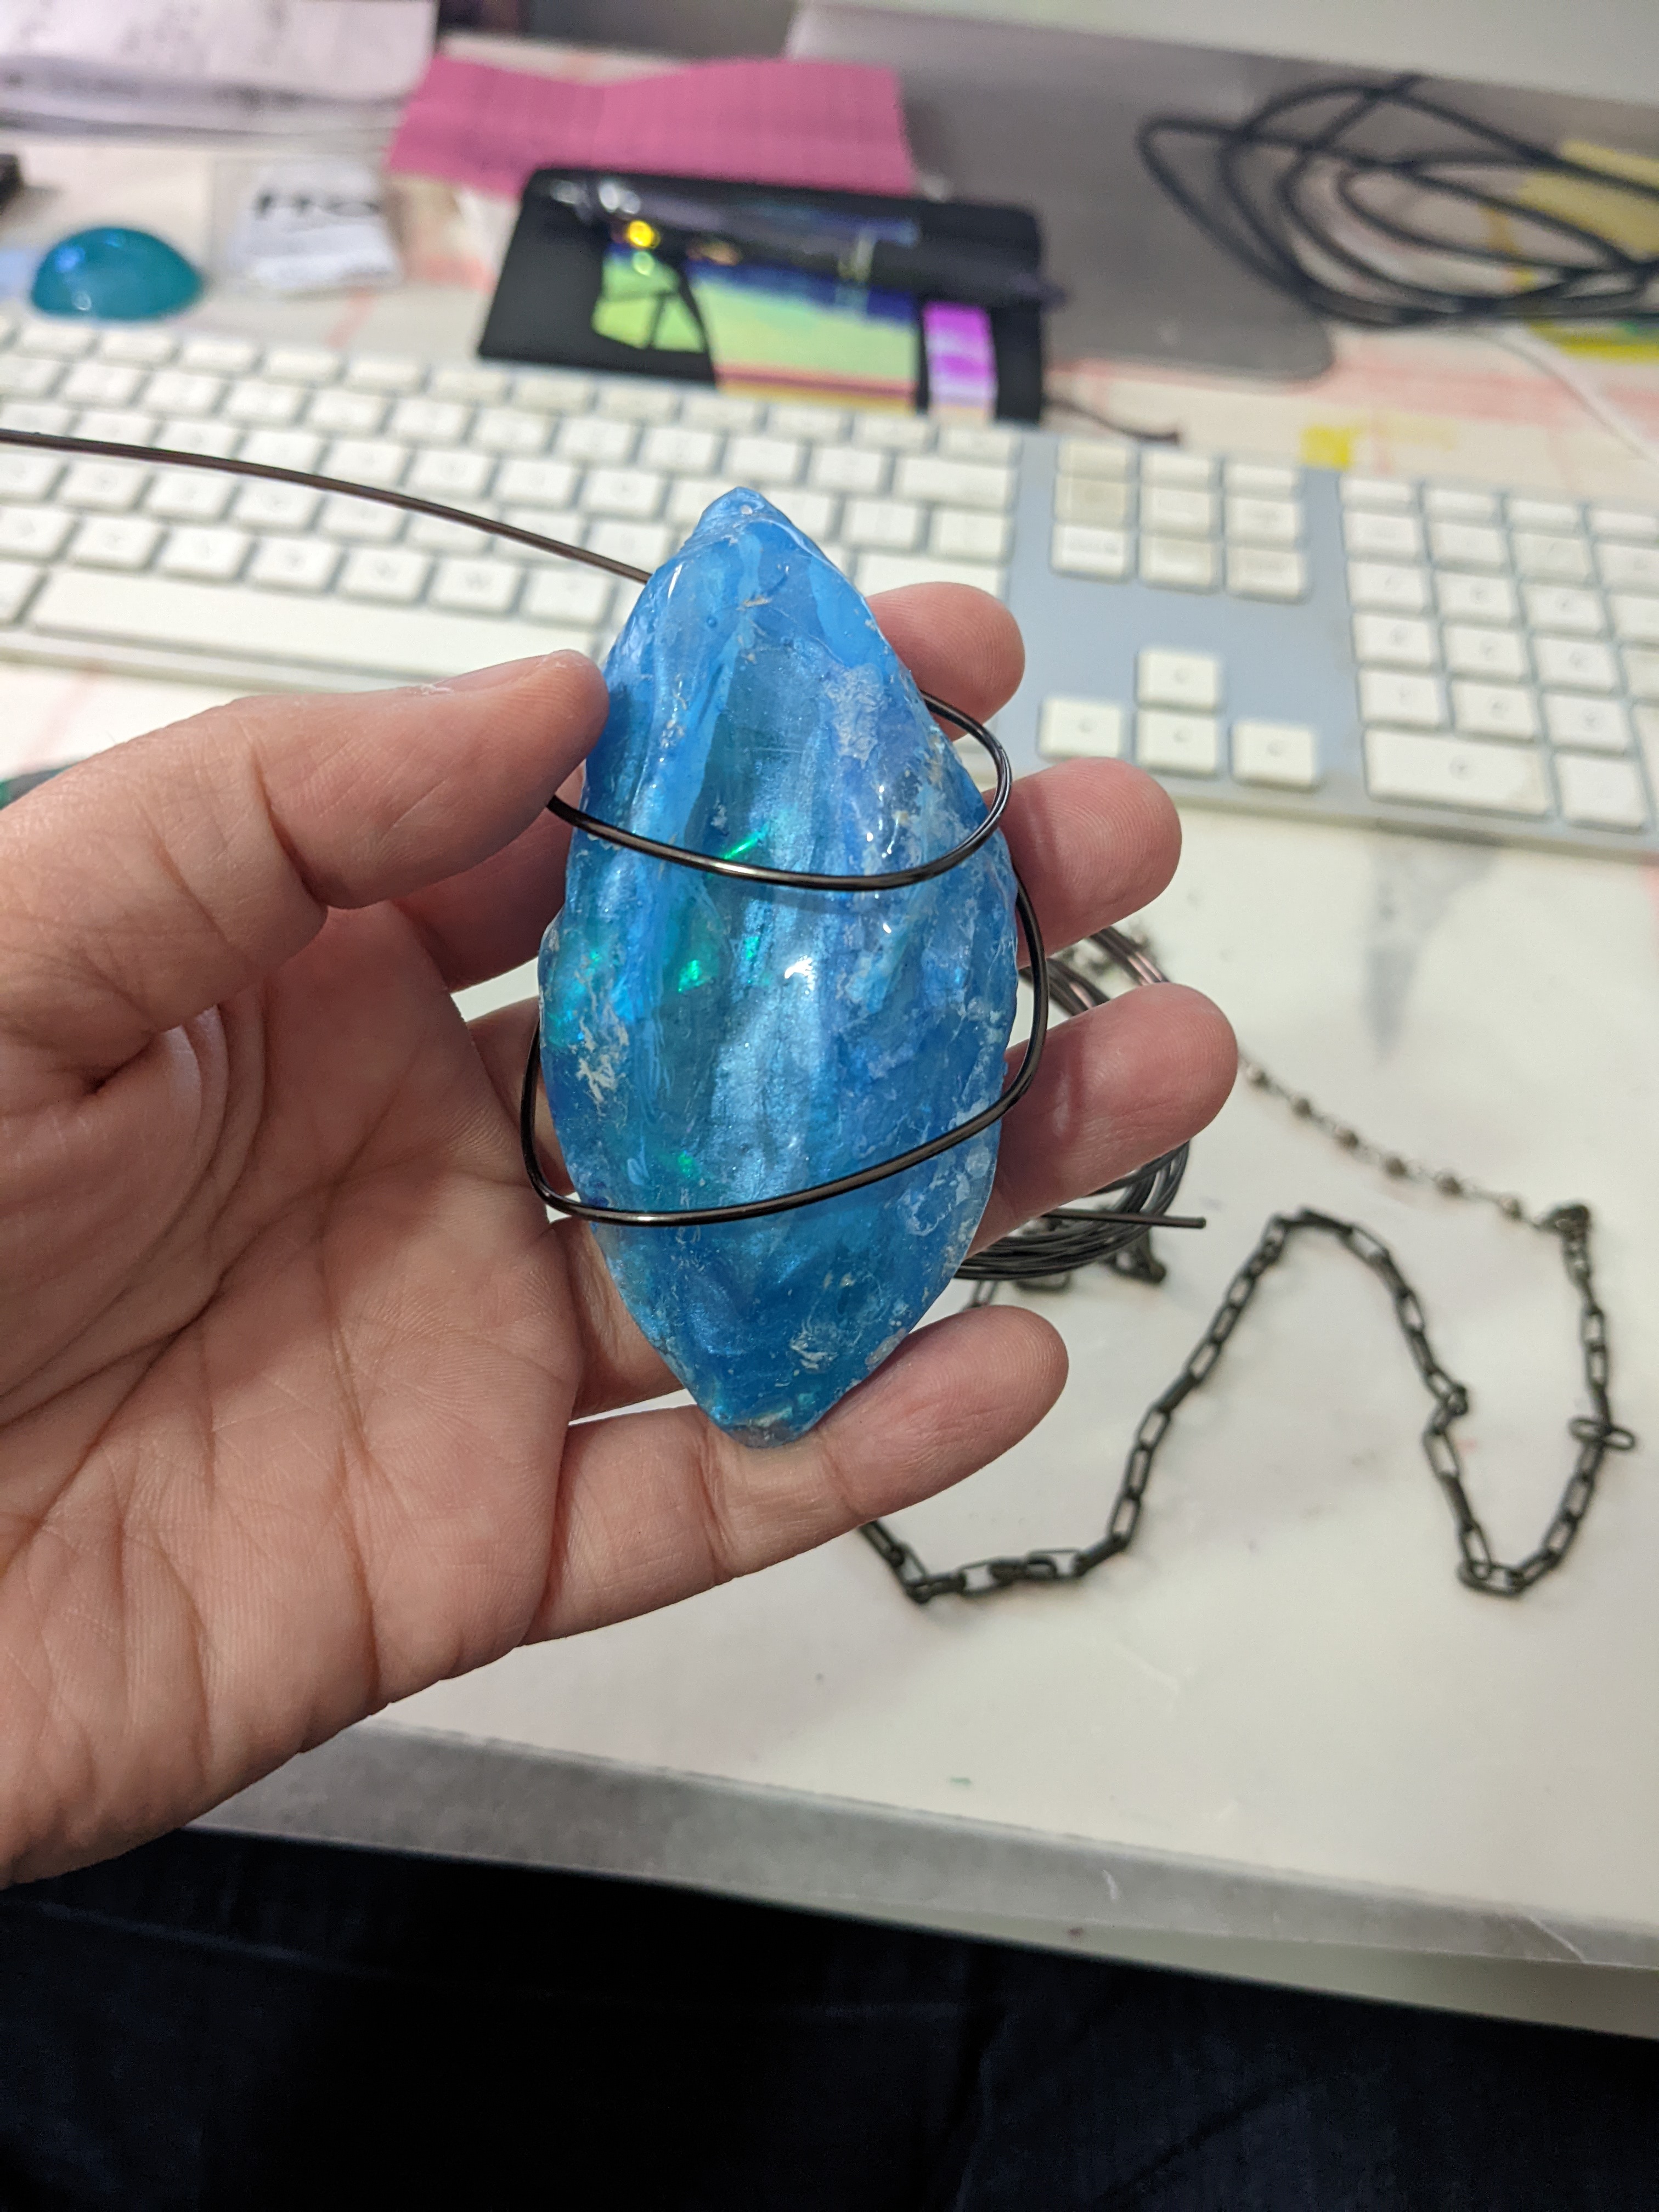
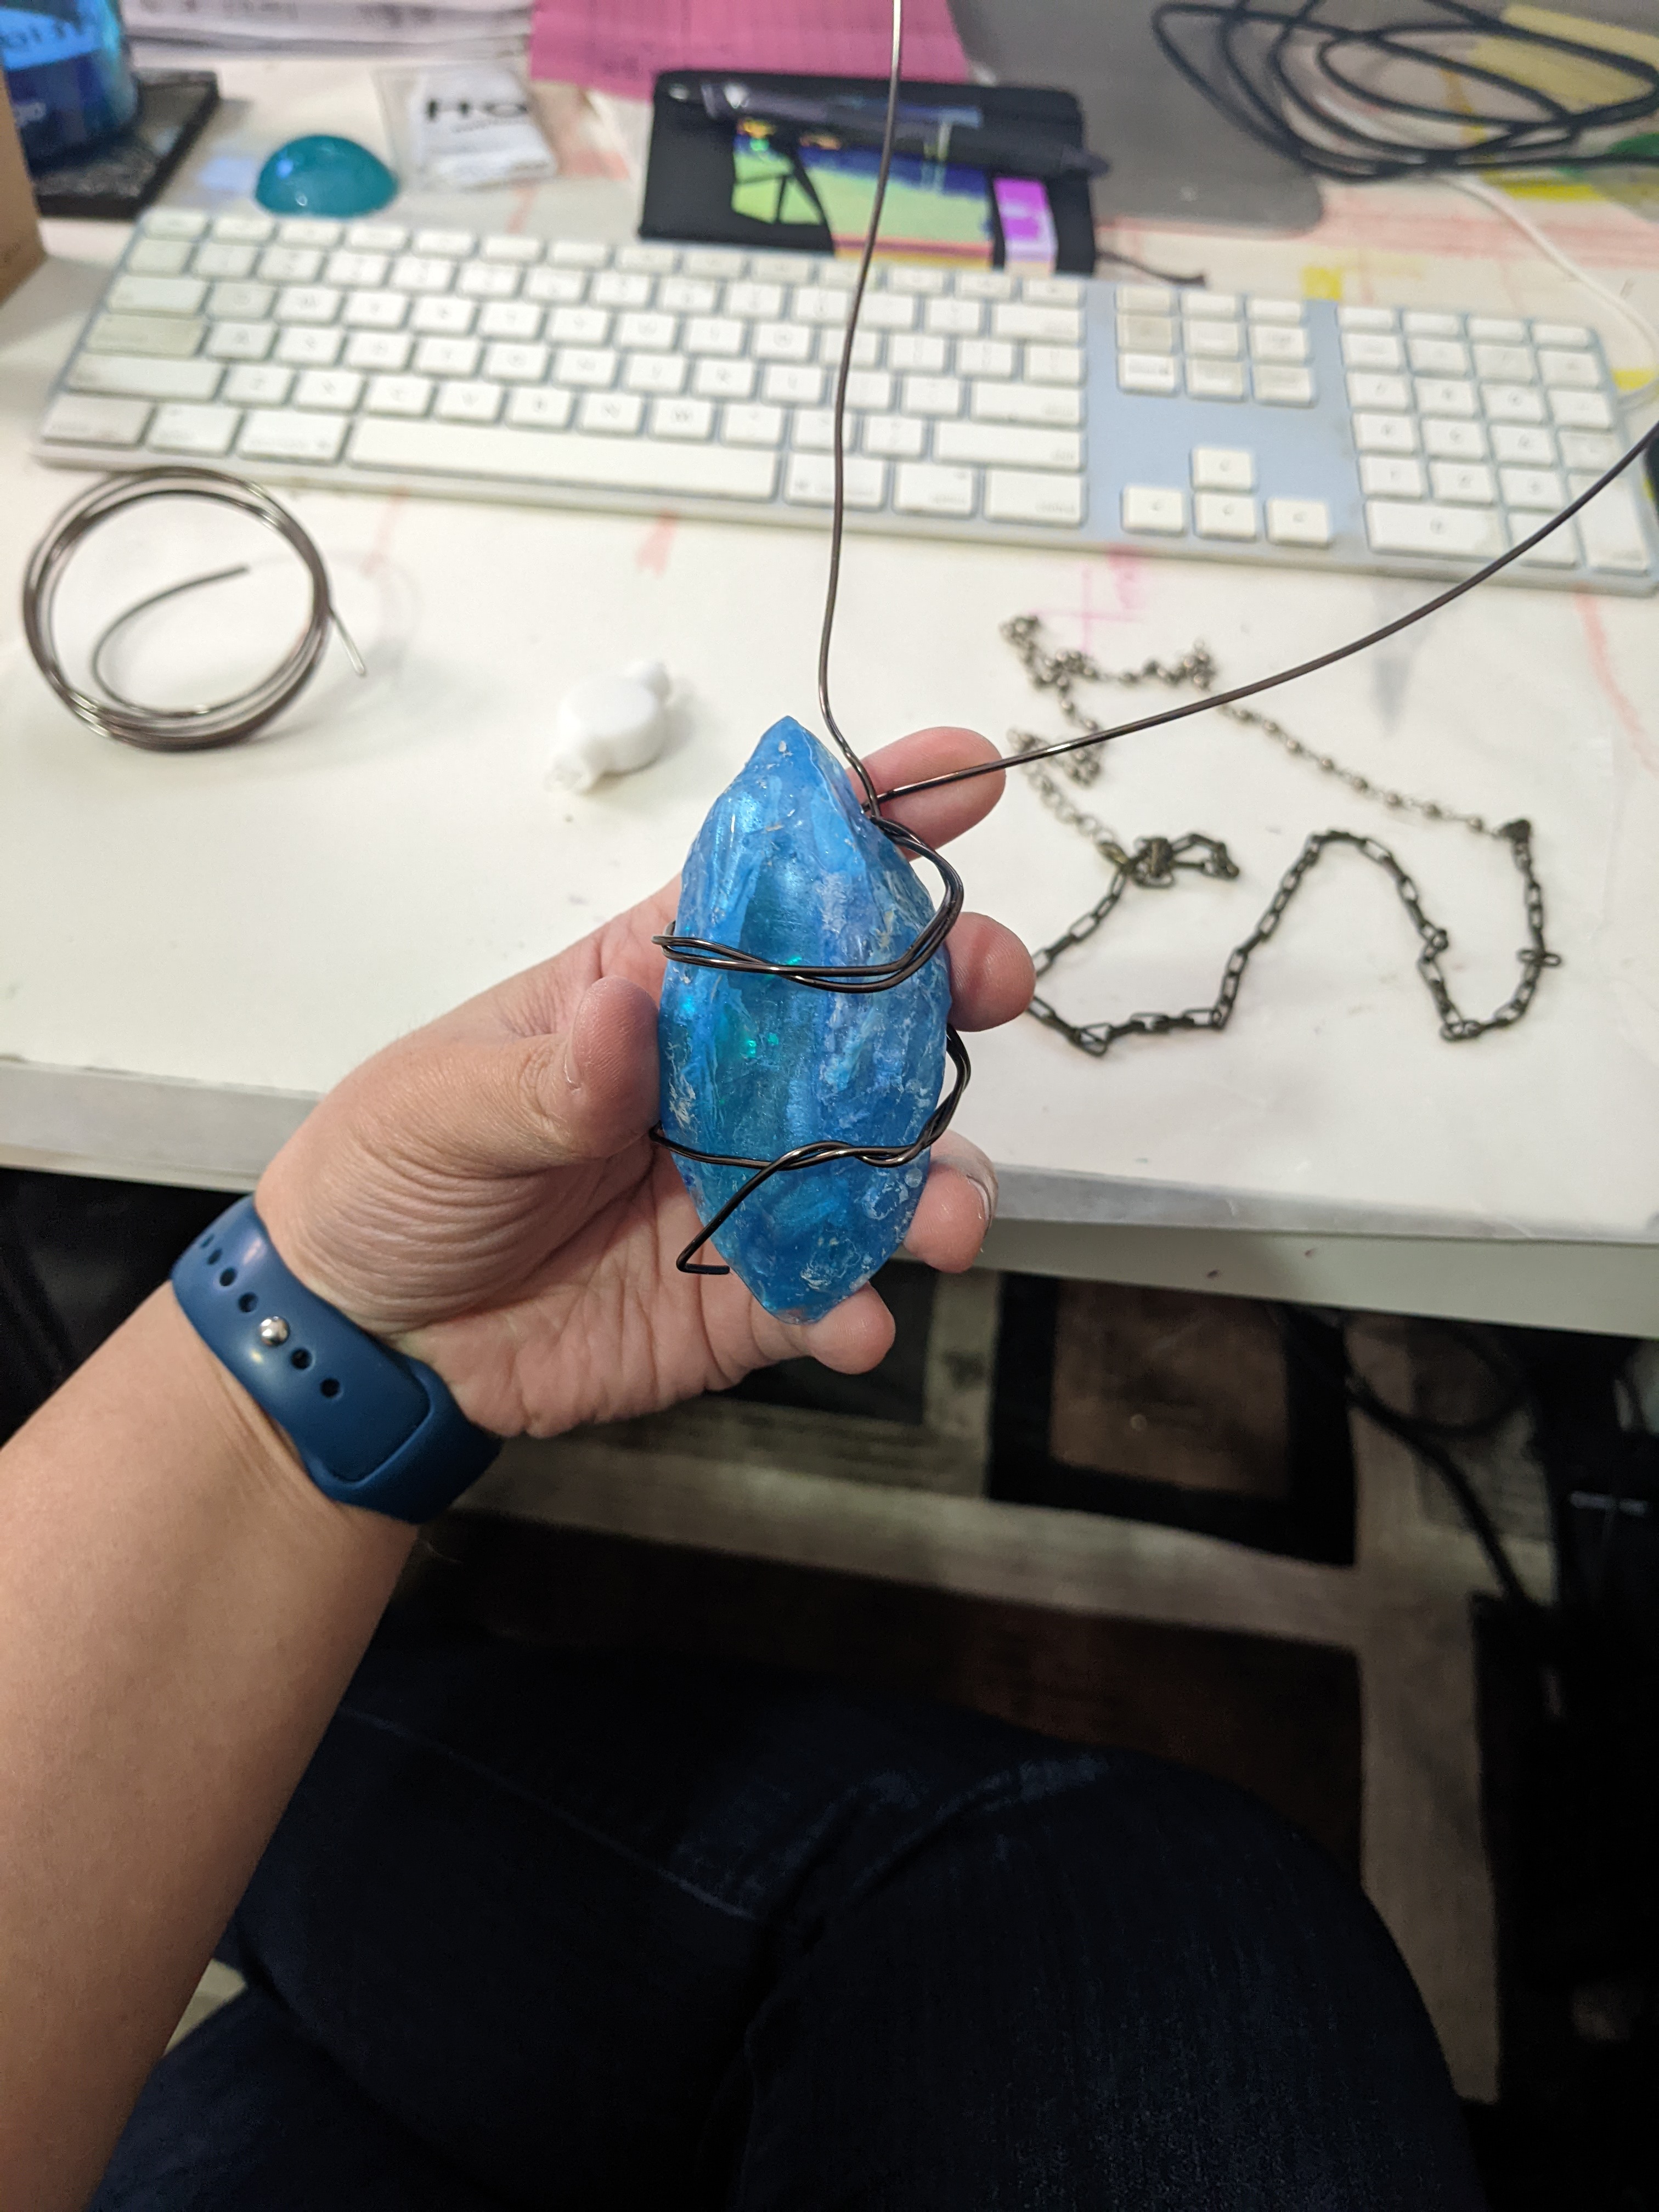
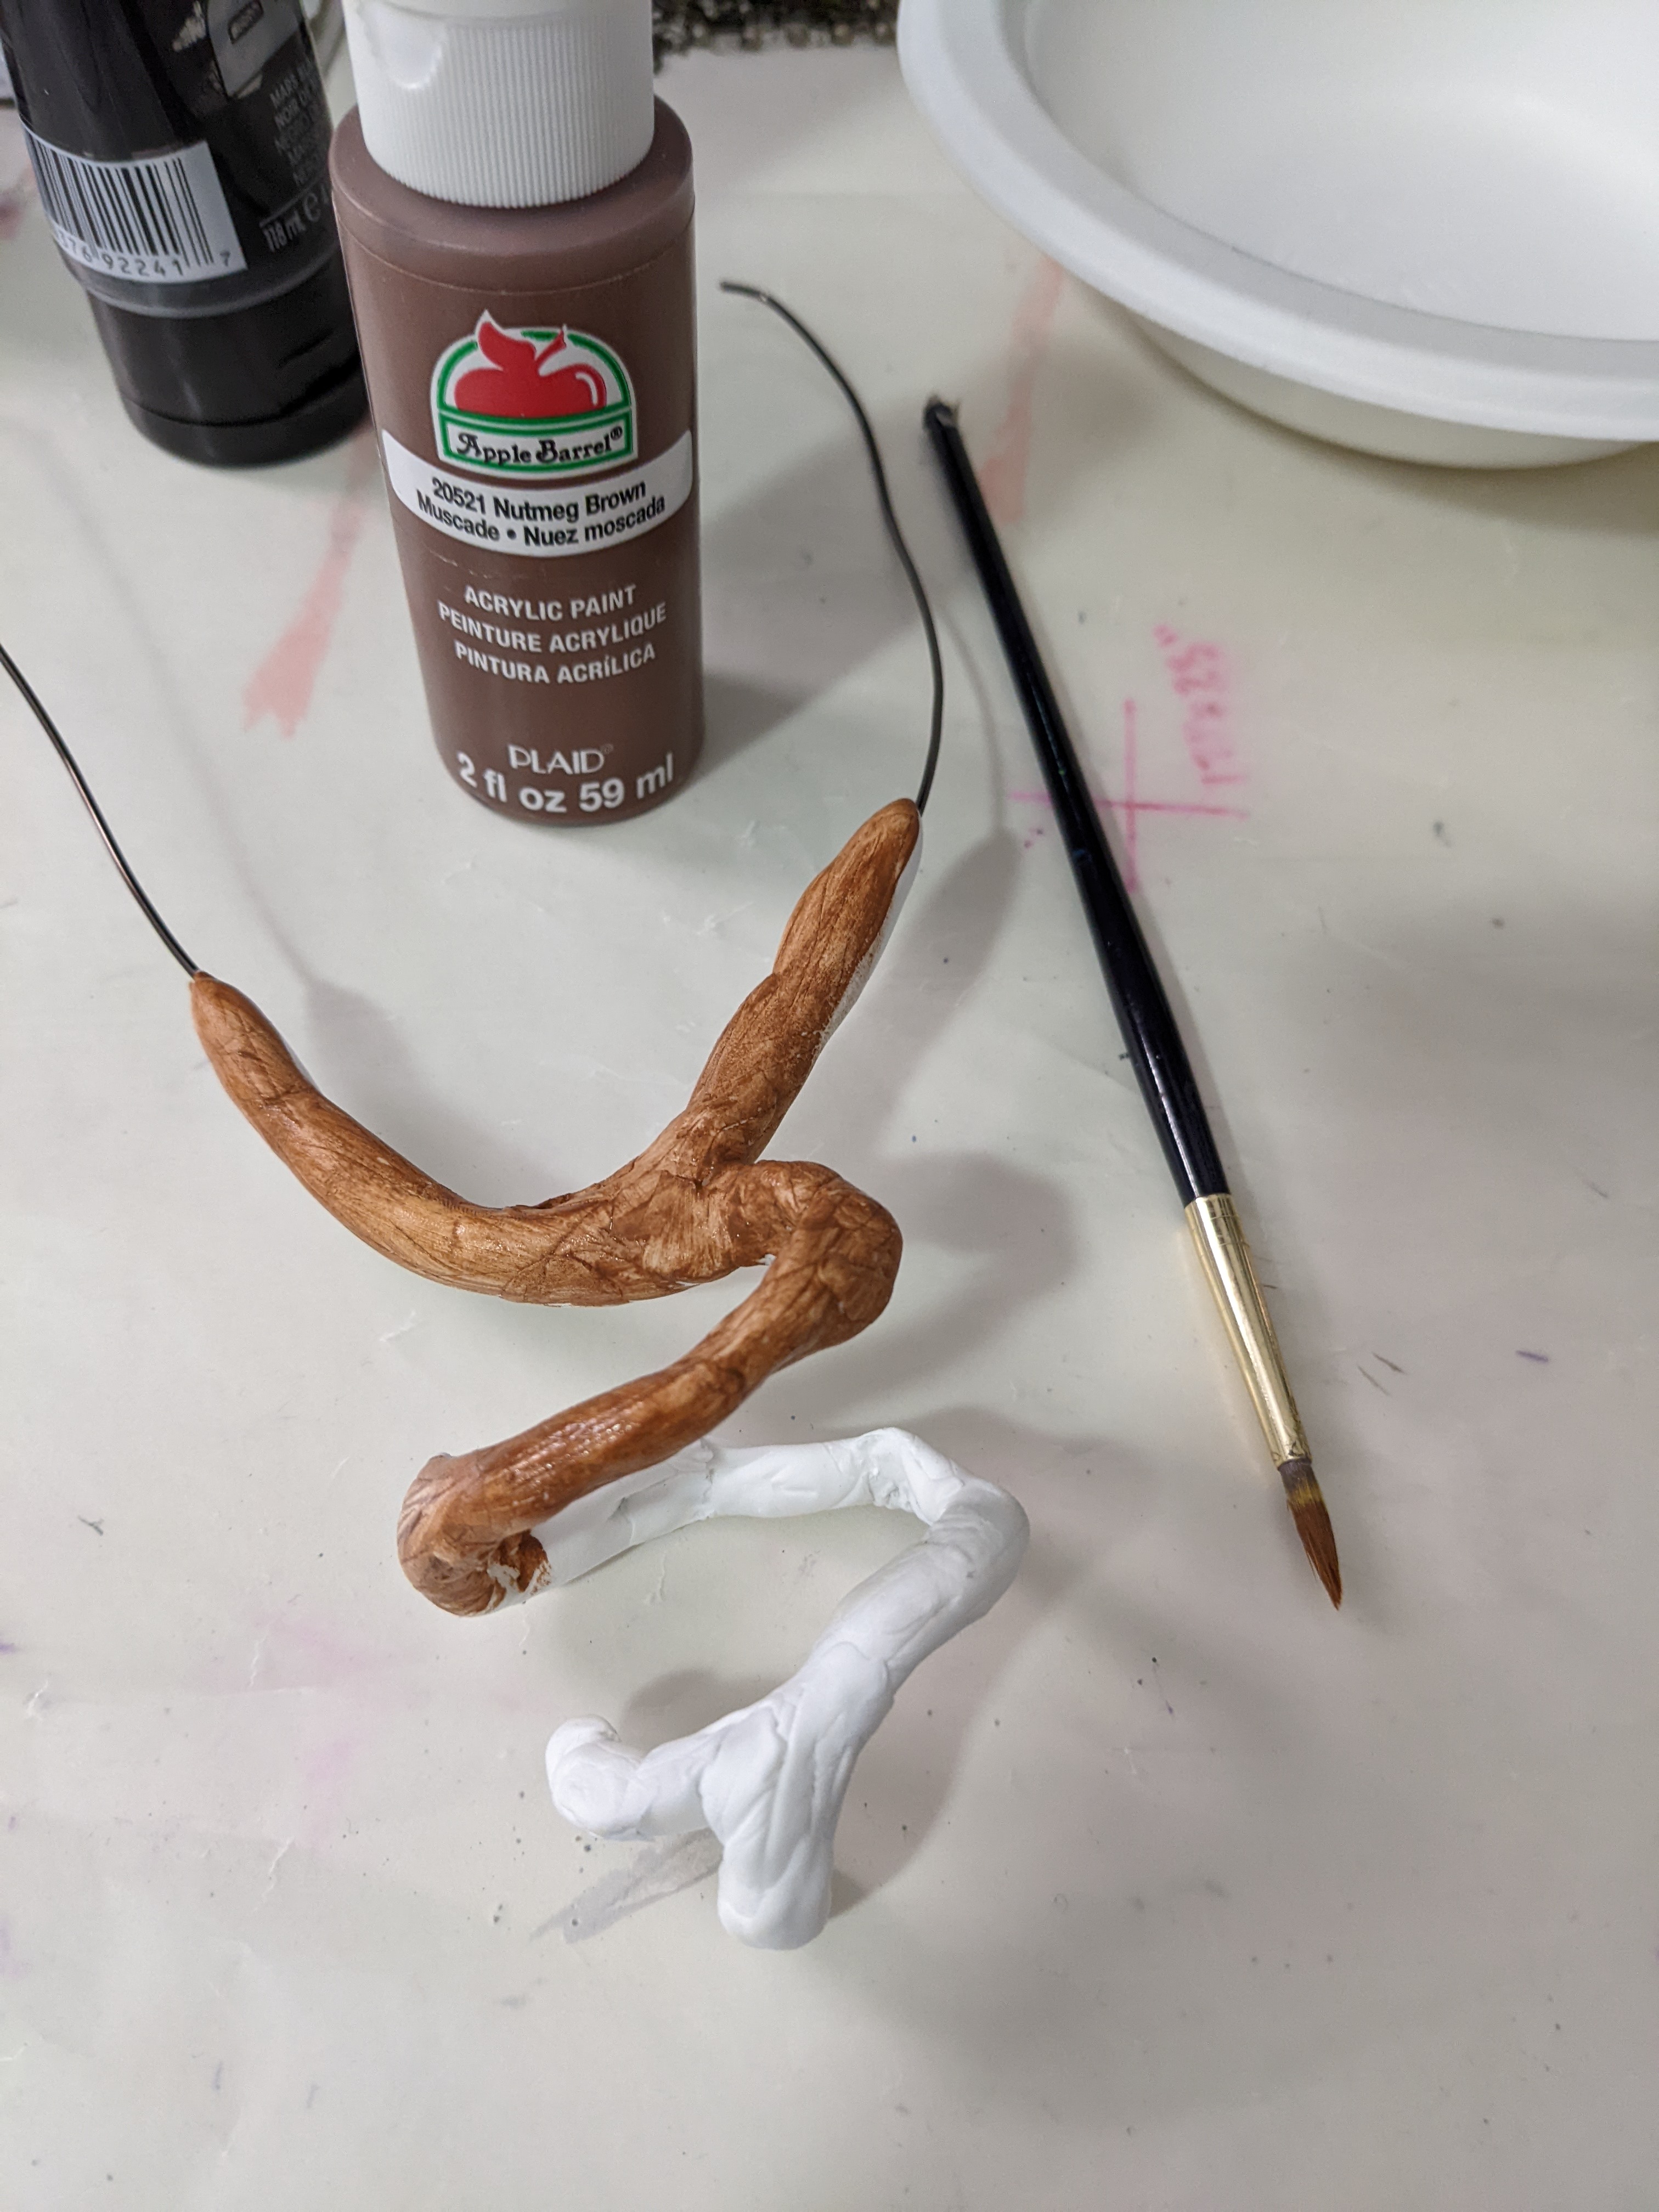
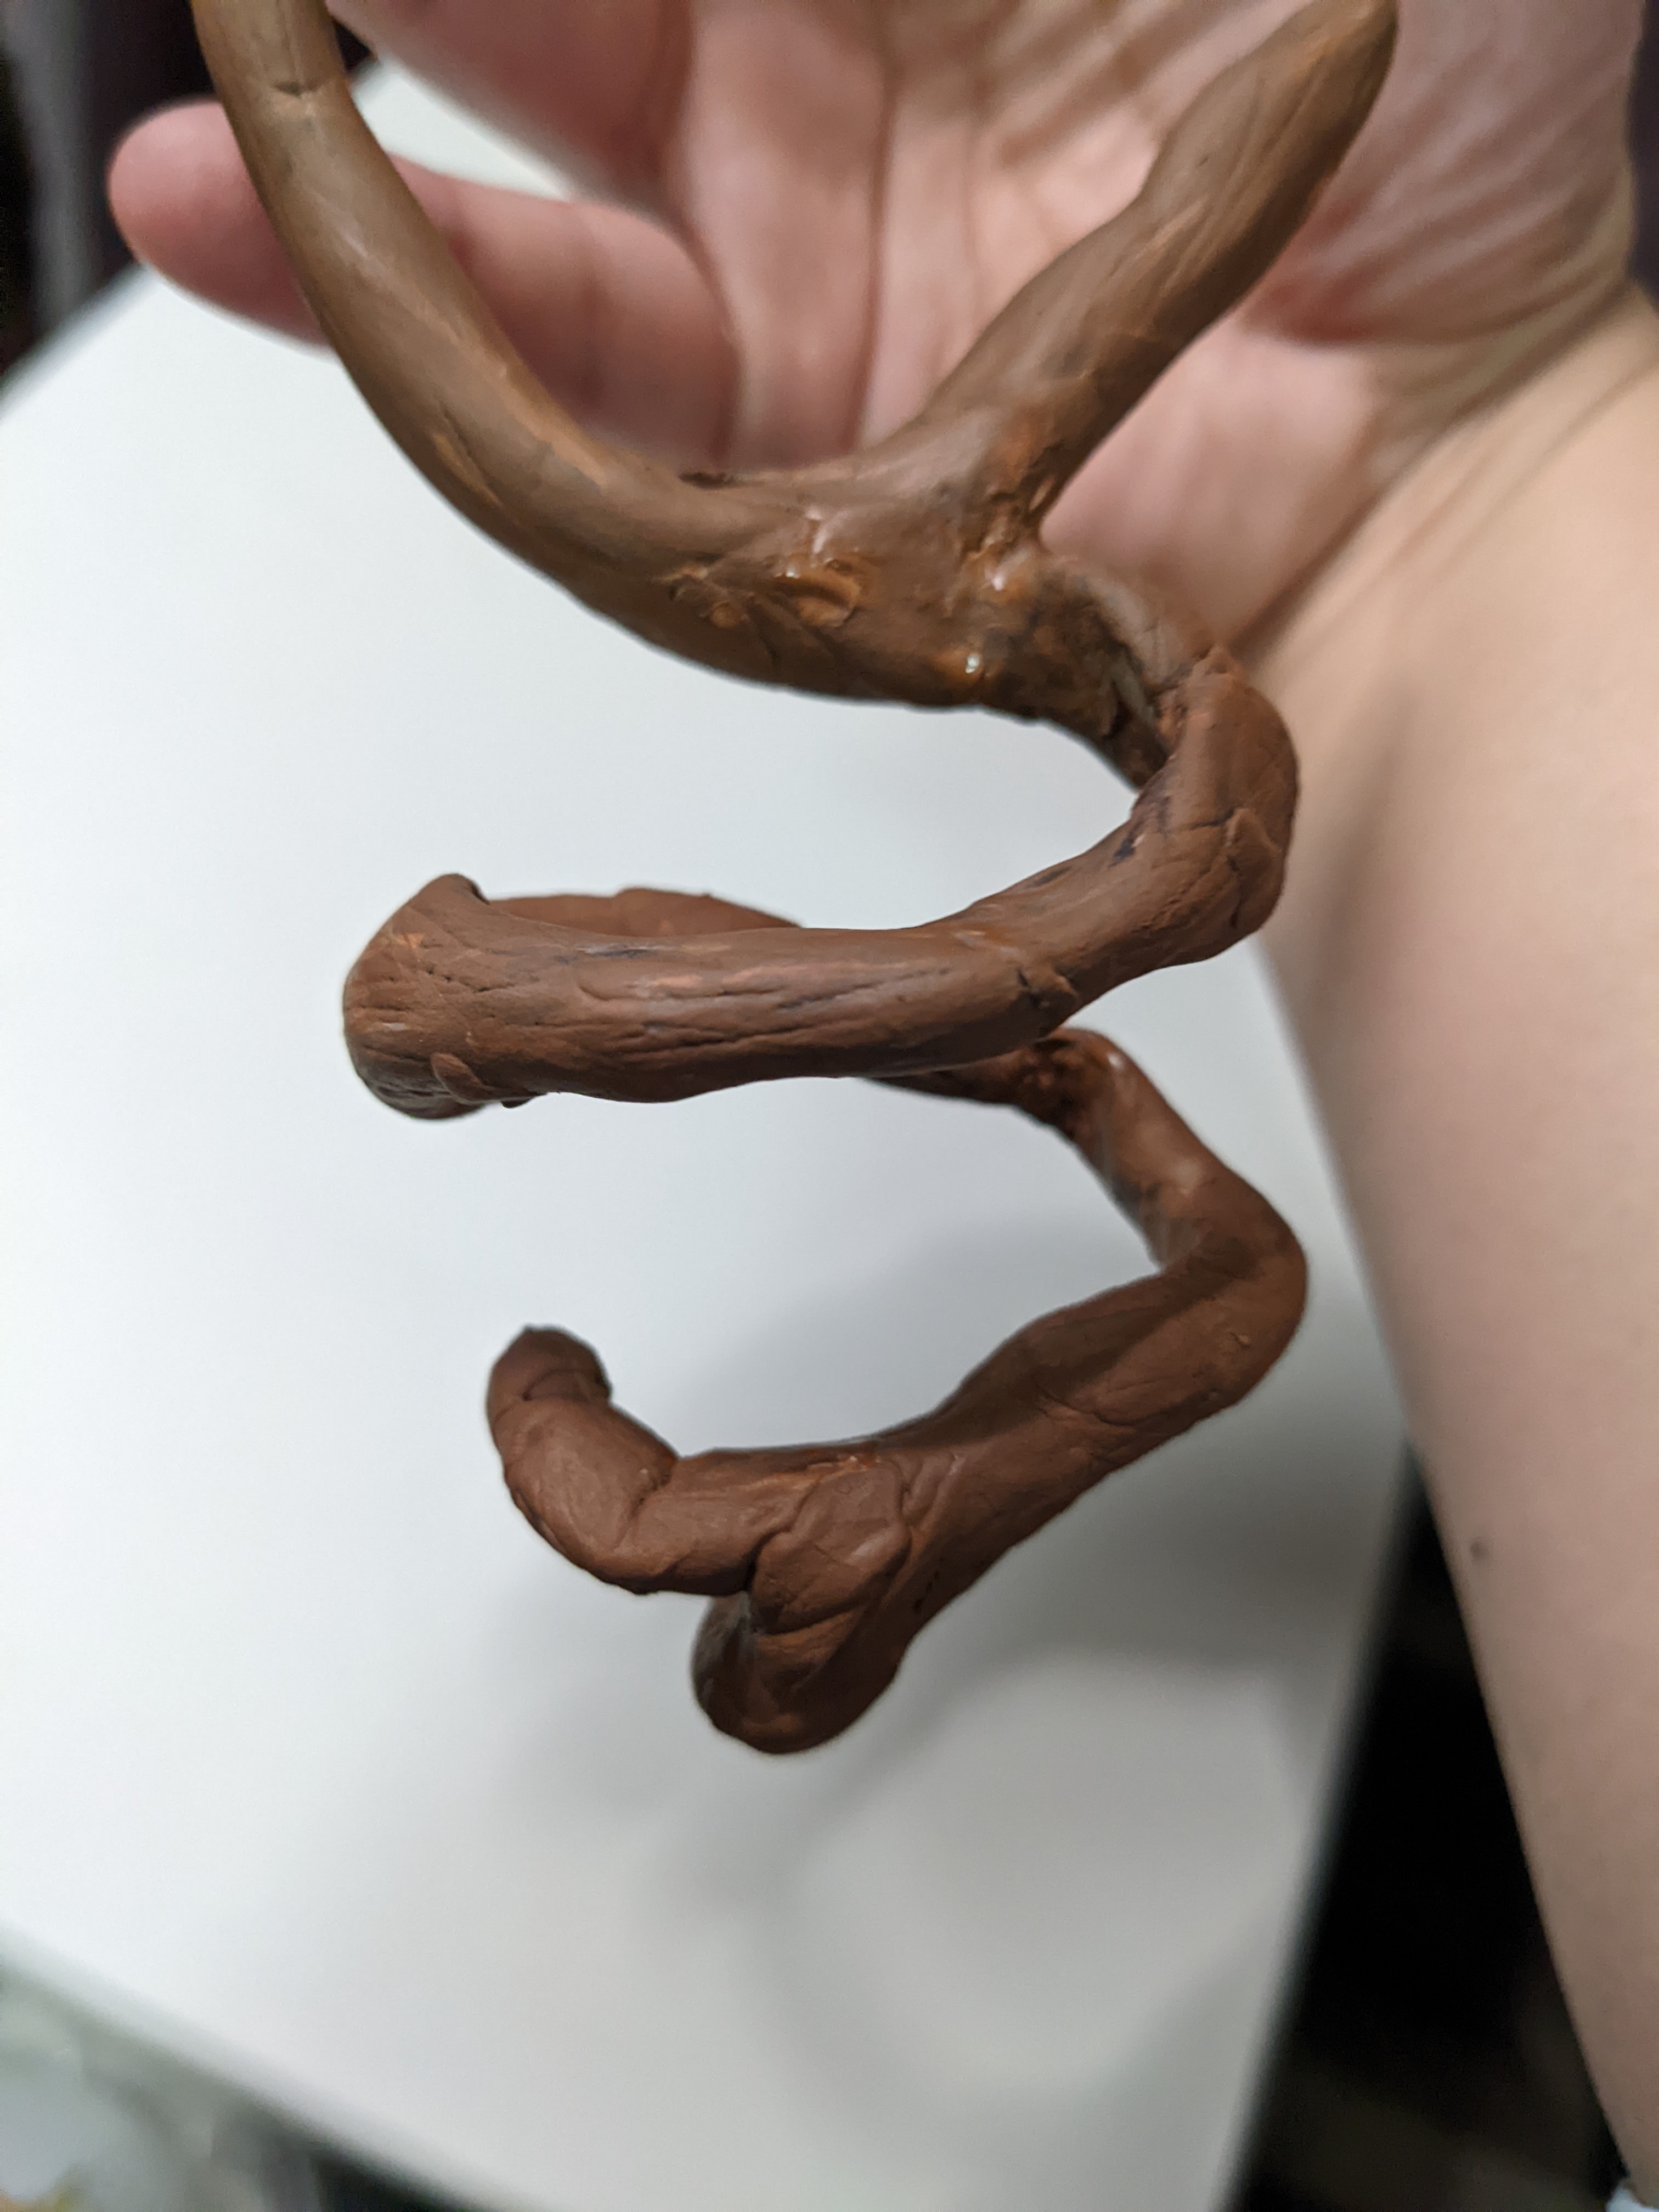
Once I received the crystal and pack of small LED lights, I was able to start putting the necklace together. First step was using two lengths of 16 gauge copper wire to wrap around the crystal. You can see in the reference images that the wooden part branches off into two pieces, so I used two pieces of wire. I wrapped them around each other to create one thicker wire, leaving the ends separated. Then, matching the reference photos, I wrapped them around the crystal, leaving room for the LED light. I cut the wires with a lot of extra length on the ends, knowing I would need the extra length for both the wooden twig details and to serve as the connection to the necklace chain.
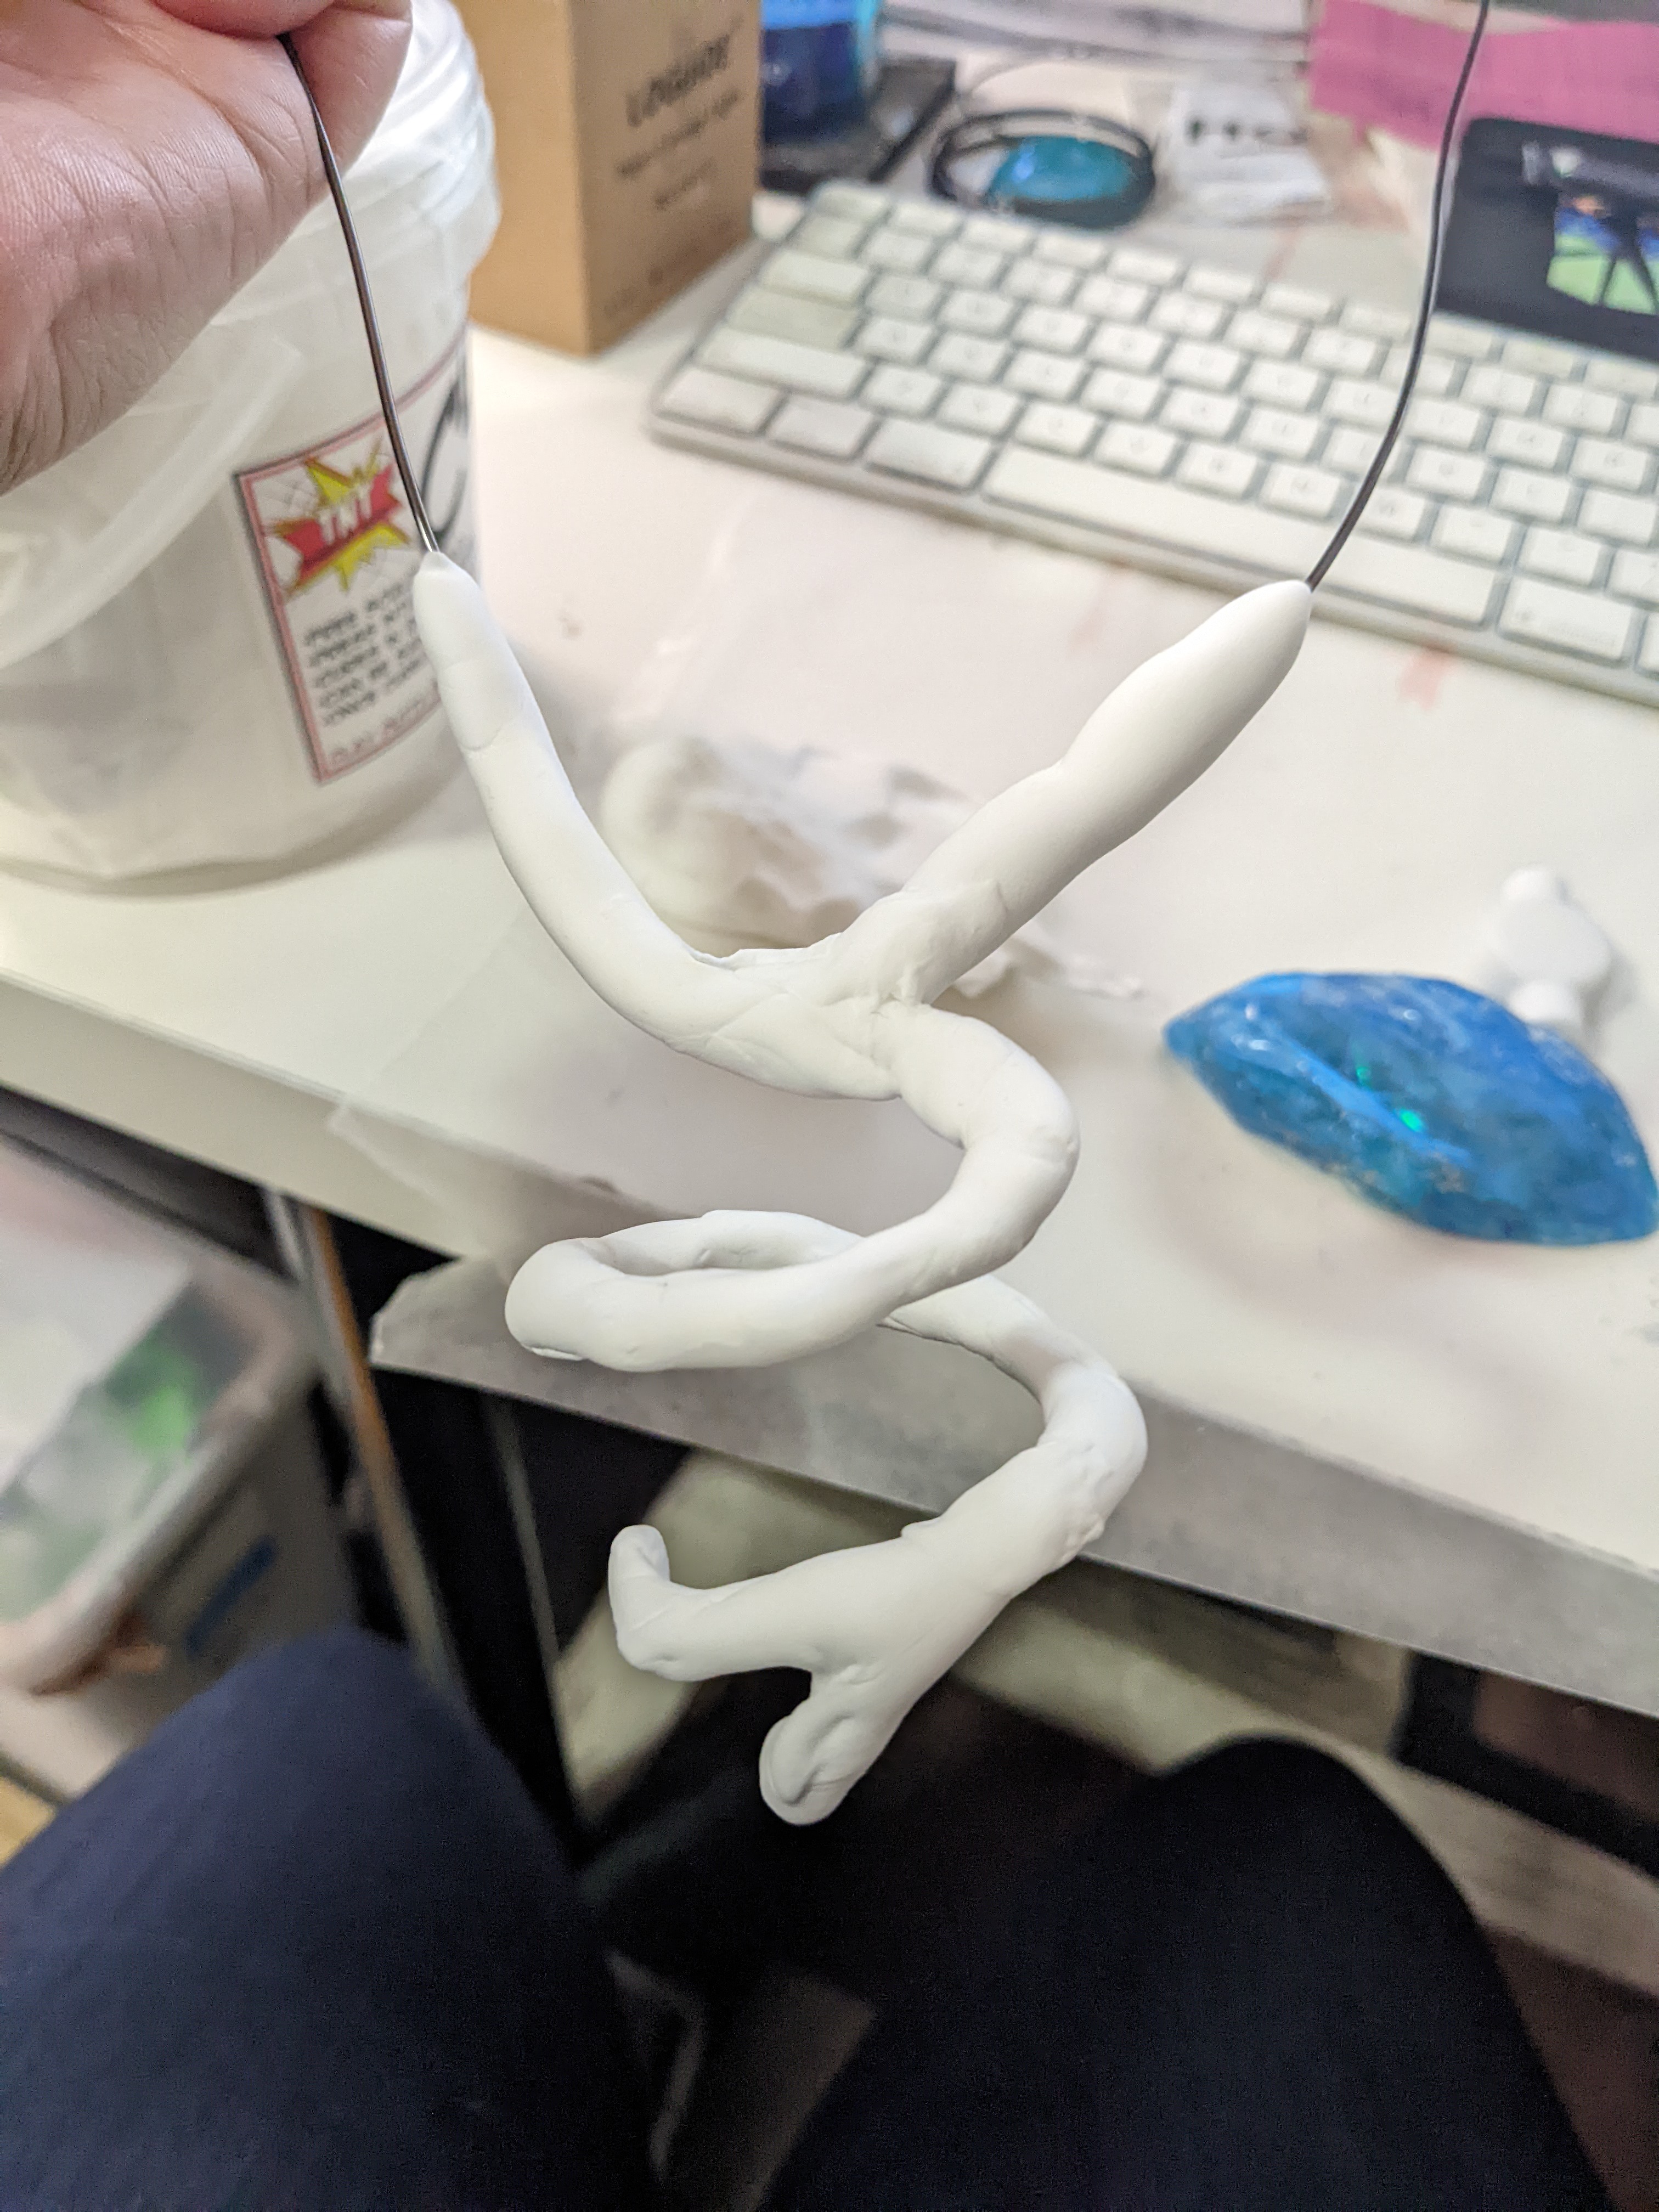
I then covered the wire carefully with foam clay. I did this by rolling the foam clay into little strips and then encasing the wire in them. Sometimes, the wire would peek through, so I’d tear off a very tiny paper-thin piece of foam clay and use that to cover the exposed wire.
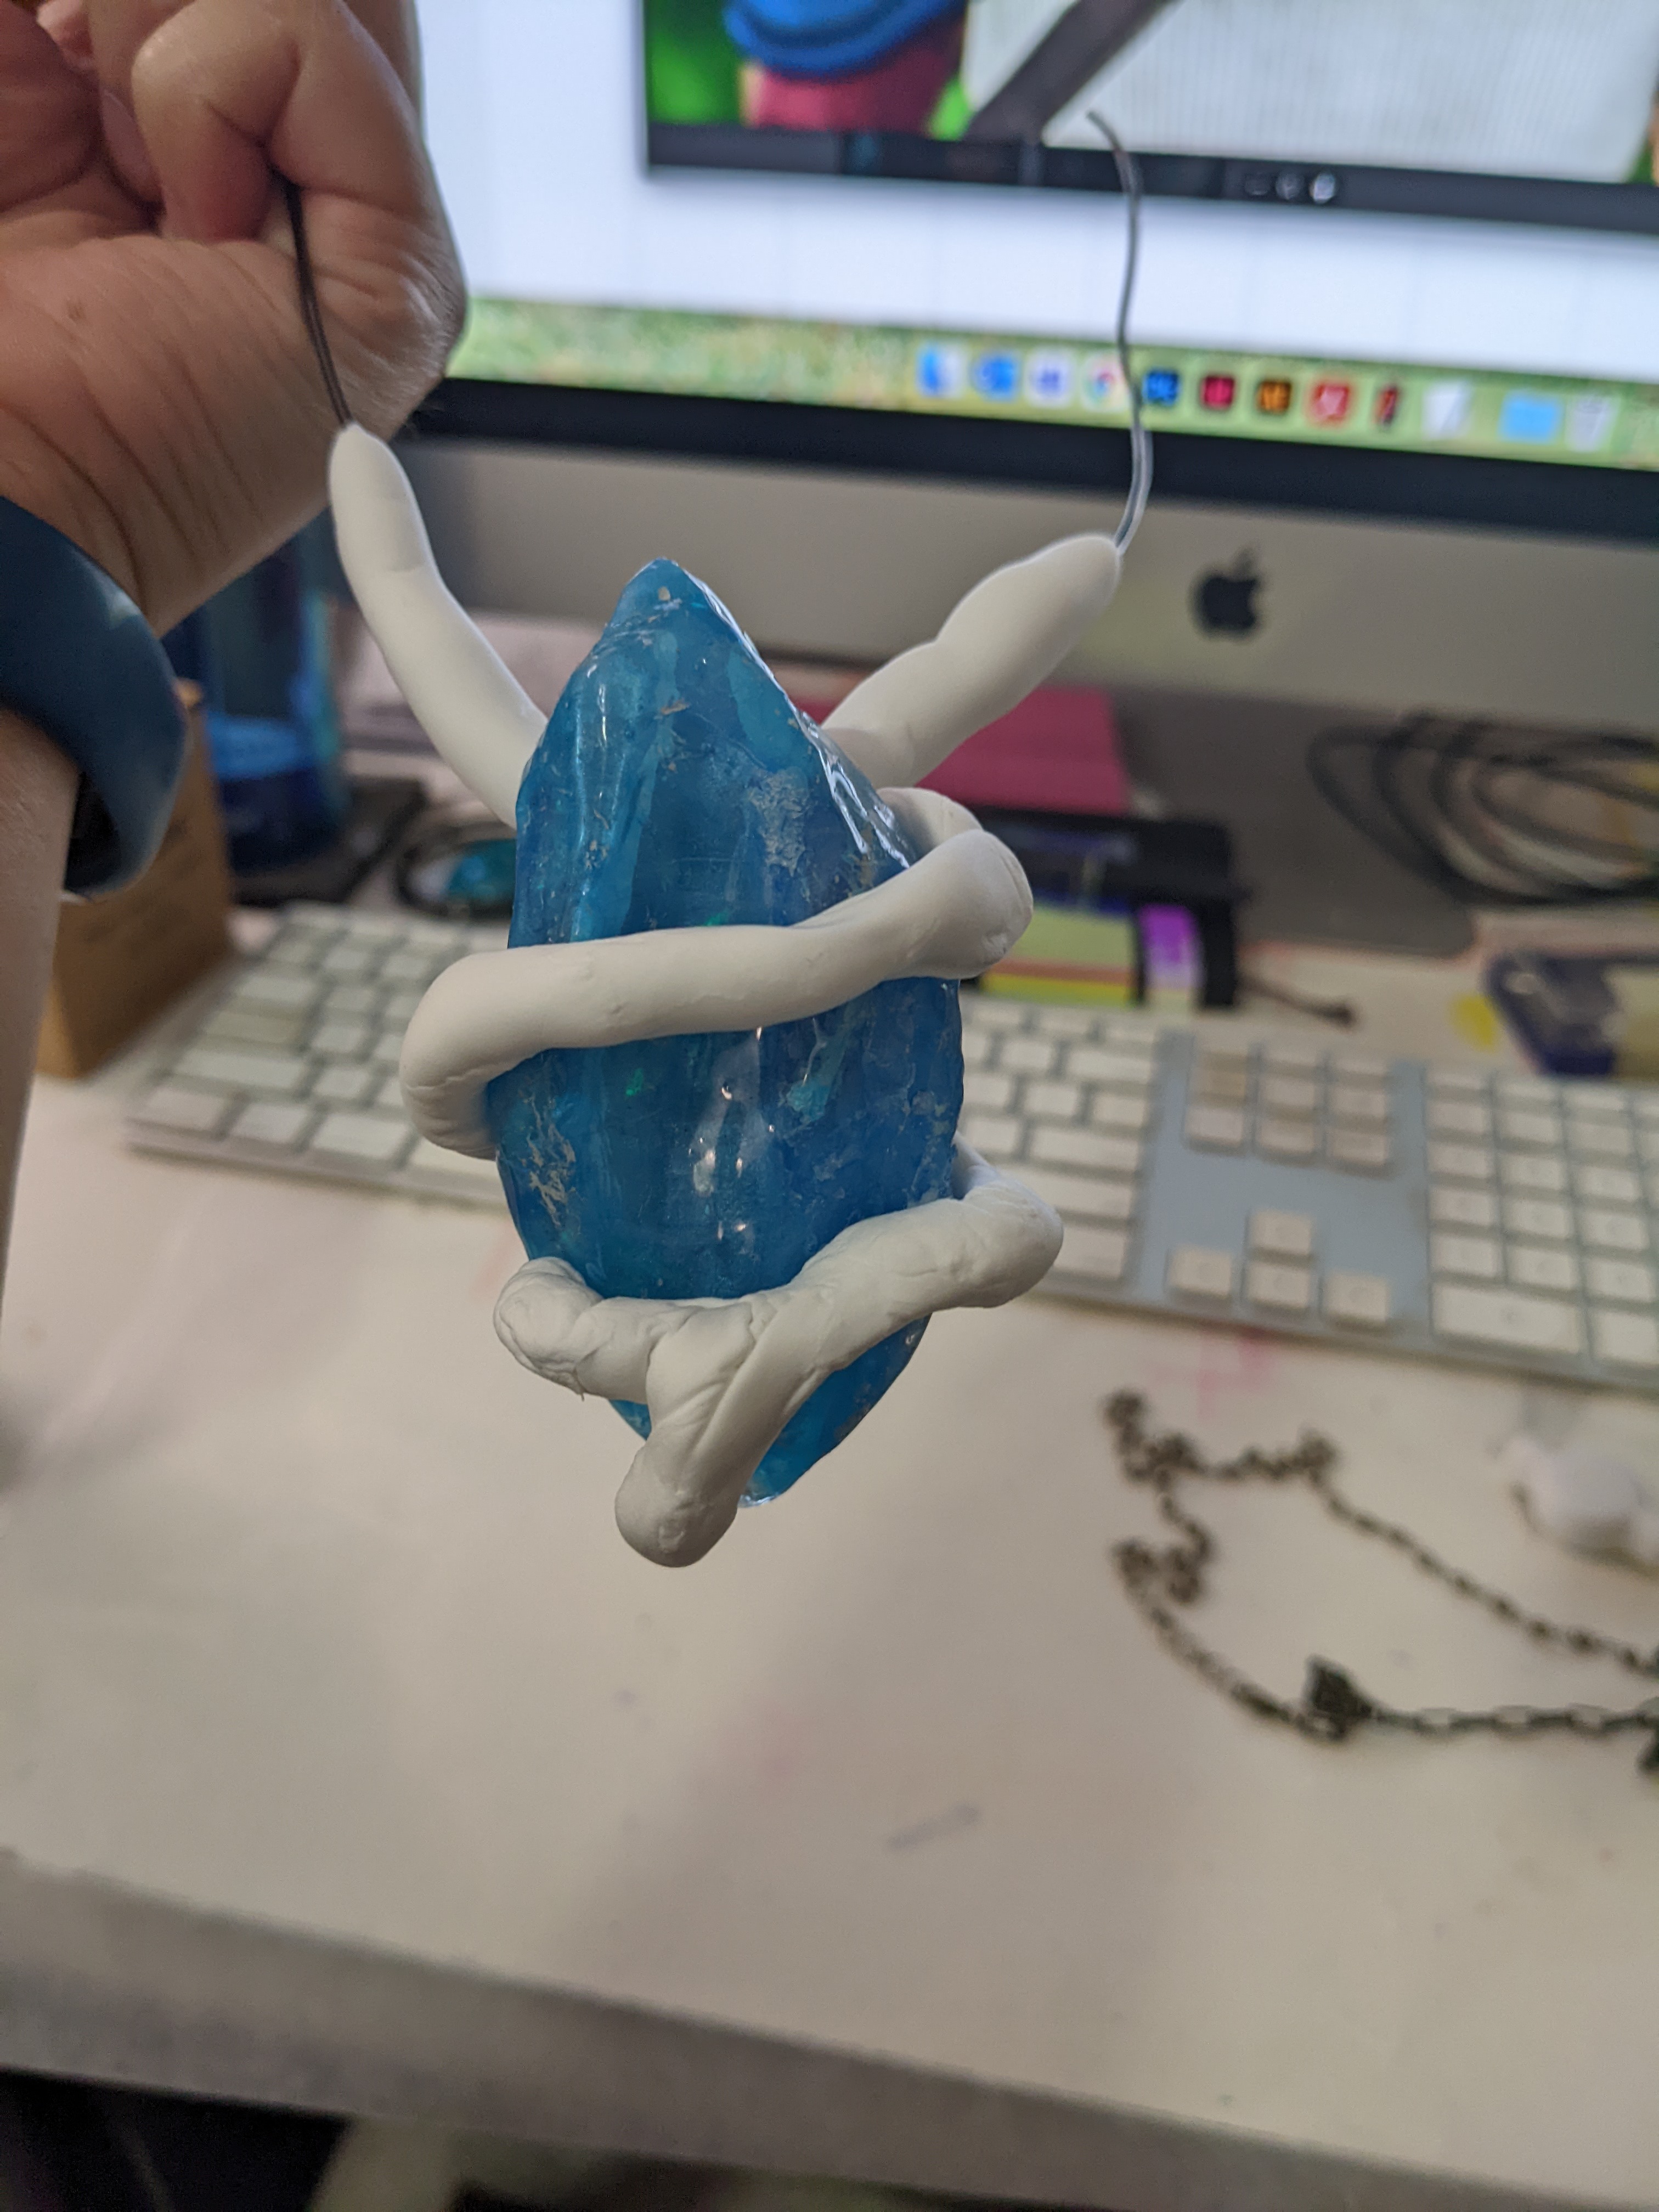
While waiting for the foam clay to finish curing, I used superglue to attach the LED light to the back of the crystal.
After using an X-acto knife to carve some detail lines all over the foam clay, I painted the whole thing to look like wood. This consisted of 2 base coats of brown paint, 1 layer of black paint weathering, another coat of brown paint, cream lines for detailing, and one more coat of brown paint over it. I then sealed it a few times so the paint wouldn’t come off.
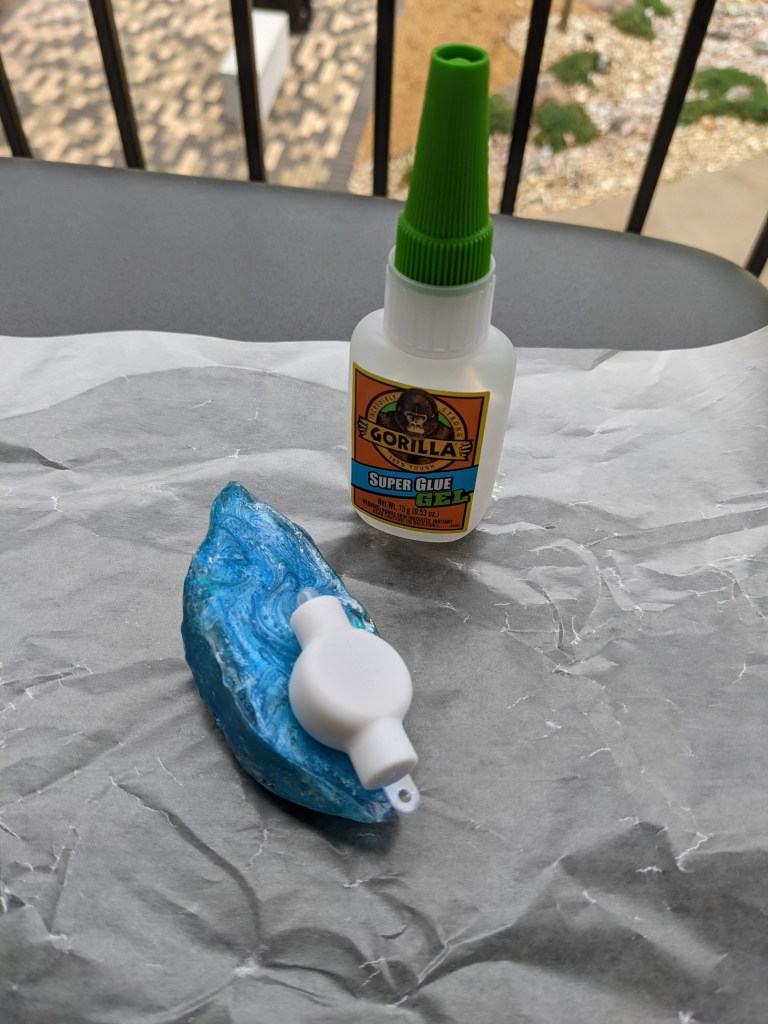
The last part was assembly! I didn’t actually even need to glue the crystal to the wood; the wood was snug enough to hold it without any adhesive!
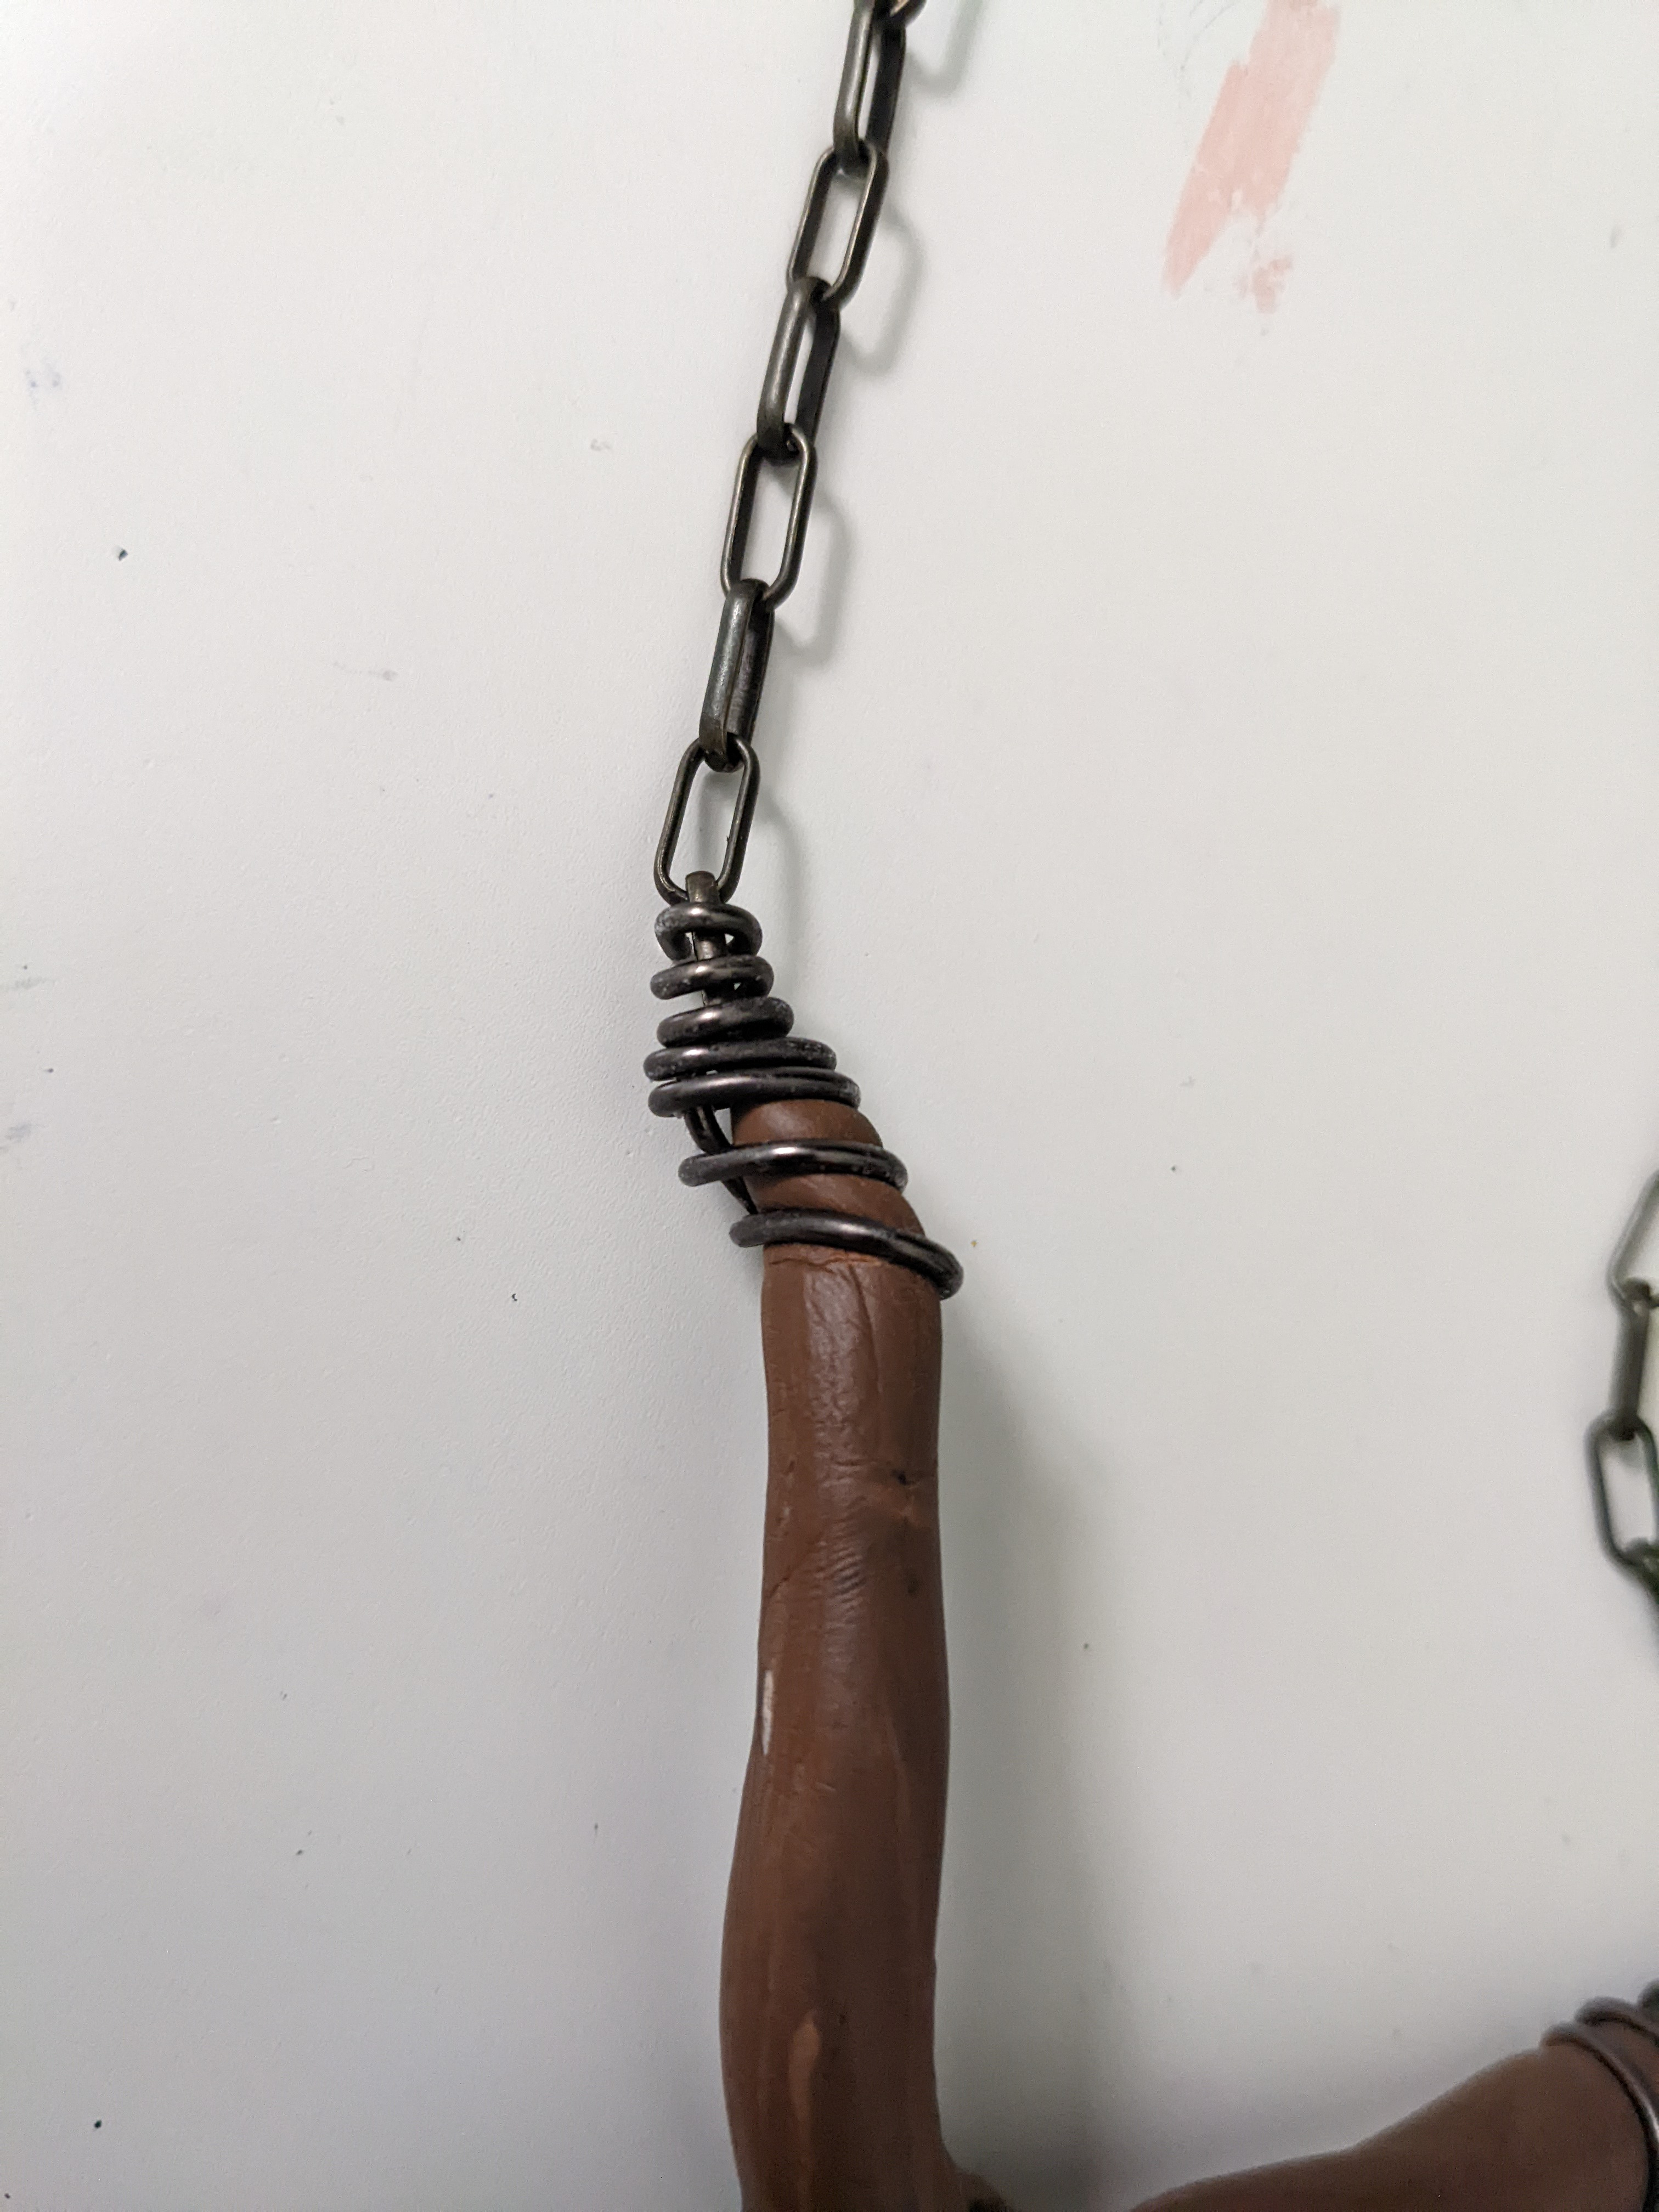
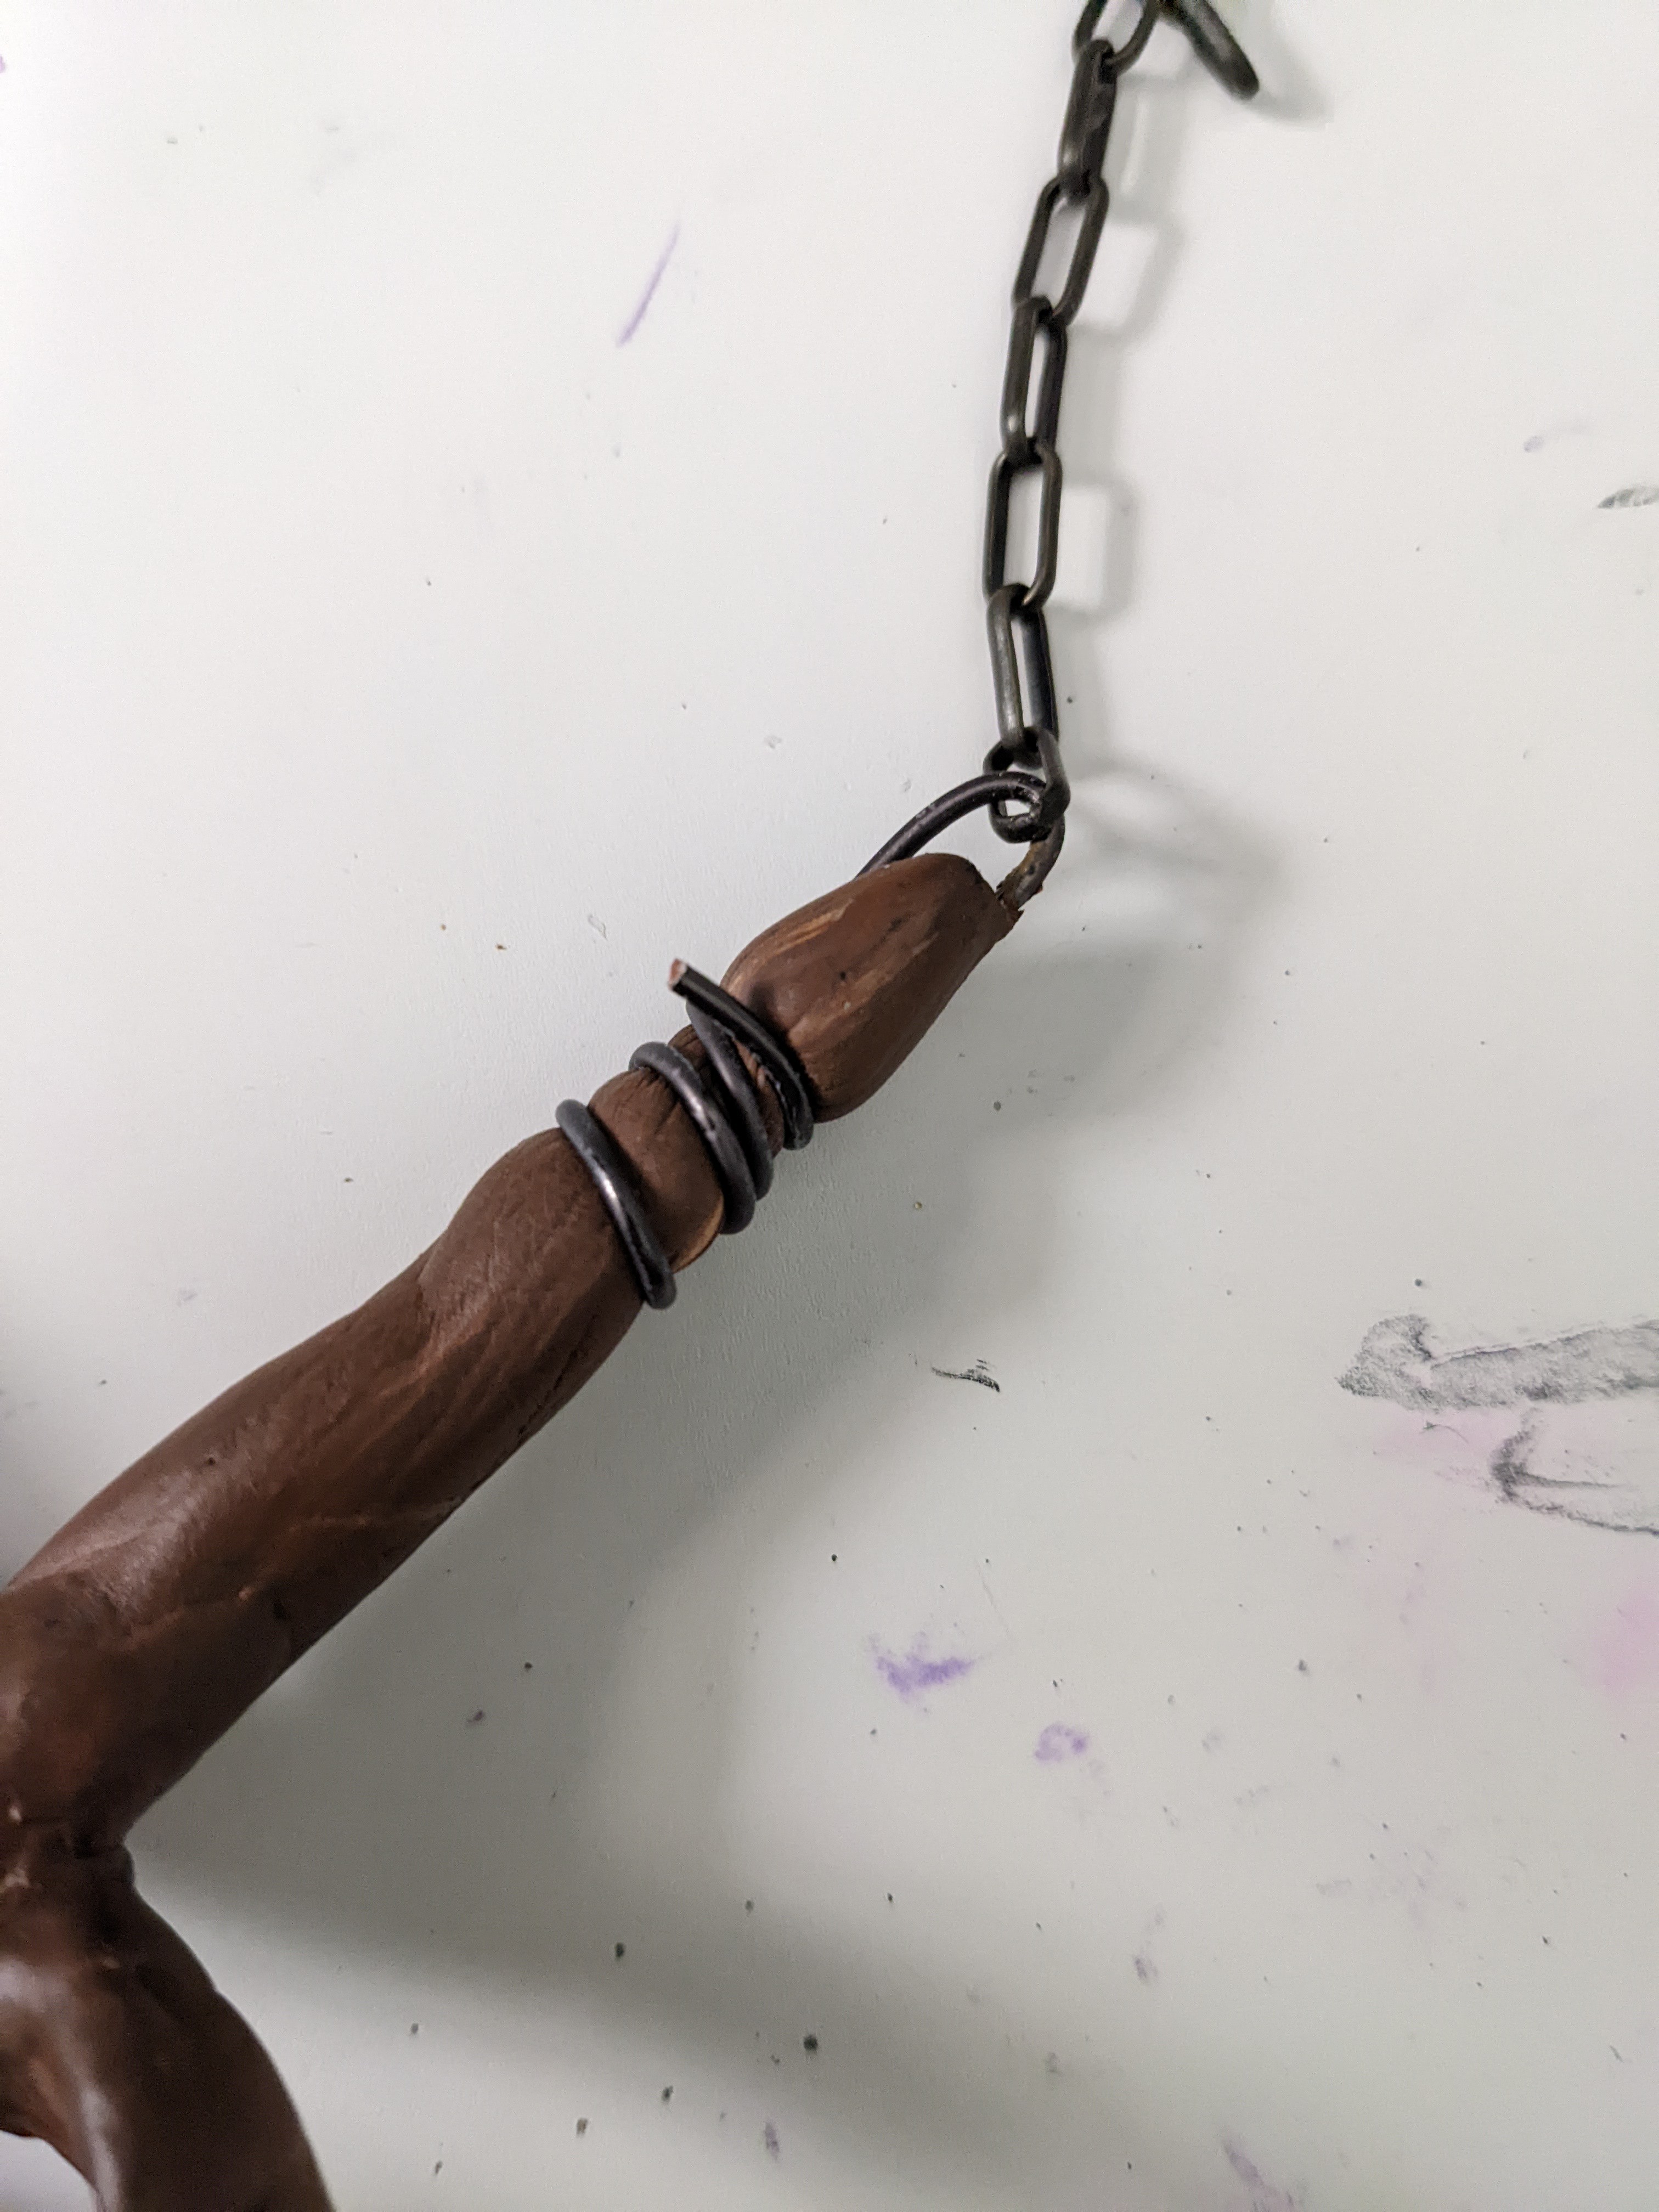
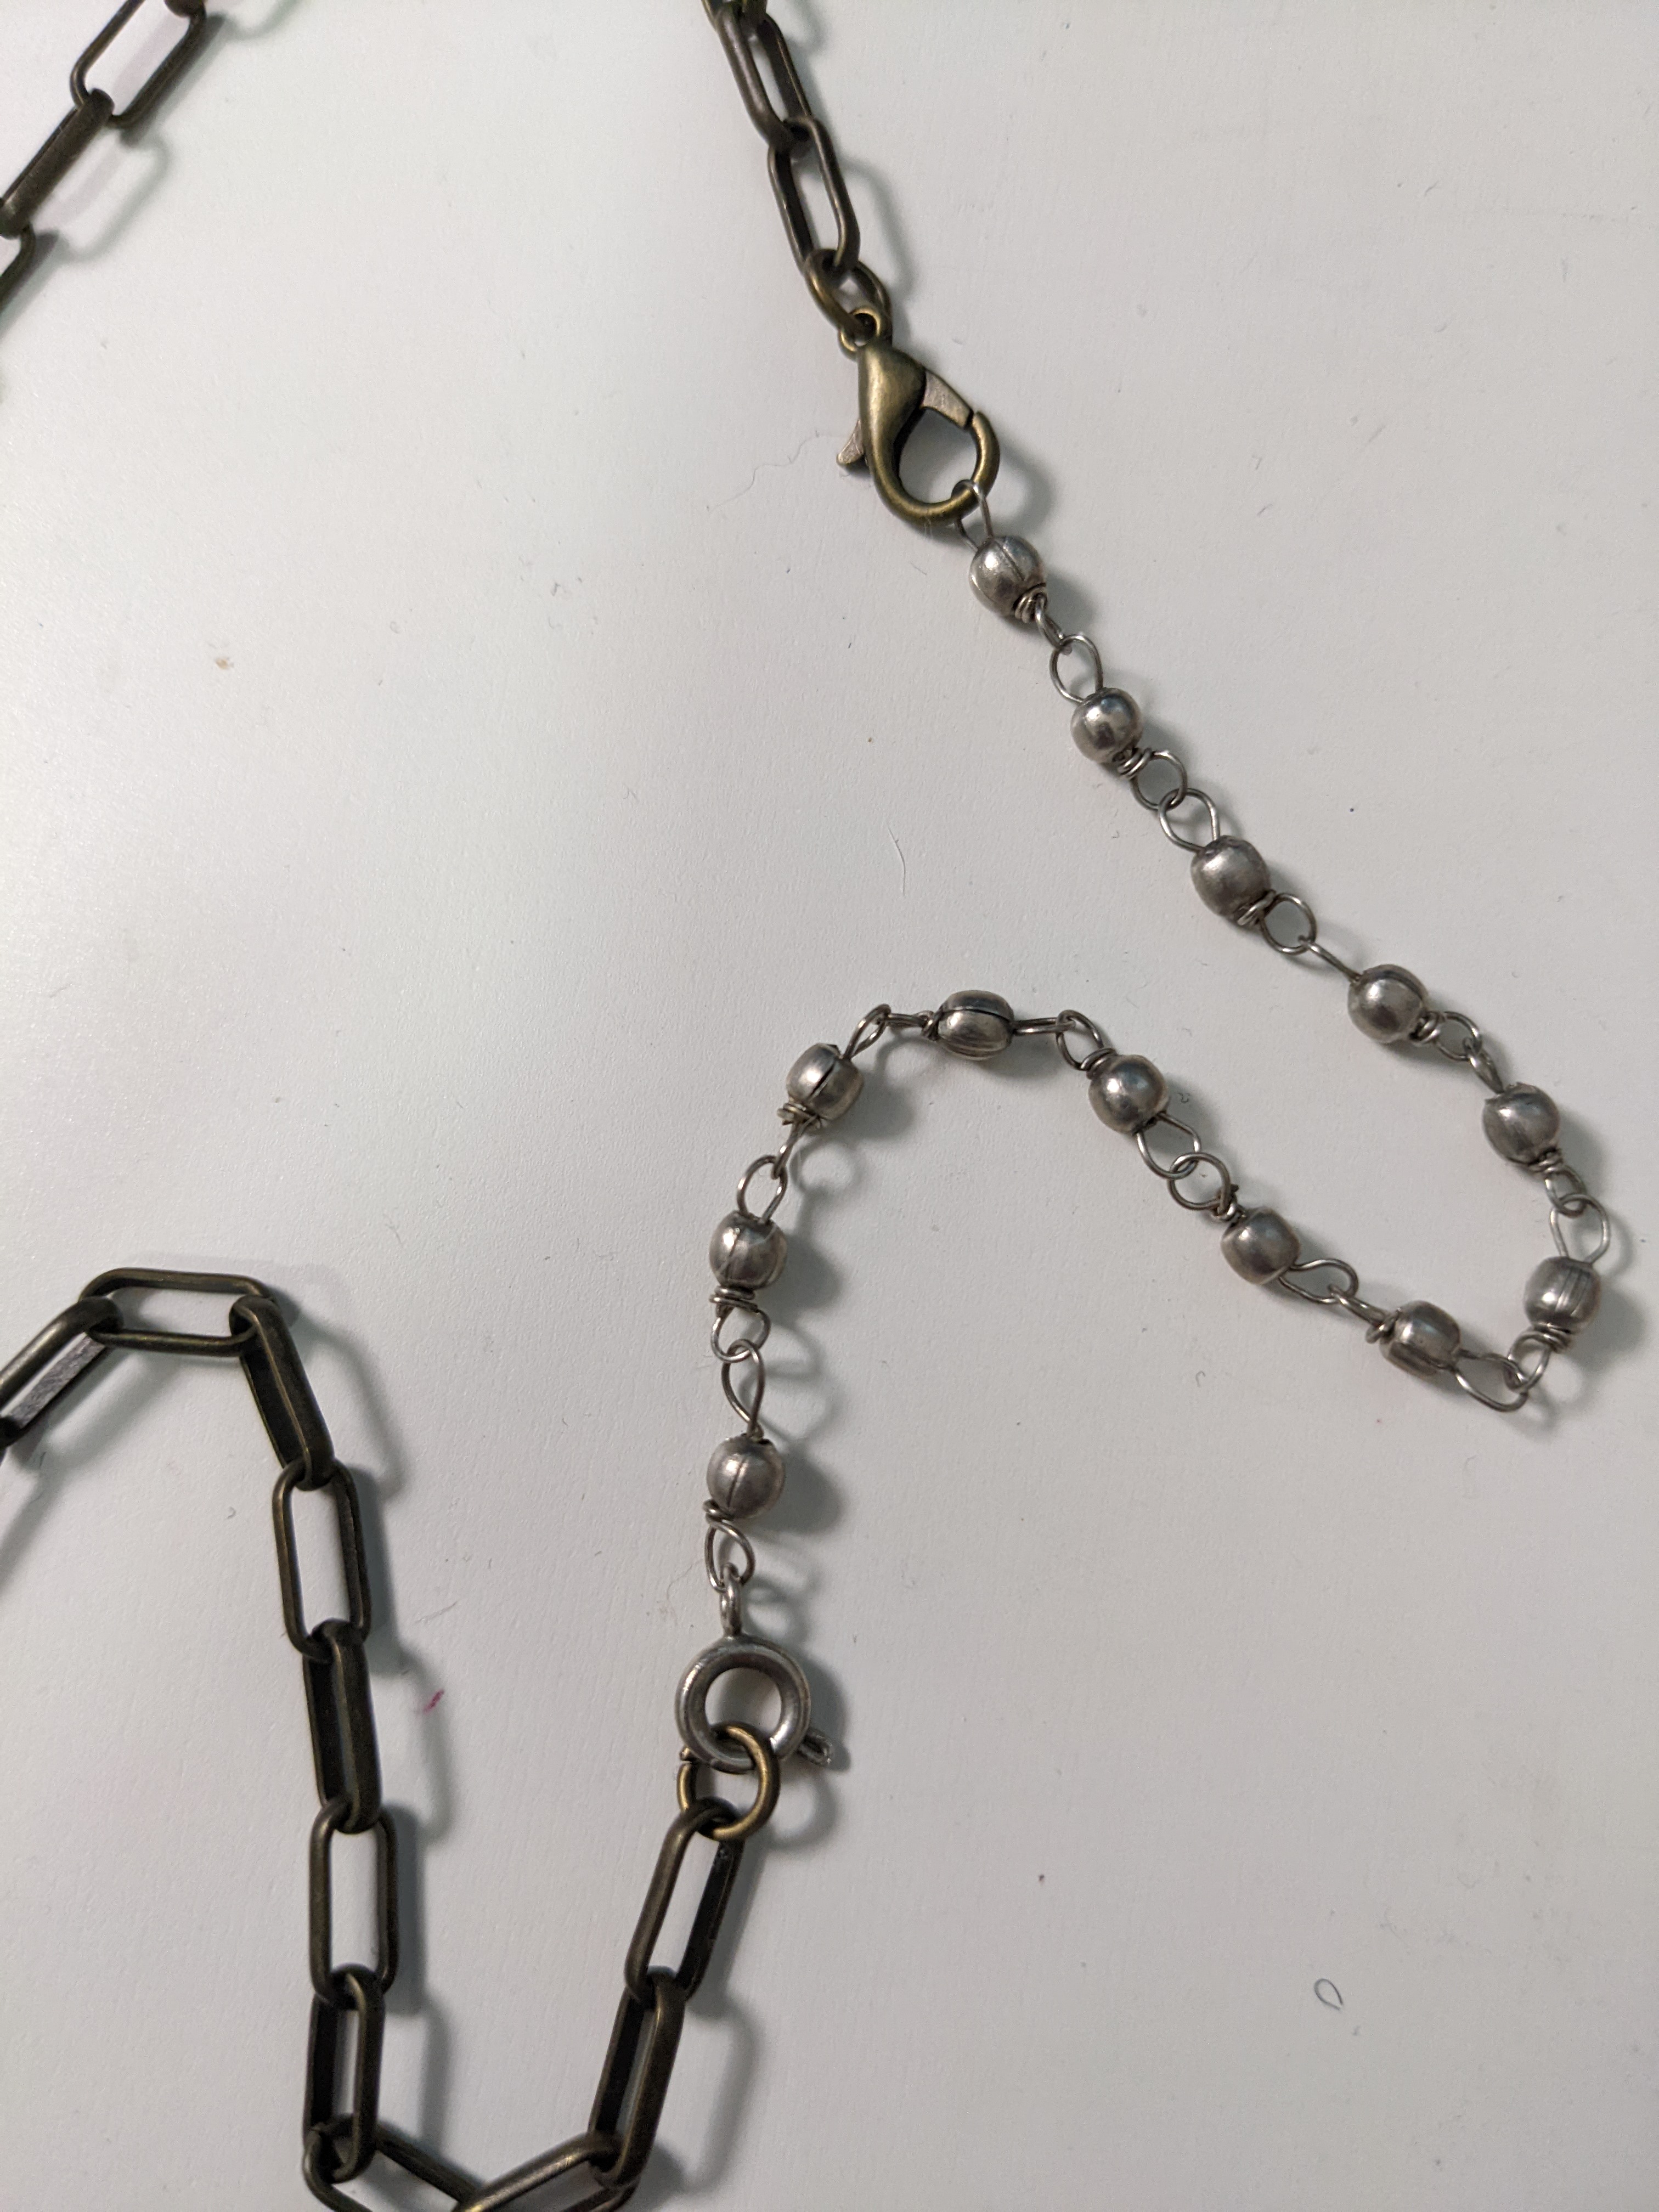
To attach the large piece to the necklace chain, I cut off the middle chain link of the necklace using wire cutters. This left me with two open ends of the necklace, I then used the exposed wire on the wooden pieces to loop through each of the chain ends and then back on itself, around the ends of the “wood.” I used another piece of wire to add more loops to fully cover the wood ends. (It helped to loop the wire first around a pen of the same width as the wood and then slide it on, as opposed to looping it around the foam.) To finish the wire ends, I sanded them down a bit with a nailer filer and then covered the ends in a small dab of superglue, so that they wouldn’t be too sharp or catch on any fabric.
Once that was done, I made sure the full necklace was the right length. The necklace chain by itself wasn’t quite long enough, so I used a chain I had in my stash to give it some more length. This chain doesn’t match exactly, but this portion of the necklace would be hidden by the scarf, so I didn’t mind. After using the already made necklace ends to clasp to the extra chain, I tried it on and adjusted the length, then cut the excess chain.
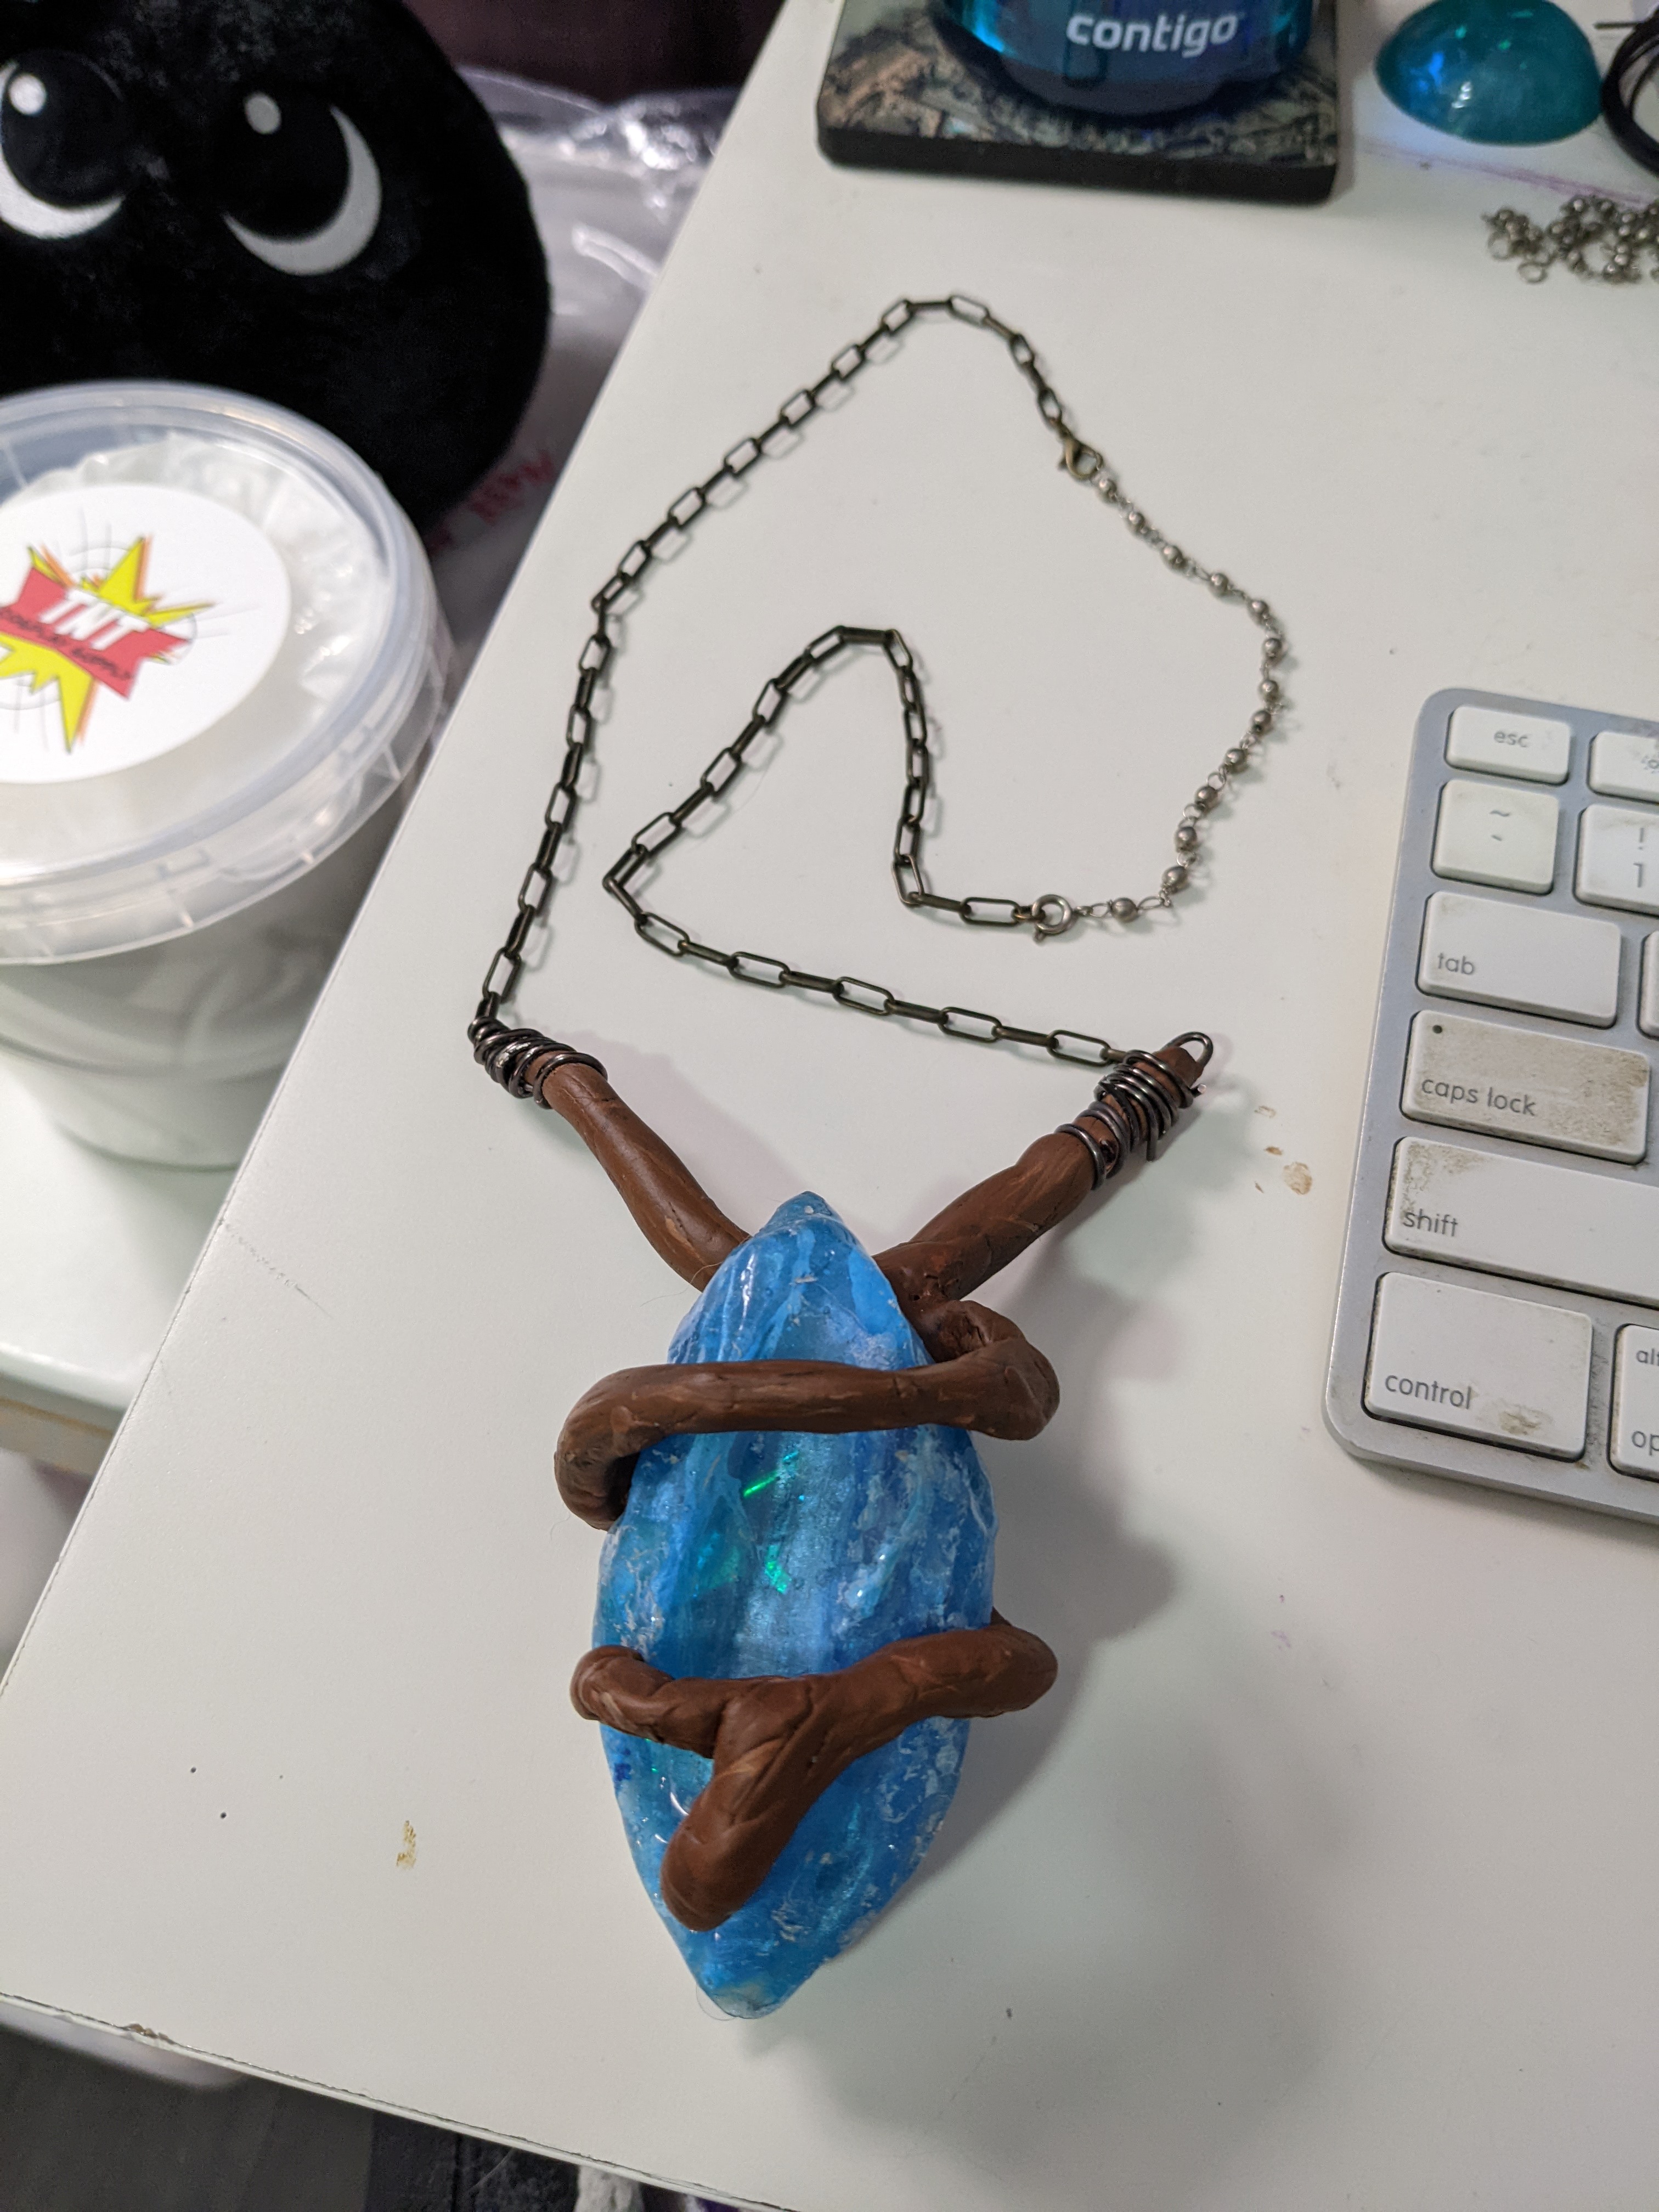
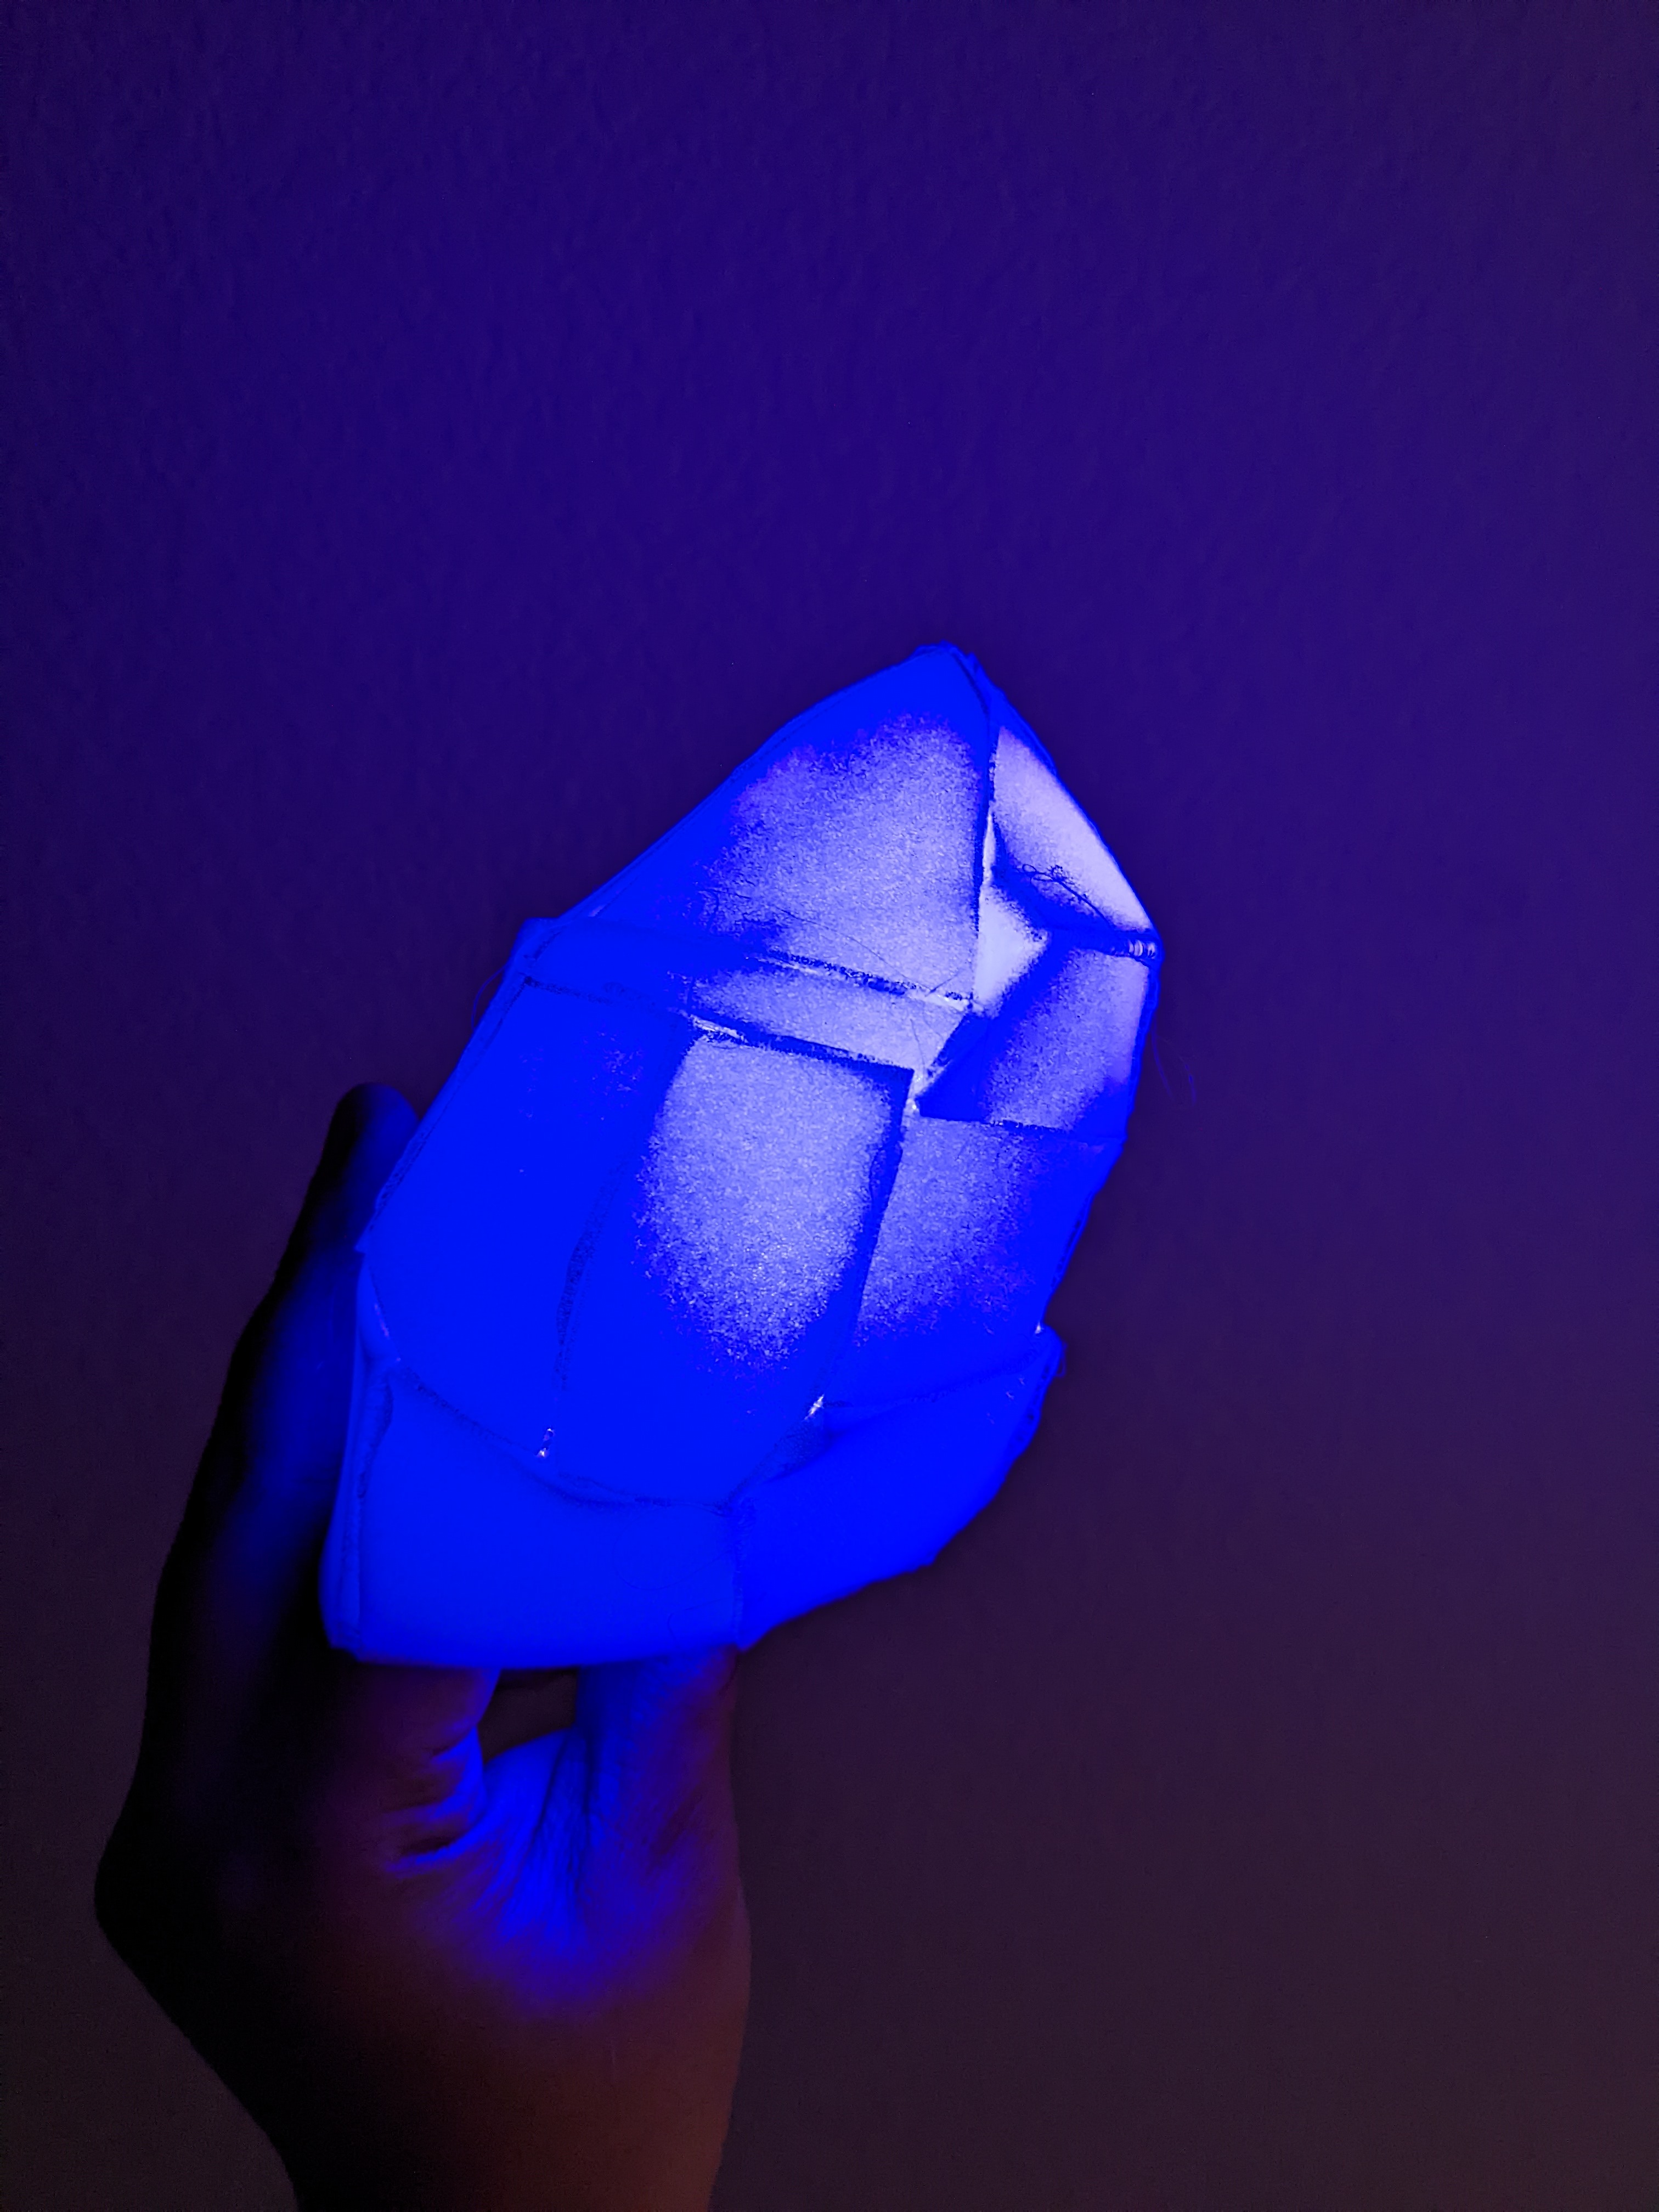
Here’s the finished necklace with the light off and on!


Staff
Crystals
For the crystals, I didn’t want to do resin. I mostly didn’t want to learn a brand new material and have to buy a bunch of new supplies/tools. So, I opted for using things I already had in my stash. First I tried experimenting with different methods.
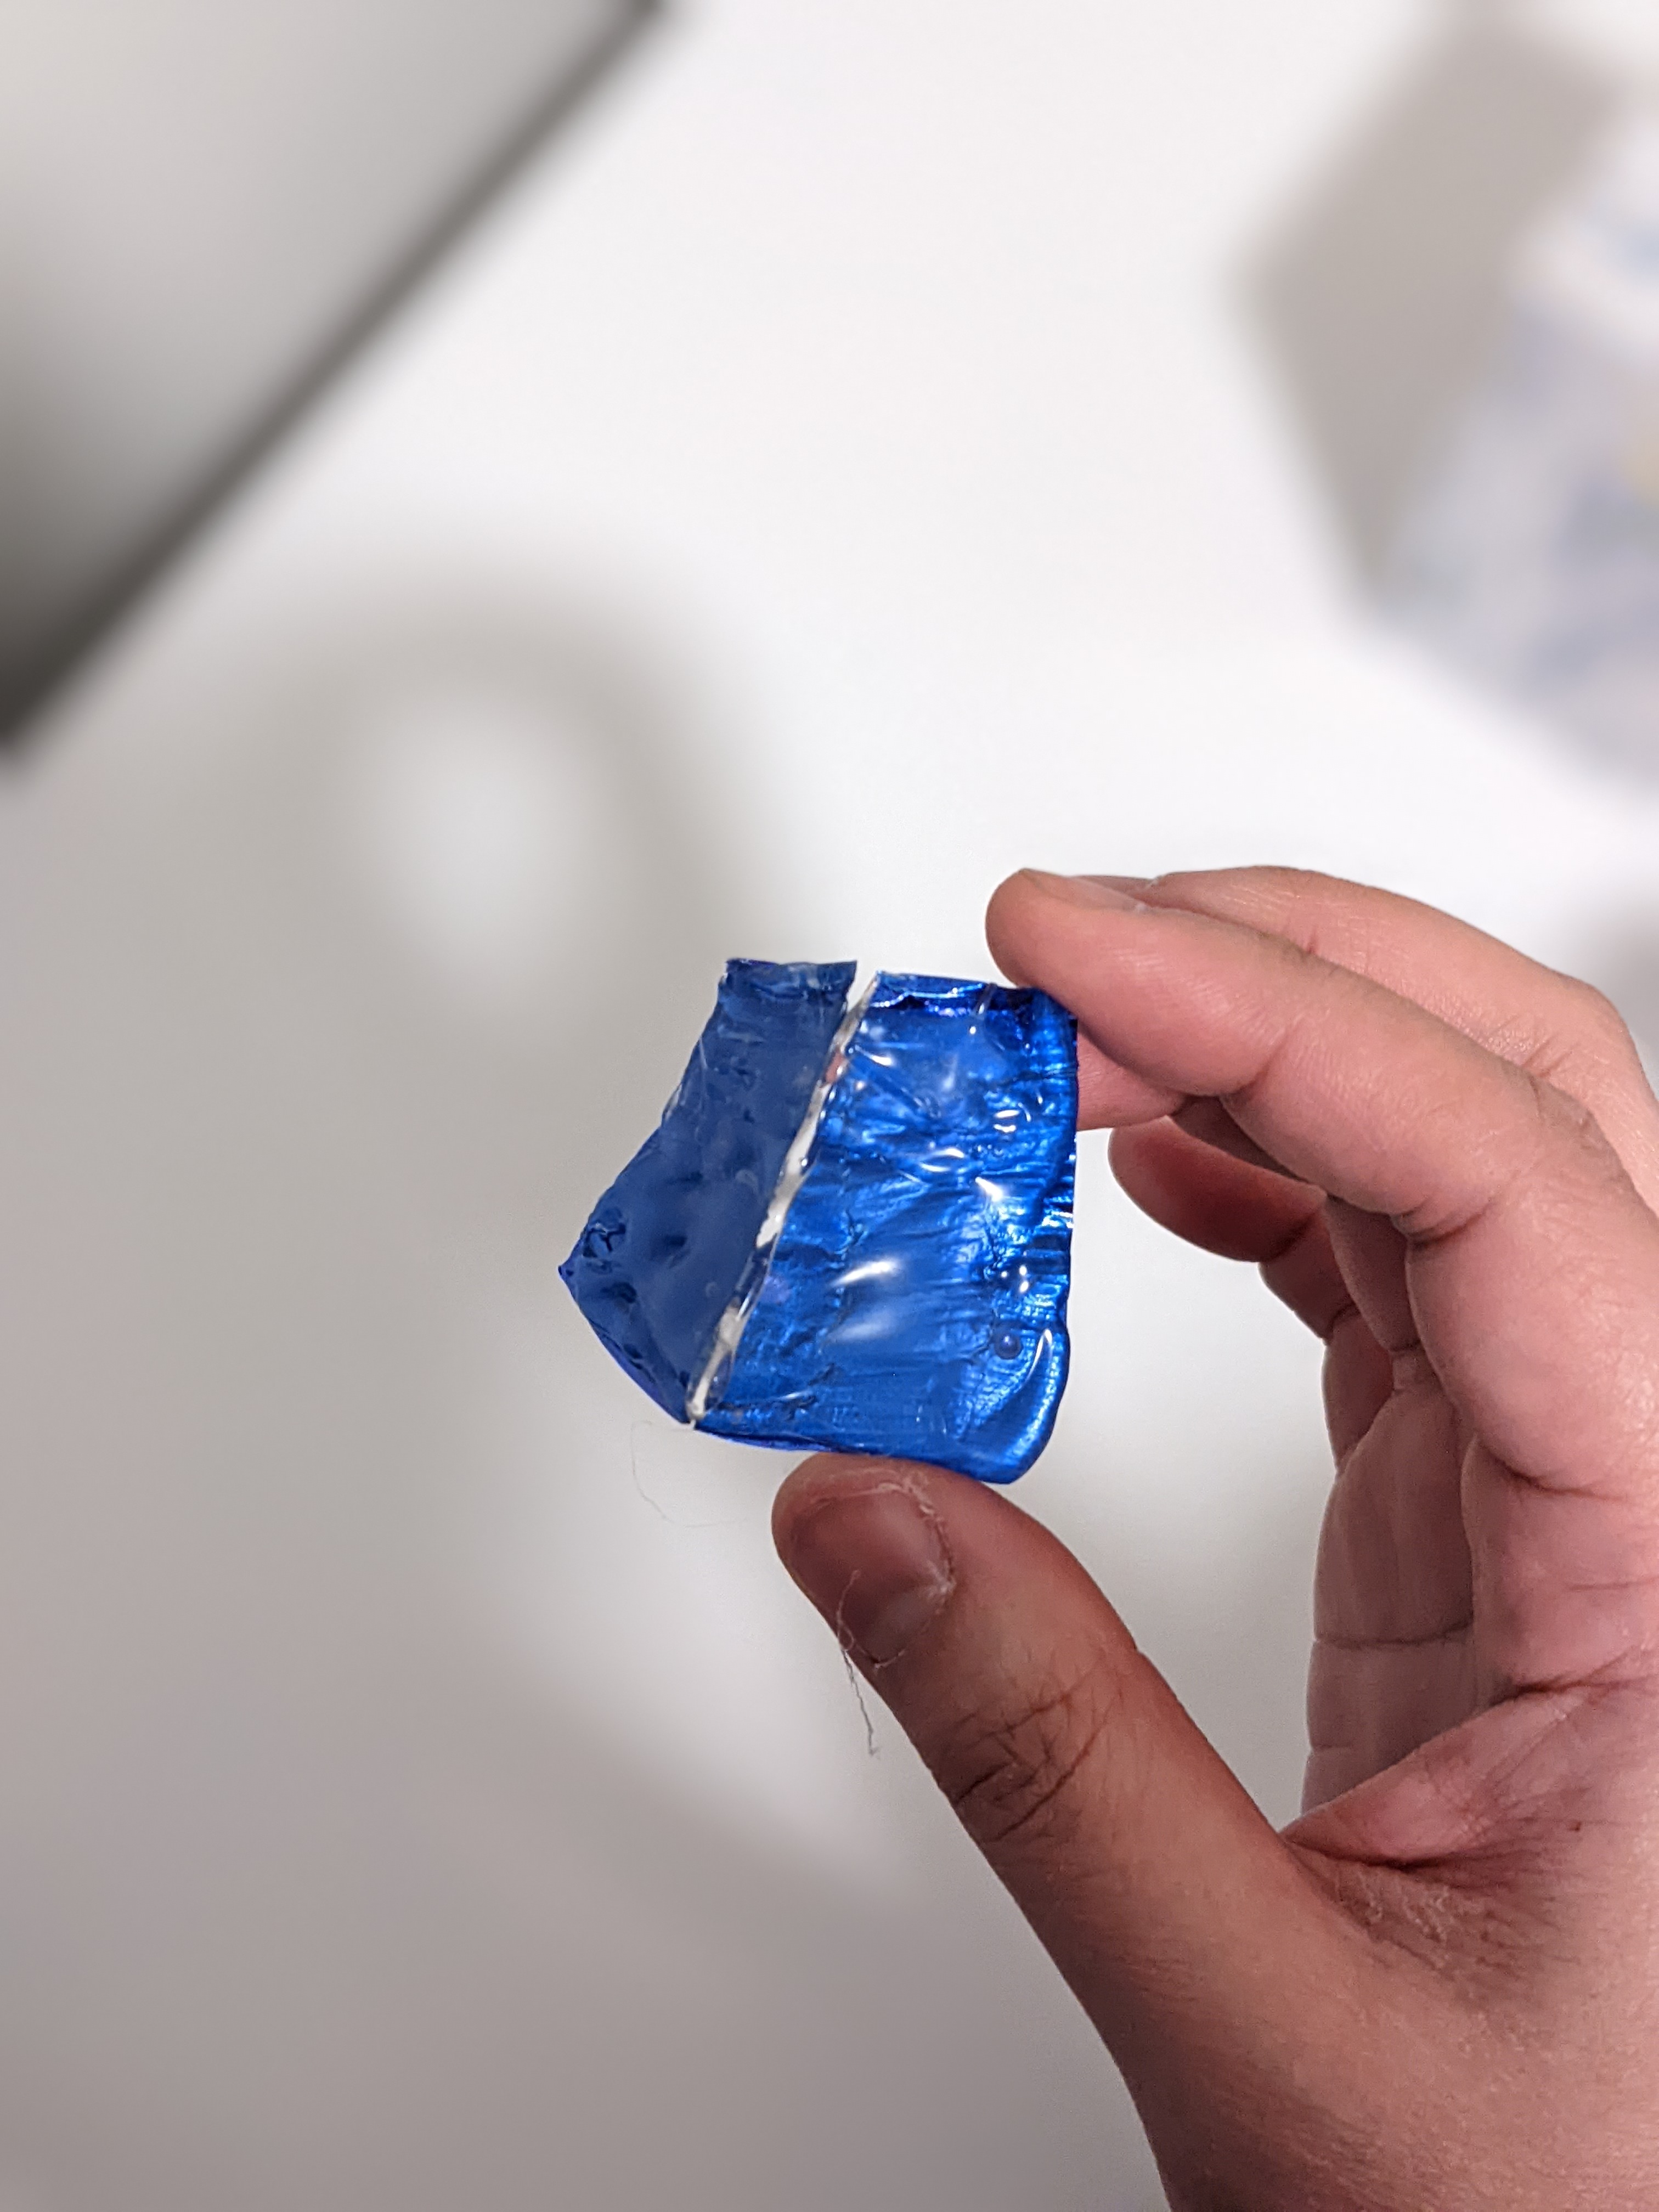
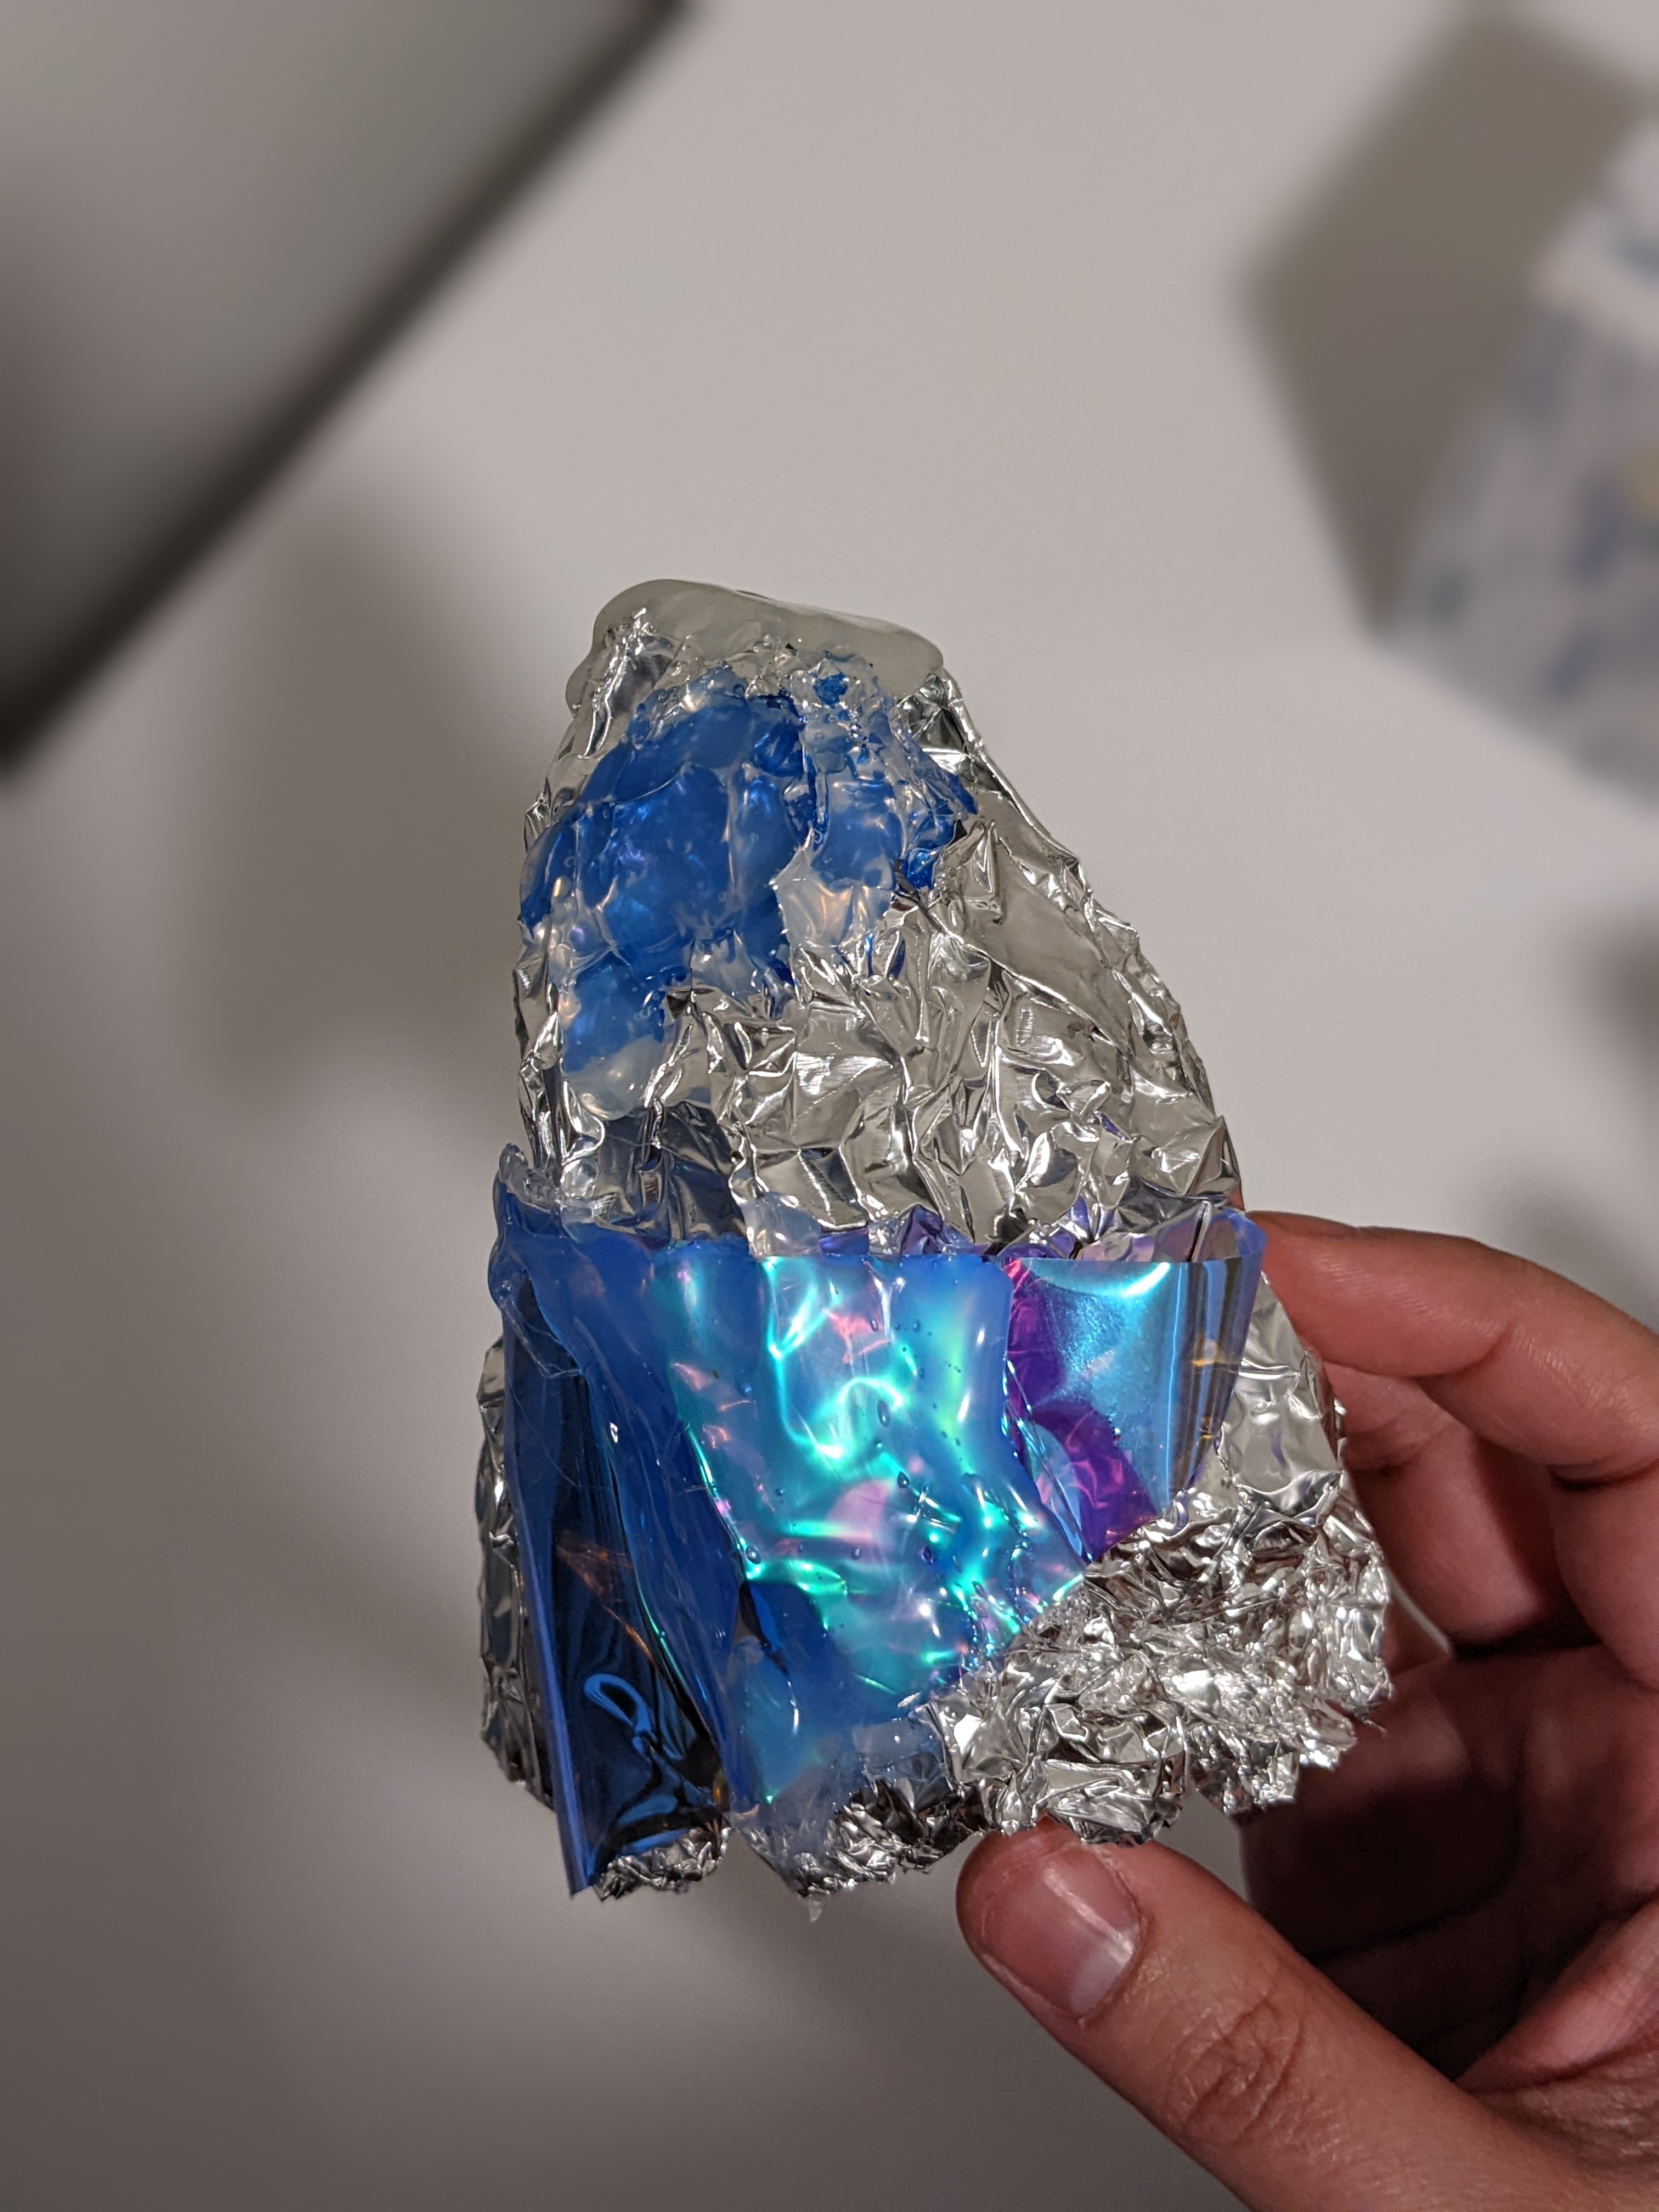
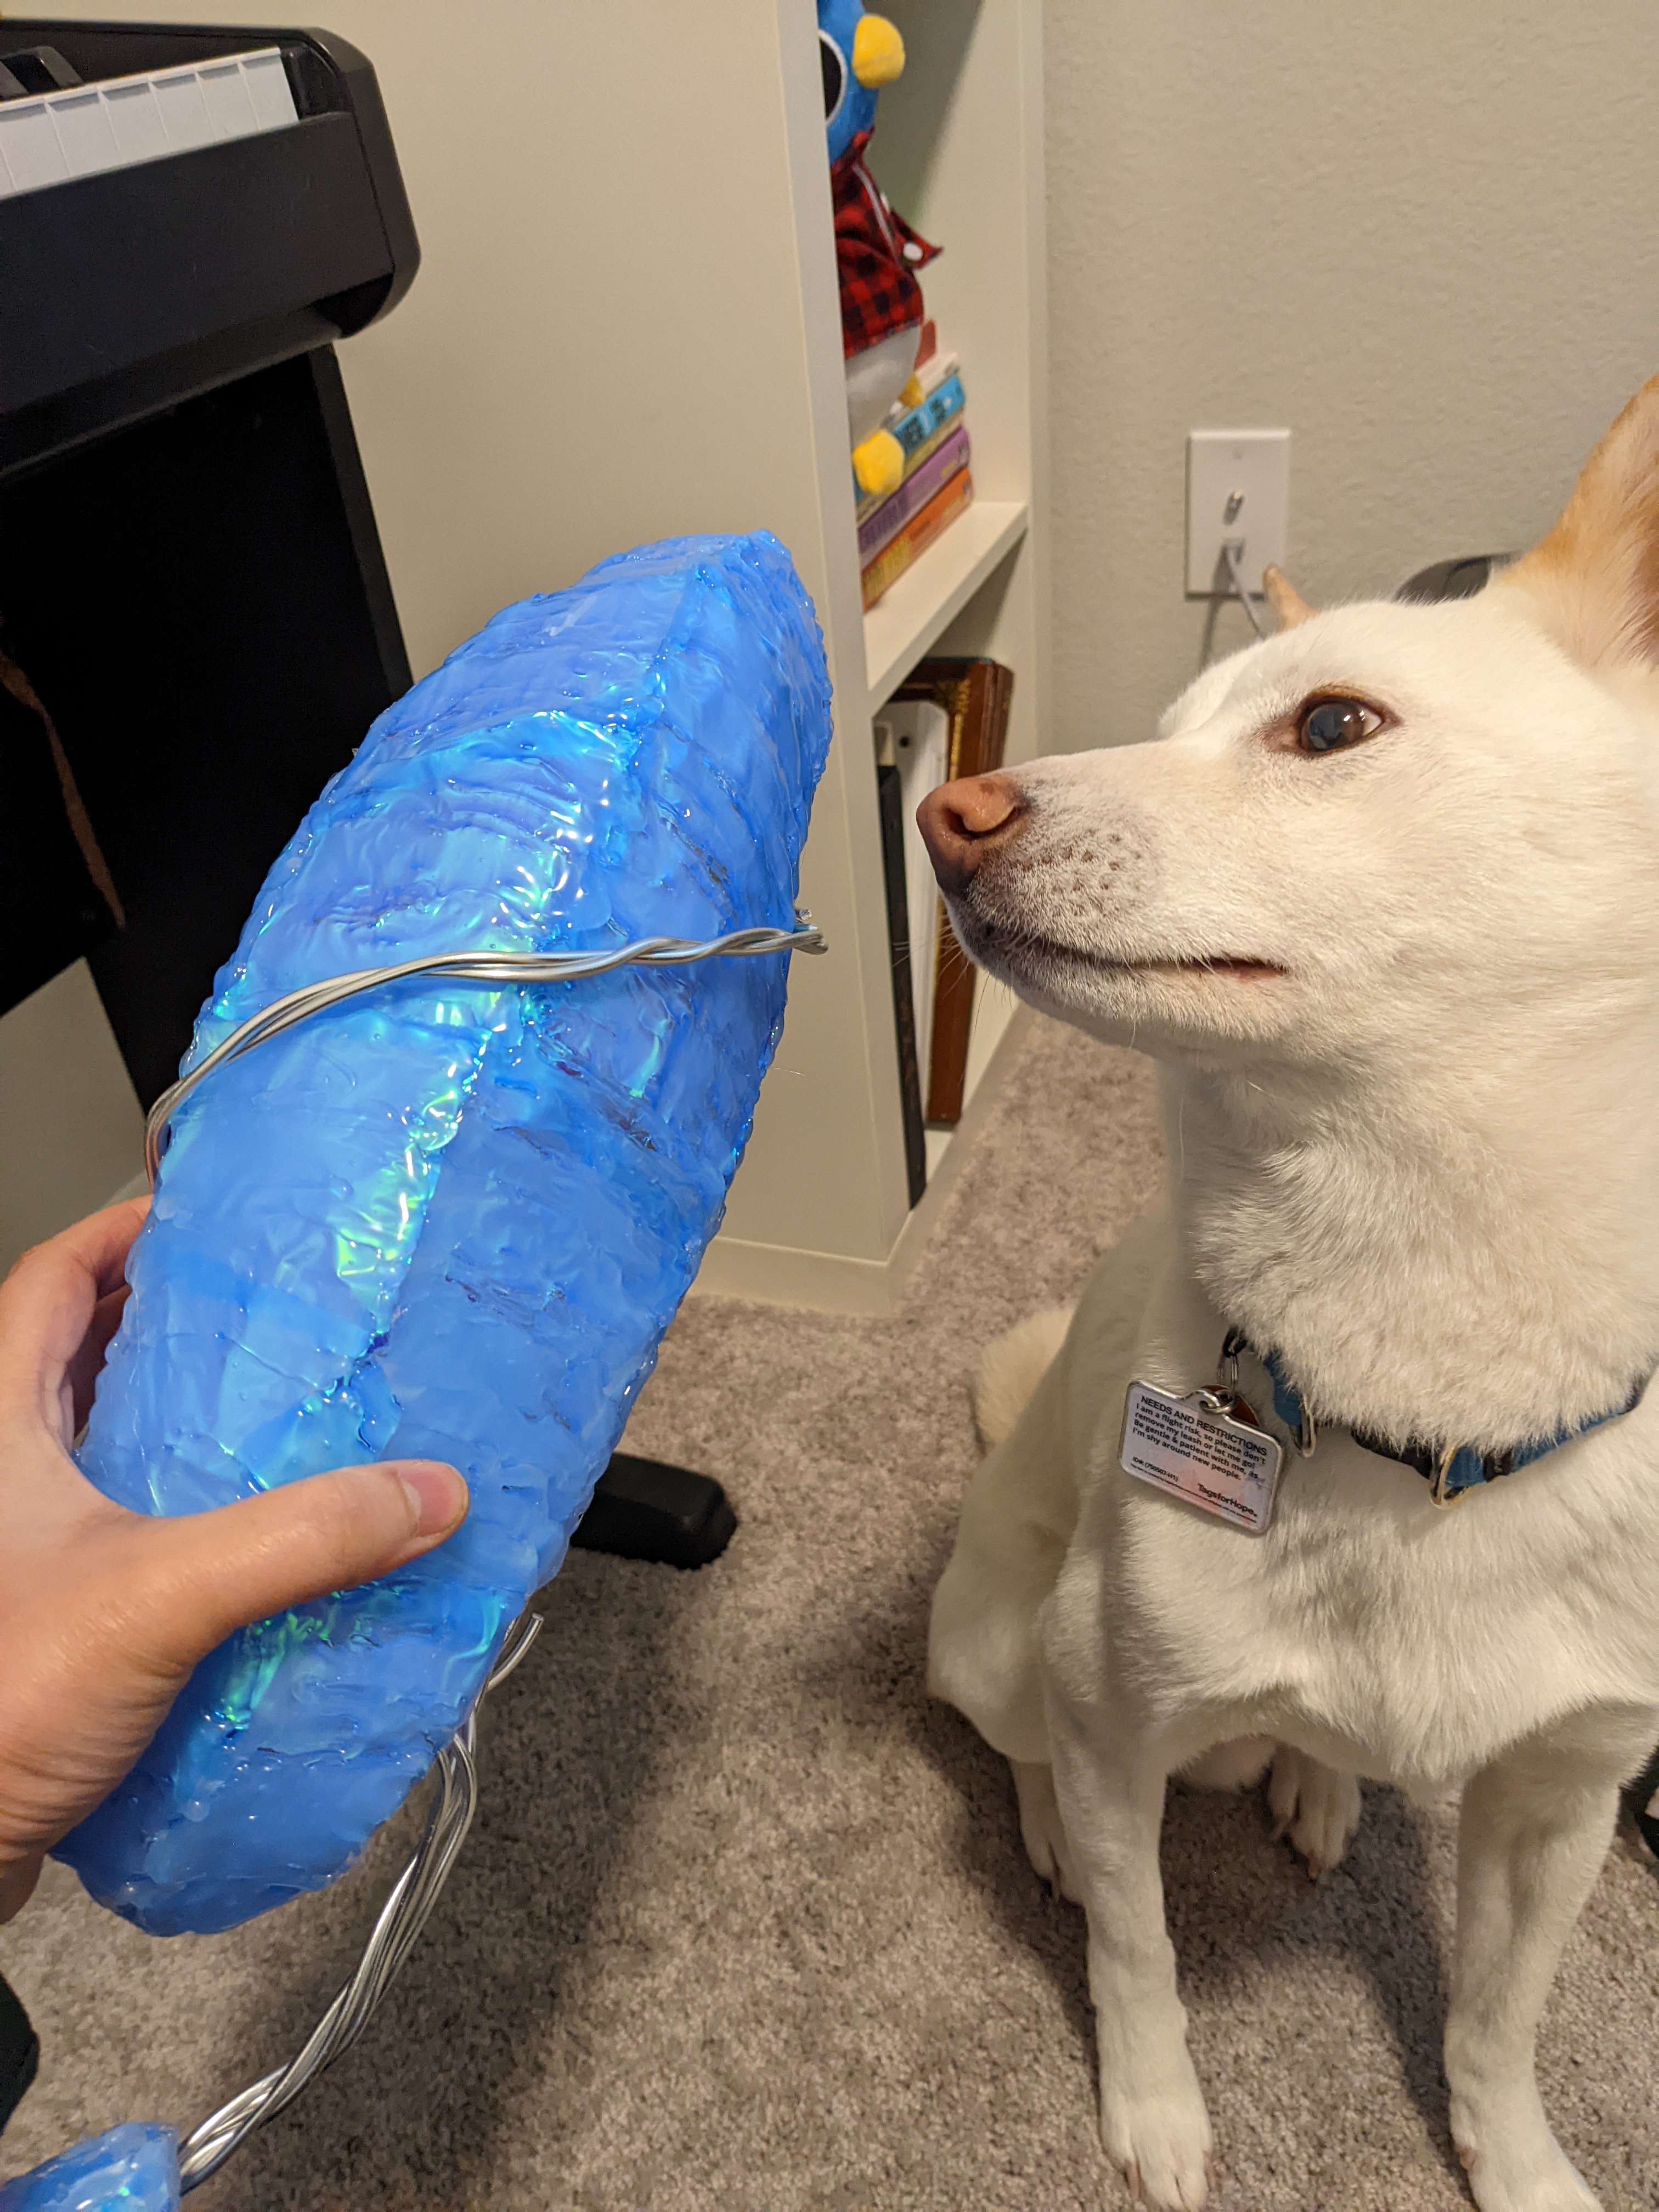
First attempt was aluminum foil and blue sharpie, with hot glue on top. I did this based on this method I found on youtube. I also tried it with blue holographic cricut vinyl. While it looked nice, it didn’t let any light through, so this wasn’t going to work because I knew I wanted to light up the crystals in the staff.
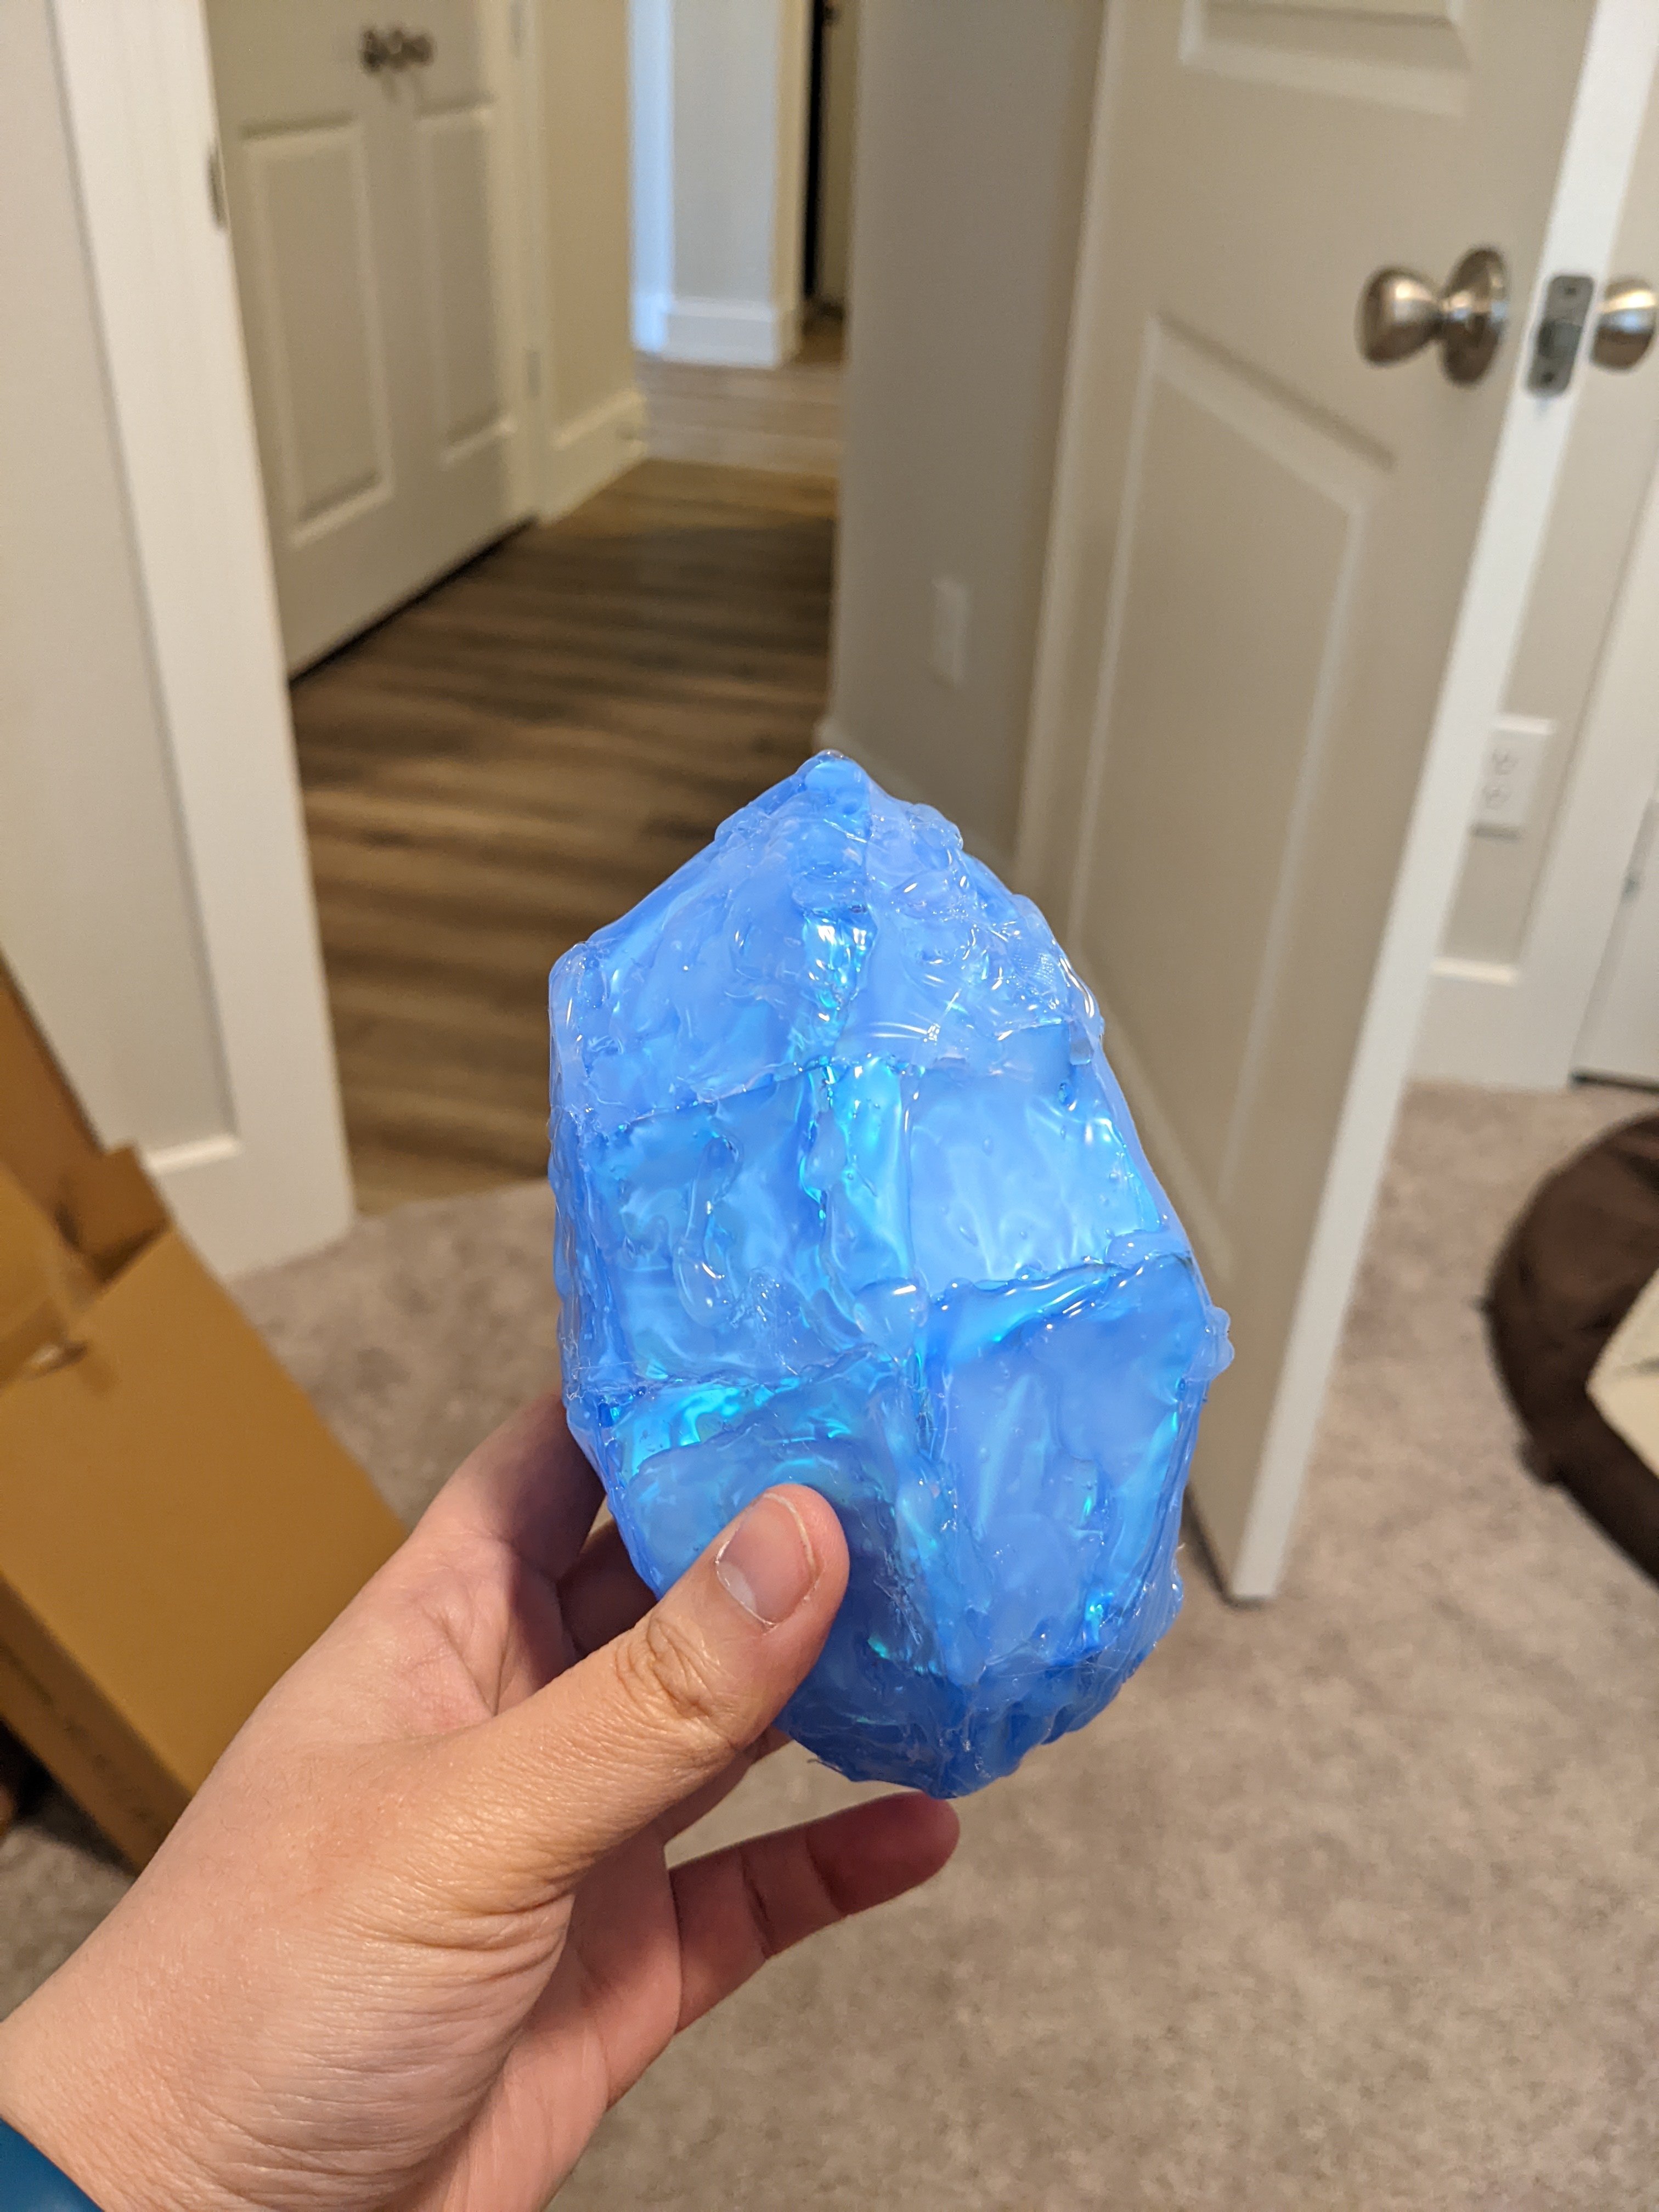
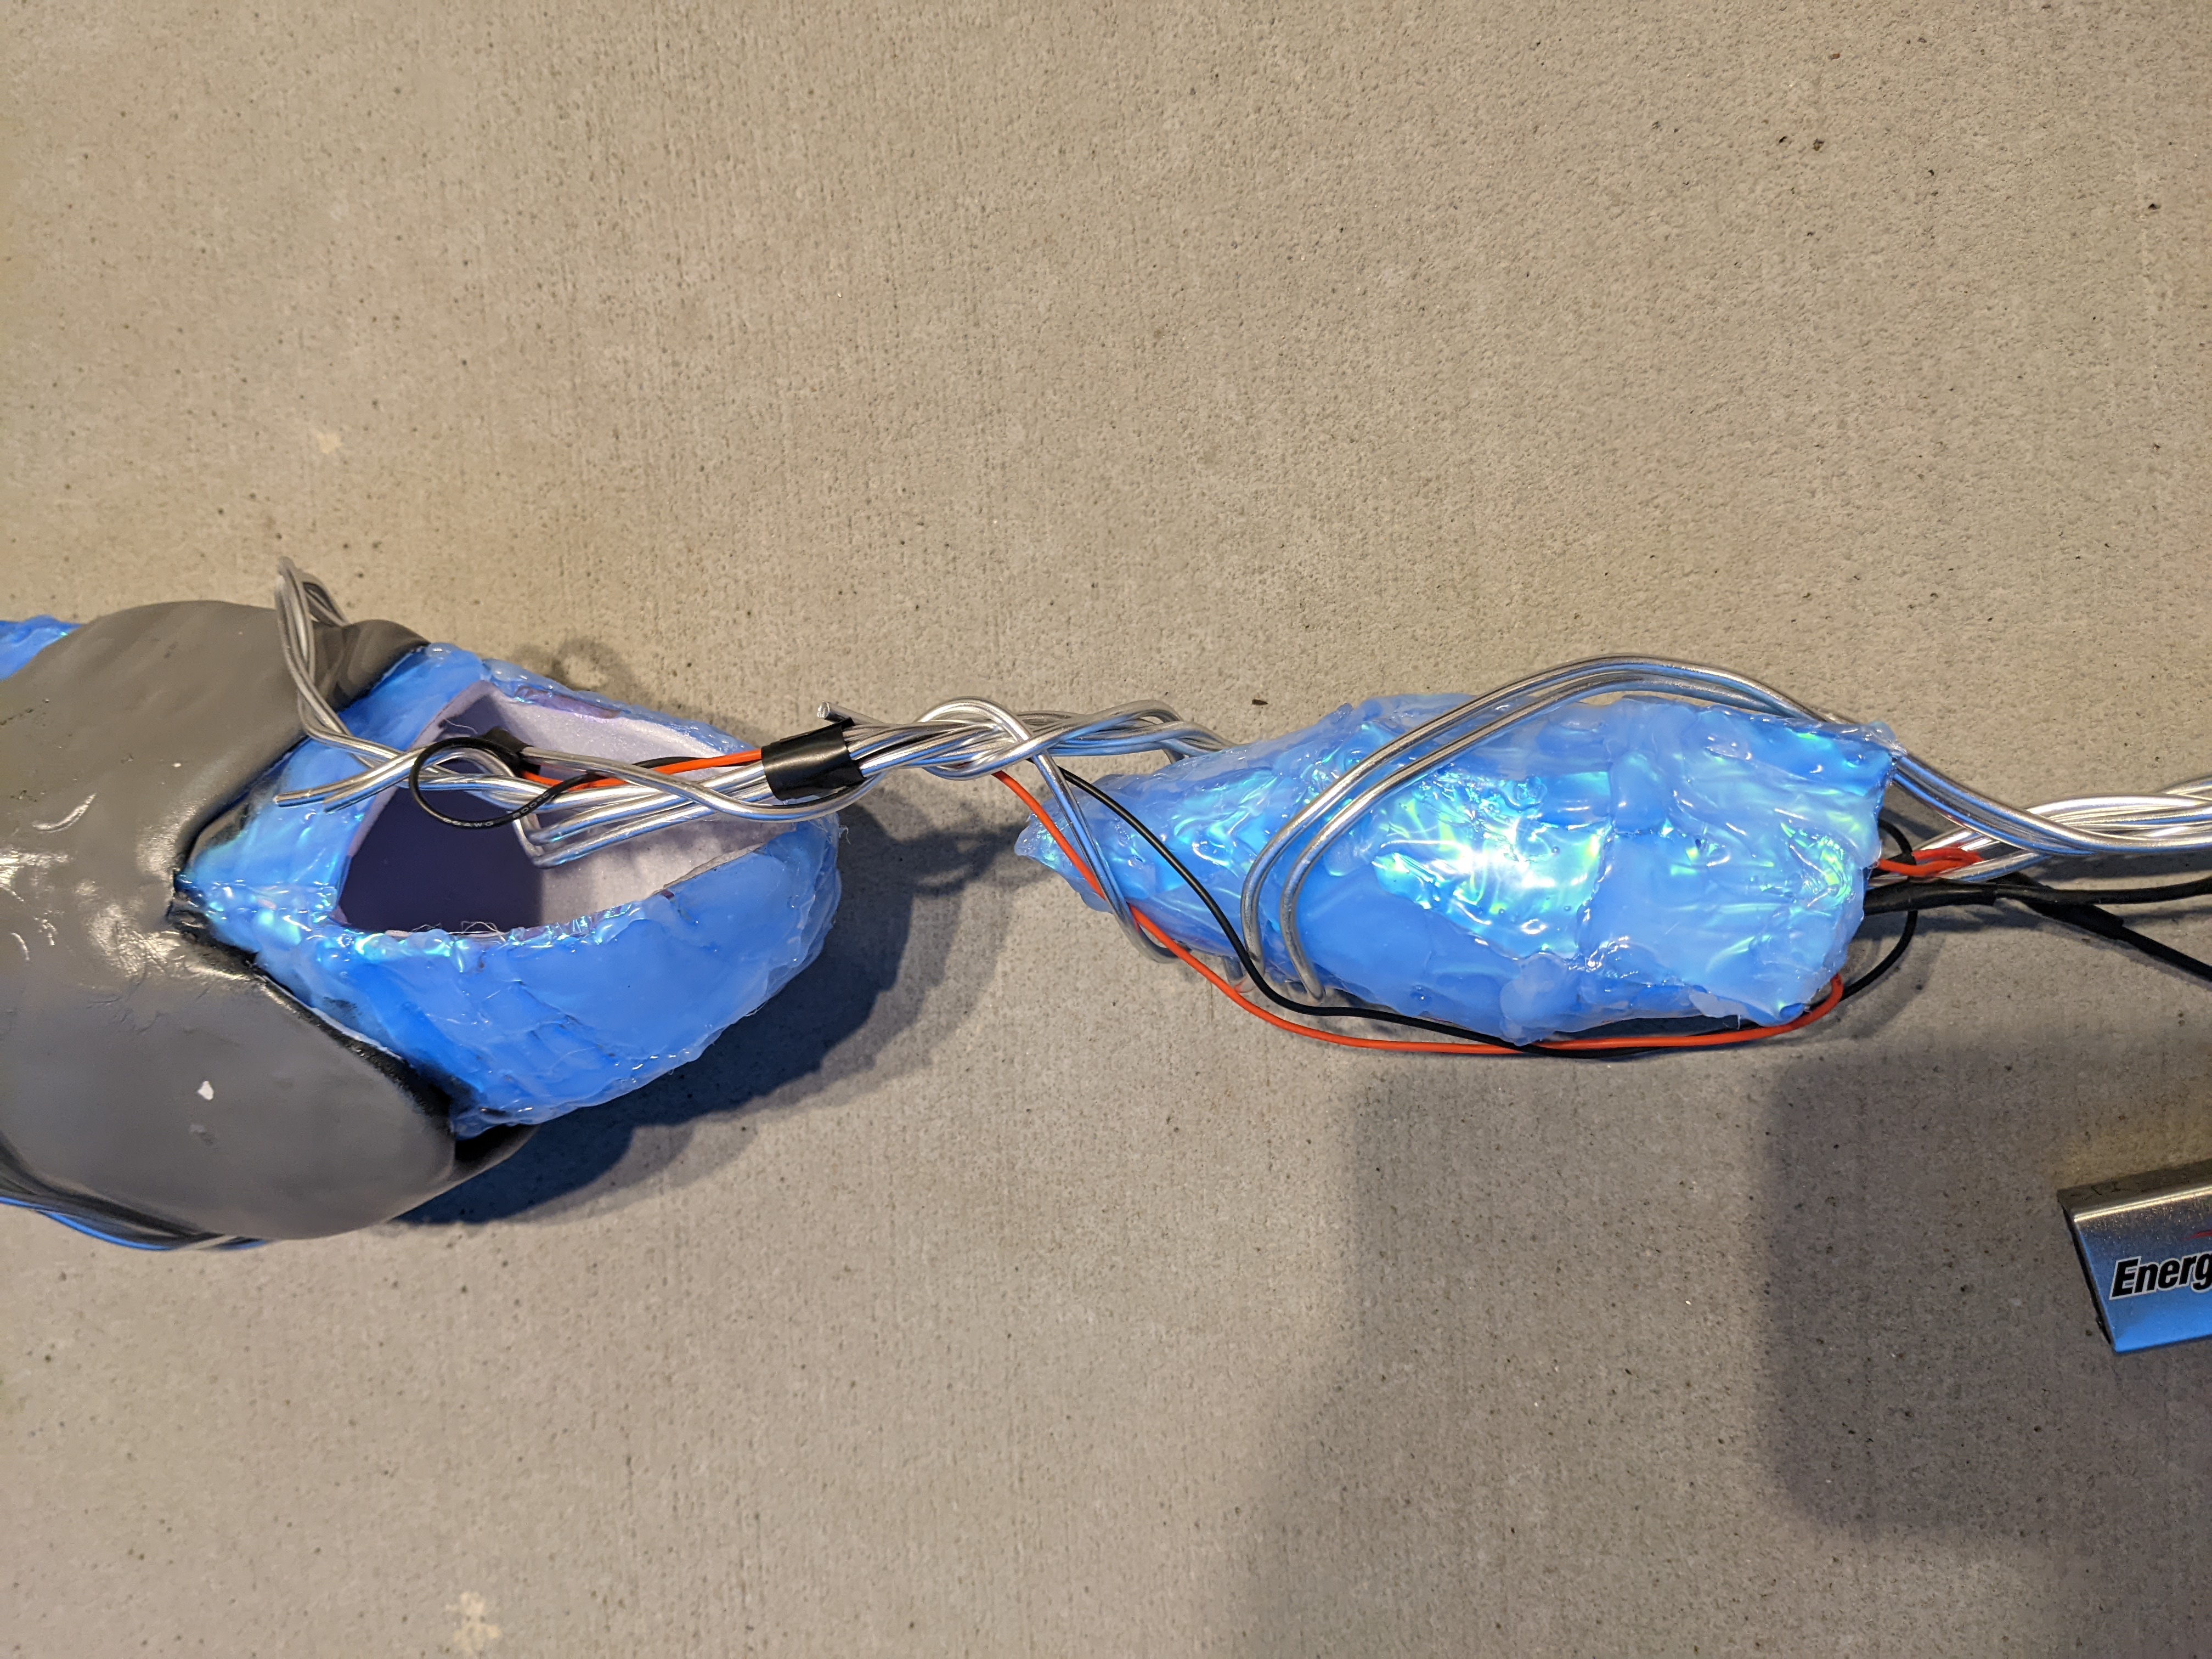
Then, using leftover Plastazote from the scythes I had made for Maria, I glued a couple pieces together, covered them in vinyl, and covered them in hot glue. It worked swimmingly!
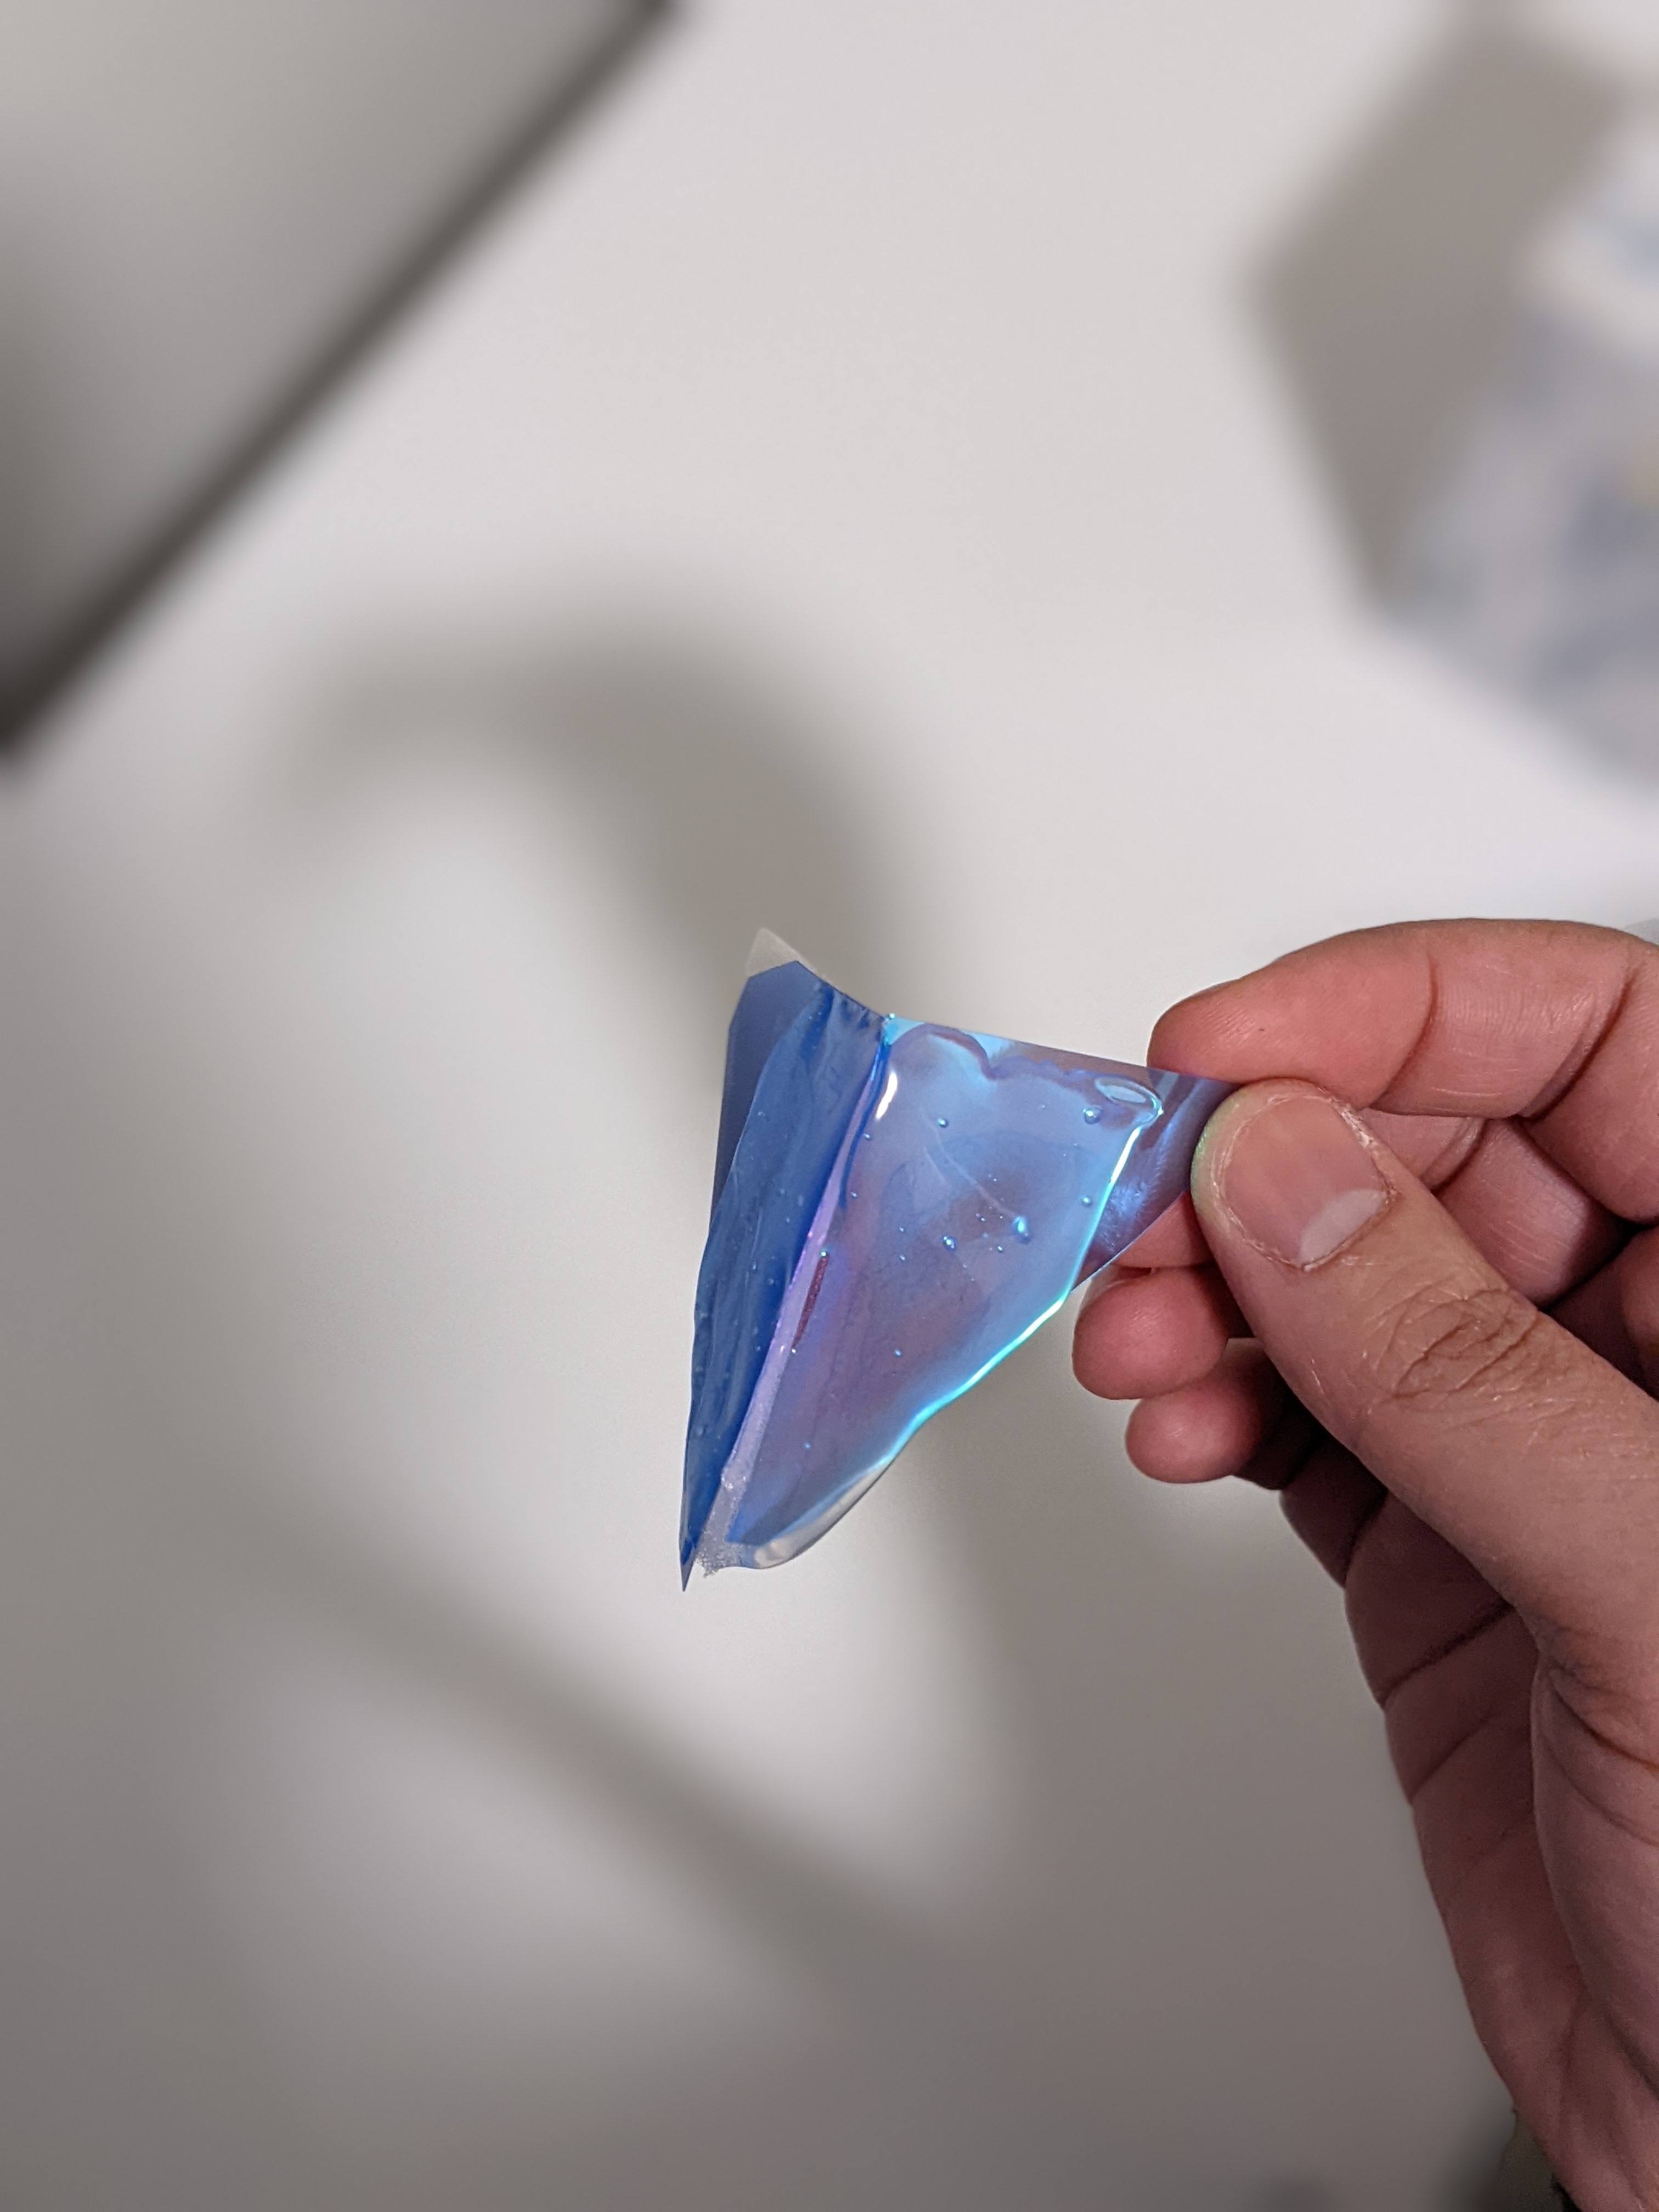
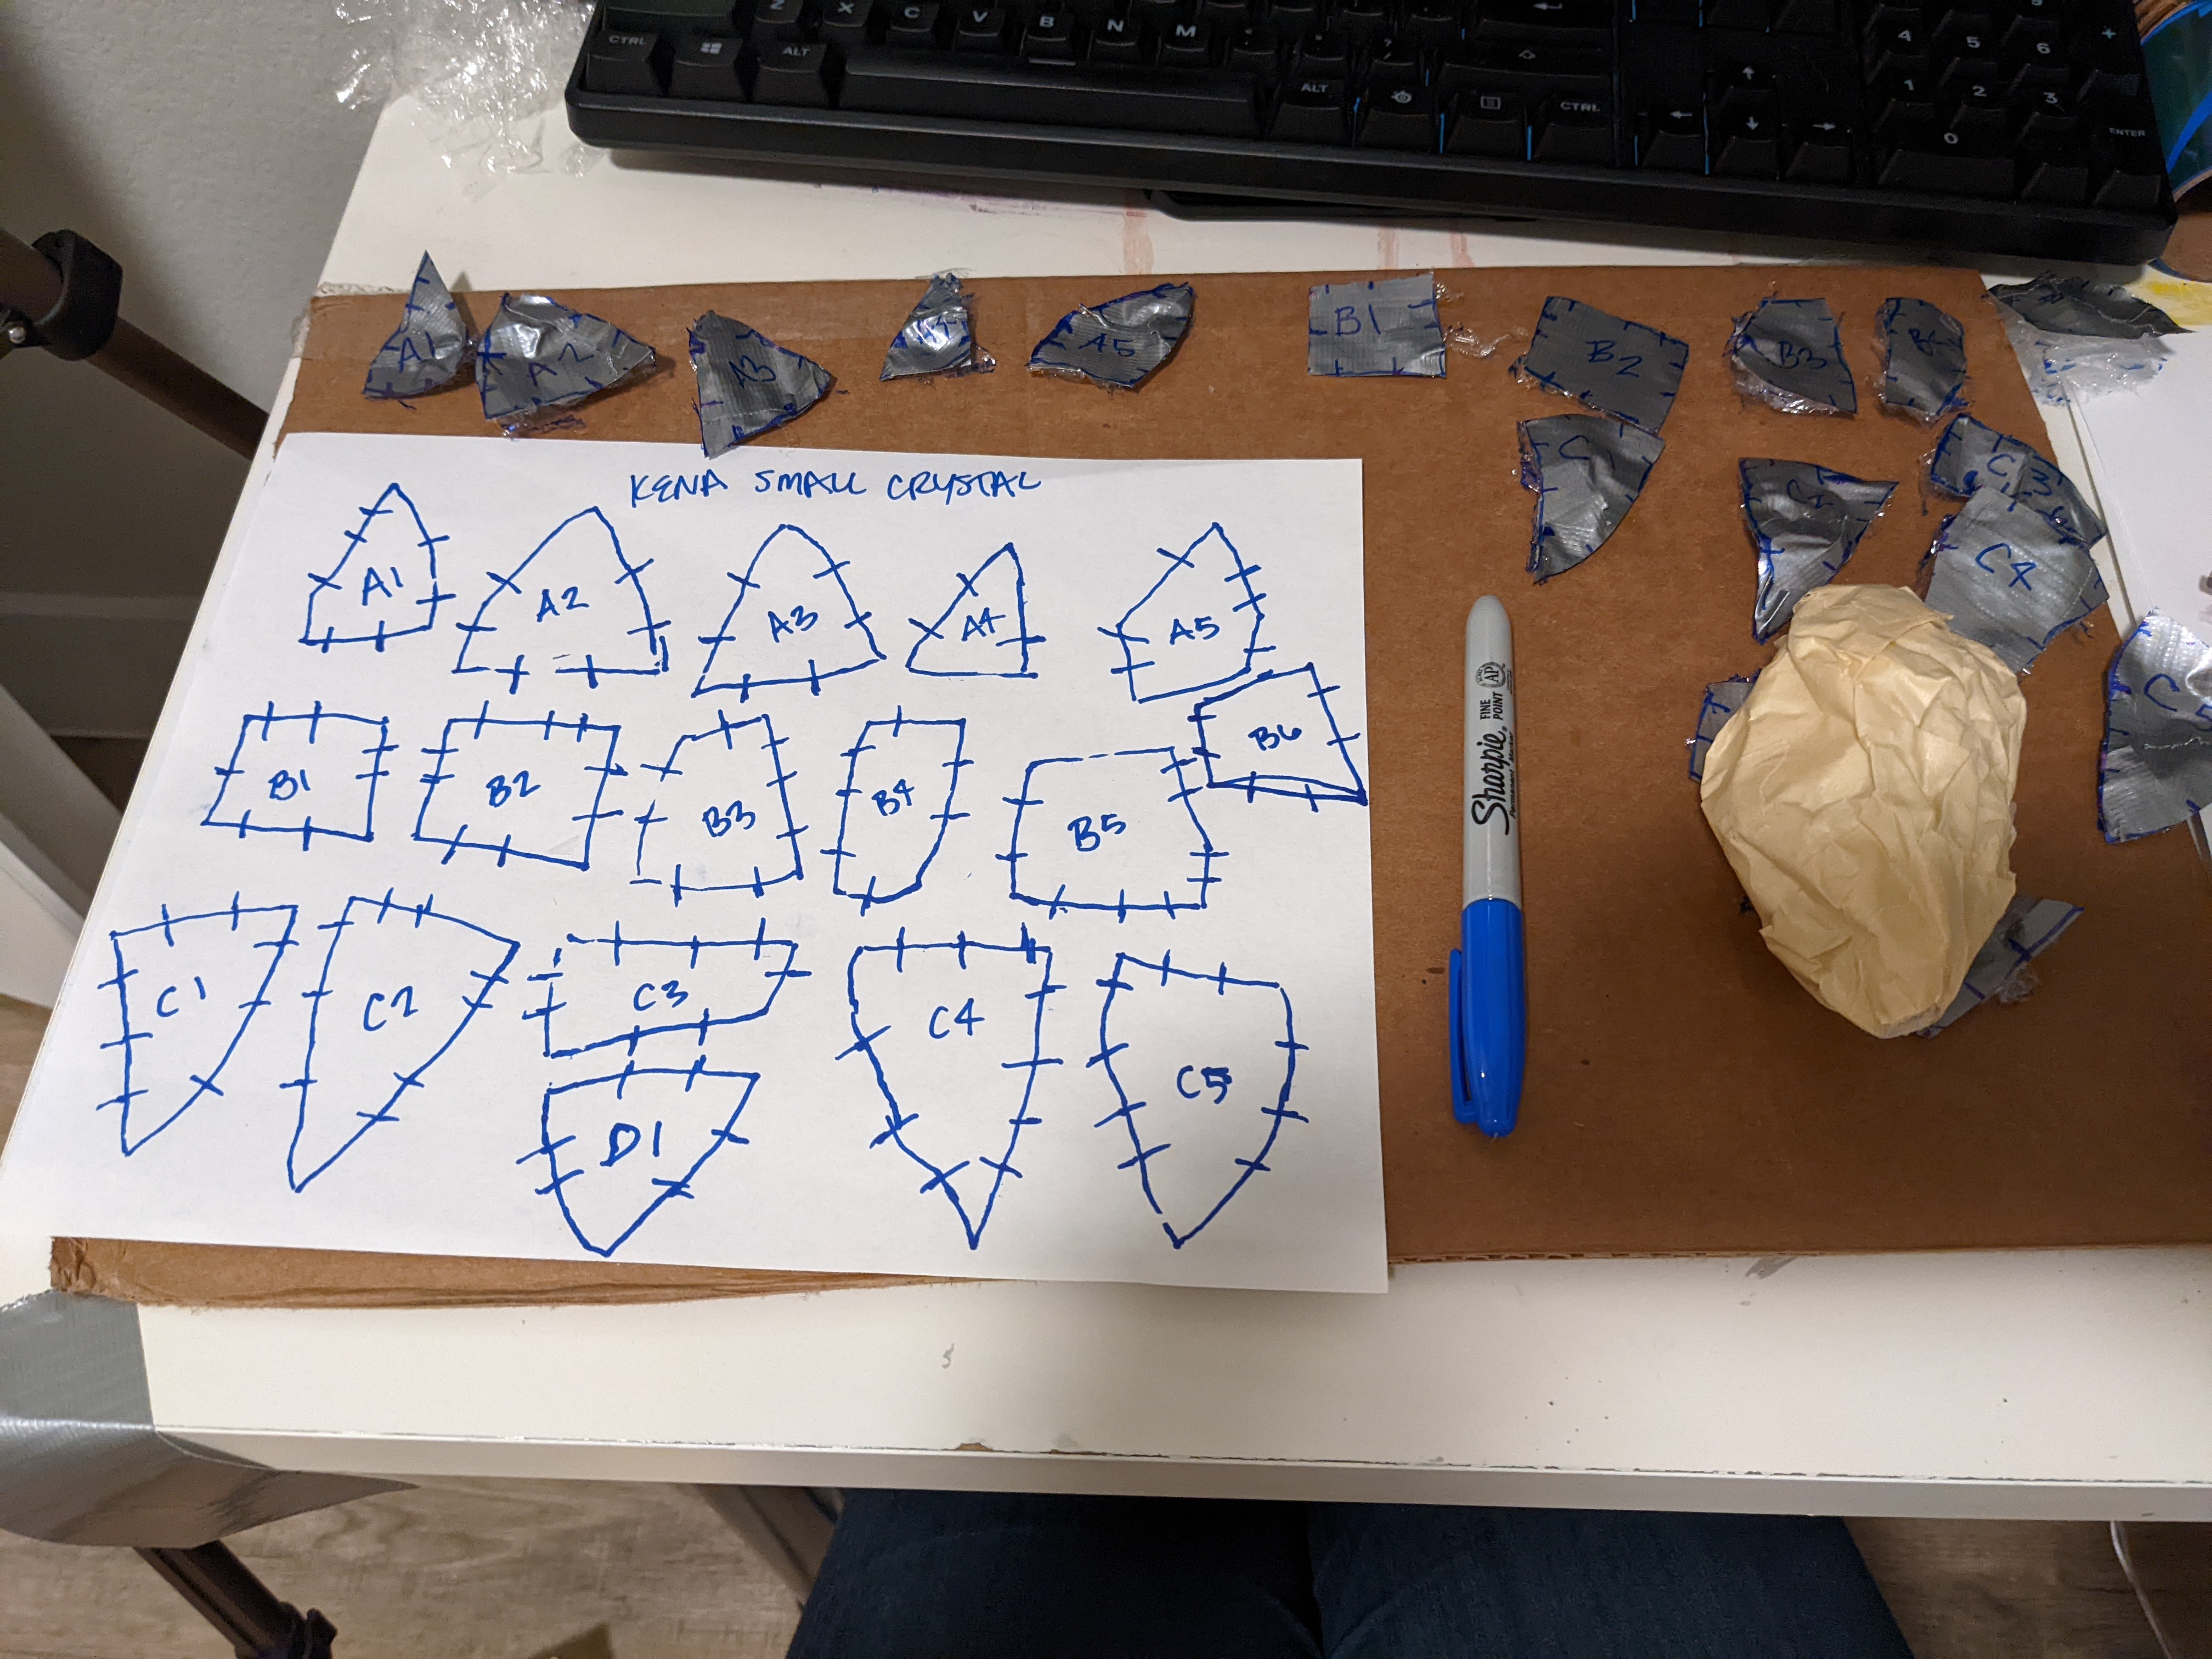
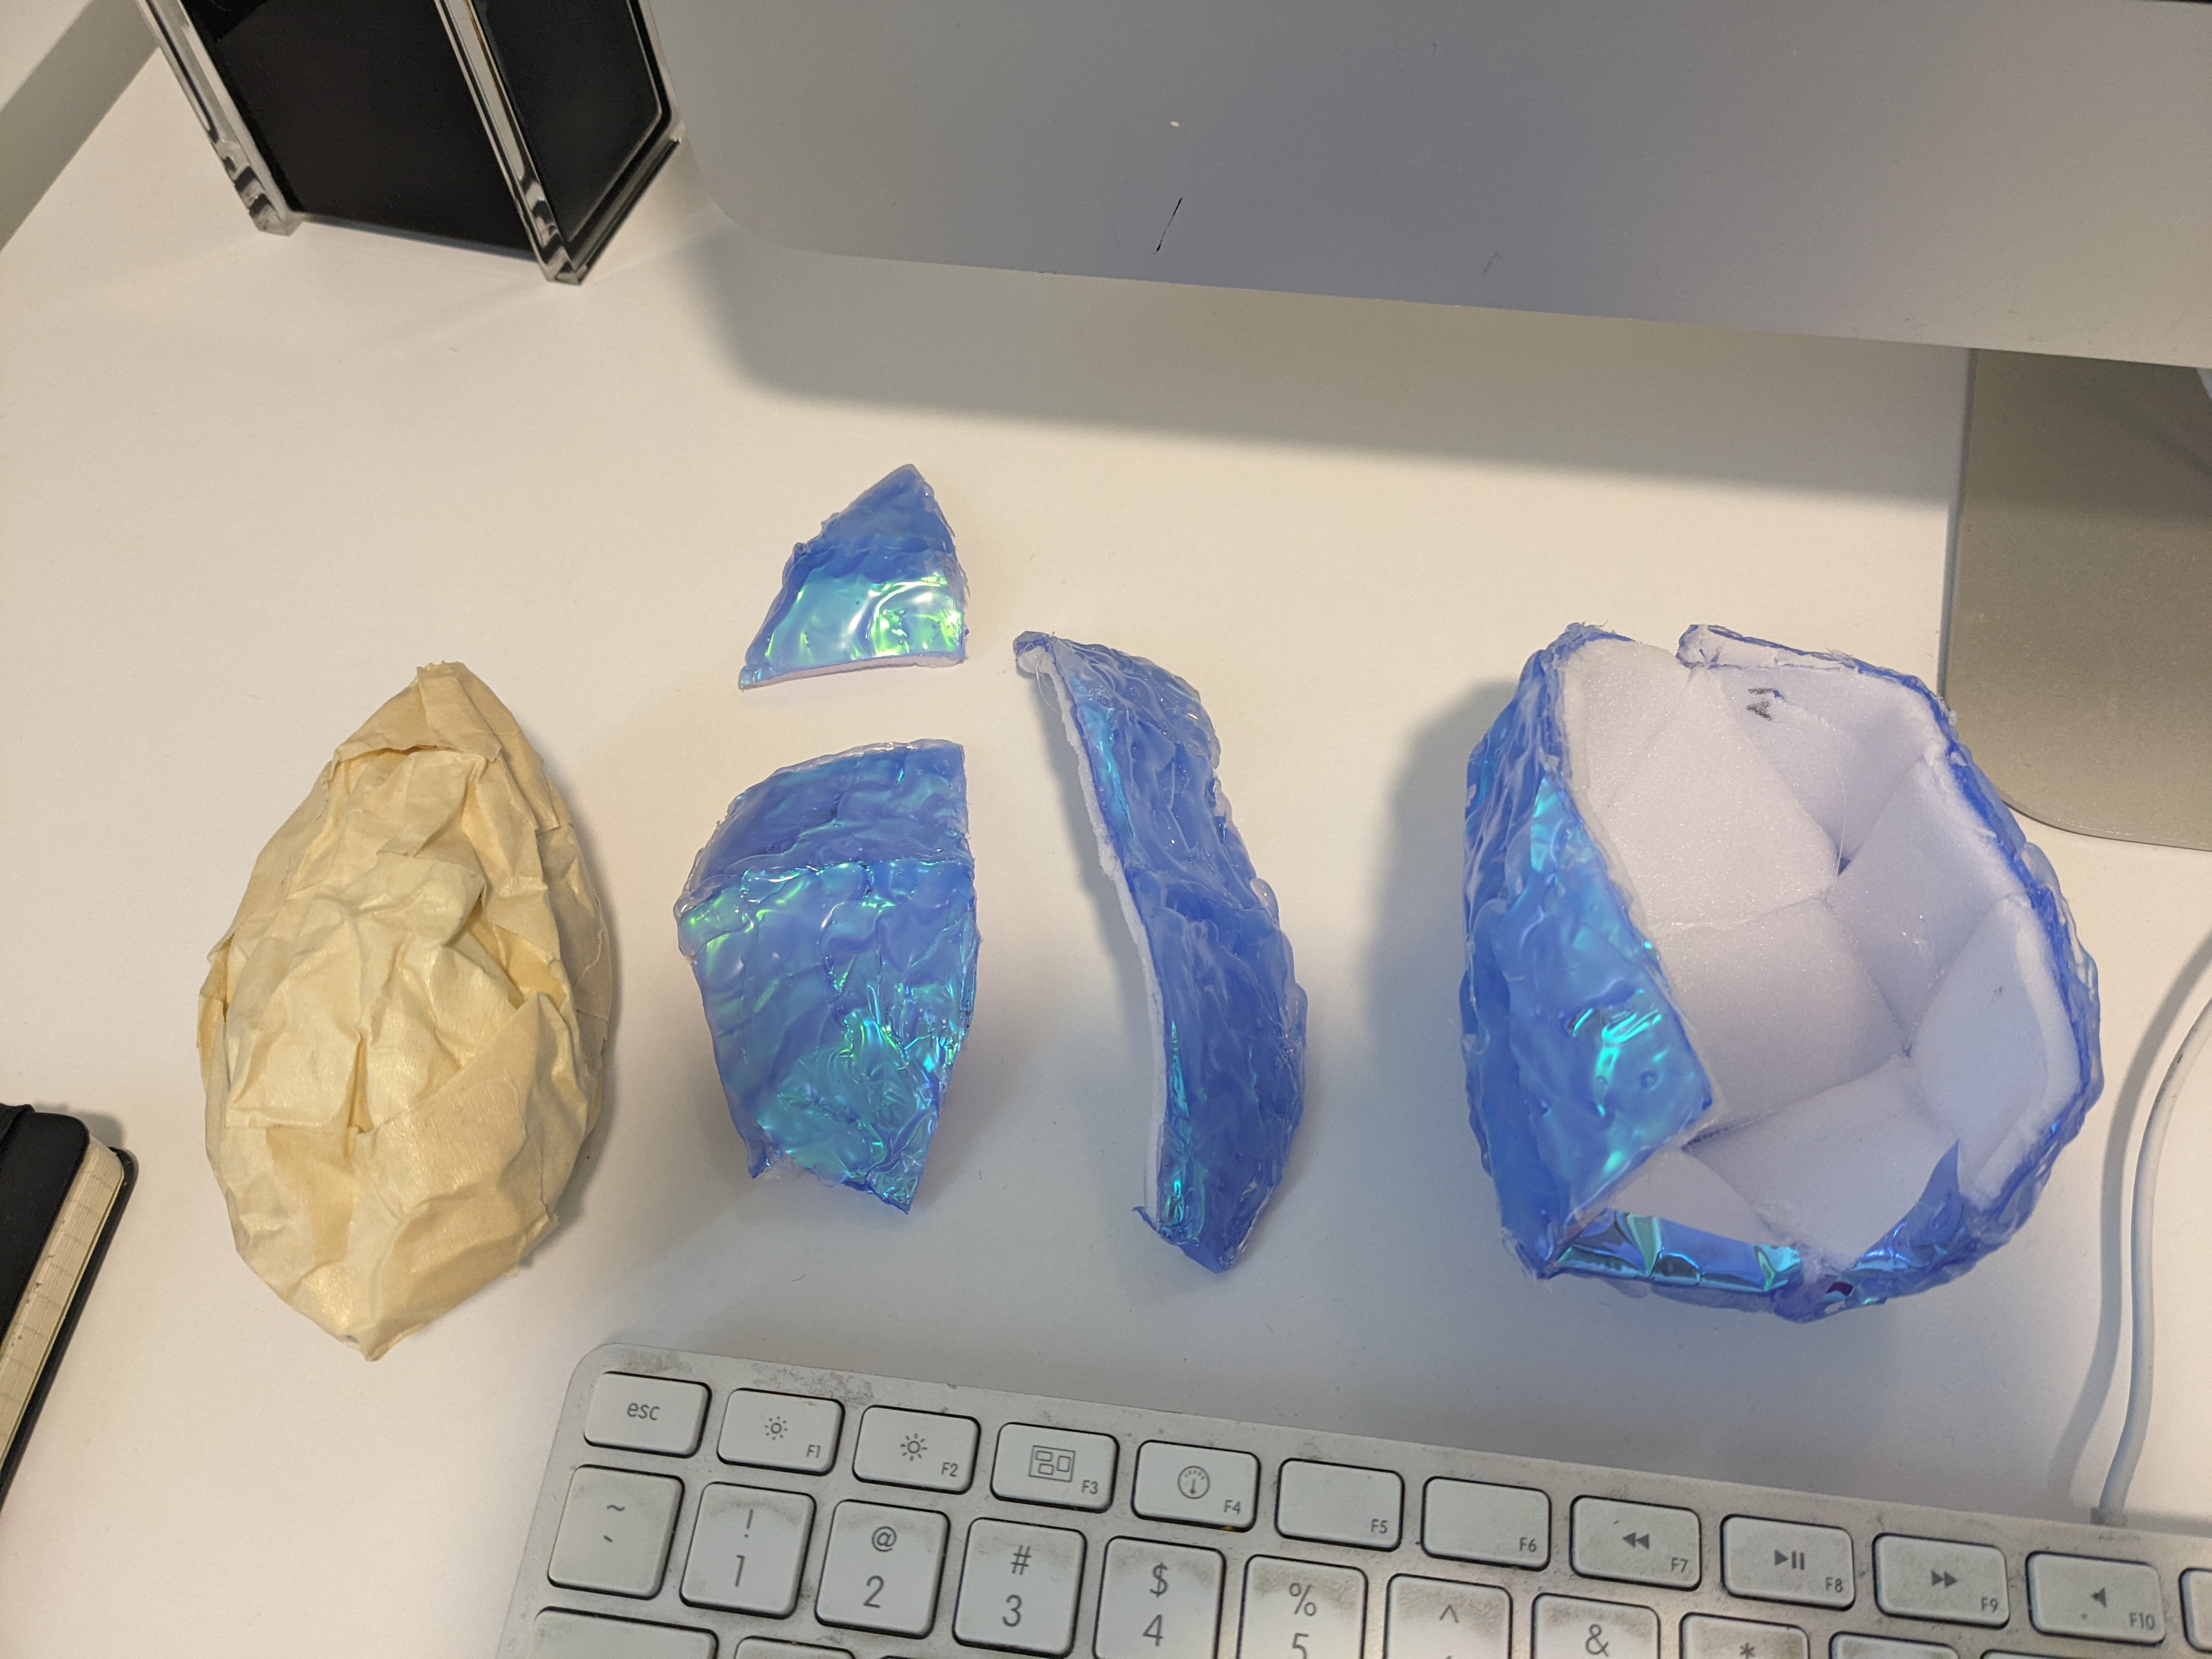
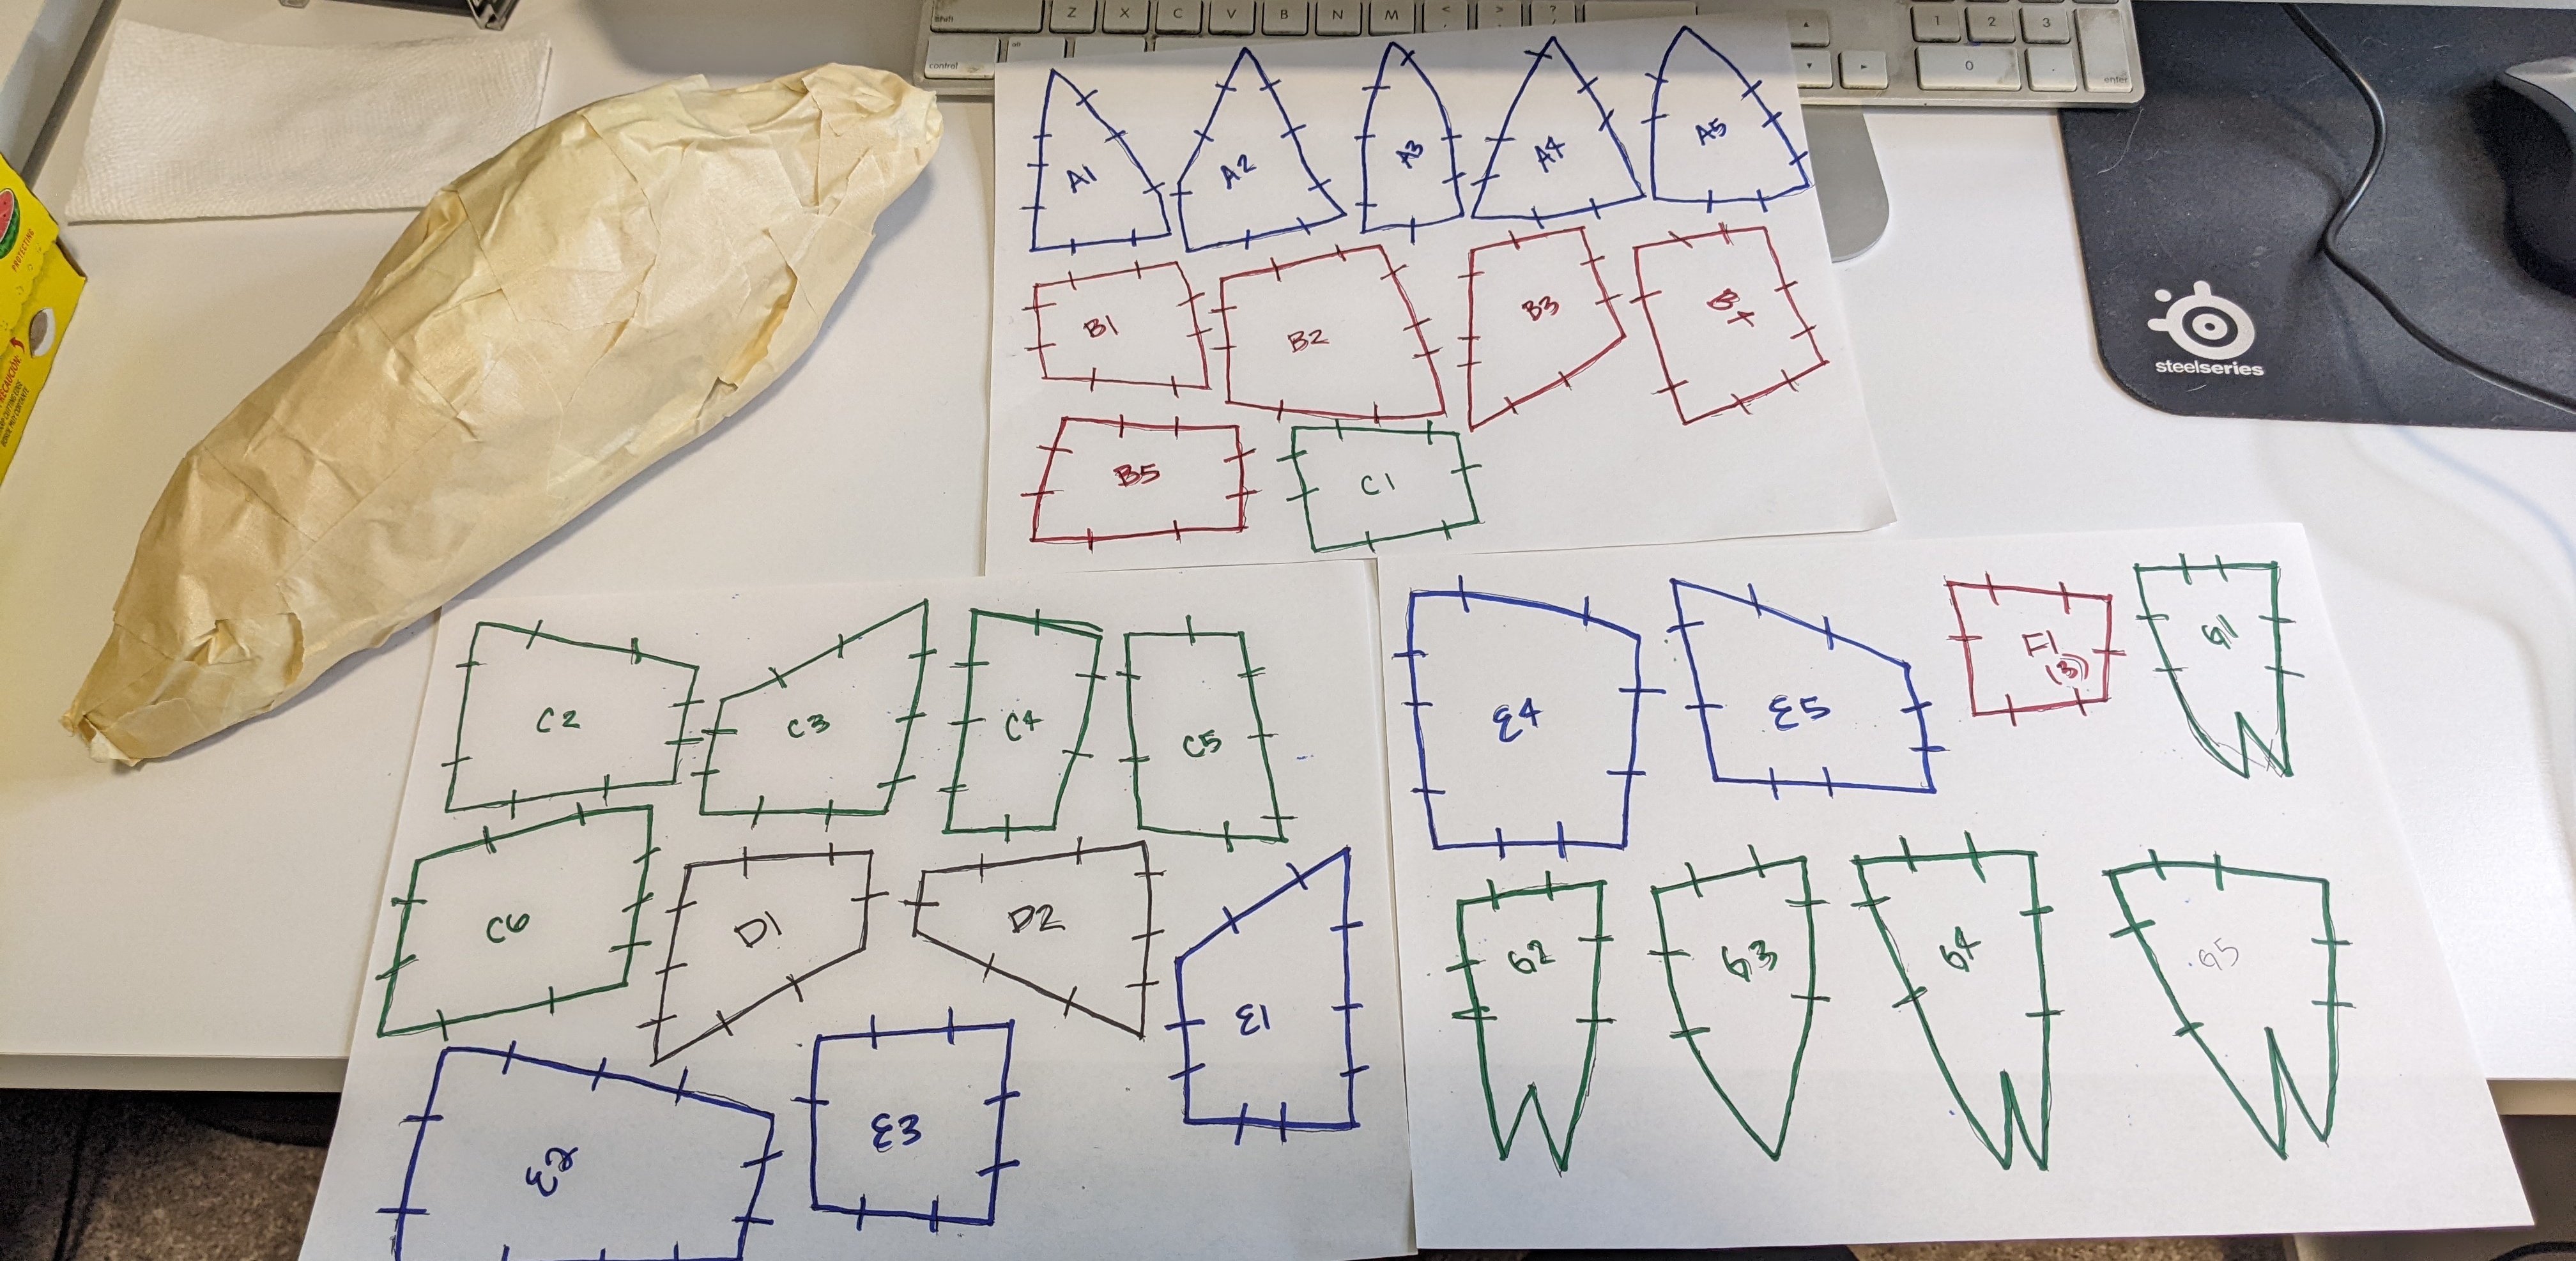
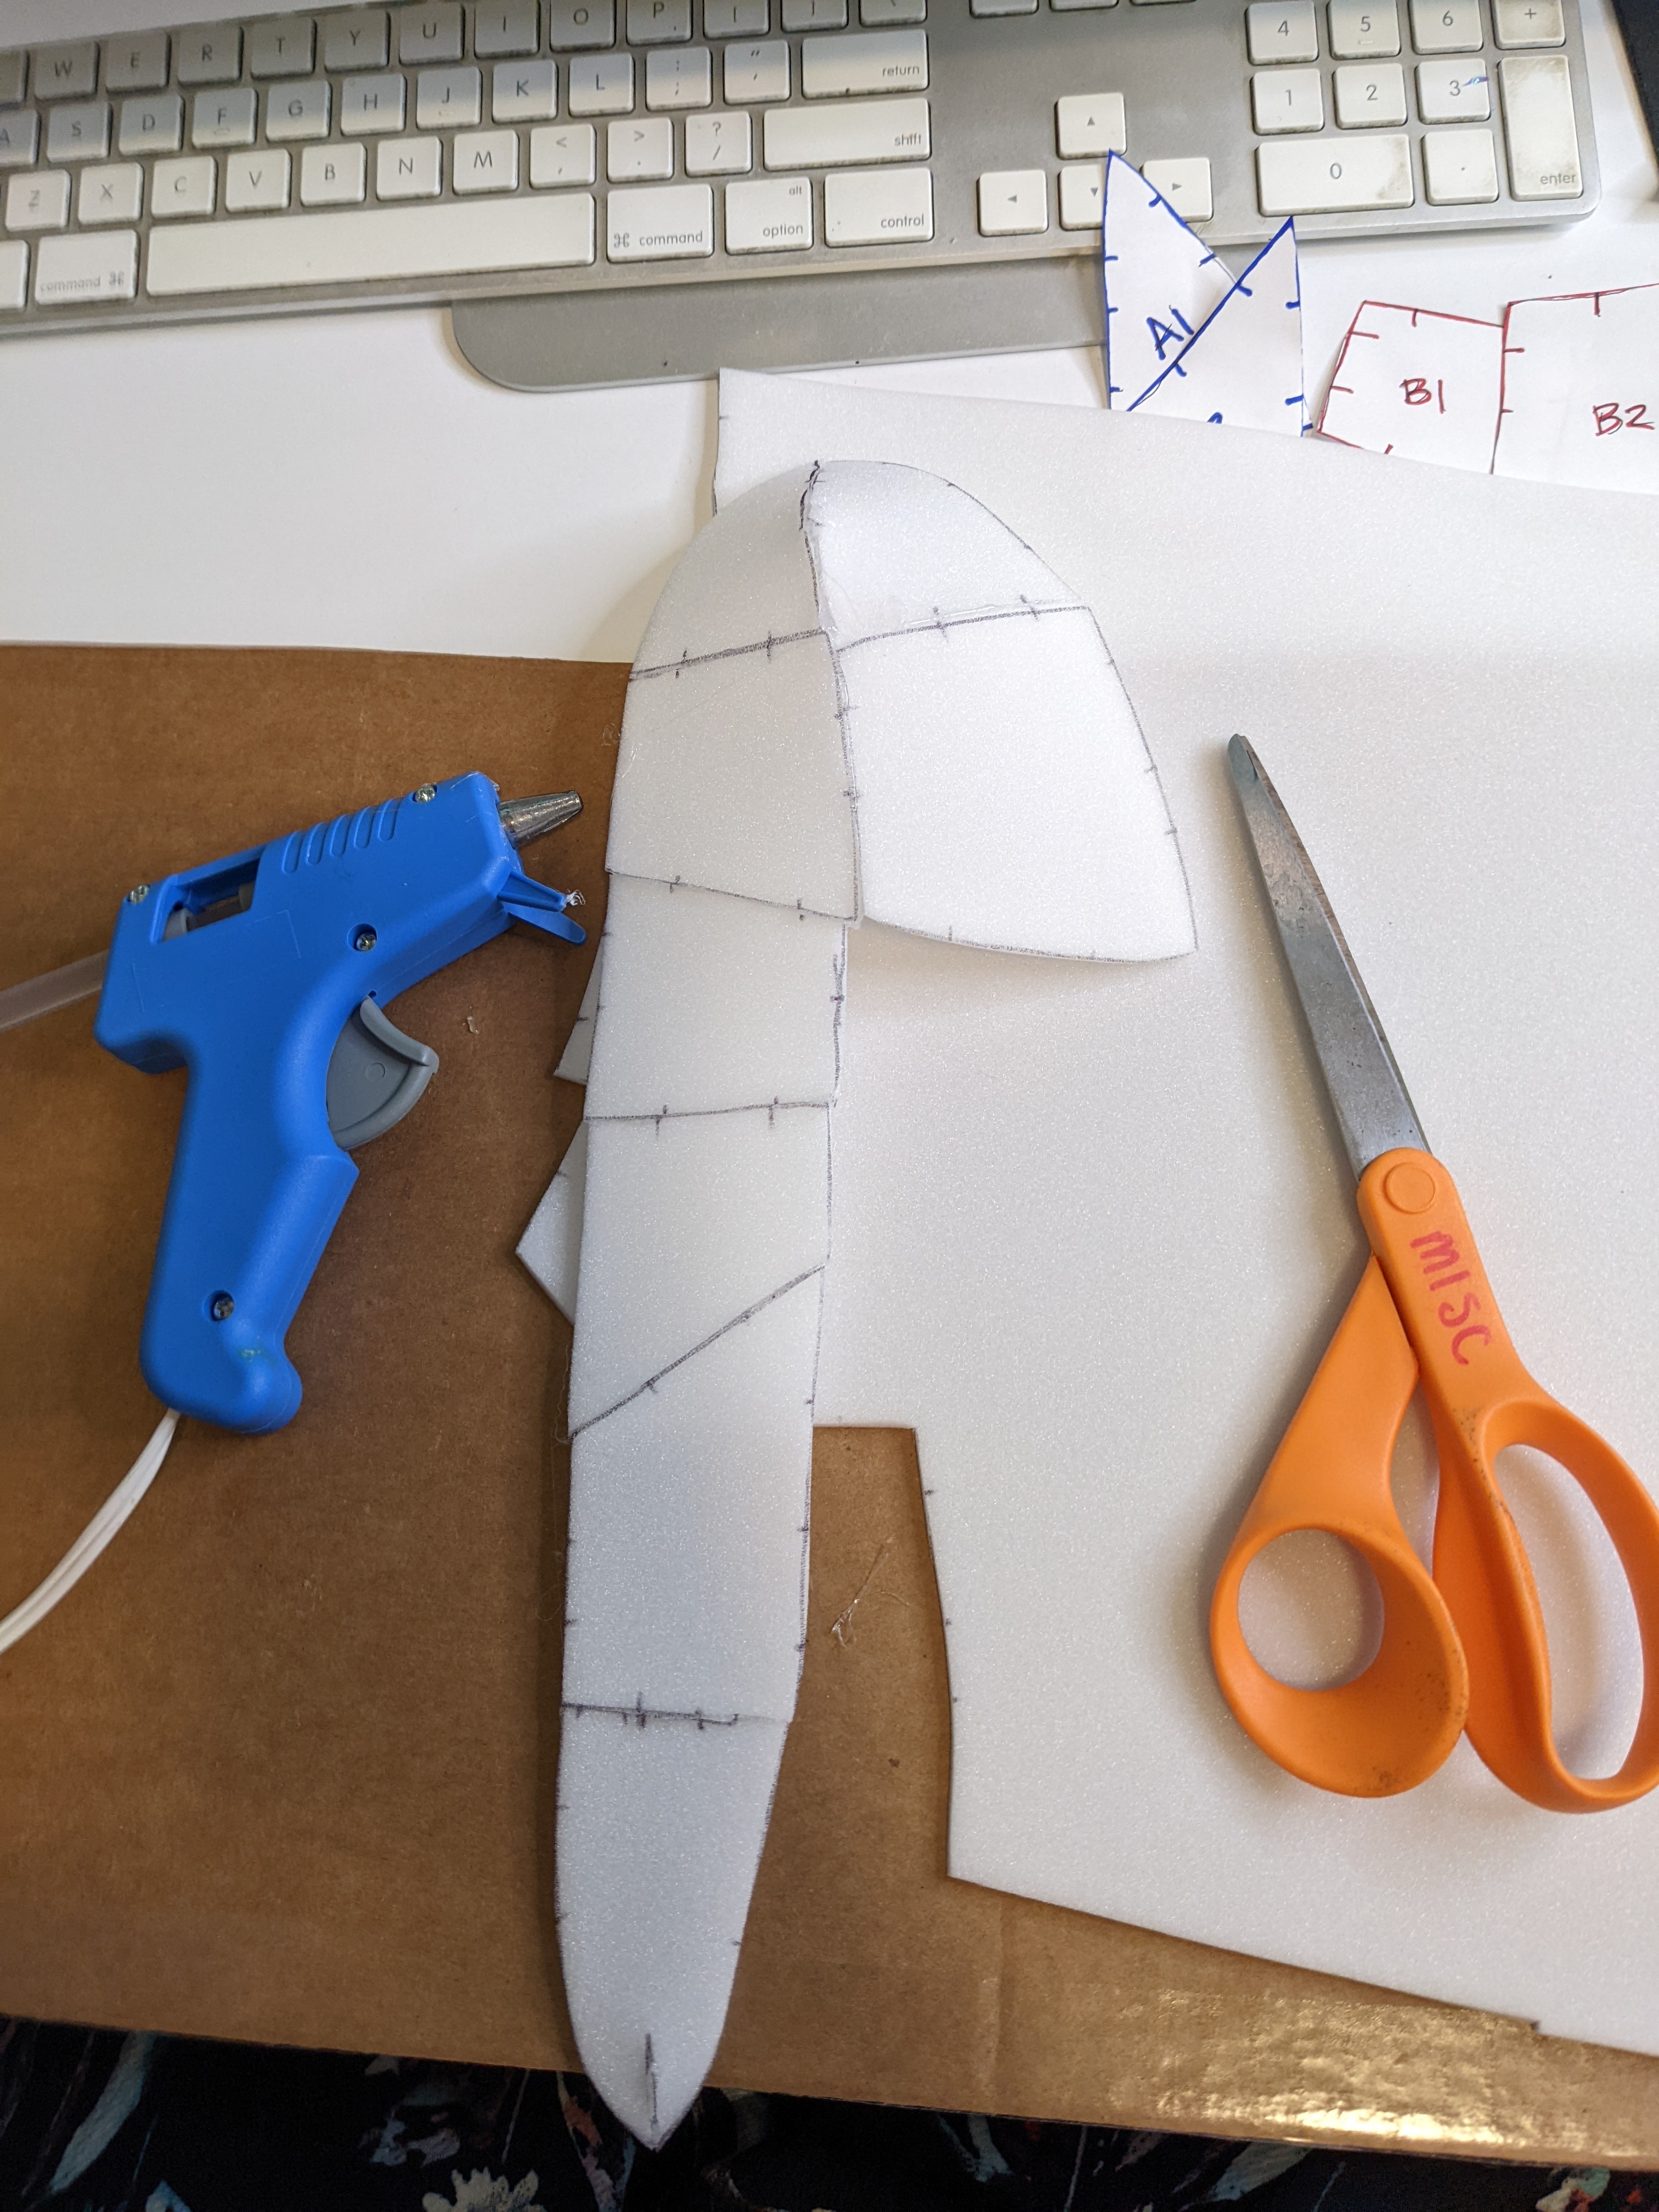
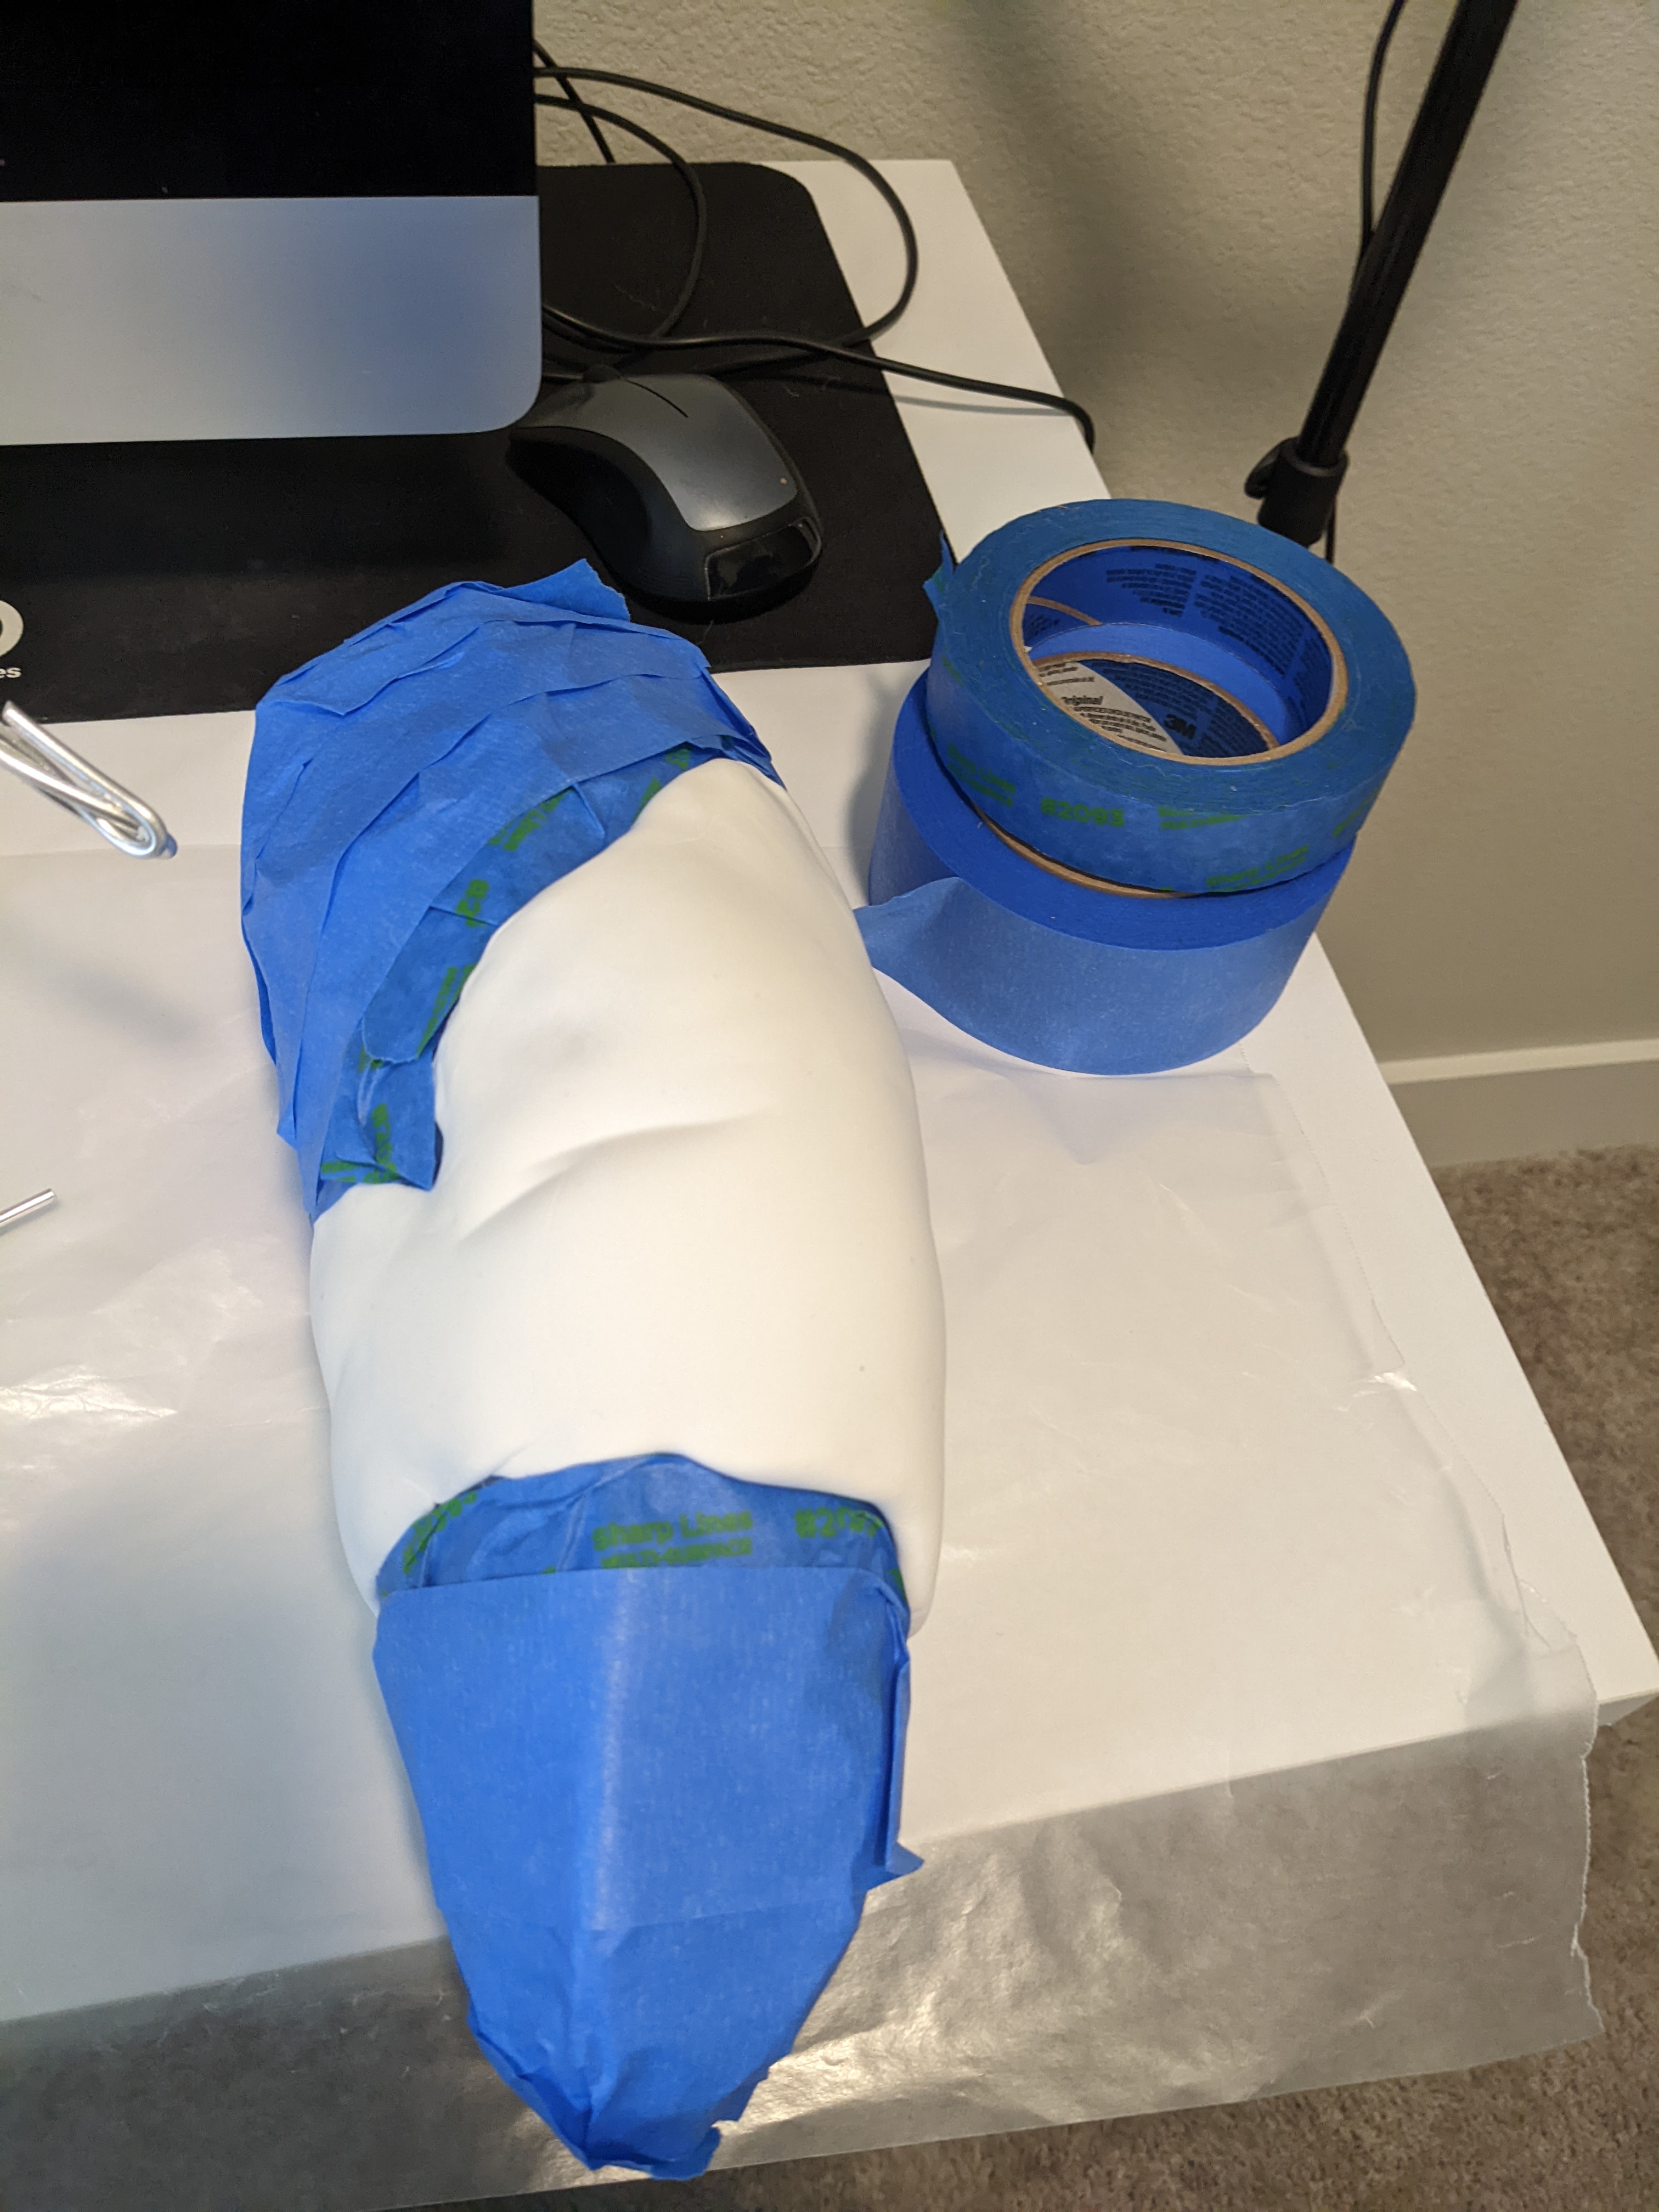
With this in mind, I set out a pattern for the crystal. I started with the small one by making a base out of paper towels and masking tape. I used this as a reference for my duct-tape pattern. From that, I made a paper test. Happy, I transferred the pattern to plastazote.
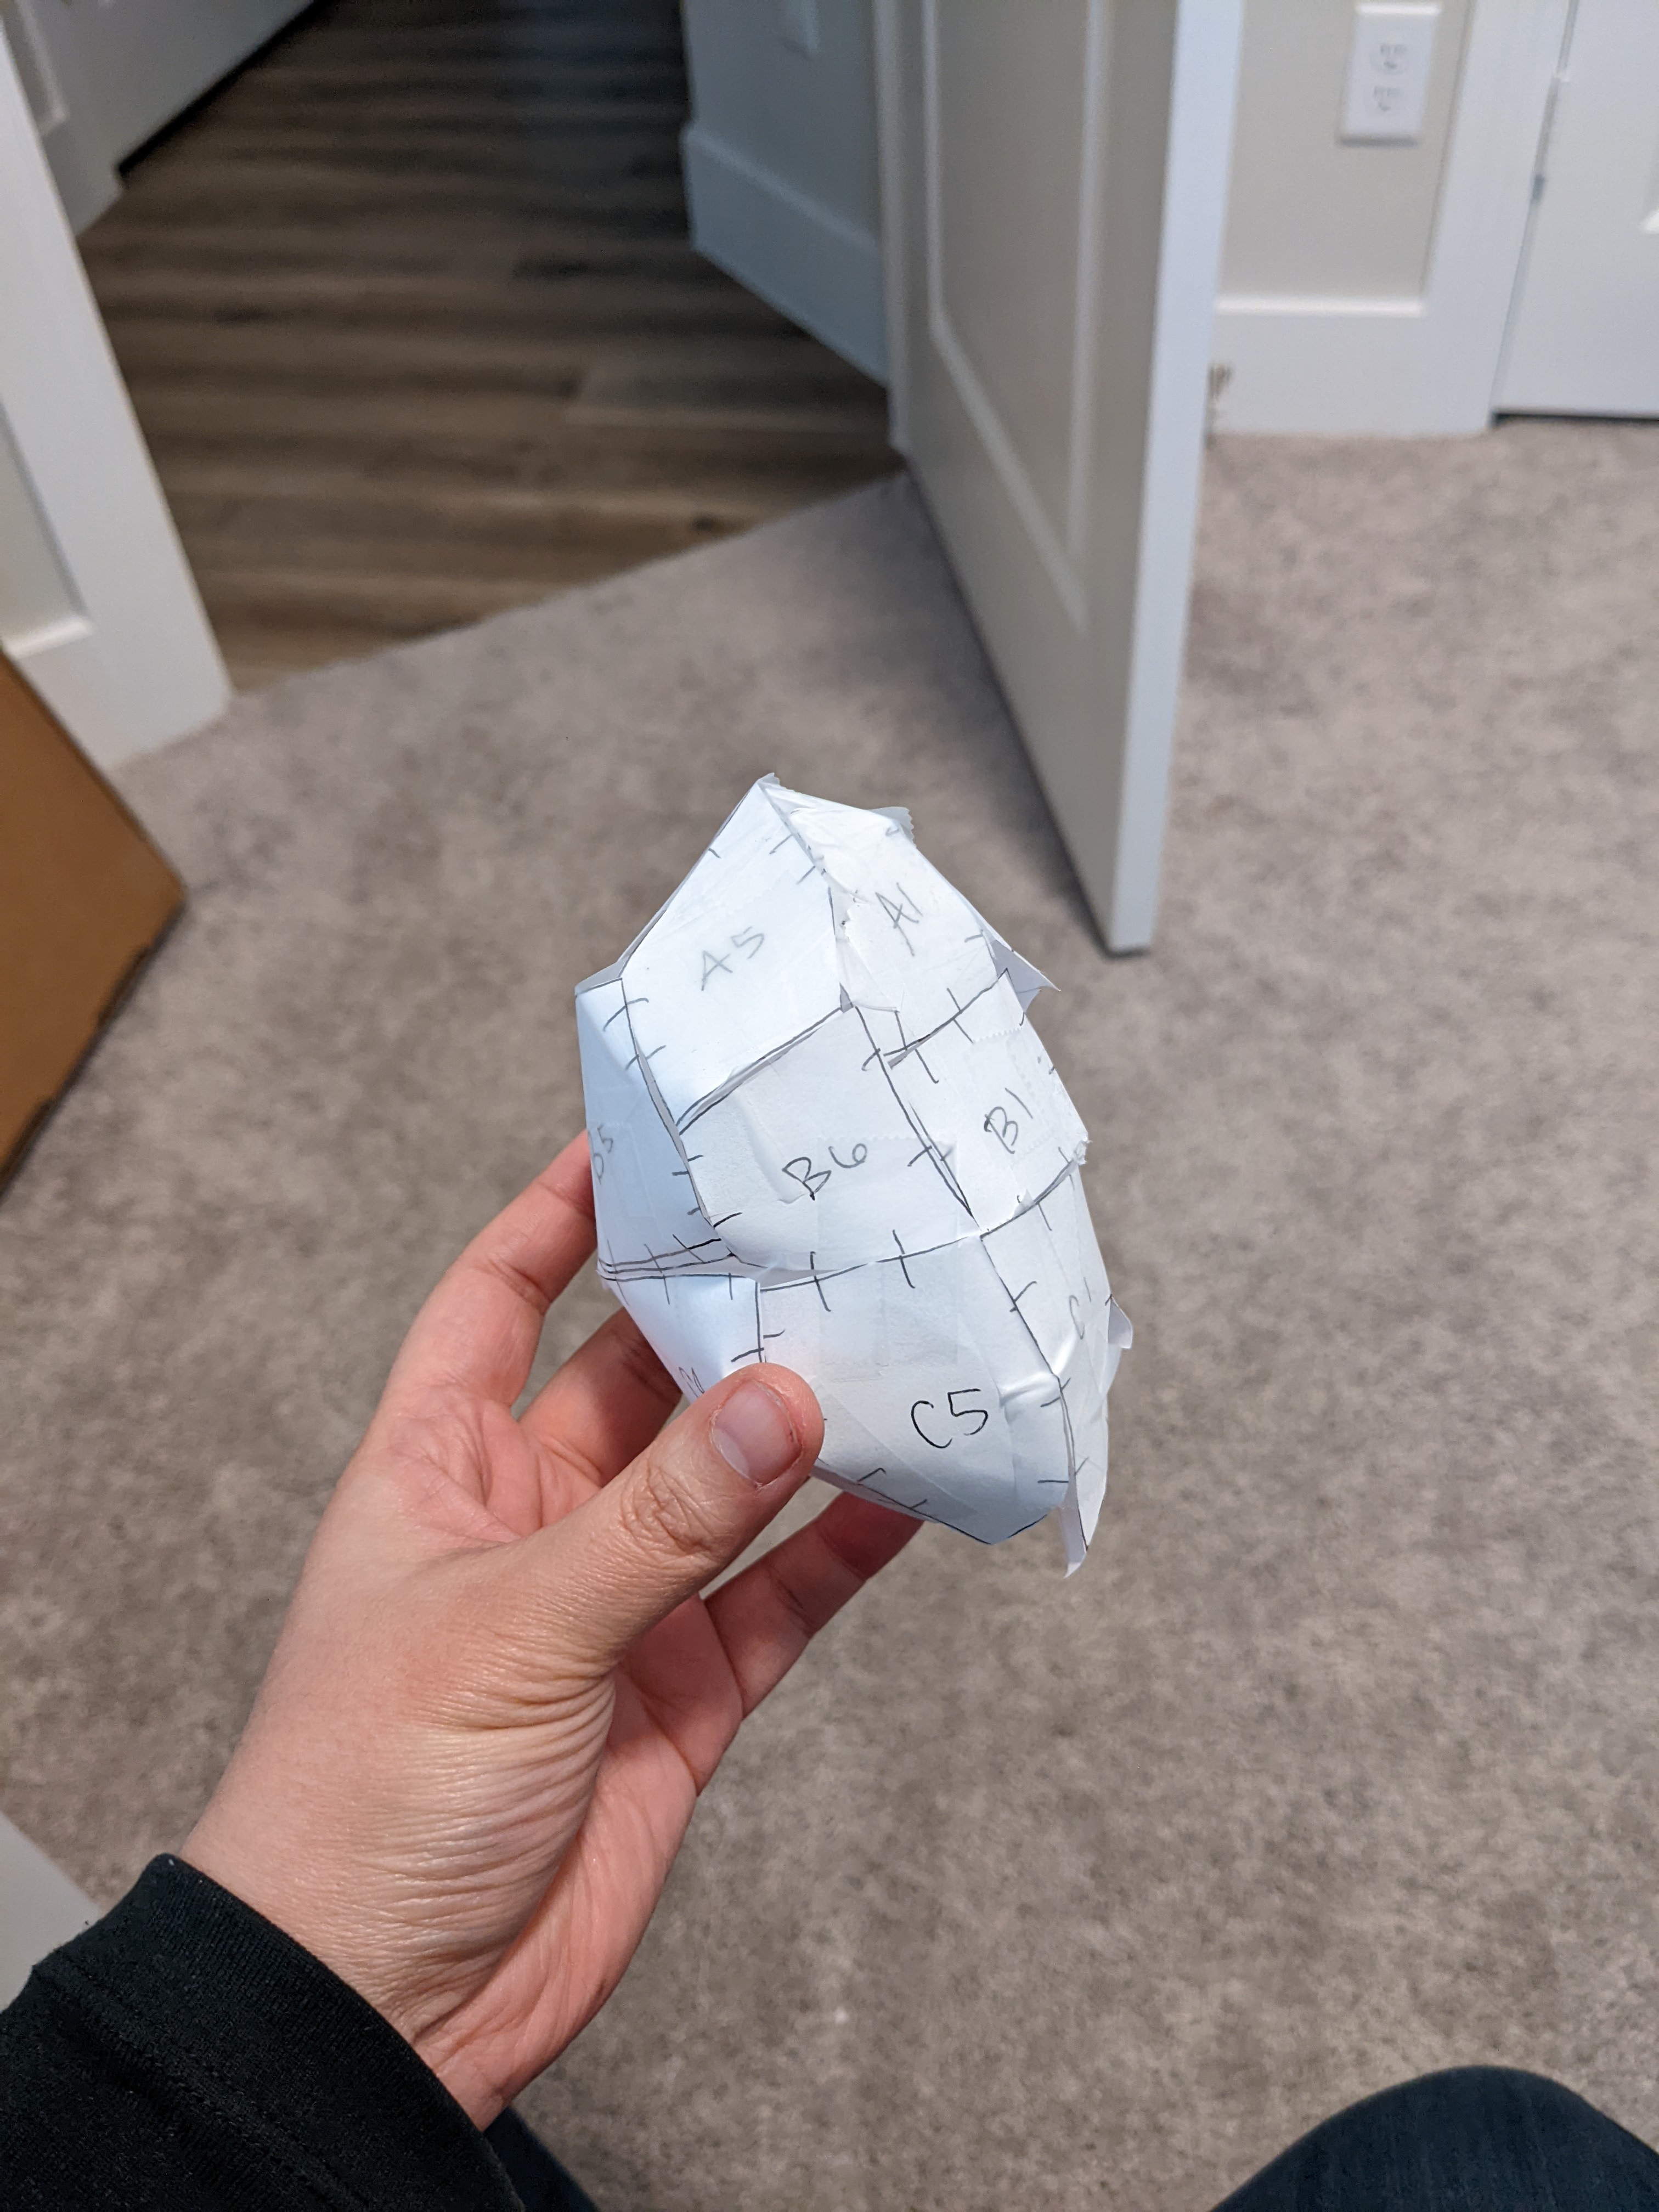
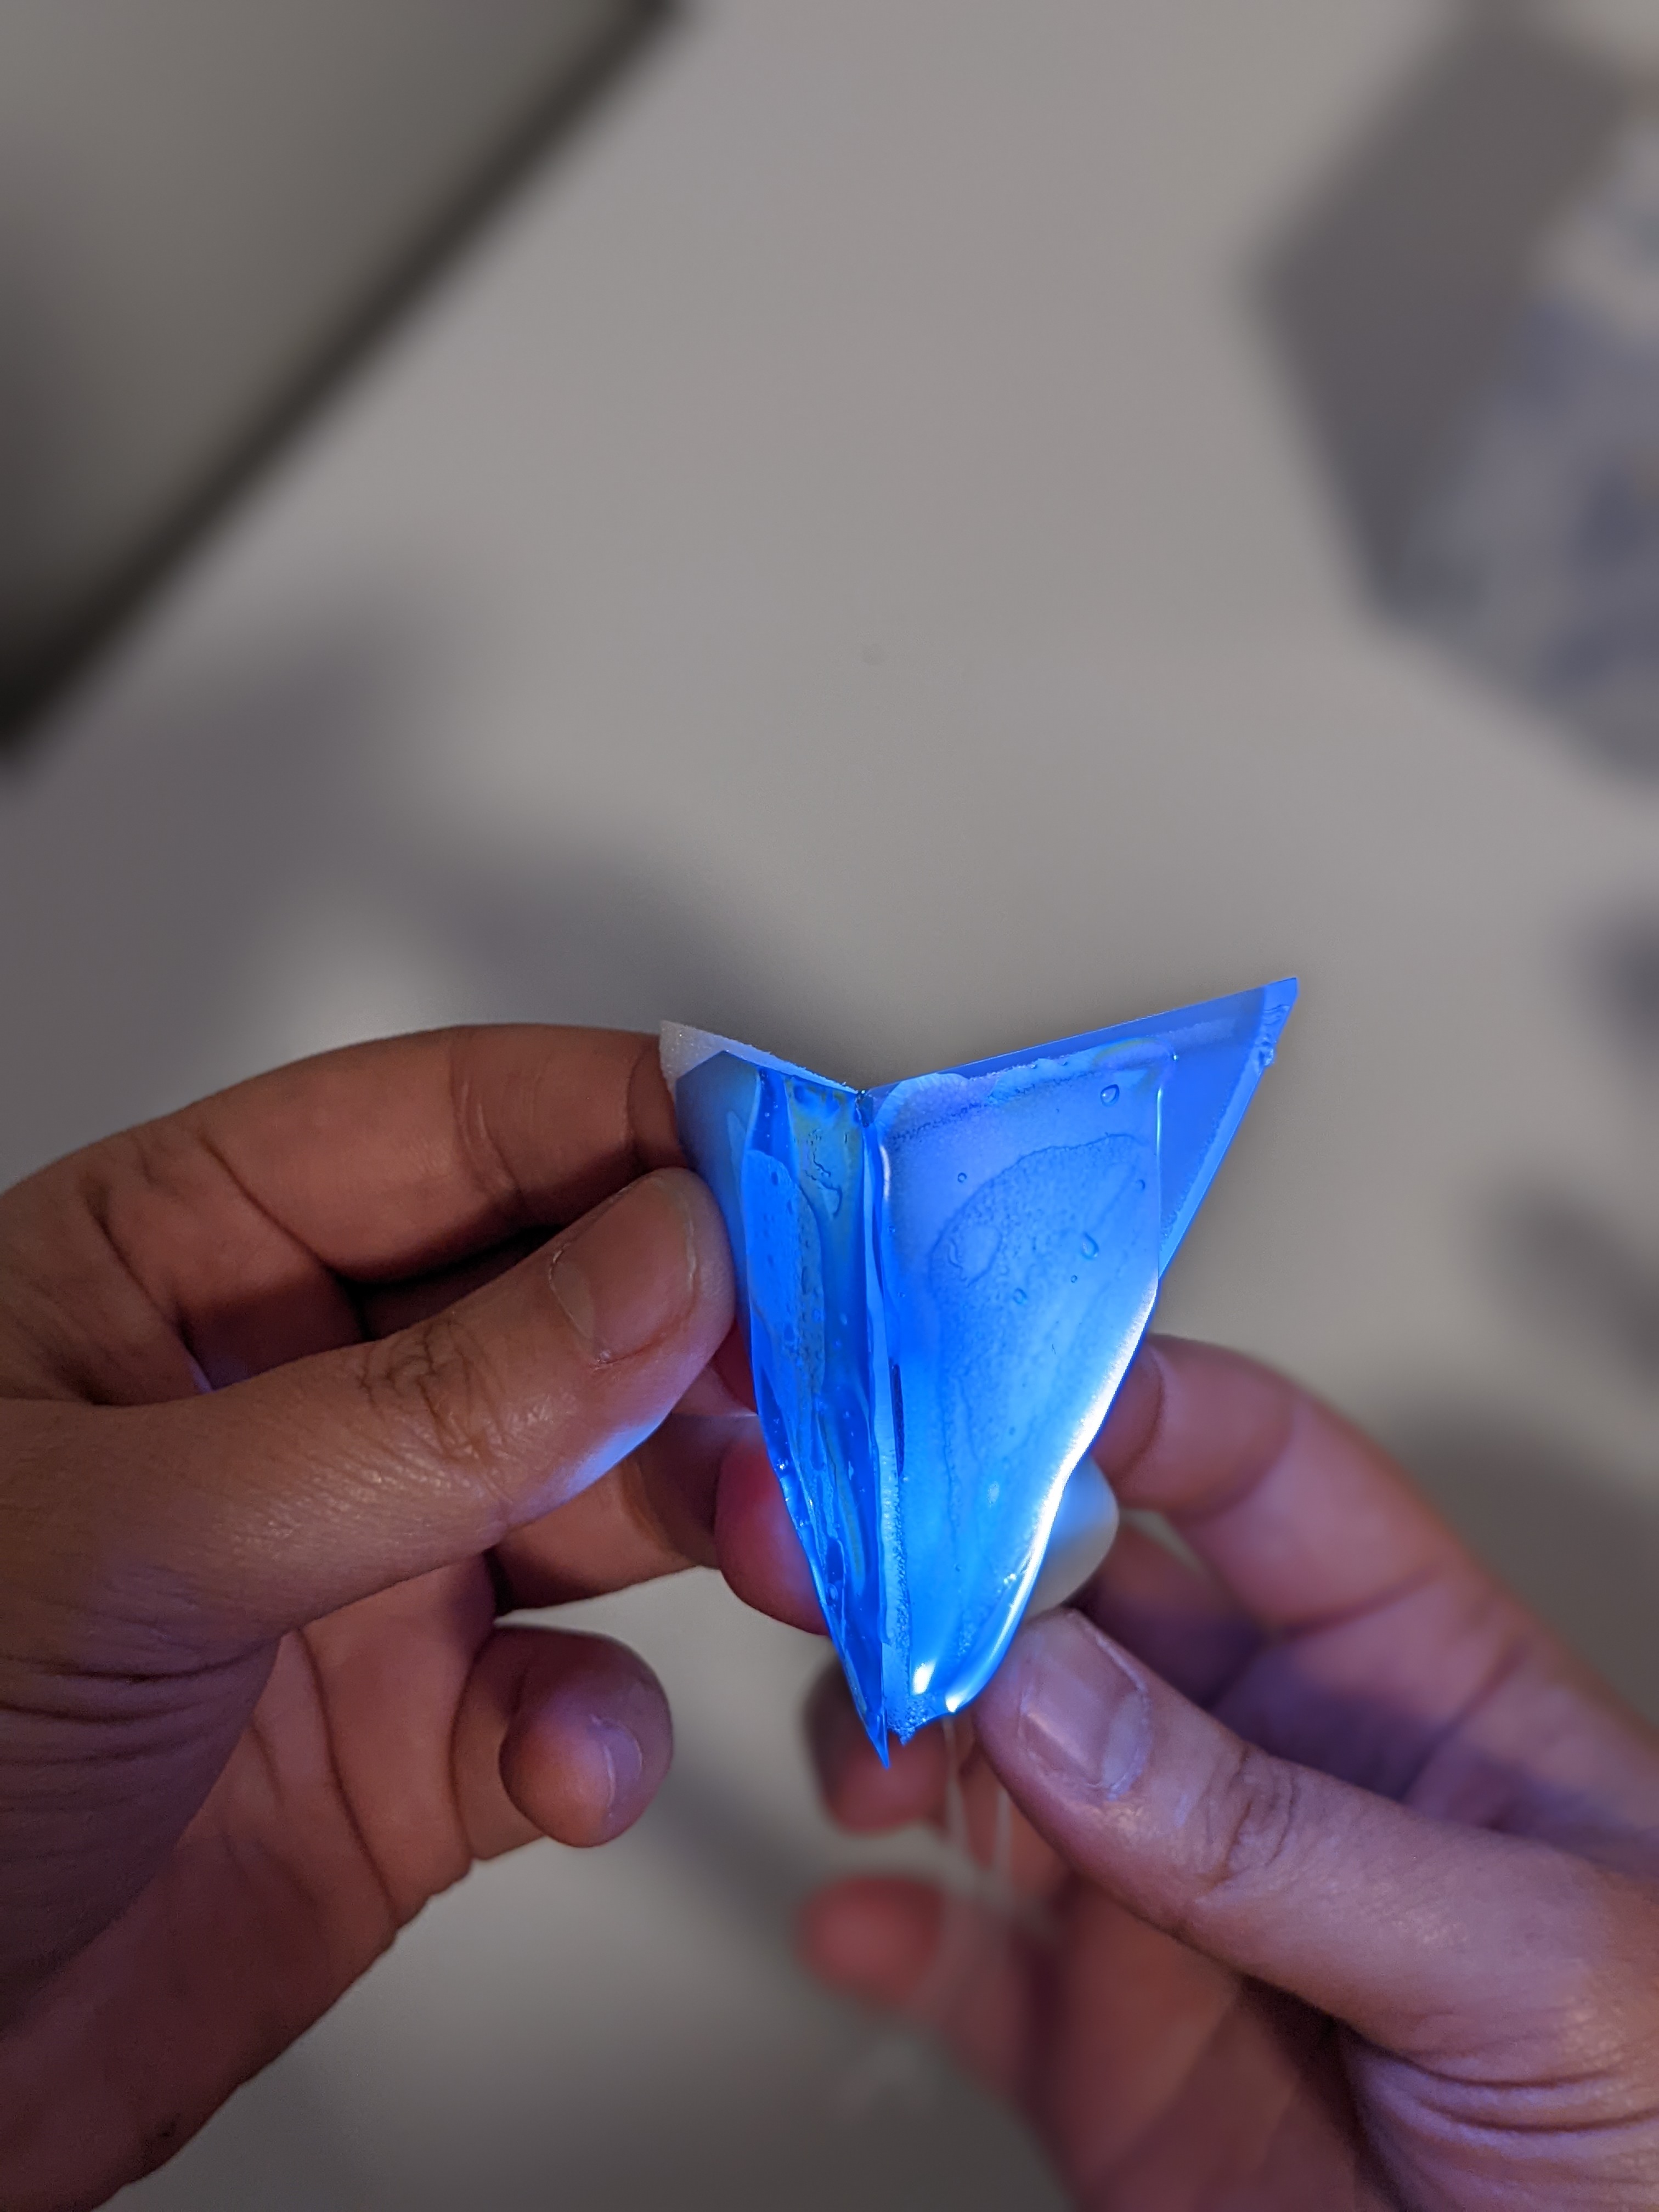
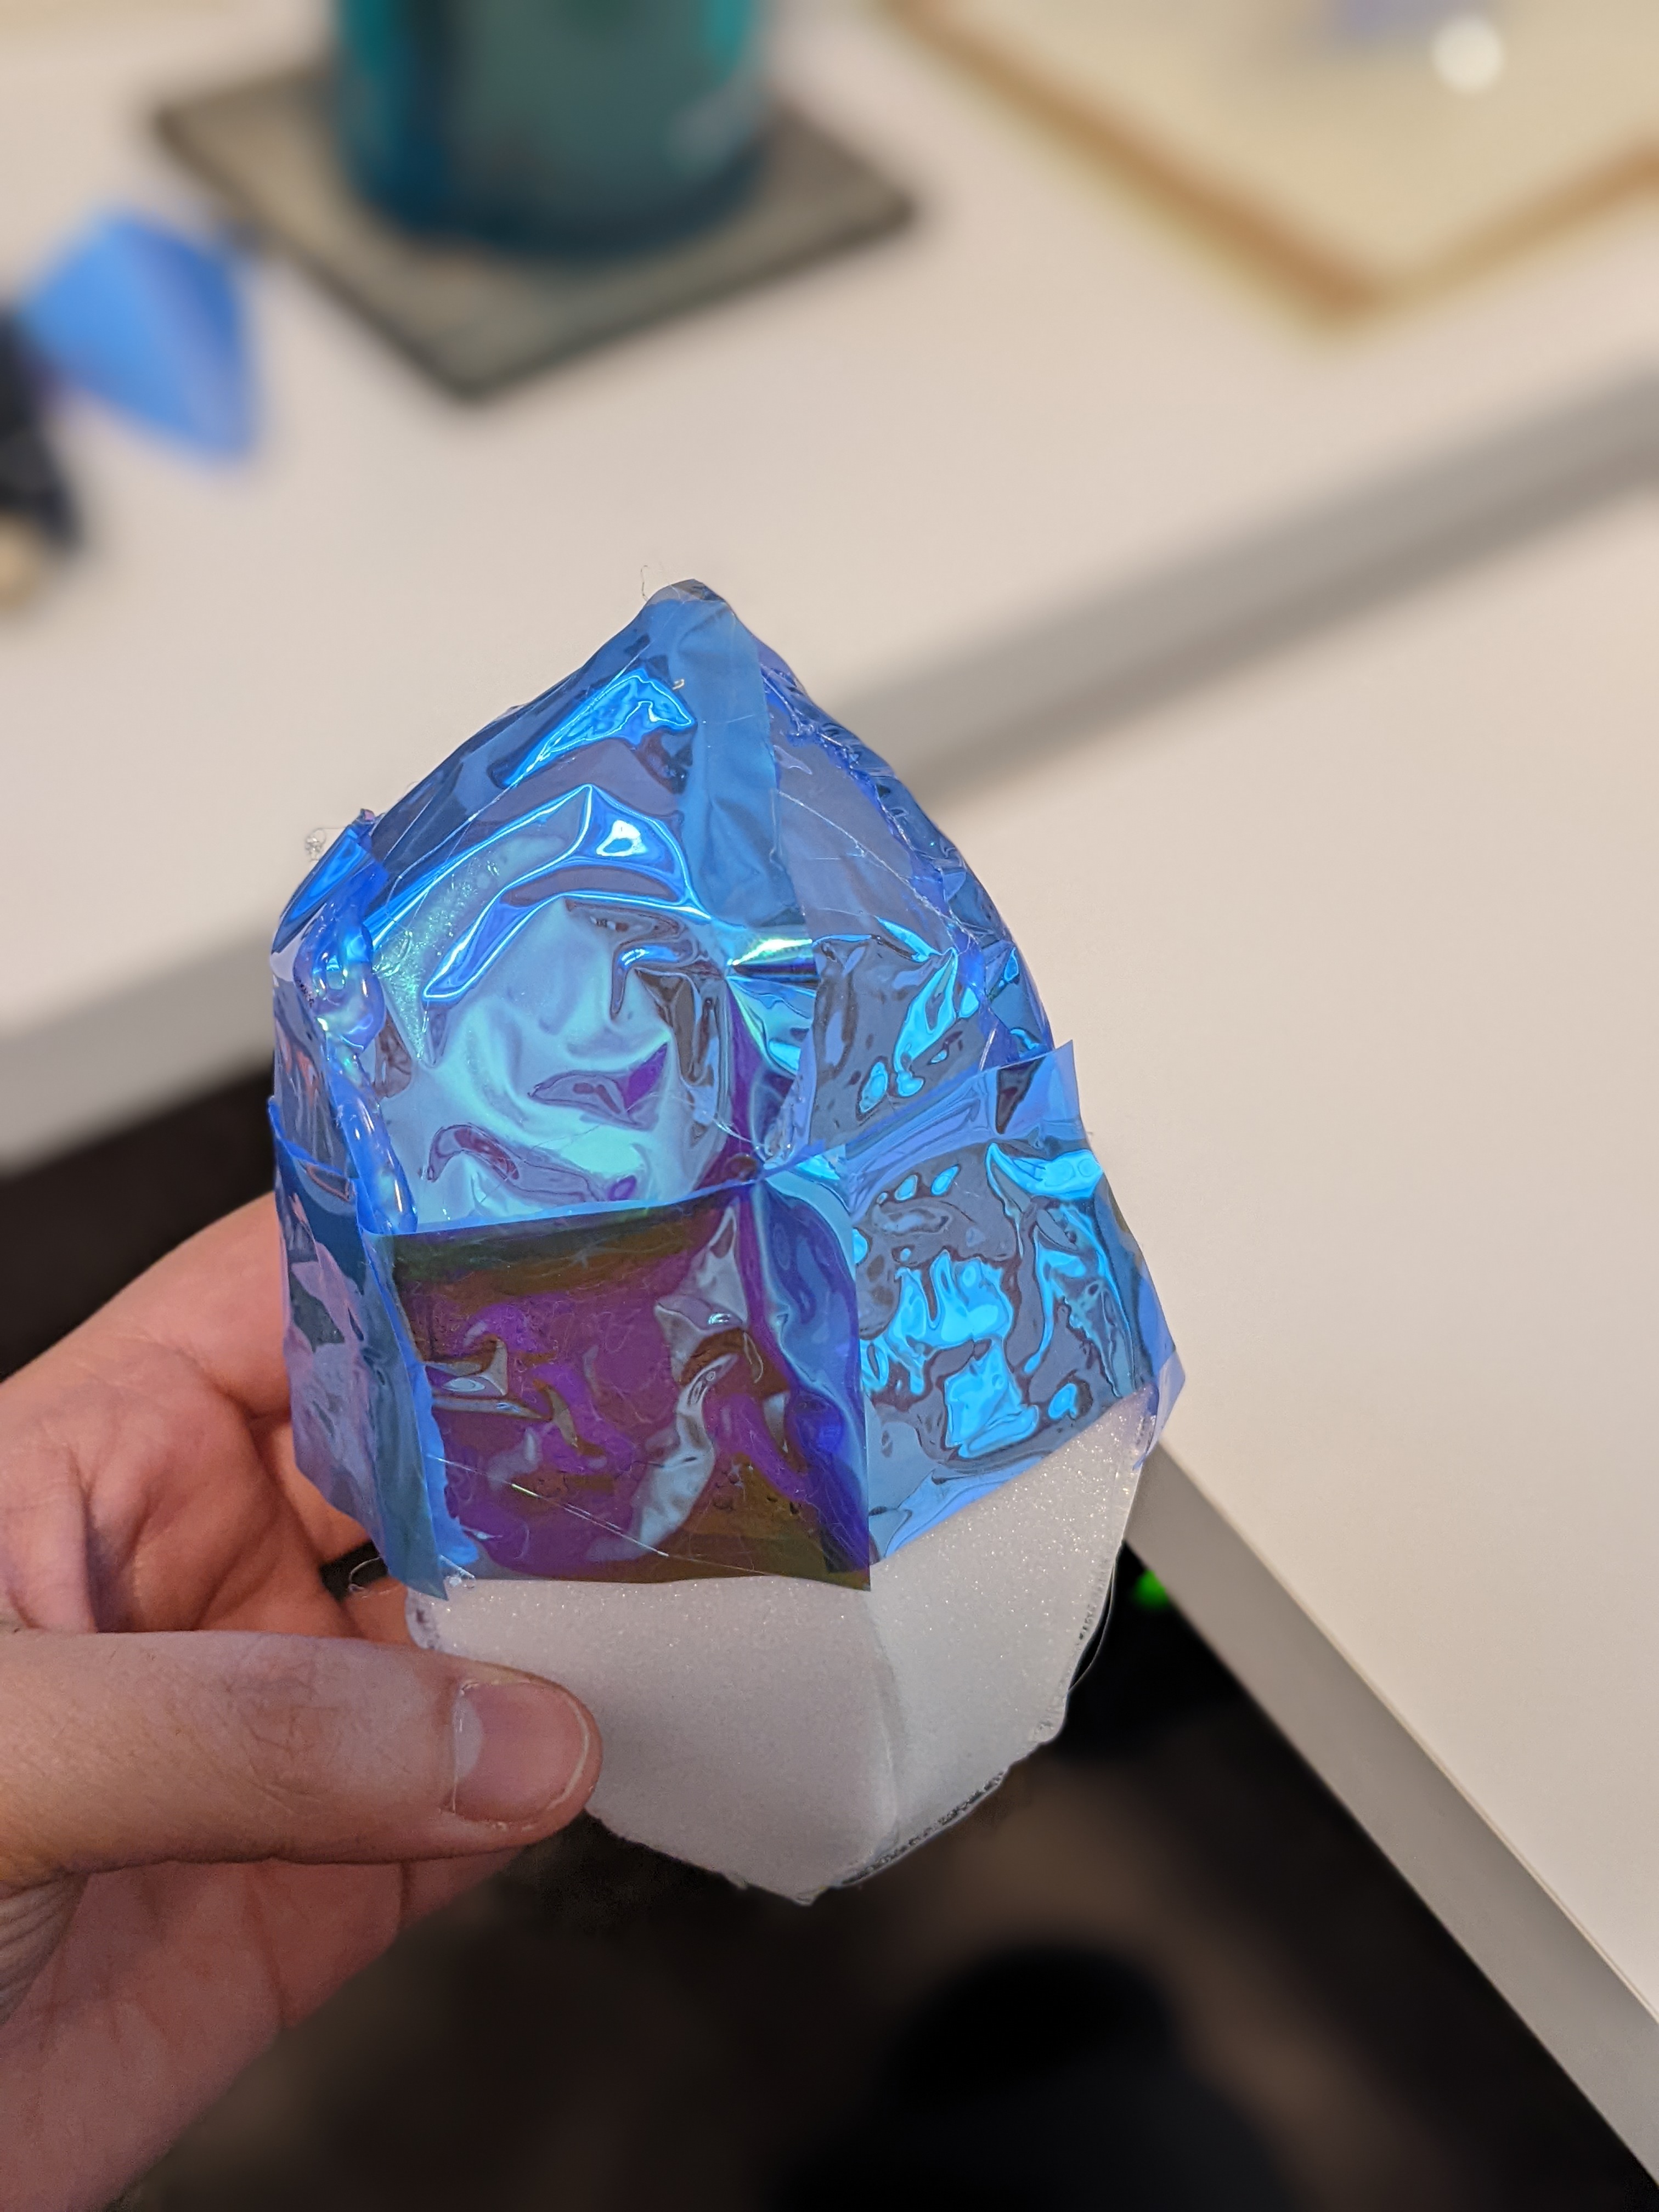
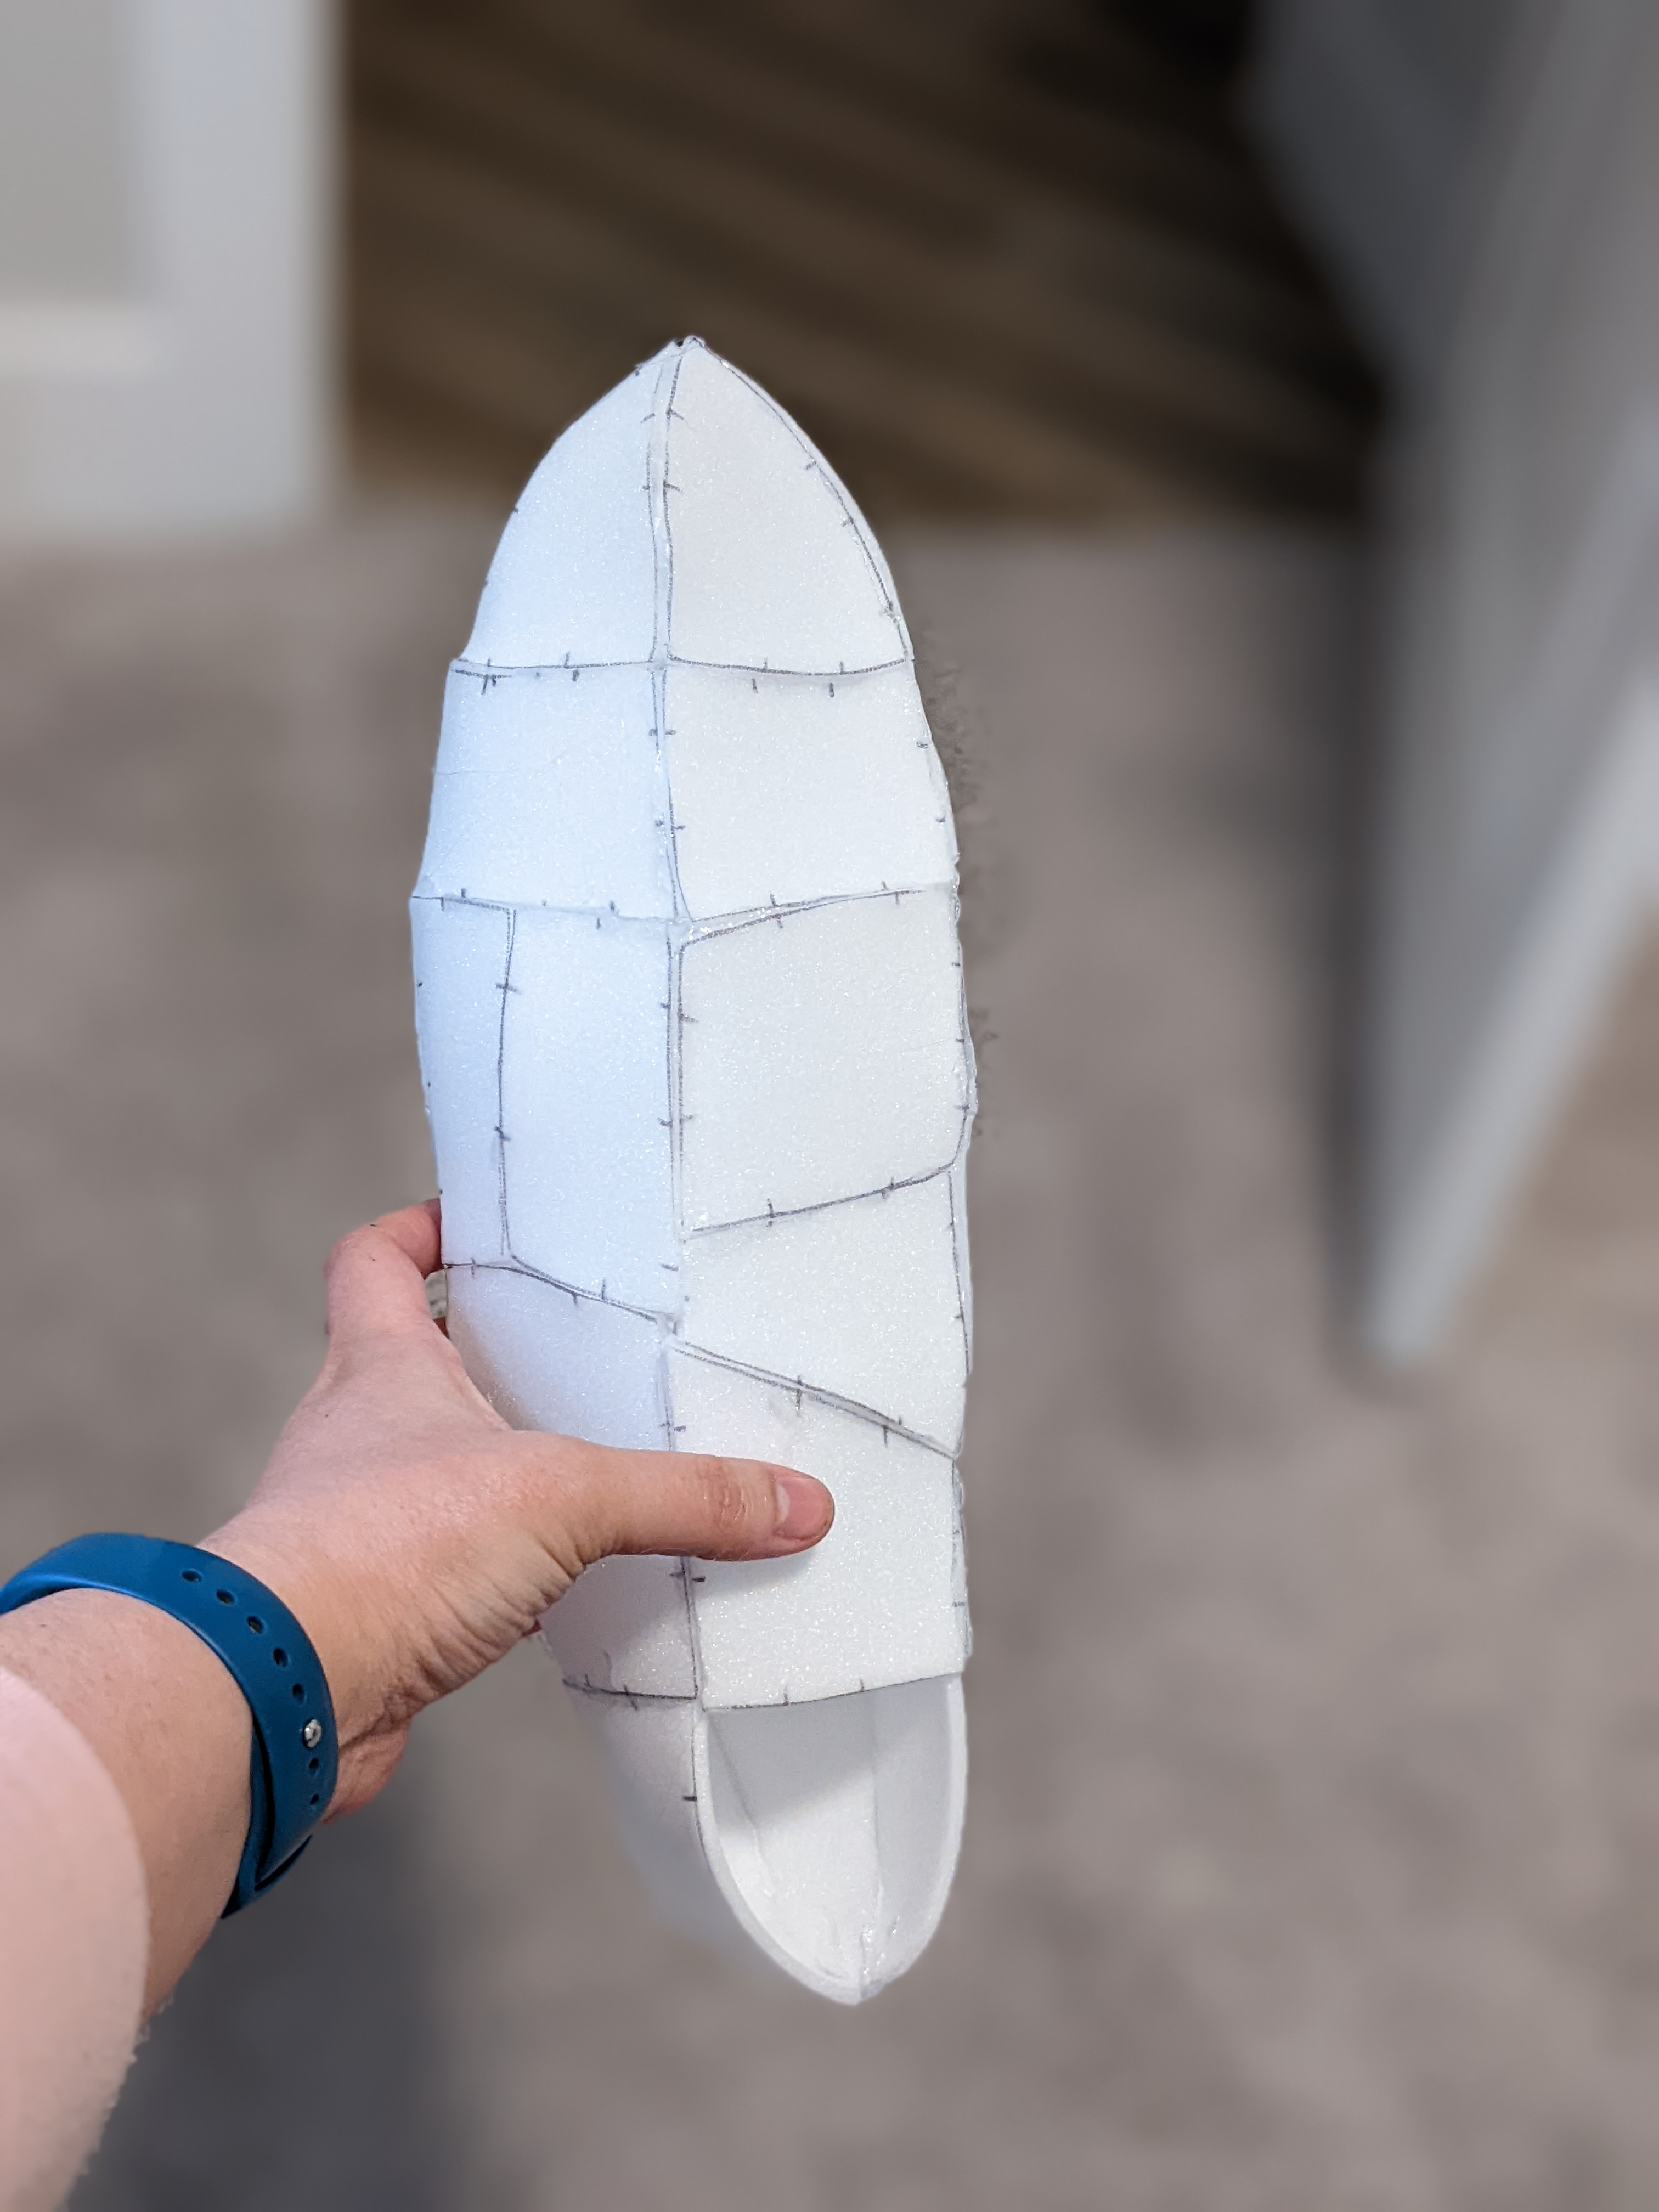
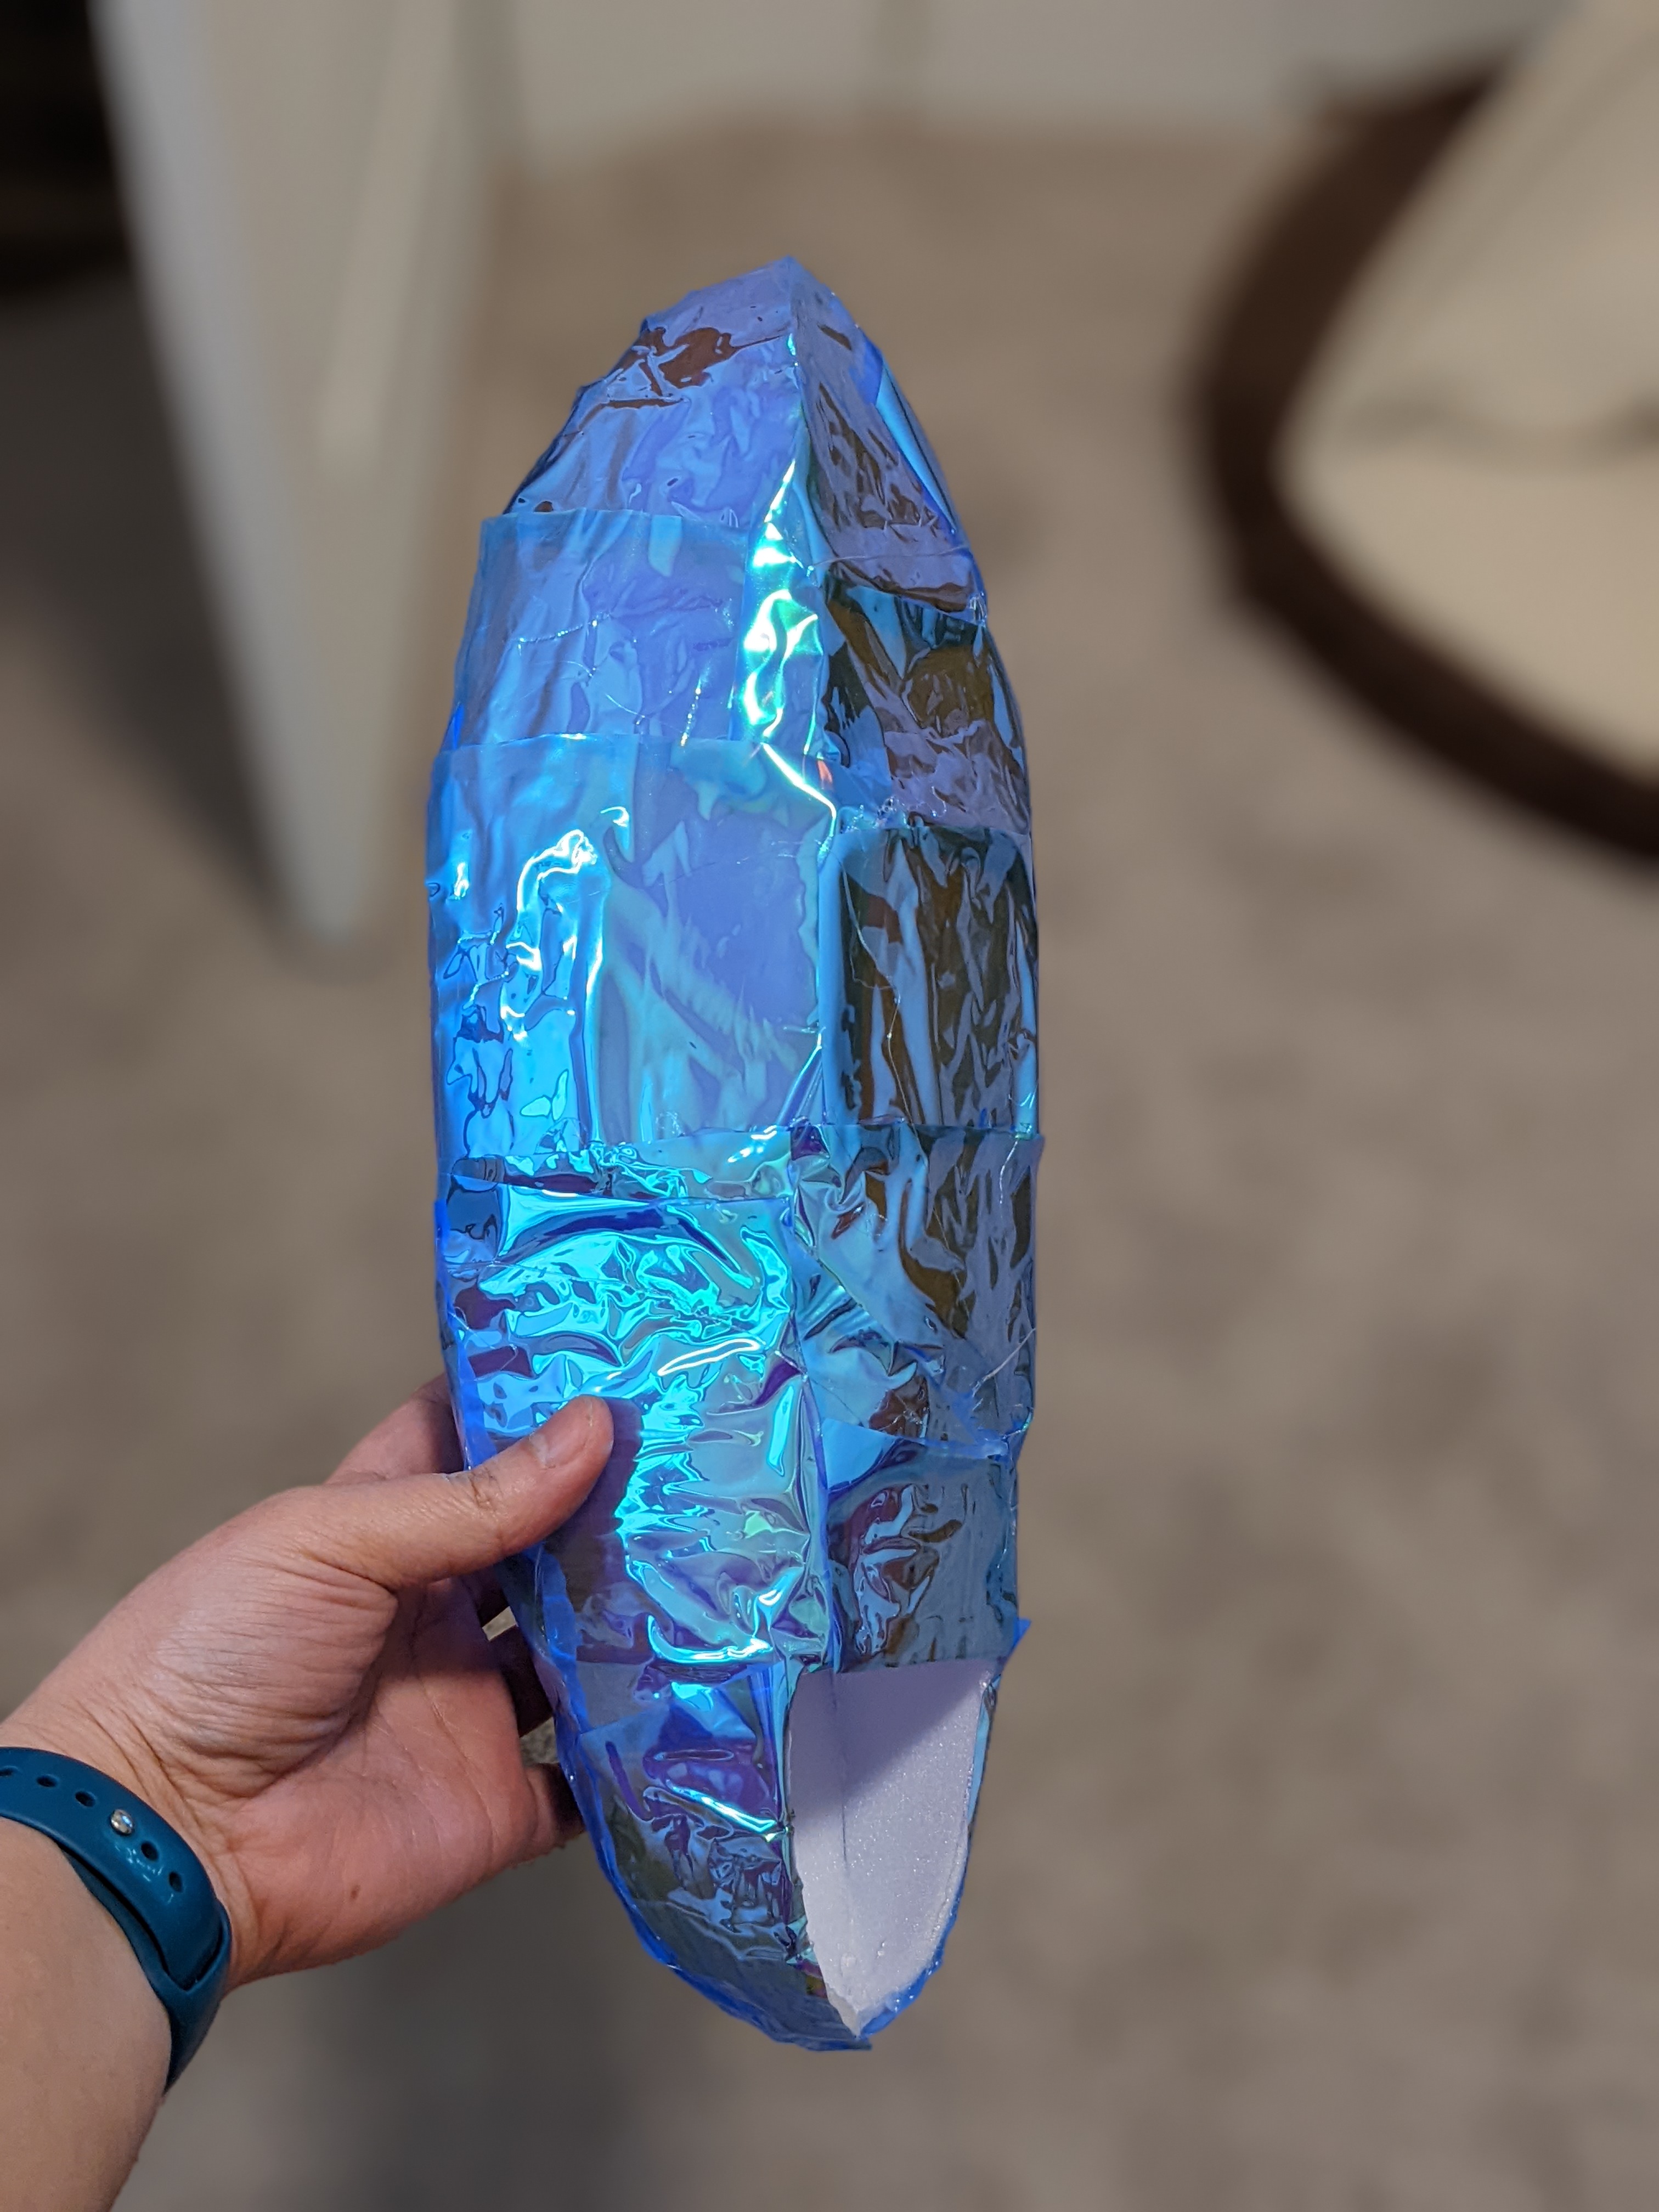
After hot gluing the plastazote together, I used more hot glue to cover the whole thing in vinyl. I left a hole at the bottom for the LED’s to go through.
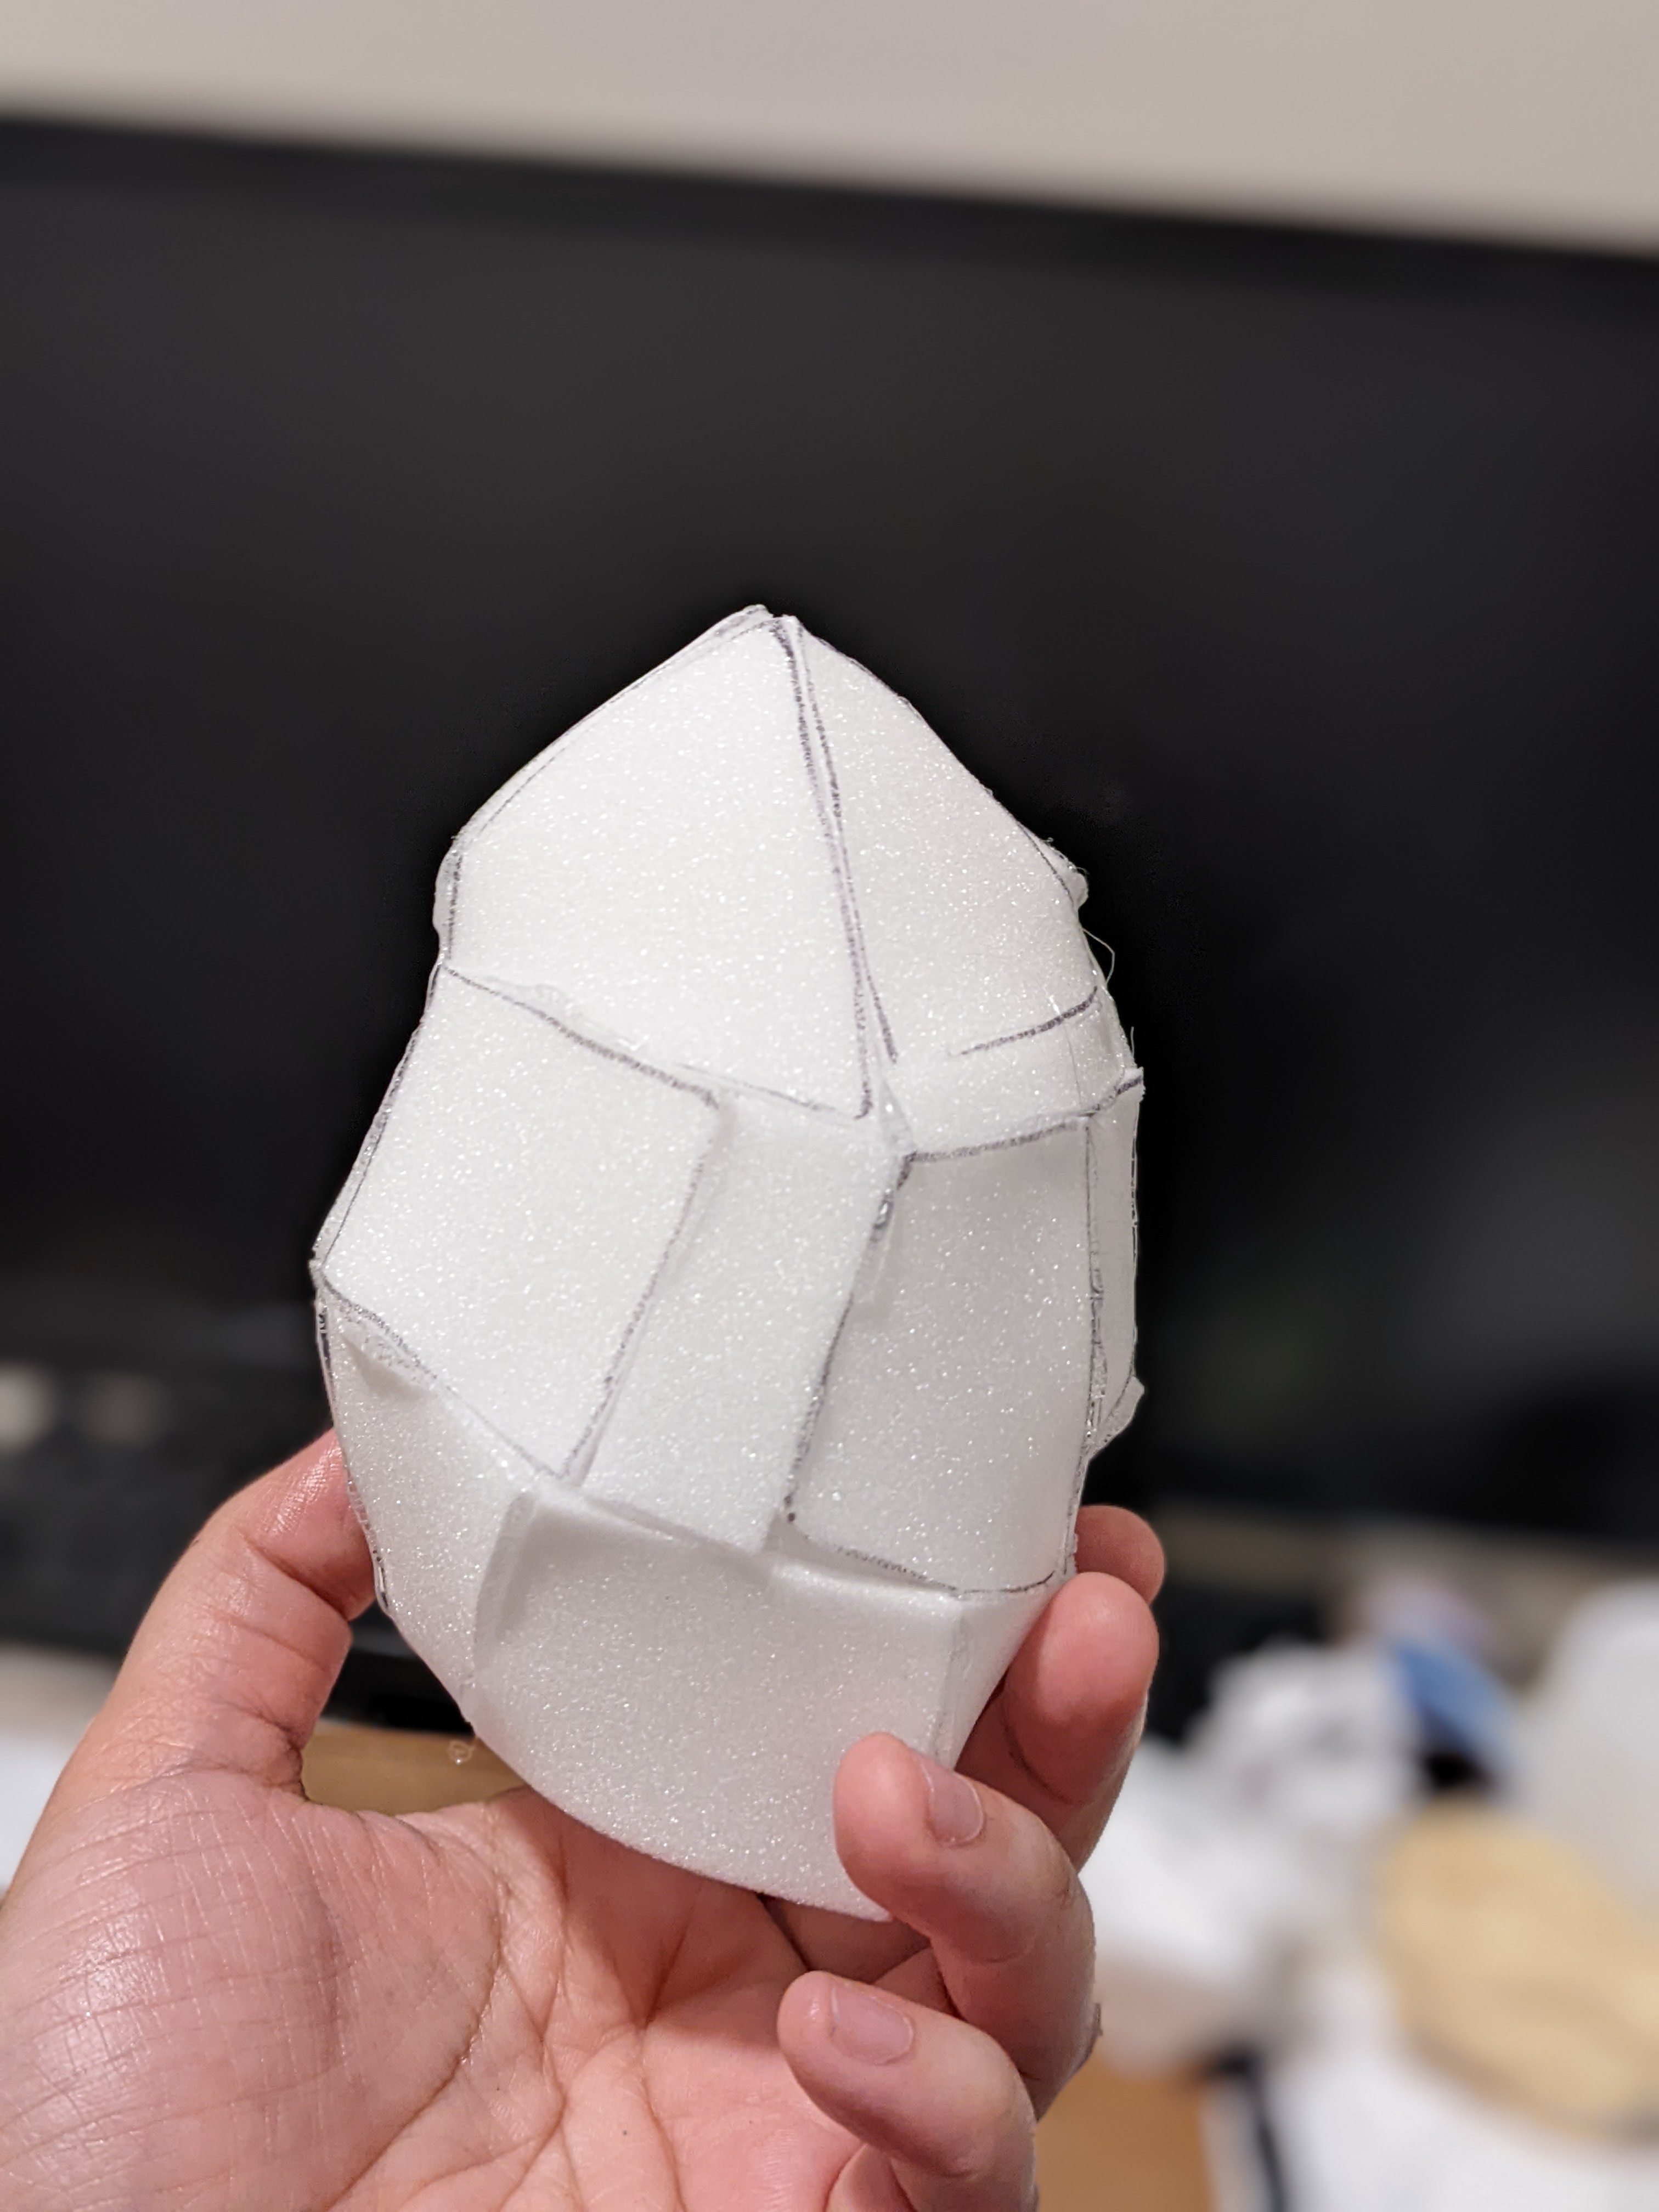
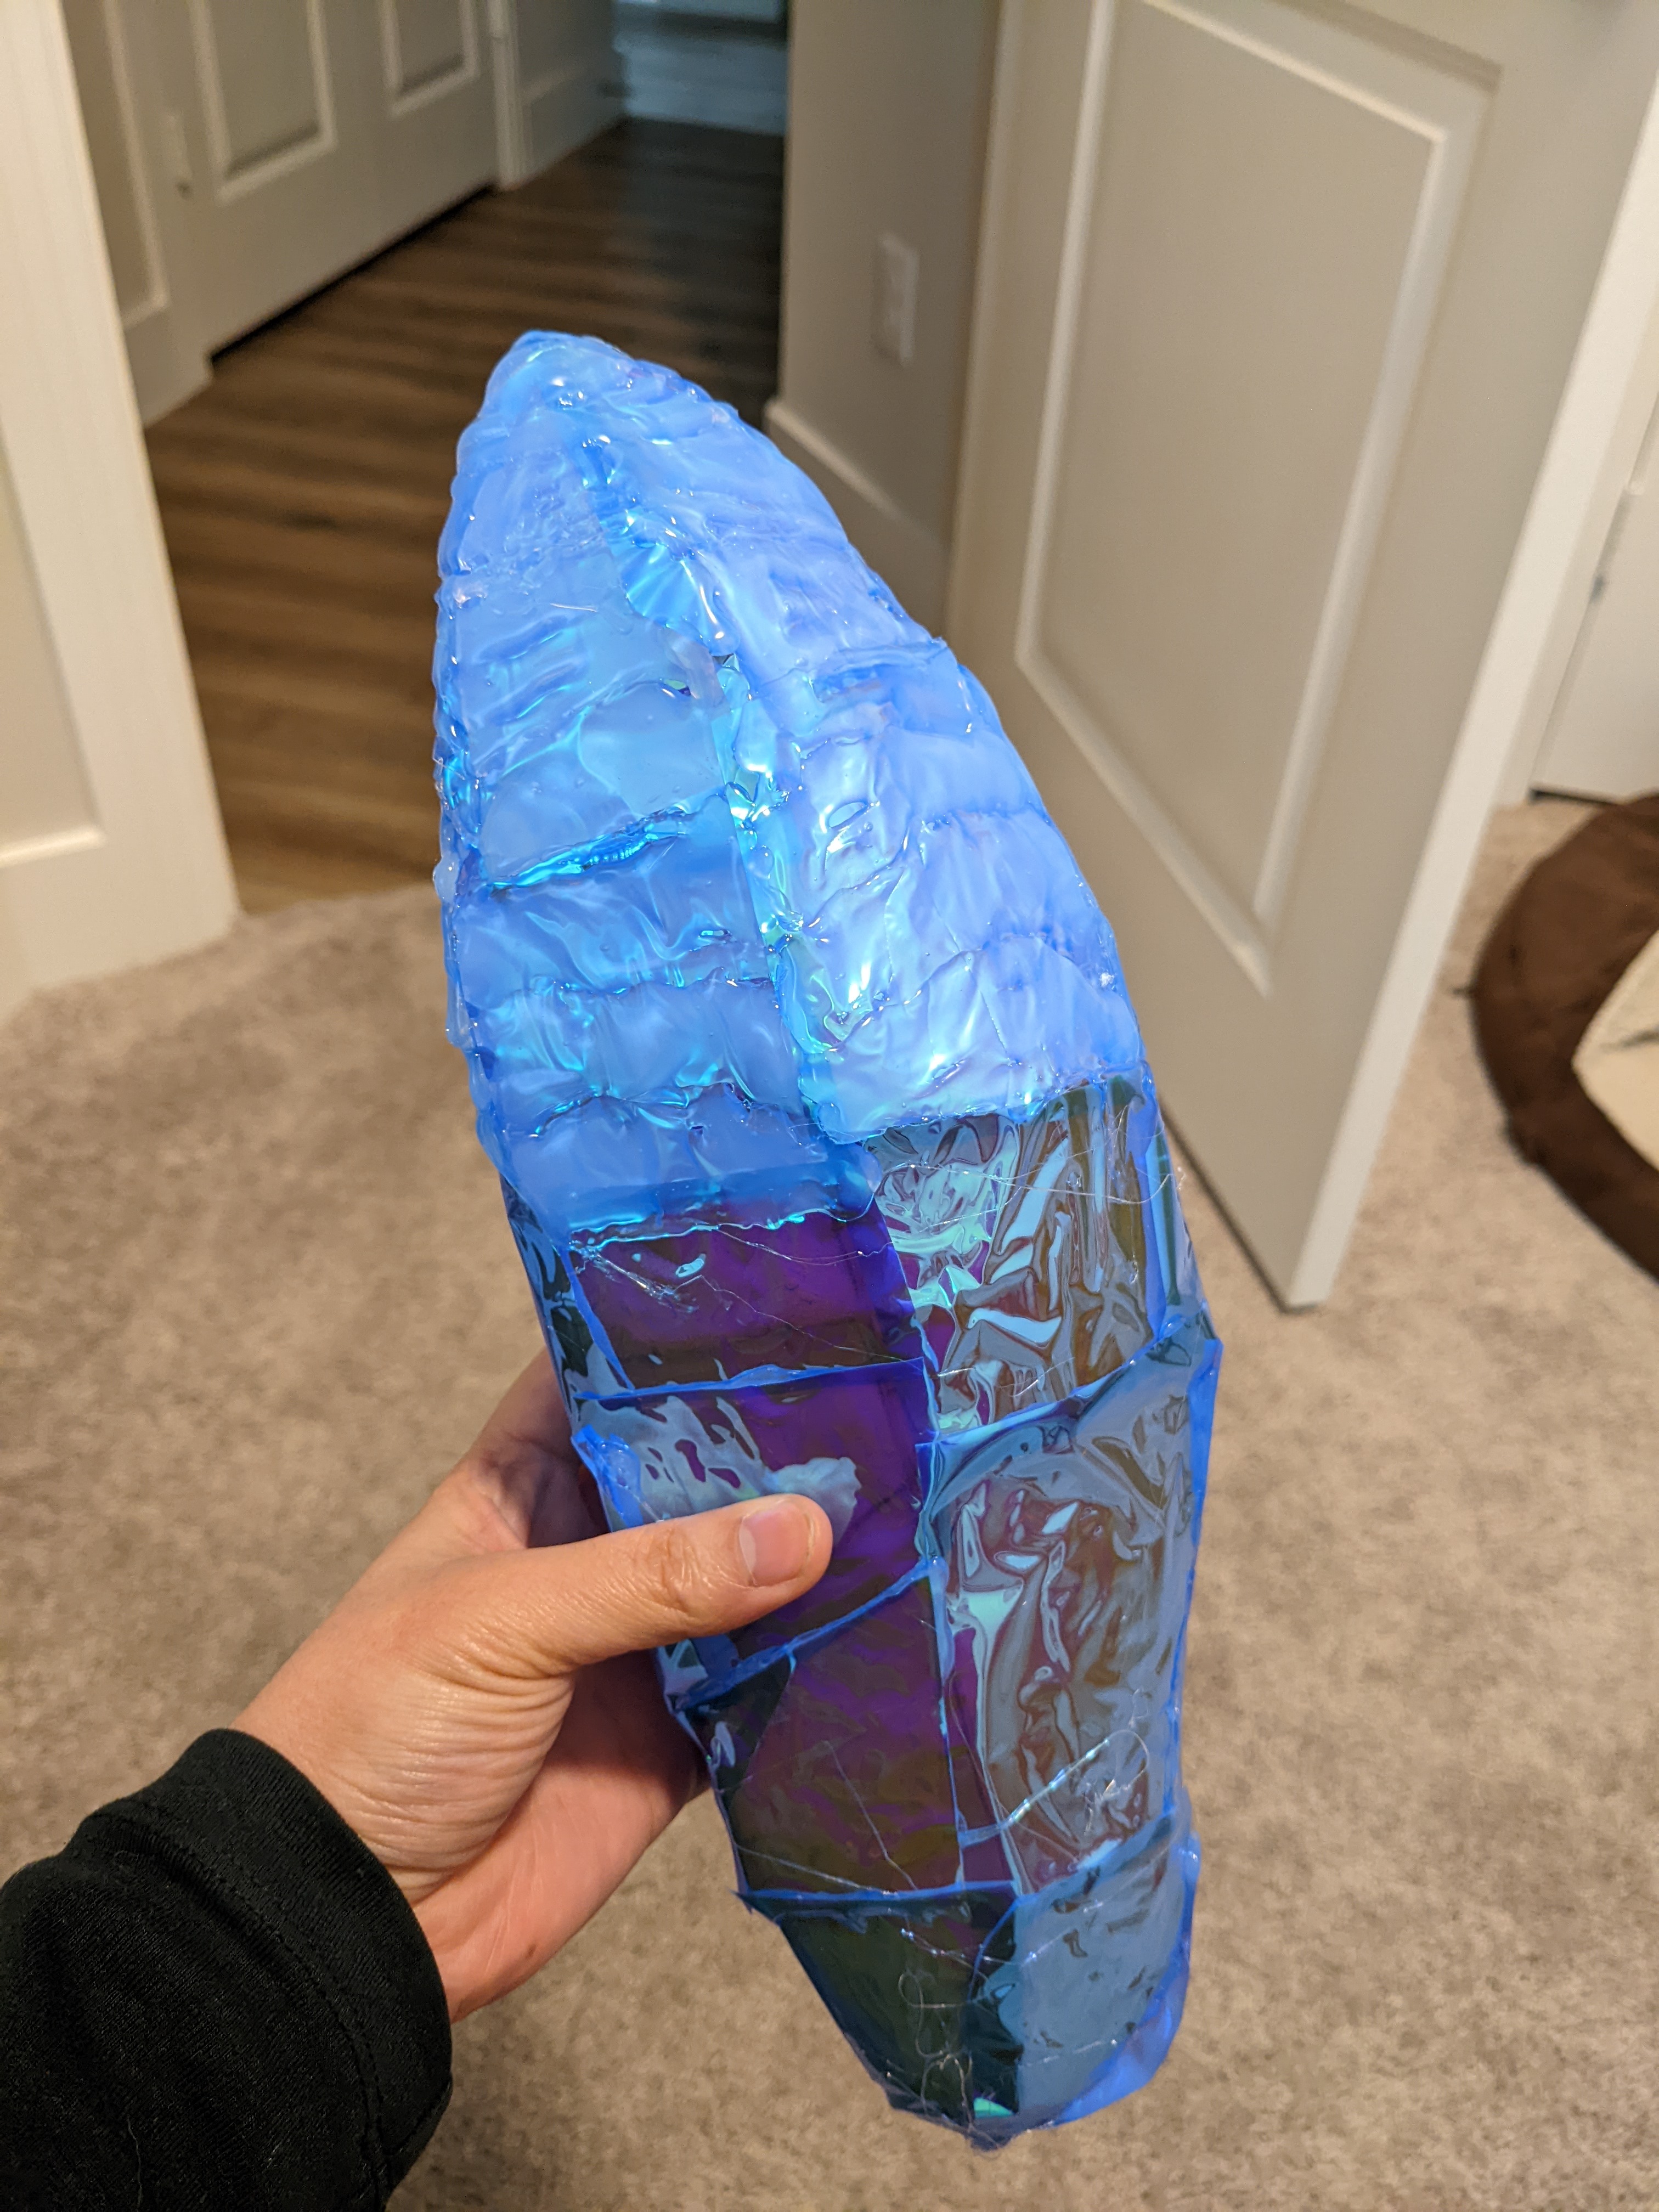
Once that was done, I used even more hot glue to cover the entire thing. After this step, I realized I didn’t actually like the size of it, so I took some scissors to it and cut off a few panels. Then, I glued it back together. The size discrepancy is likely because the plastazote itself has some thickness to it (much more than paper), so that adds to the width. Fixing this would mean making the masking tape shape smaller in the future.
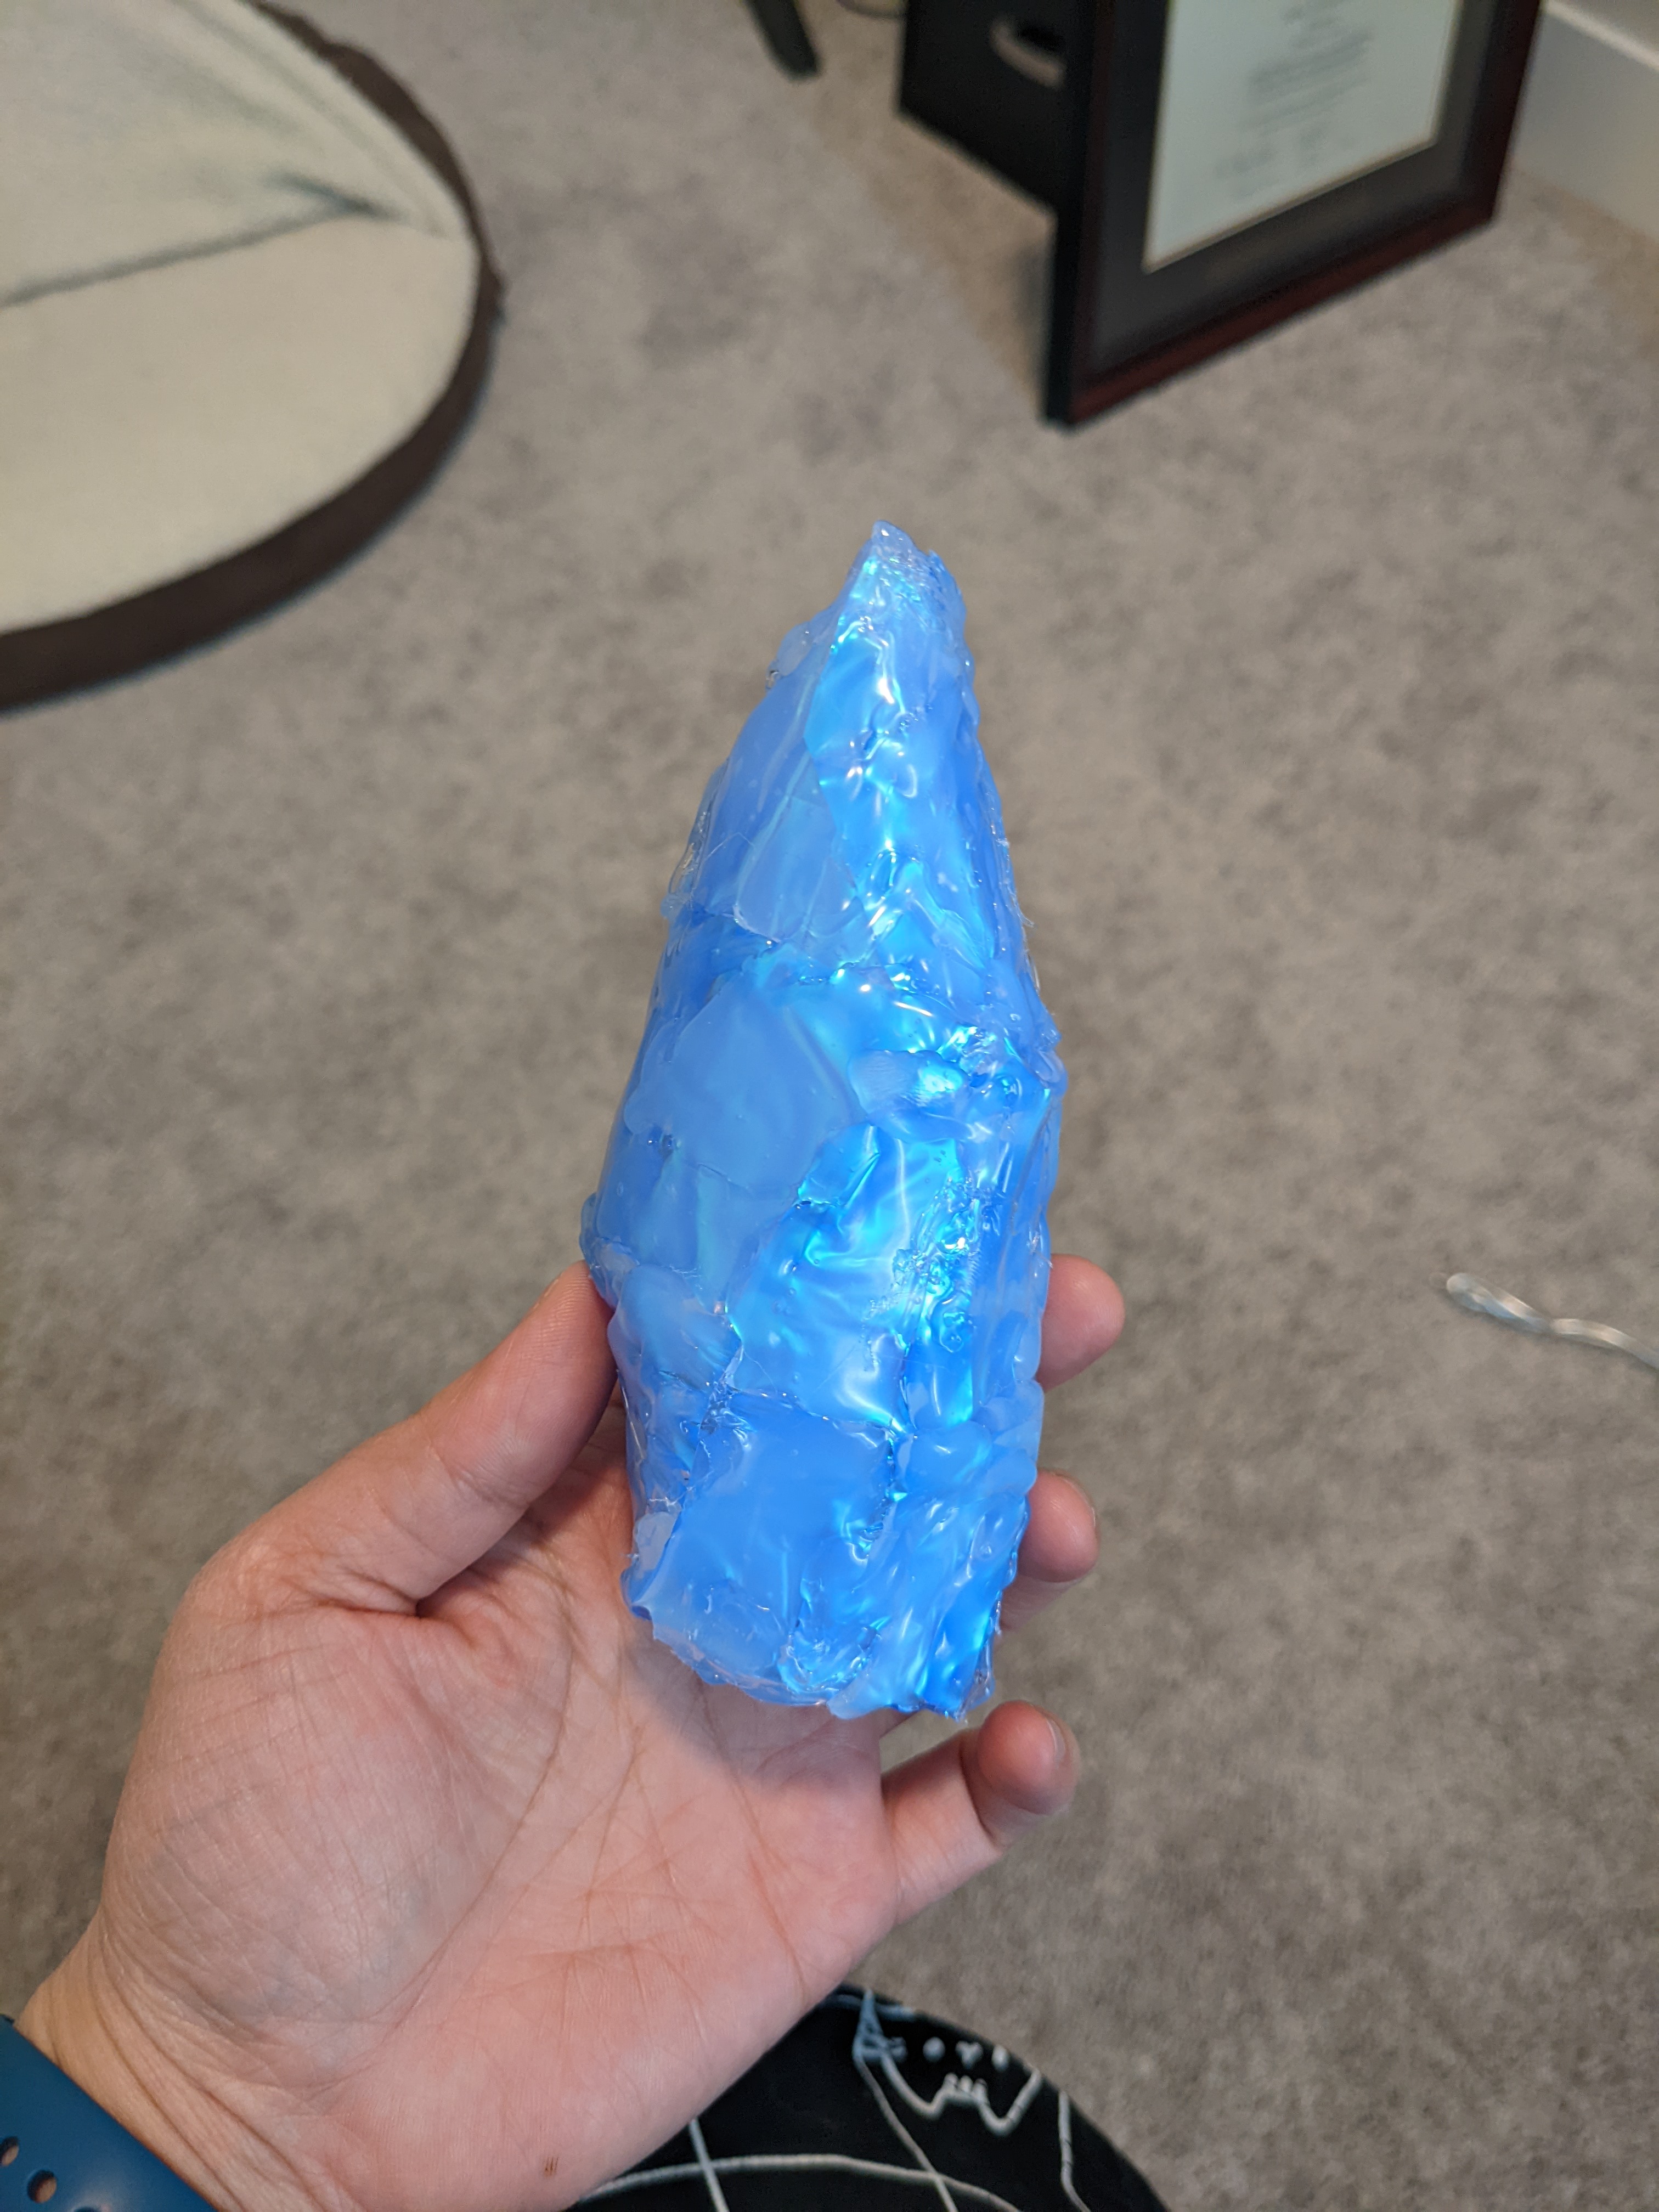
So. did I take that size mistake into account when doing the big crystal? Nope. I just continued on because I wasn’t really thinking and honestly was in a rush and thought it would be okay.
I followed the exact same method as before, just larger.
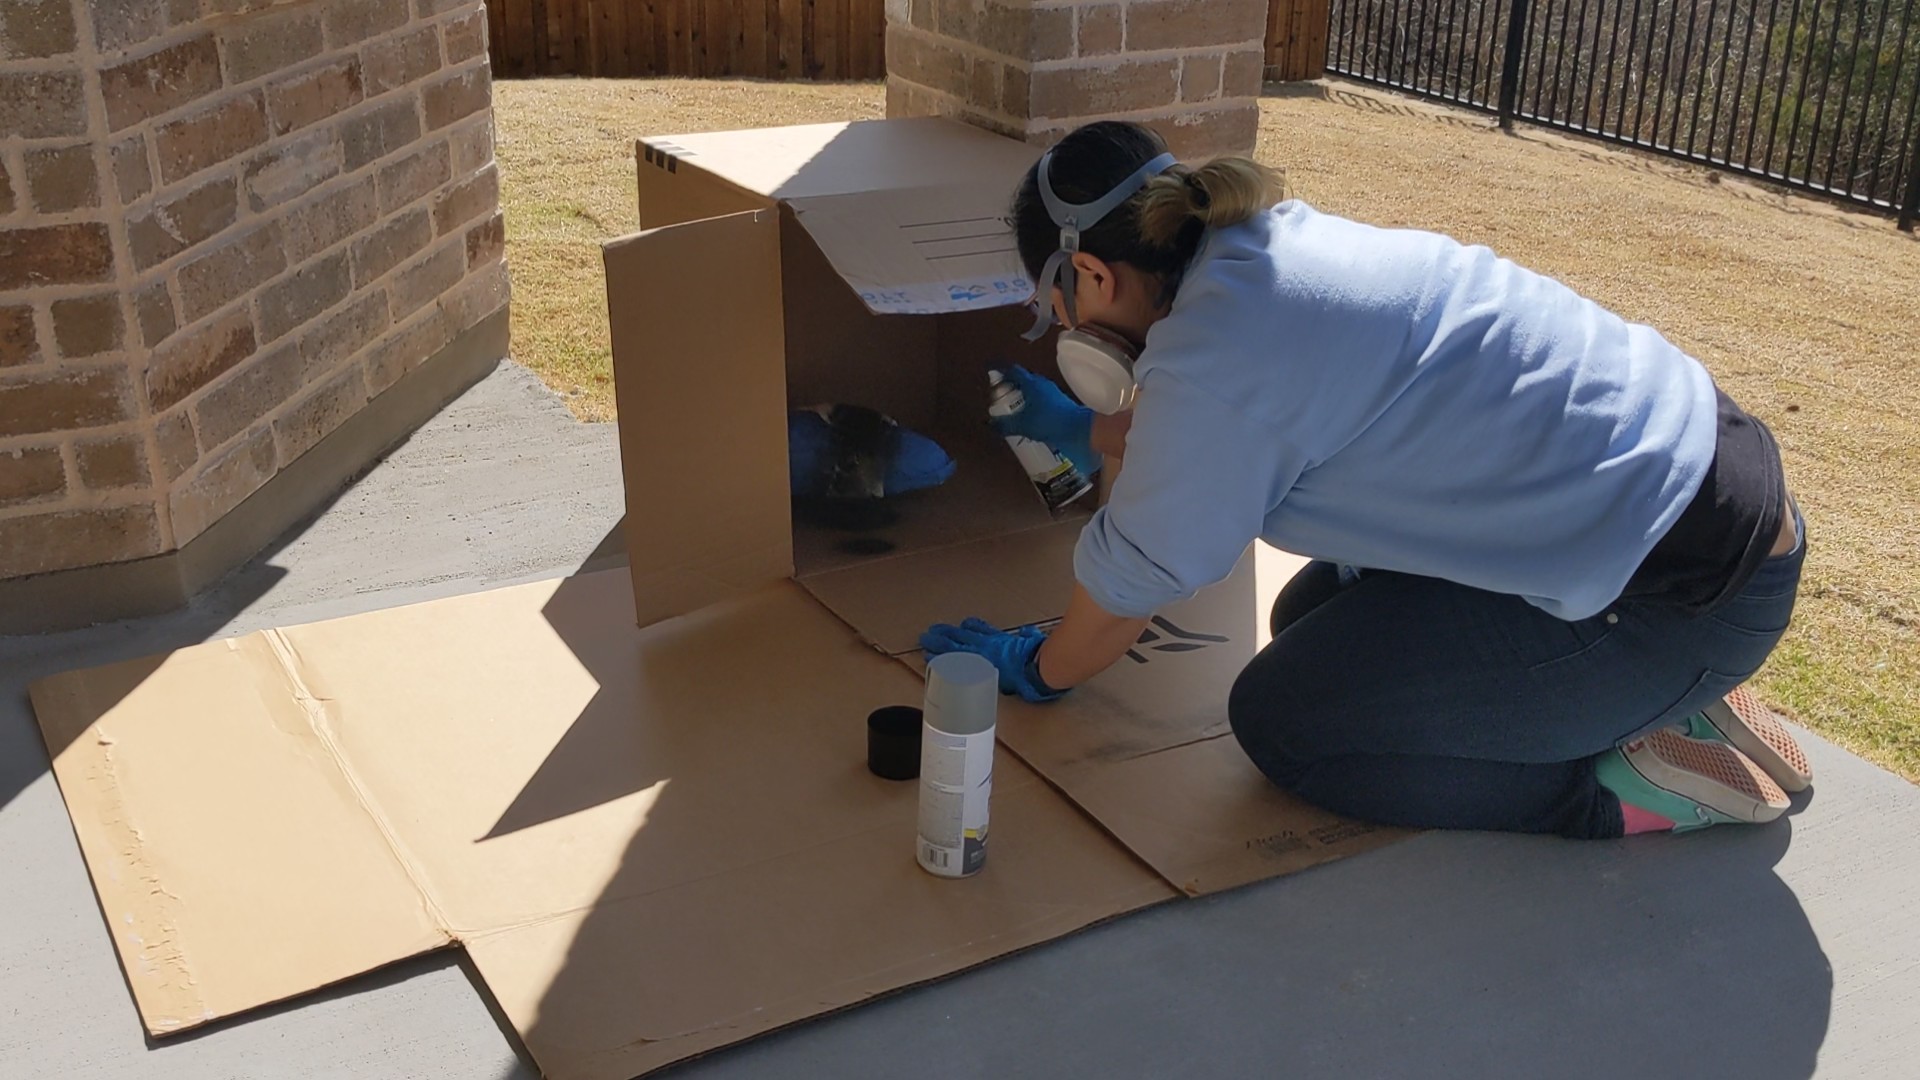
The final touch for the crystals was adding foam clay to the large one to be the rock part. I covered the crystal in painters tape and then primed and painted the rock. You’ll soon see that this painting was going to be in vain.
Circuit
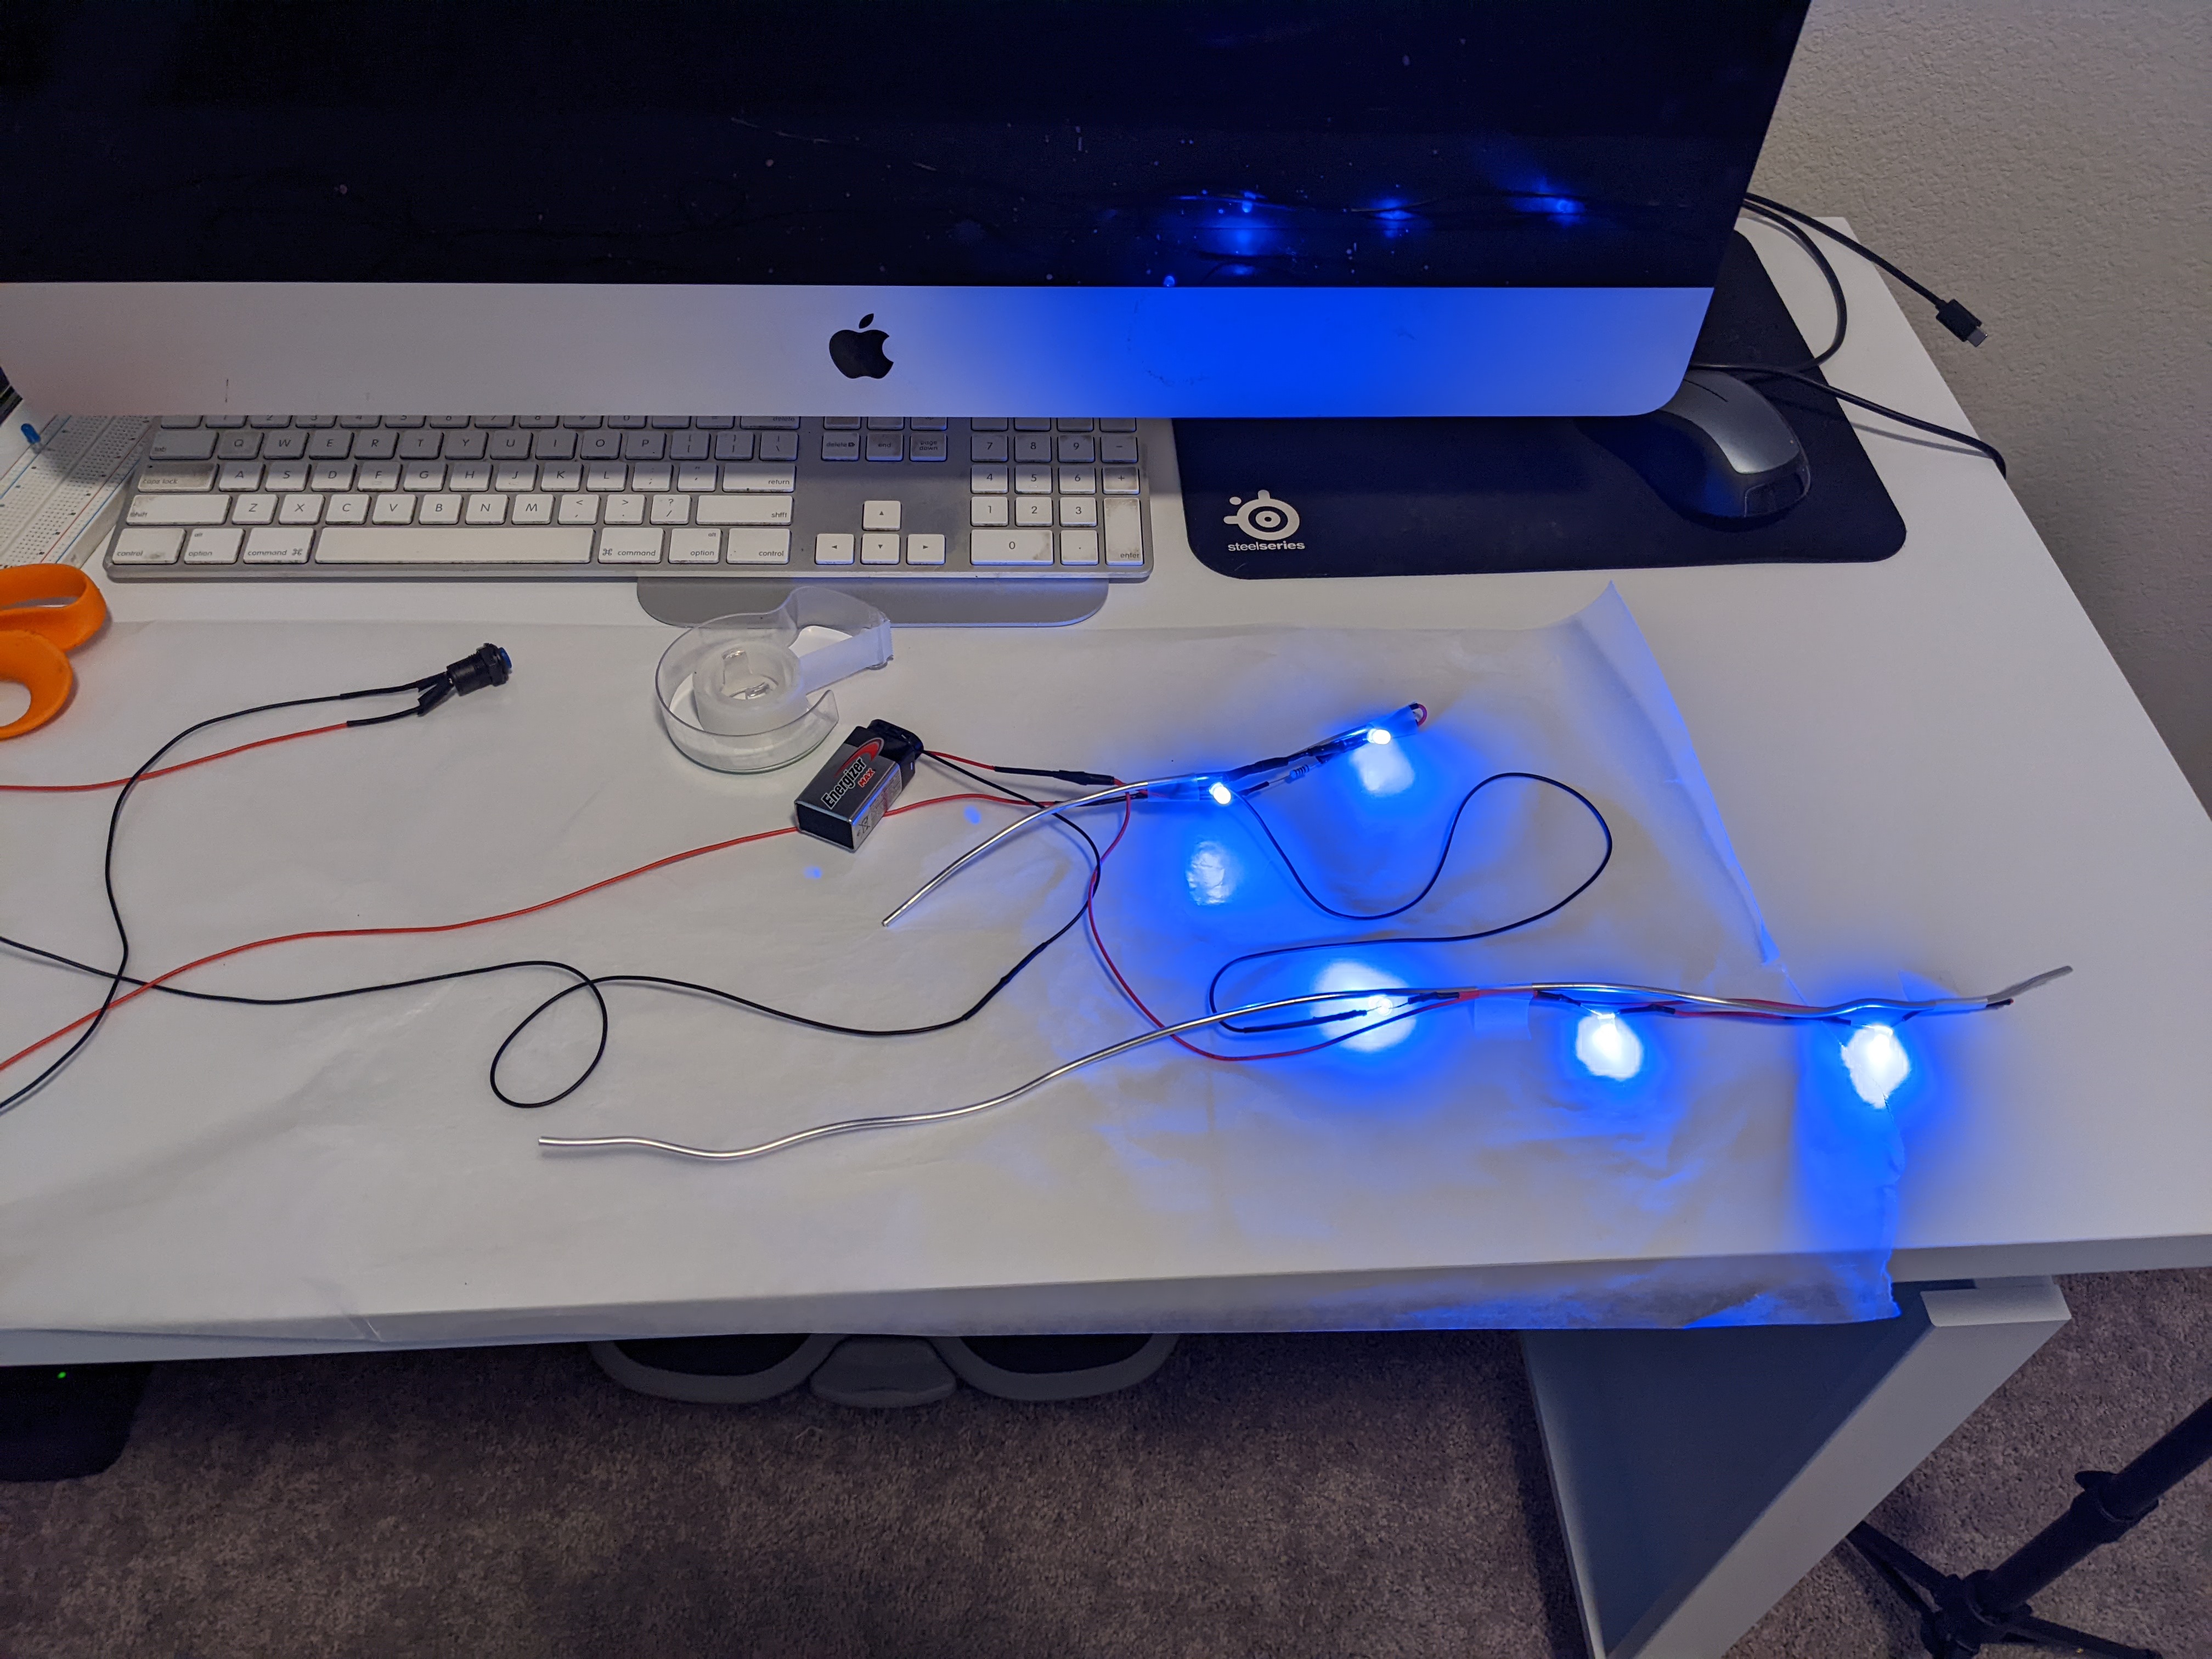
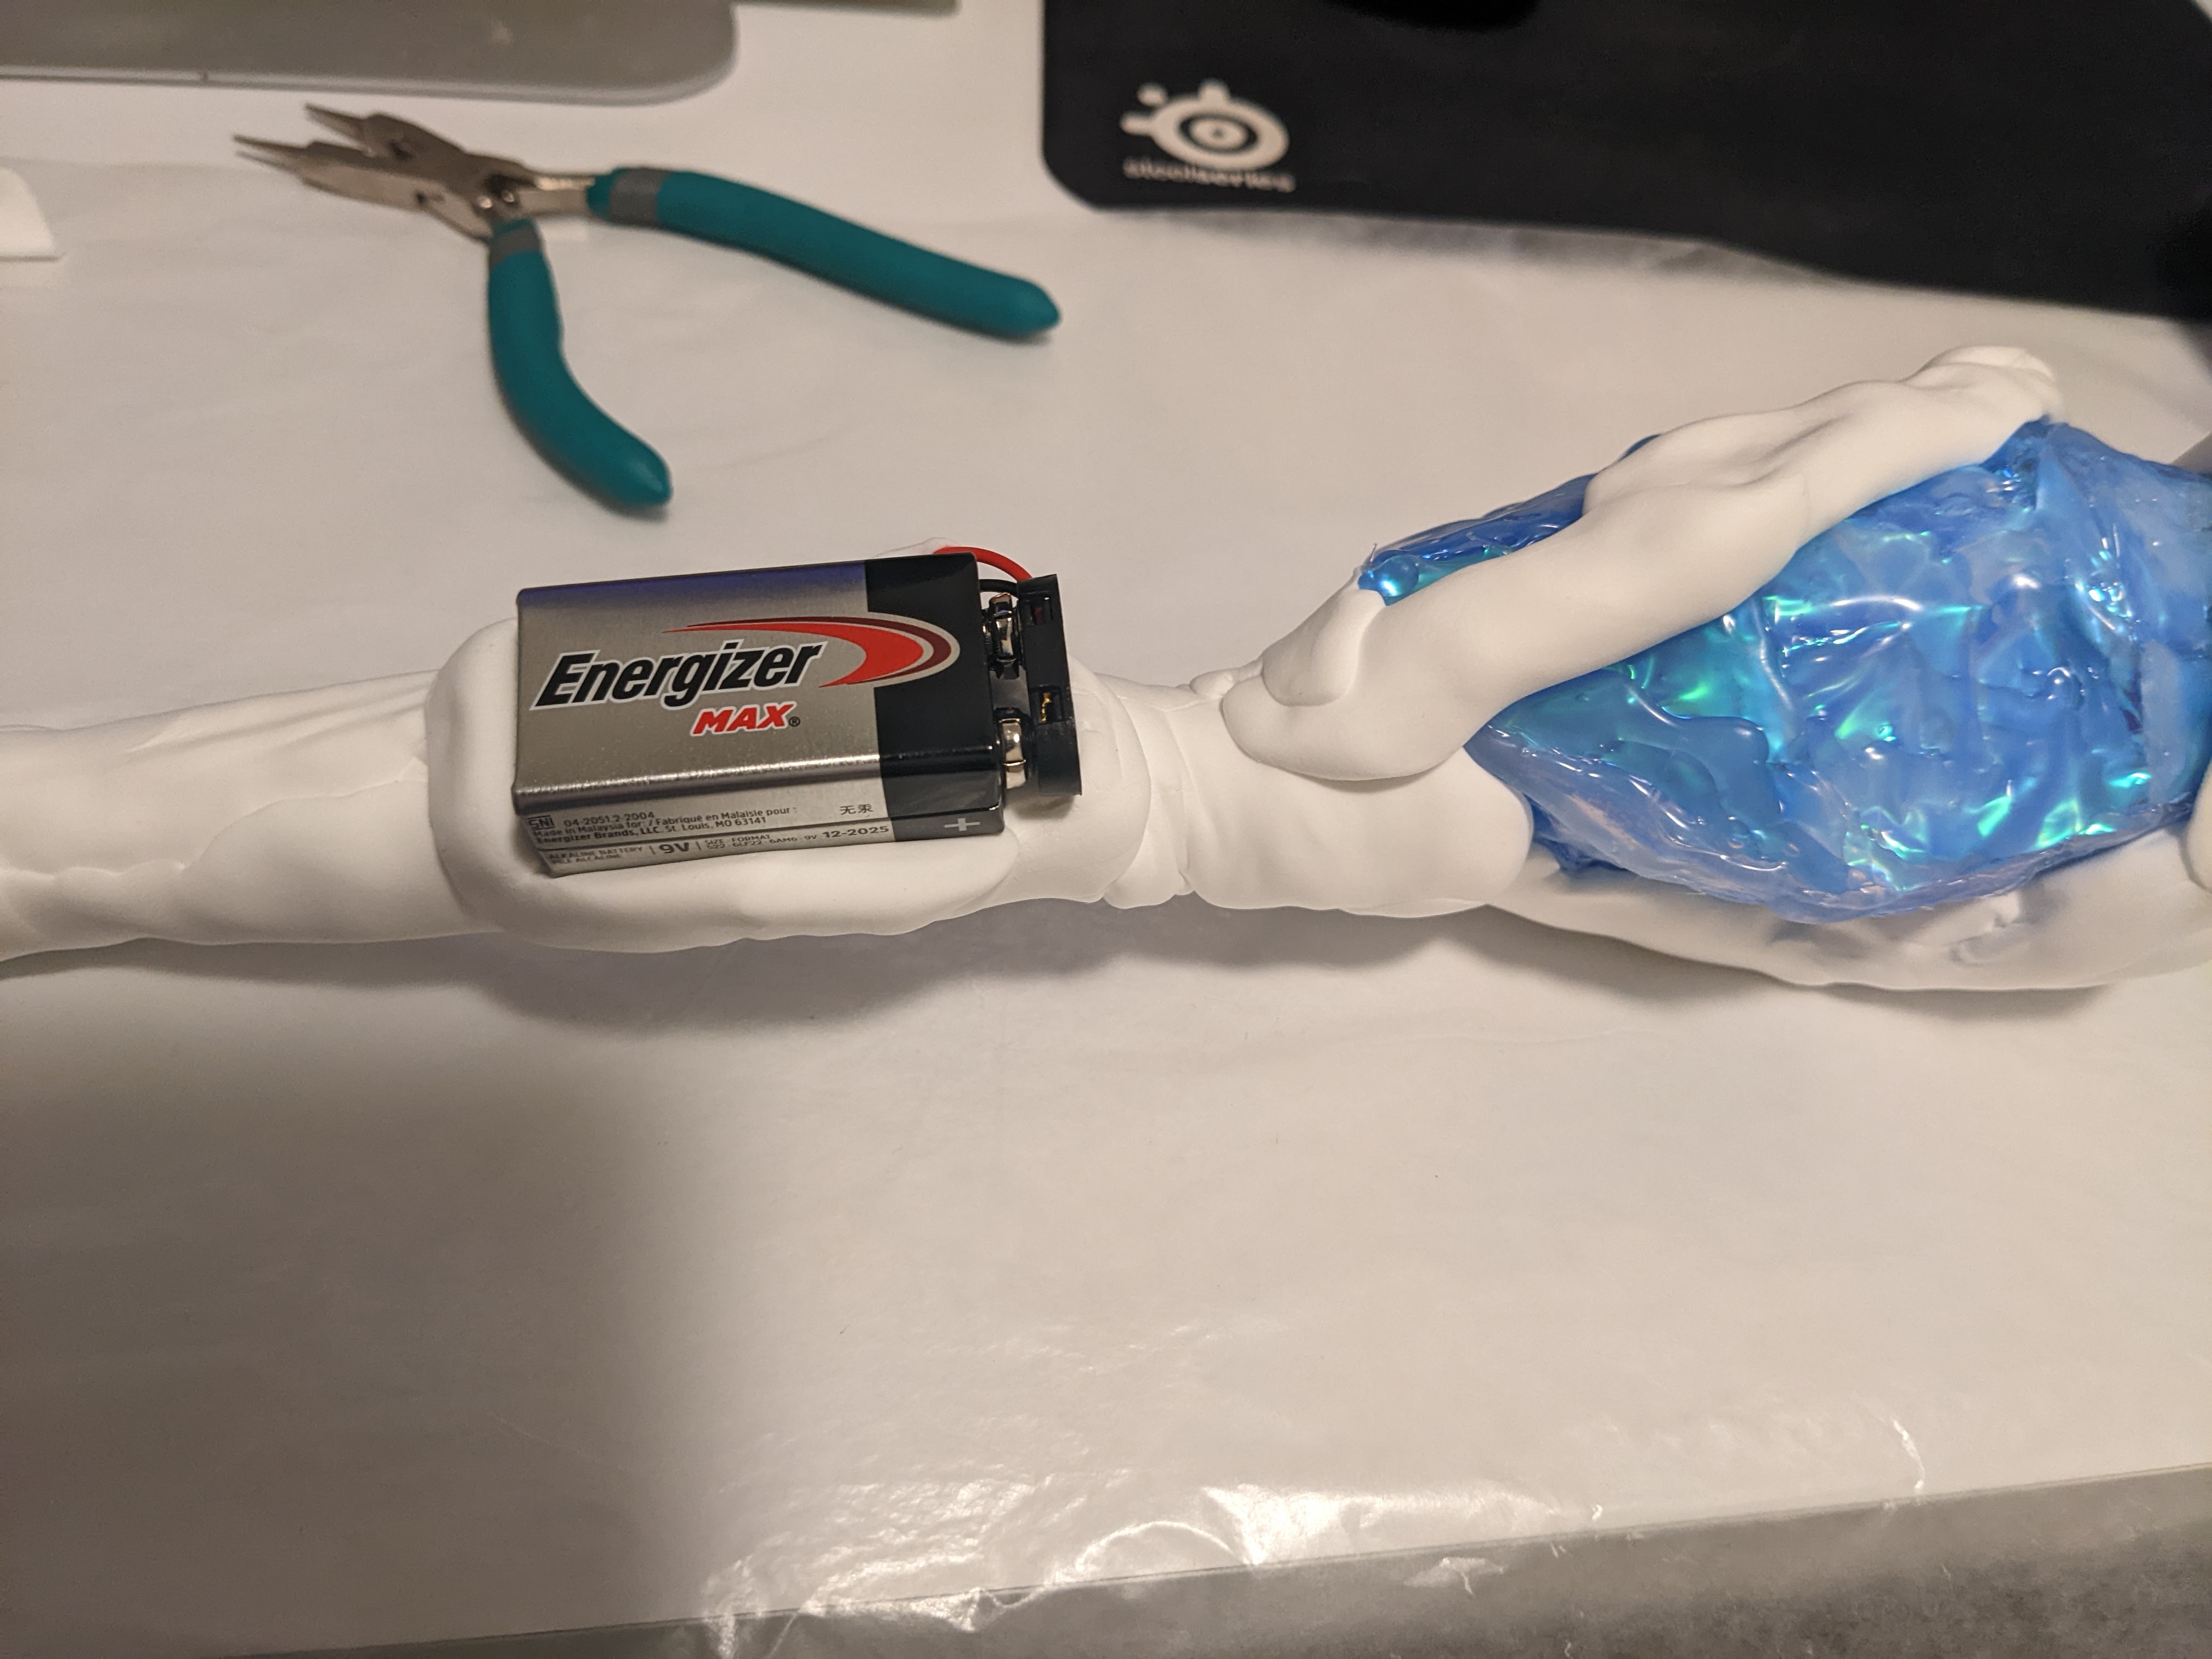
This was my first time really truly incorporating lights into a cosplay. I had attempted before with Maria, but that was a very poor attempt. I basically bought an existing light/battery pack set off Amazon and shoehorned it into the scythes. This time, I was making a custom circuit so that the lights looked and behaved exactly how I wanted them to.
Now would be the time to shout-out Kamui Cosplay’s book “The Book of Cosplay Lights” that helped me tremendously. It was very beginner friendly and I was able to figure out how to use a breadboard to test the lights. (After realizing much too late that my LEDs were different voltages dependent on the color. Which is why I ended up frying a couple in the process. Whoops.)
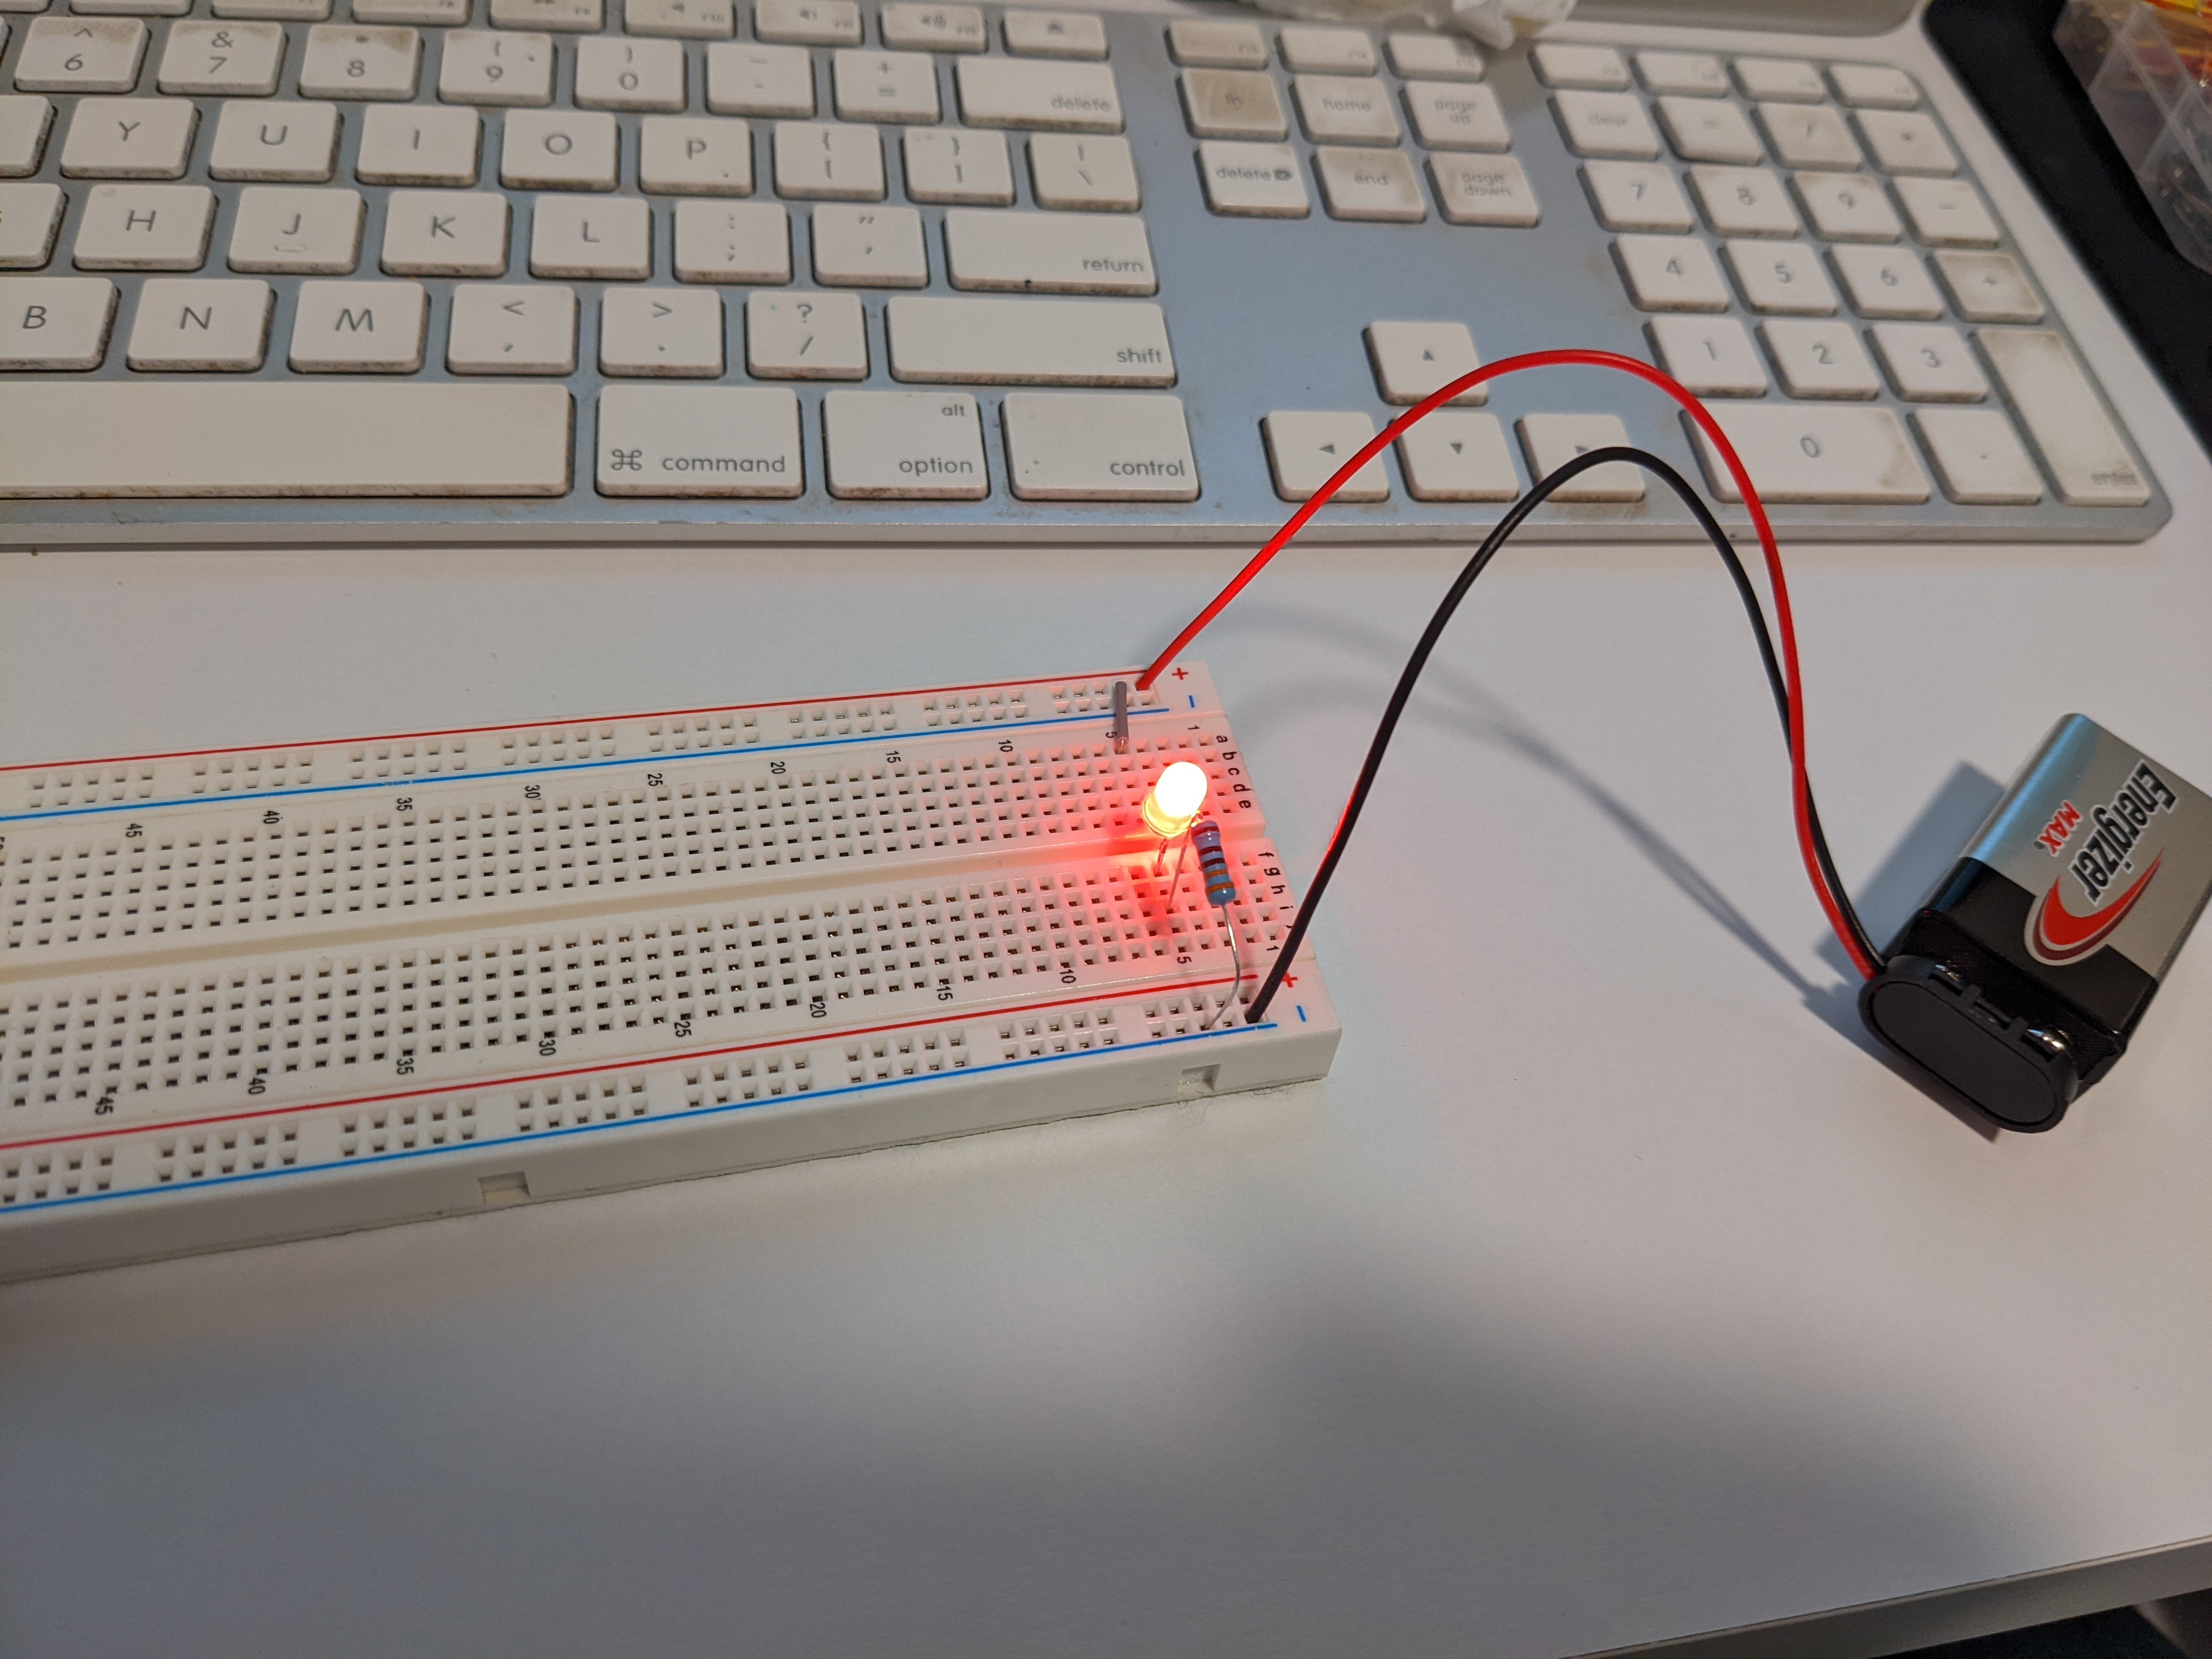
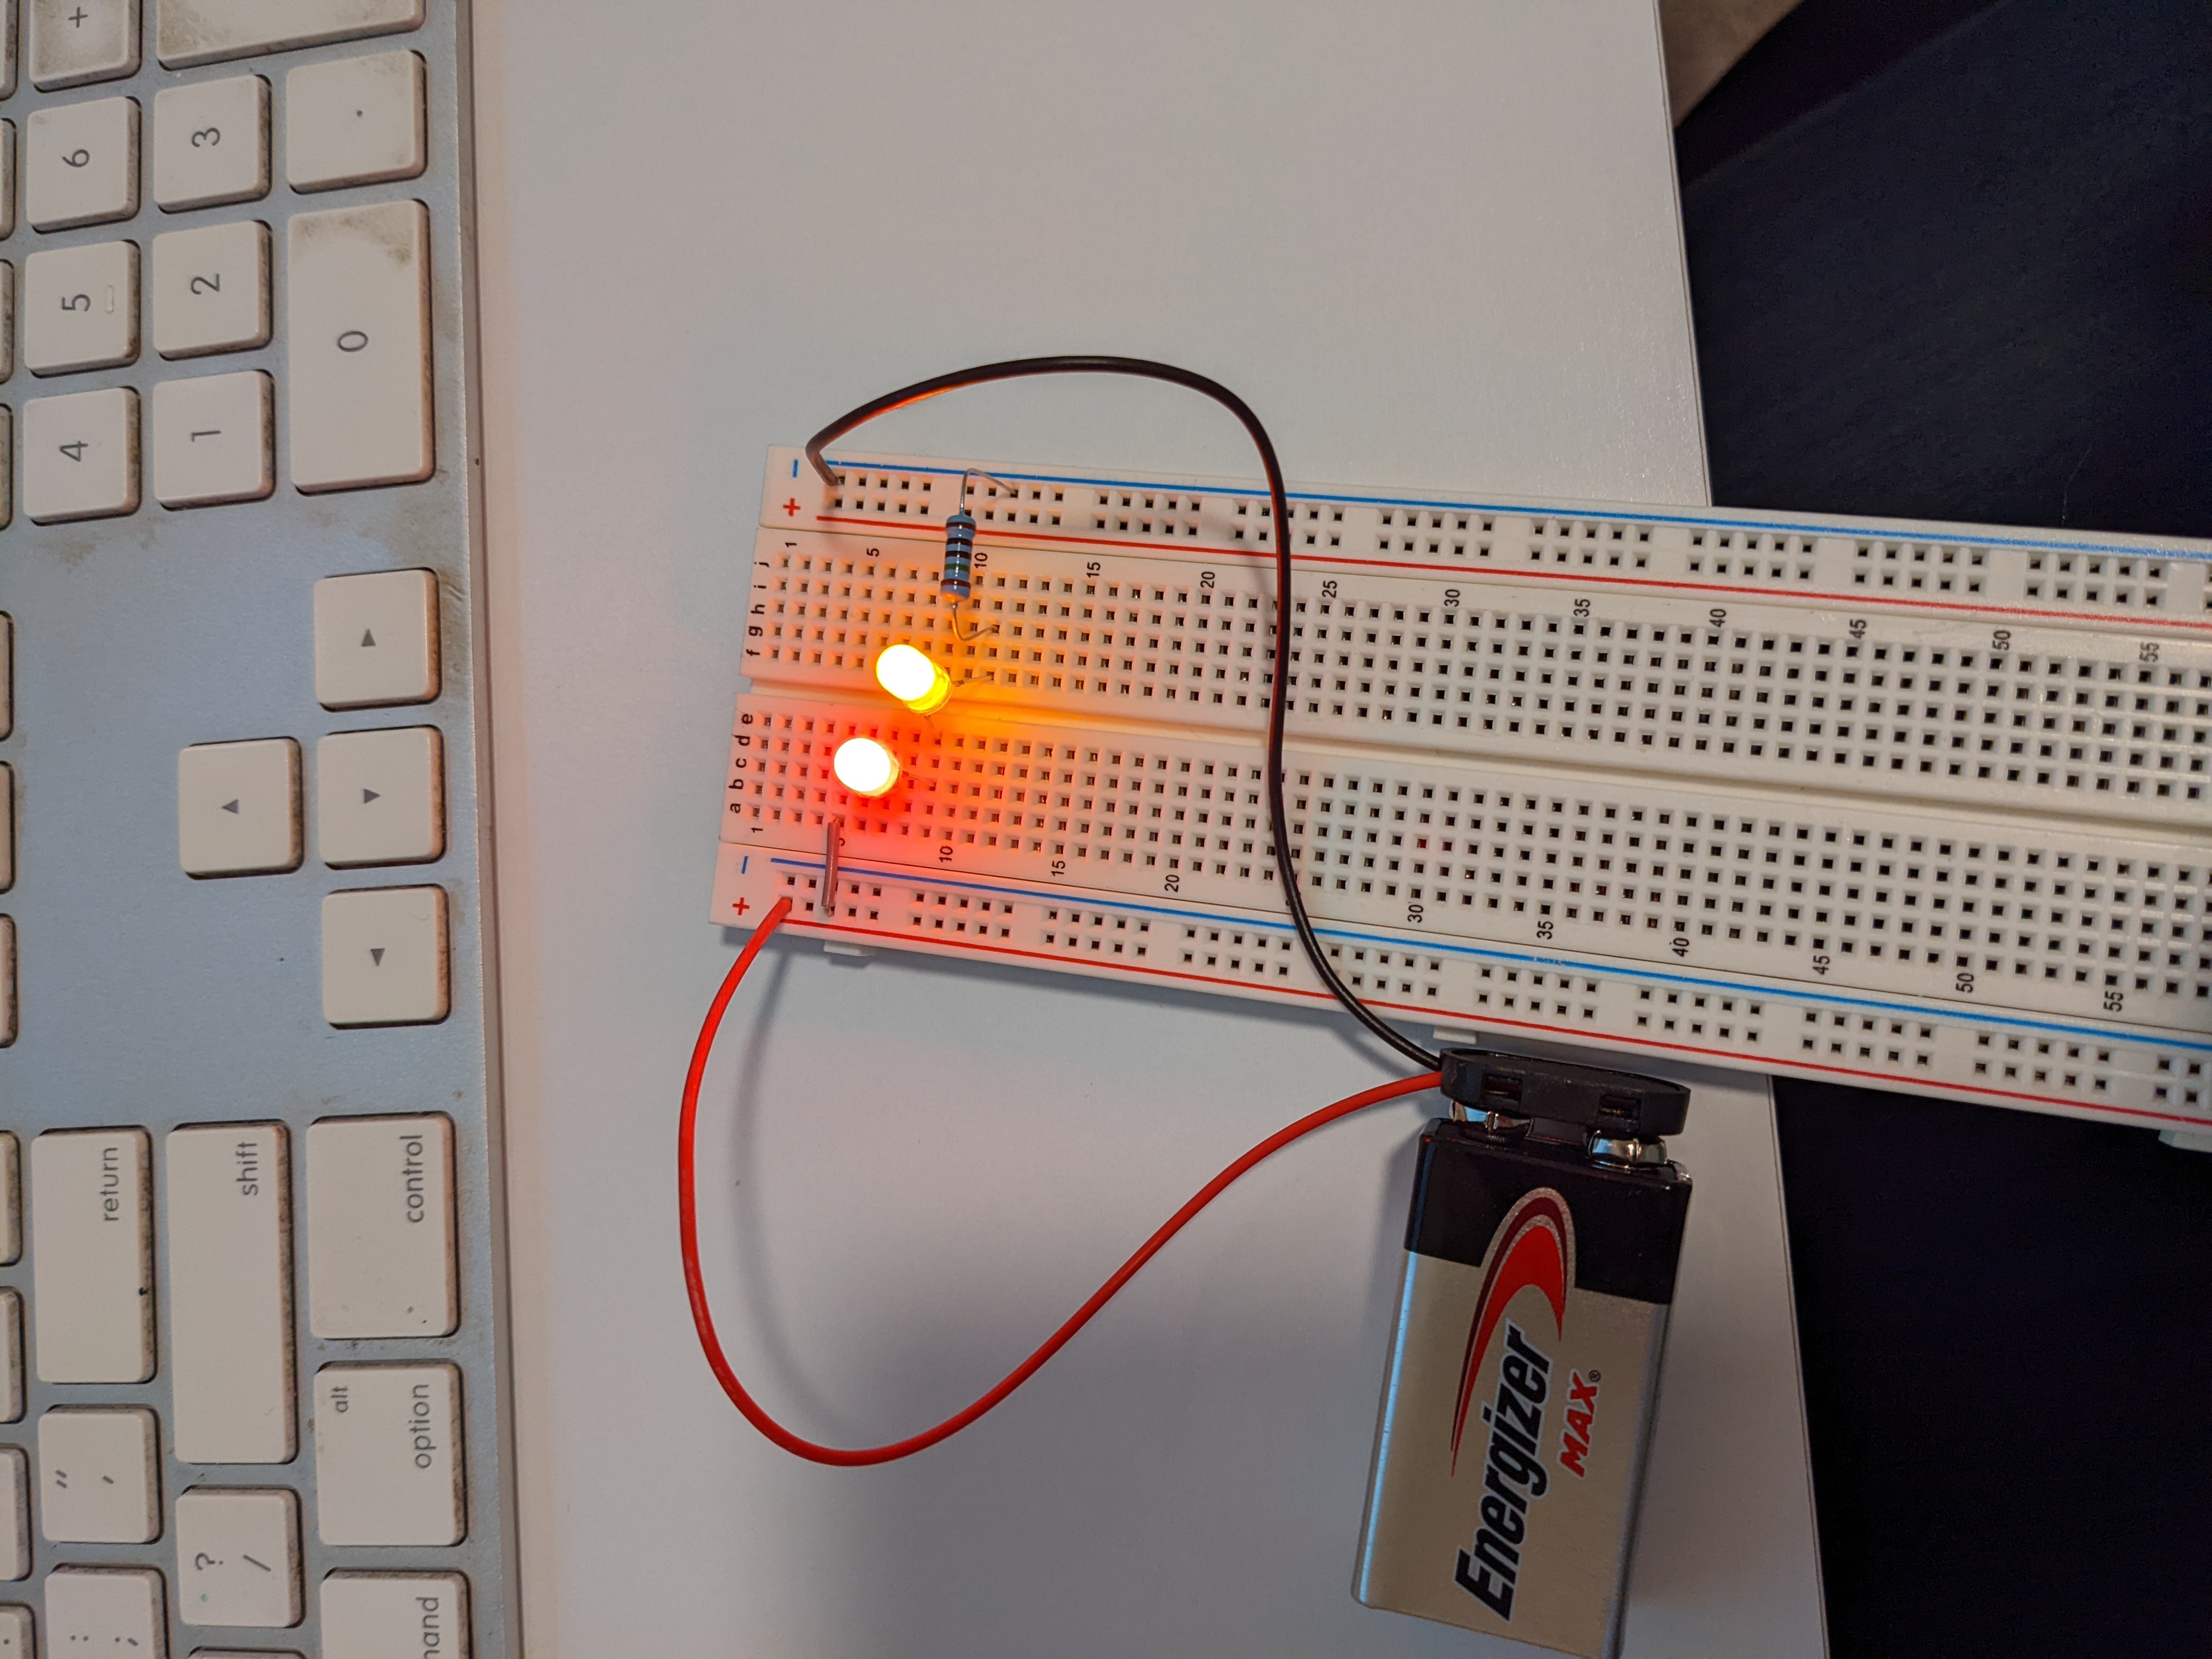
After getting the hang of the logistics of the circuit, it was time to get the hand of soldering. I had never done it before and Kamui’s book was extremely helpful here.

Once I made a test circuit, it was time to make the real thing.
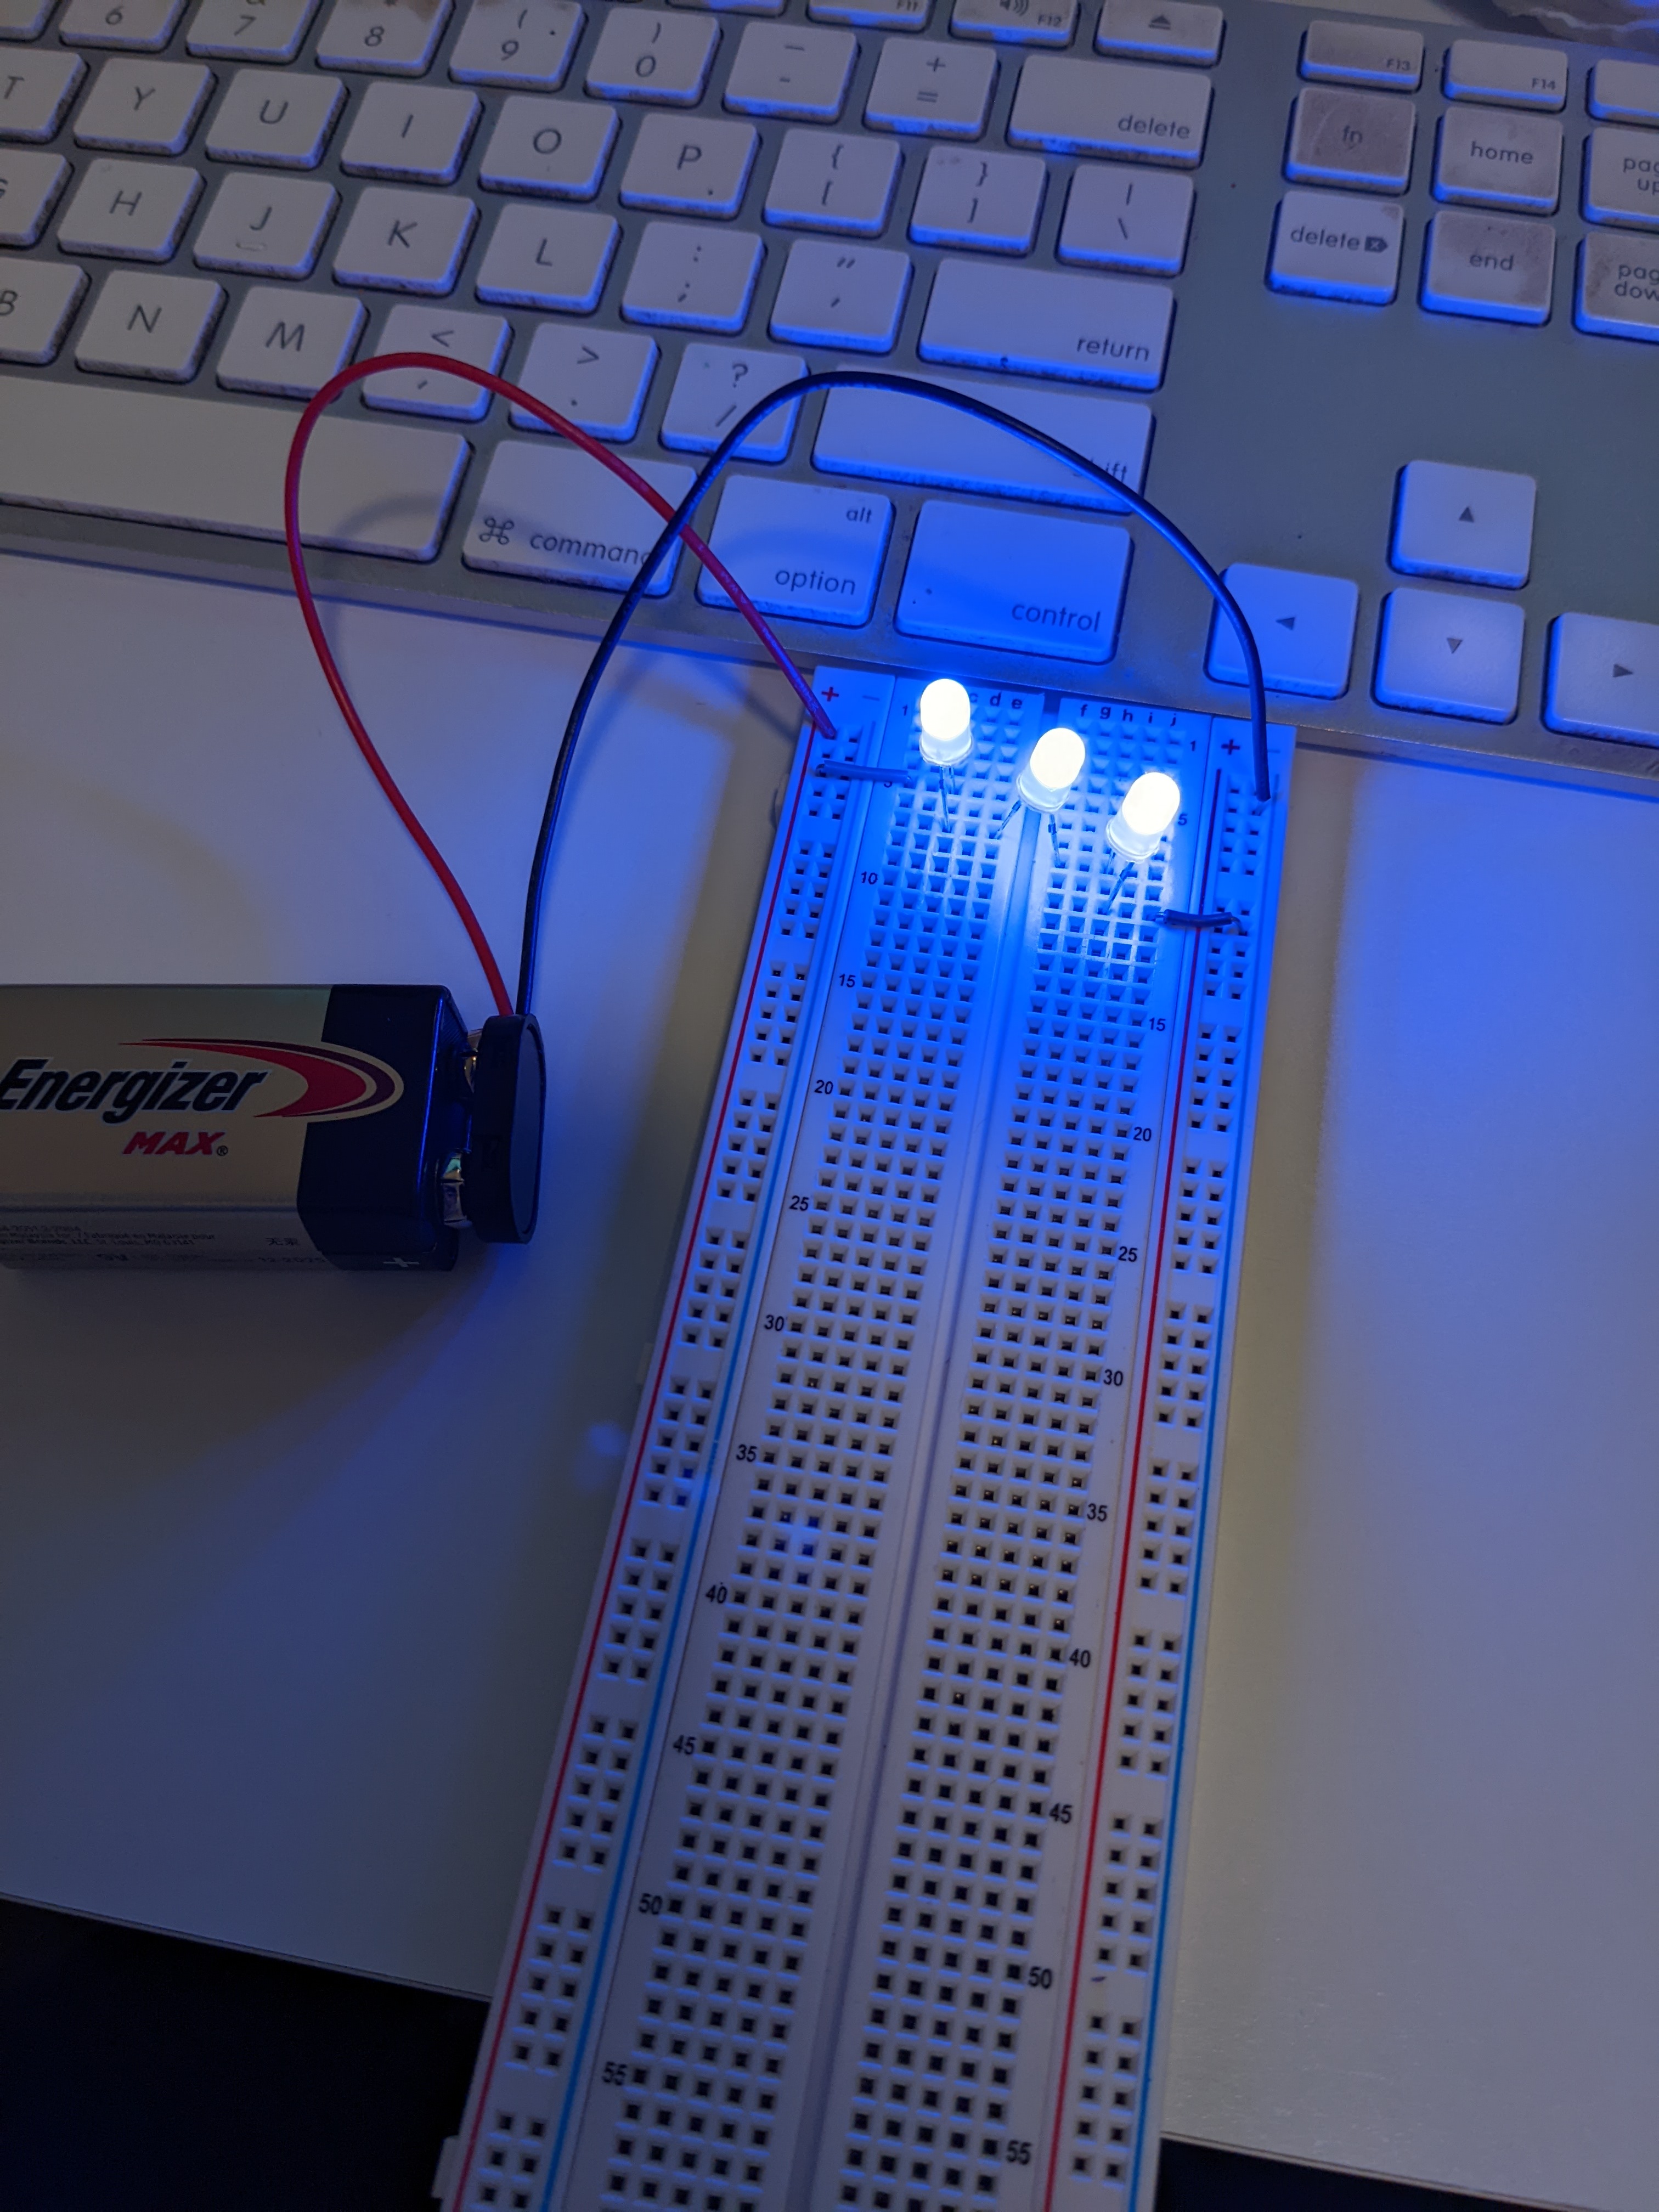
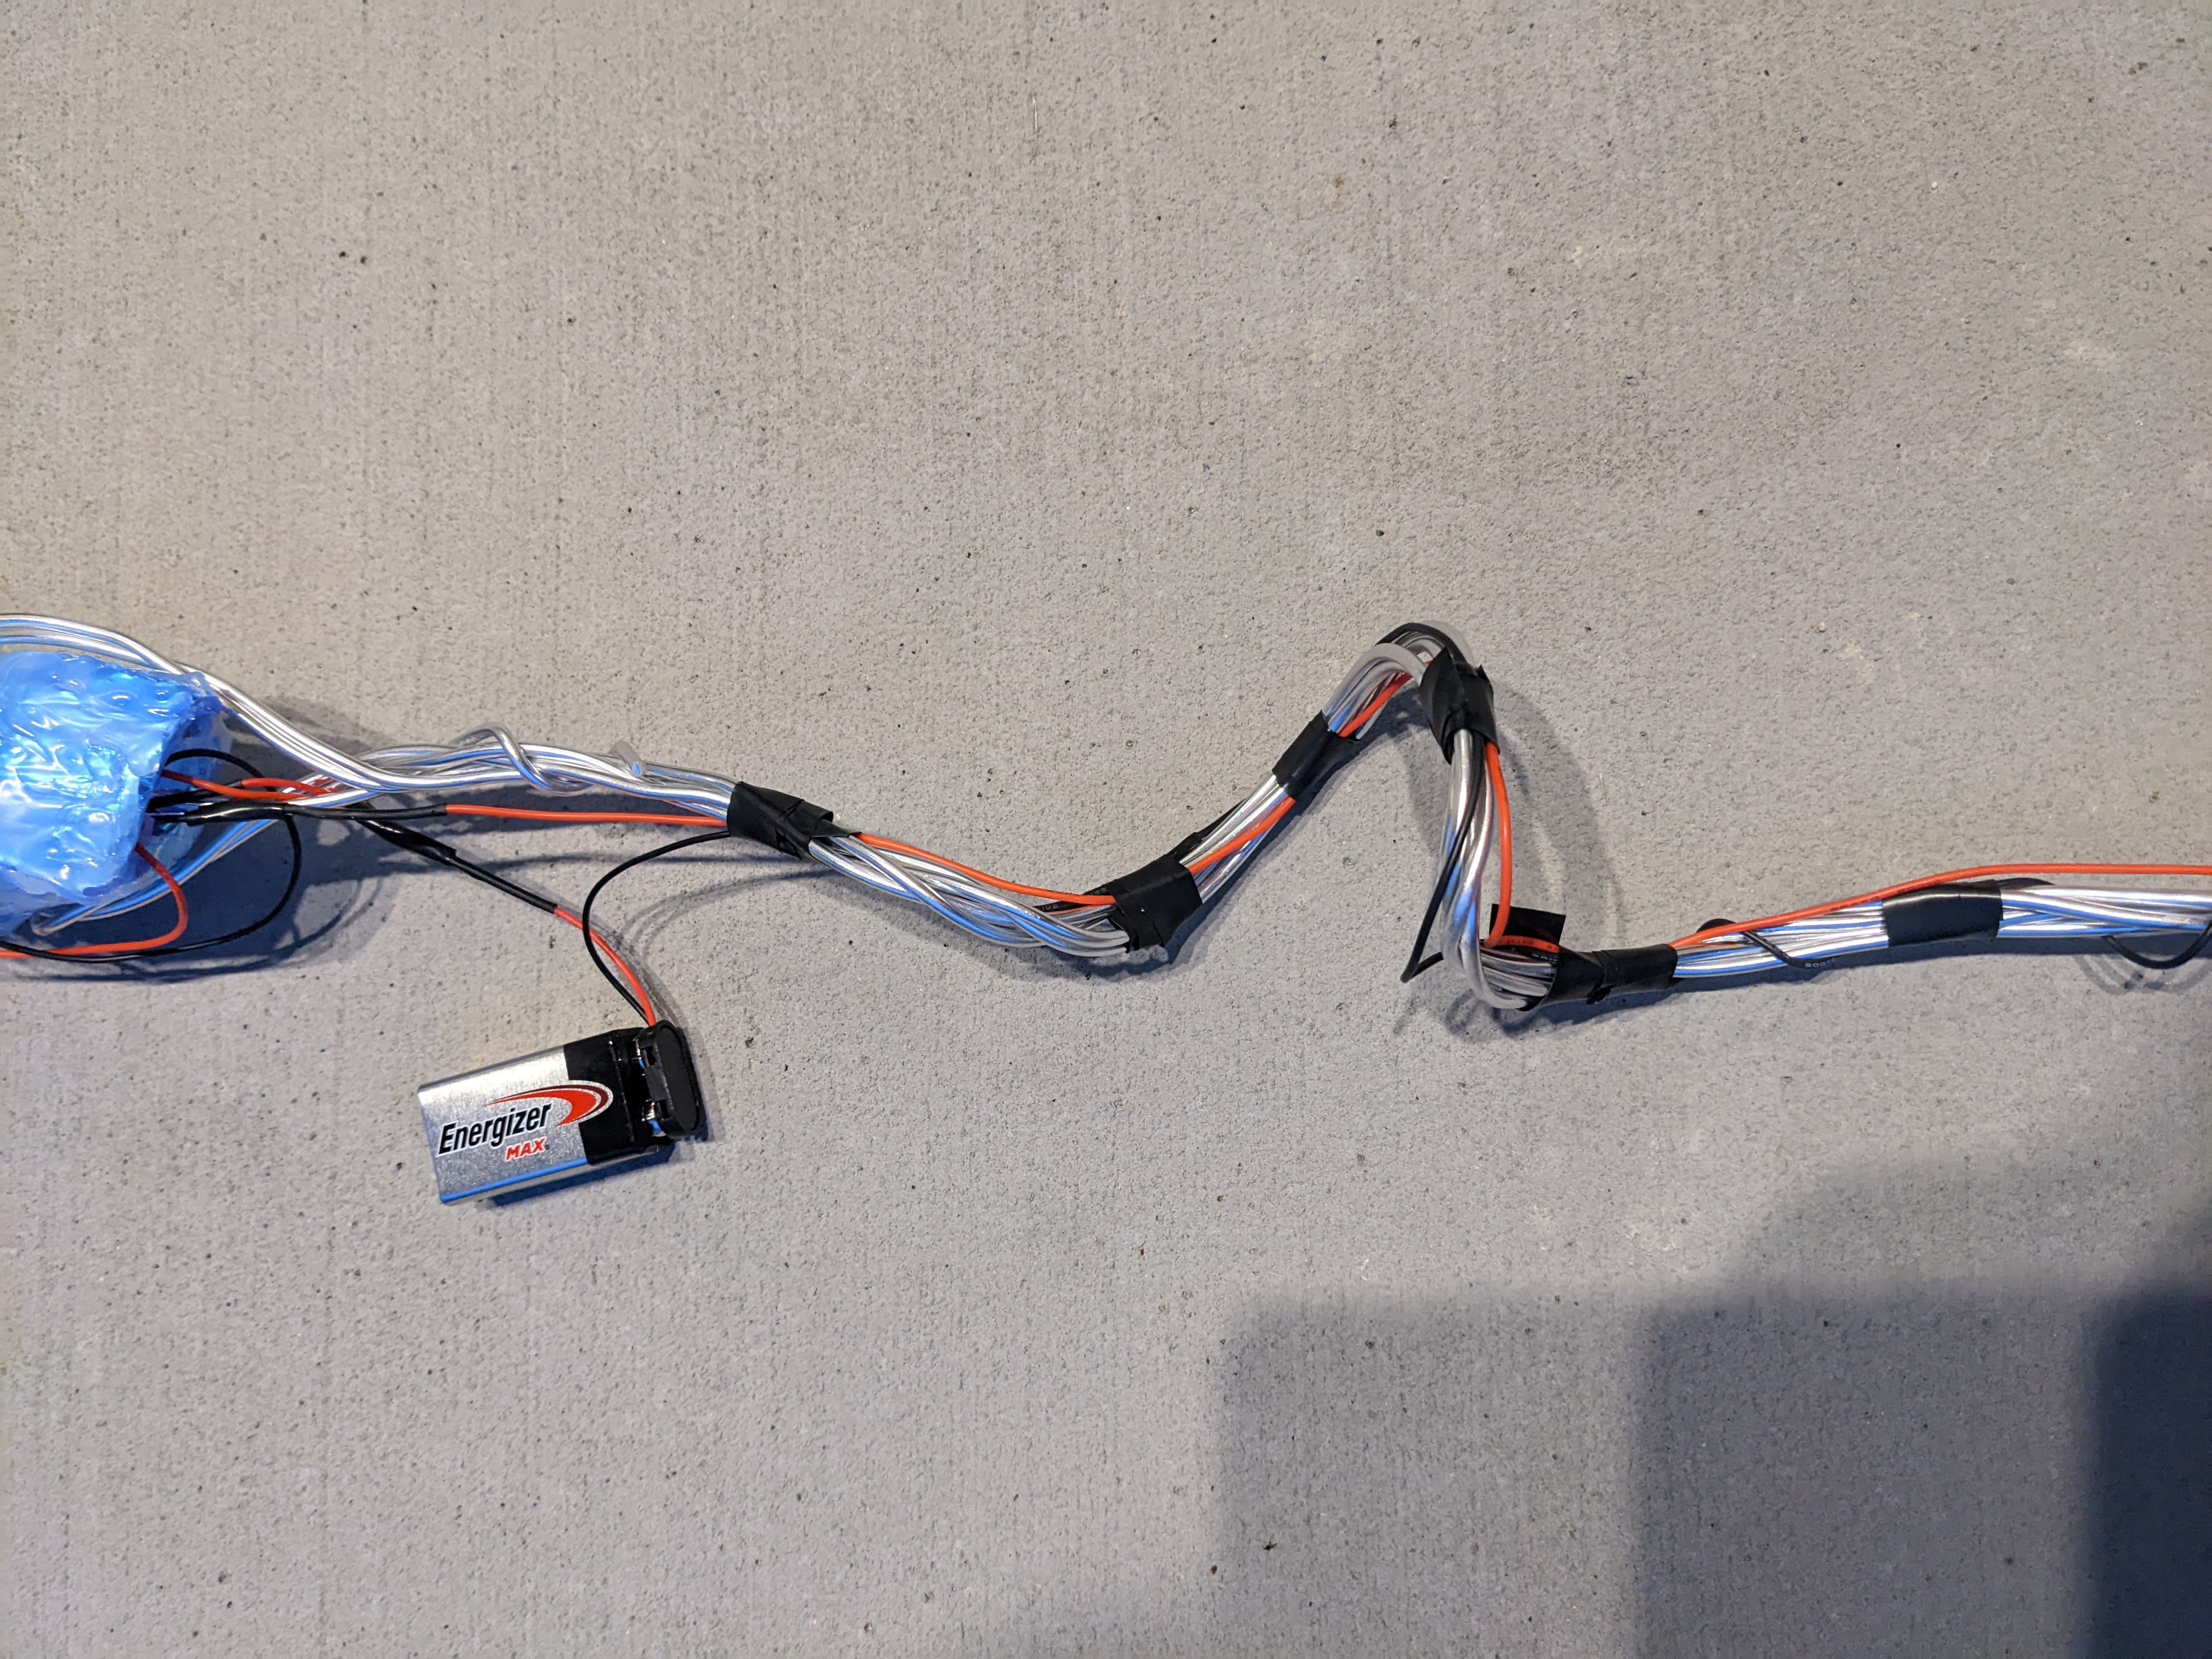
The circuit consisted of two parallel lines: One with 3 blue 3V LEDs, the other with 2 blue 3V LEDs and a 150ohm resister. all powered by a 9V battery. While 9V batteries don’t last super long, I wanted to start off simple and just following Kamui’s book. This worked fantastically for what I needed. I also included a button that would be at the bottom of the staff.
Putting it all together
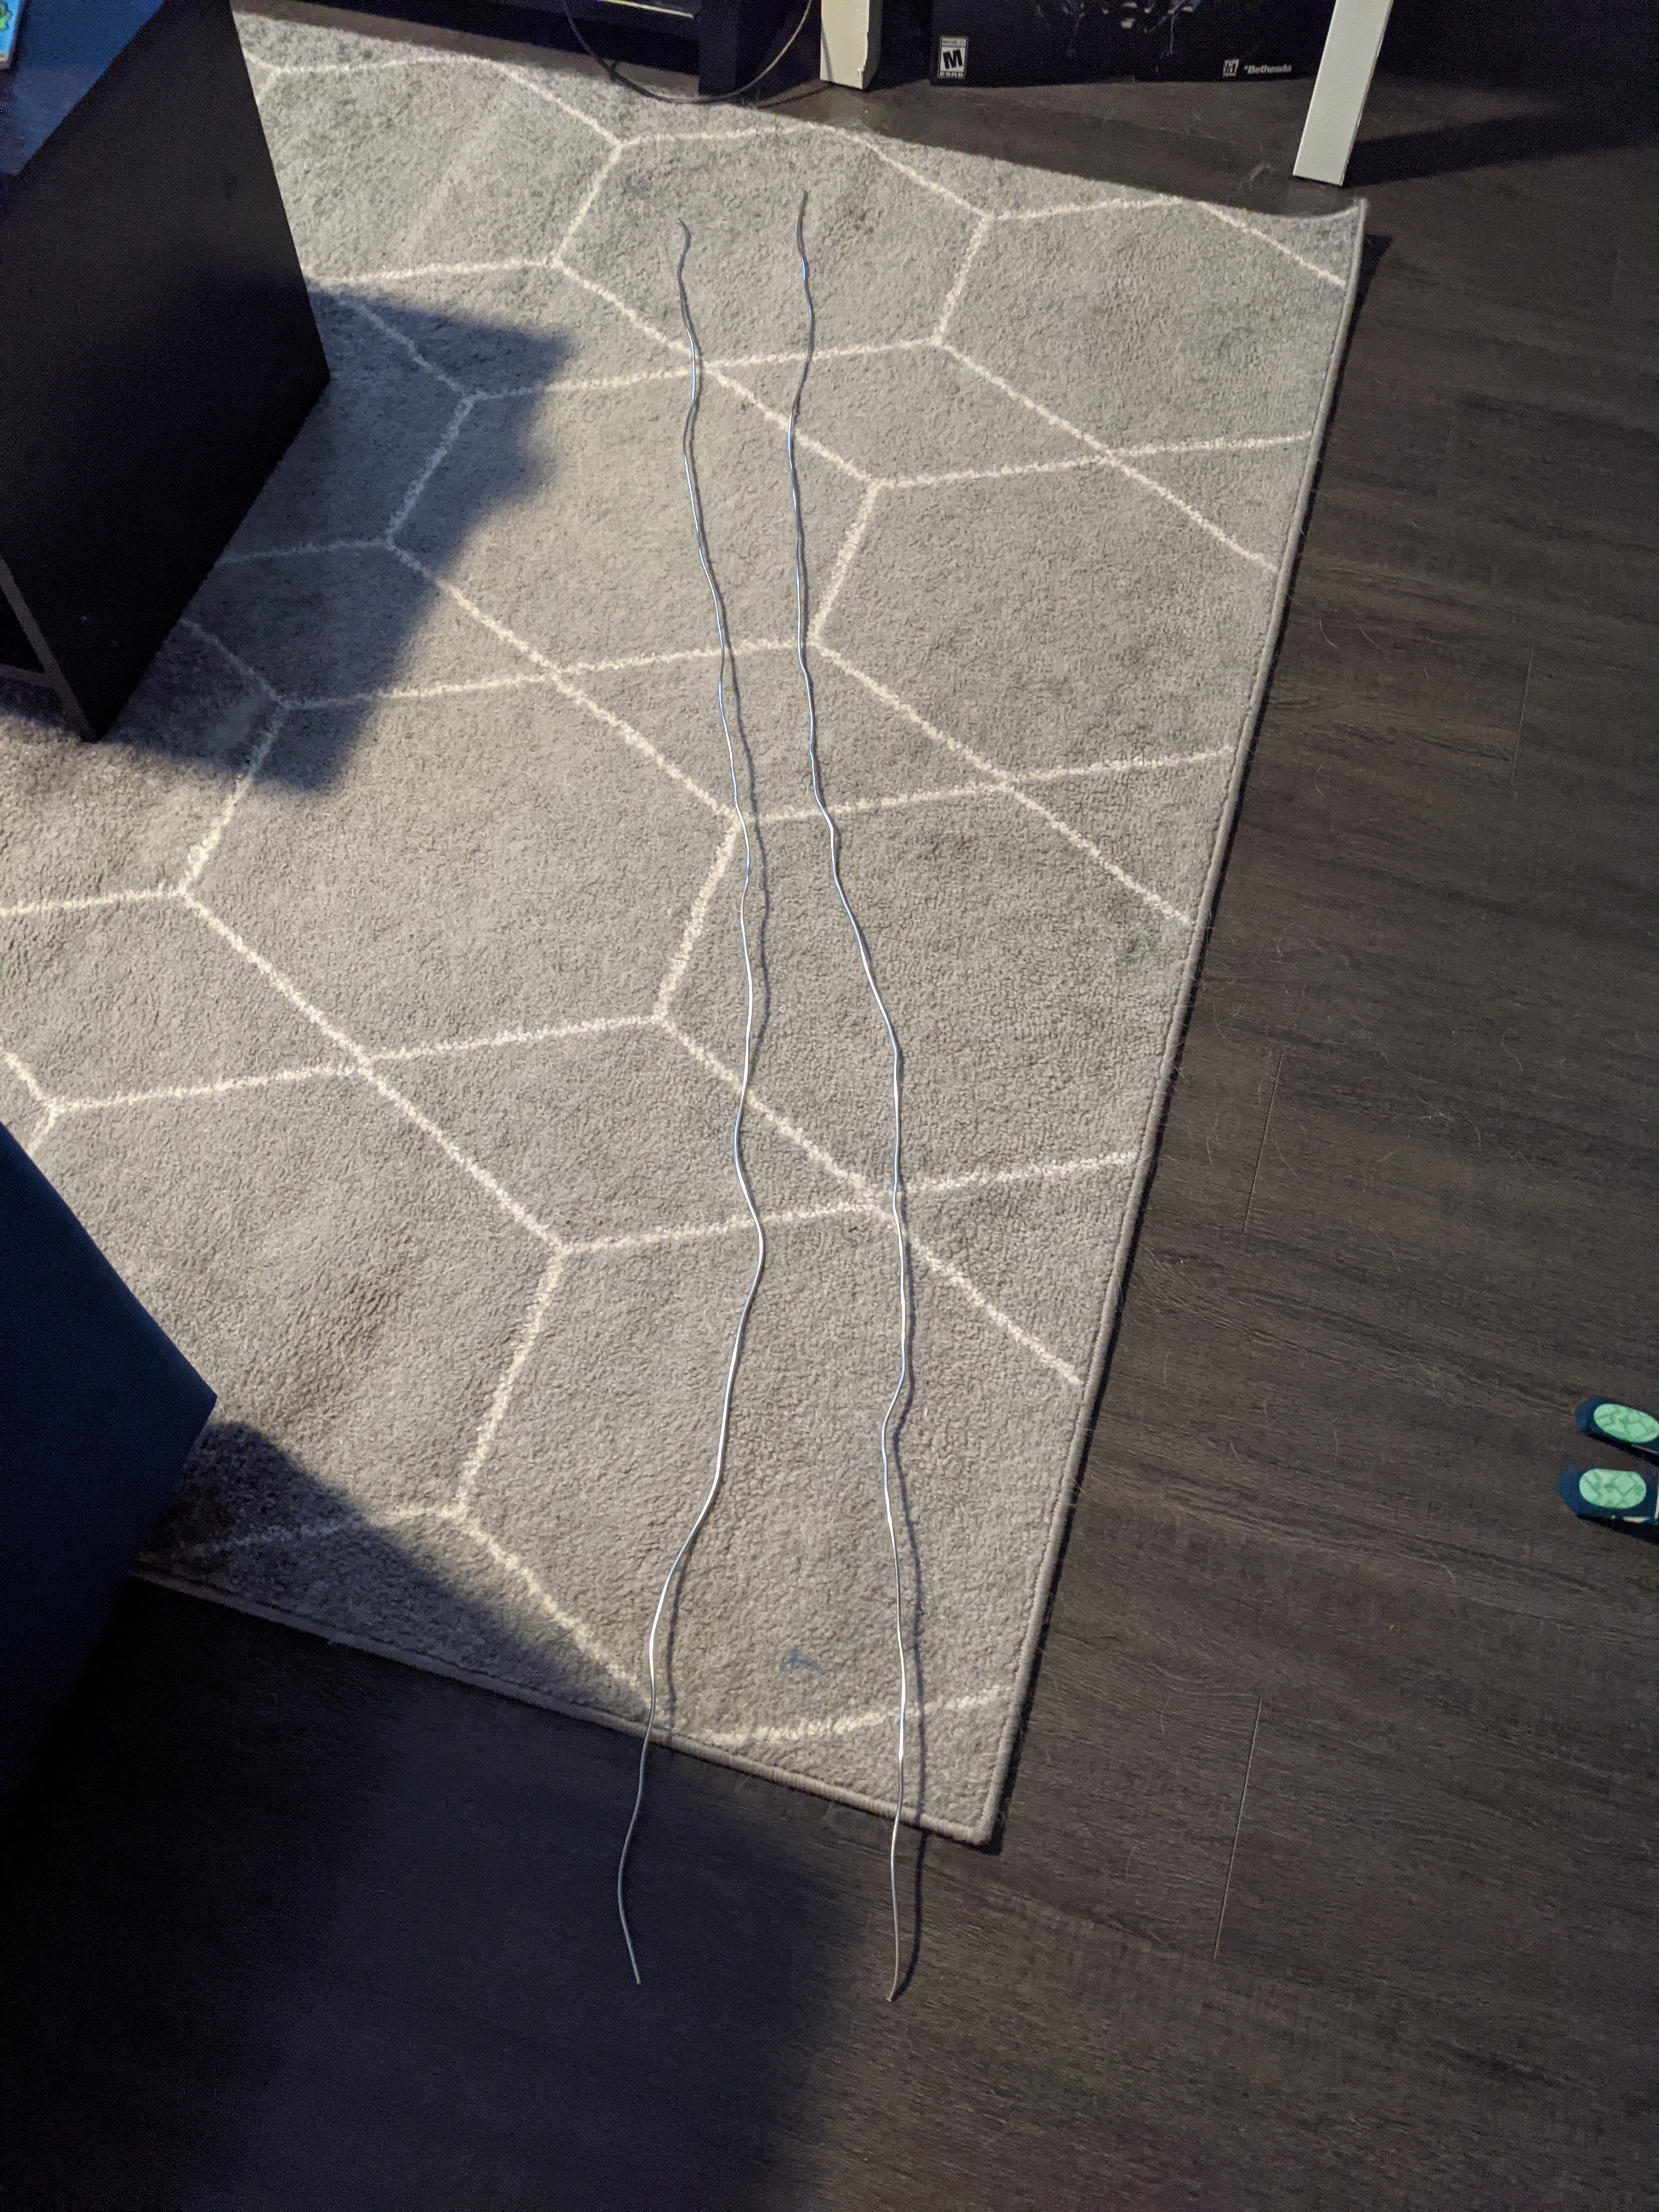
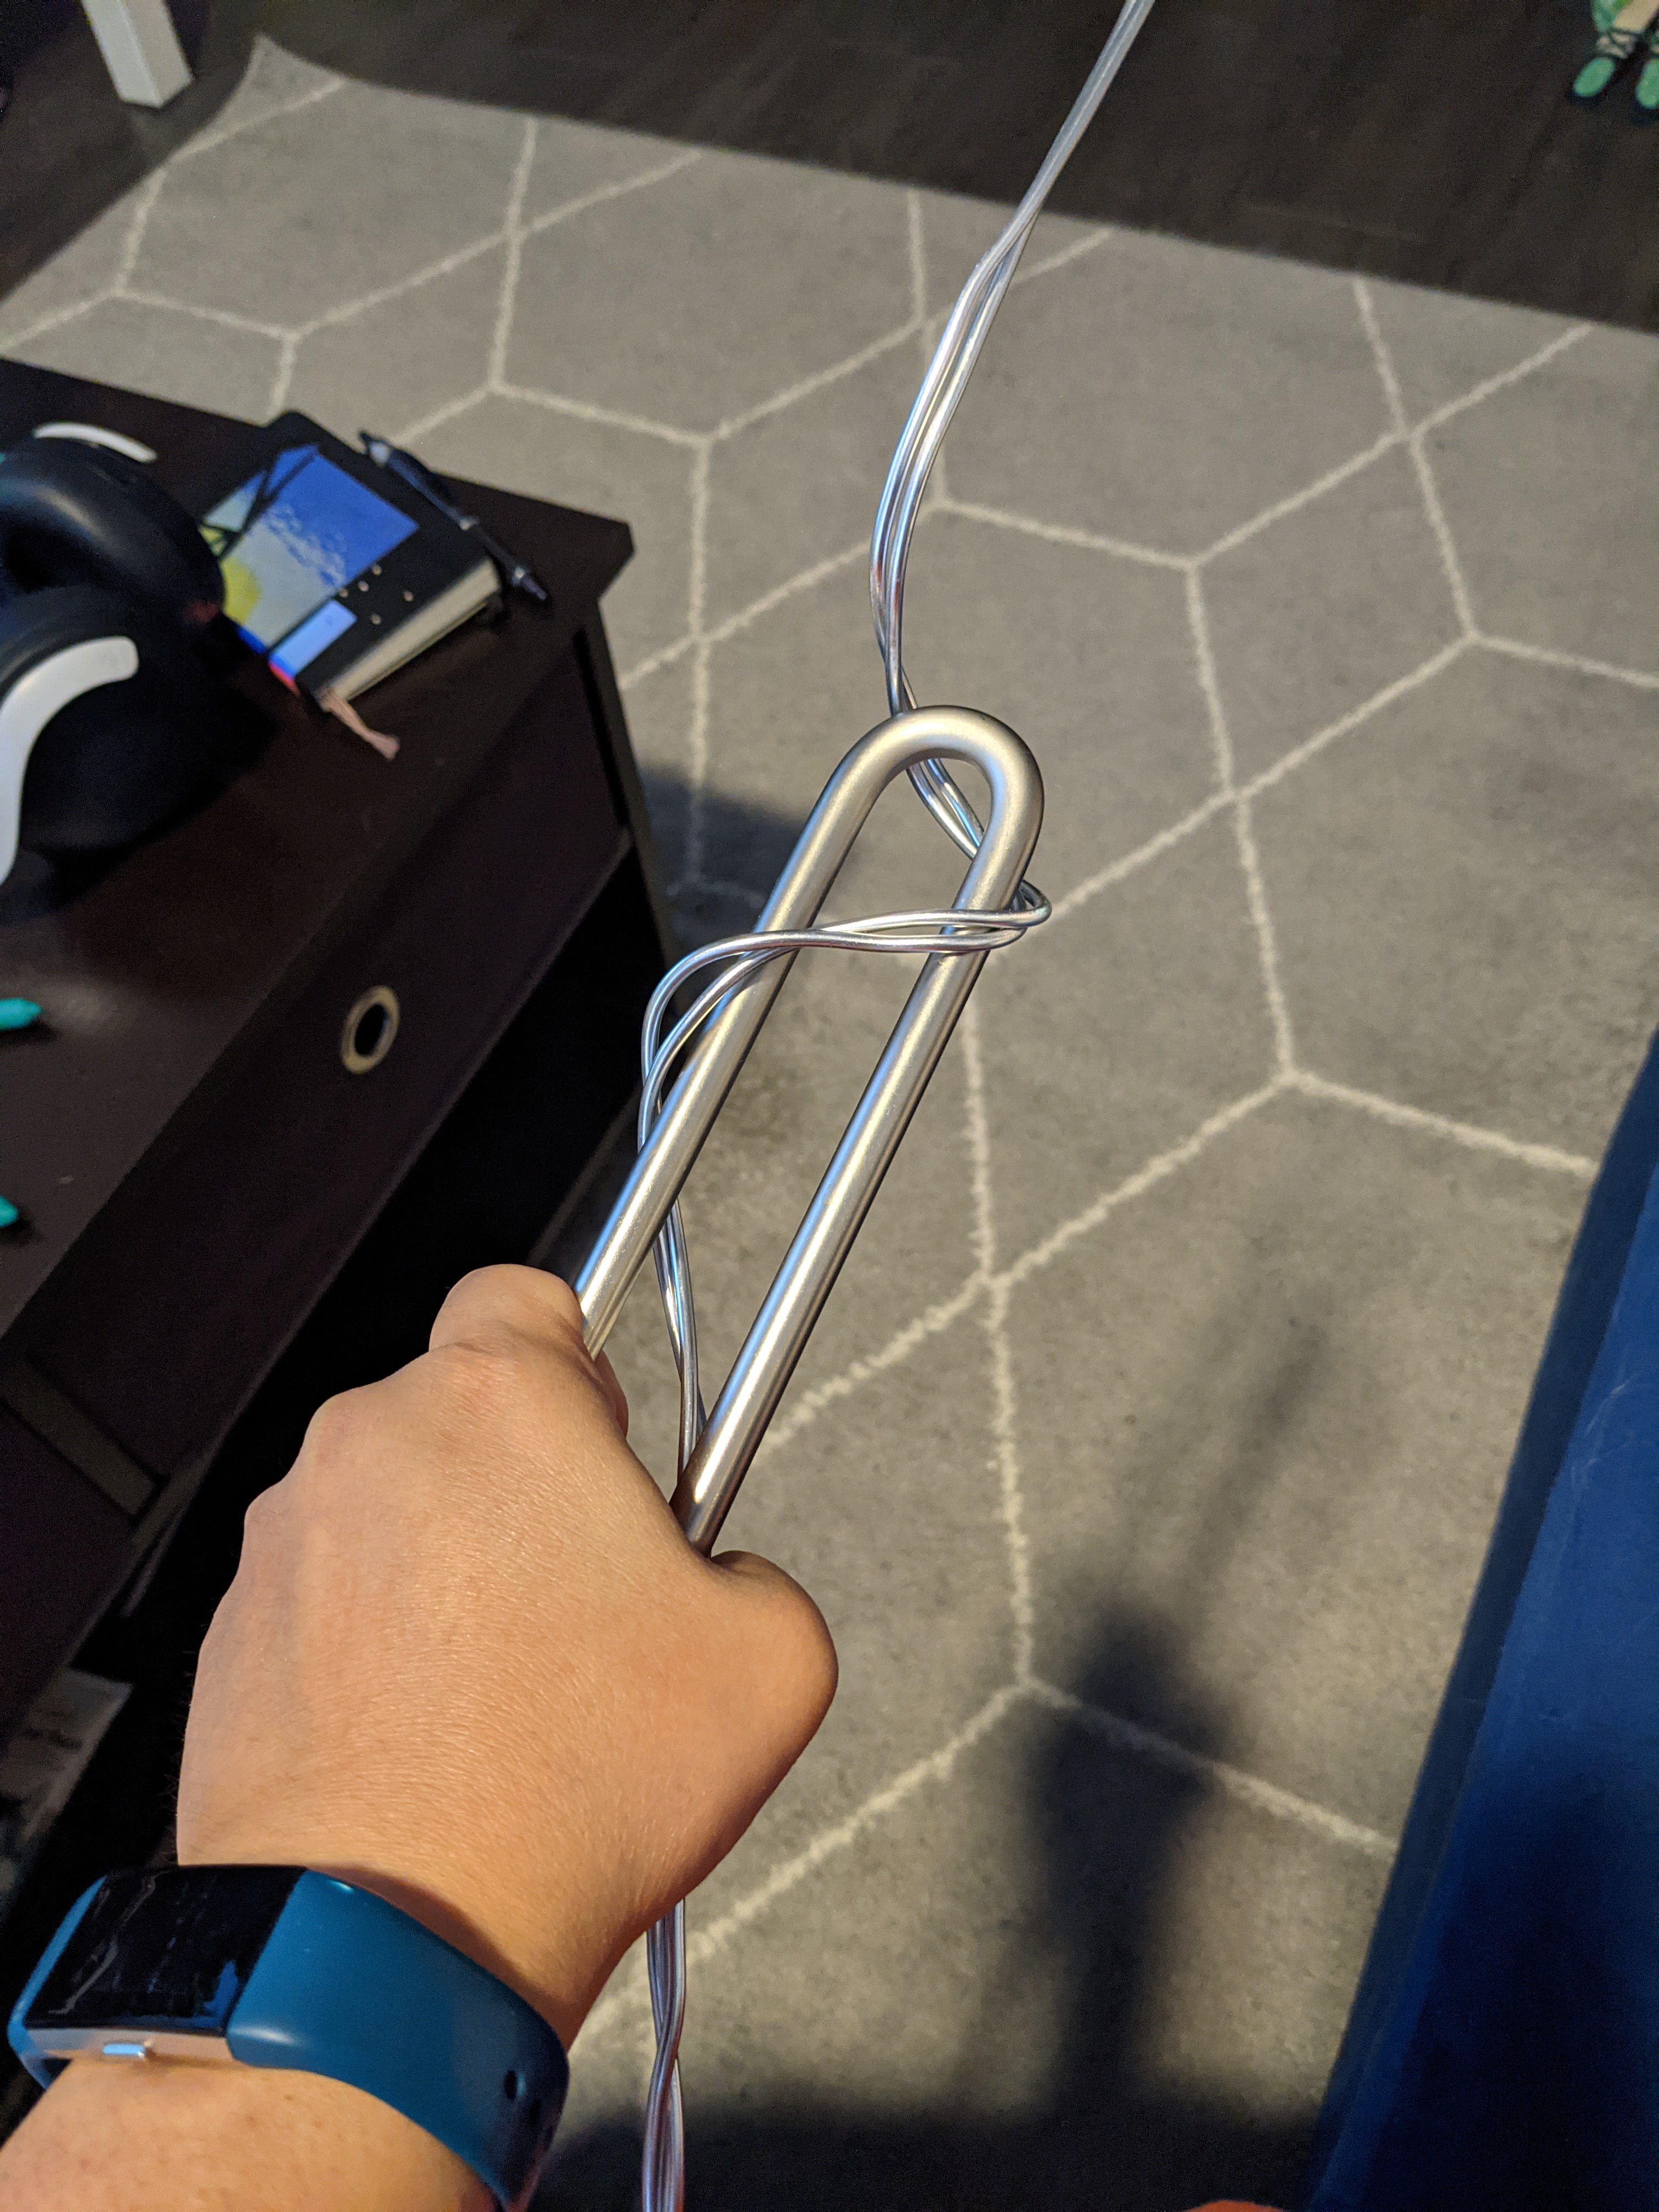
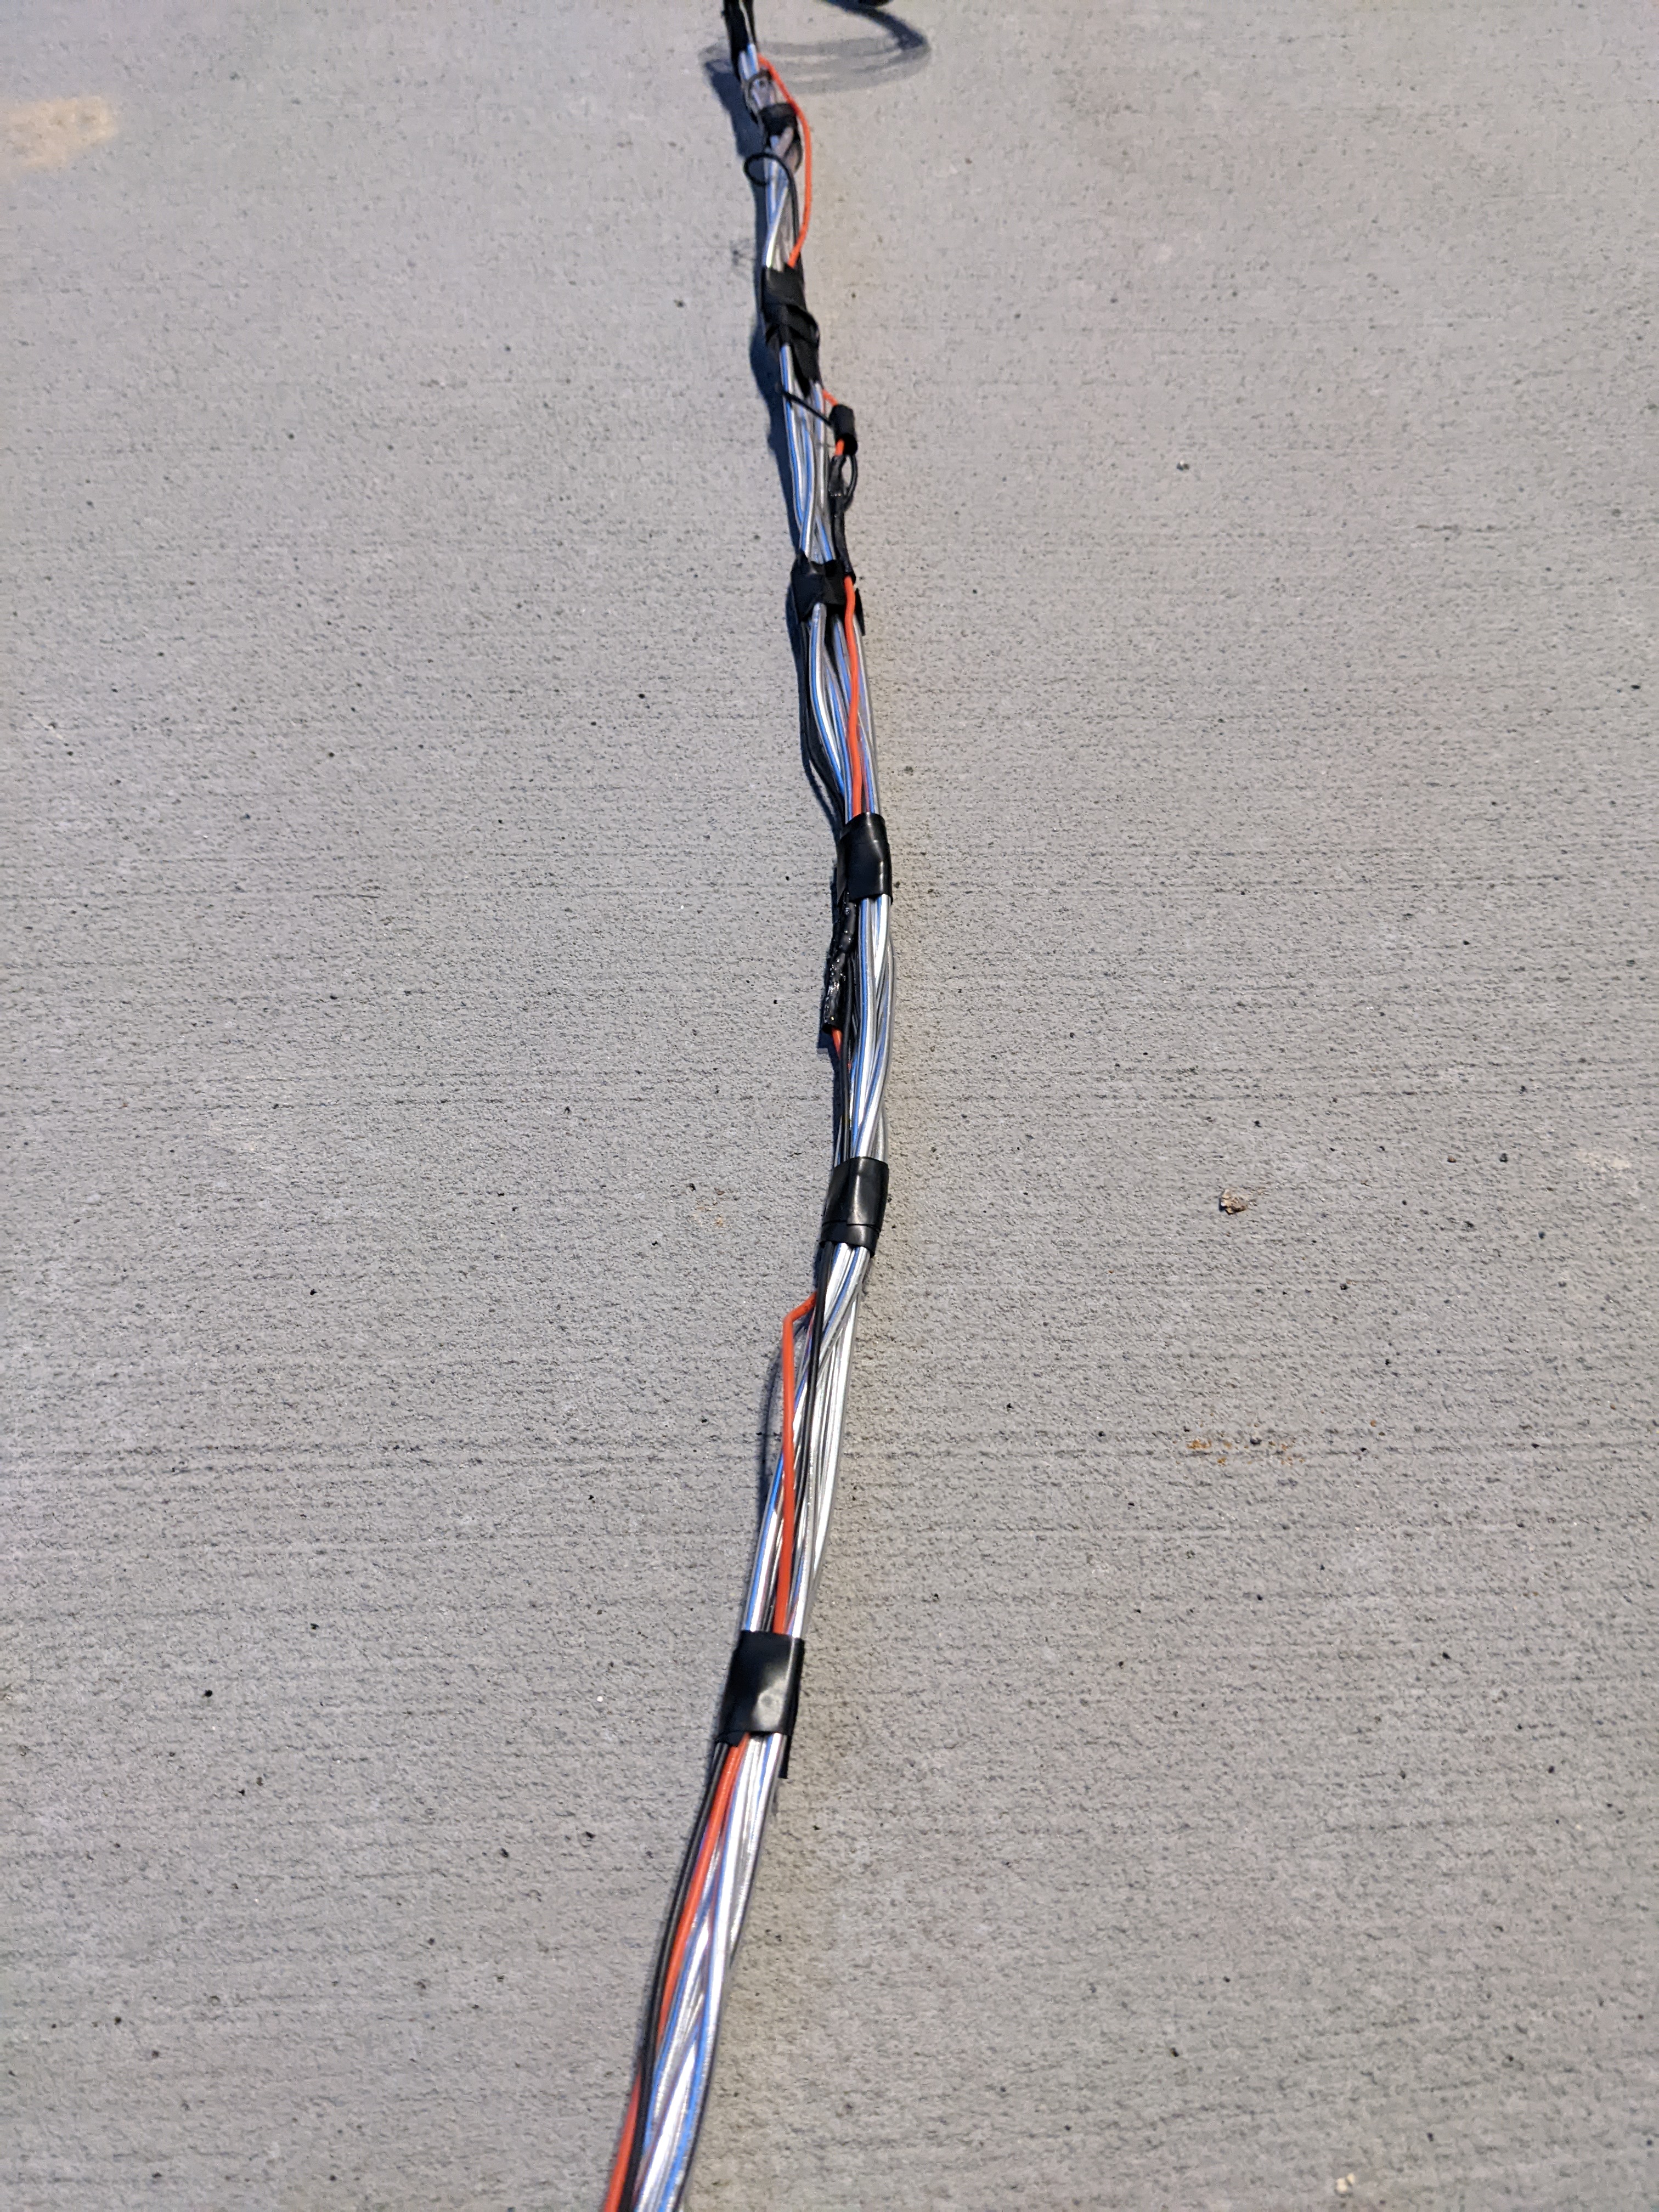
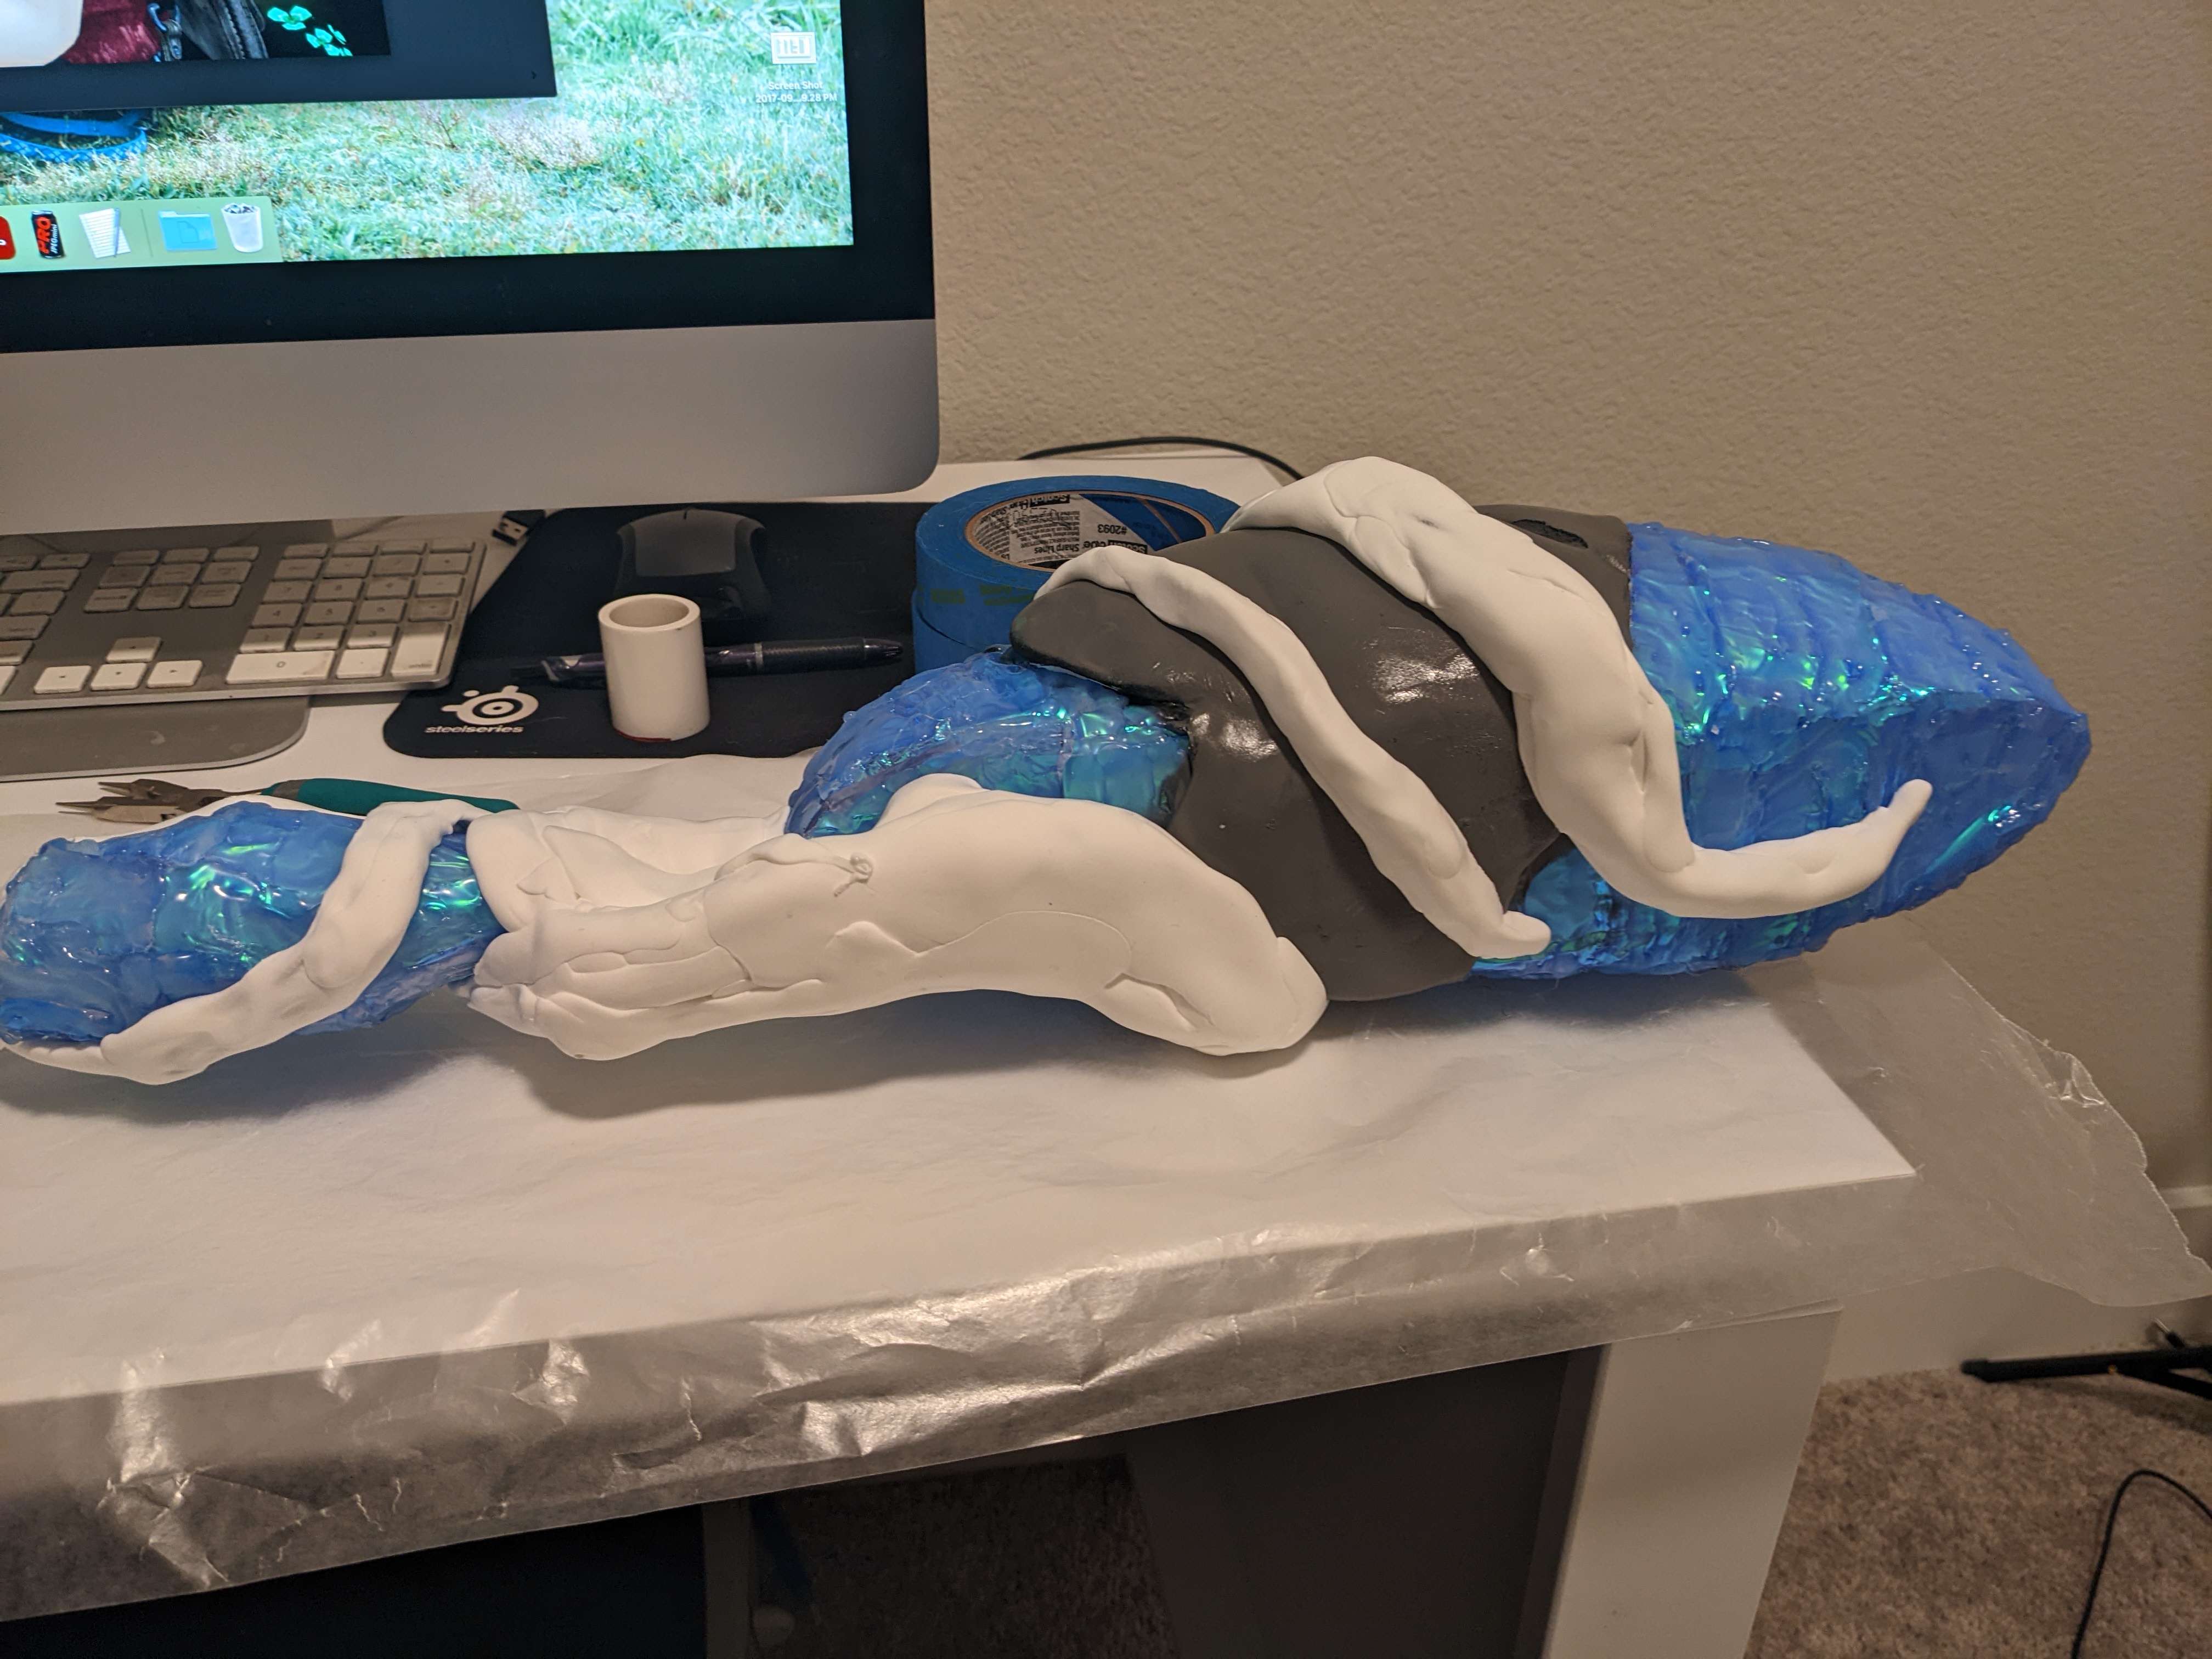
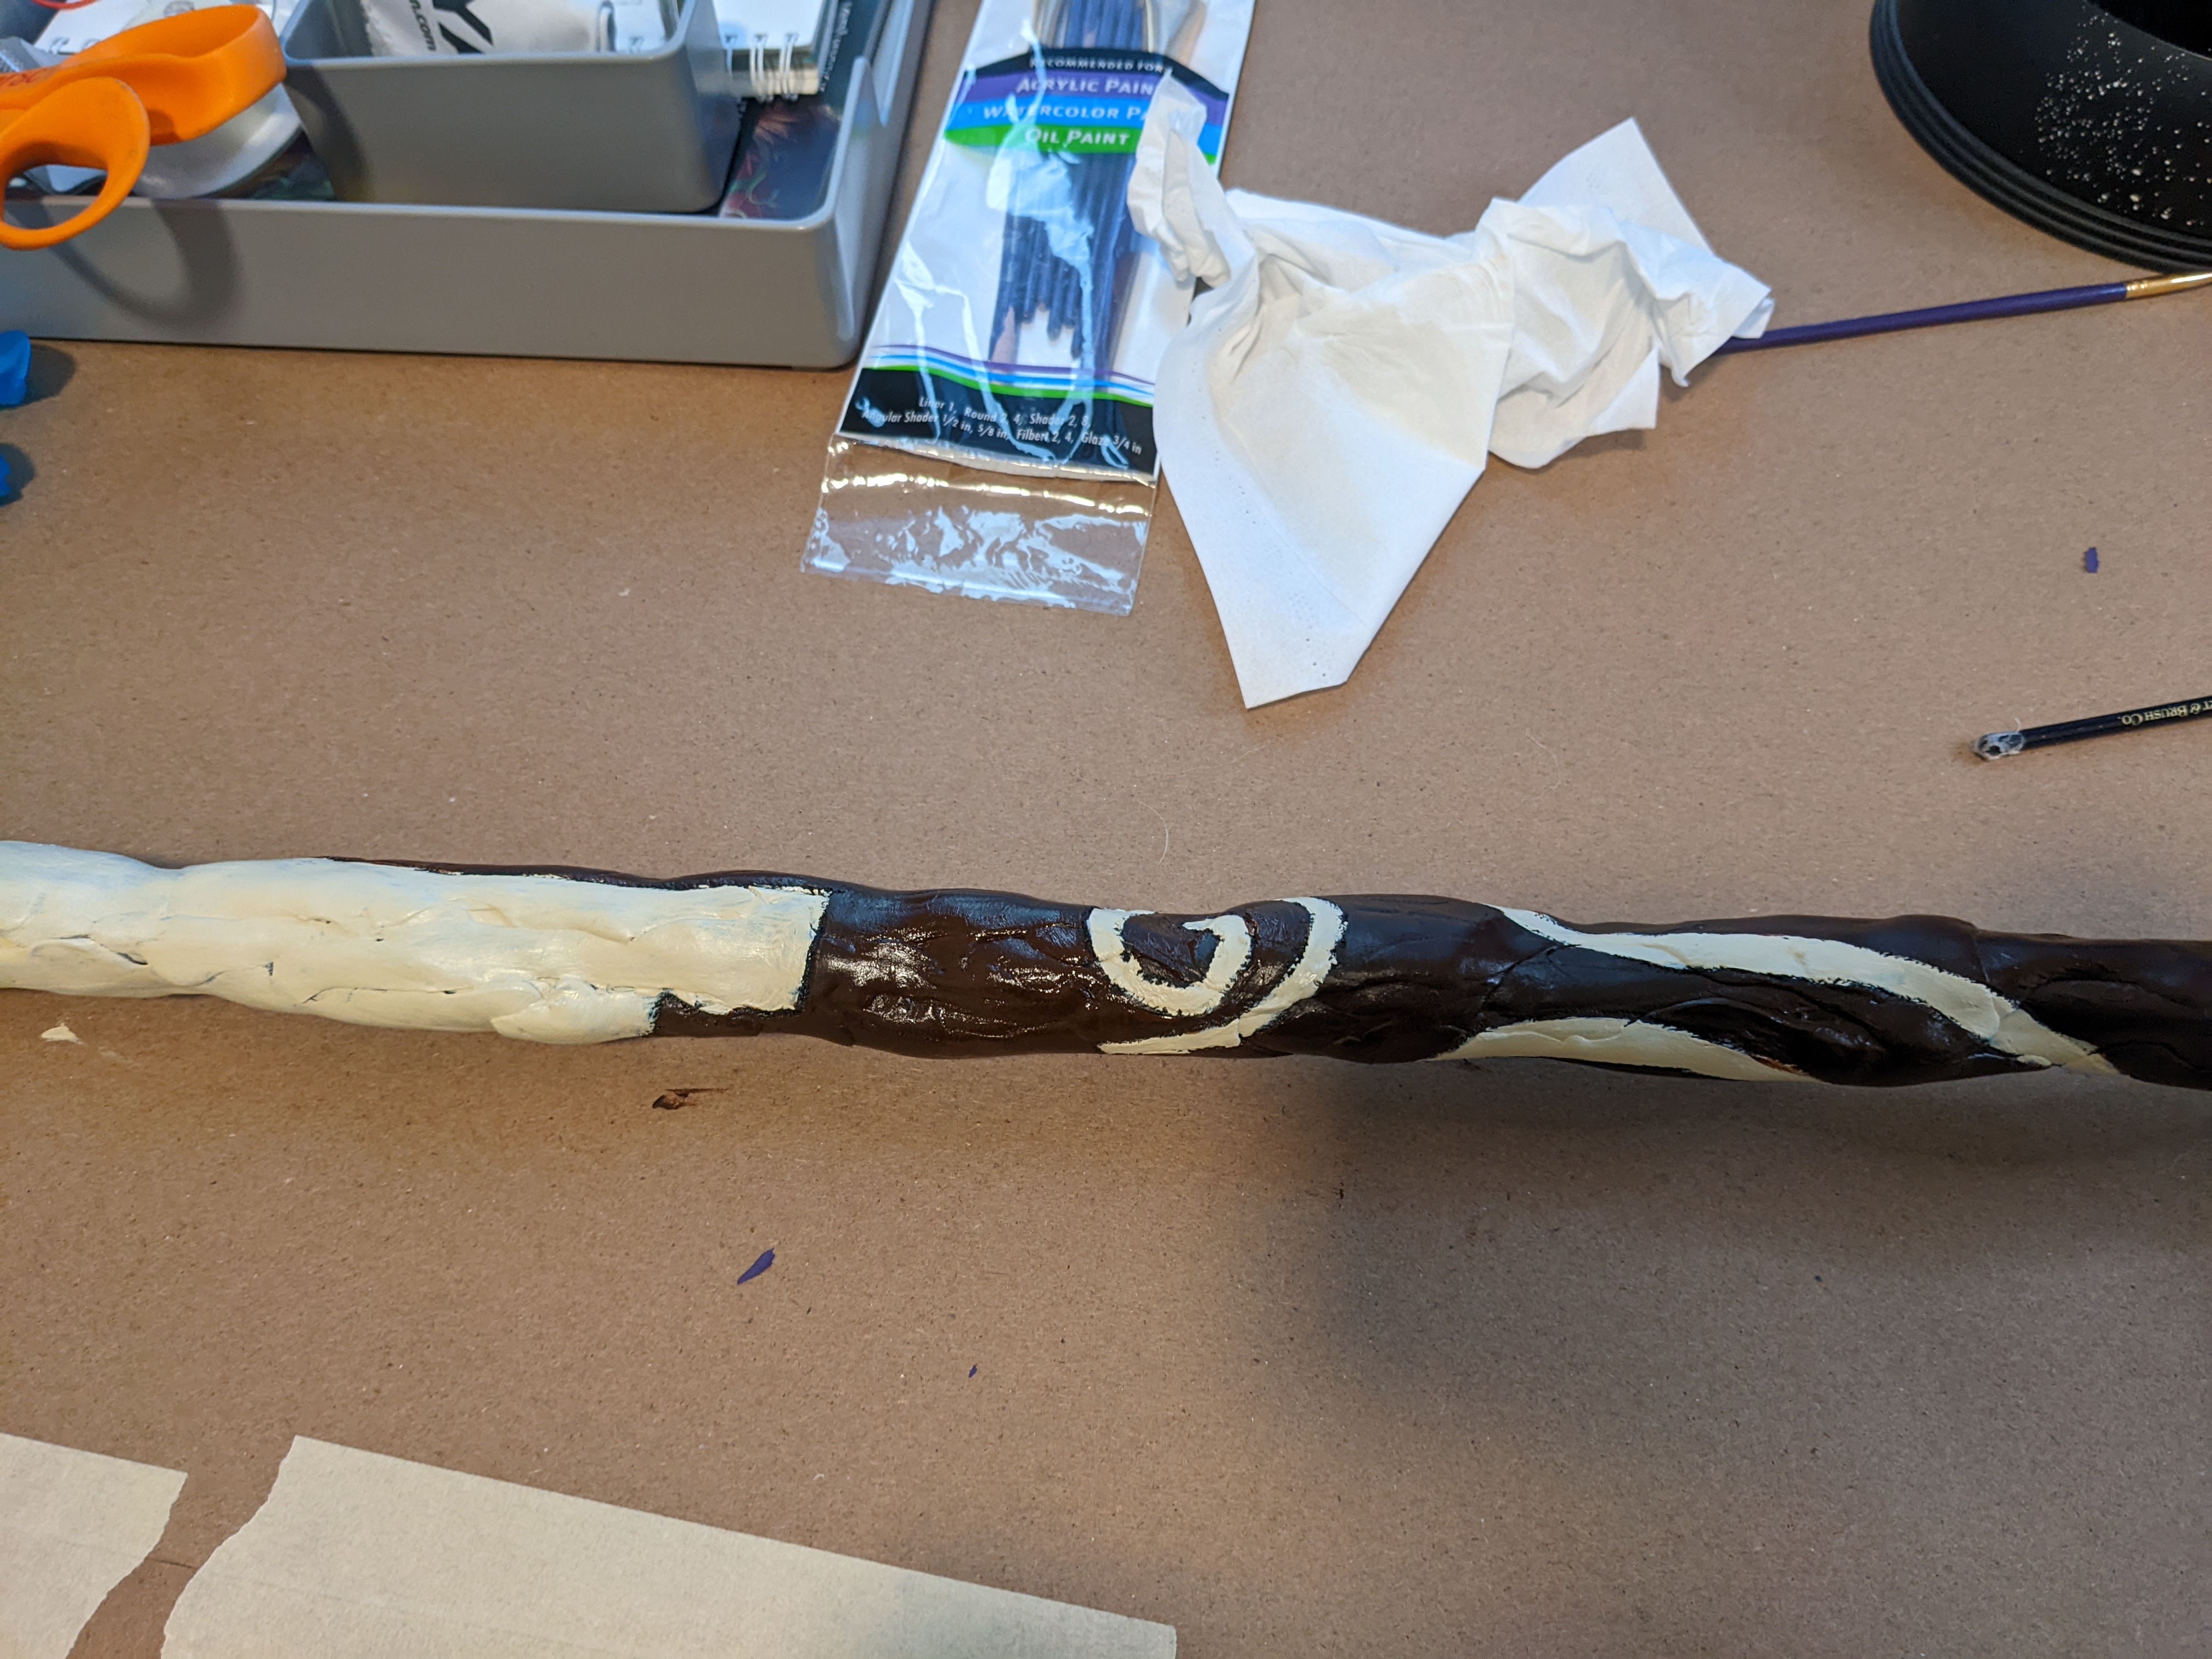
The base of the staff is aluminum wire, 8mm guage. I cut out two very long pieces and then wrapped them around each other. Then, referencing the in-game model, started to bend the wire to match the spiral shape of Kena’s staff. To help with that, I used a metal paper towel holder to help shape the wire and bend around it.
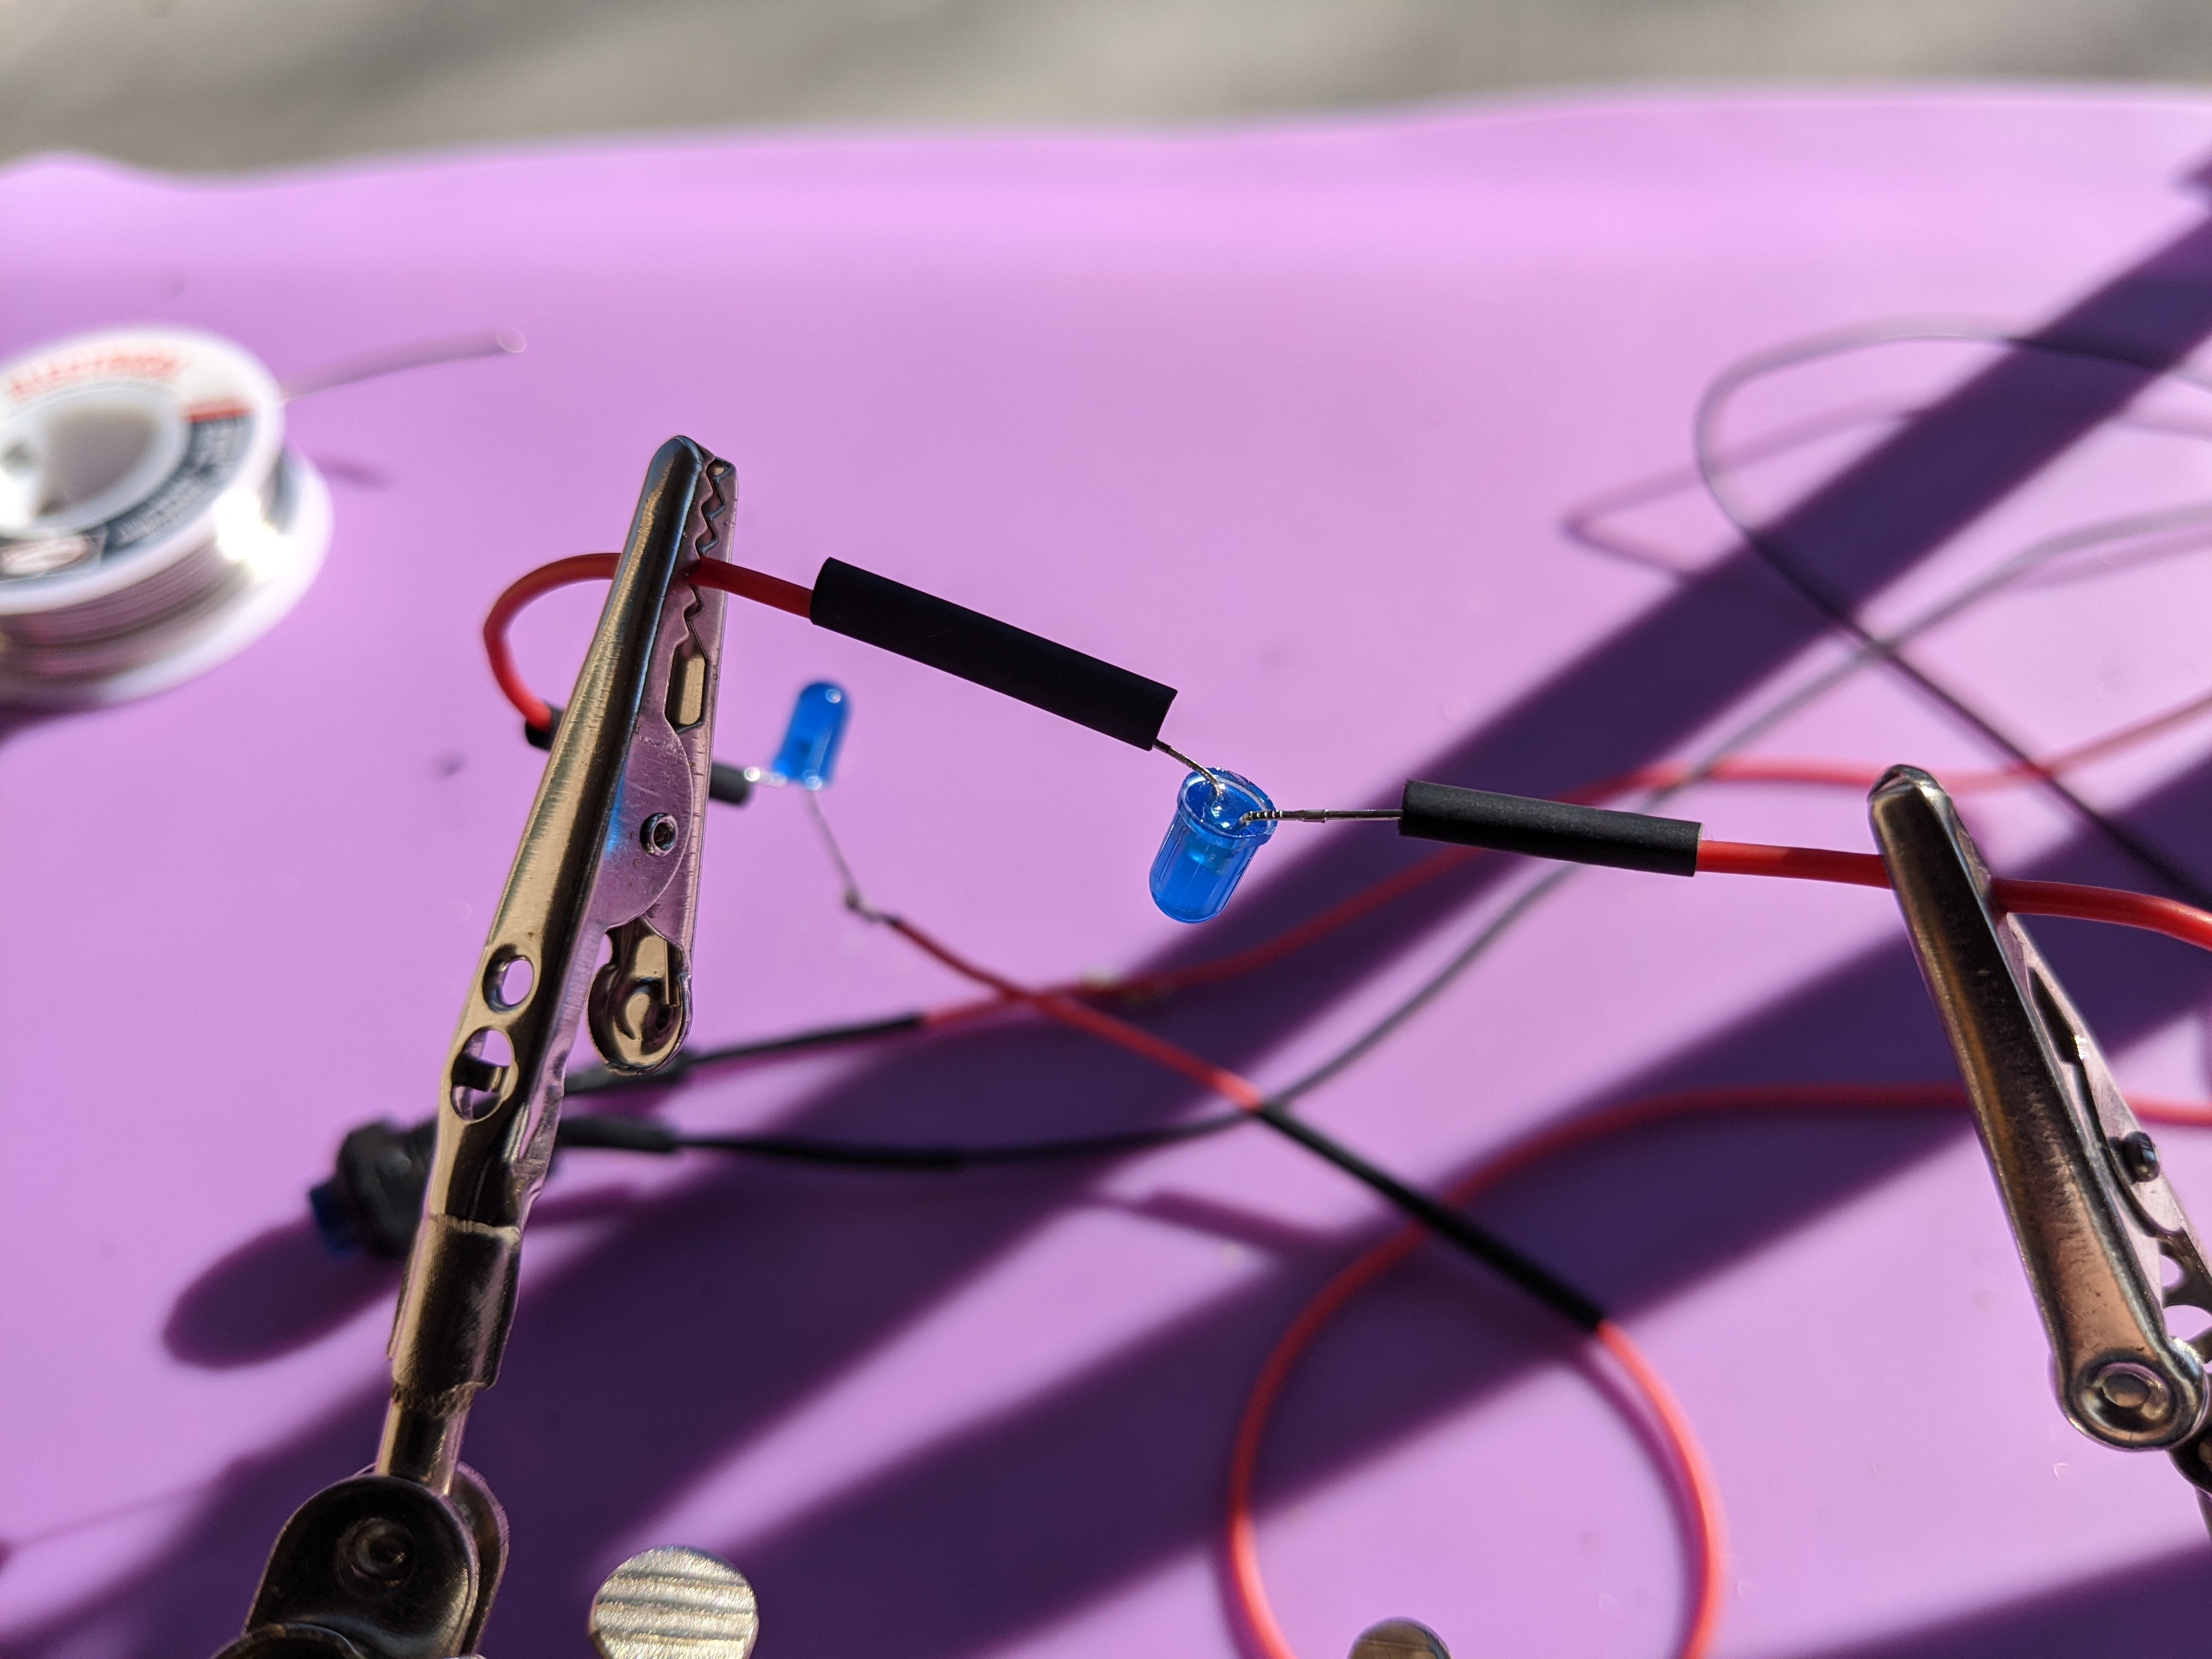
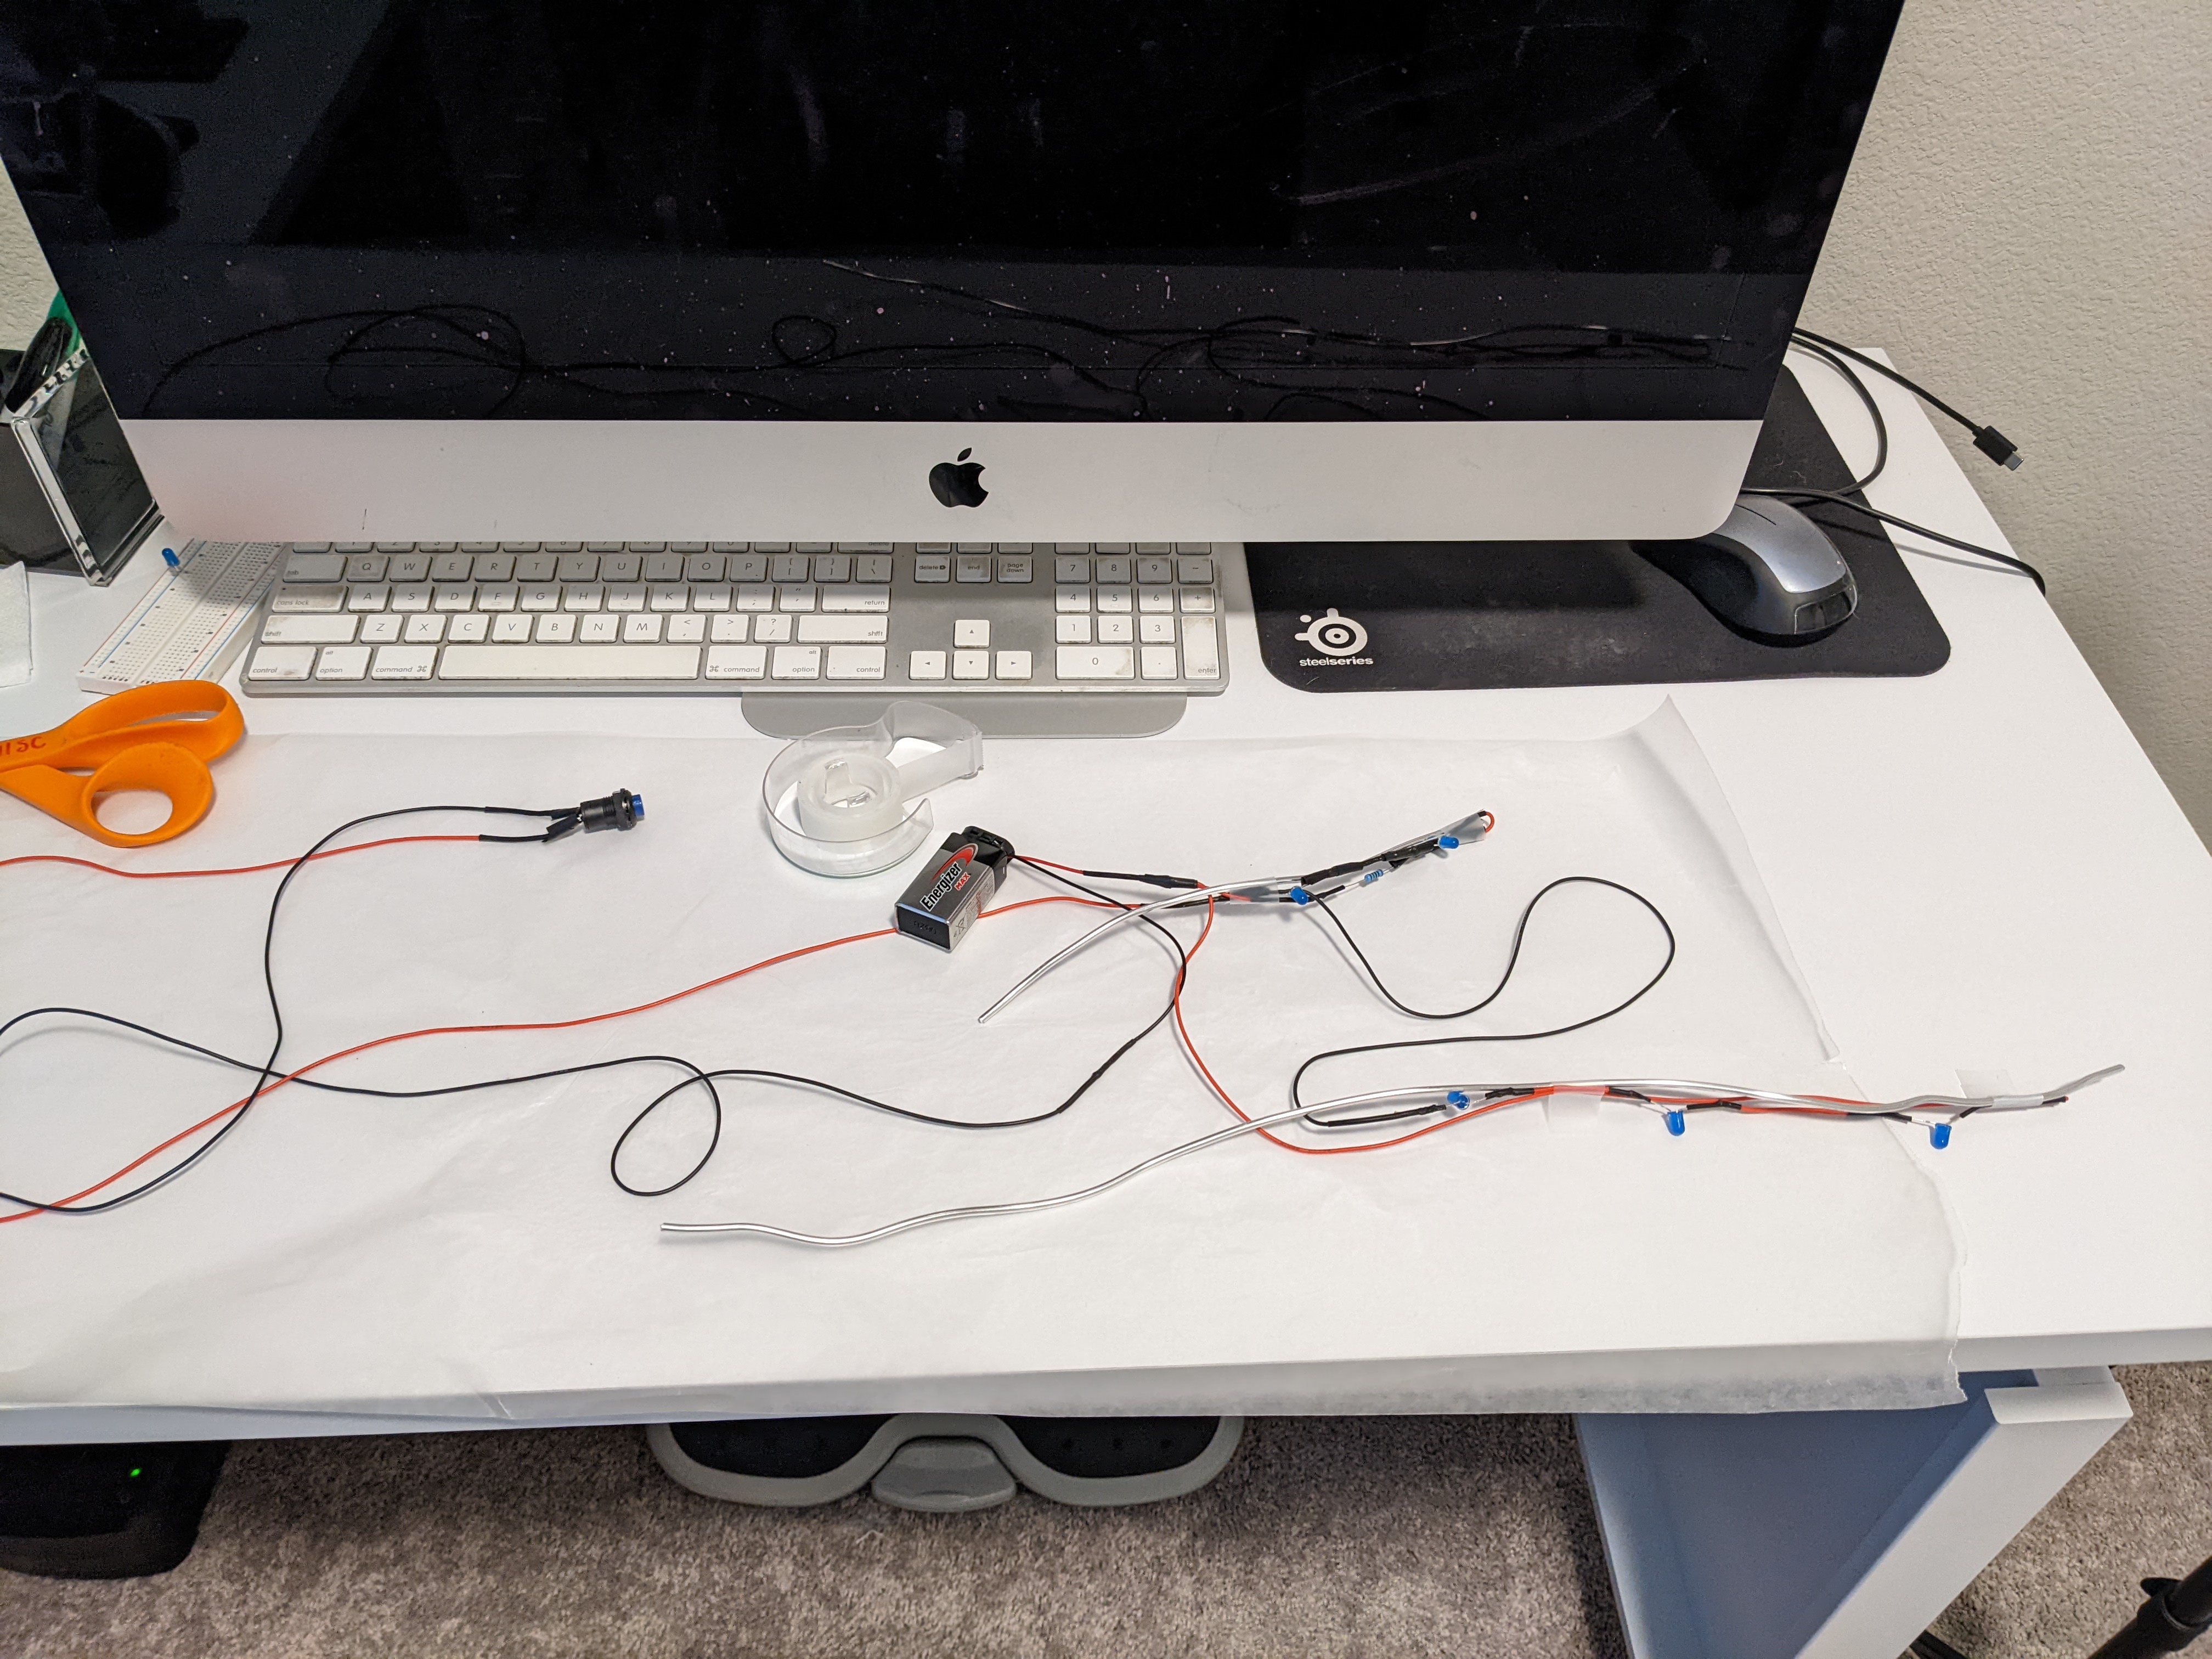
After I had made the crystals, I realized that I would probably need some more support, so I added 2 more lengths of wire around the whole base. Inserting the lights was a mater of taping the circuit around a small strand of aluminum wire and shoving the wire into the hollow crystal, I then wrapped the excess wire around the main wire base. This was so the lights stayed exactly where they should and would always be perfectly spaced out.

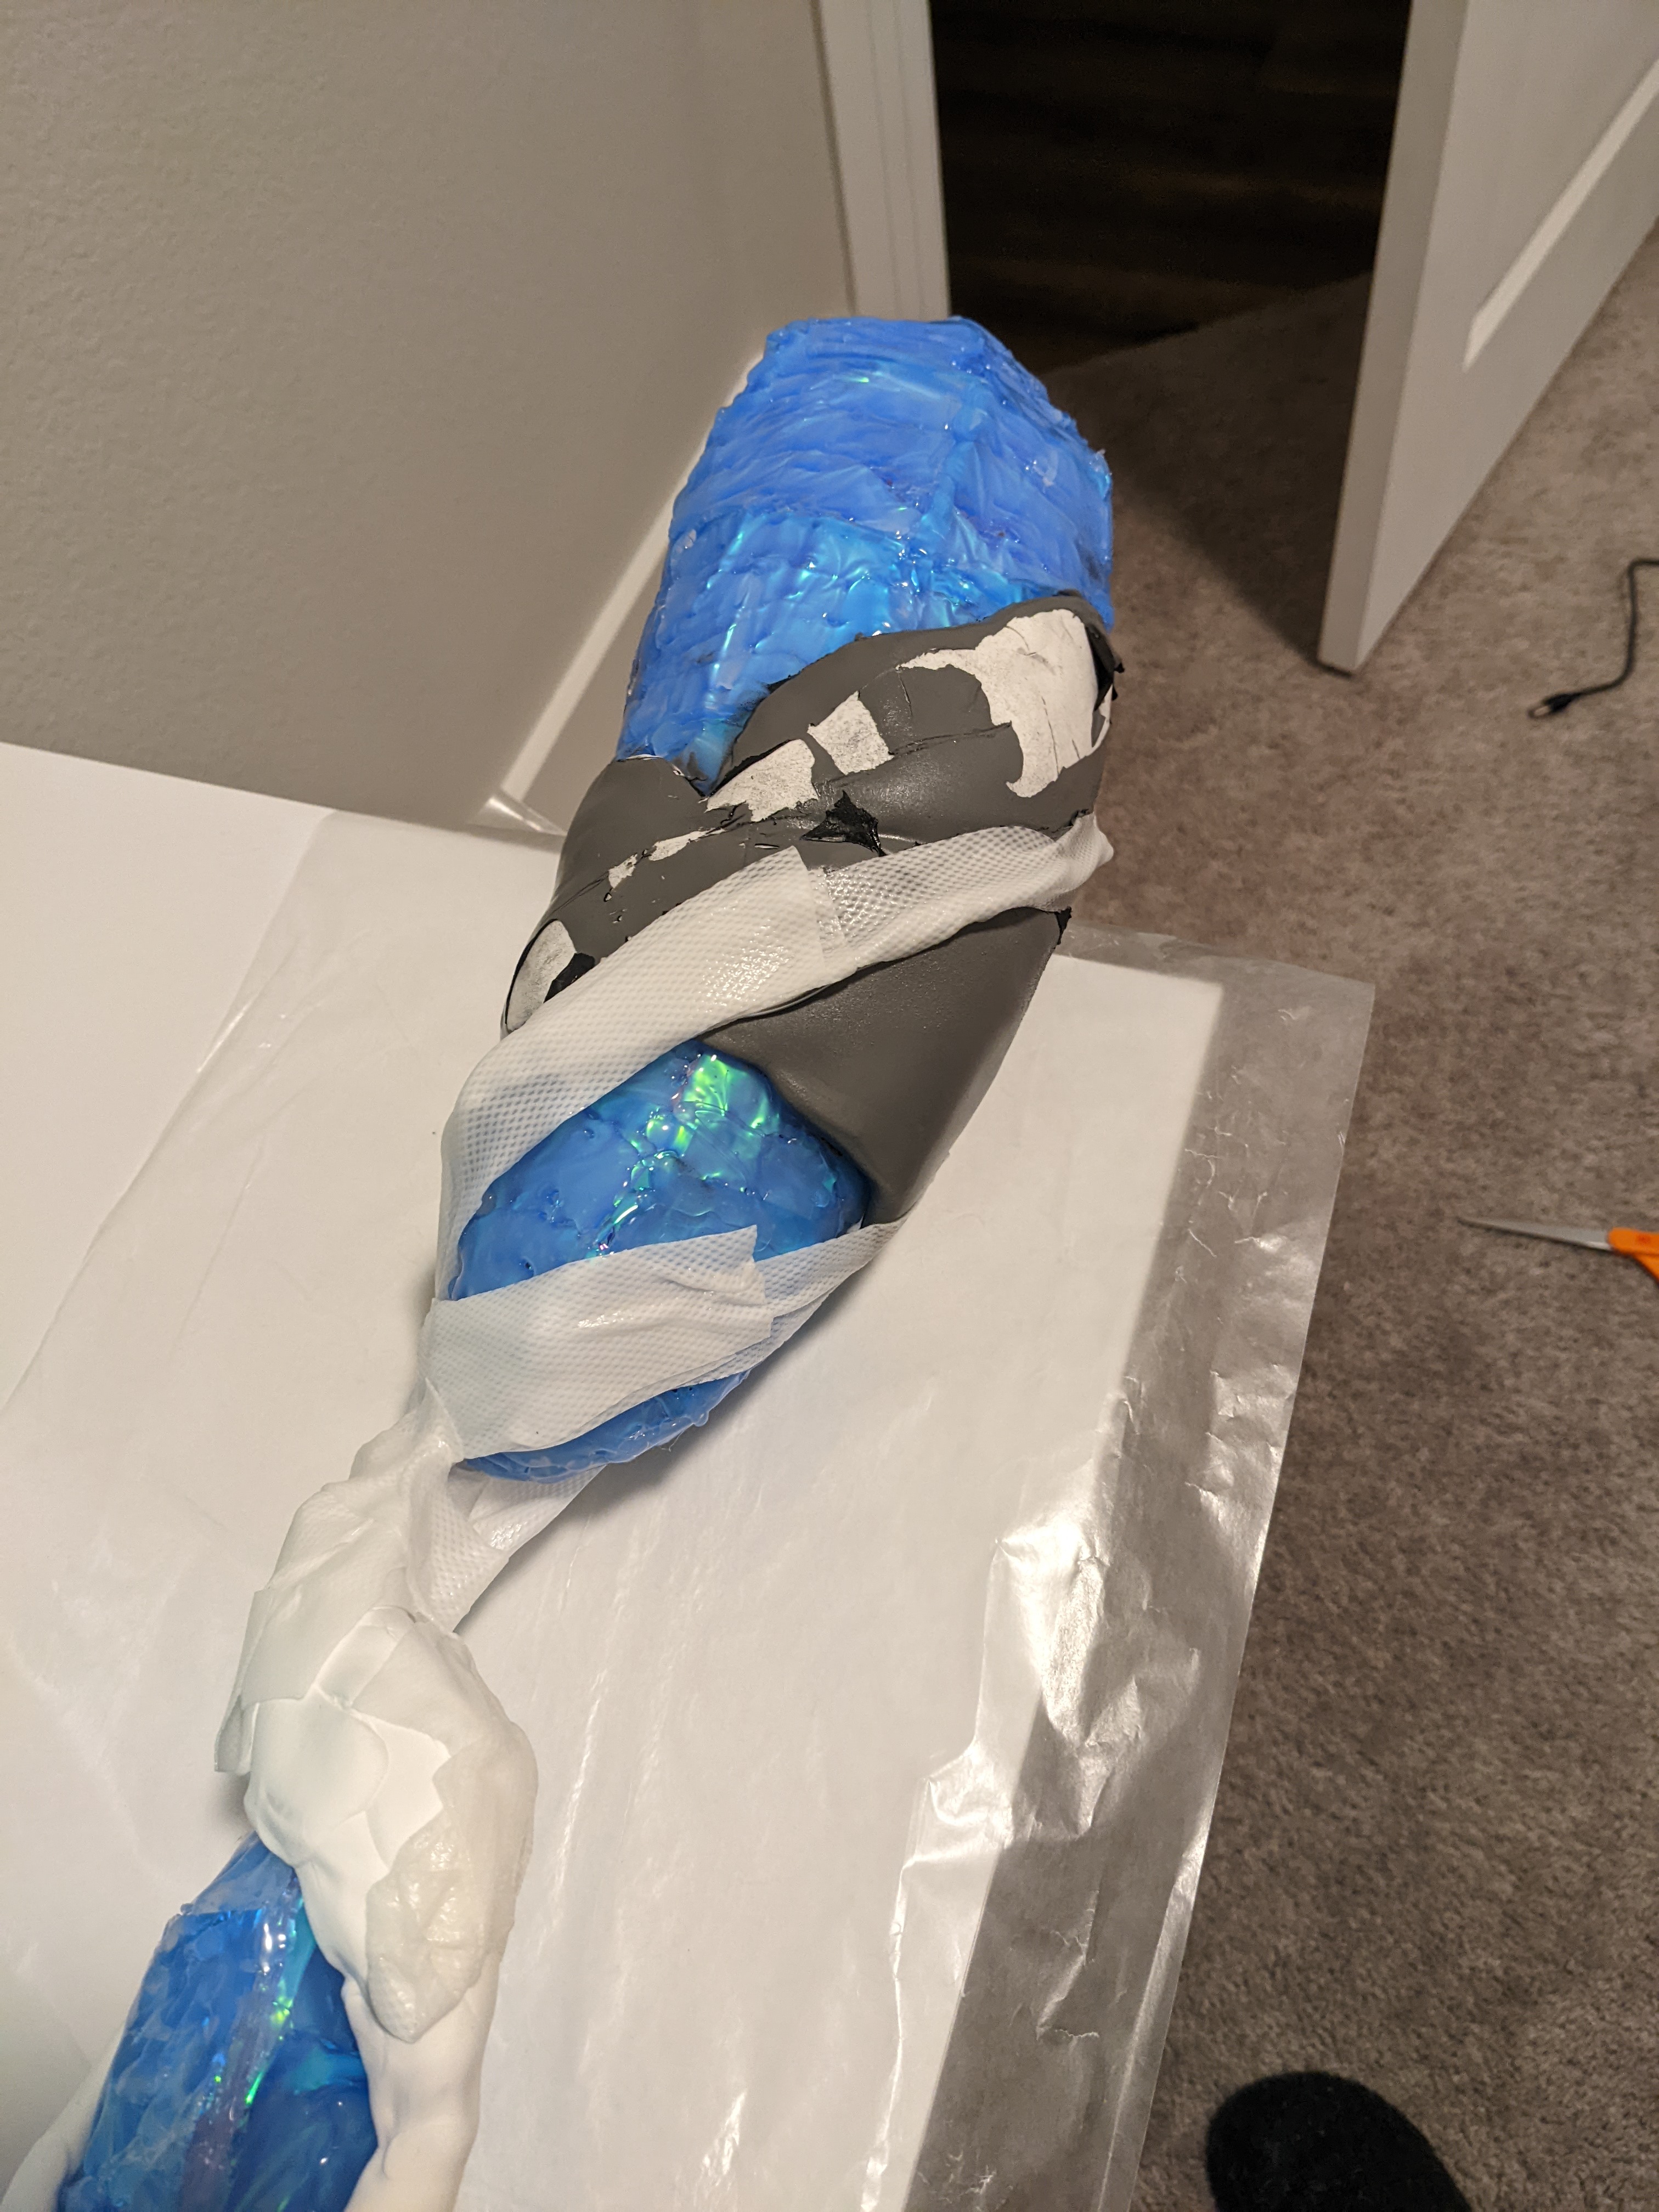
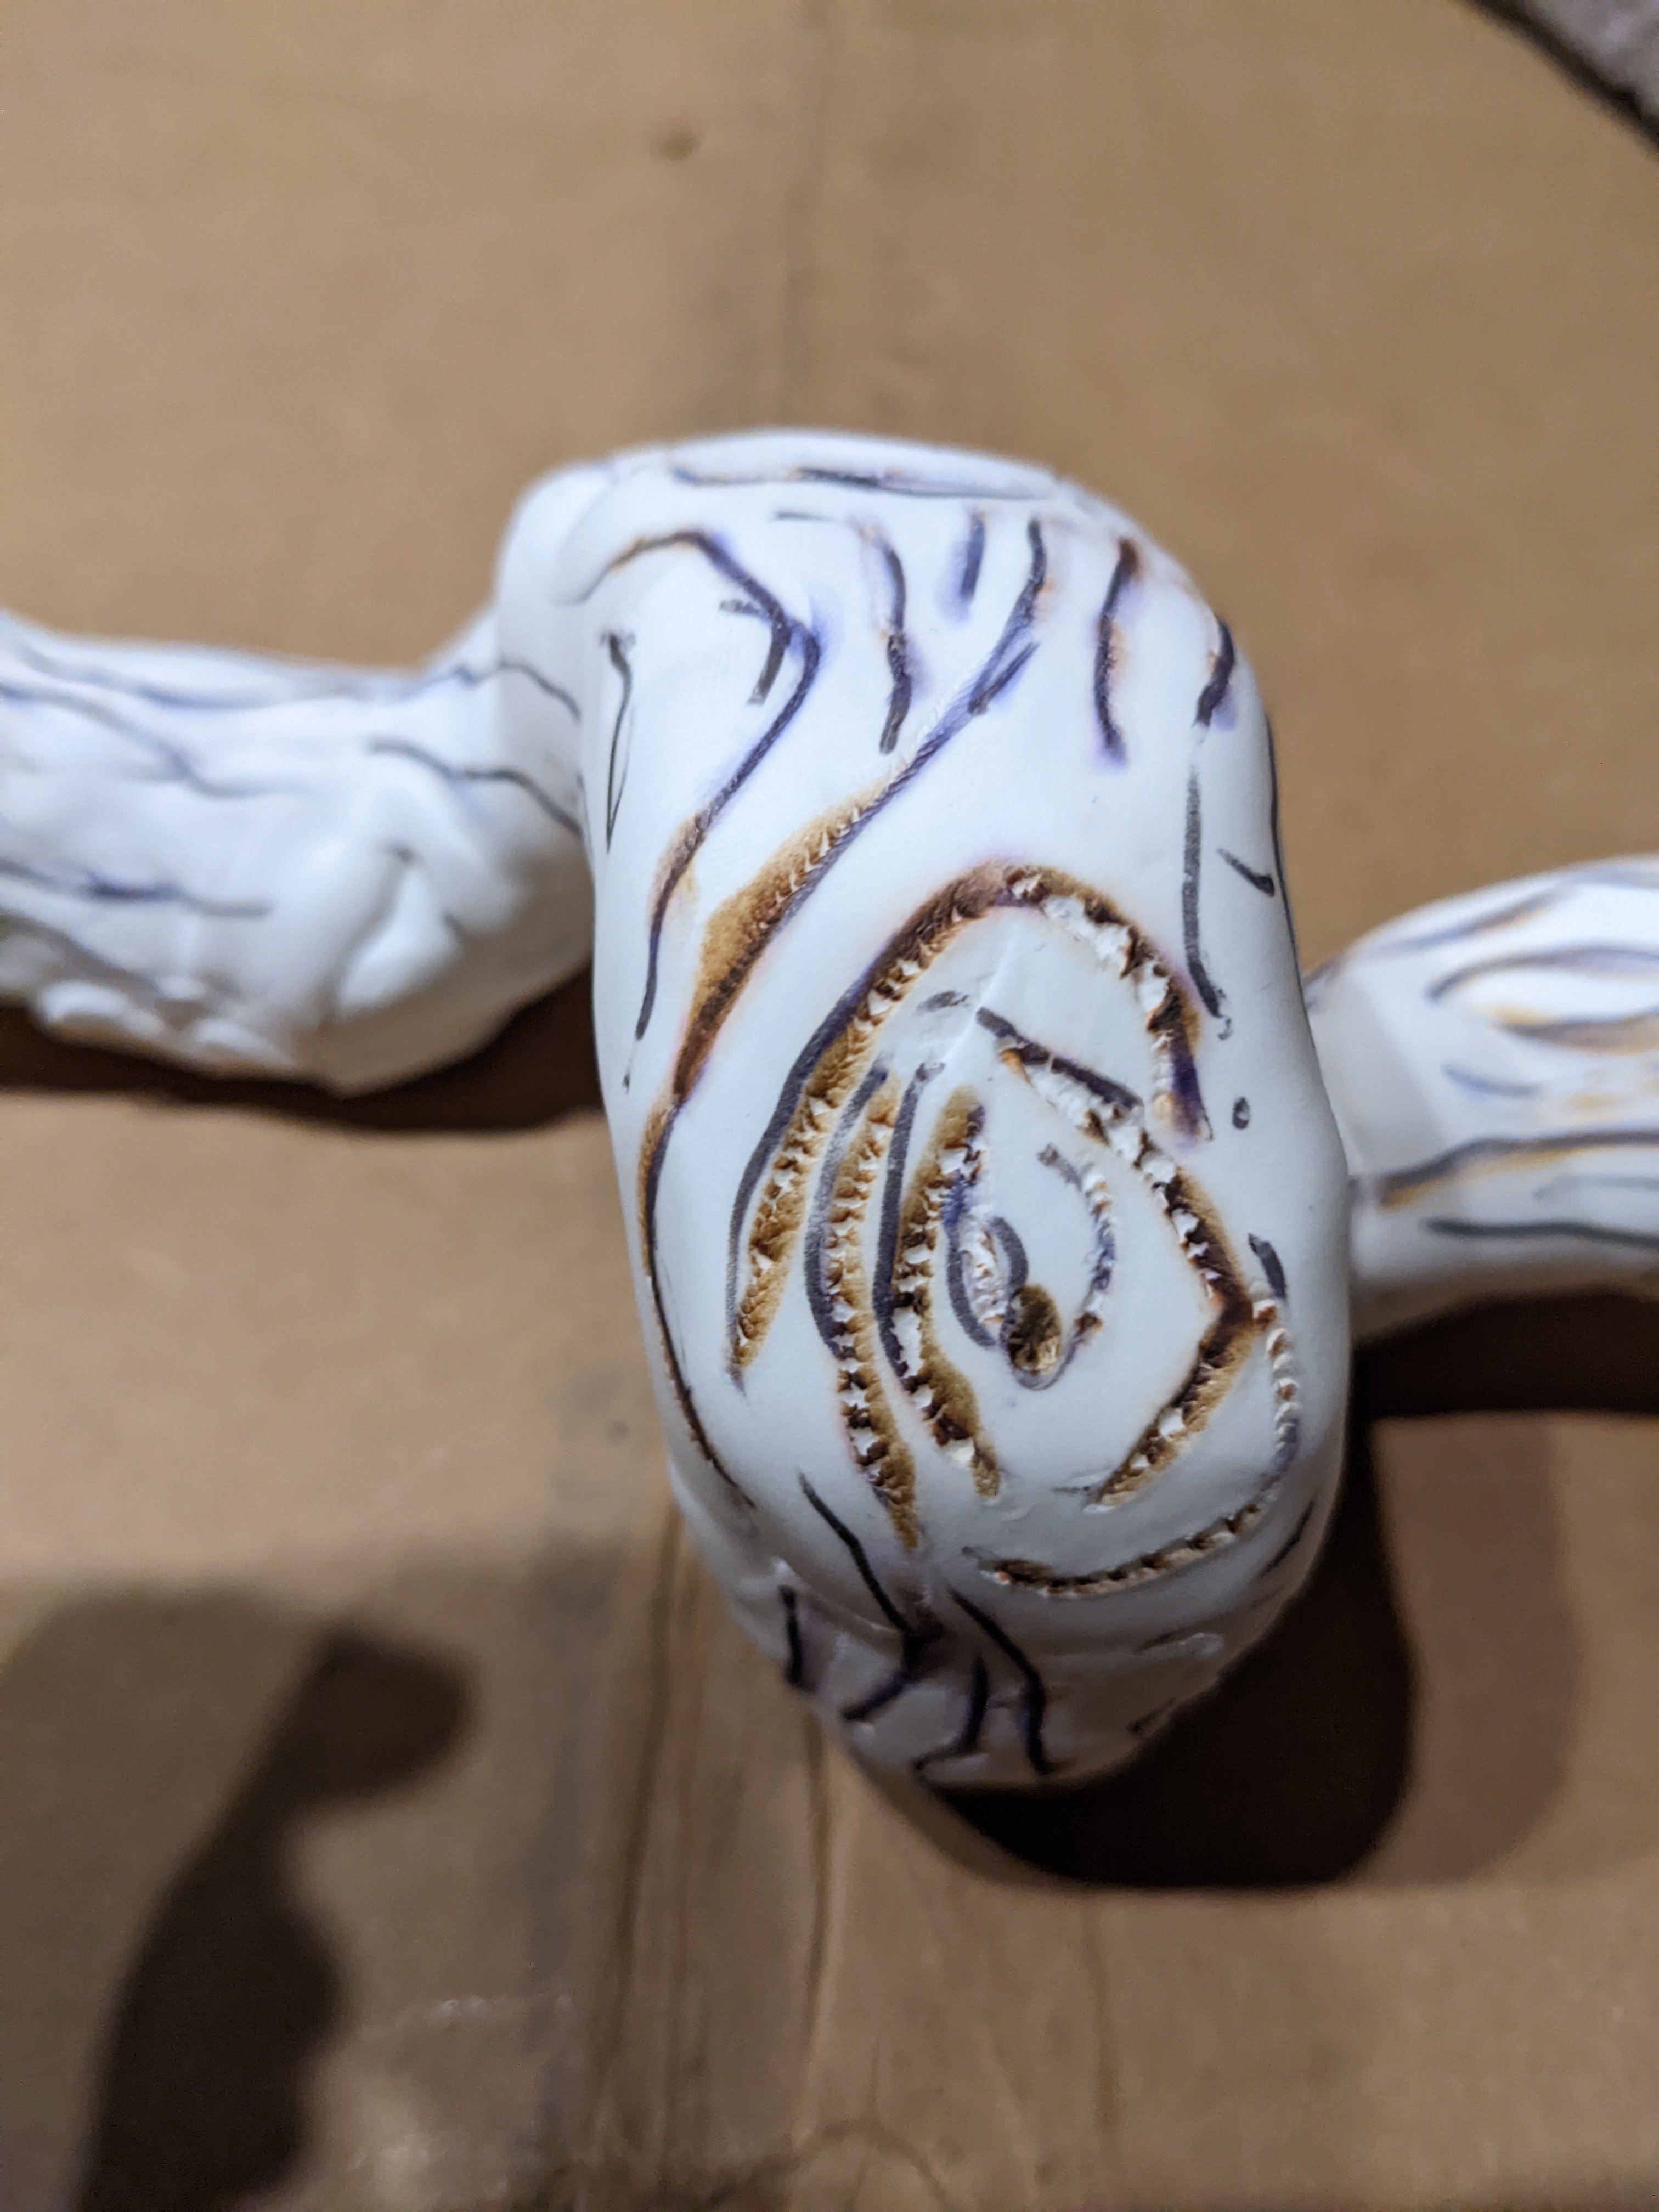
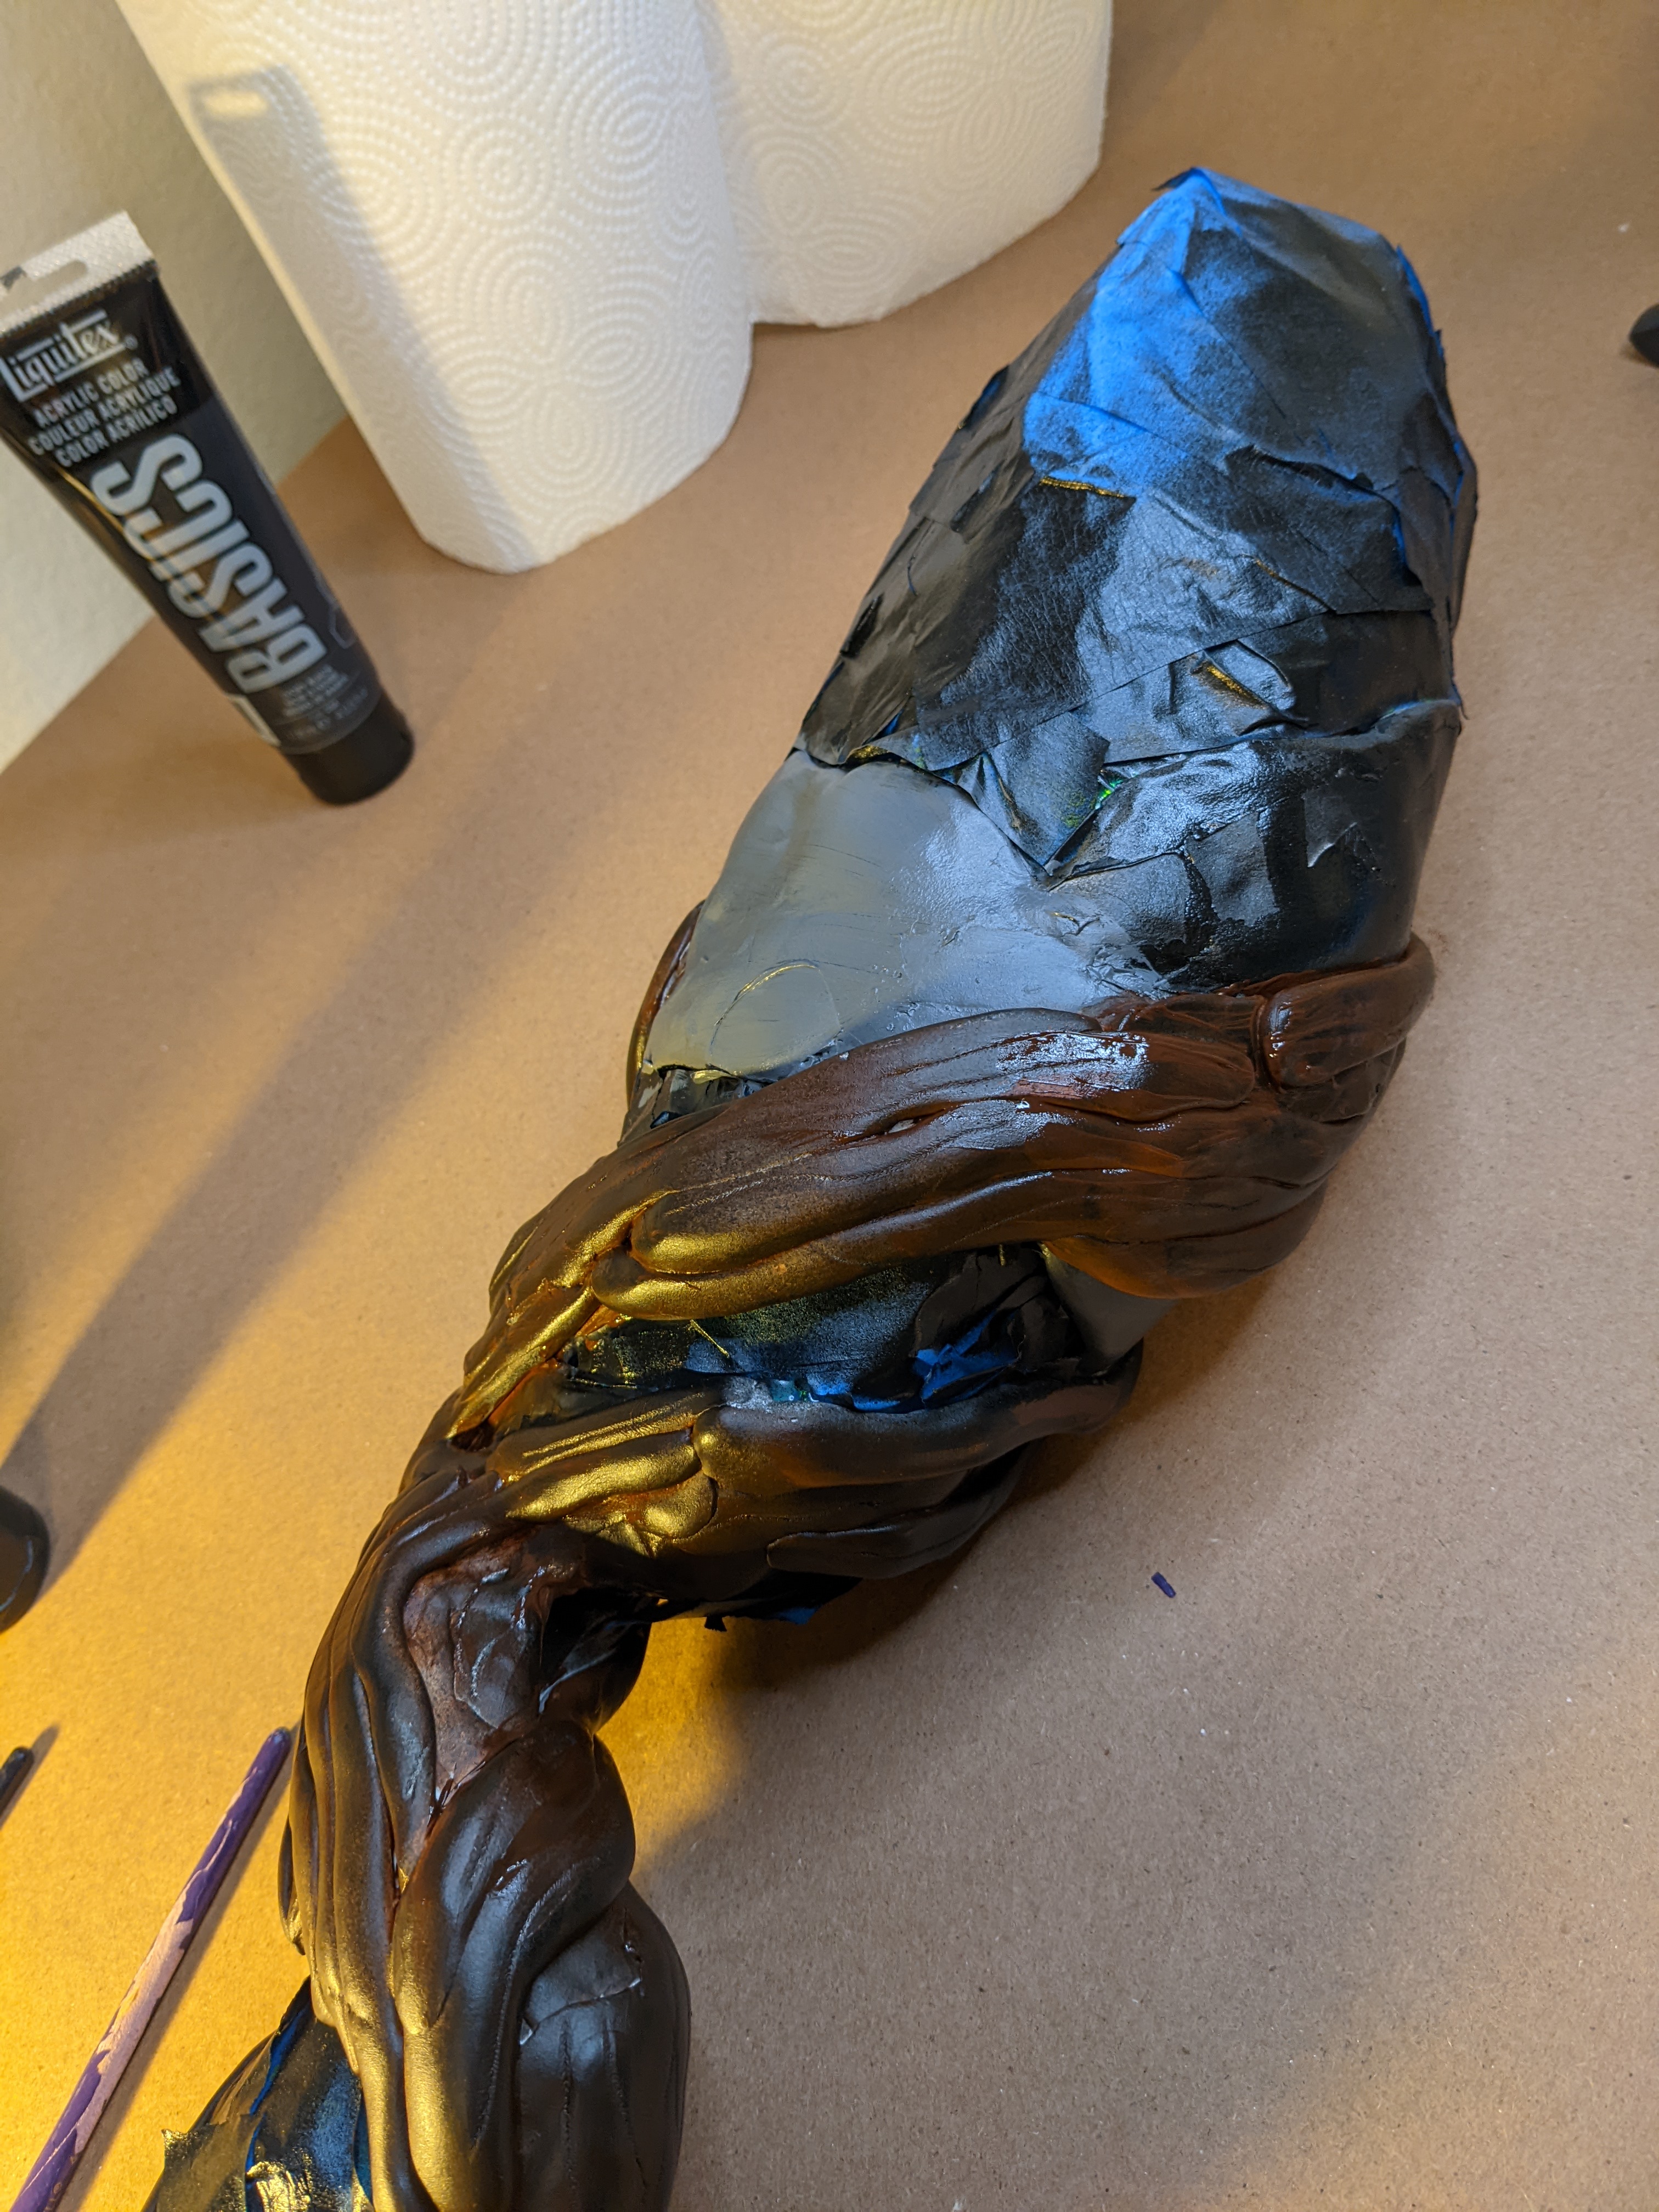
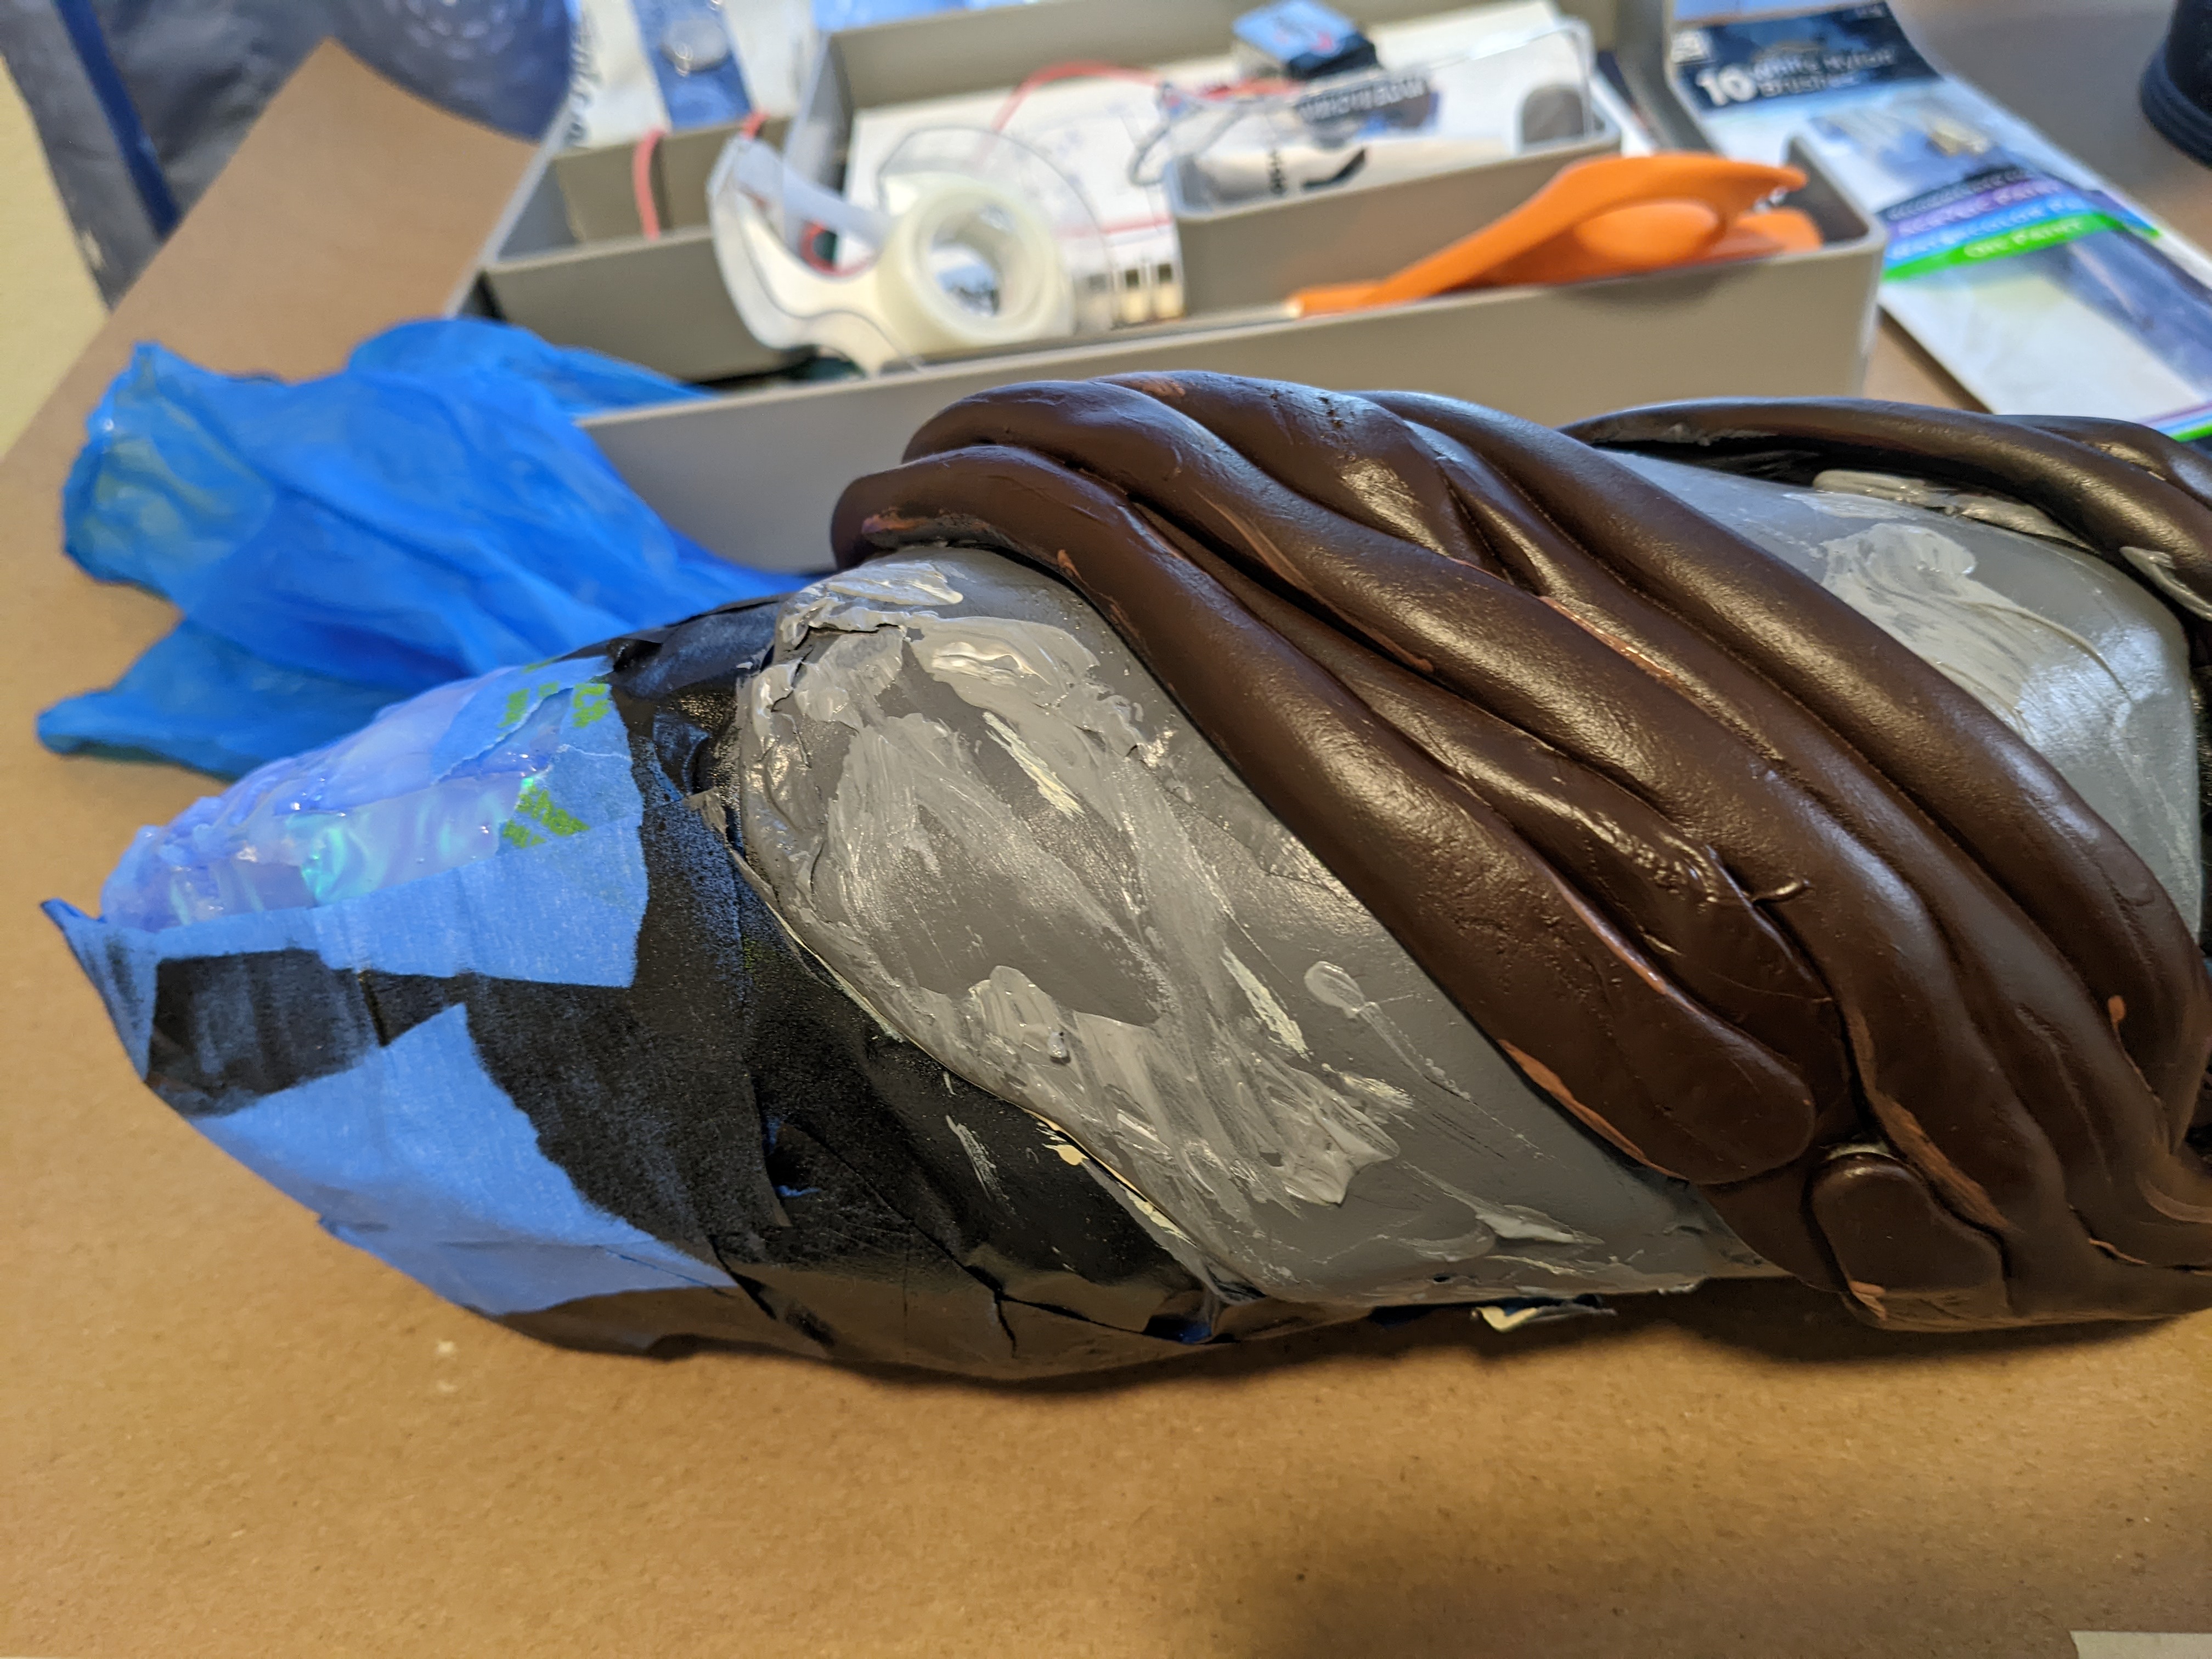
Once the crystals, wire, and LED circuit was in place, it was time to cover the whole thing in foam clay. This part took a while because foam clay itself can take a while to finish drying and curing. At one point, I was using a hair dryer just to speed up the process.
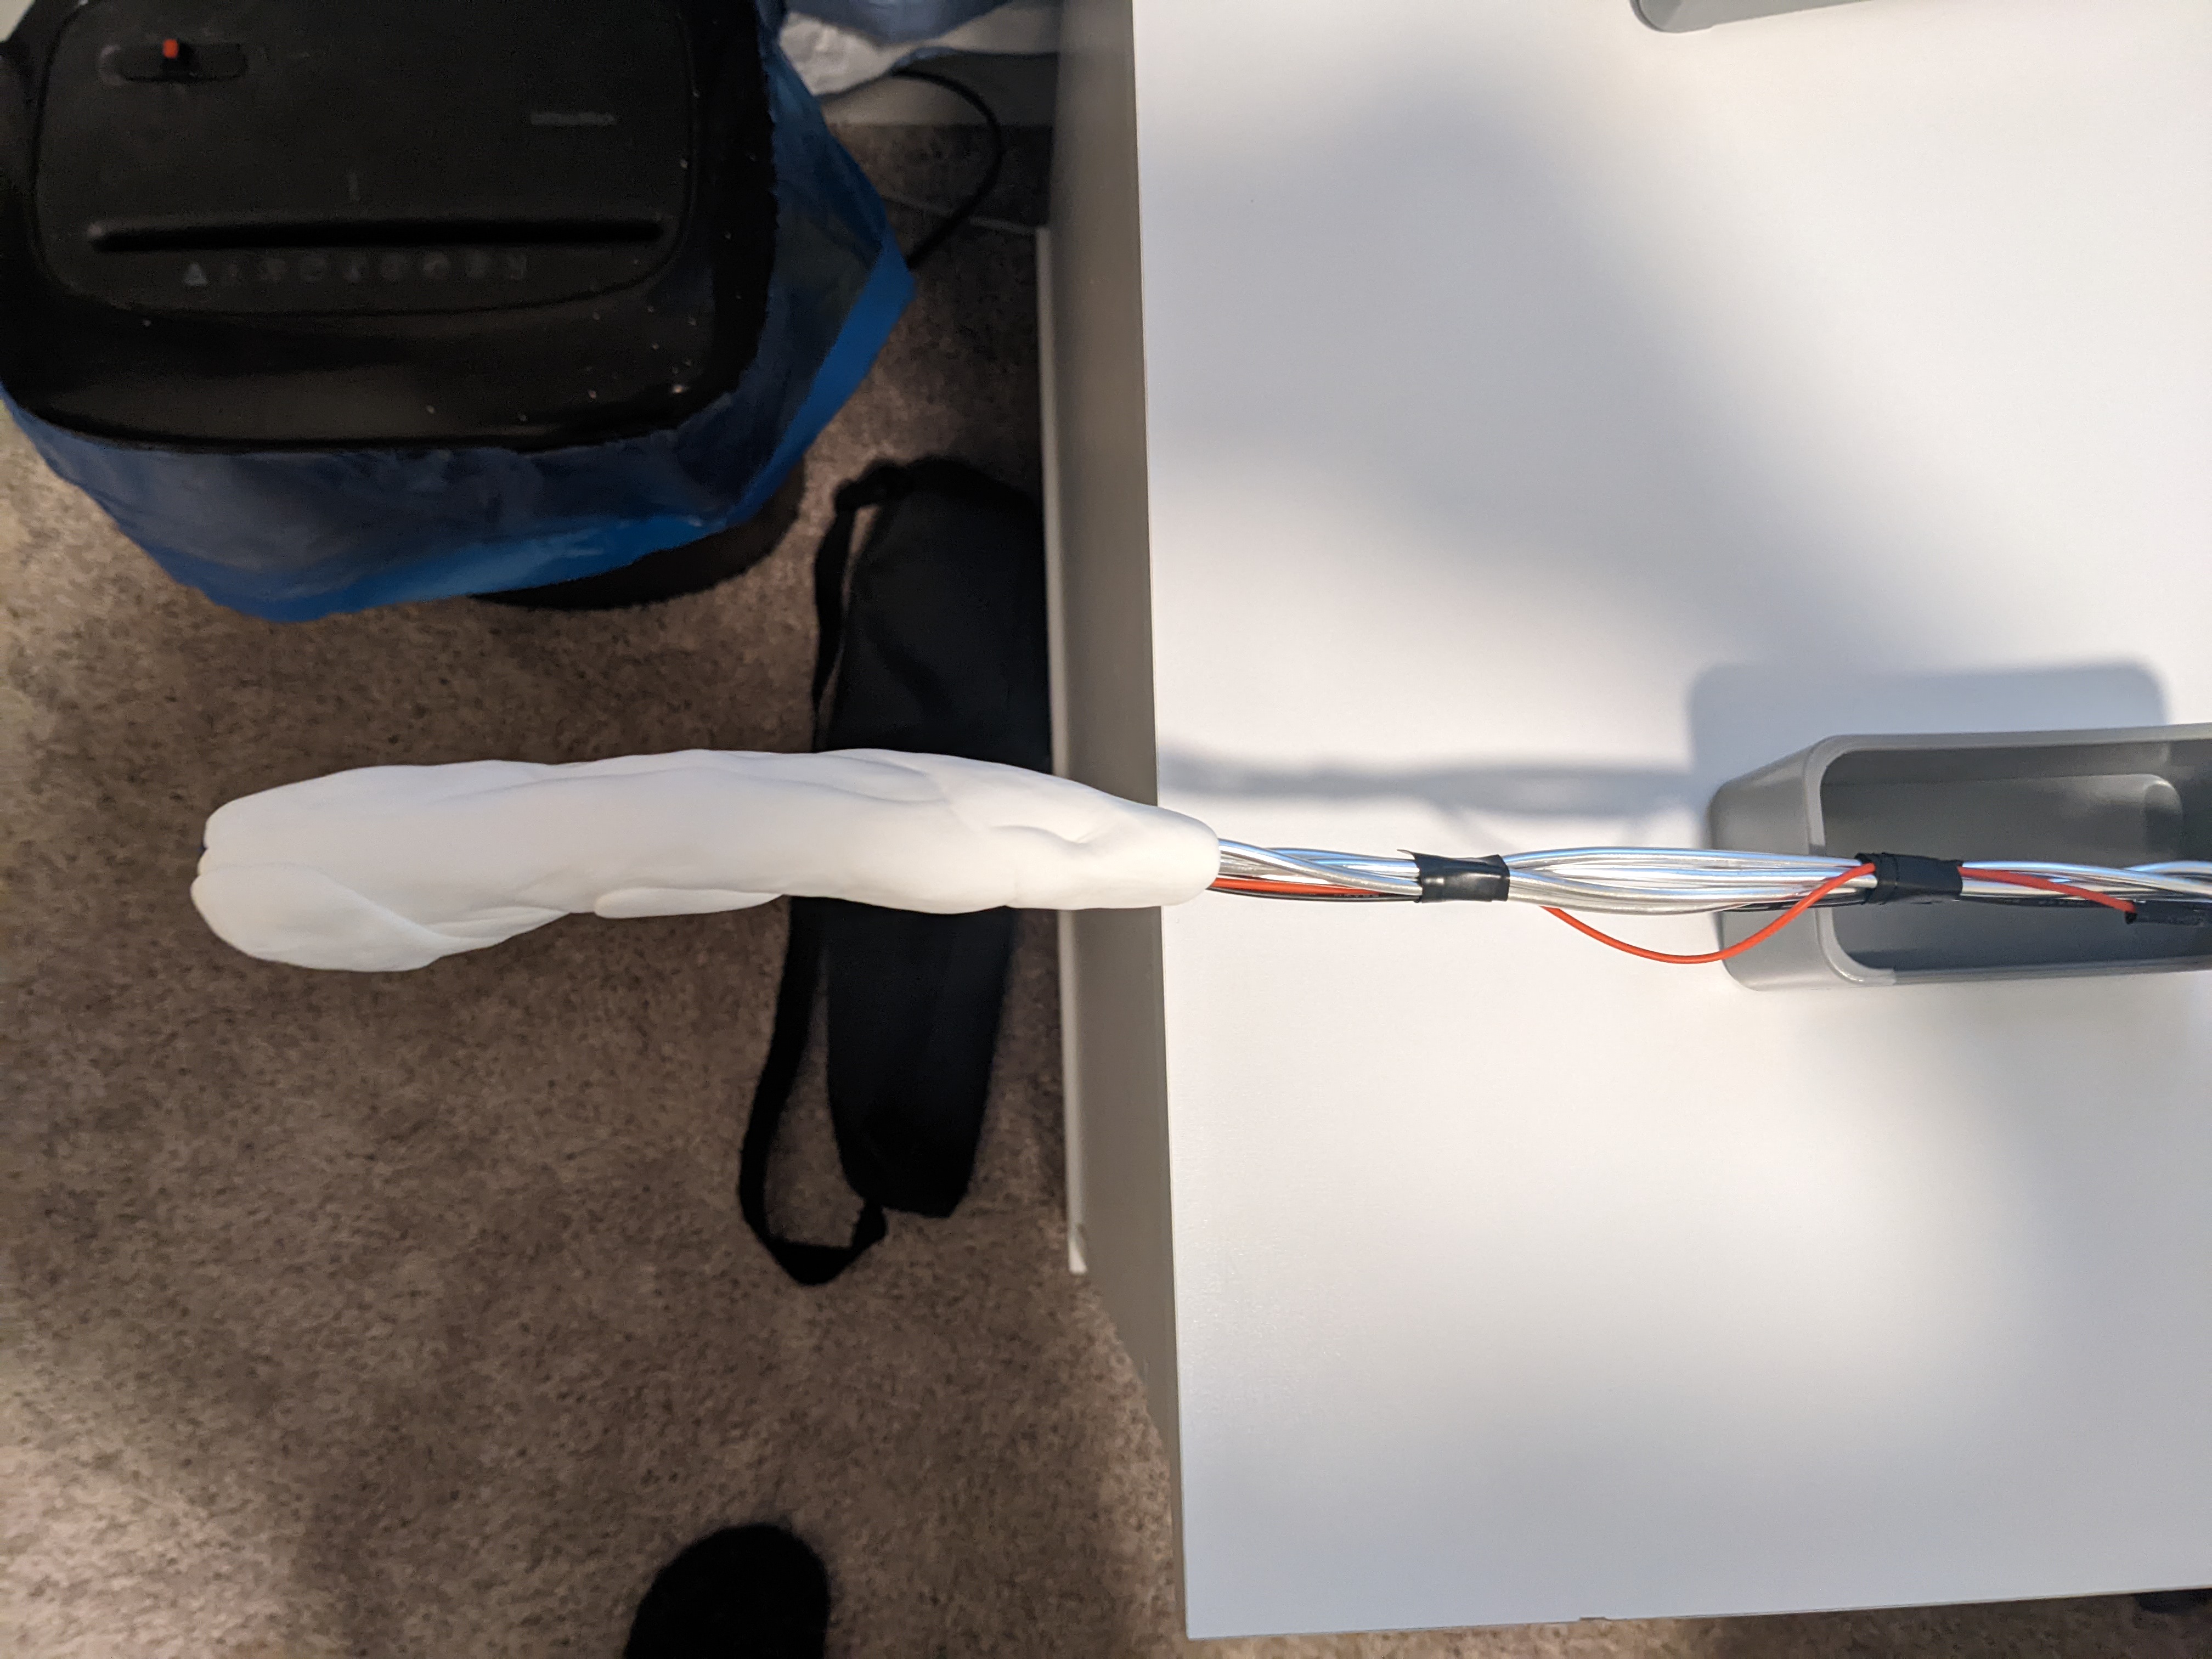
I slowly realized that the big crystal was just not supported well enough, so I used the rest of my leftover Kobracast from my Seraphine cosplay to join the small crystal to the big one. But to do that, I first had to remove the foam clay I had put on the night before. I ended up losing some paint that had been added to the rock part of the big crystal, but I knew I’d have to paint the whole thing anyway, so it was fine. After adding the Kobracast, I then covered all that in foam clay.
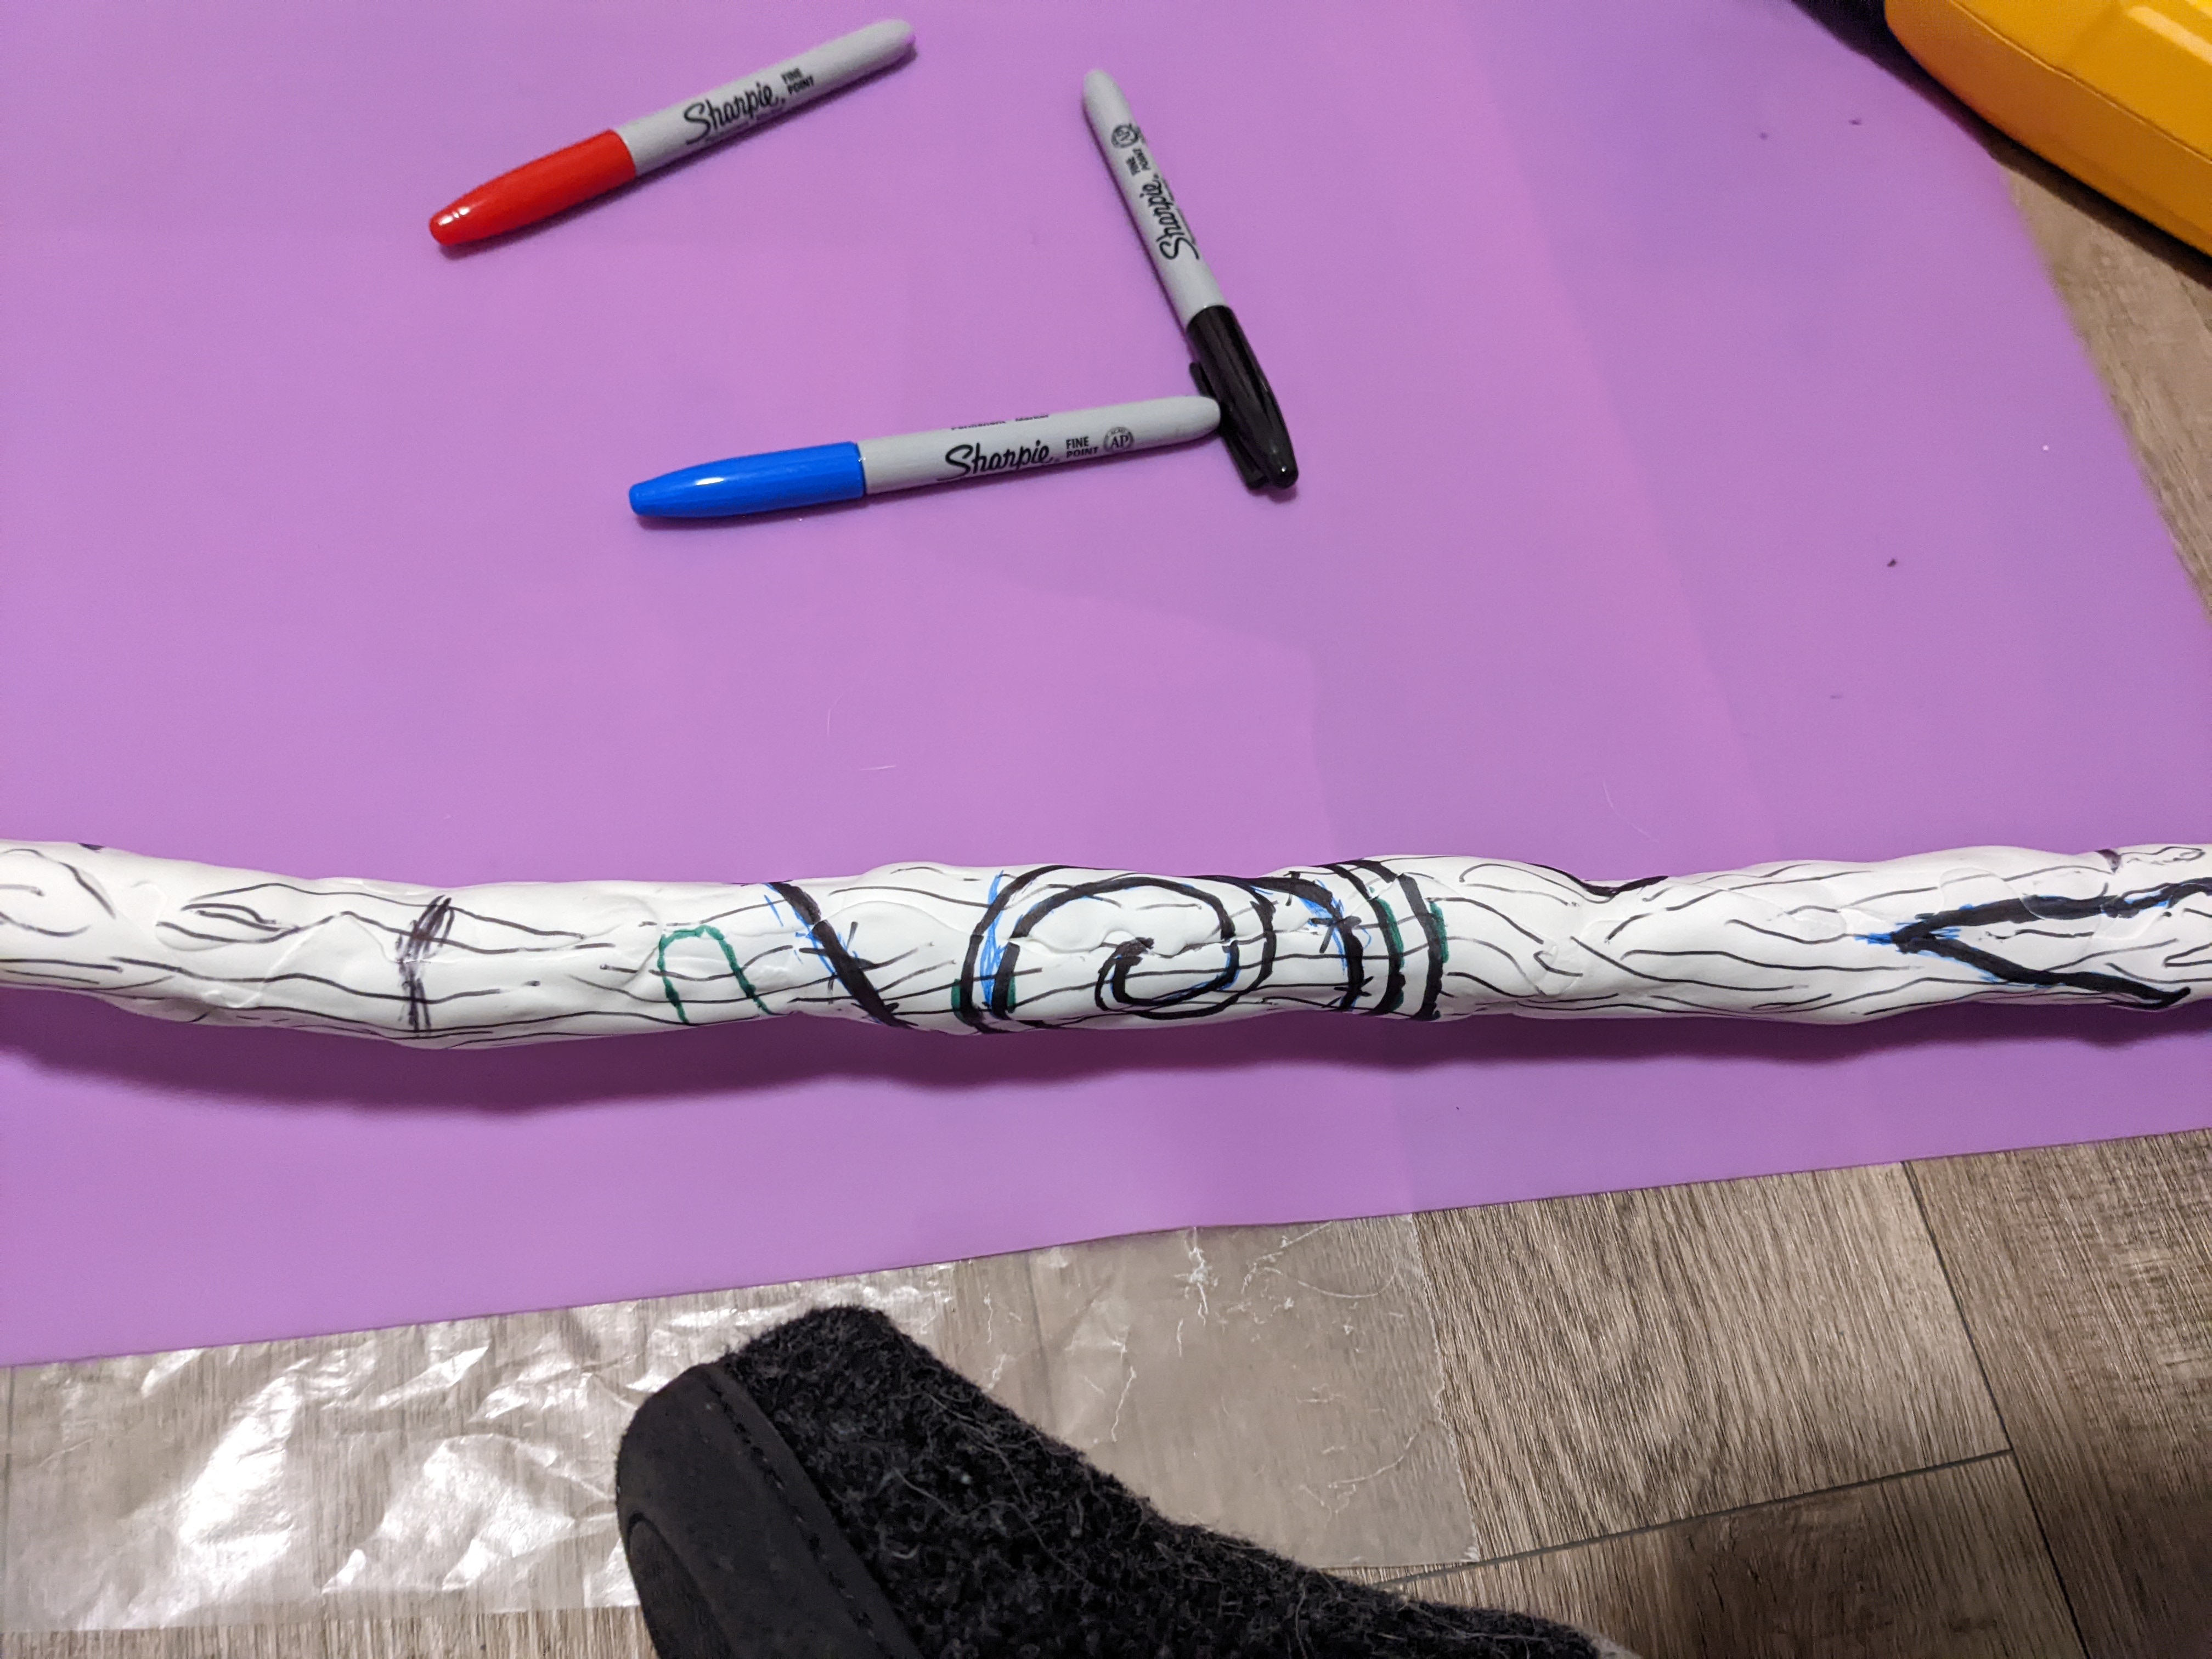
Next, I marked with pen and sharpie where the staff details would be. There are parts of the staff that almost look carved into swirl designs, so I used my soldering iron to mark these as well as give it some depth. I don’t know if it’s just that my soldering iron might not have been powerful enough or maybe I was too featherlight on the touch, but the details probably could’ve been deeper.
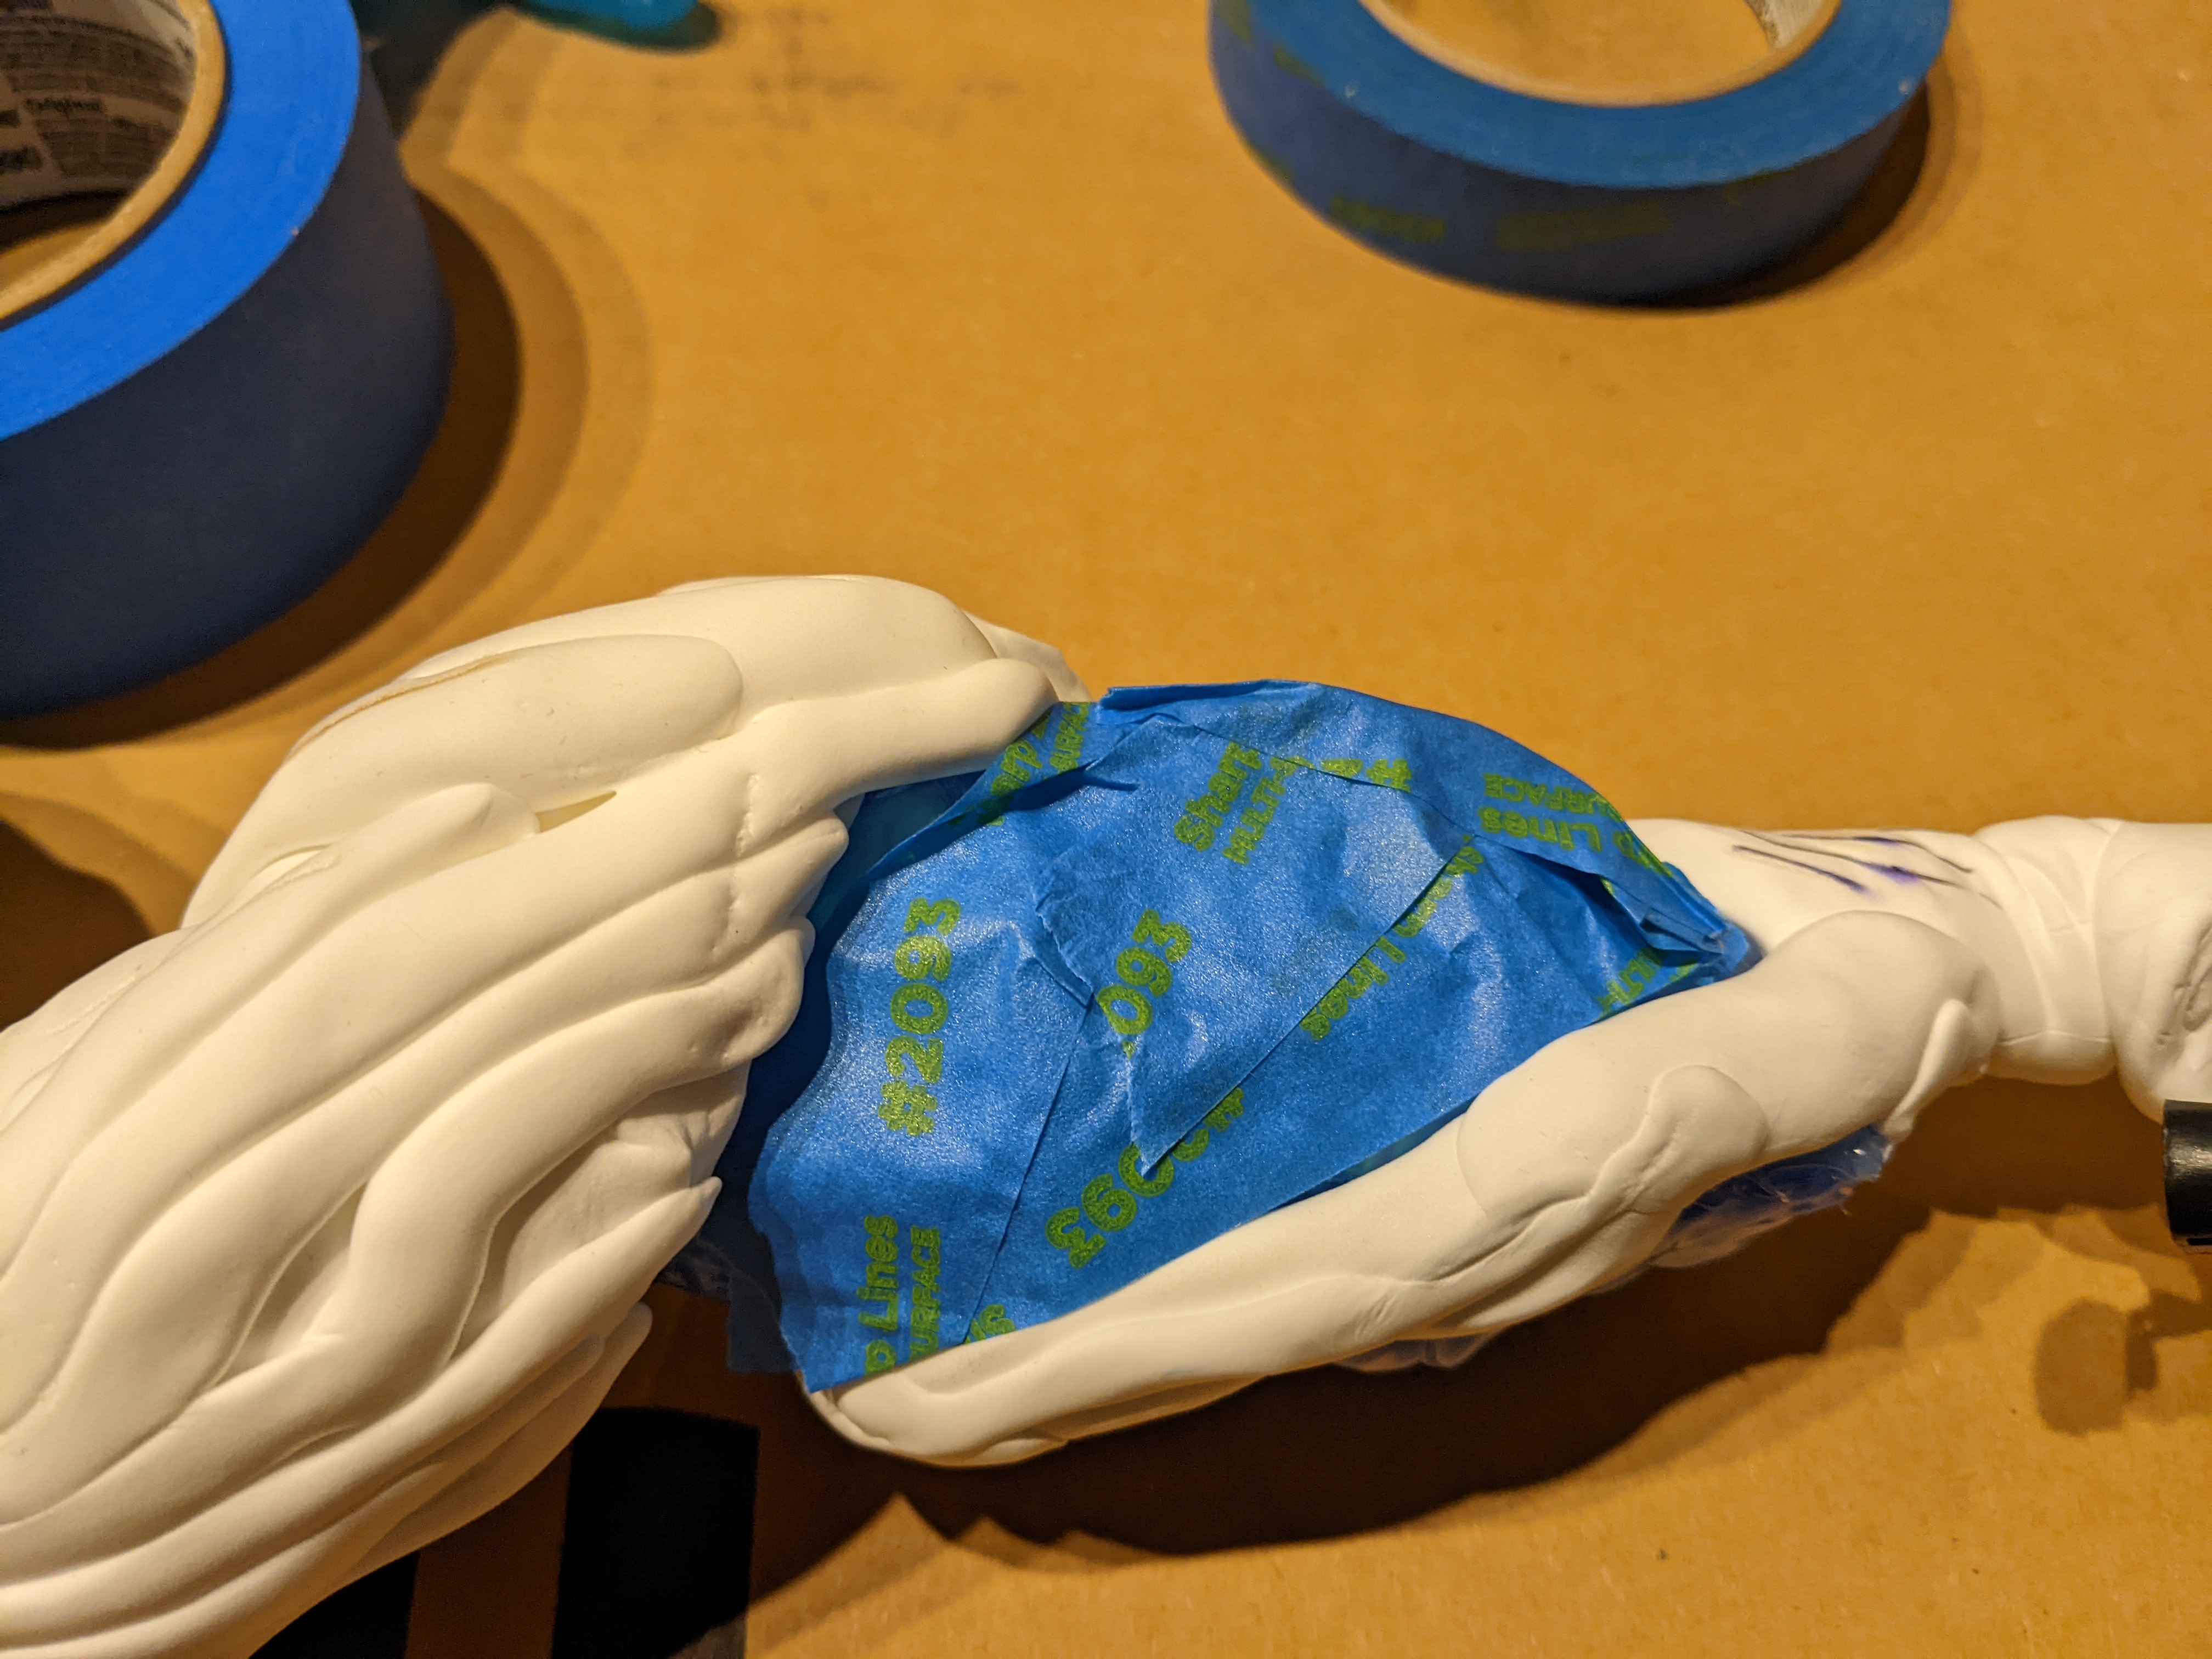
After covering the crystals with painters tape, I primed the whole thing. I slept really poorly the night it stayed outside overnight to dry. I was convinced the wind would move it too much and ruin it. Thankfully, it was fine.

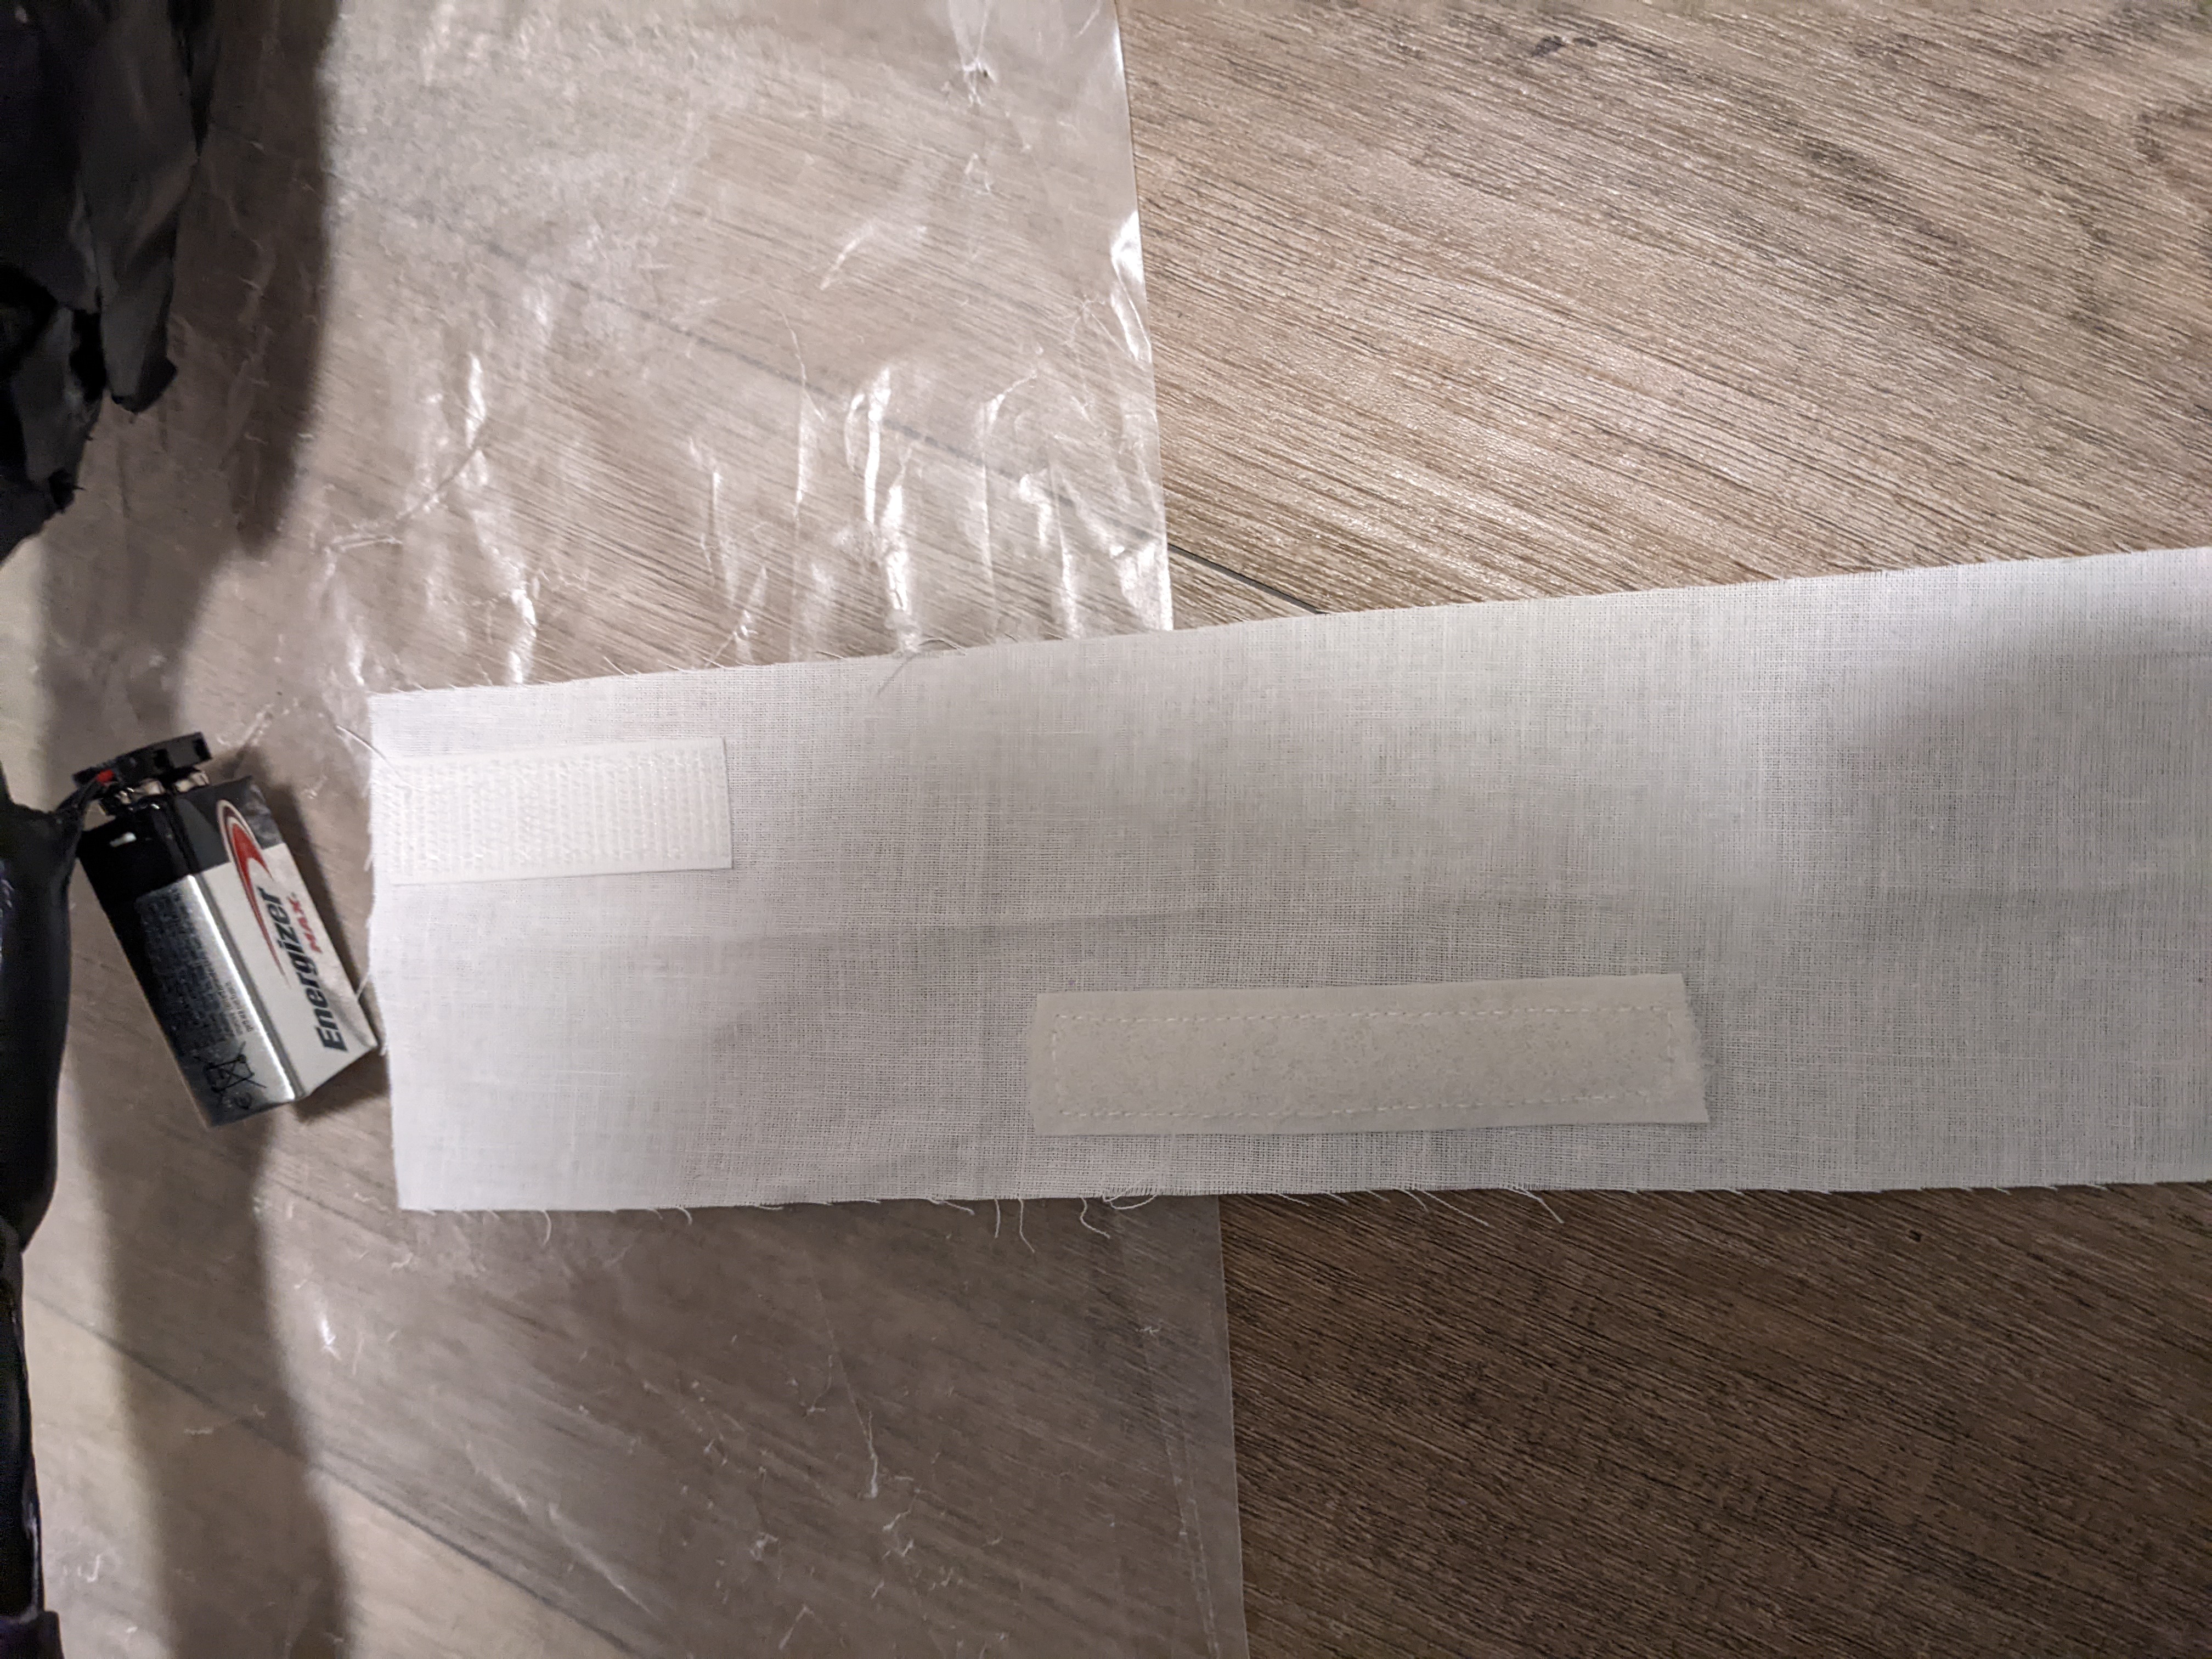
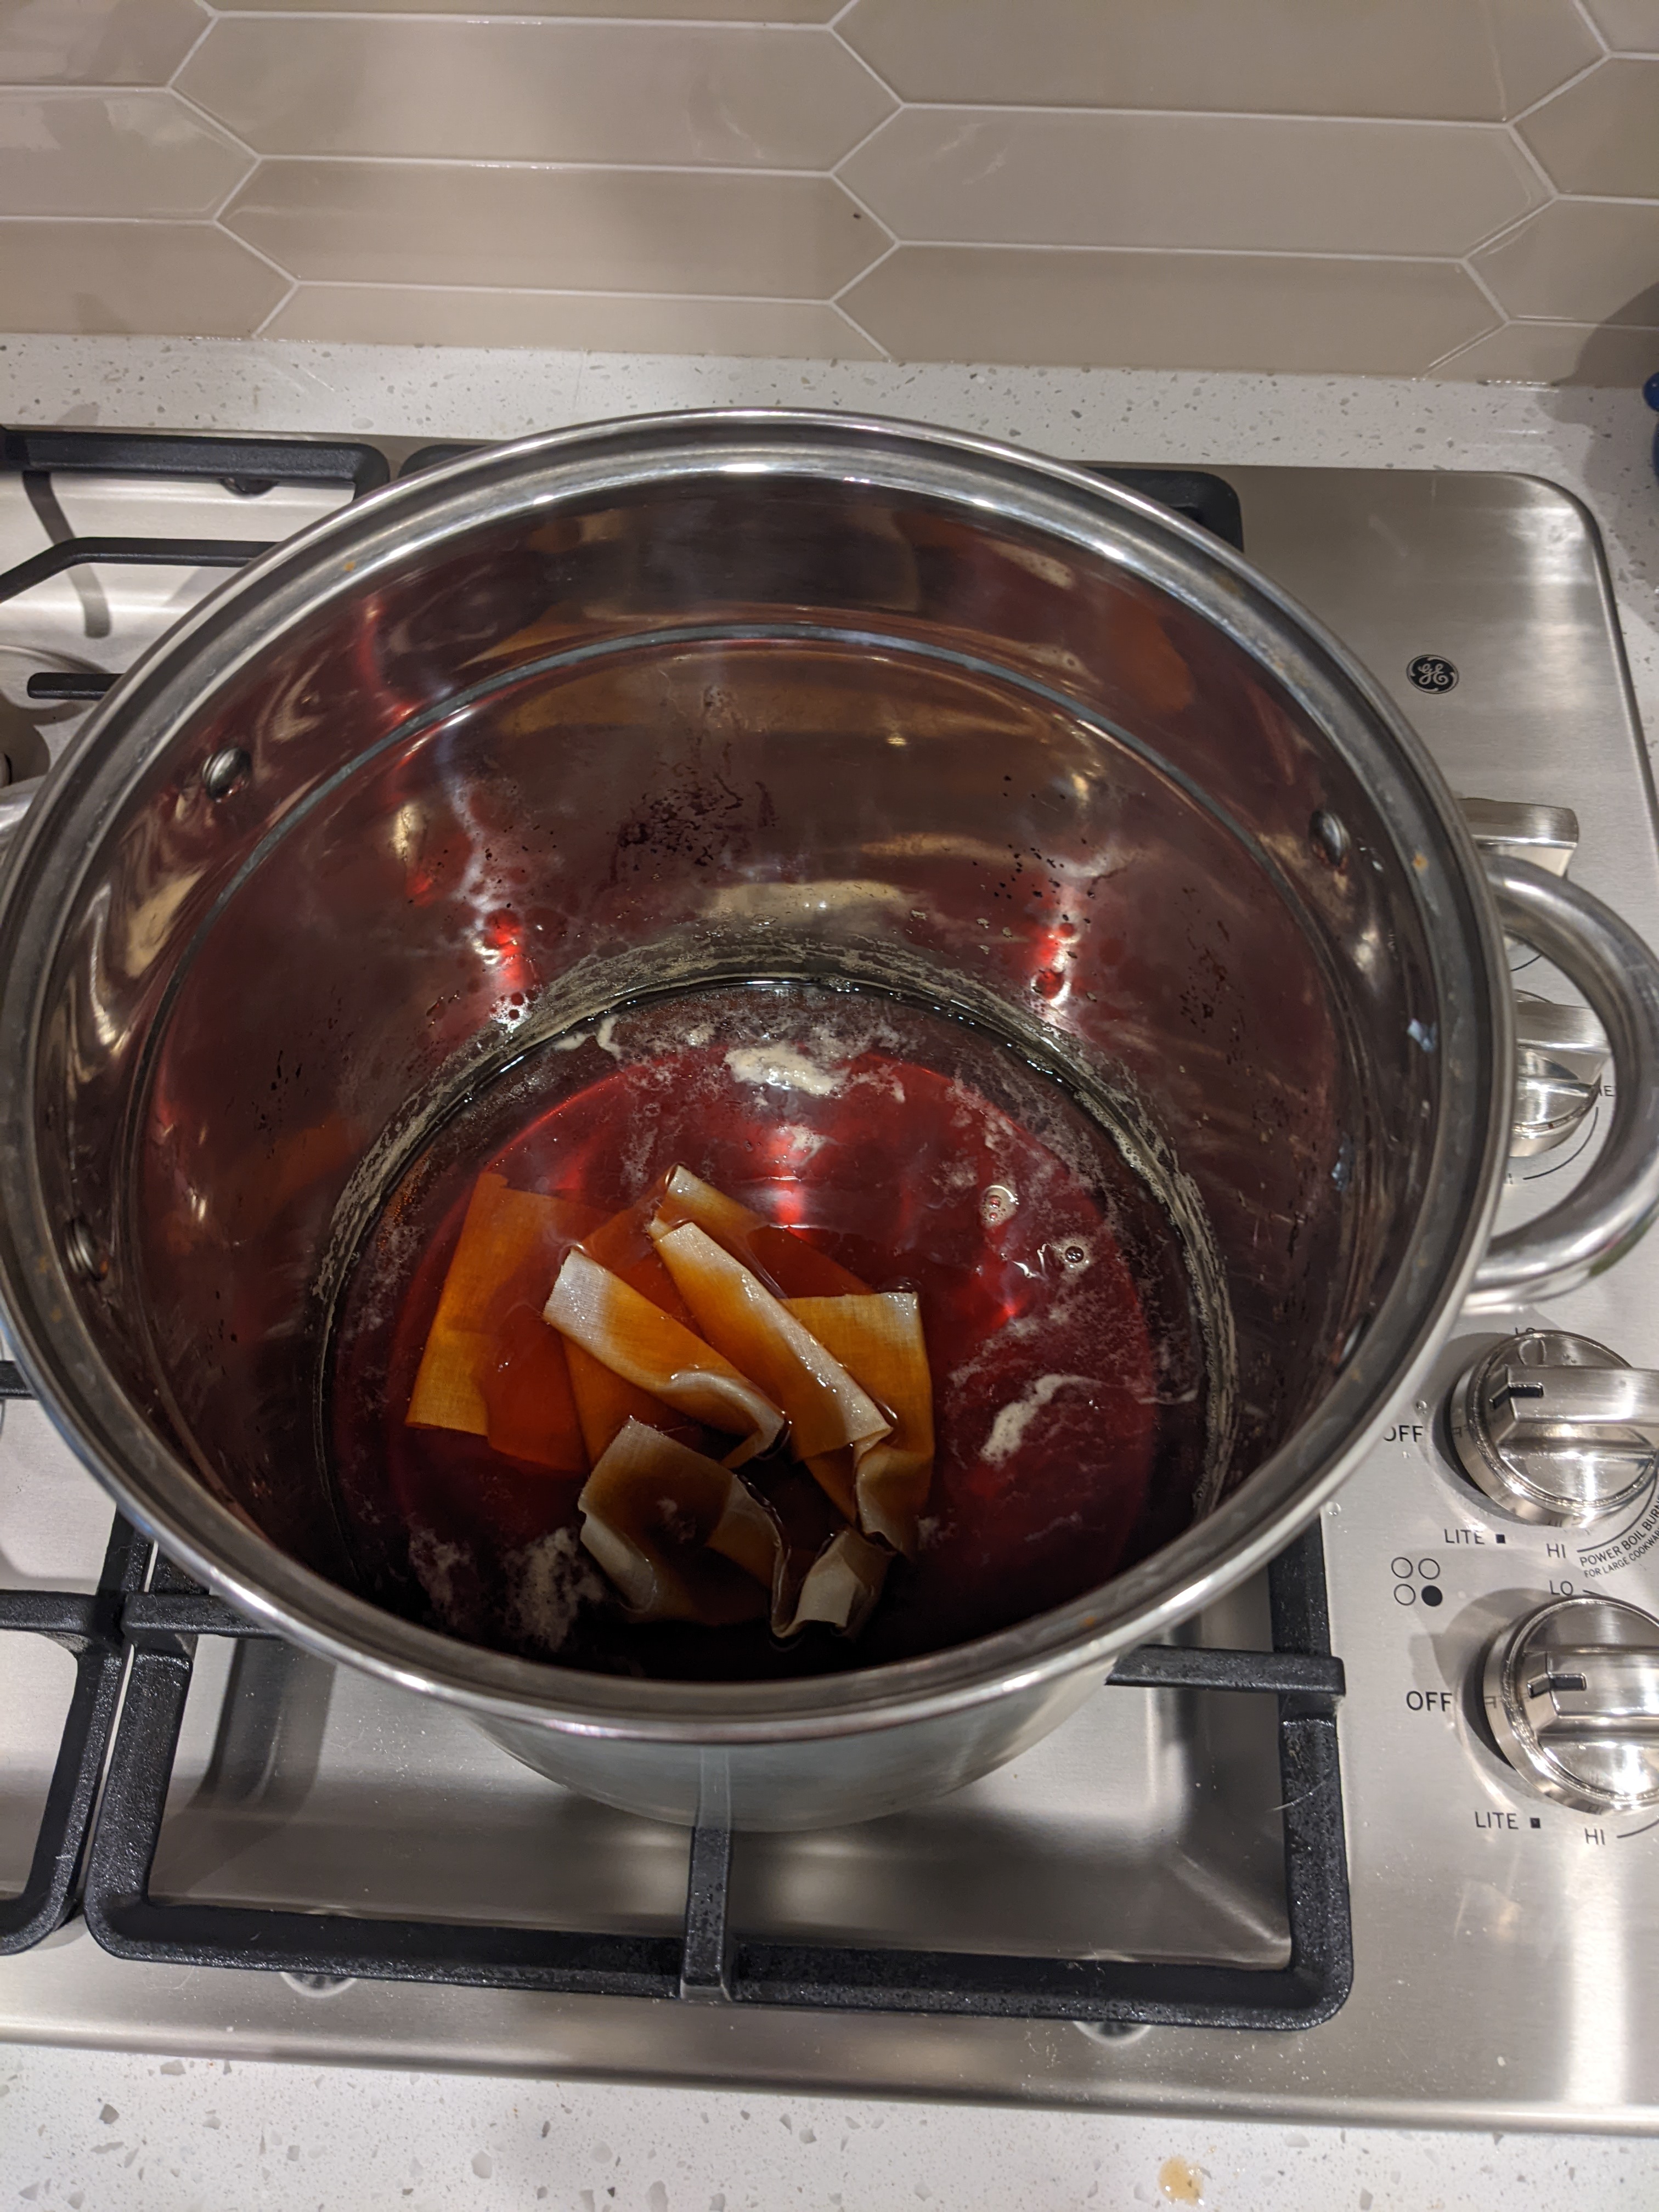
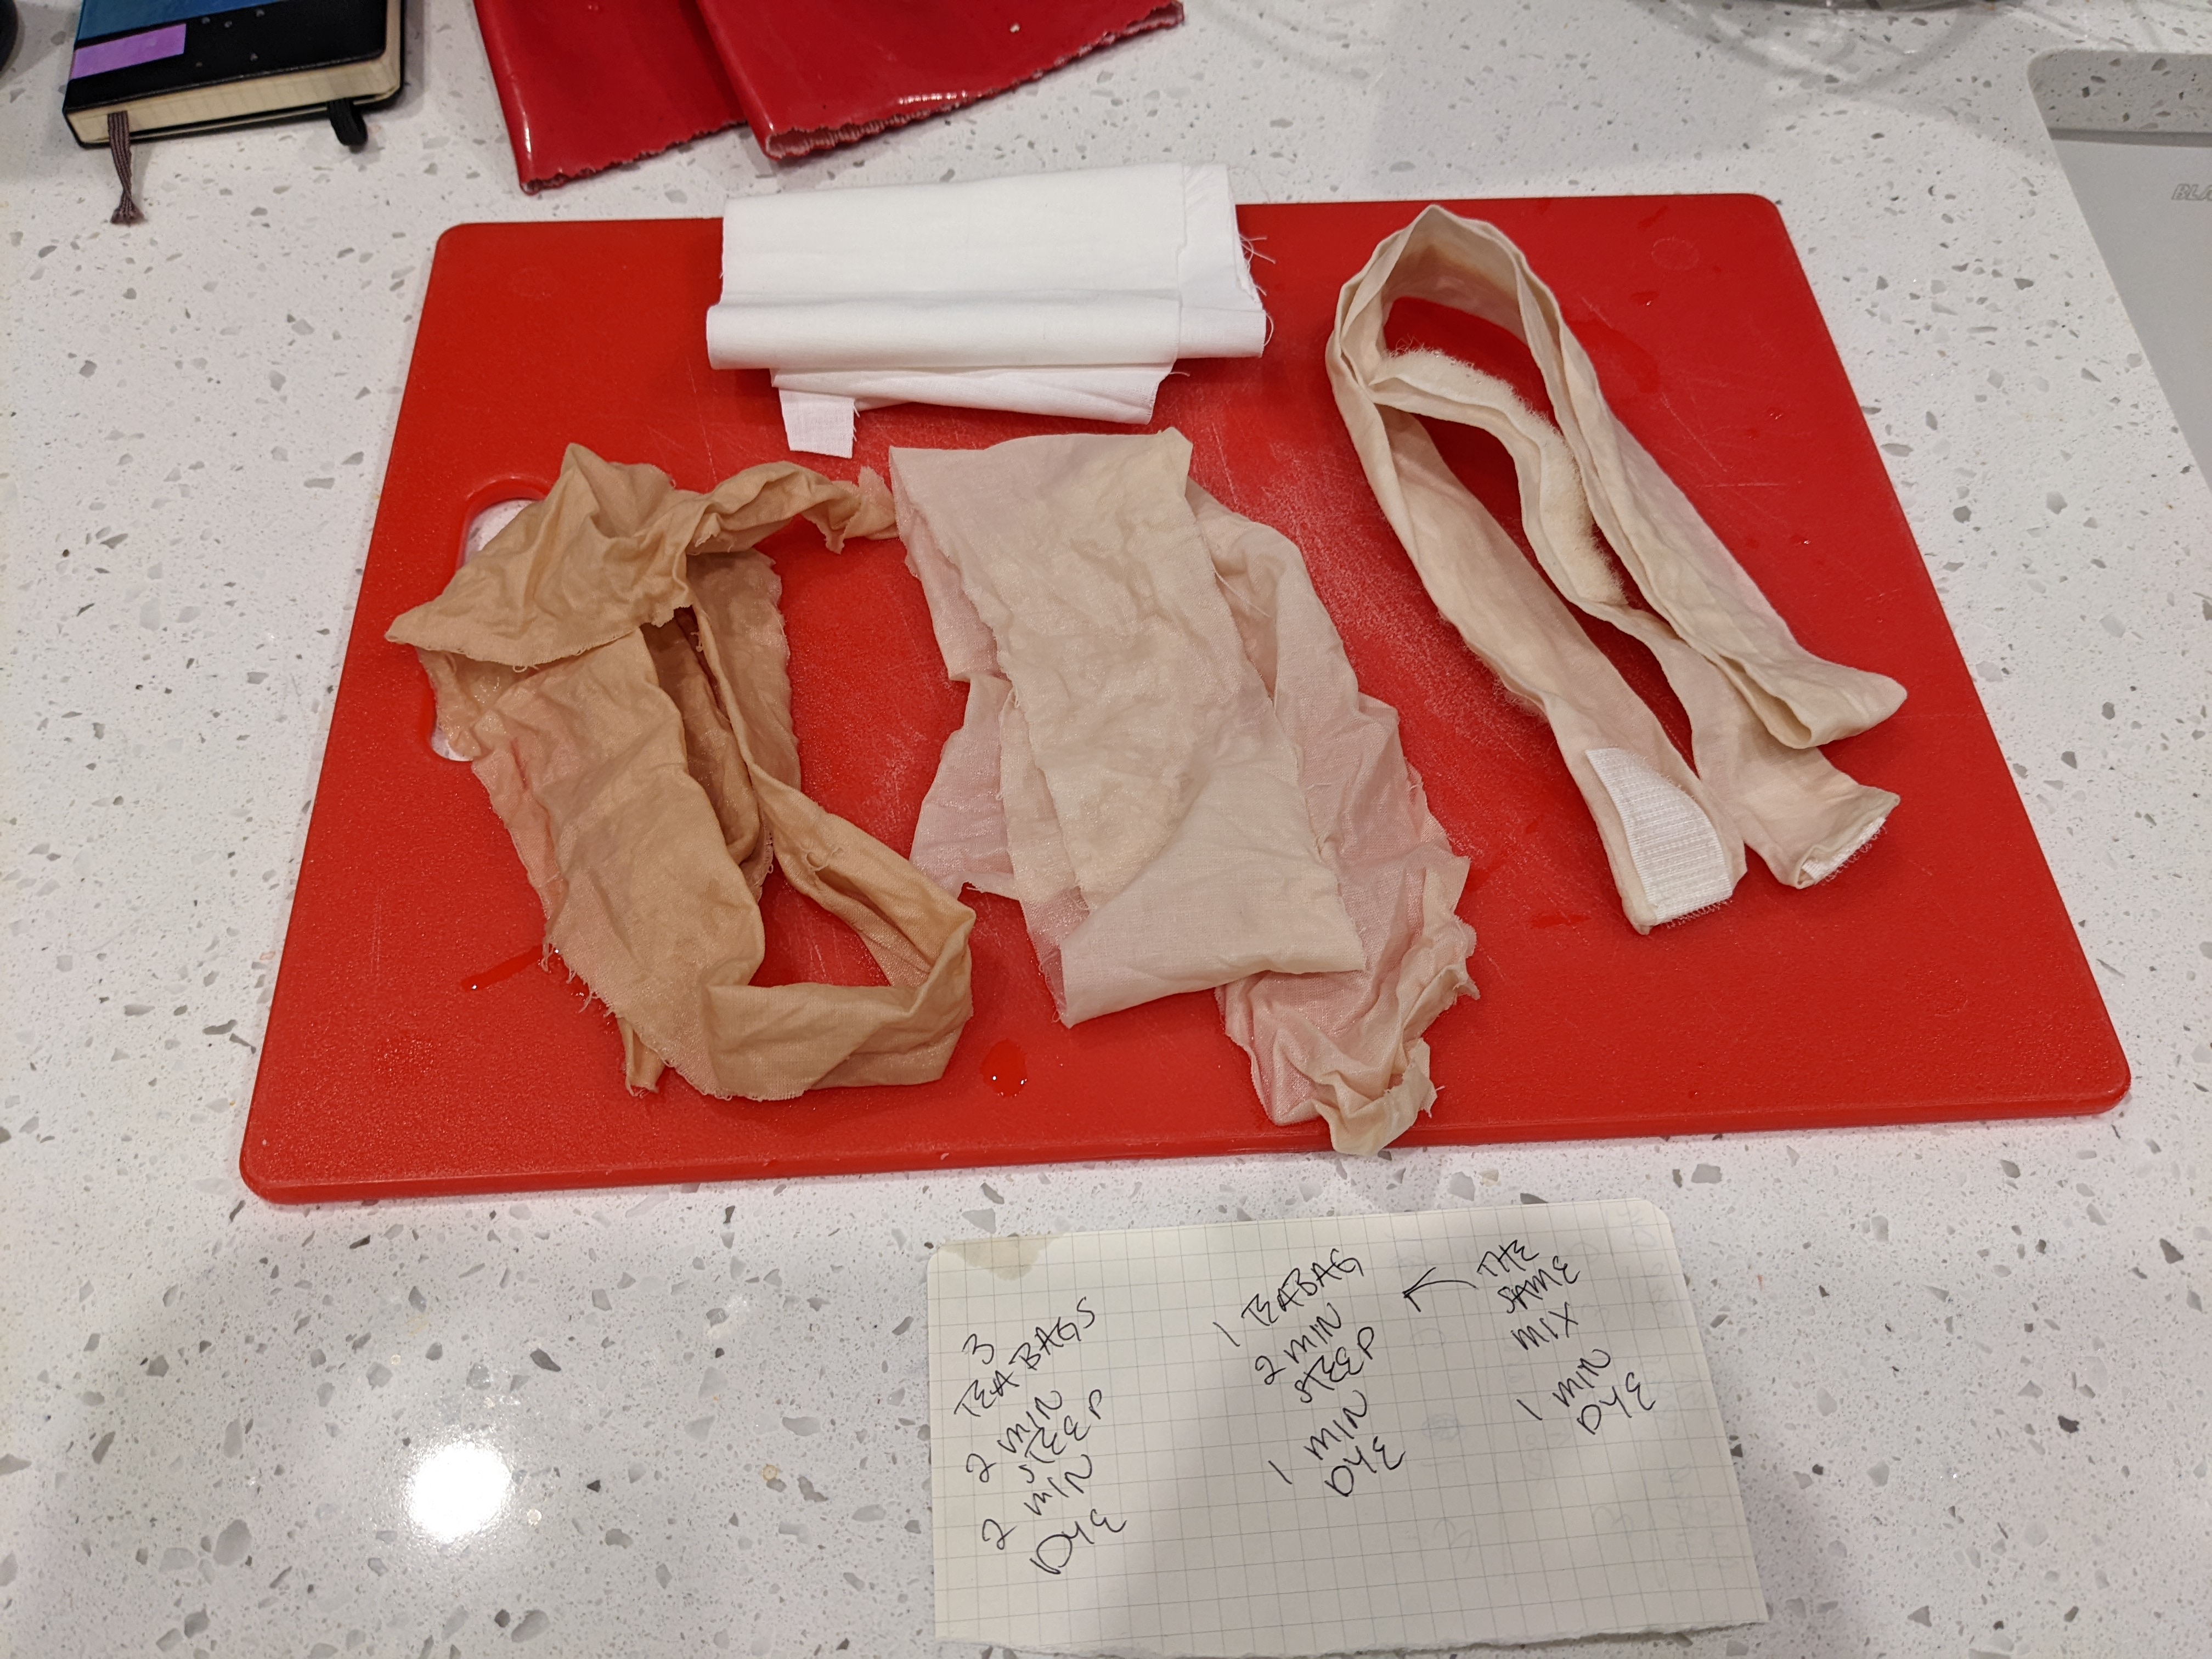
One small touch that was added was I needed straps to cover the battery pack as well as be part of the handle. Using scrap fabric, I made a long strap that had velcro on both ends so that I could attach it to the staff. I made the straps and then use the tea-stain method to dye them. (I did NOT need as much tea used in that link. In fact, I tried 3 tea bags on a test piece of fabric and it was actually too much! The magic number was 1 tea bag, steeped for 2 minutes, with the strap submerged for 1 minute.
All the painting was done the day before Nishi Fest. As far as crunch days goes, this was the most chill. I thankfully didn’t have work, so I was able to just paint all day while listening to the Kena soudtrack and podcasts. After I was done painting, I sealed the whole thing up and it was all done!
Conclusion
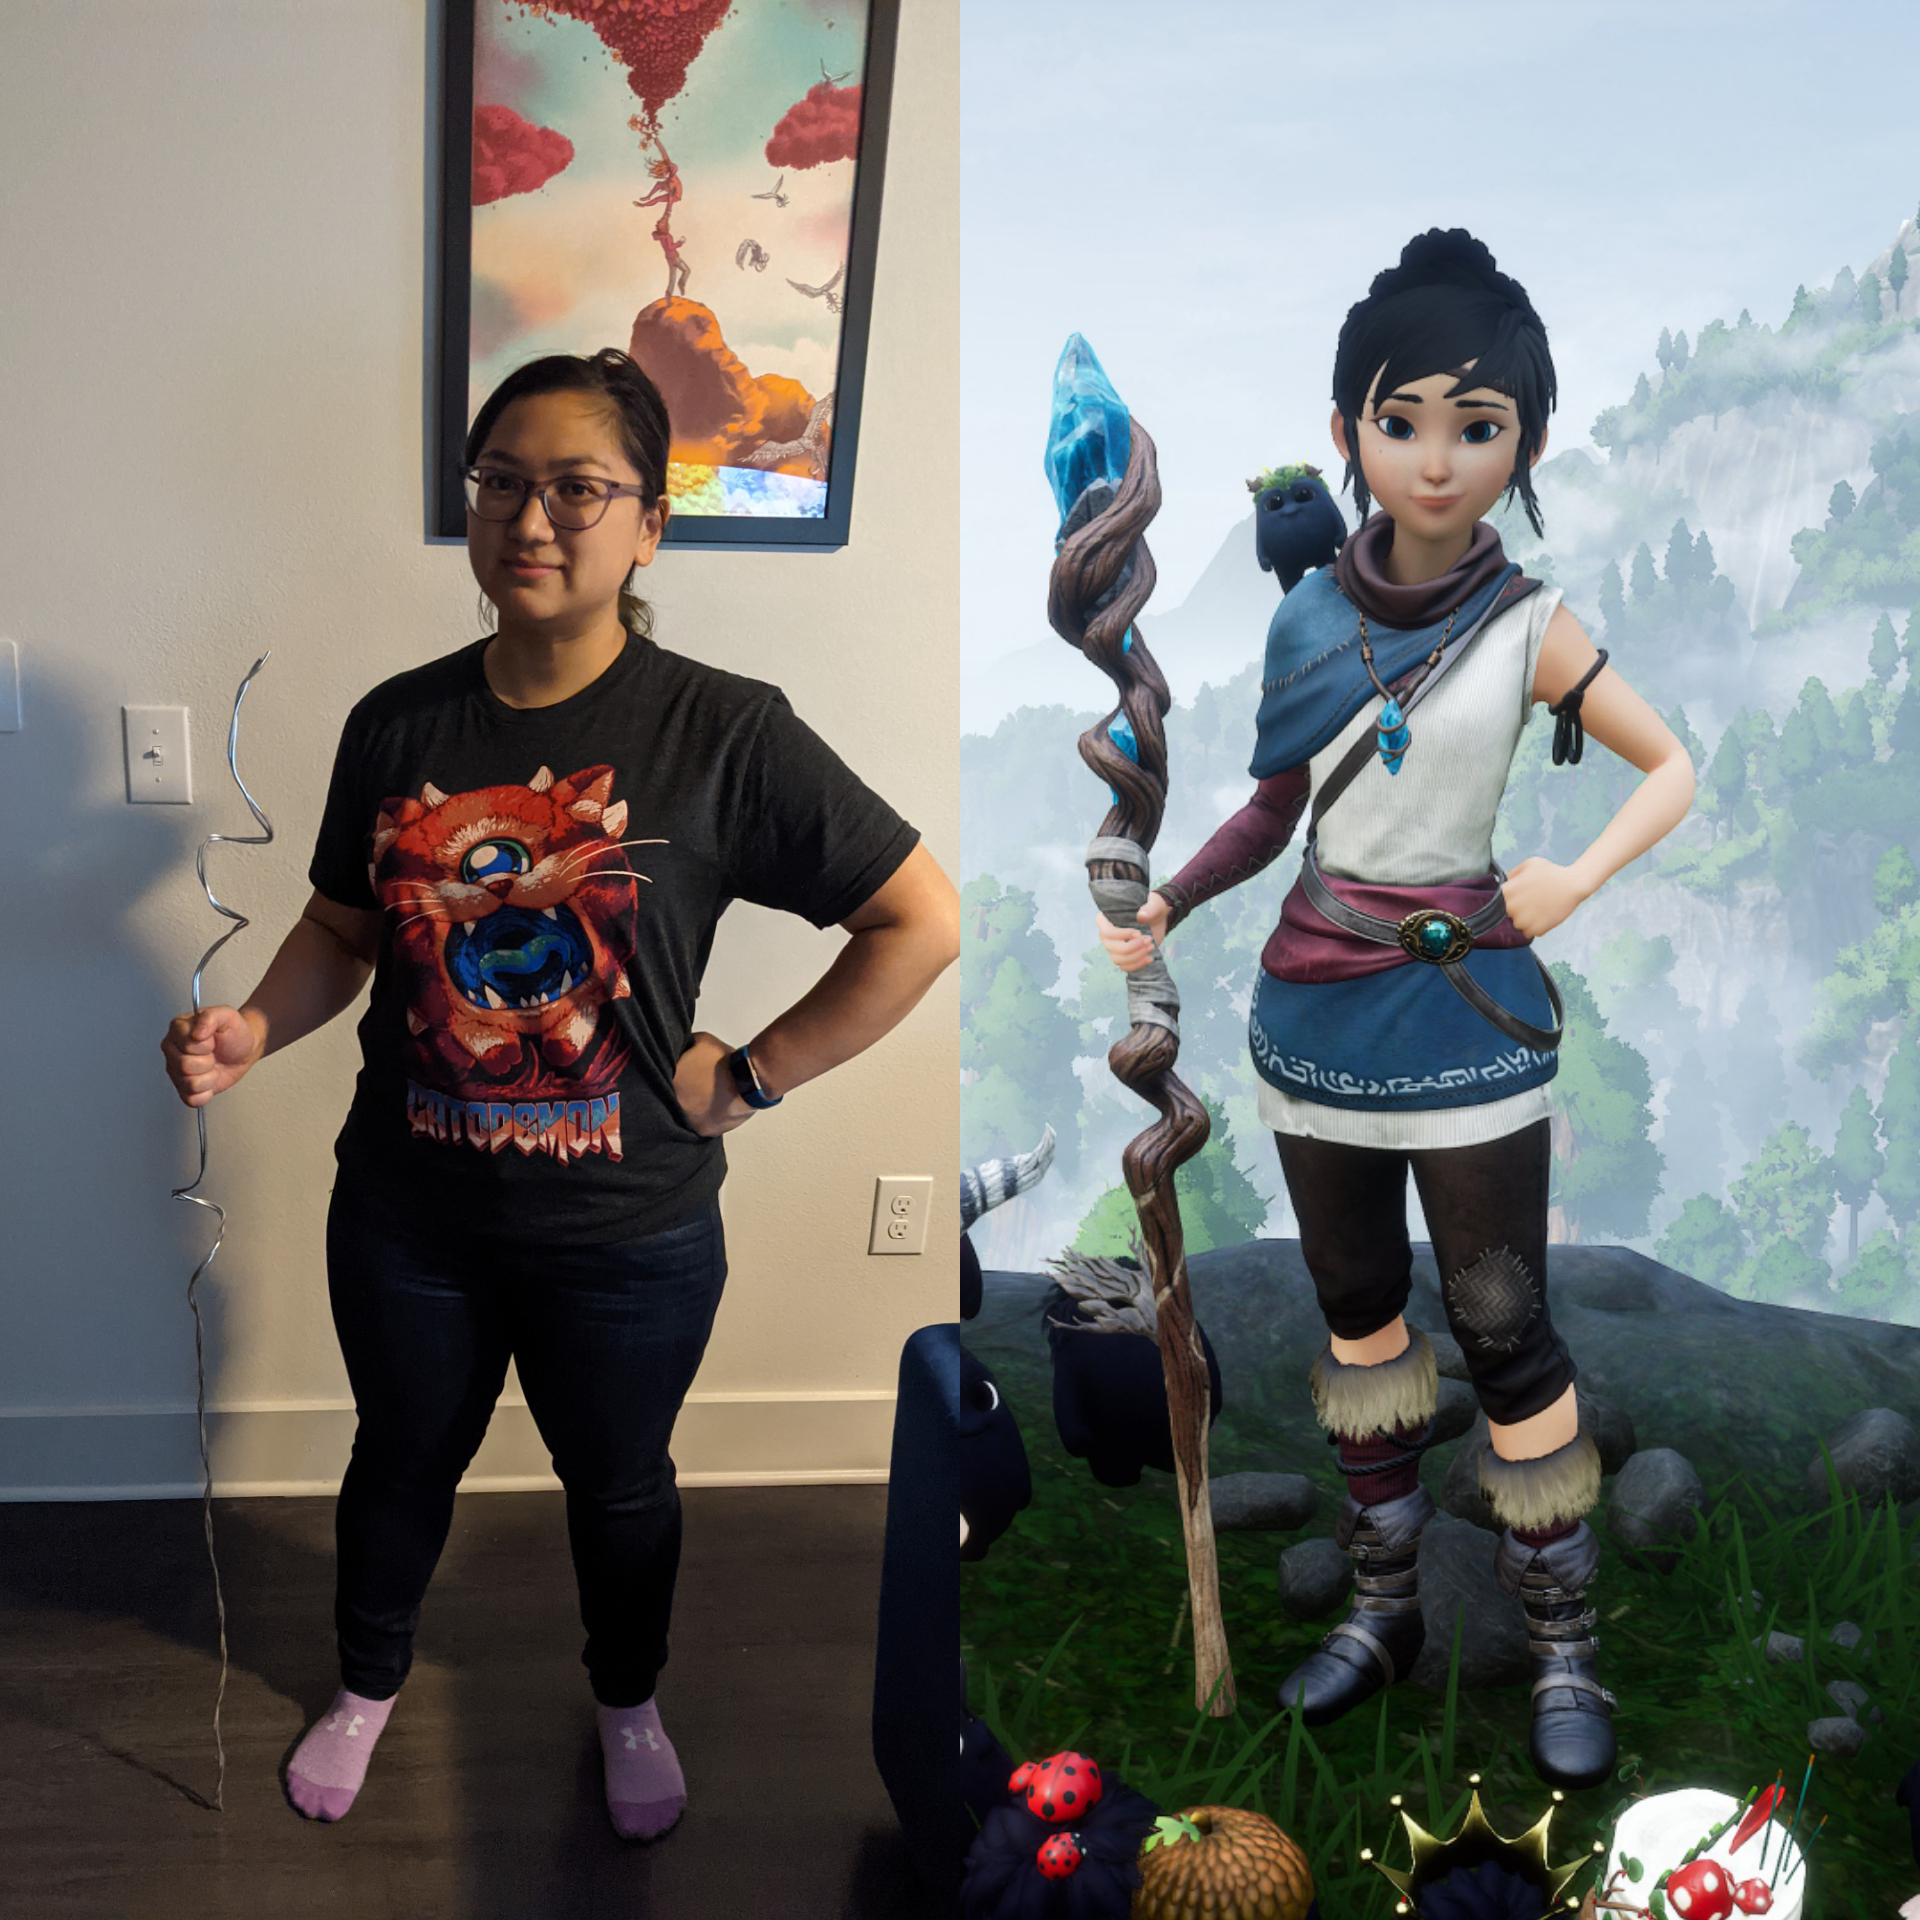
I fully intend to remake this staff. It was a fun experiment to crunch fo Nishi Fest, but I know I can do better. I believe the best parts of it were the crystals and the LED circuit. The weakest by far was using aluminum wire for the base. I intend to remake this staff using PVC pipe for the core to my next competition, which is likely A-kon in June. I’ll probably write an entirely new post for that build since this one is already very long.
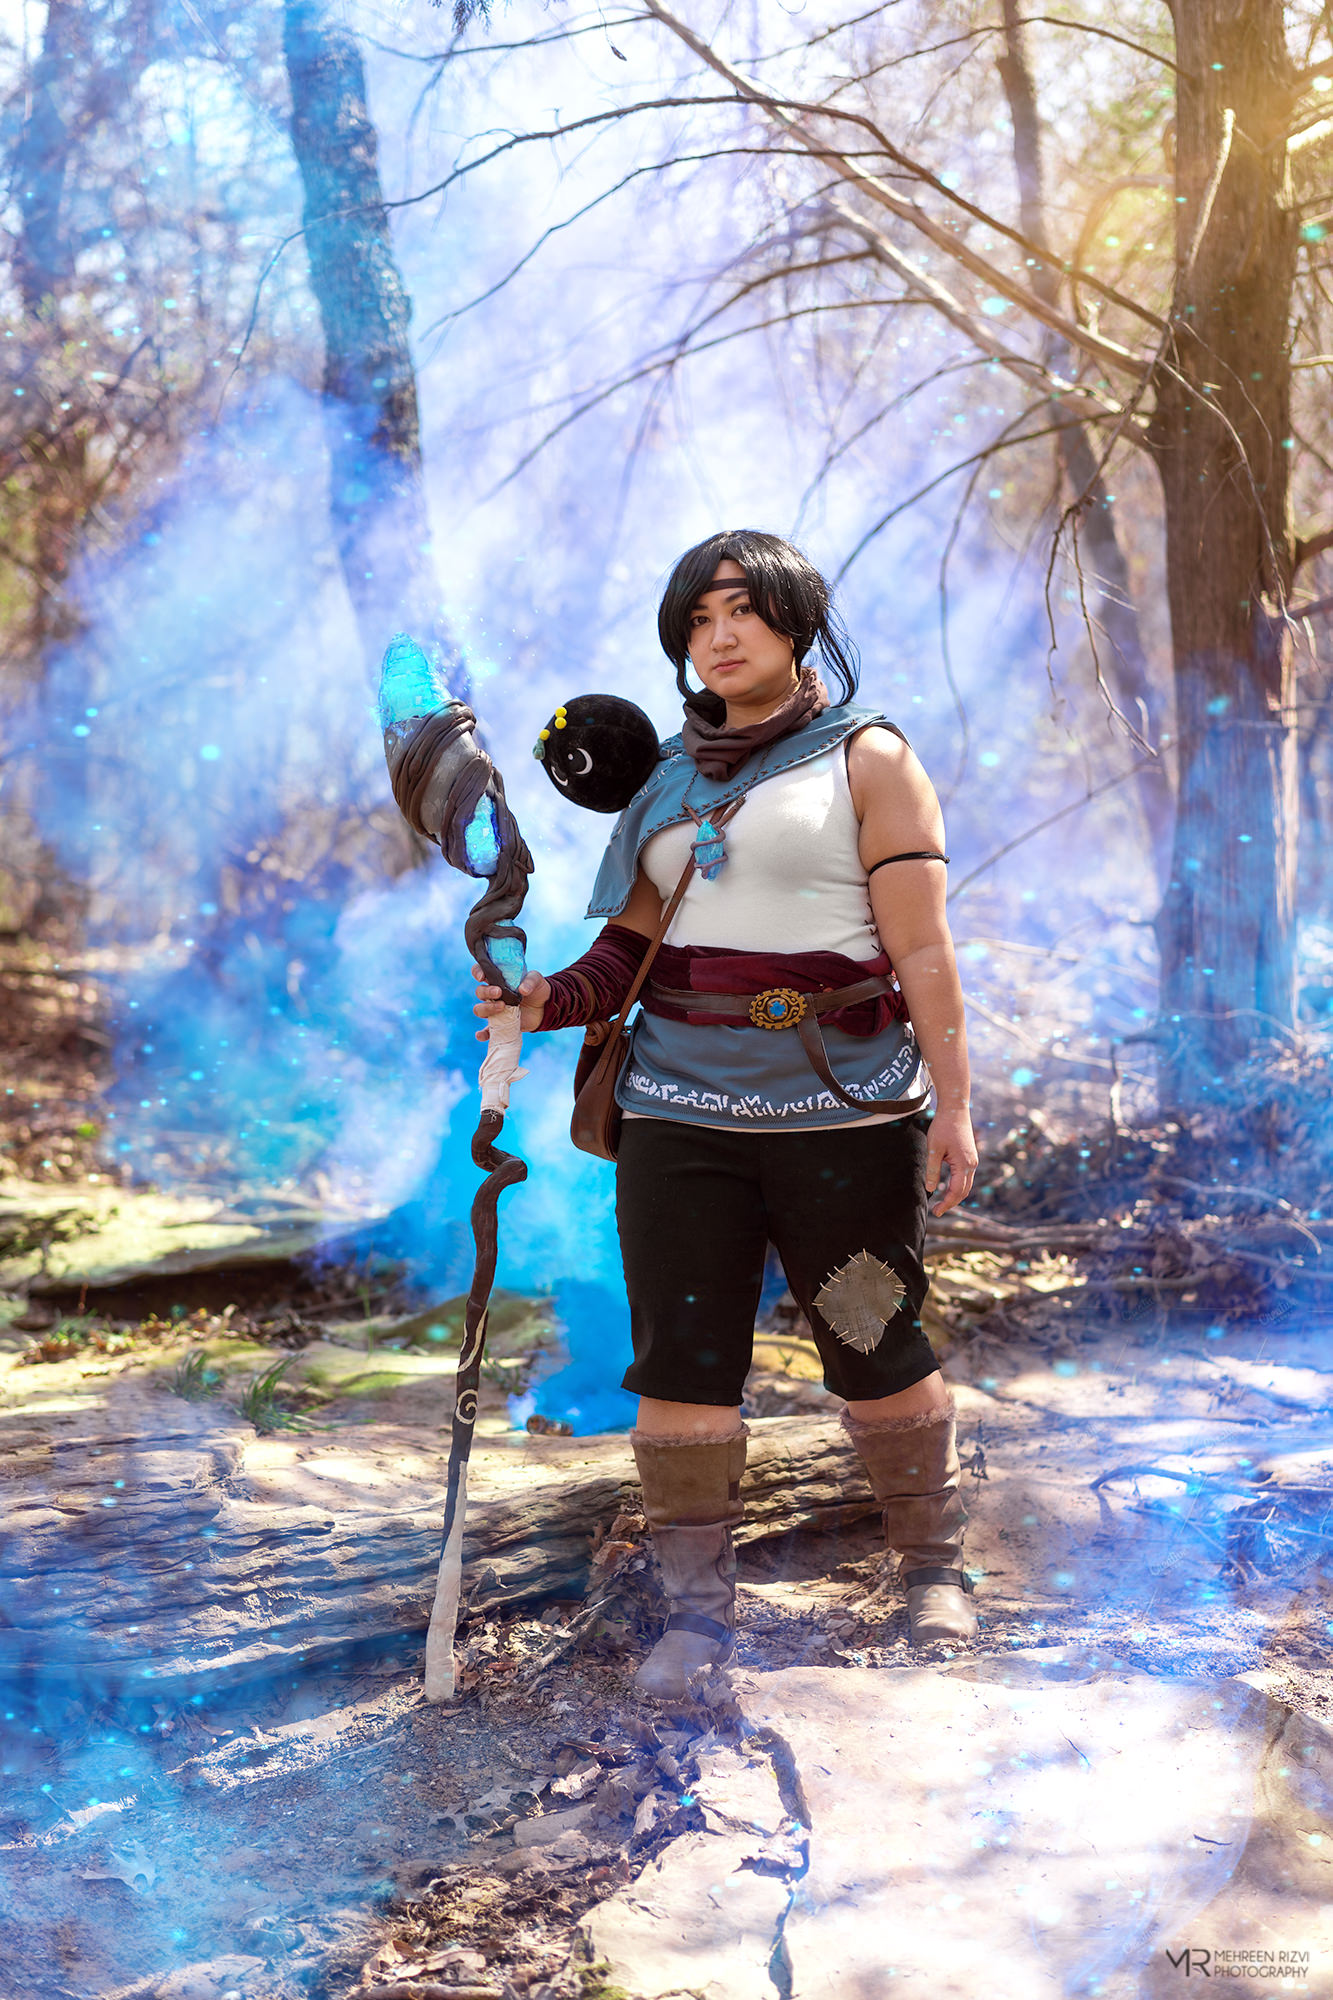
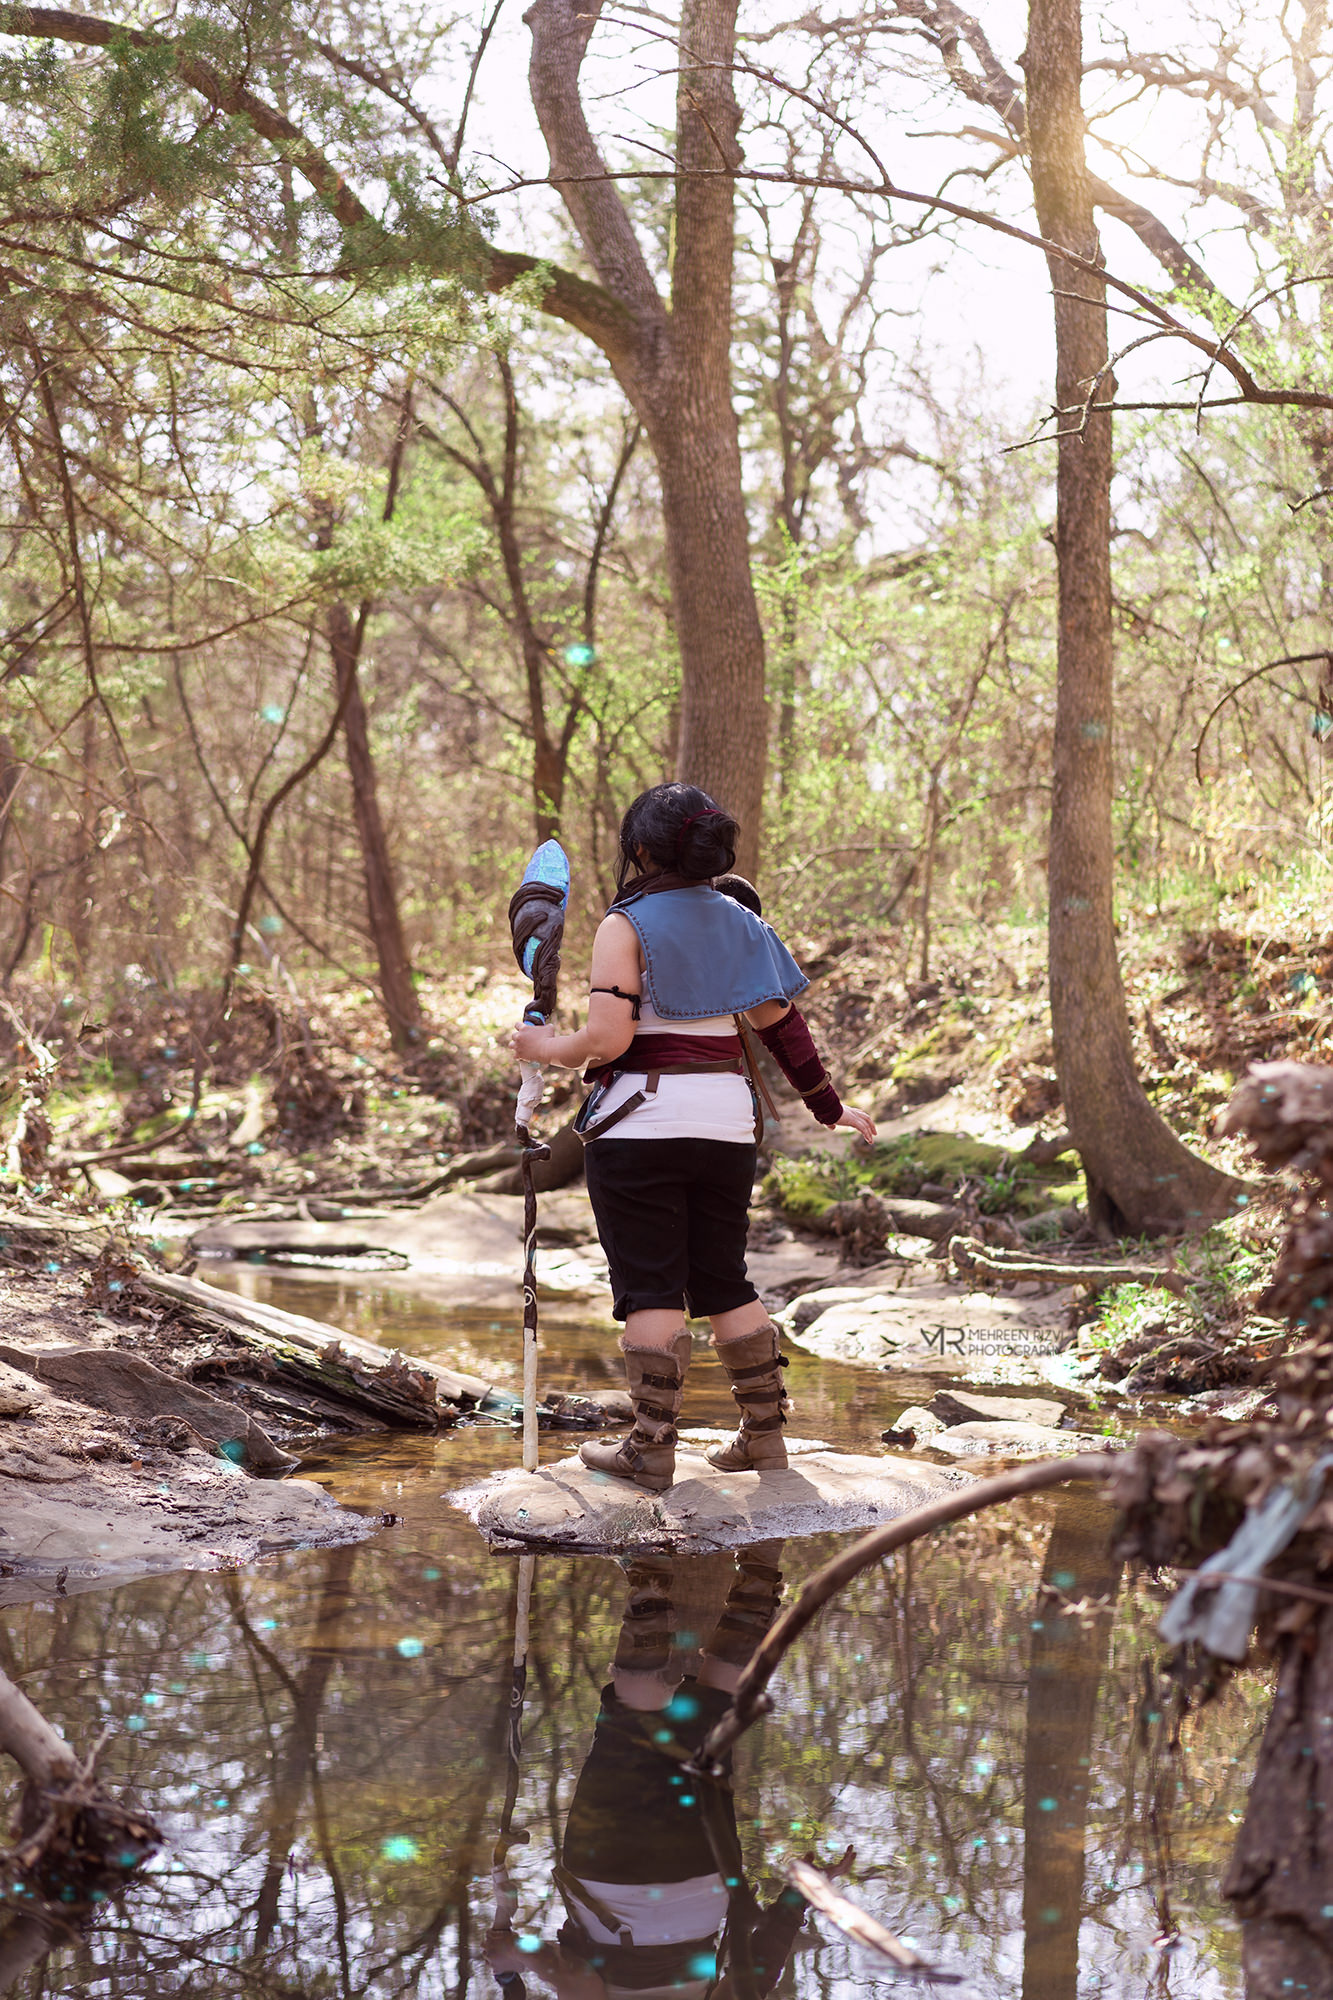
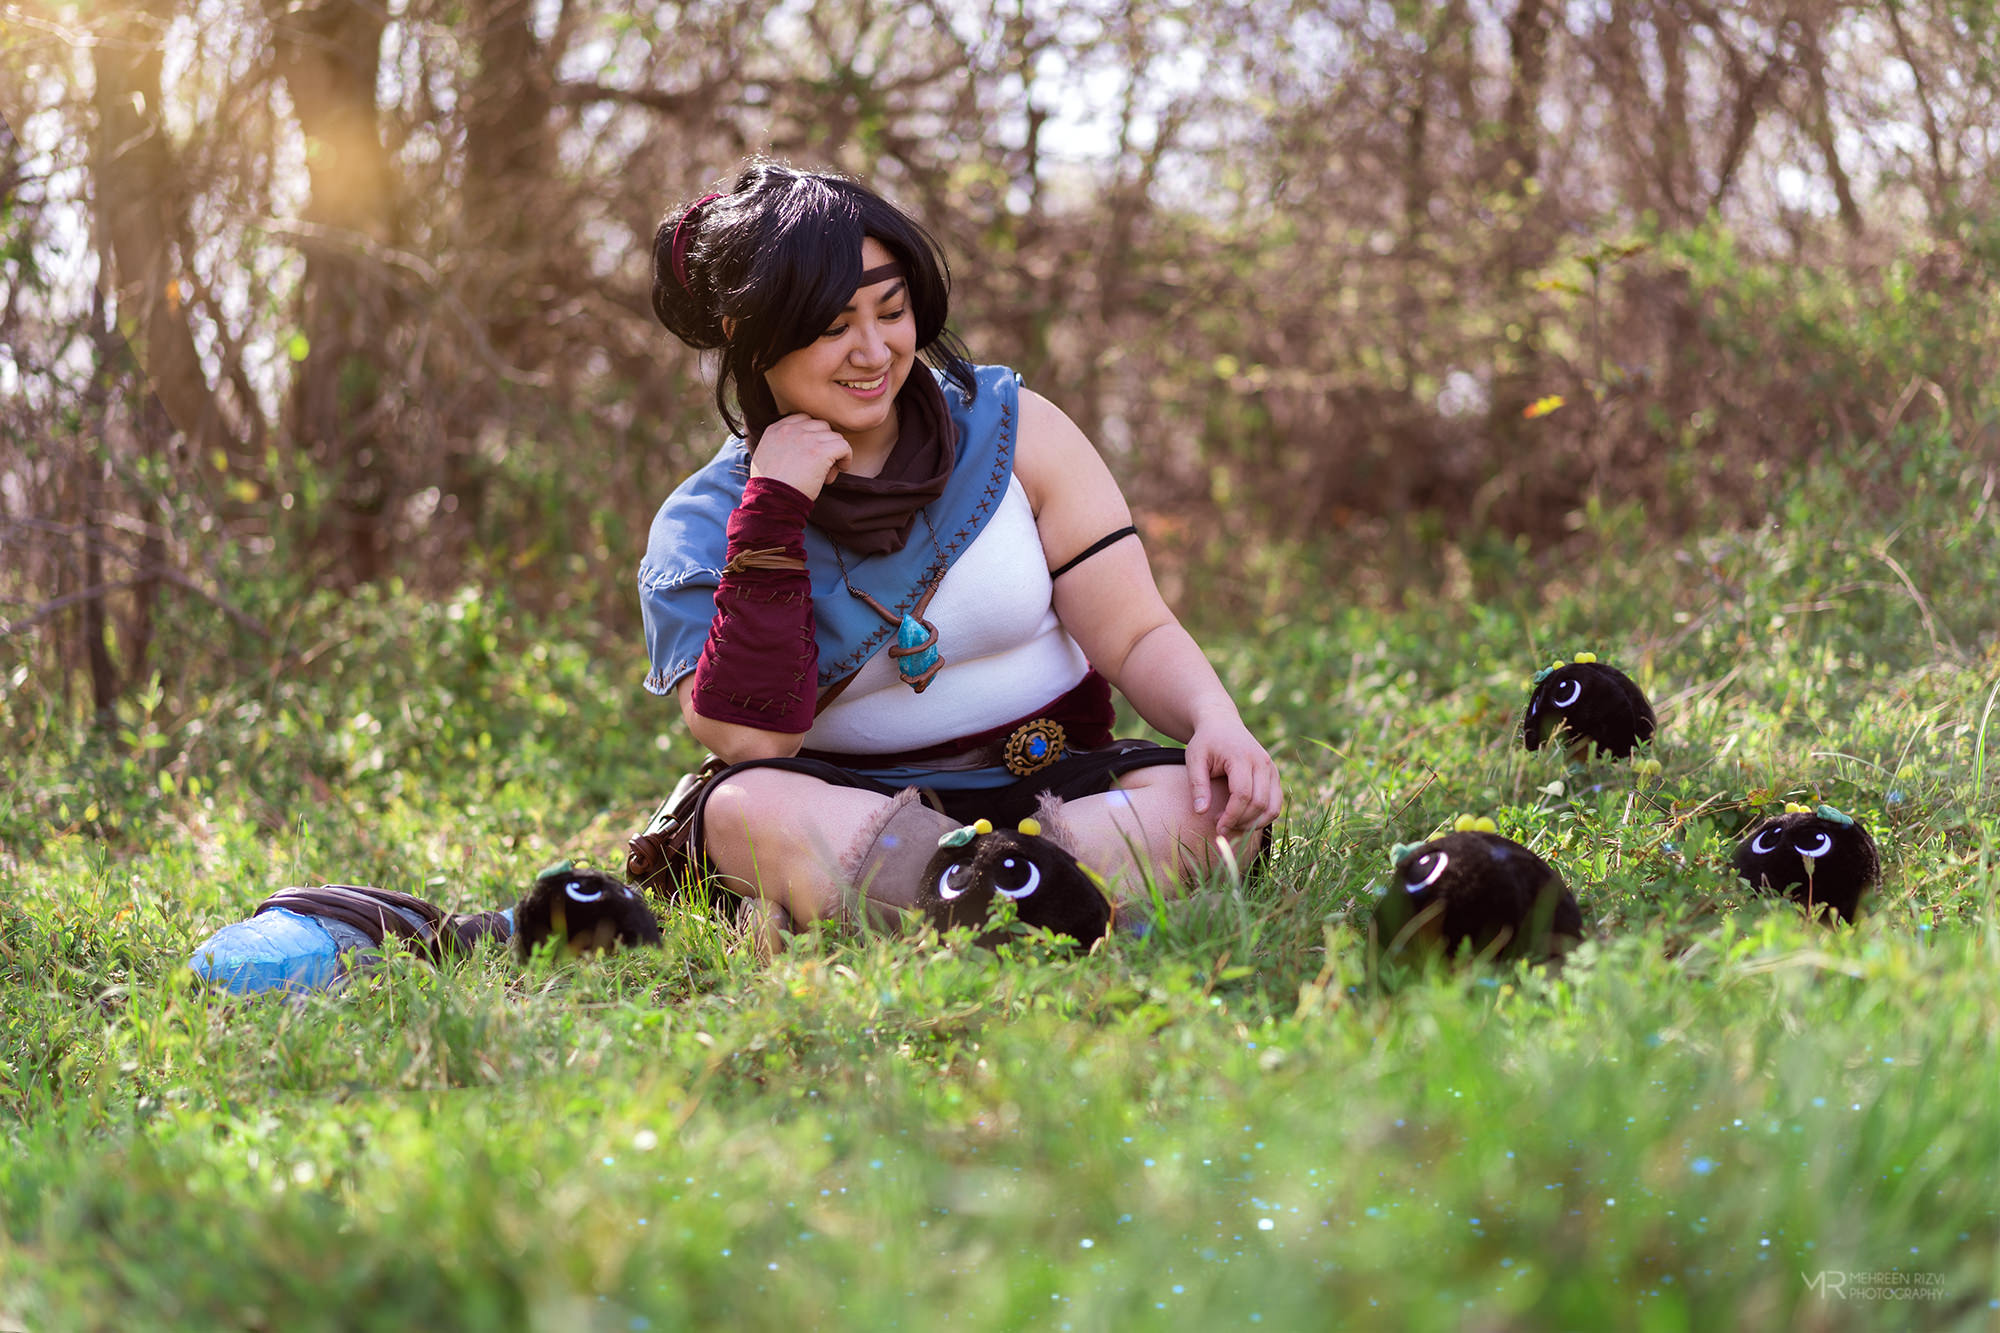
Finished photos by Mehreen Rizvi
Use my build post as inspiration? Let me know!
If you followed along with my build post to help you make your cosplay, I’d love to see it! Leave me a comment or send me an email at ashweezcosplay(at)gmail(dot)com. If you’re comfortable with it, I’d love to showcase your cosplay photo(s) in the blog! I will of course give you credit and link to any socials you may have.
