
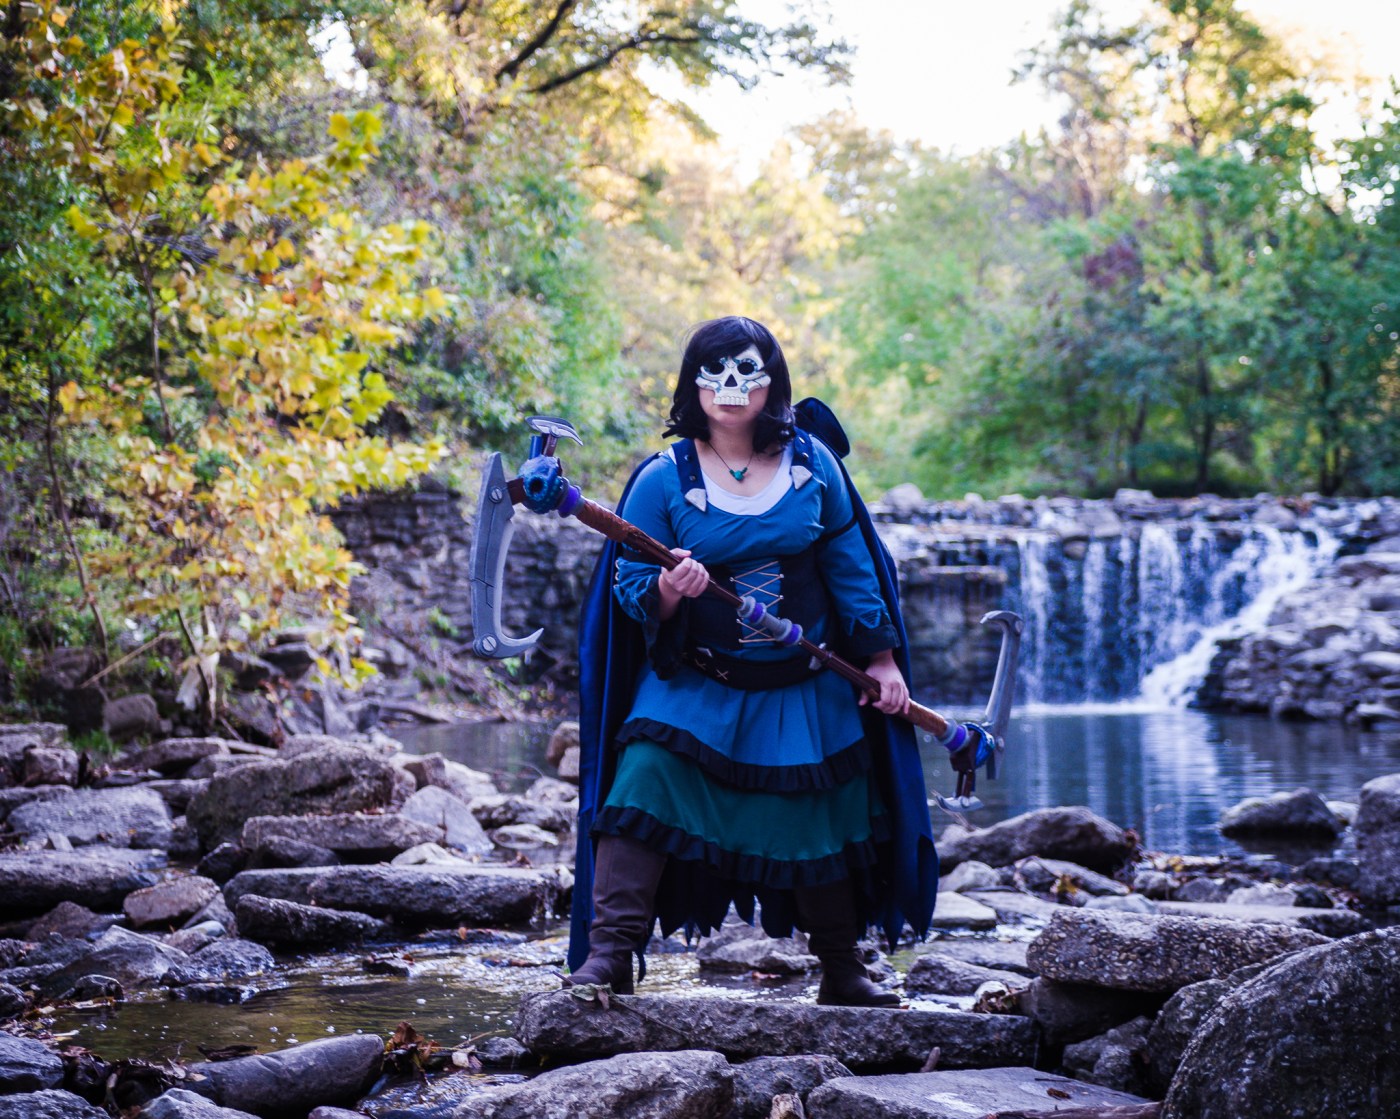
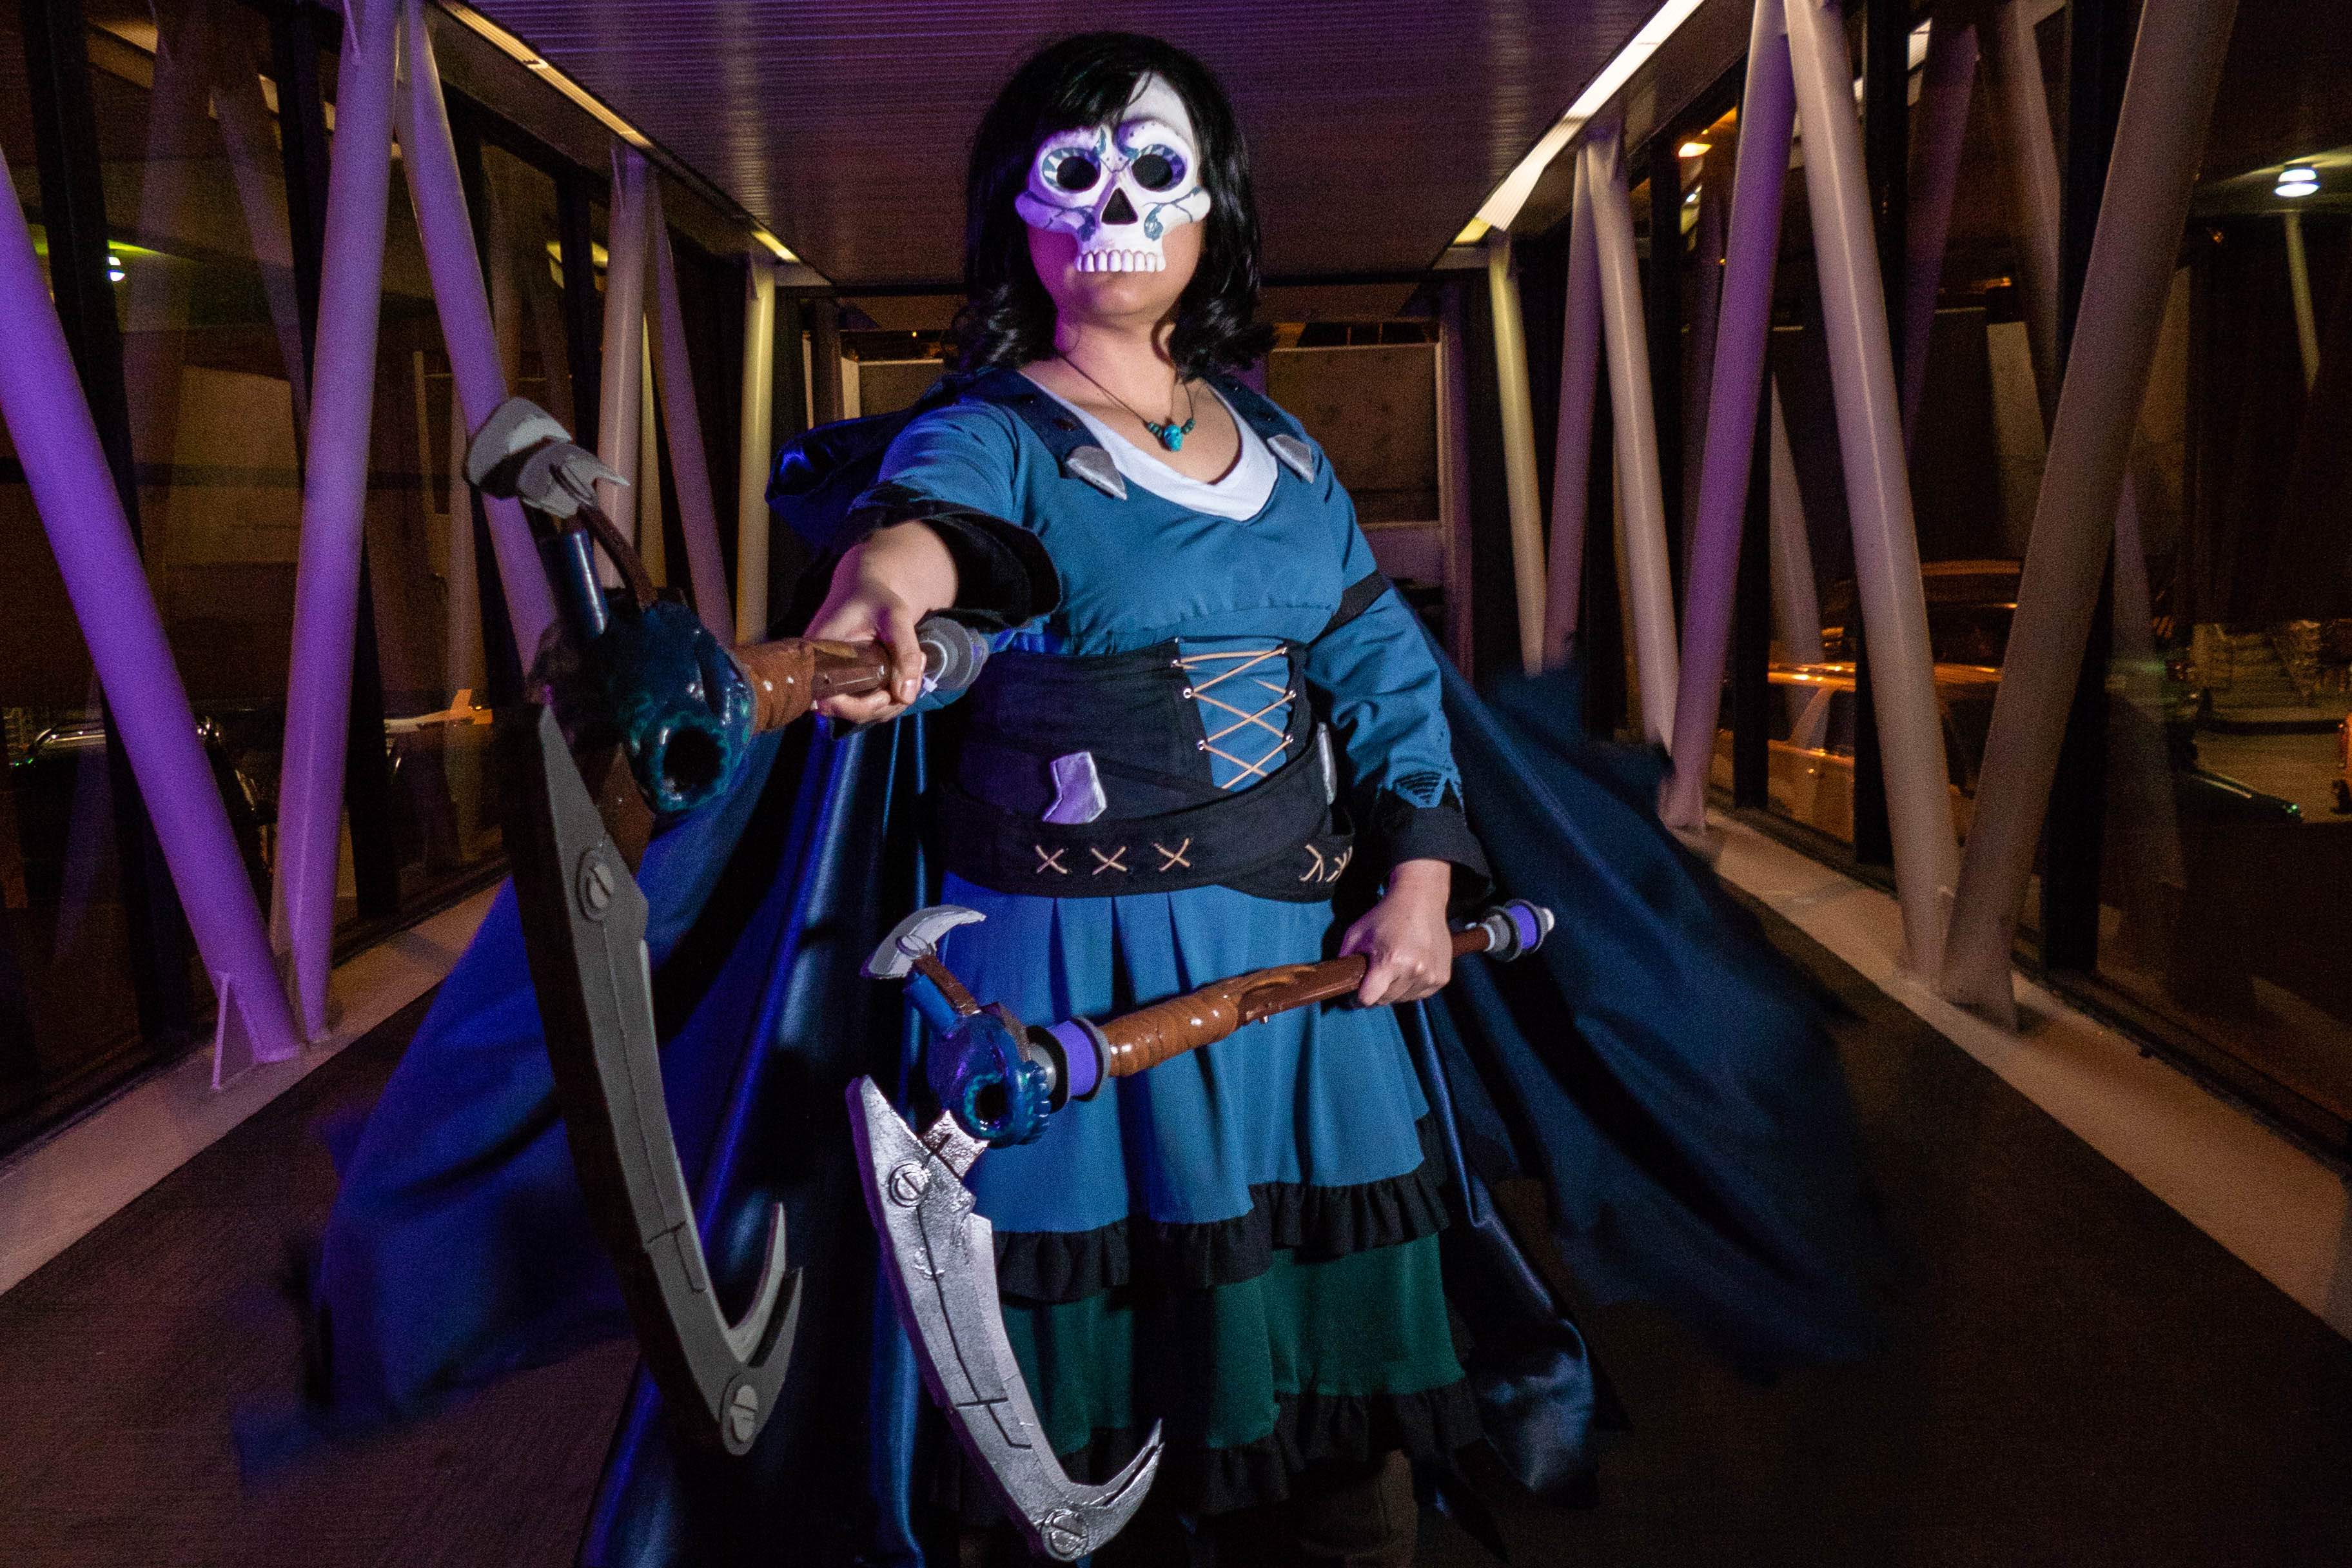
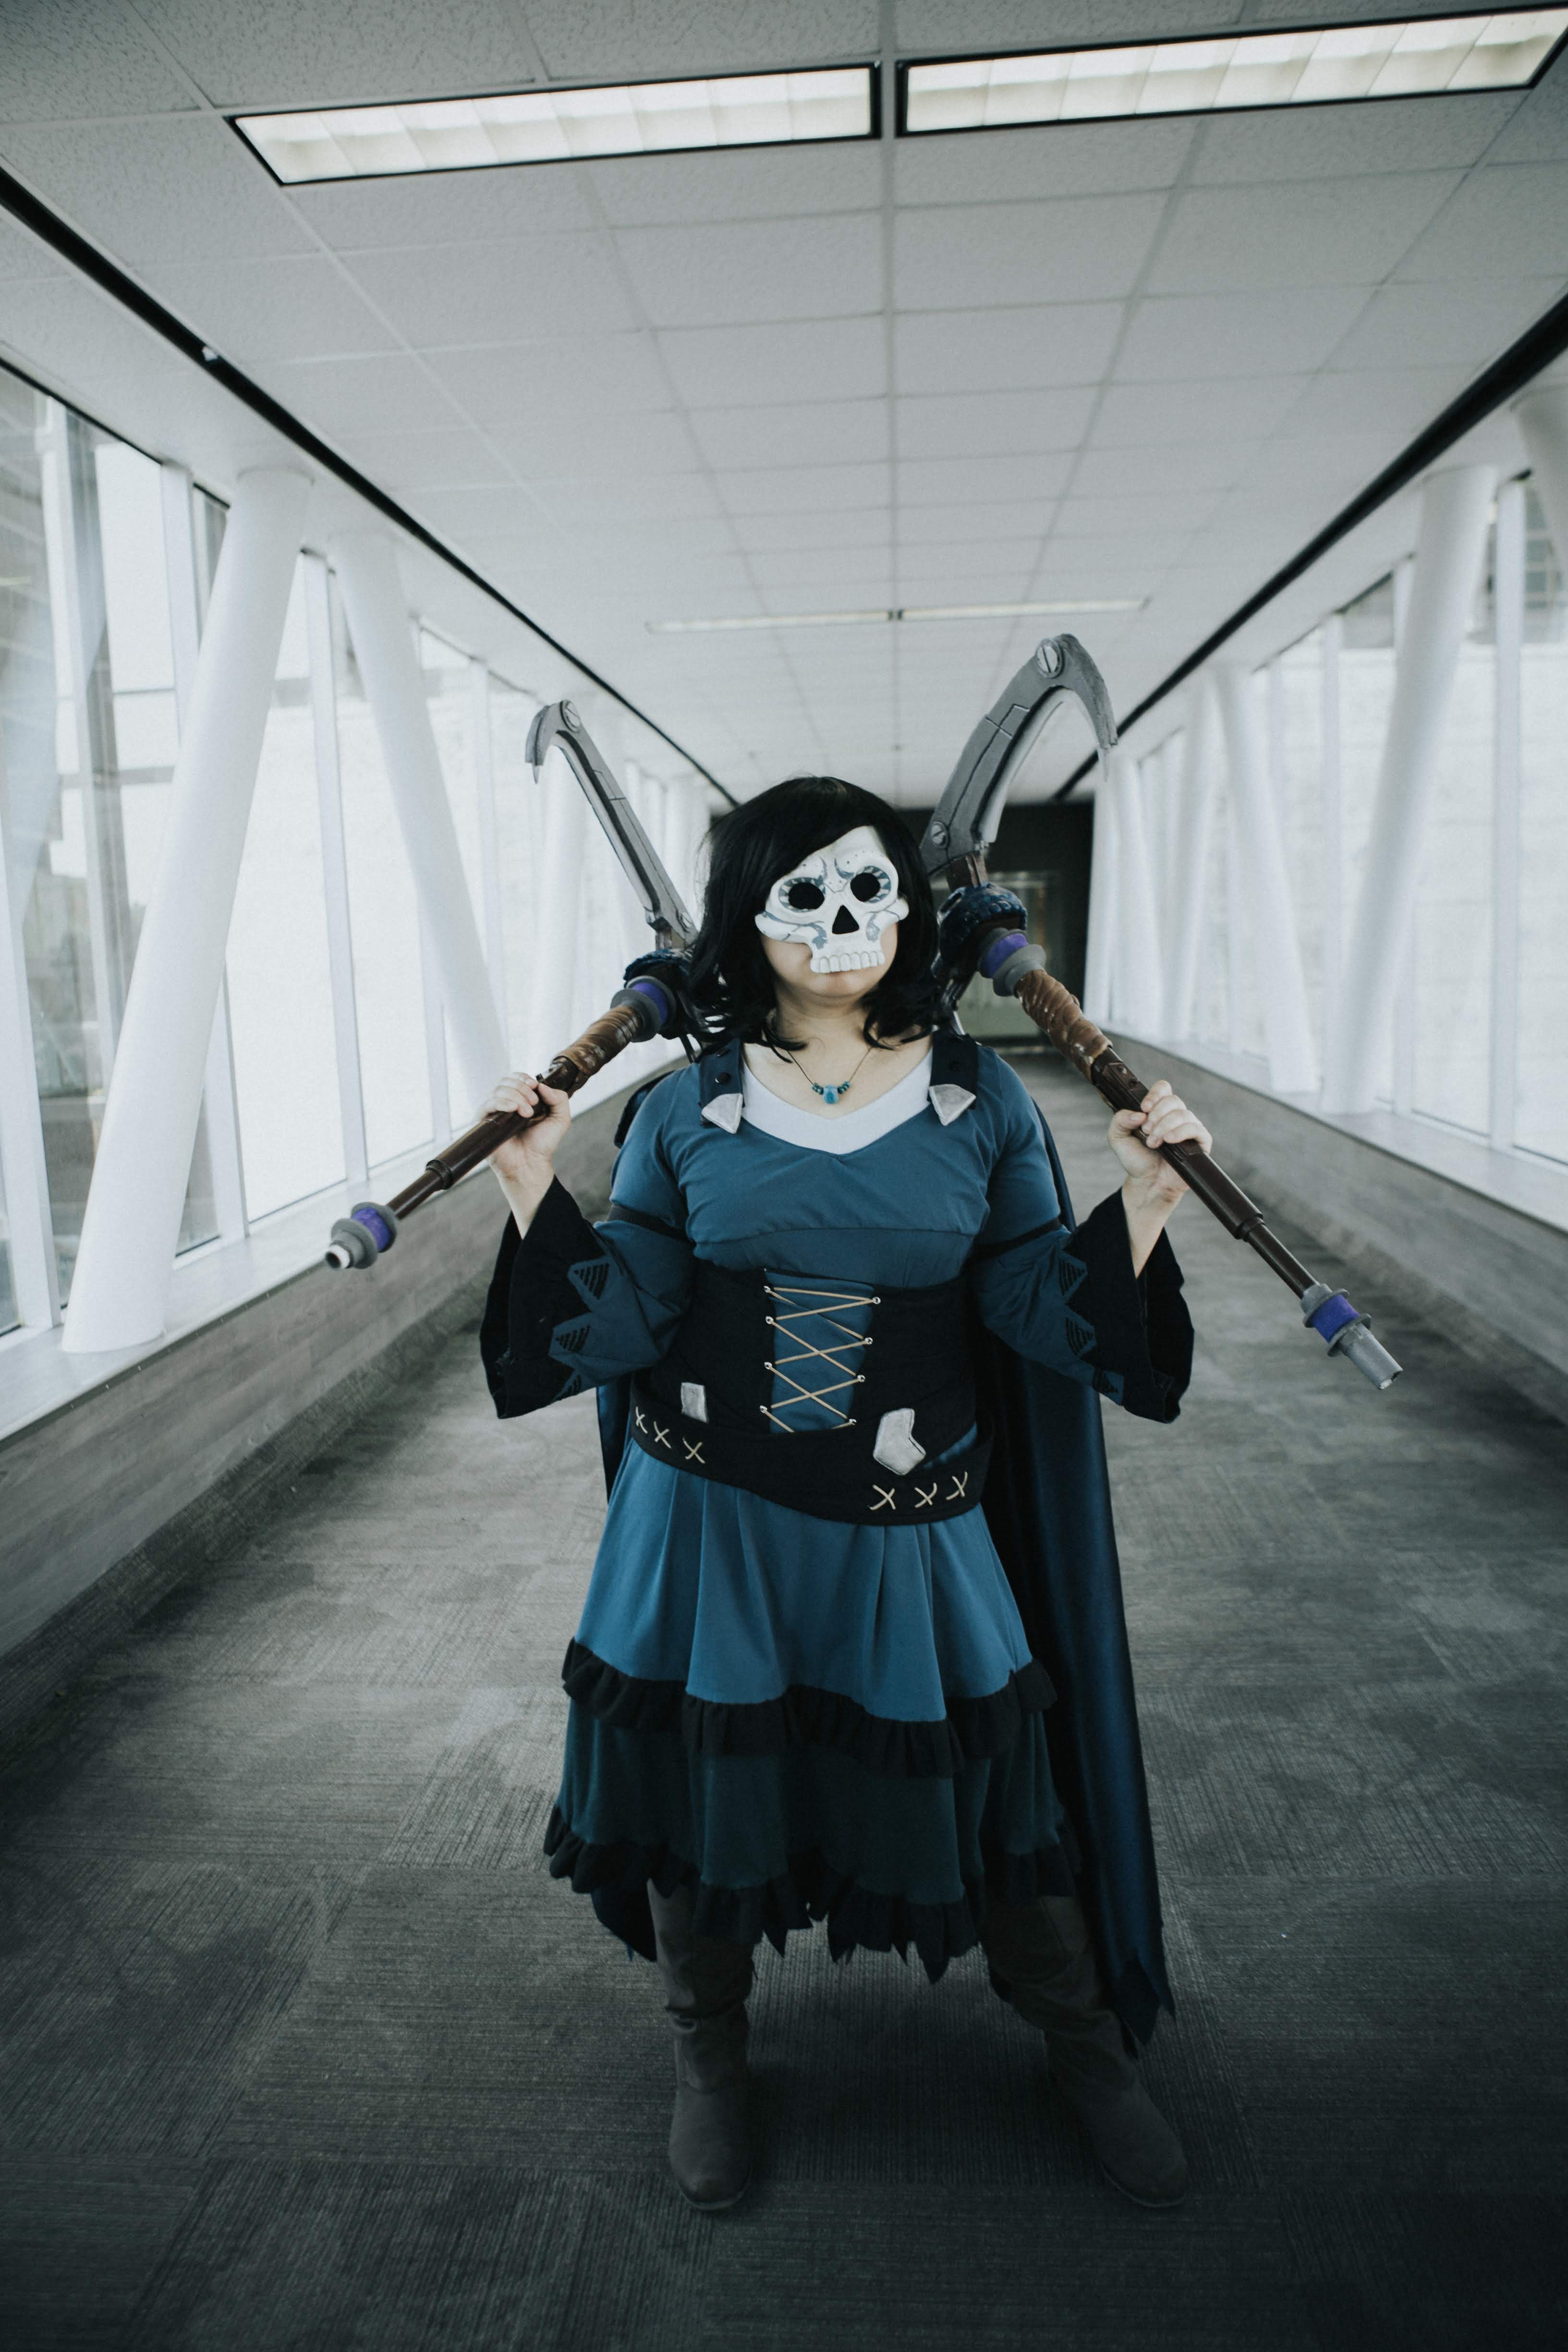
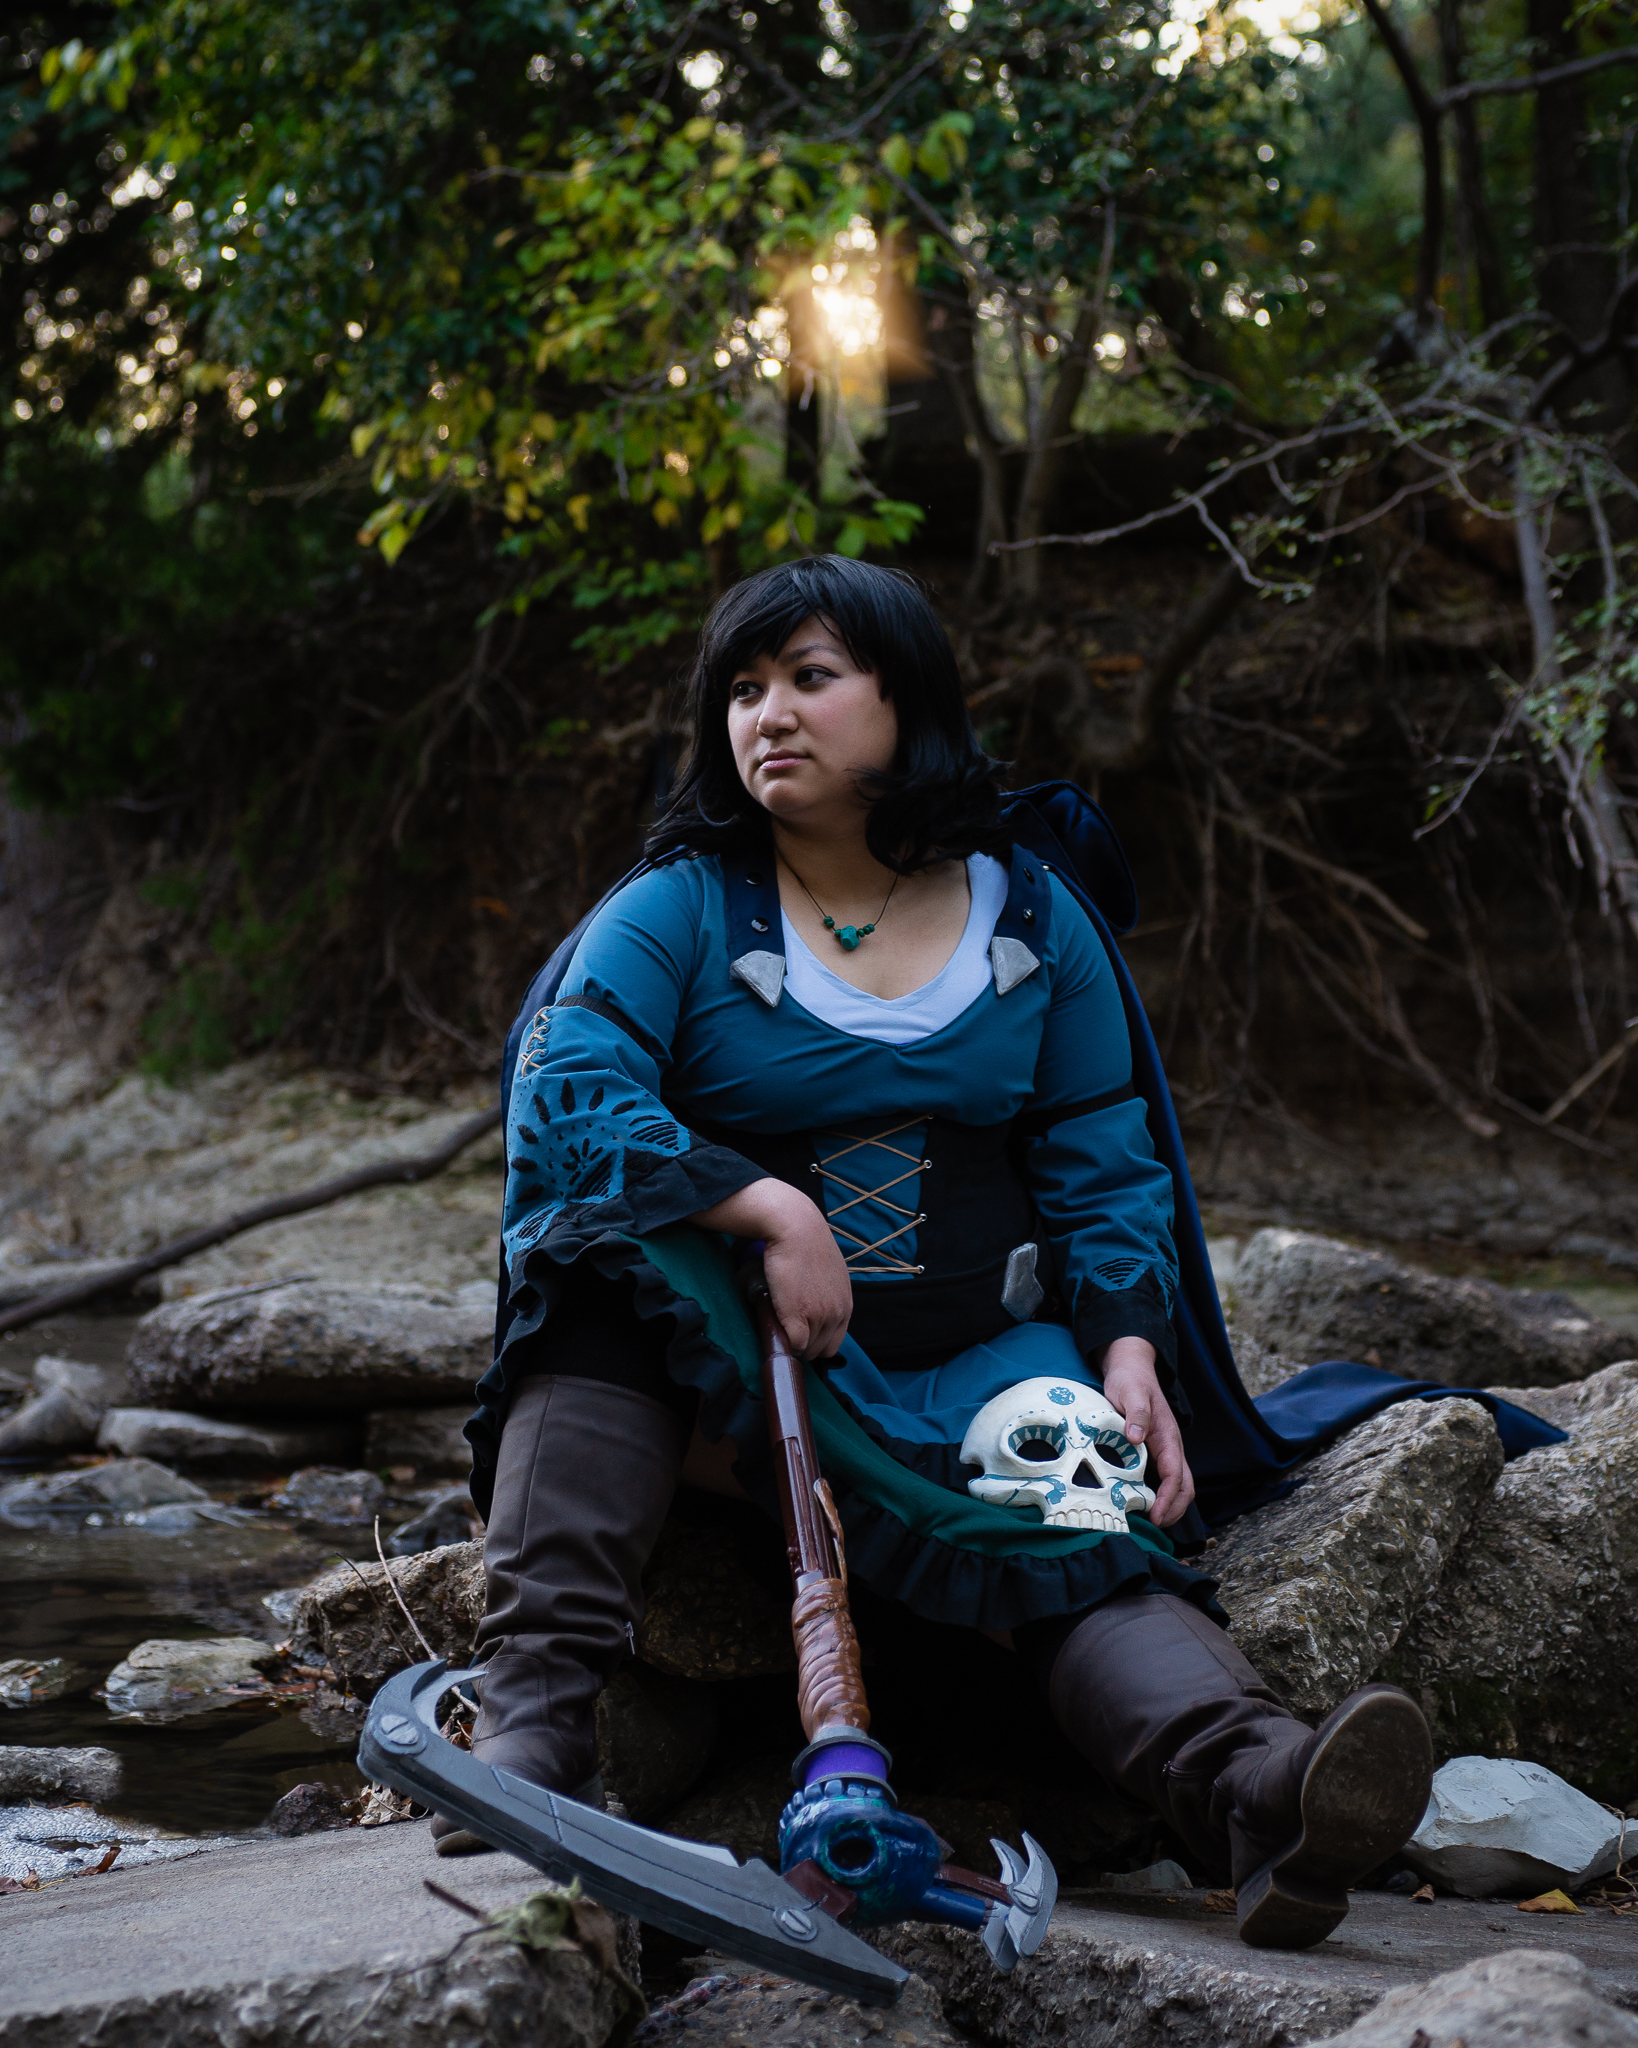
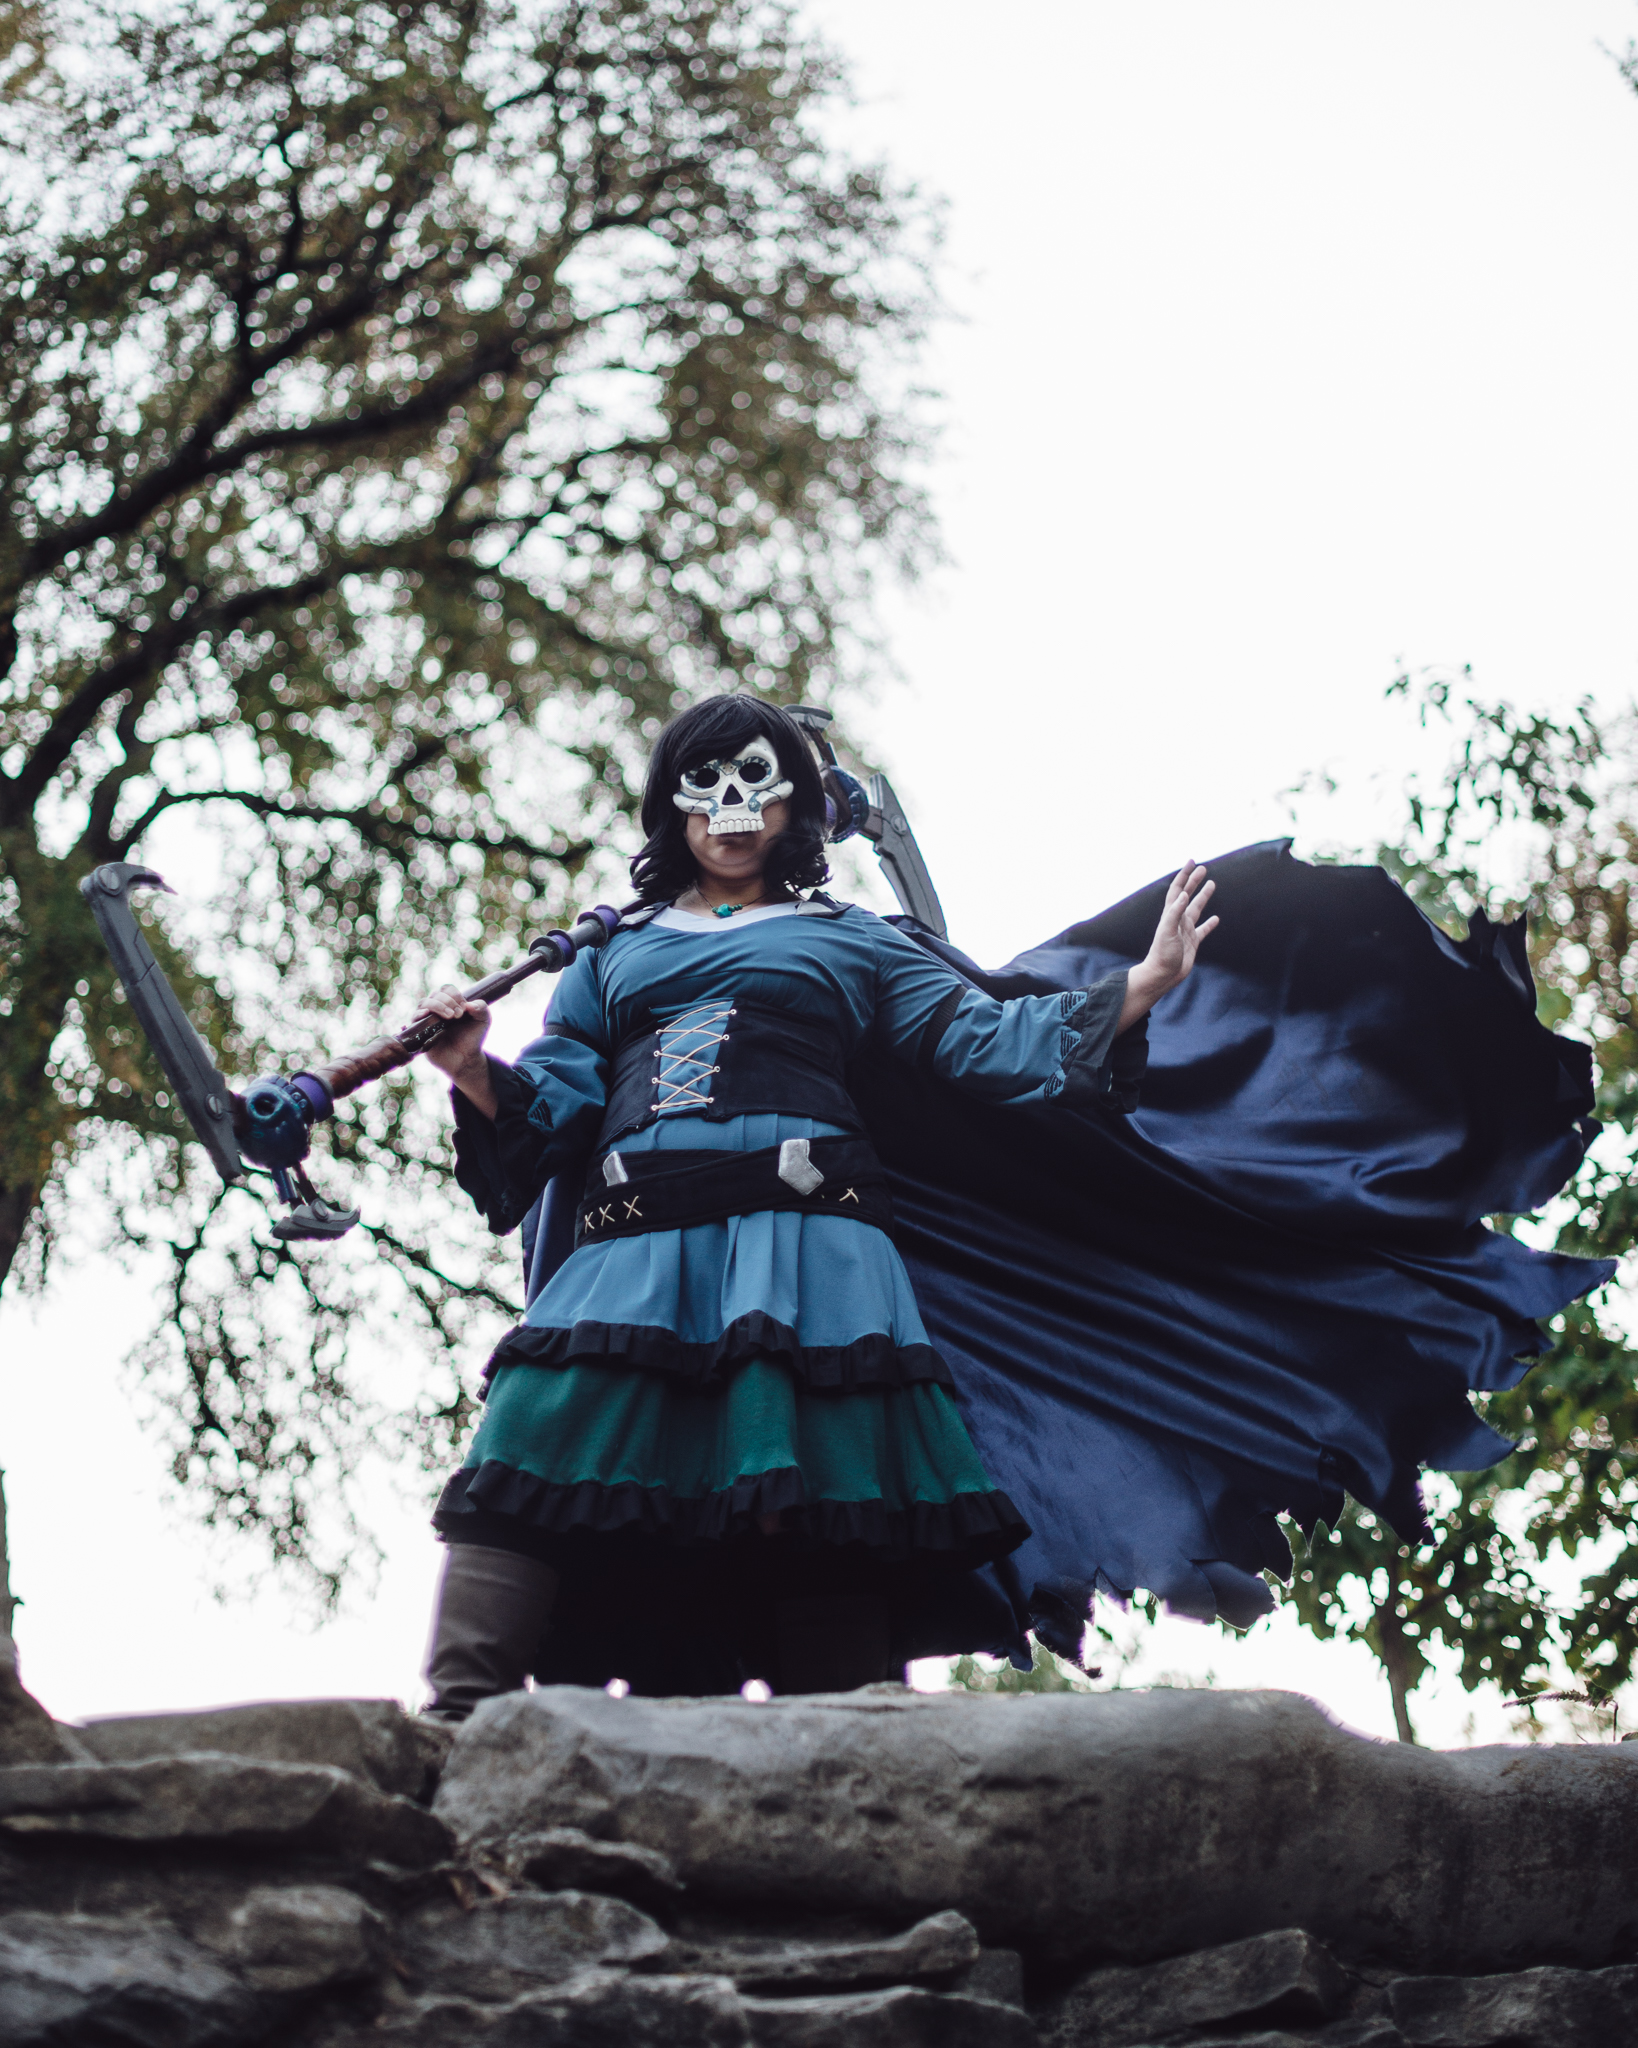
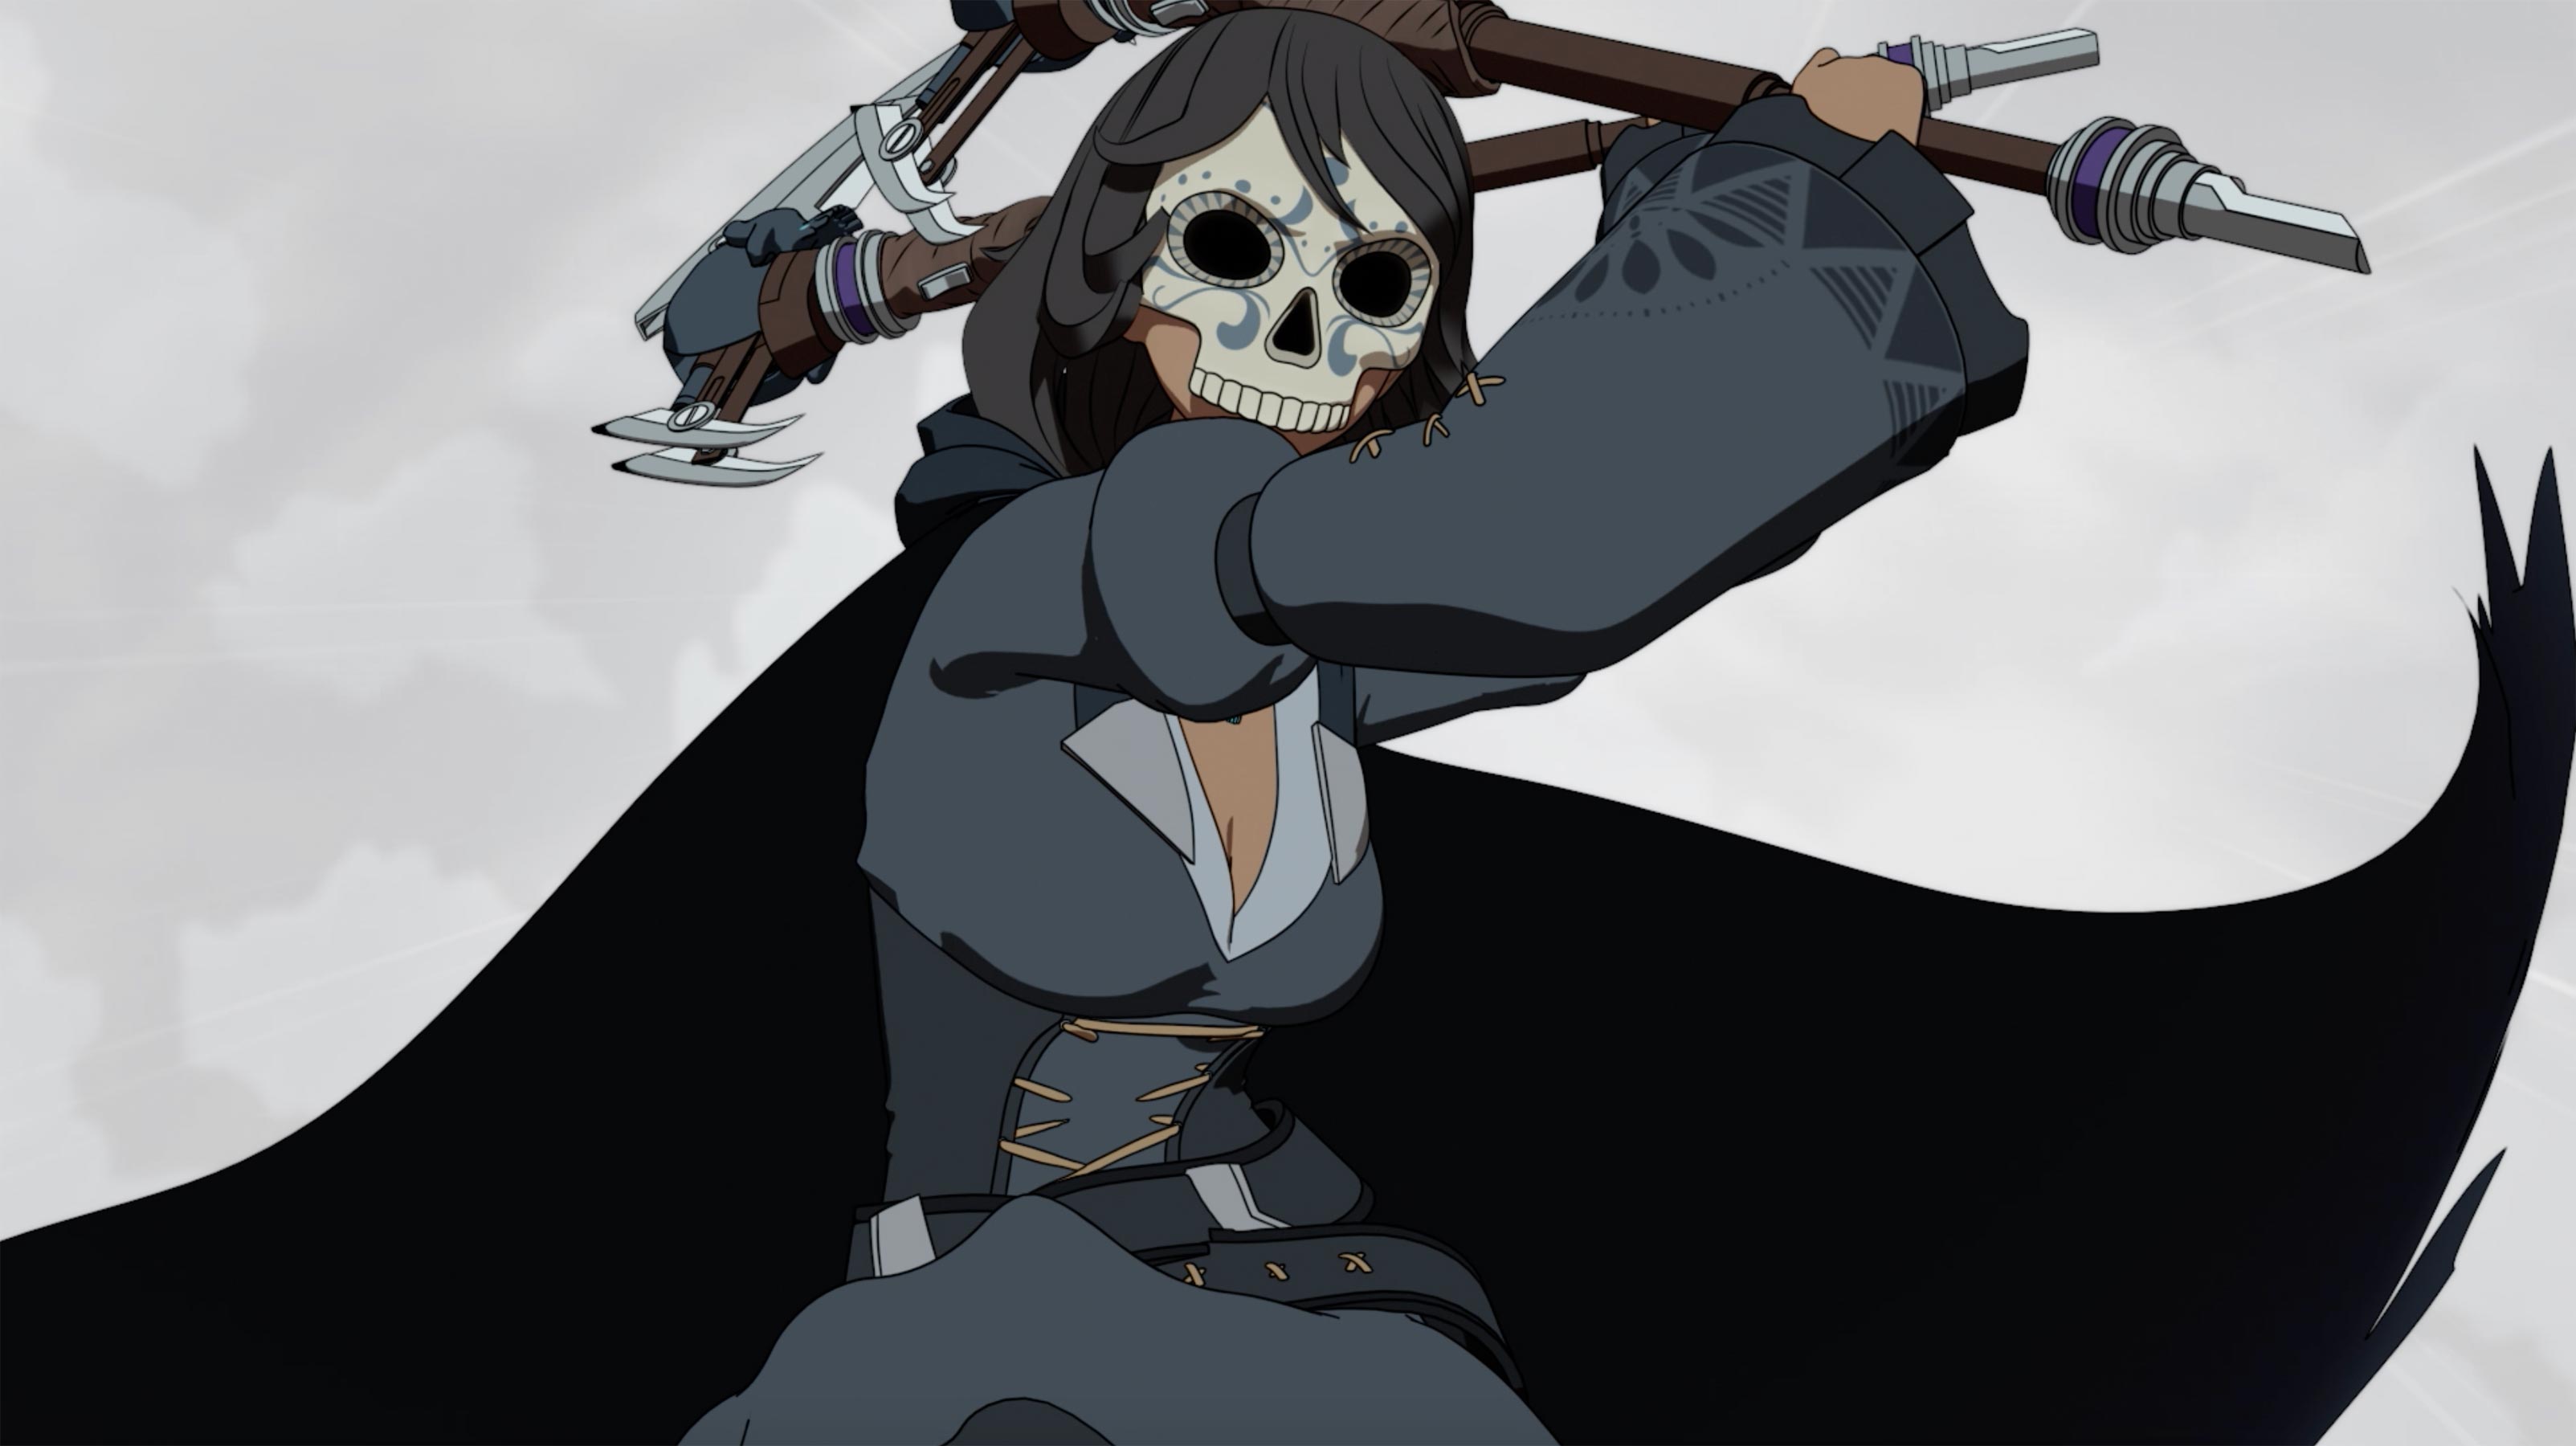
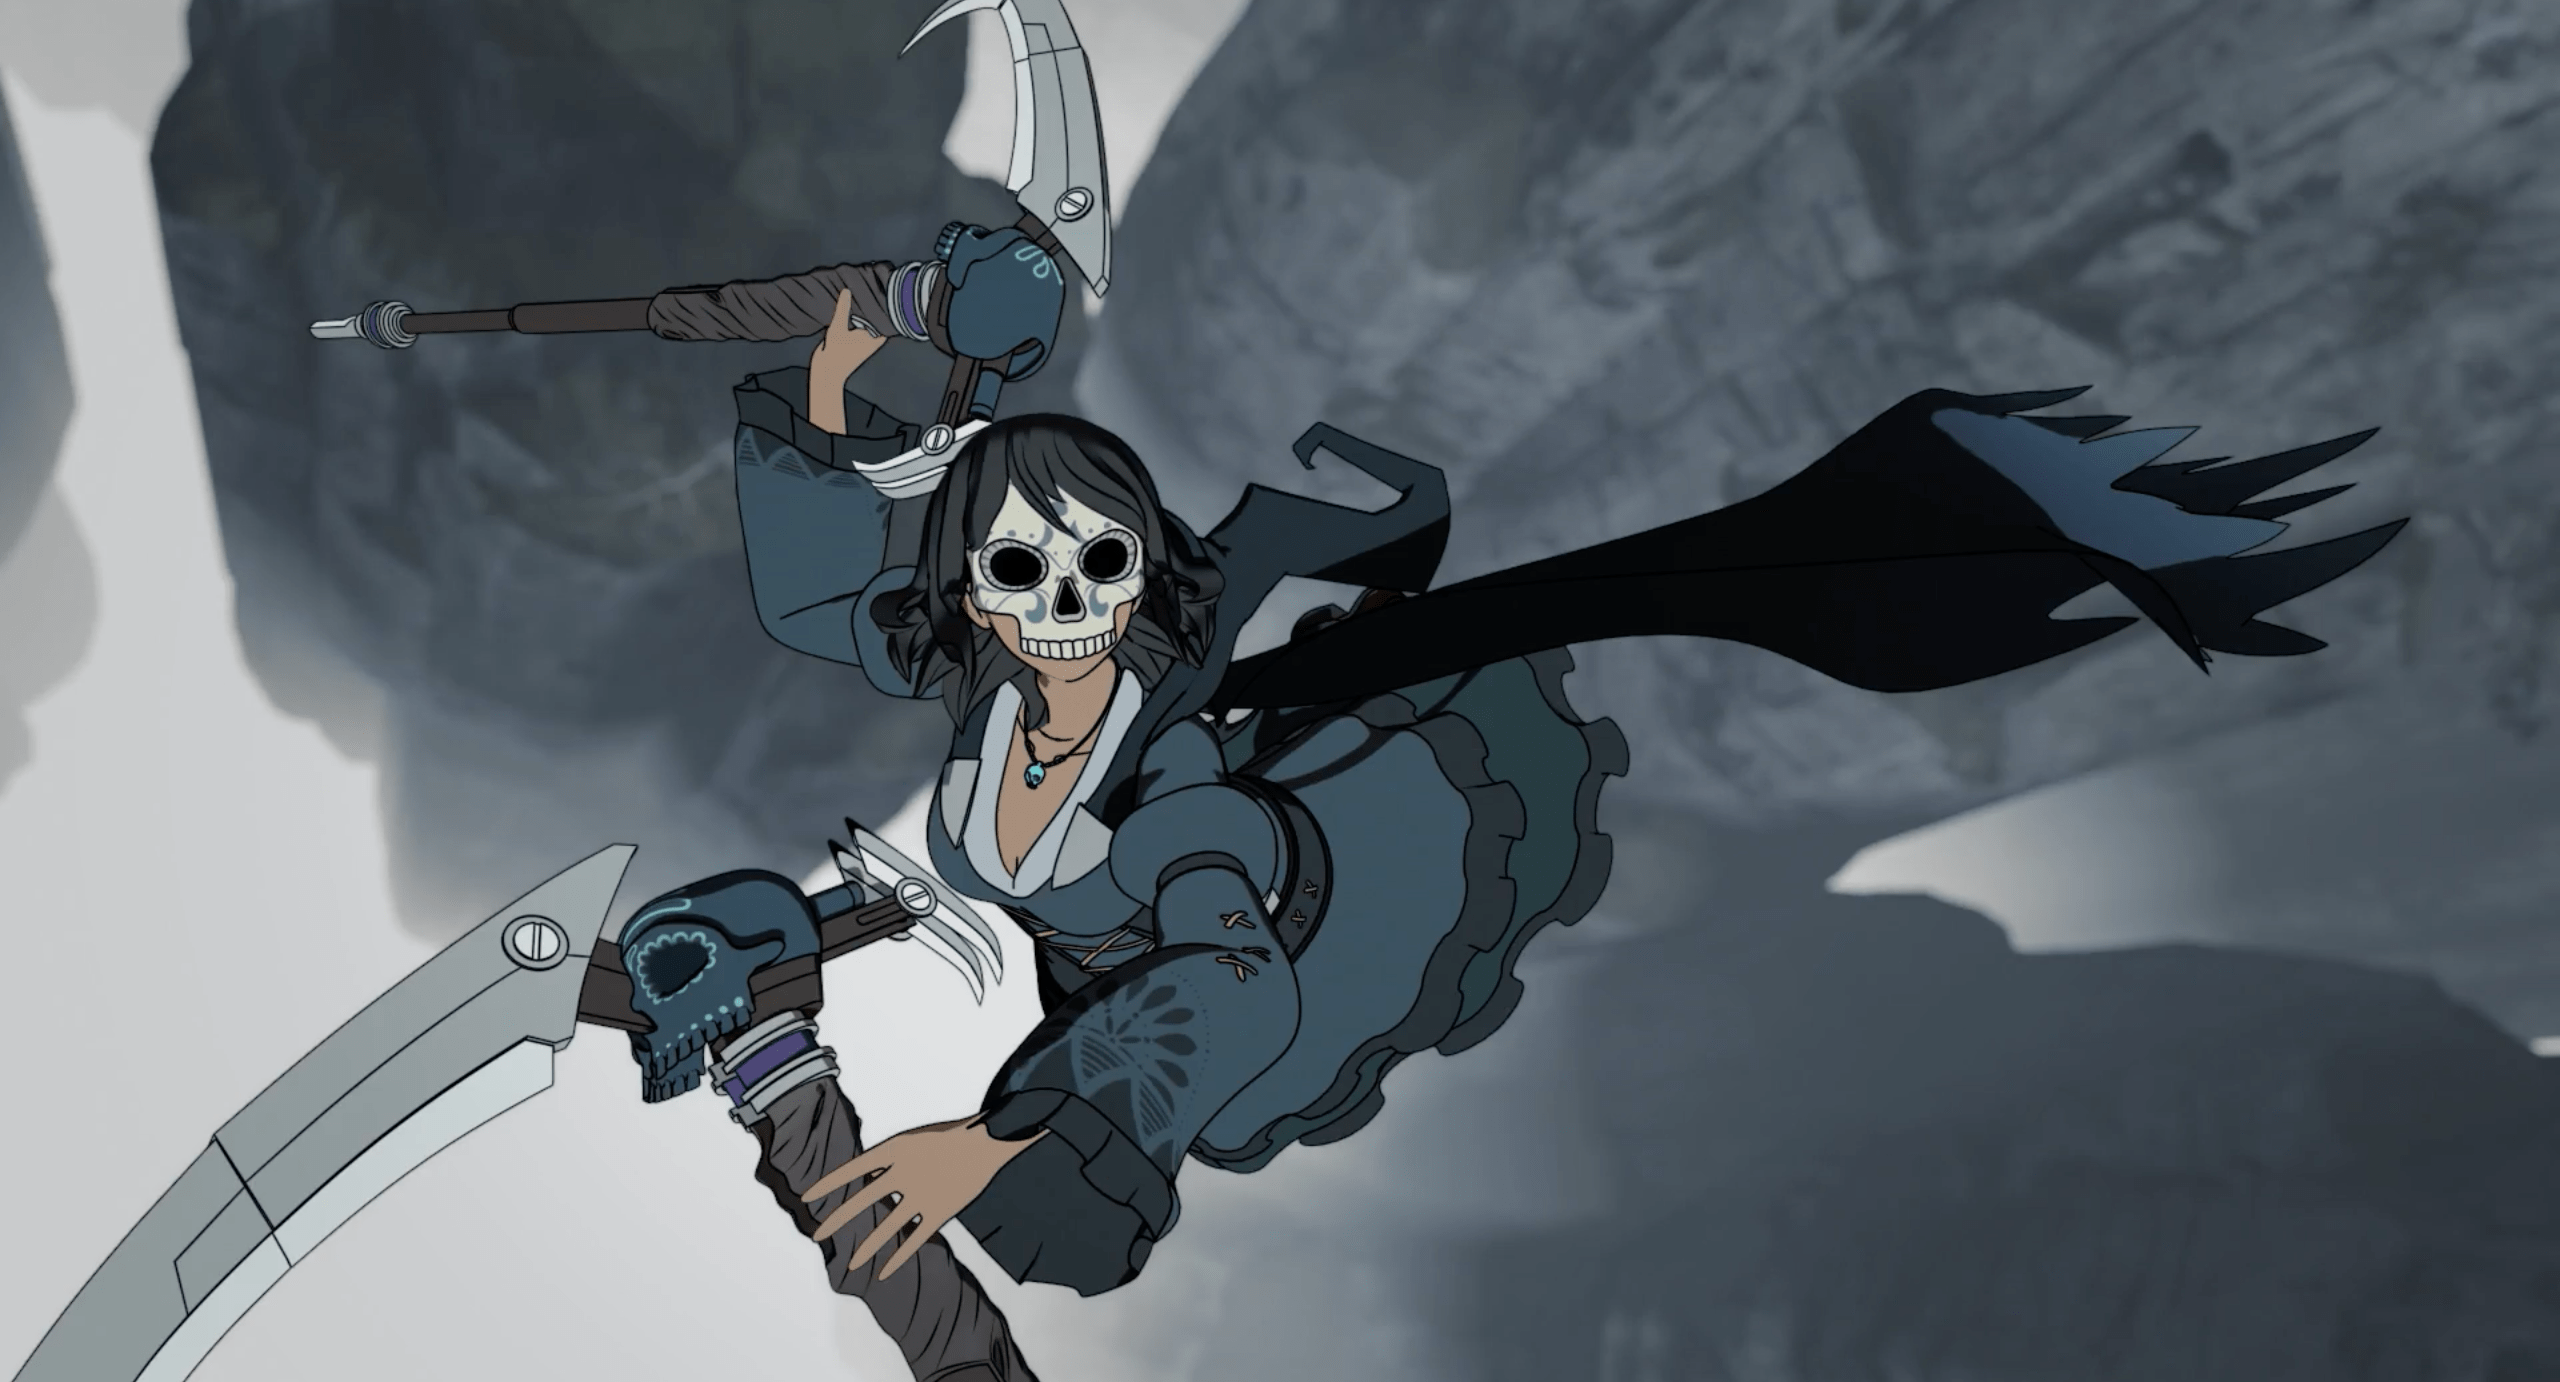
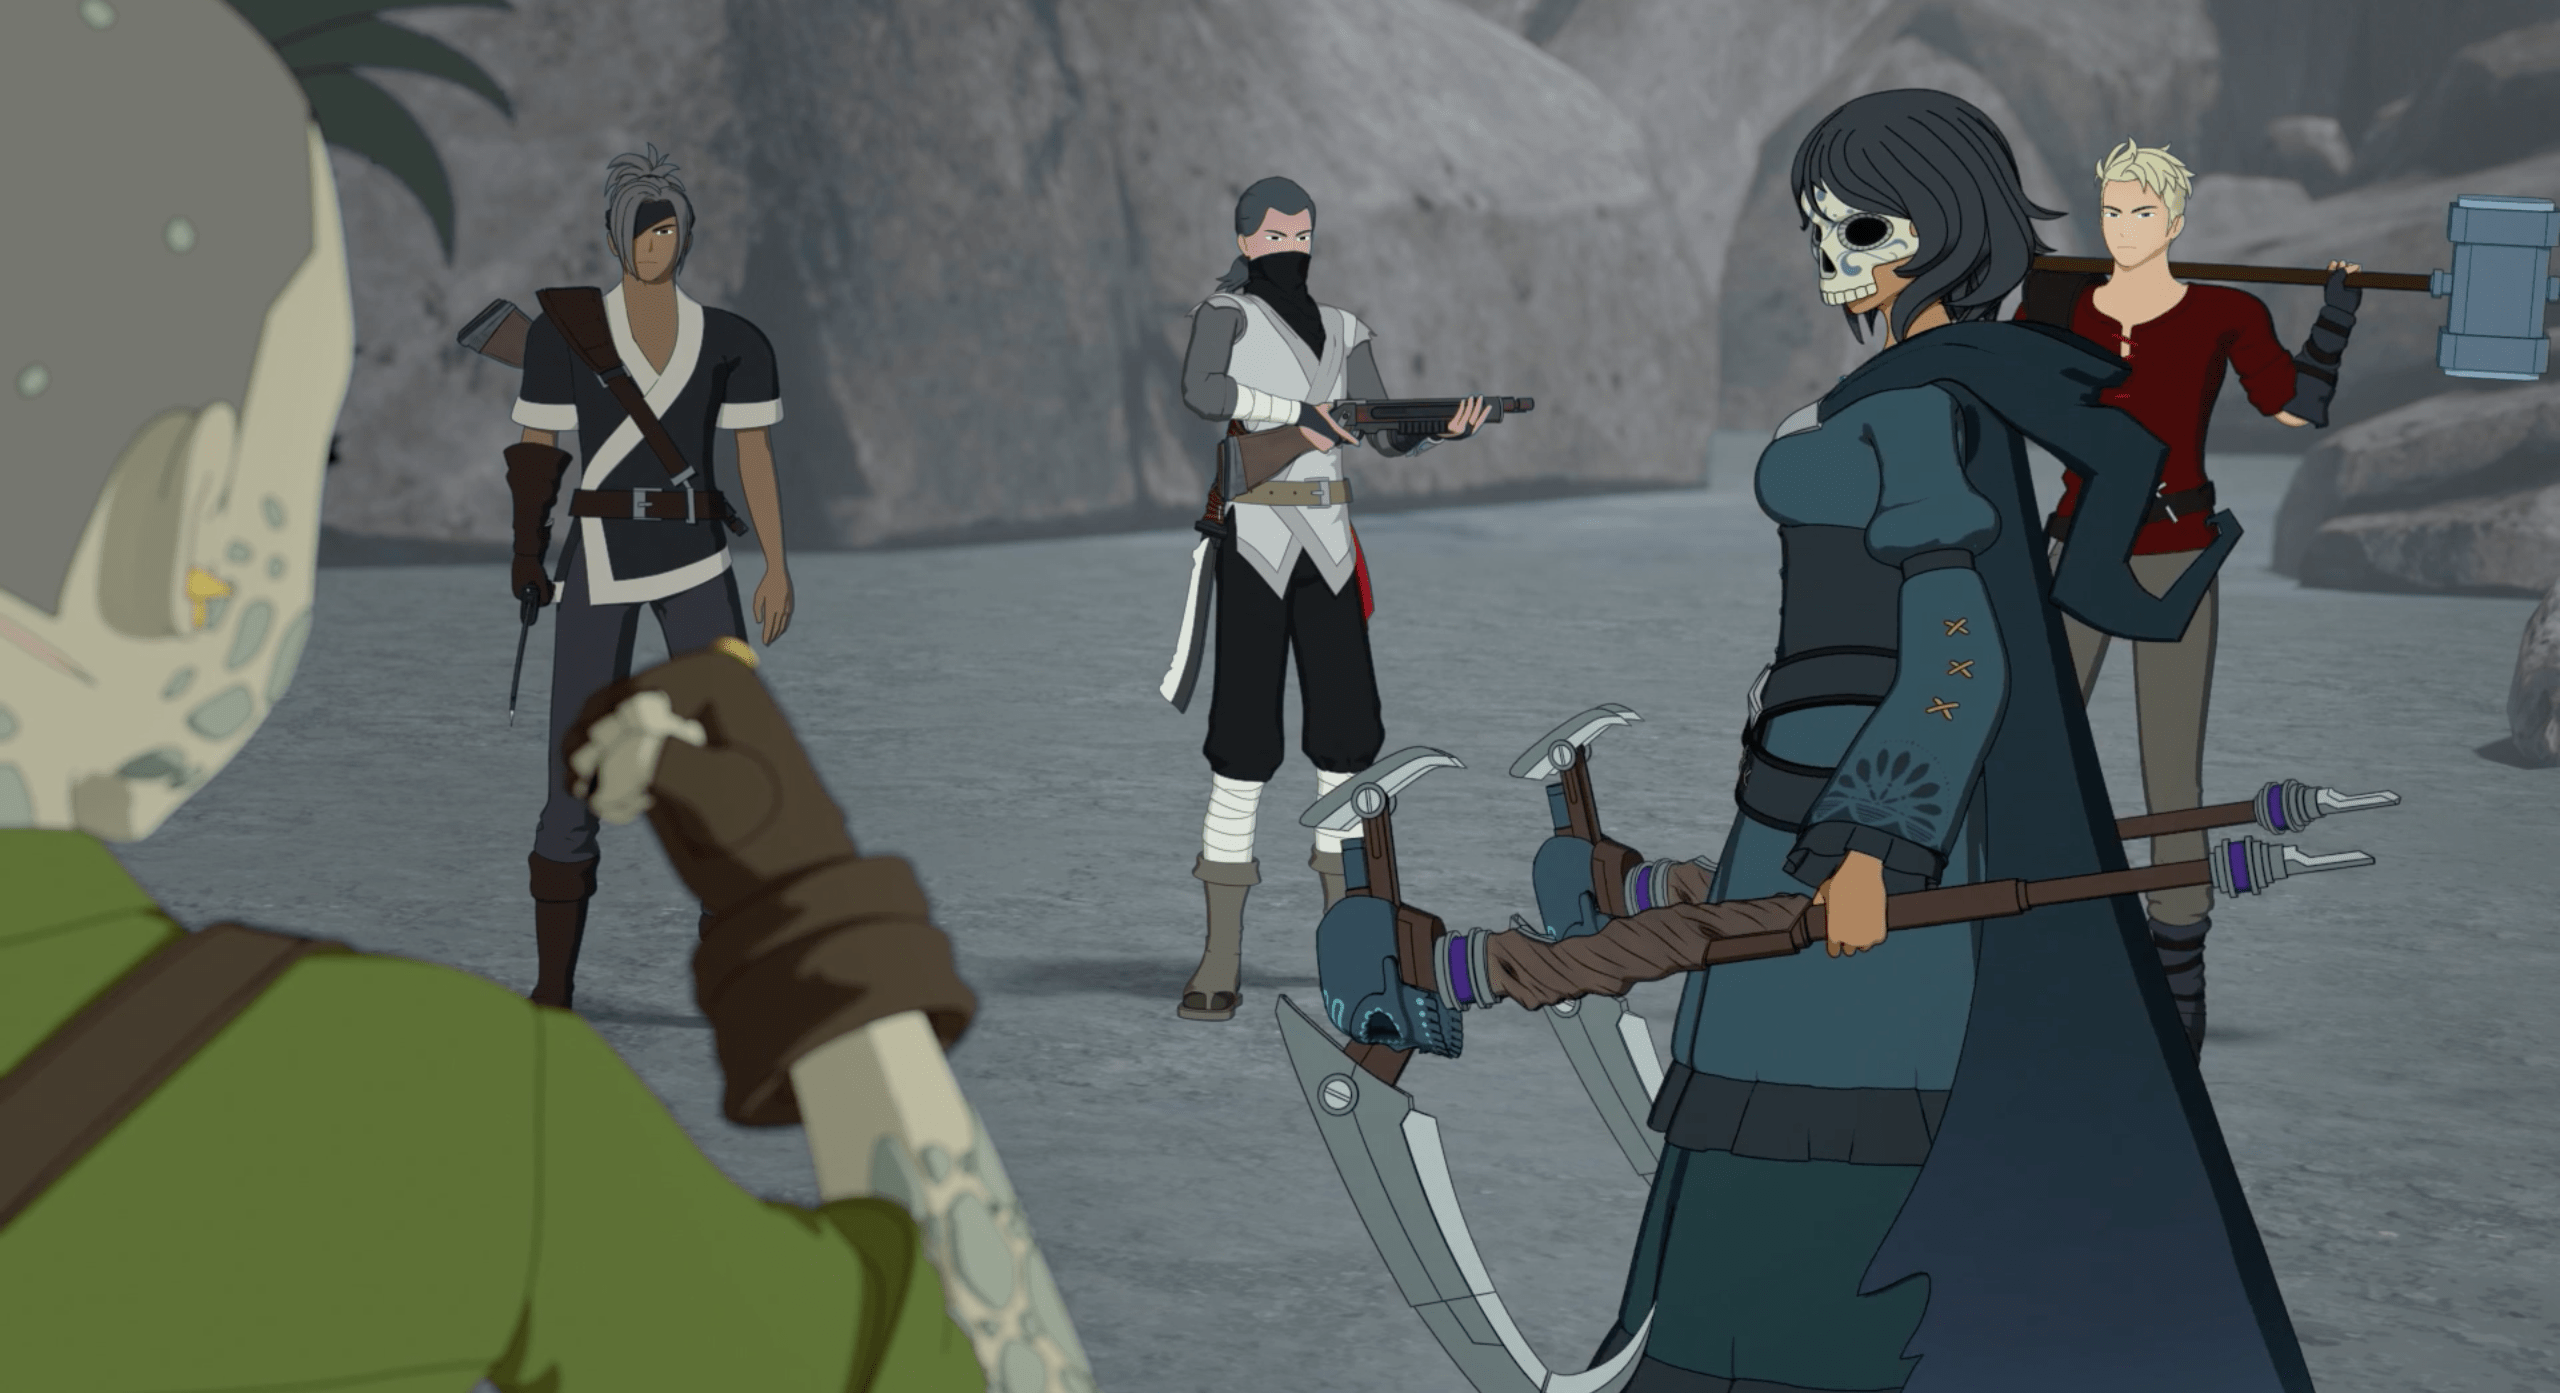
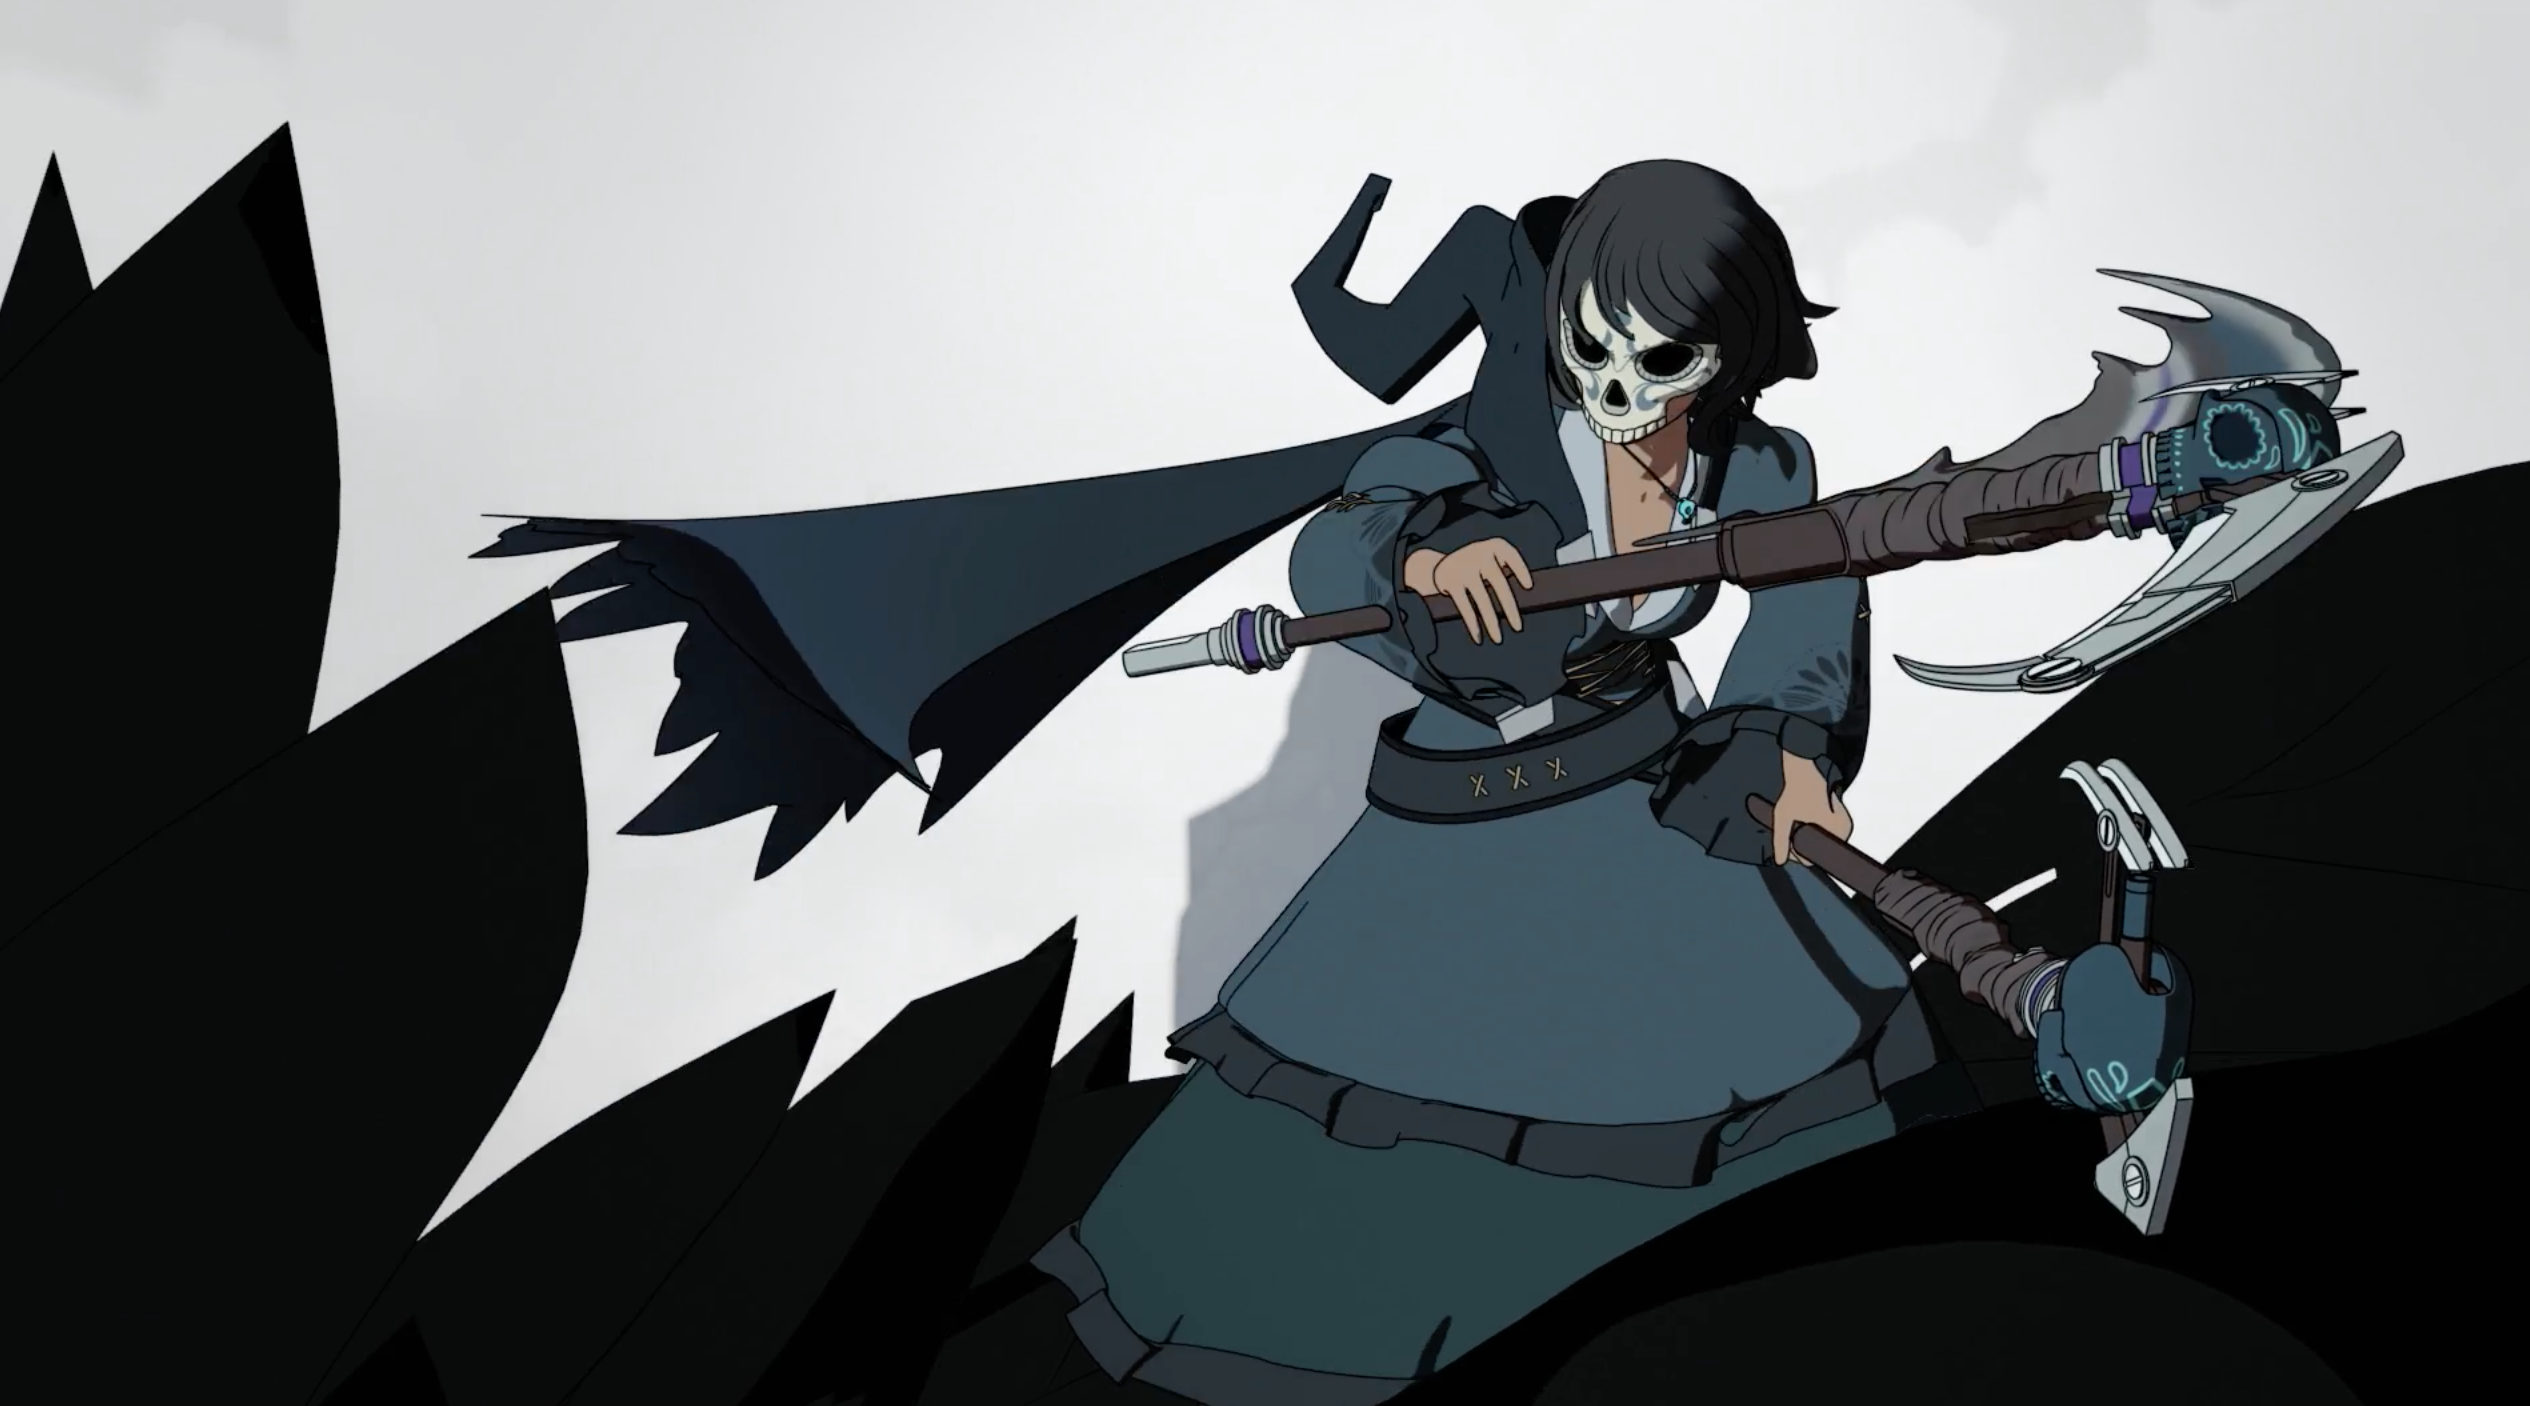
As soon as I saw the episode that featured young Maria Calavera, a dual-scythe-wielding, silver-eyed all-around badass, I knew I wanted to cosplay her. Not only was her character incredibly fascinating, but her costume design was beautiful. I loved her colors, the Tabasco dress inspired attire, and all the little nods to Dia de los Muertos.

Items I bought
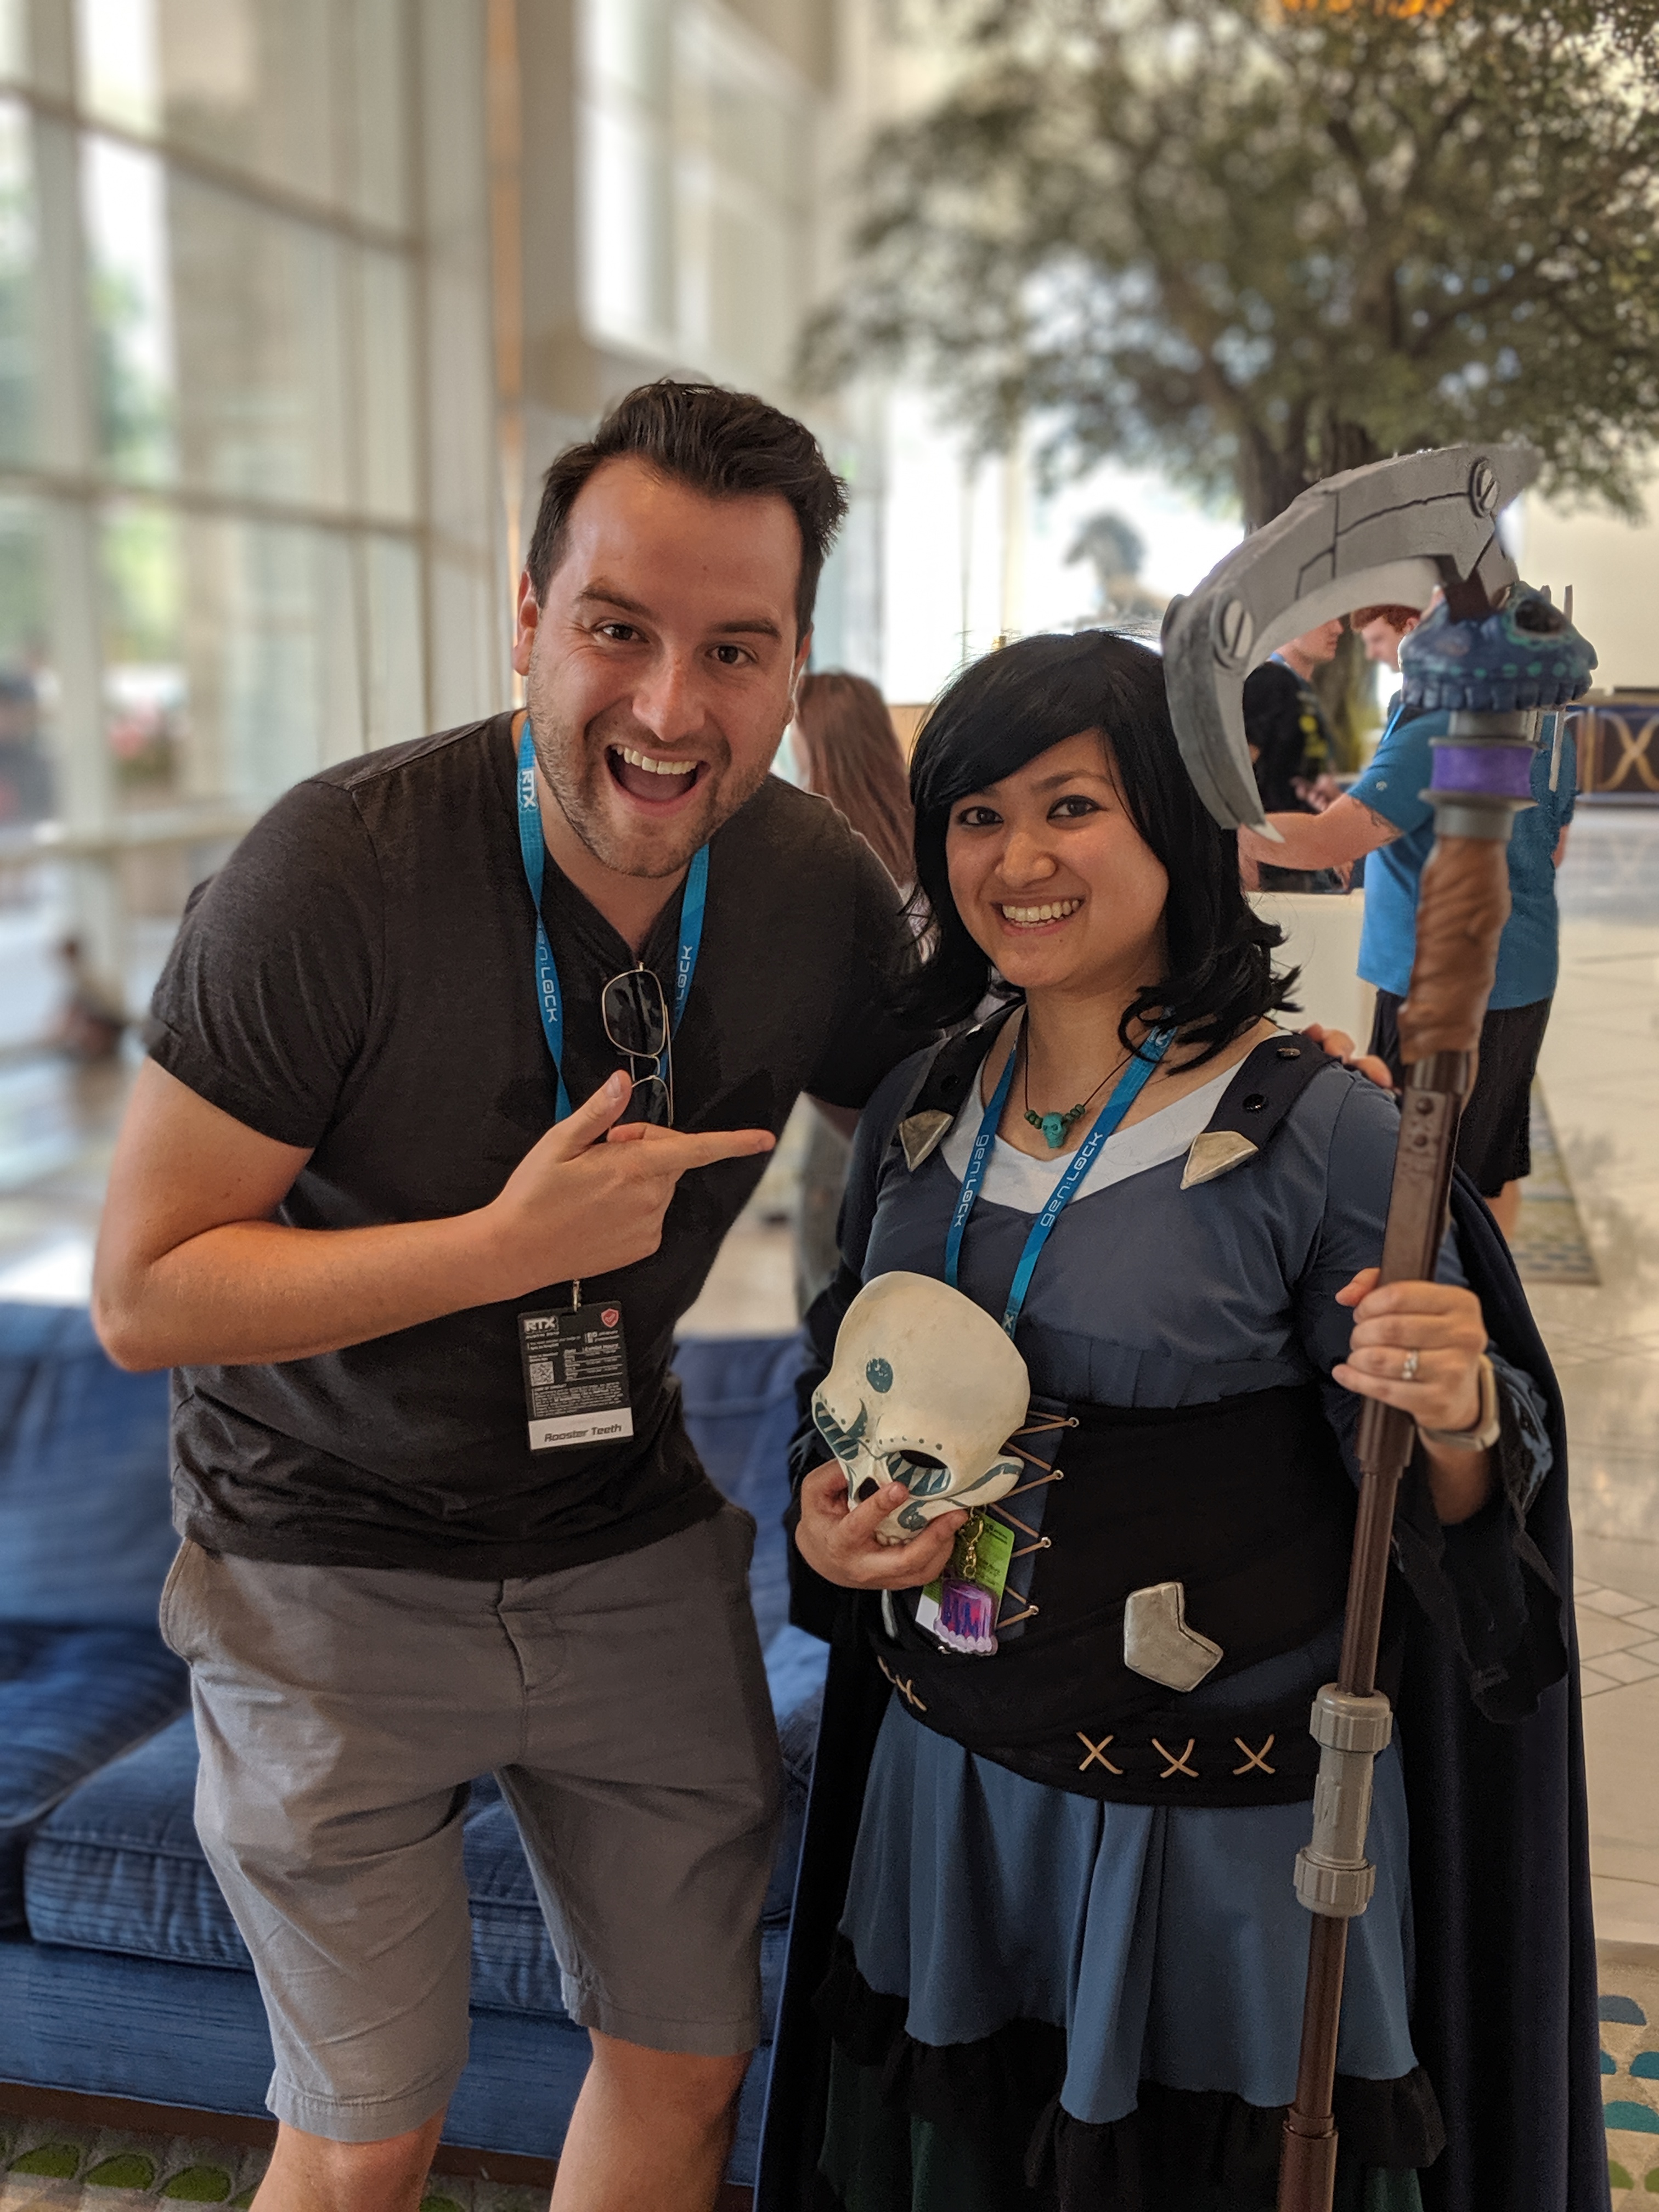
- Mask from RedBaranCosplay on Instagram
- Black Ferrari wig from Arda Wigs (which I trimmed to the correct length)
- Brown boots
- Black shorts
Items to make
Undershirt

The undershirt was super simple. Using a v-neck t-shirt I already had as a pattern, I made a small under “shirt” with some pale blue fabric I had leftover from an old project. I would’ve made it a full-sized shirt, but the amount of fabric I had was very limited, so it ended up being a very short crop top, which was fine for my purposes since I literally just needed it for the neckline.
Dress
For Maria’s dress, I used Simplicity pattern 3673, Option C. I repurposed the sleeve pattern I had made for my Kali cosplay for the sleeves and altered the neckline to be a v-neck.
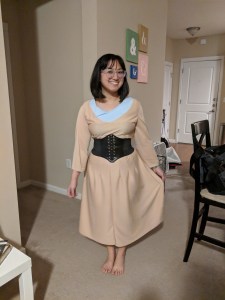
The first thing I did was make a mockup using some scrap fabric I had leftover from previous projects. The only adjustment I needed to make was make the sleeves longer and just a little bit wider. From there, I started using the navy fabric I had purchased to make the real dress. I used blue scrap fabric for the lining. The darts took a while to do, but was totally worth it. I attached the crop top to the dress neckline by top-stitching it in place. I then cut a line down the back so that I could install the zipper to the dress as well as the undershirt. Next was the skirt.
Maria’s skirt consists of two colors: navy and a bluish-green. After lots of measuring, pinning, and trying it on, I marked where I wanted the green fabric to go on my navy dress. I trimmed off the excess fabric and then carefully cut off the part of the navy dress that would be replaced with the green fabric. I used that fabric as a pattern and cut out three green fabric pieces (2 back, 1 front). Before I could attach the green to the skirt, however, I’d have to add my first layer of black trim.
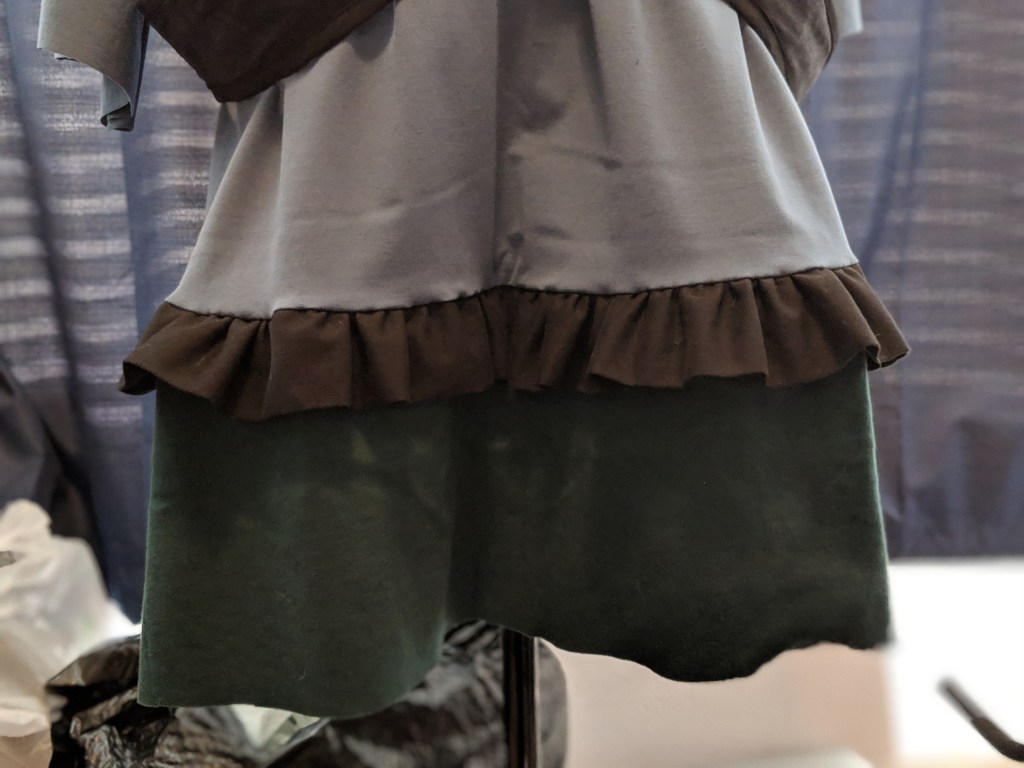
I unfortunately couldn’t find any readymade black trim to my liking for the sleeves and skirt, so I made my own. I bought about 2 yards of black cotton fabric and cut it into 6″ wide strips. I then folded them in half, clipped them in place, and ironed the fold to hold its shape. To make the trim, I gathered the fabric using this method. It was time-consuming but worth it. This part took quite a bit of trial and error. I wasn’t super precise with gathering the fabric and had to keep clipping it onto the green fabric to match the length. Once happy with it, I stitched it onto the green fabric and then stitched the newly finished piece to the rest of the dress.
I used the same process for the sleeves. These required a lot less gathering because too much gathering made the sleeve ends too puffy. I still wanted there to be a slight gather however, so I adjusted accordingly.
For the embroidery, I designed the pattern in Illustrator and scaled it up to the right size. It was pretty big, so I printed it onto tabloid (11×17″) paper. I pinned the pattern to the inside of the sleeve and then I used my coworker’s lightbox to trace the design onto the sleeves with a fabric pen. (Initially I was going to just use the flashlight of my phone to do this when I realized my coworker had something that’d make this much easier.)


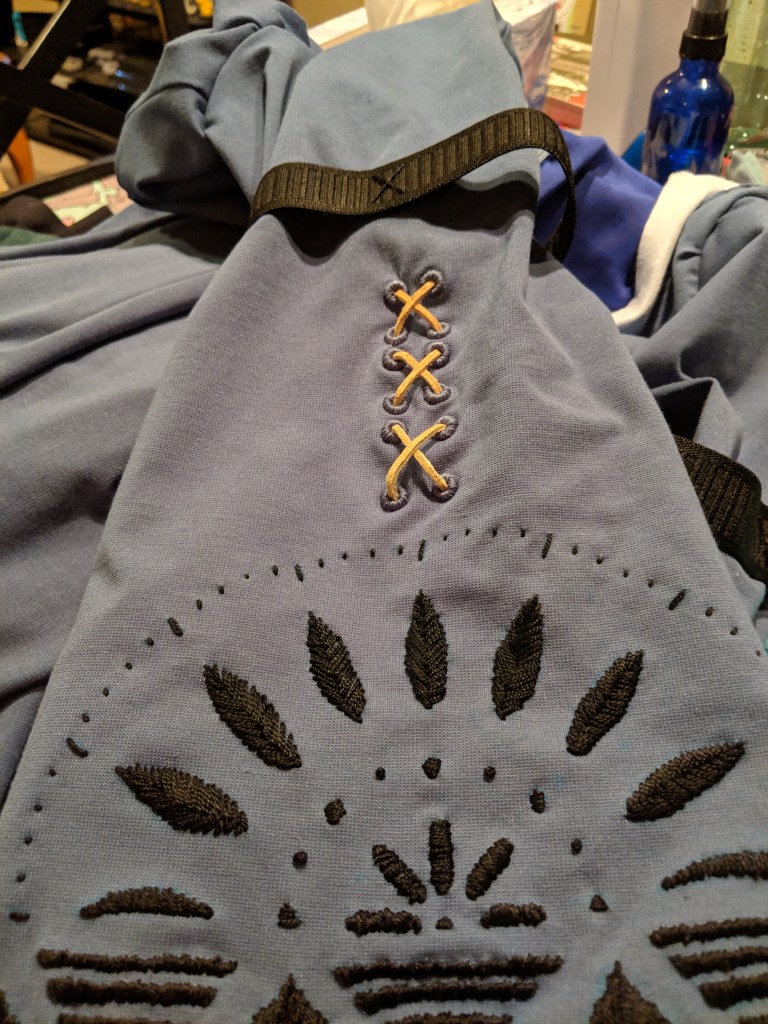
Once the designs were traced onto the fabric, I painstakingly hand stitched the embroidery with black cotton embroidery floss. I first started with backstitched outlines, then filled in all the triangles with satin stitching. The leaves were done using a fishbone stitch and the dots were french knots. This in total took 42 hrs and 20 mins. In the end, it was worth it because the embroidery came out beautiful and I love the texture and depth it gives the sleeves.
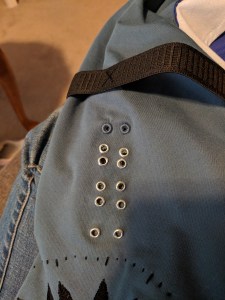
After the embroidery, I punched 12 holes into each sleeve to serve as the holes for the X embellishments, which would be done with beige cord. To ensure the holes didn’t unravel, I closed them with eyelets. To ensure the eyelets didn’t draw too much attention, I covered them with navy thread so that they blended in with the sleeve fabric. (Yup. More hand stitching). To make the X embellishments, I cut short strips of the beige cord, tied one end into a knot, slipped that through an eyelet from the wrong side of the fabric, then slipped it through the right end and tied another knot. It required 6 small strips per sleeve.
The elastic strip at the upper arm was pretty simple: measured how long it needed to be, stitched the ends together to form a circle, then stitched it into place. I did this by just making a little X out of thread in on spot so that it had freedom to stretch.
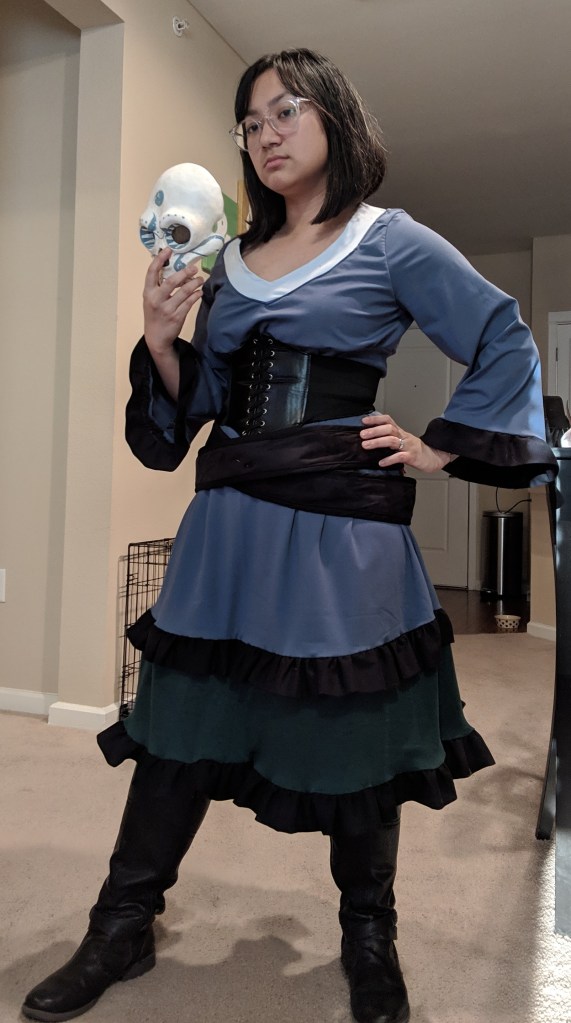
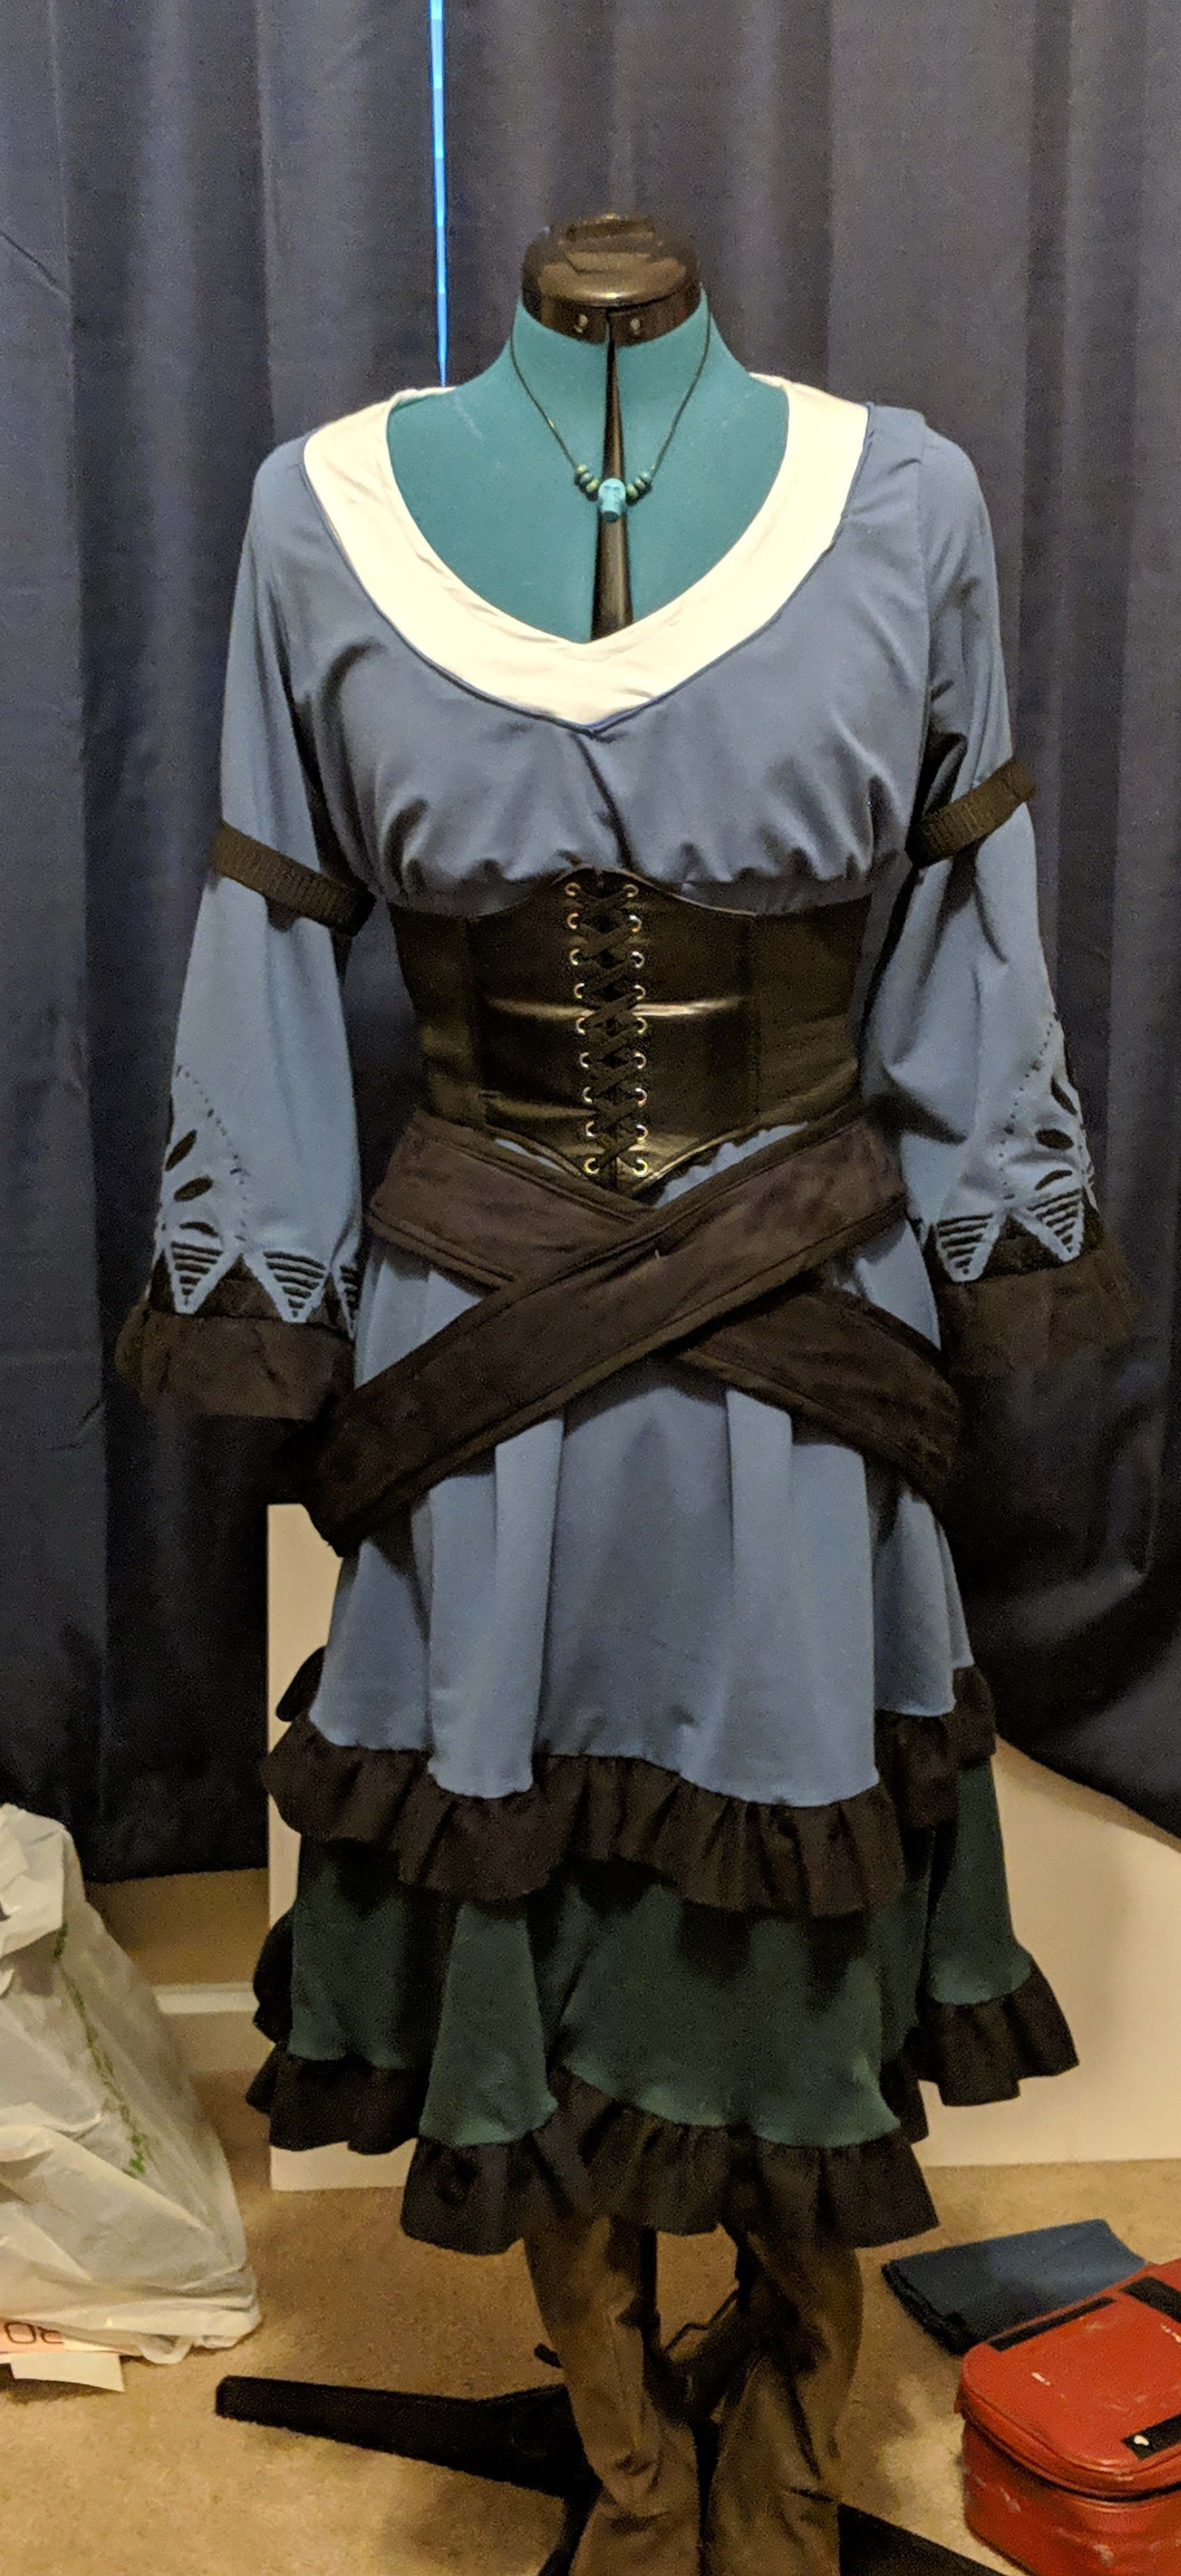
Once that was all done, all that was left was finally adding a hook and eye to the back of the dress at the neckline! The base dress took 26 hours and 20 minutes to make, while the embroidery took 42 hours and 20 minutes, for a total of 68 hours and 40 minutes of work on the dress!
Necklace


For the necklace, I bought a skull off Etsy and then primed, painted, and sealed it. I bought a few beads, some string and some clasps from Joann’s for the rest of necklace, then threw them all together. It was super easy!
Belts (2)
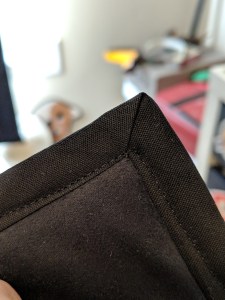
I used a tape measurer to determine how long the belts should be. They needed to sit asymmetrically on my hips, so they were longer than a standard belt. I cut out 4 strips of the black faux suede fabric I had bought that would work as the fashion fabric for the belts. I then cut out 2 pieces of batting and 2 pieces of buckram fabric in the same dimensions, which would serve as the “stuffing” for the belt. I sandwiched these pieces in between the 2 pieces of faux suede and then basted them in place. After trimming the edges a bit to clean them up and get rid of excess fabric, I finished all the raw edges with double fold black bias tape.
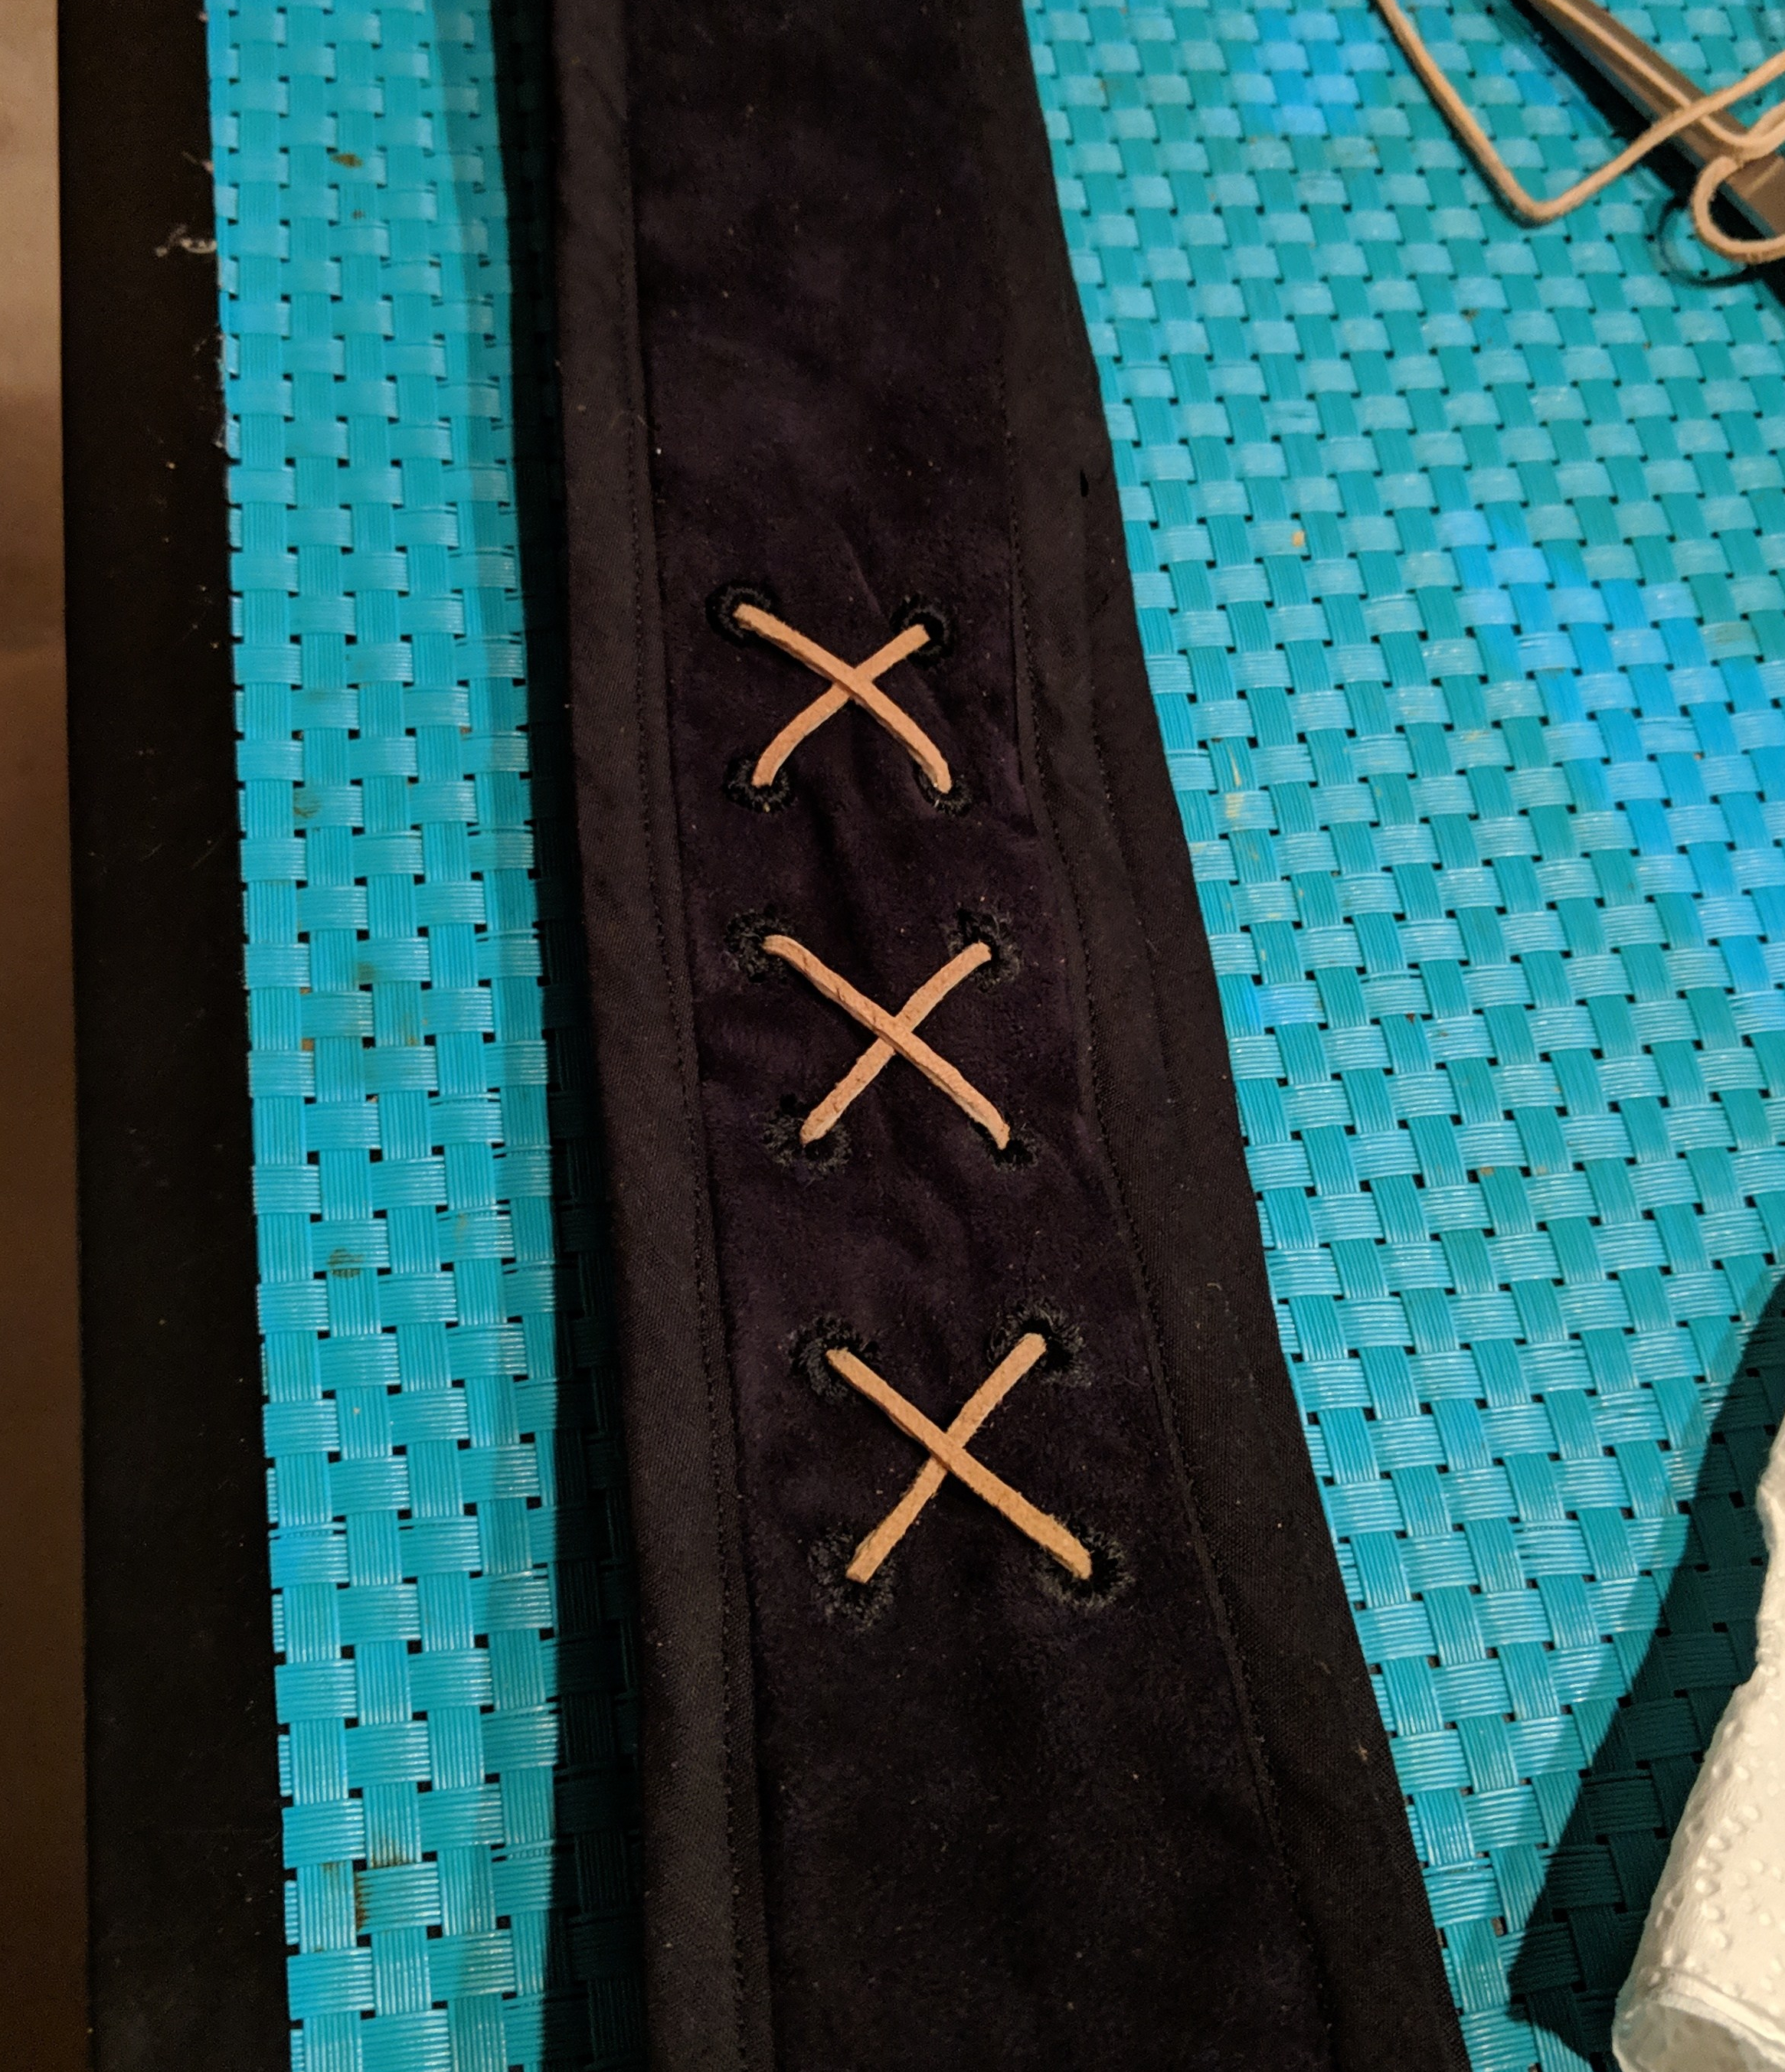
Next up, I attached heavy duty velcro to the belt ends. (At first I tried magnets but the magnets were both too heavy and too weak, so I wouldn’t recommend it.) The X embellishments worked in the same way as the dress sleeves: make holes, install eyelets, cover eyelets with thread. Only difference is the thread was black instead of navy and the X’s for these were a bit bigger. I was also able to use one long strand of cord instead of 6 smaller ones for each belt.
For the little silver belt buckles, I used foam clay that I bought from TNT Cosplay Supply. After designing the shape on a piece of paper, I sculpted the two pieces from the clay. I made sure to let it cure on a piece of wax paper so that it would peal off easily. I was happy with the shape but wasn’t happy with the thickness, so I cut it to be thinner with a box cutter. At this point I discovered it hadn’t actually fully cured! So I let it sit and finish curing before using a Dremel to smooth the edges.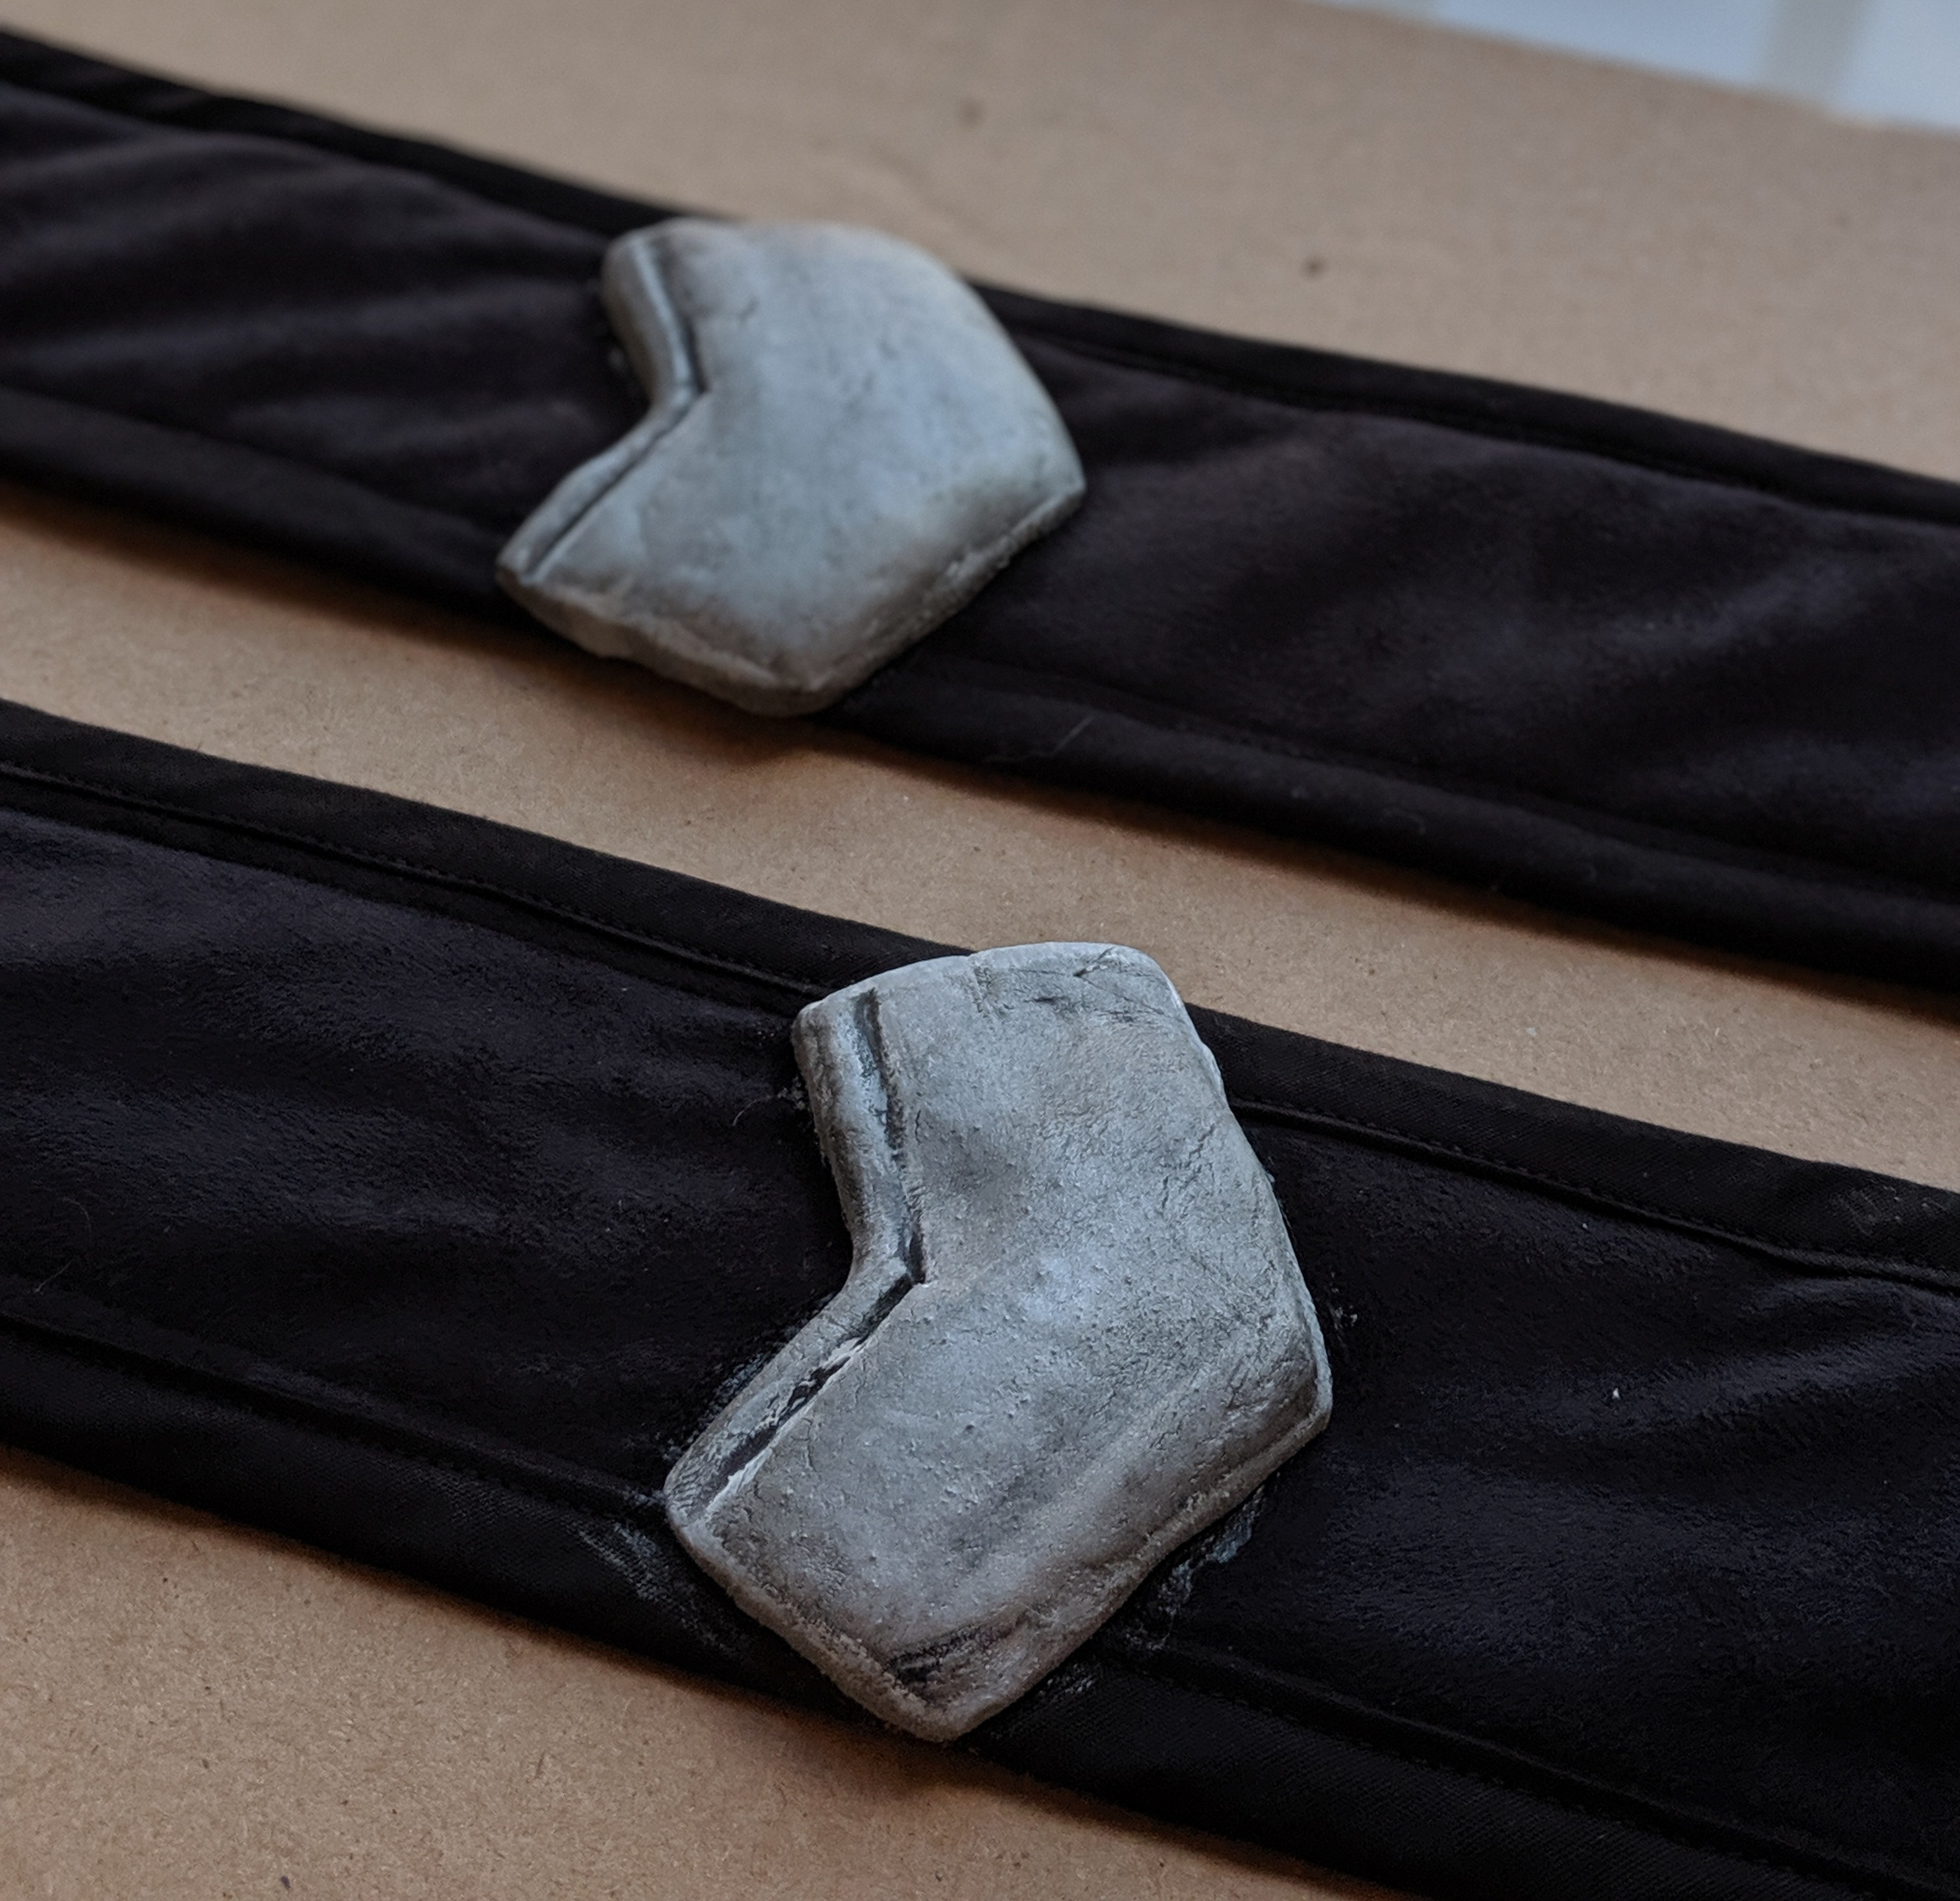
Painting consisted of priming, spray-painting chrome silver, weathering, then sealing. I use Kamui Cosplay‘s video on Painting with Acrylics as a reference anytime I’m painting props.
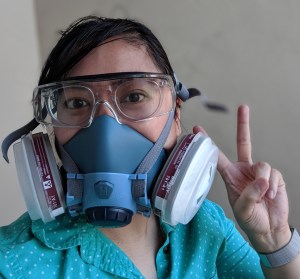
The last step was gluing the buckles to the belt. I did this by first marking where I wanted them to go, then going out to the balcony of my apartment to use the barge cement I had bought, making sure I had proper safety gear (eye goggles, a respirator mask, and gloves). The whole gluing process took only about 5 minutes.
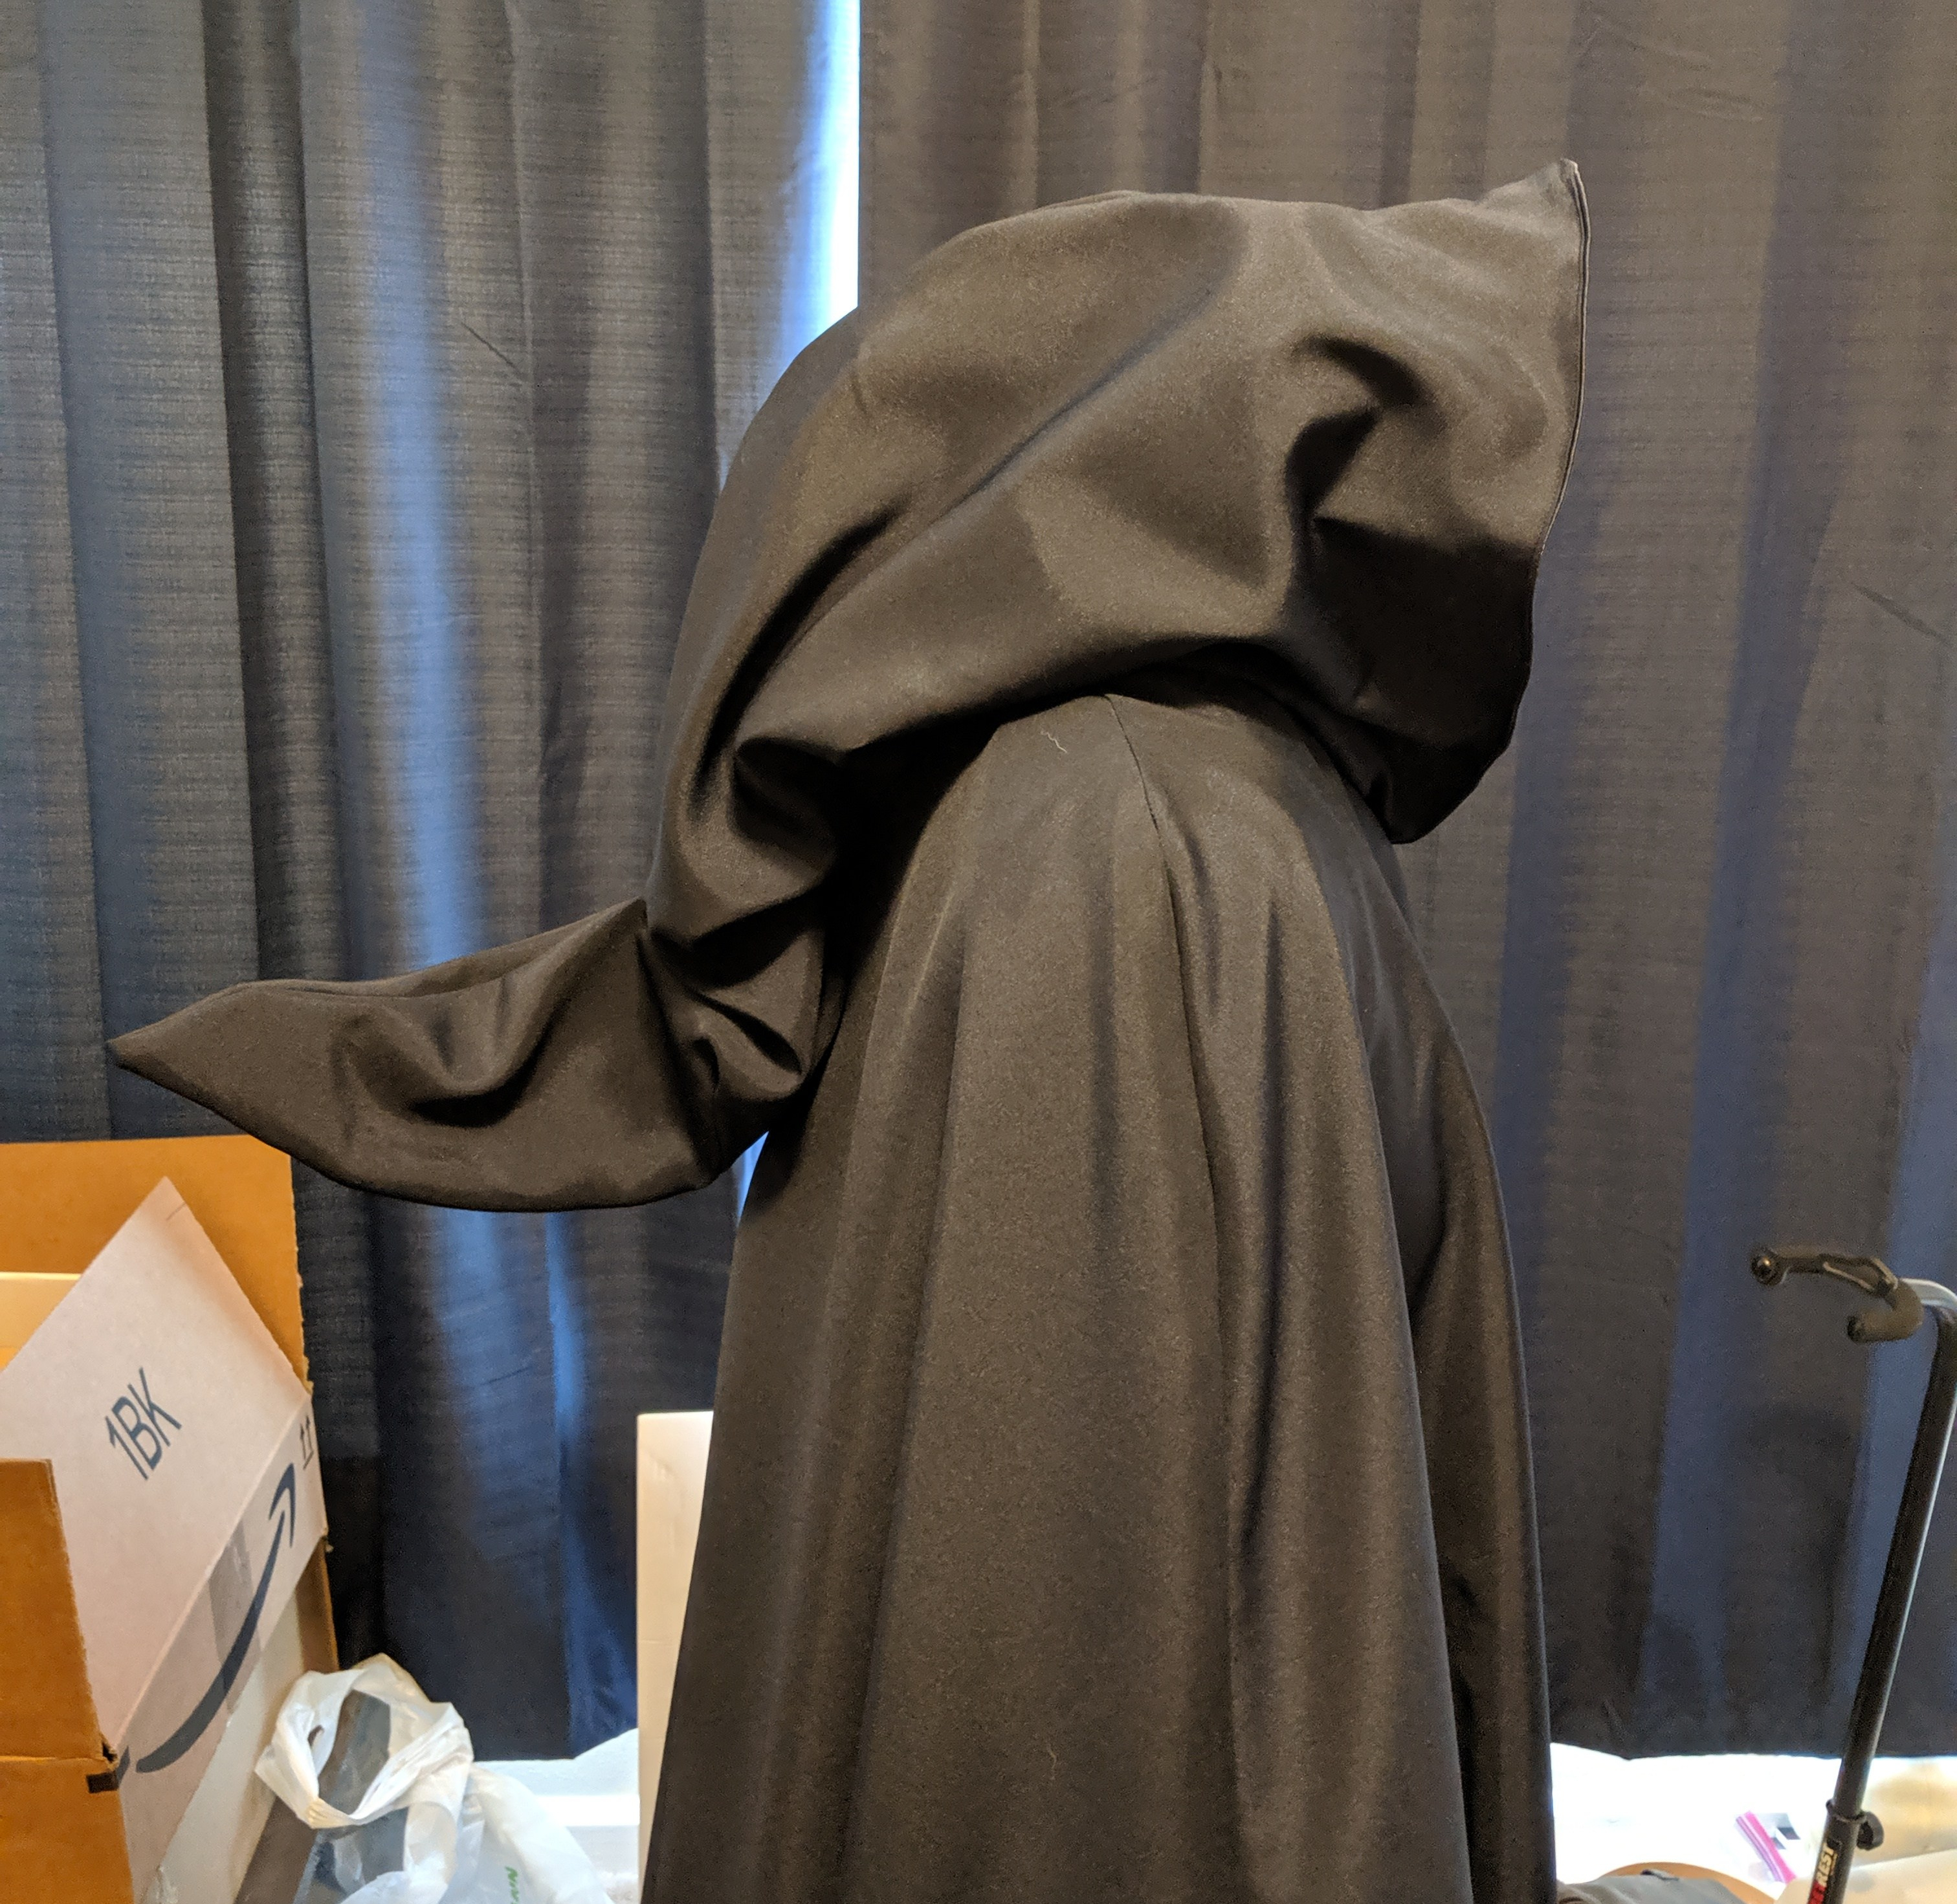
Hooded cape
This cape took two tries because the first time, I used cheap cotton fabric. Would not recommend: cotton wrinkles so easily. Find a fabric that’s not going to wrinkle because with all the whooshing you’ll be doing, you’ll want something that’s not a pain to maintain.
I used the same cape pattern I used for my Mae cosplay (Simplicity Pattern #8238 Pattern A). After following the pattern for the cloak part, I cut up the ends so that they looked all frayed and tattered like Maria’s.
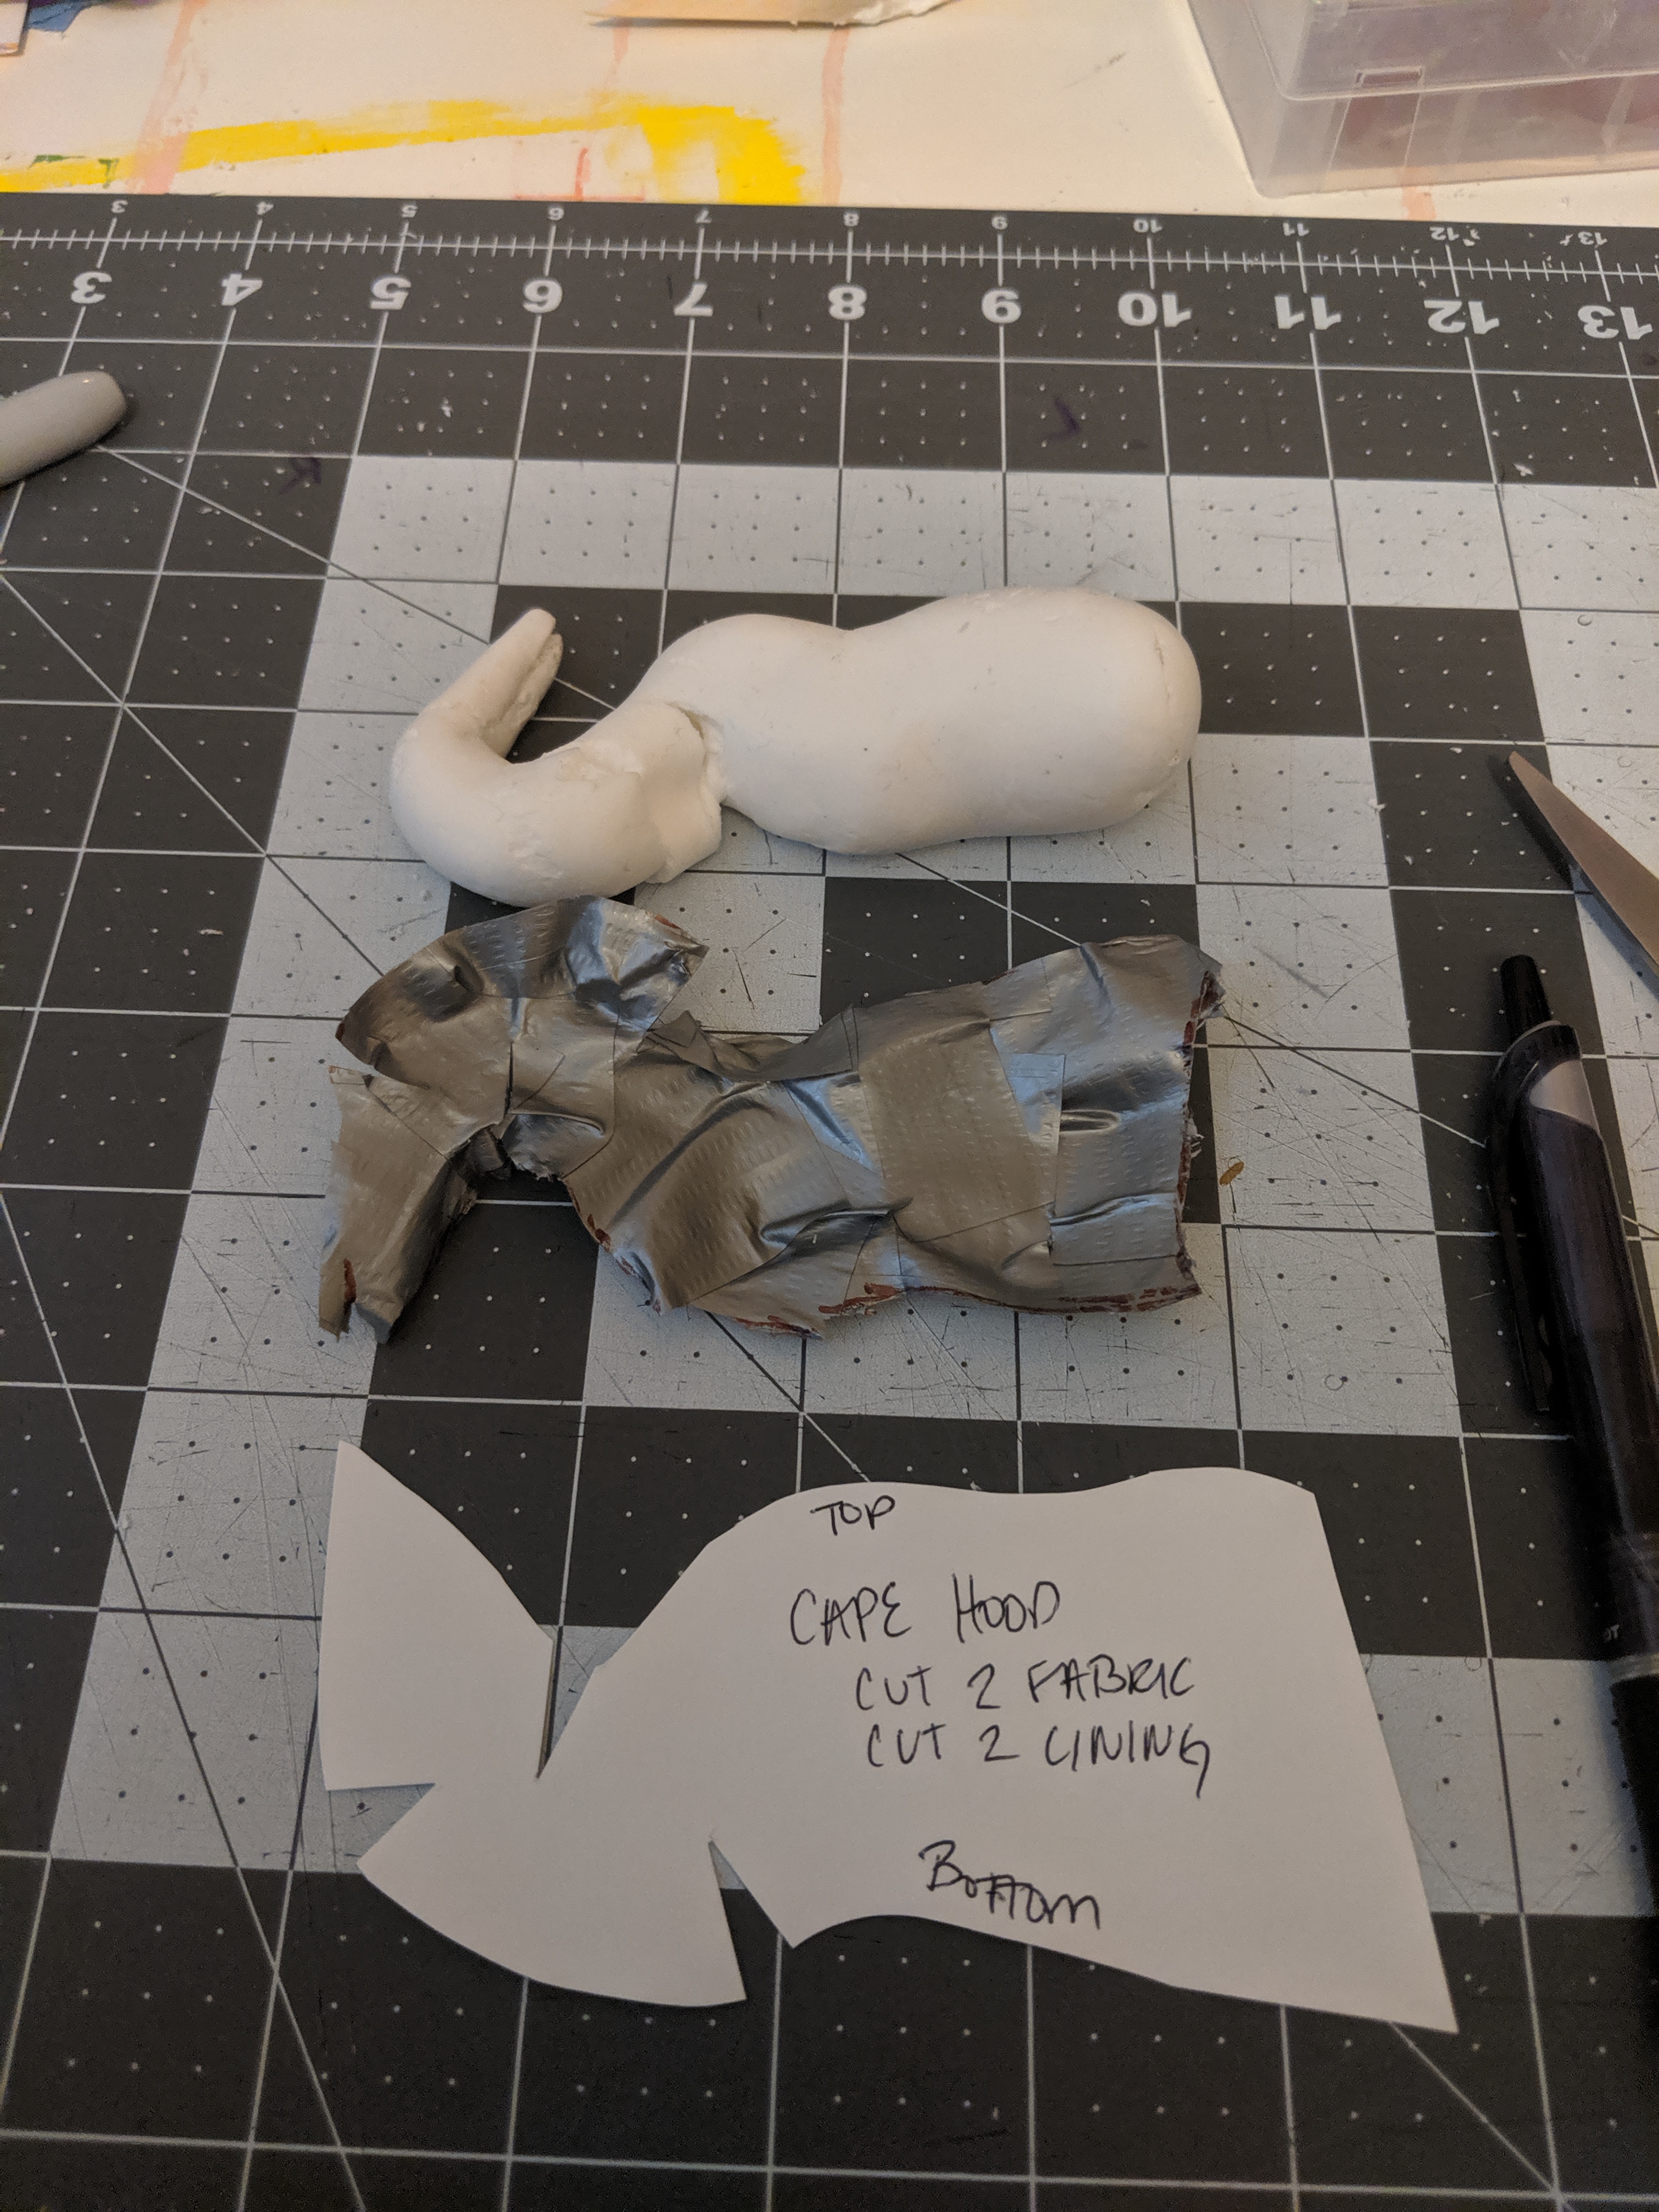
For the hood, I decided to make my own pattern. To do this, I used foam clay to sculpt a tiny model of what I wanted to hood to look like. Once it cured, I covered it in duct tape, drew the pattern on top of it with sharpie, then carefully cut the pattern off with an X-acto knife. I traced the pattern onto printer paper and then scaled it up by having my husband hold it and a flashlight above a big piece of butcher paper, which I then traced the enlarged shadow on. (The same thing can be achieved much more easily using a projector.)
I cut four pieces of fabric for the hood, two for the fashion layer and two for the lining. I then took a wire hanger and used the metal to help support the pointy end of the hood.
The hood requires a small length of fabric to attach to the dress, so I made one with the same blue cape fabric and a length of buckram fabric. I added heavy duty snaps to the shoulders of the cape and the shoulders of the dress to hold it in place since the cape itself is so heavy. I used two snaps per shoulder. I had initially used these same snaps on the collar I had made, but it didn’t actually seem necessary, so now the snaps are just decorative.
I made the silver ends the same way I made the belt buckles: paper pattern, foam clay sculpt, prime, paint, weather, seal. I glued them on the same time that I glued the belt buckles. Once the collar was done, I stitched the hood to it. Then, I attached that to the cloak. After a few test runs, I decided to add small velcro strips to the collar so that they stayed in place. I added the velcro to the collar as well as the dress itself. With that all finished, the hooded cloak was complete!


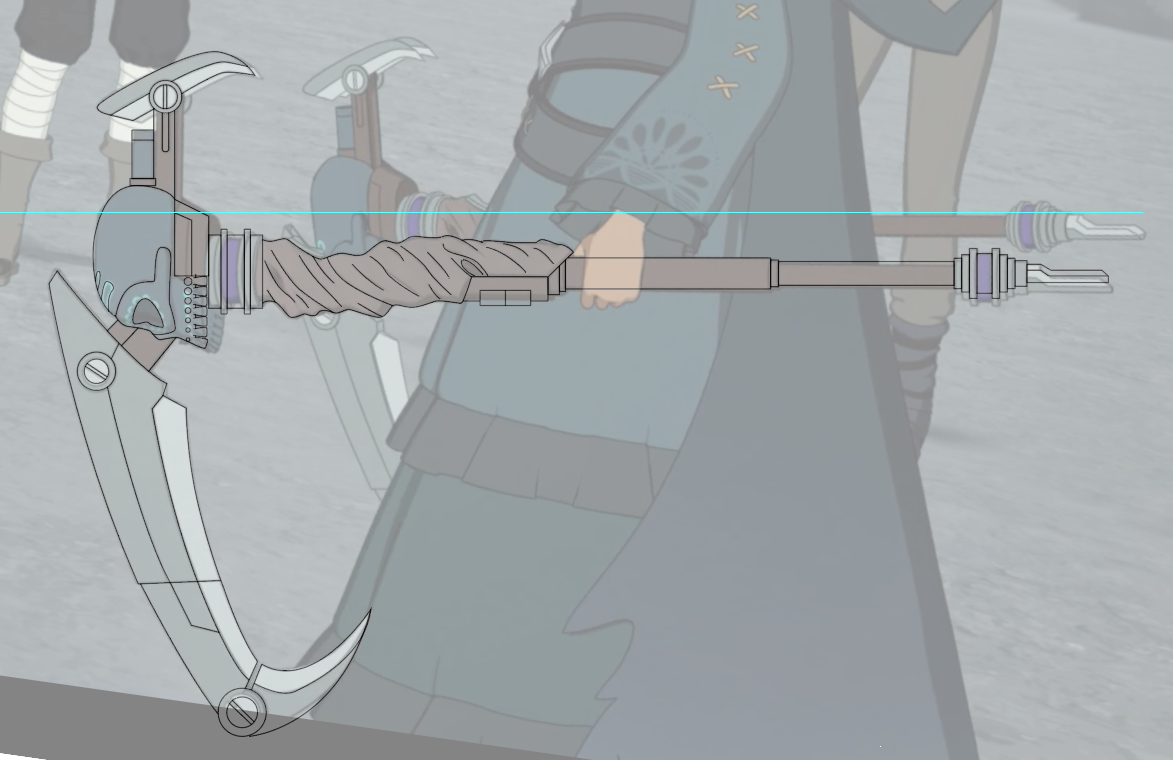
Life & Death (Scythes)
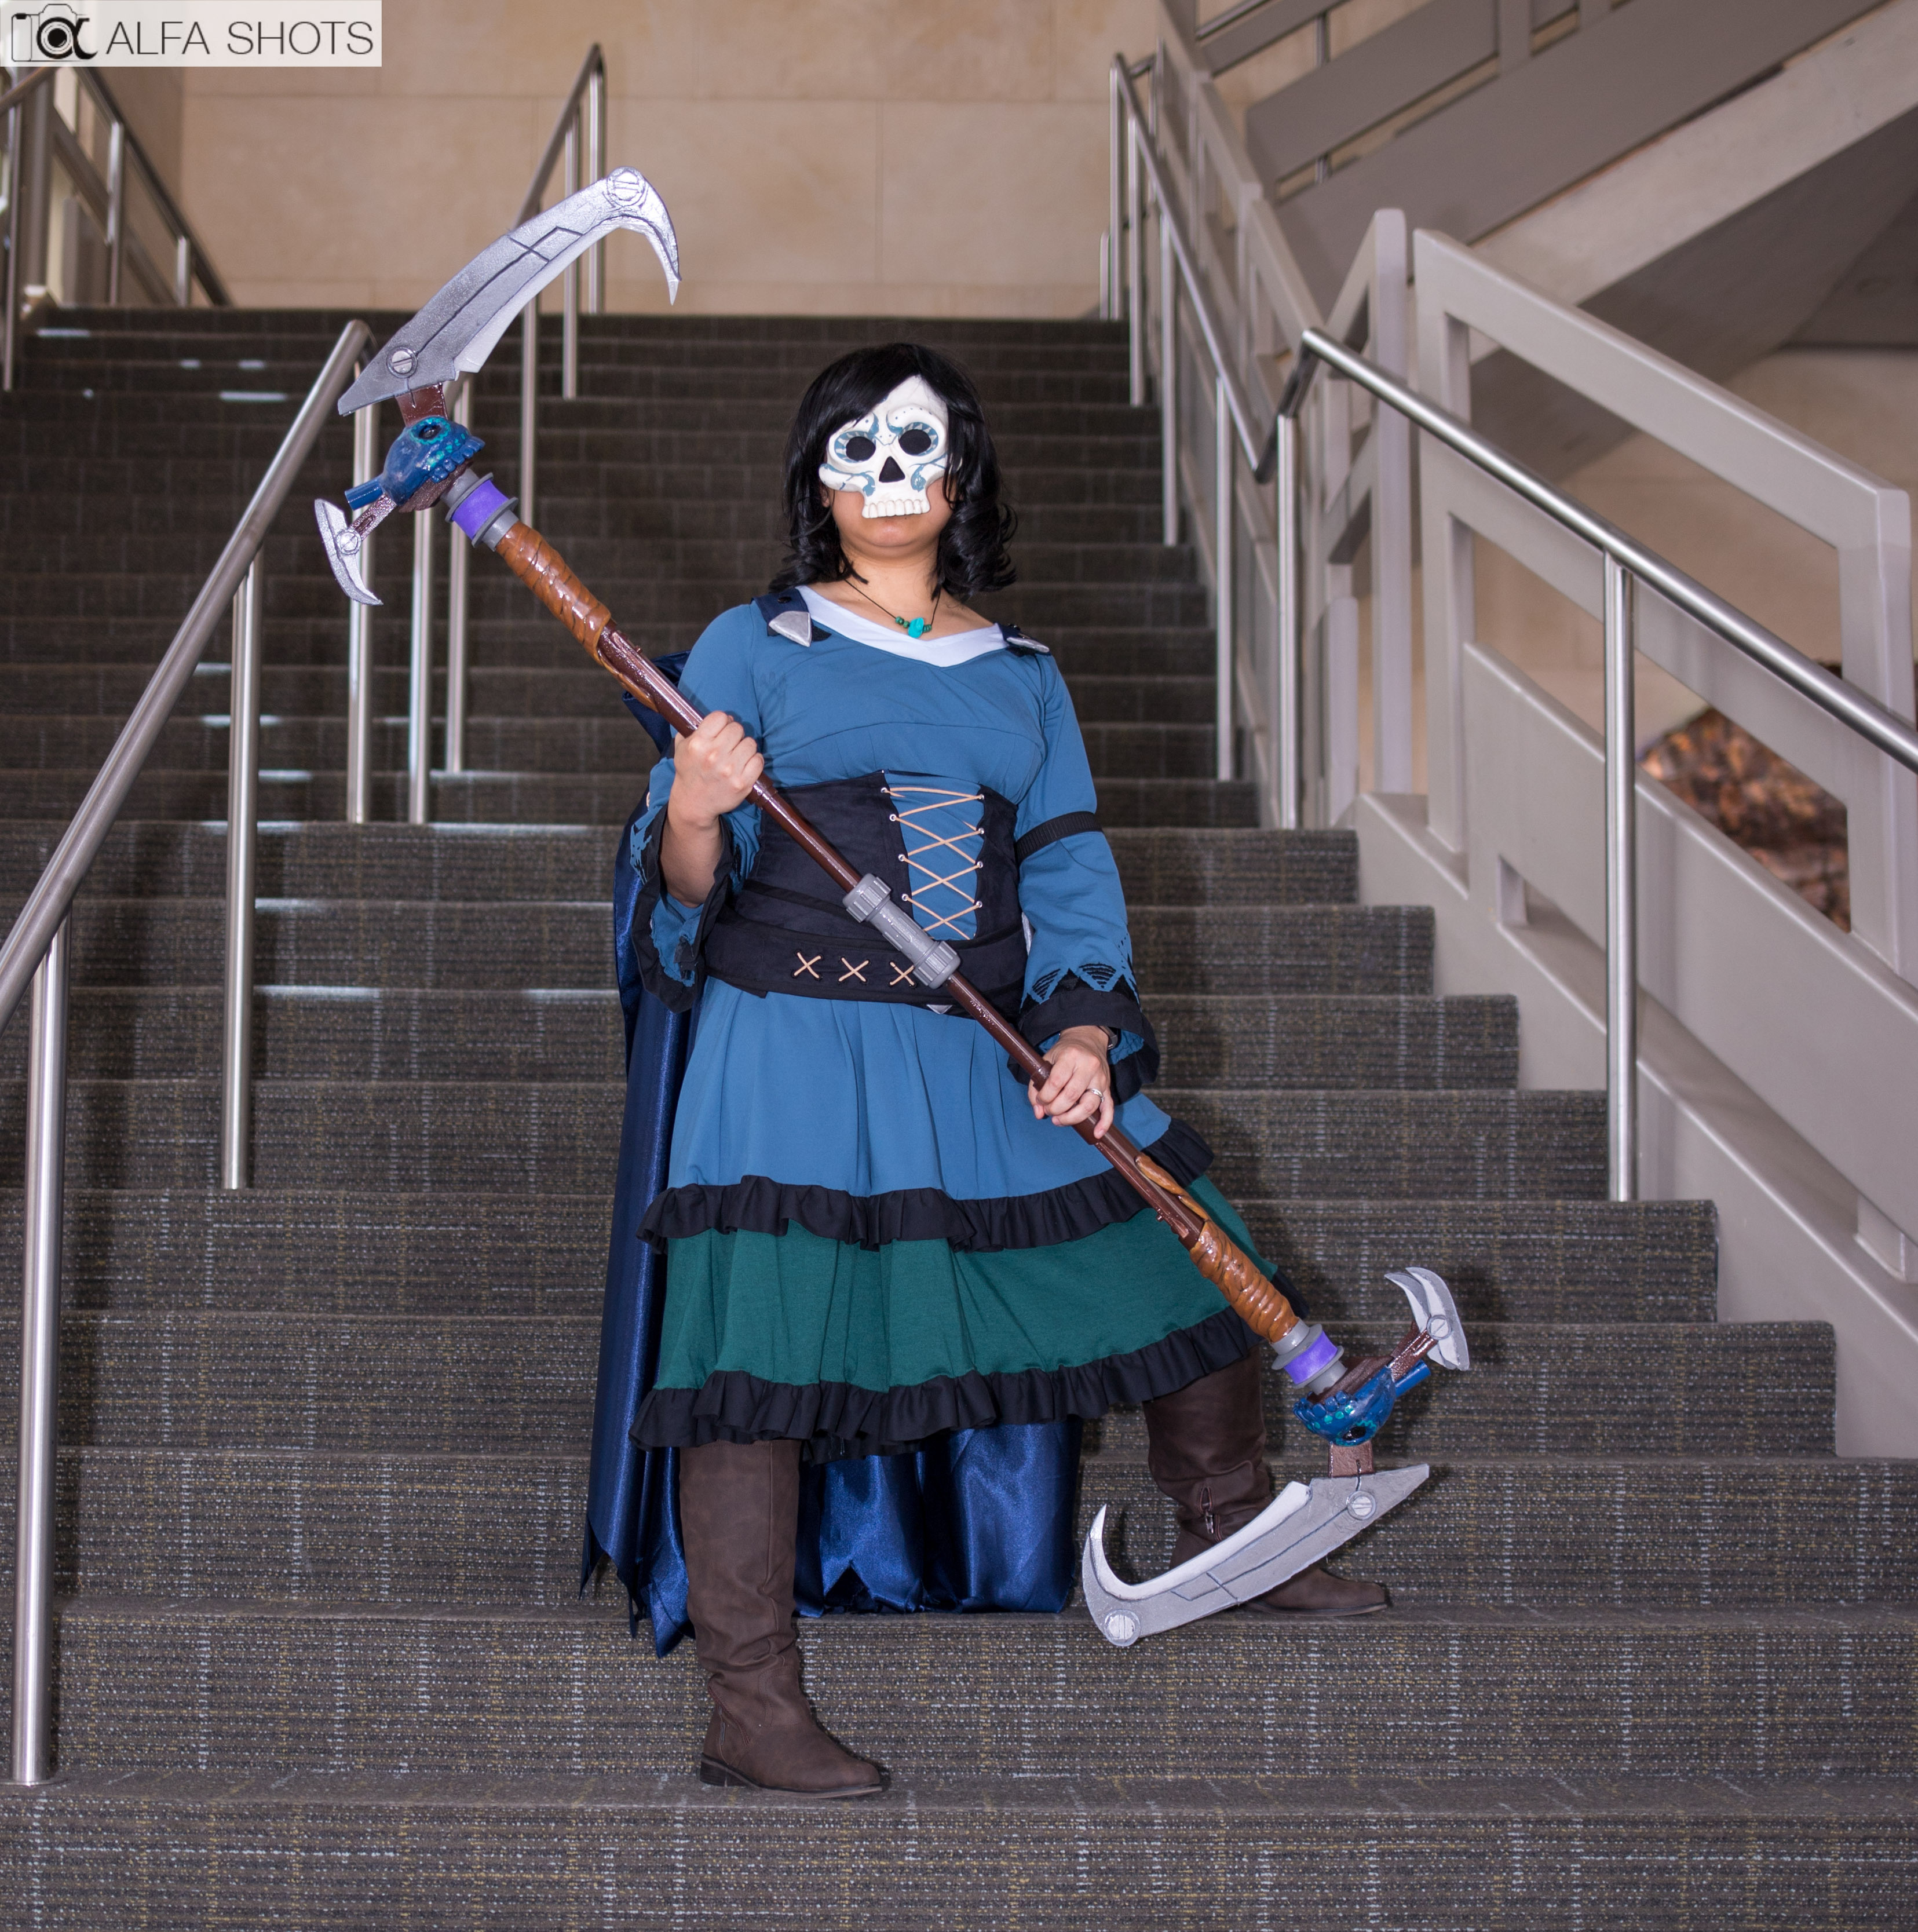
For the scythes, I traced the design in Adobe Illustrator. After tracing it, I scaled it up to suit my proportions (I didn’t want it to be too big and therefore unwieldy for me.)
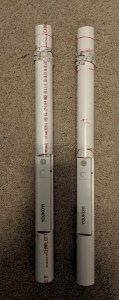
For the staff, I bought four different pre-cut PVC pipes, 2 were 1/2″ wide and 2 were 3/4″ wide. I bought a pair of ratcheting cutter so I could shorten the pipes to the right size. I also bought a coupling so that the two scythes could be joined together for staff mode. This meant that the aesthetic accuracy would be off, but the stability would be good.
For the blades, I ordered lots of EVA foam from TNT Cosplay Supply. I got two sheets of 10mm, one sheet of 4mm, and one sheet of 2mm. I didn’t actually need the second sheet of 10mm but I’m sure it’ll come in handy later for a future project.
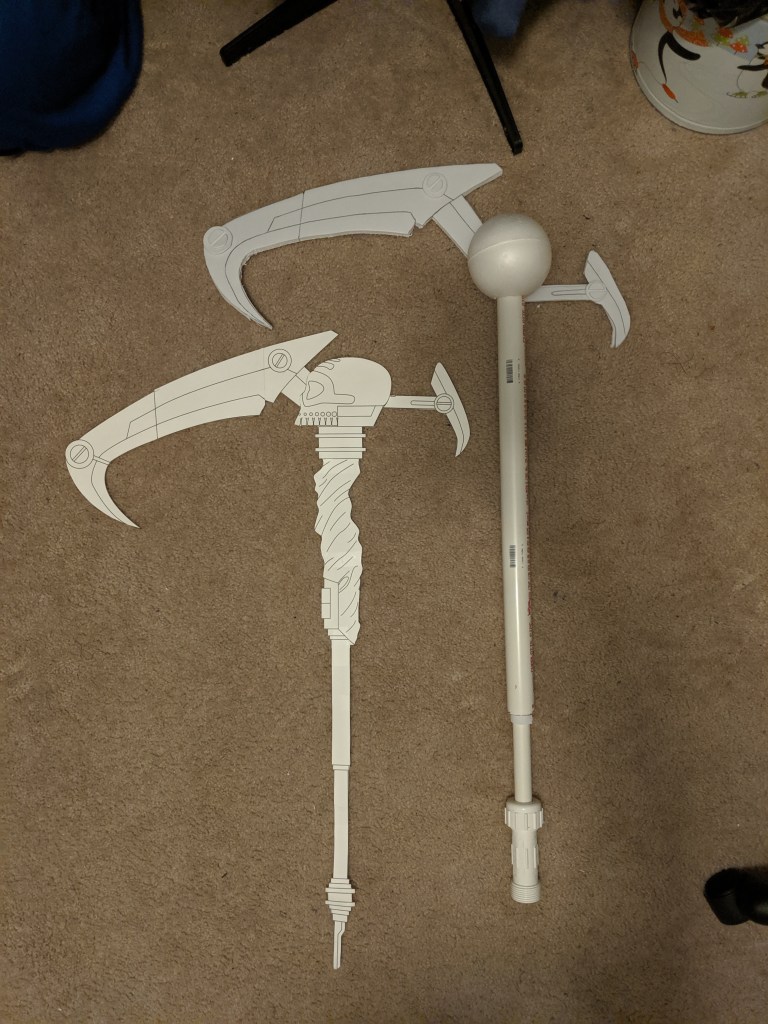
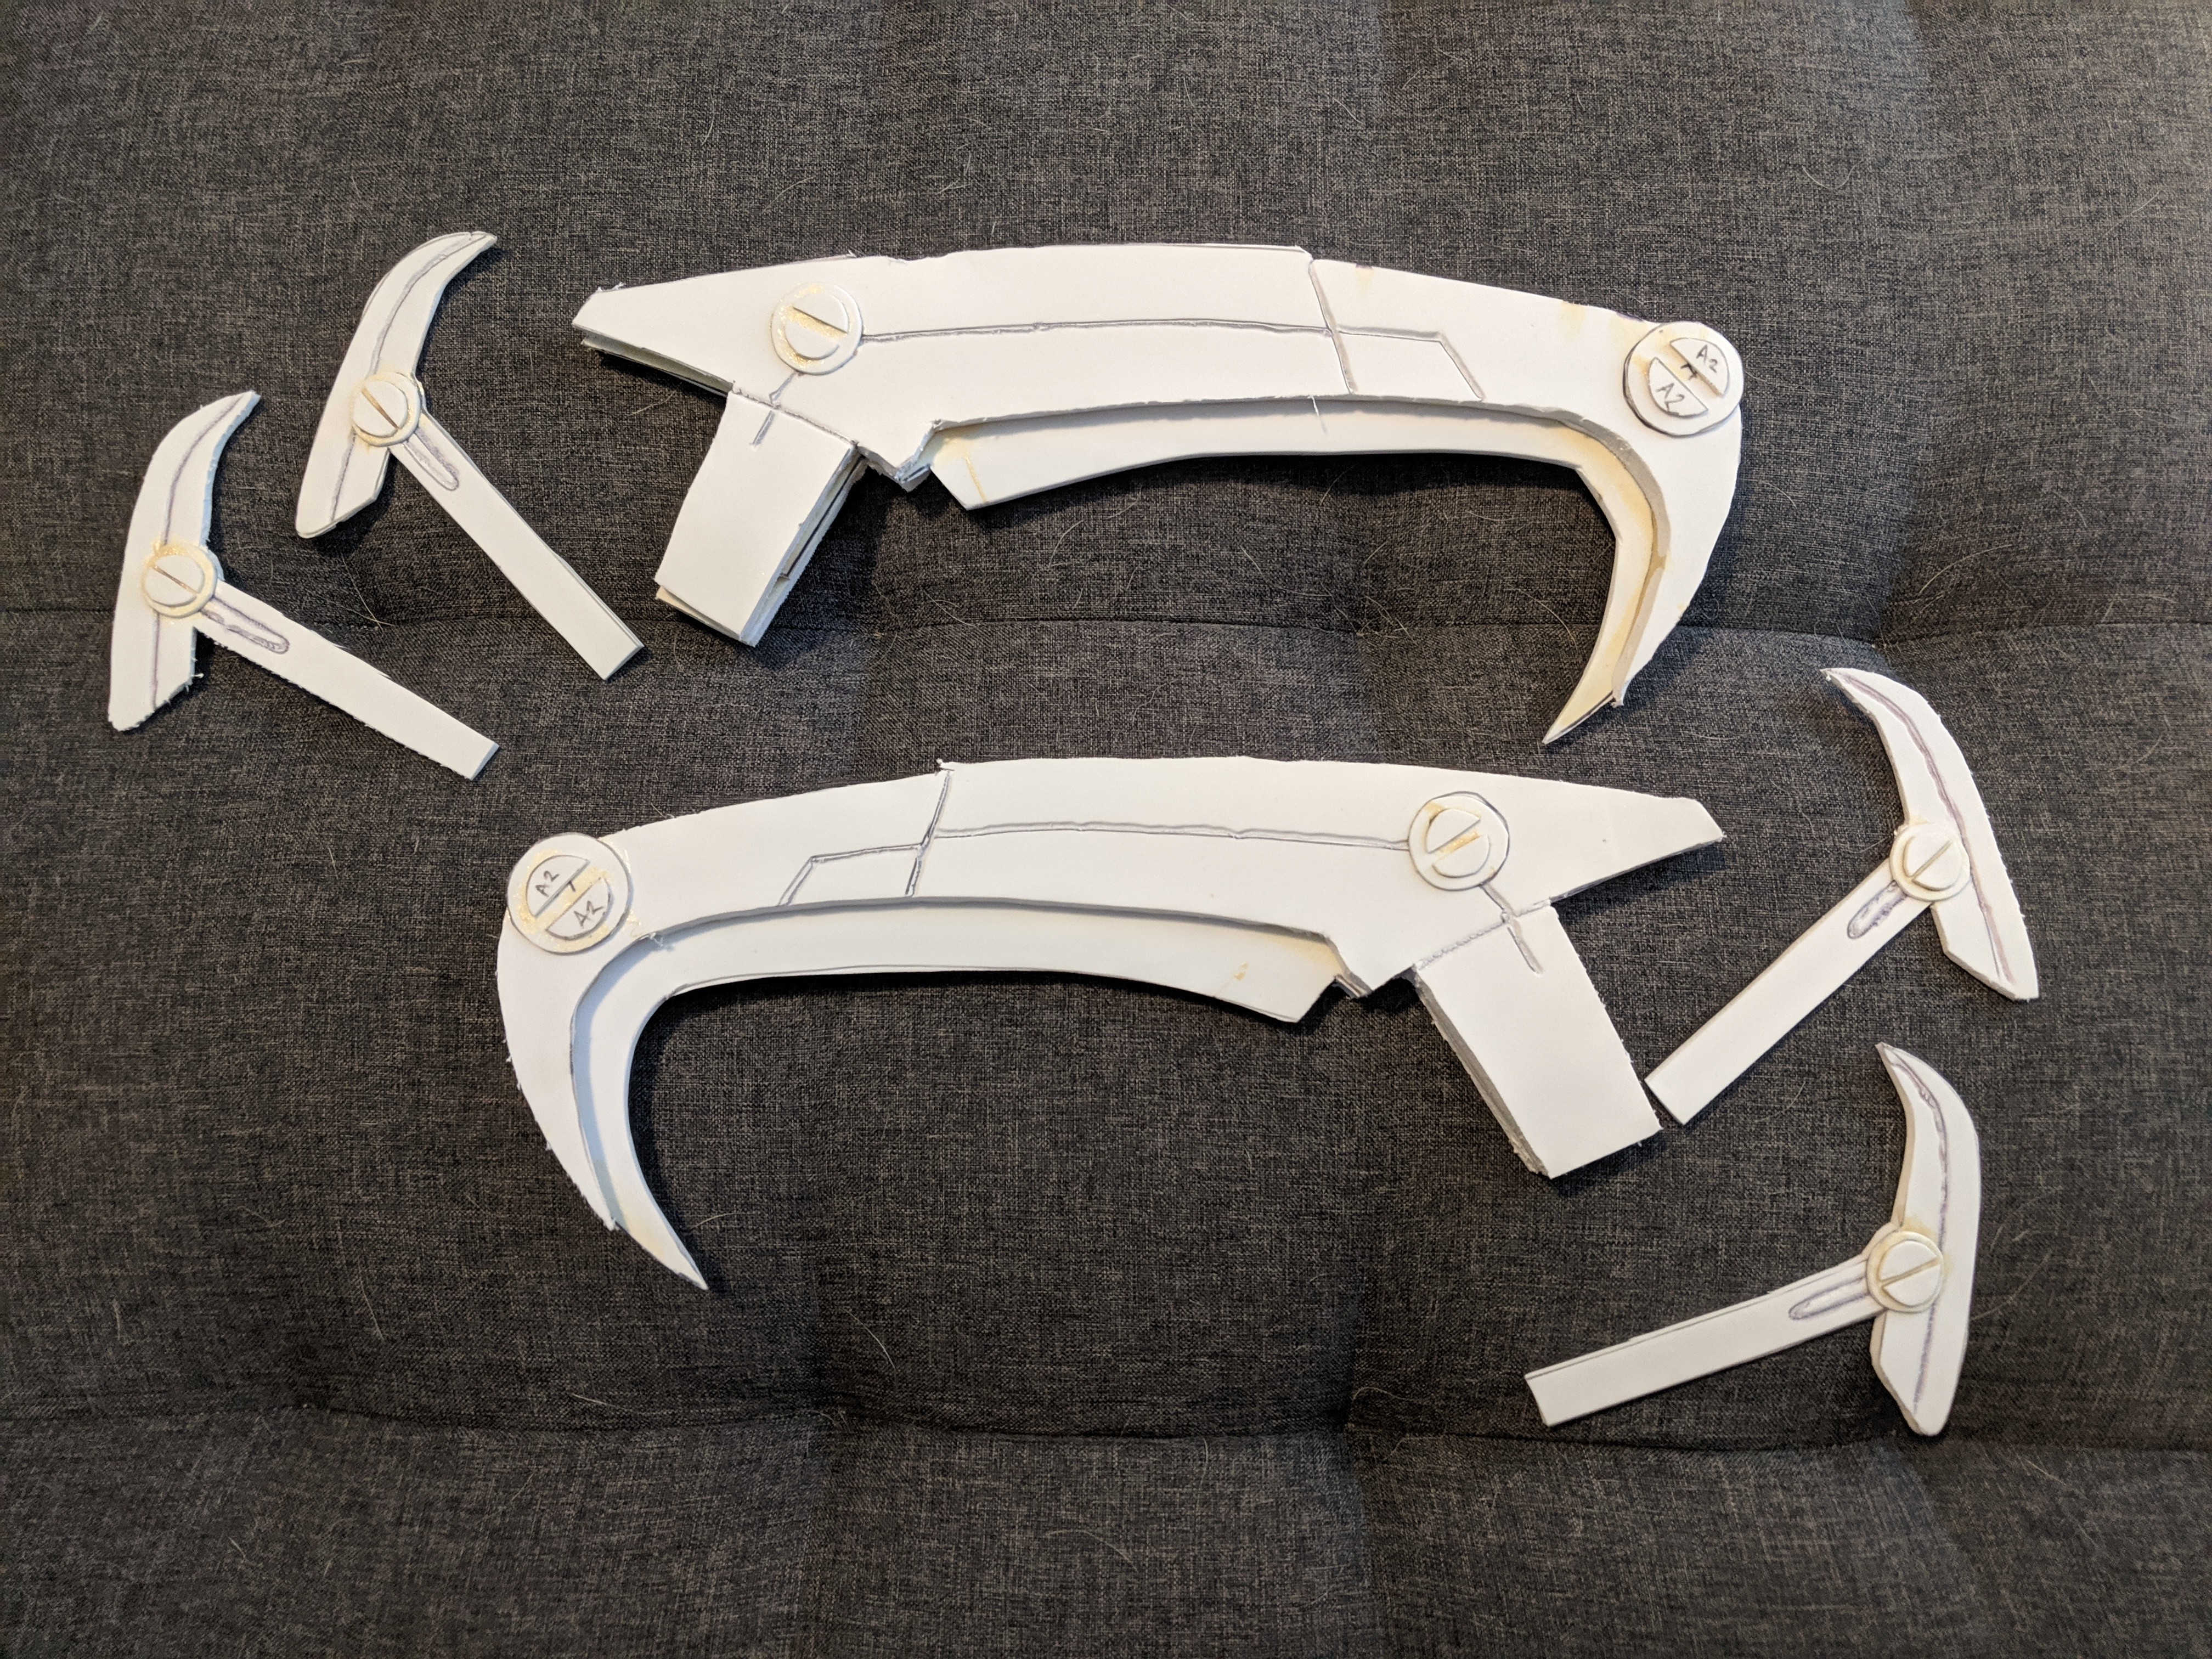
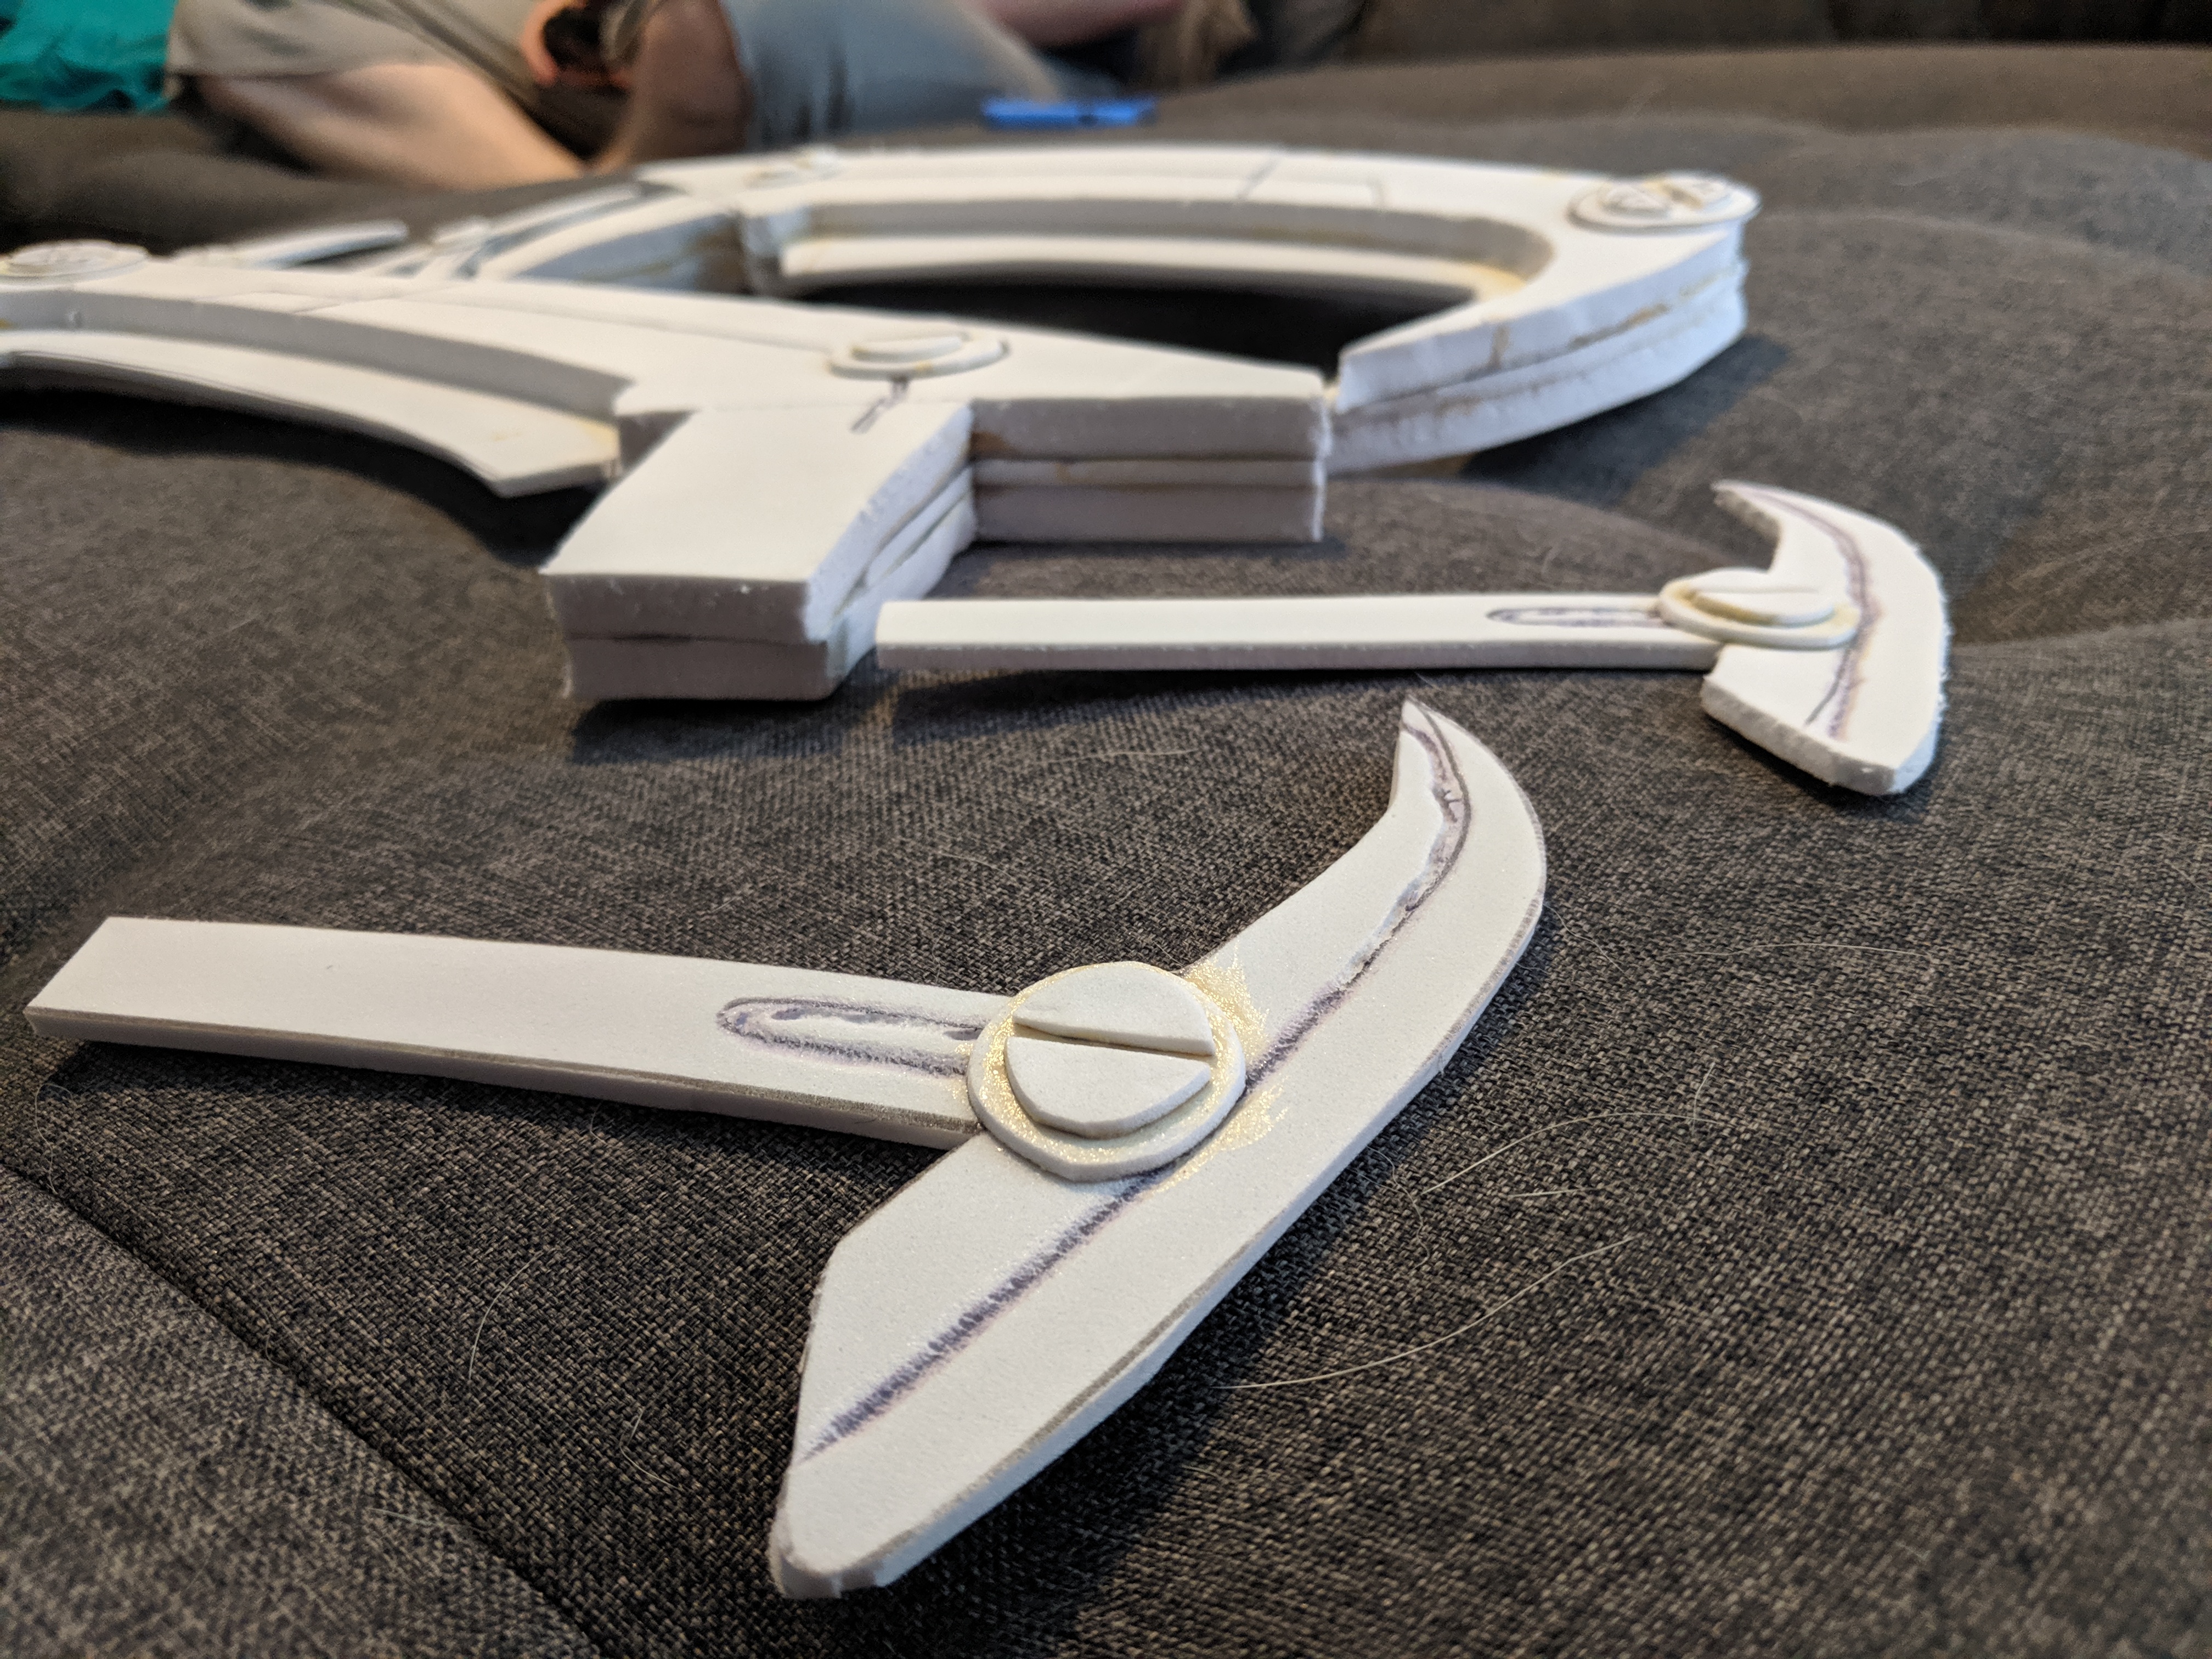
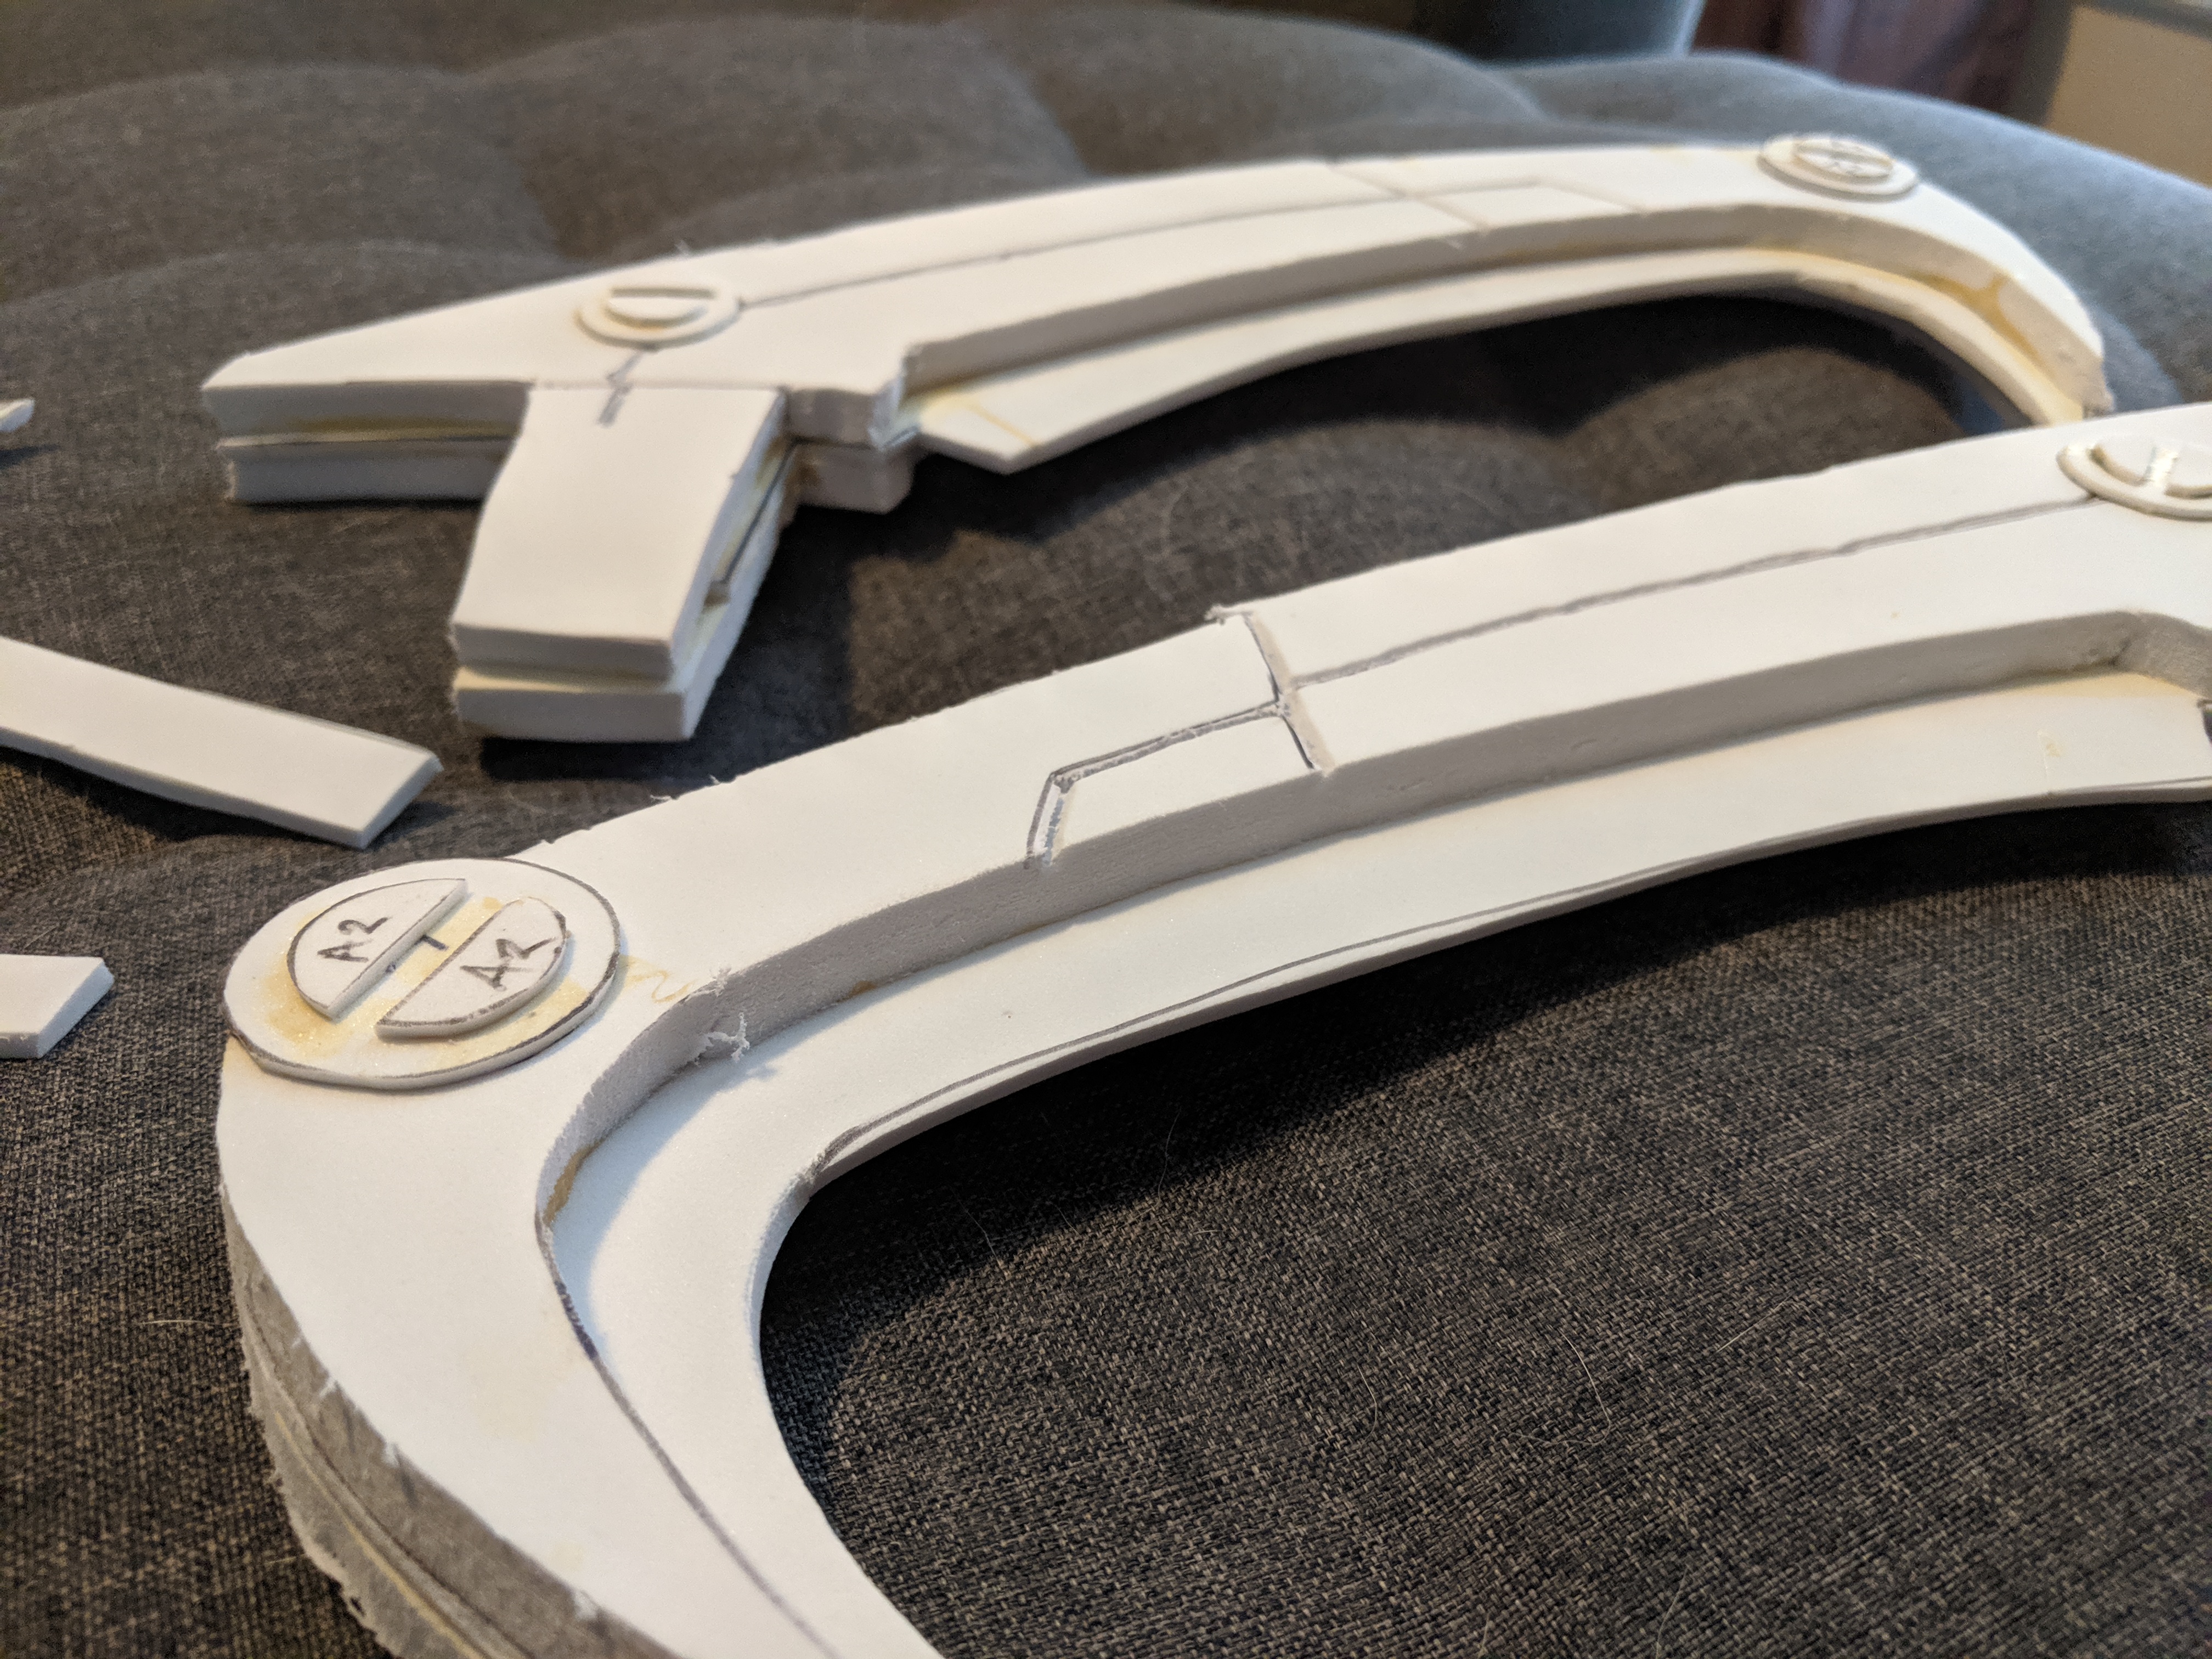
After printing my scythe pattern onto card stock, I cut it out and taped it together. Then, I cut the pattern along the blade part so I could use it to trace the shape onto the foam. 10mm wasn’t quite thick enough for the big blade, so instead of only cutting one piece per blade, I cut two so I could double its thickness. To add more depth to the big blade, I cut out the blade pattern on 4mm foam and sandwiched it in between the 10mm blades. (I made sure to trim part of the 10mm blade so the 4mm was showing.)
For the smaller blades on the back of the scythe, I used for 4mm. Finally, I used the 2mm foam for the little circular screw details that go on both sets of blades, making sure to label them all since there are 3 different screw sizes.
Blade foam pieces all cut out, I used my newly purchased Dremel to sand the edges. I used barge cement to glue the 10mm “bread” to the 4mm “meat” of the blade sandwich and then sanded the edges to smooth the seams. Once that was all dry, I used my dremel again, this time to carve out the lines in the big blades. It took a while to get the hang of, but I really wanted to carve these details in rather than paint them on afterwards. Carved = more depth! Once done with that, I painstakingly glued the screw details to all the blades. It required some tweezers to make sure I could hold the tiny pieces more easily. At one point, I actually even had to run downstairs because some of the pieces flew off the balcony of my apartment when I was gluing them. I was much more careful with my foam after that incident.
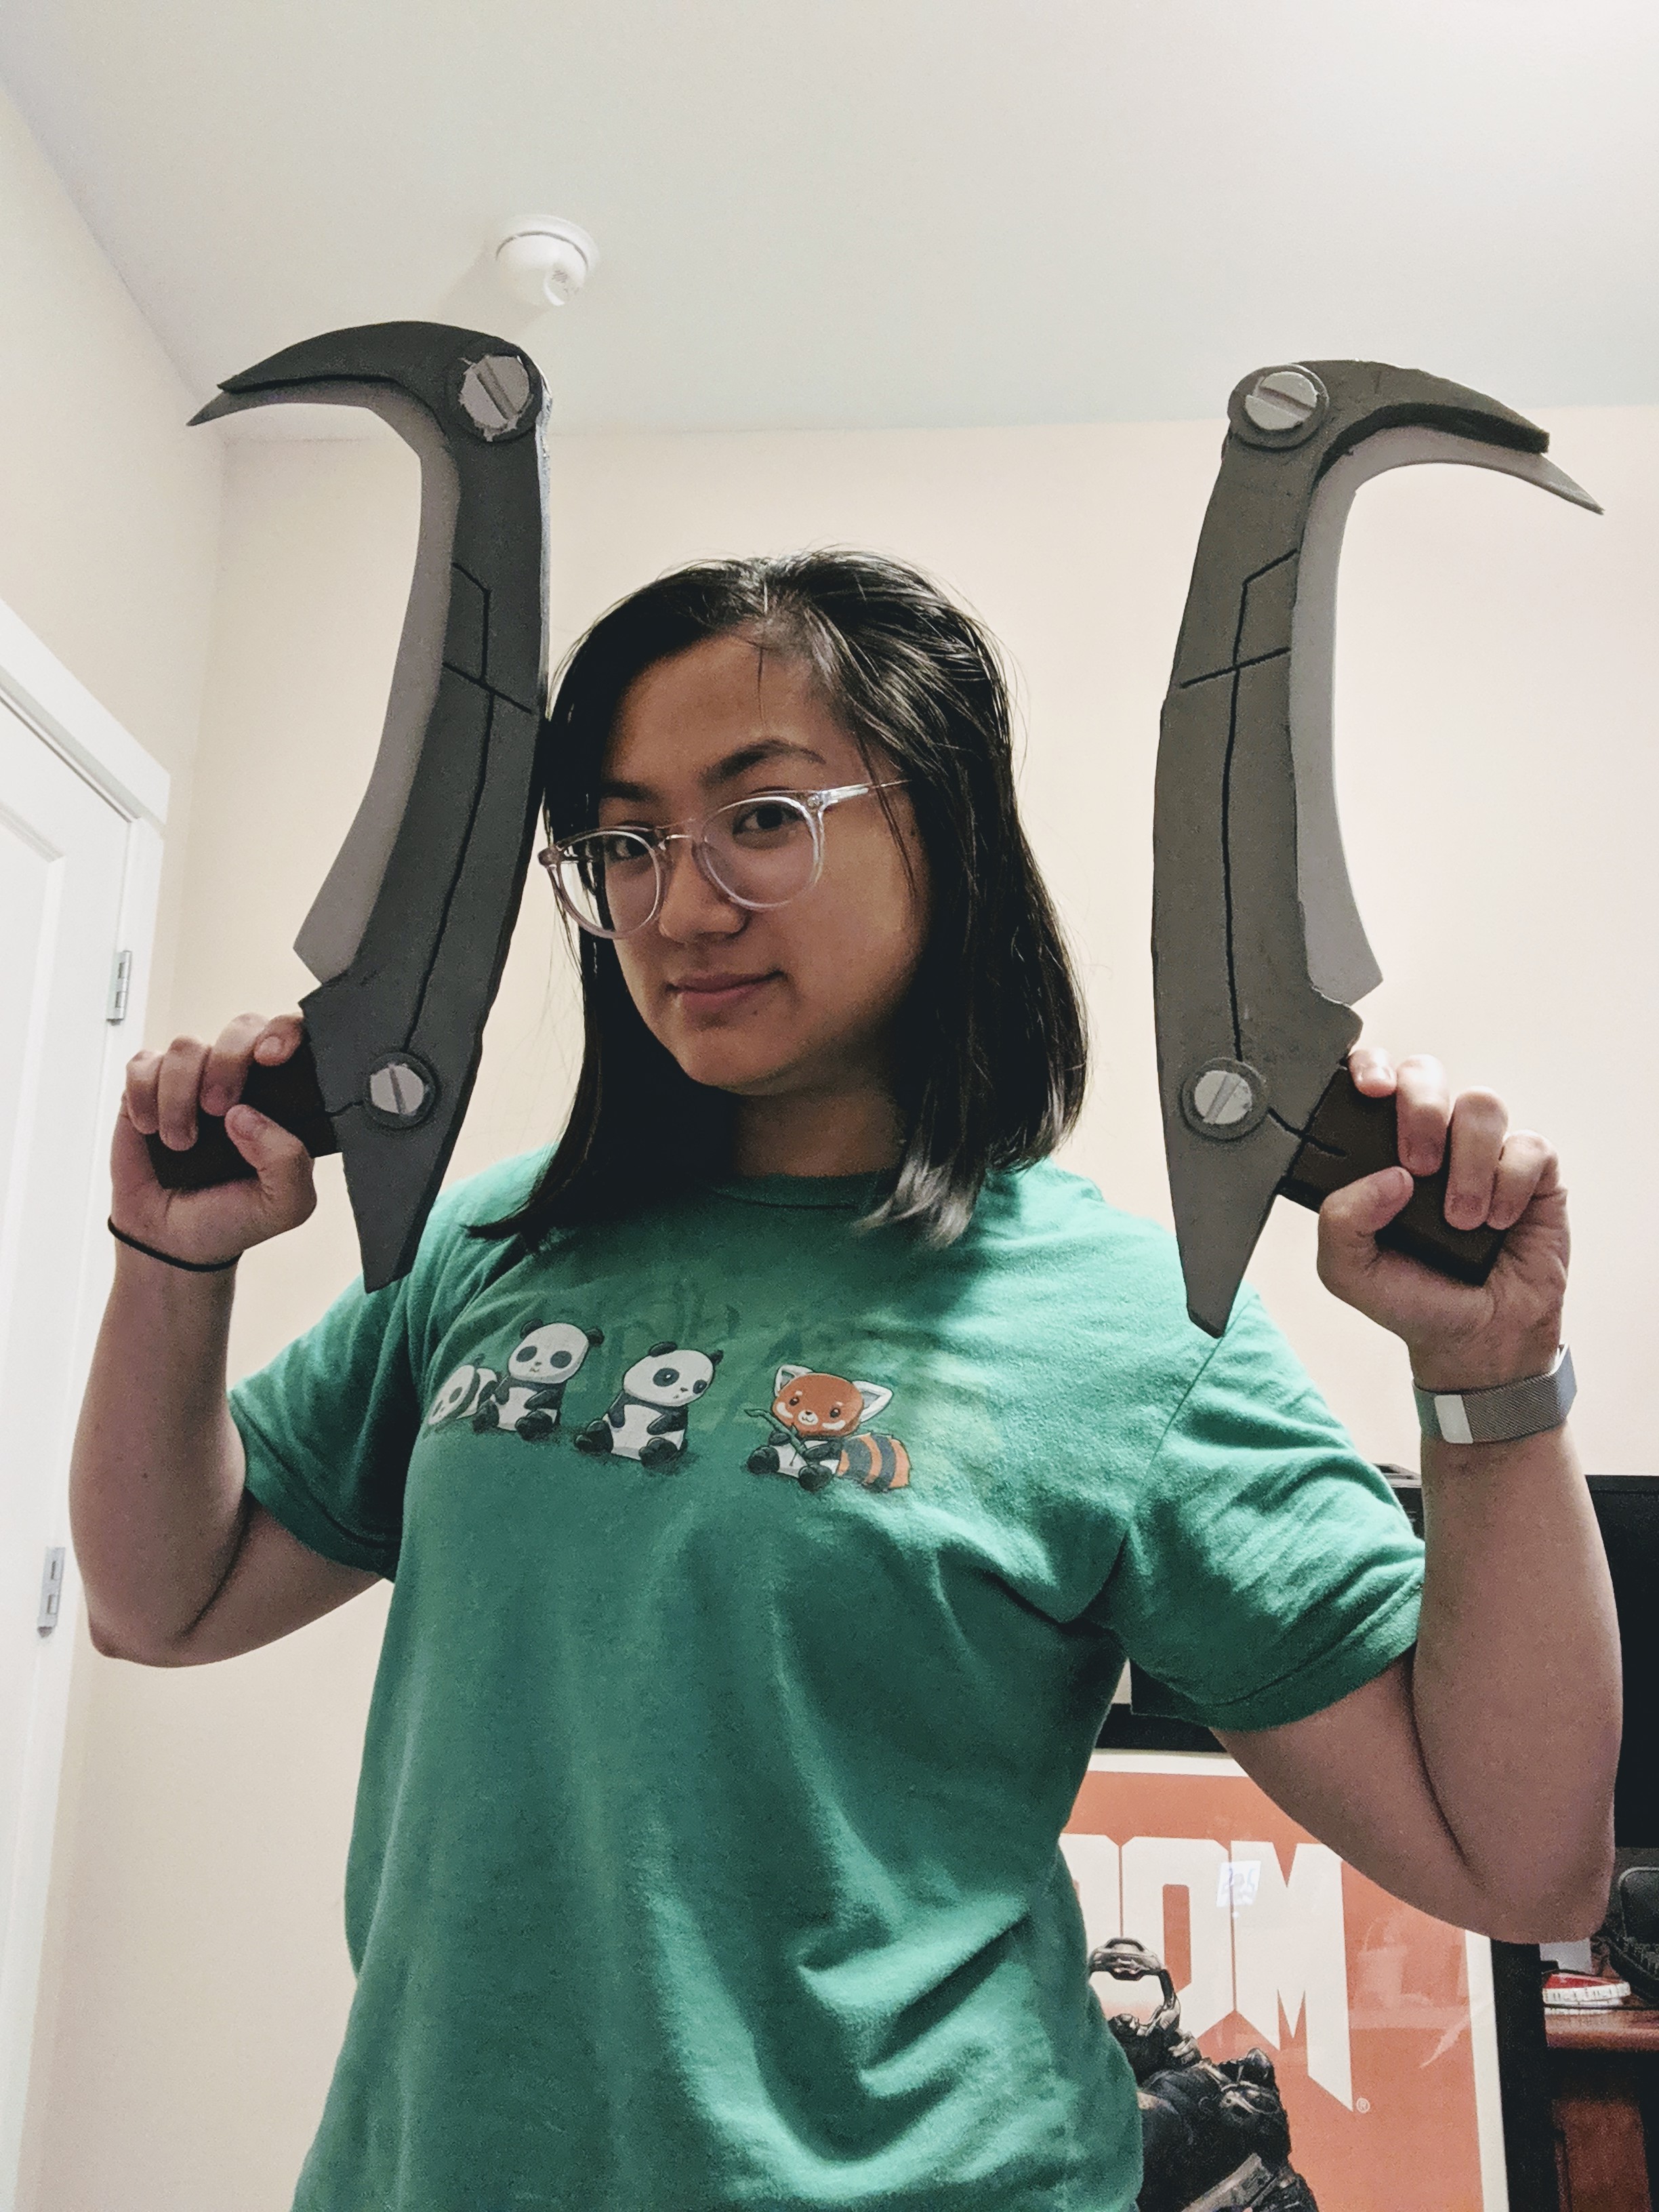
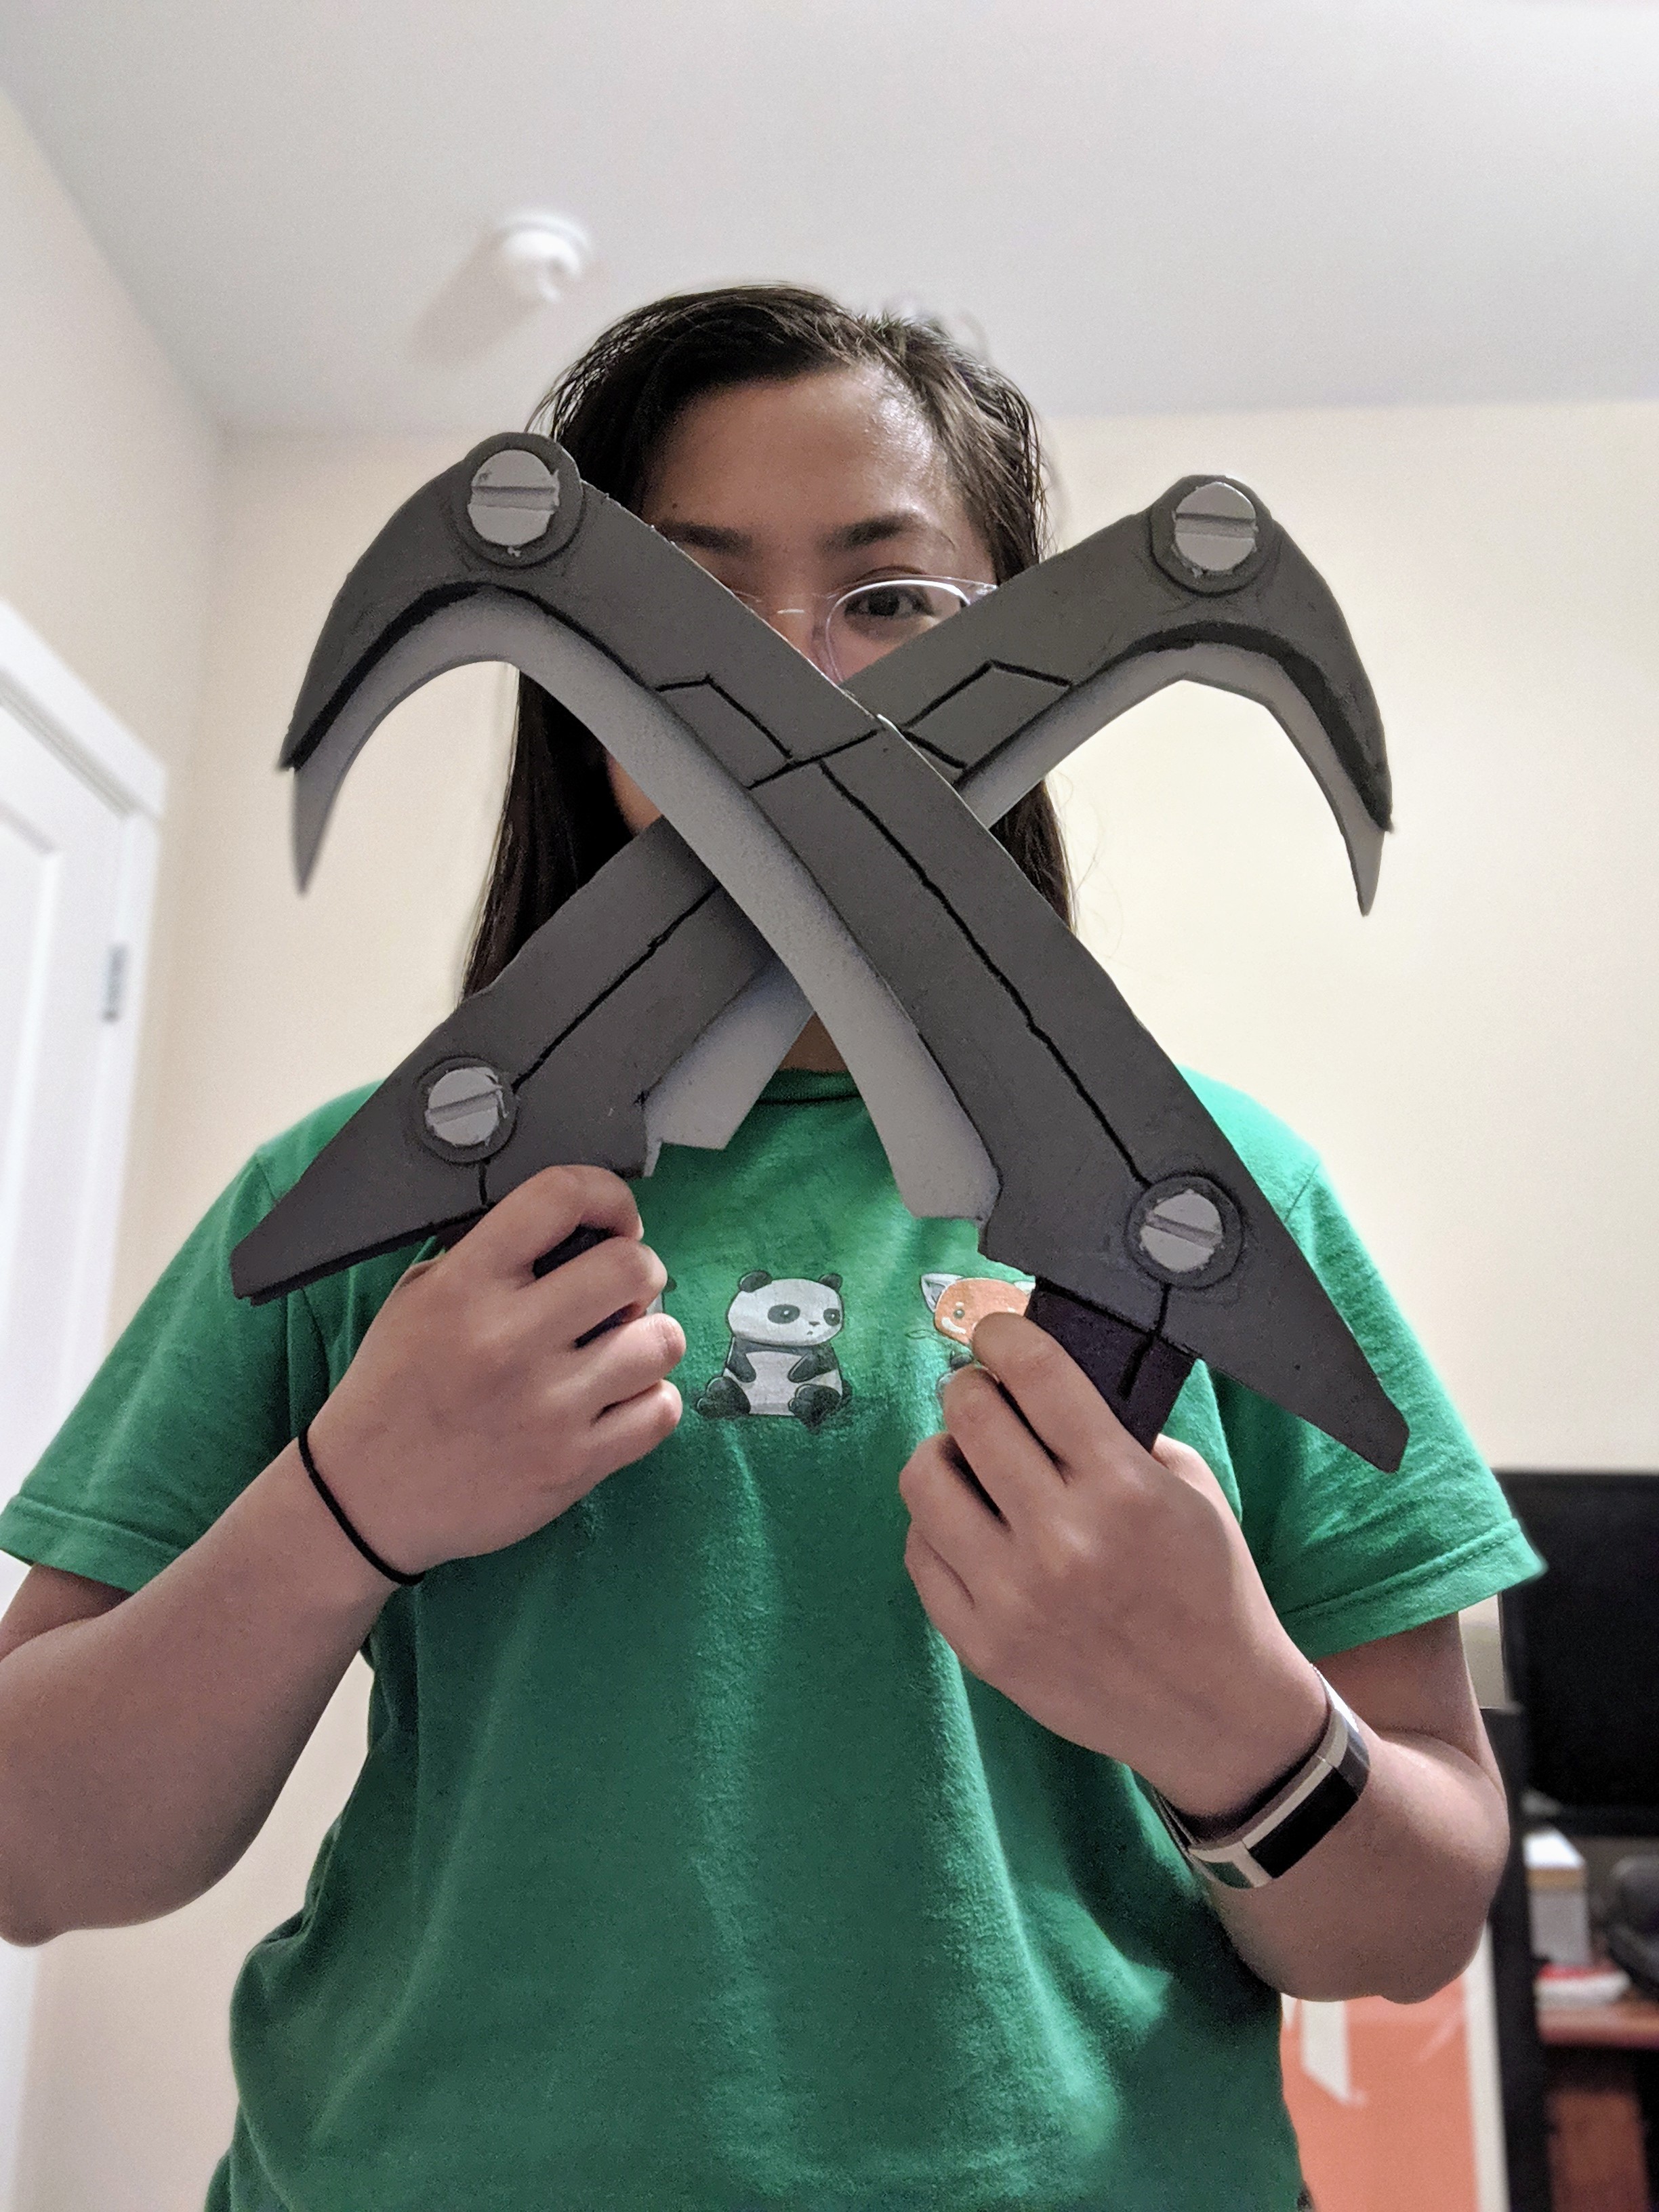
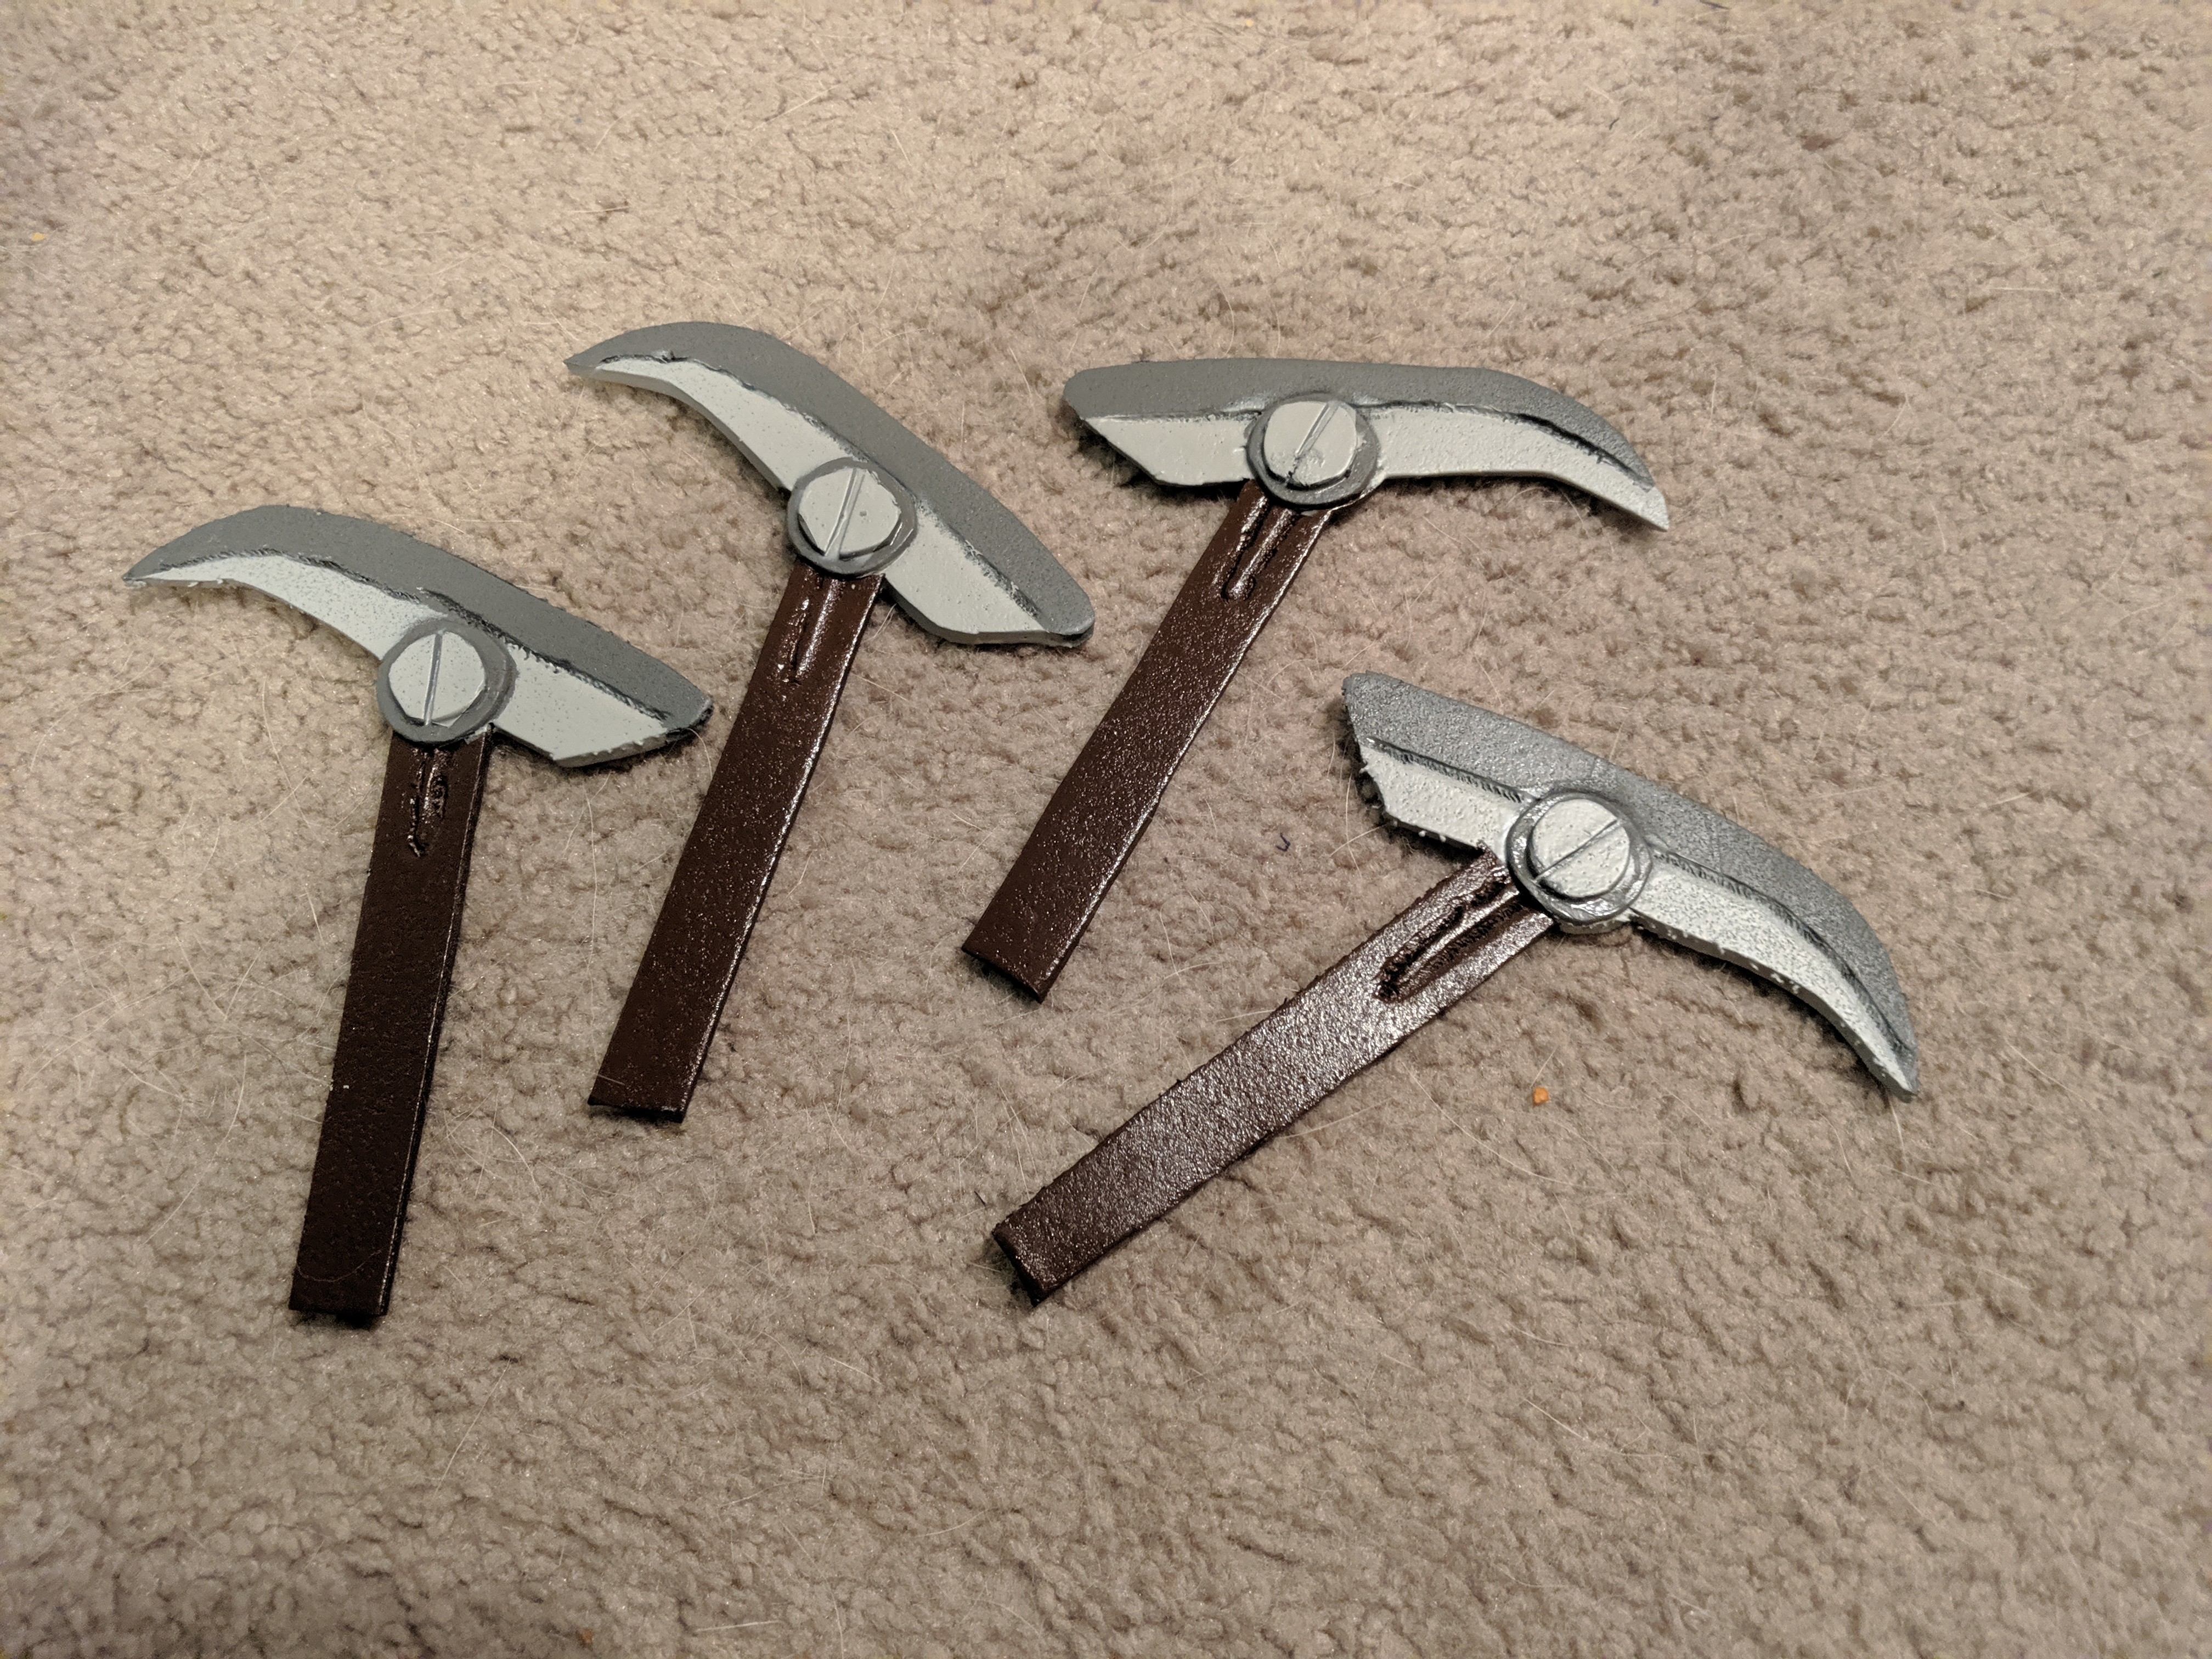
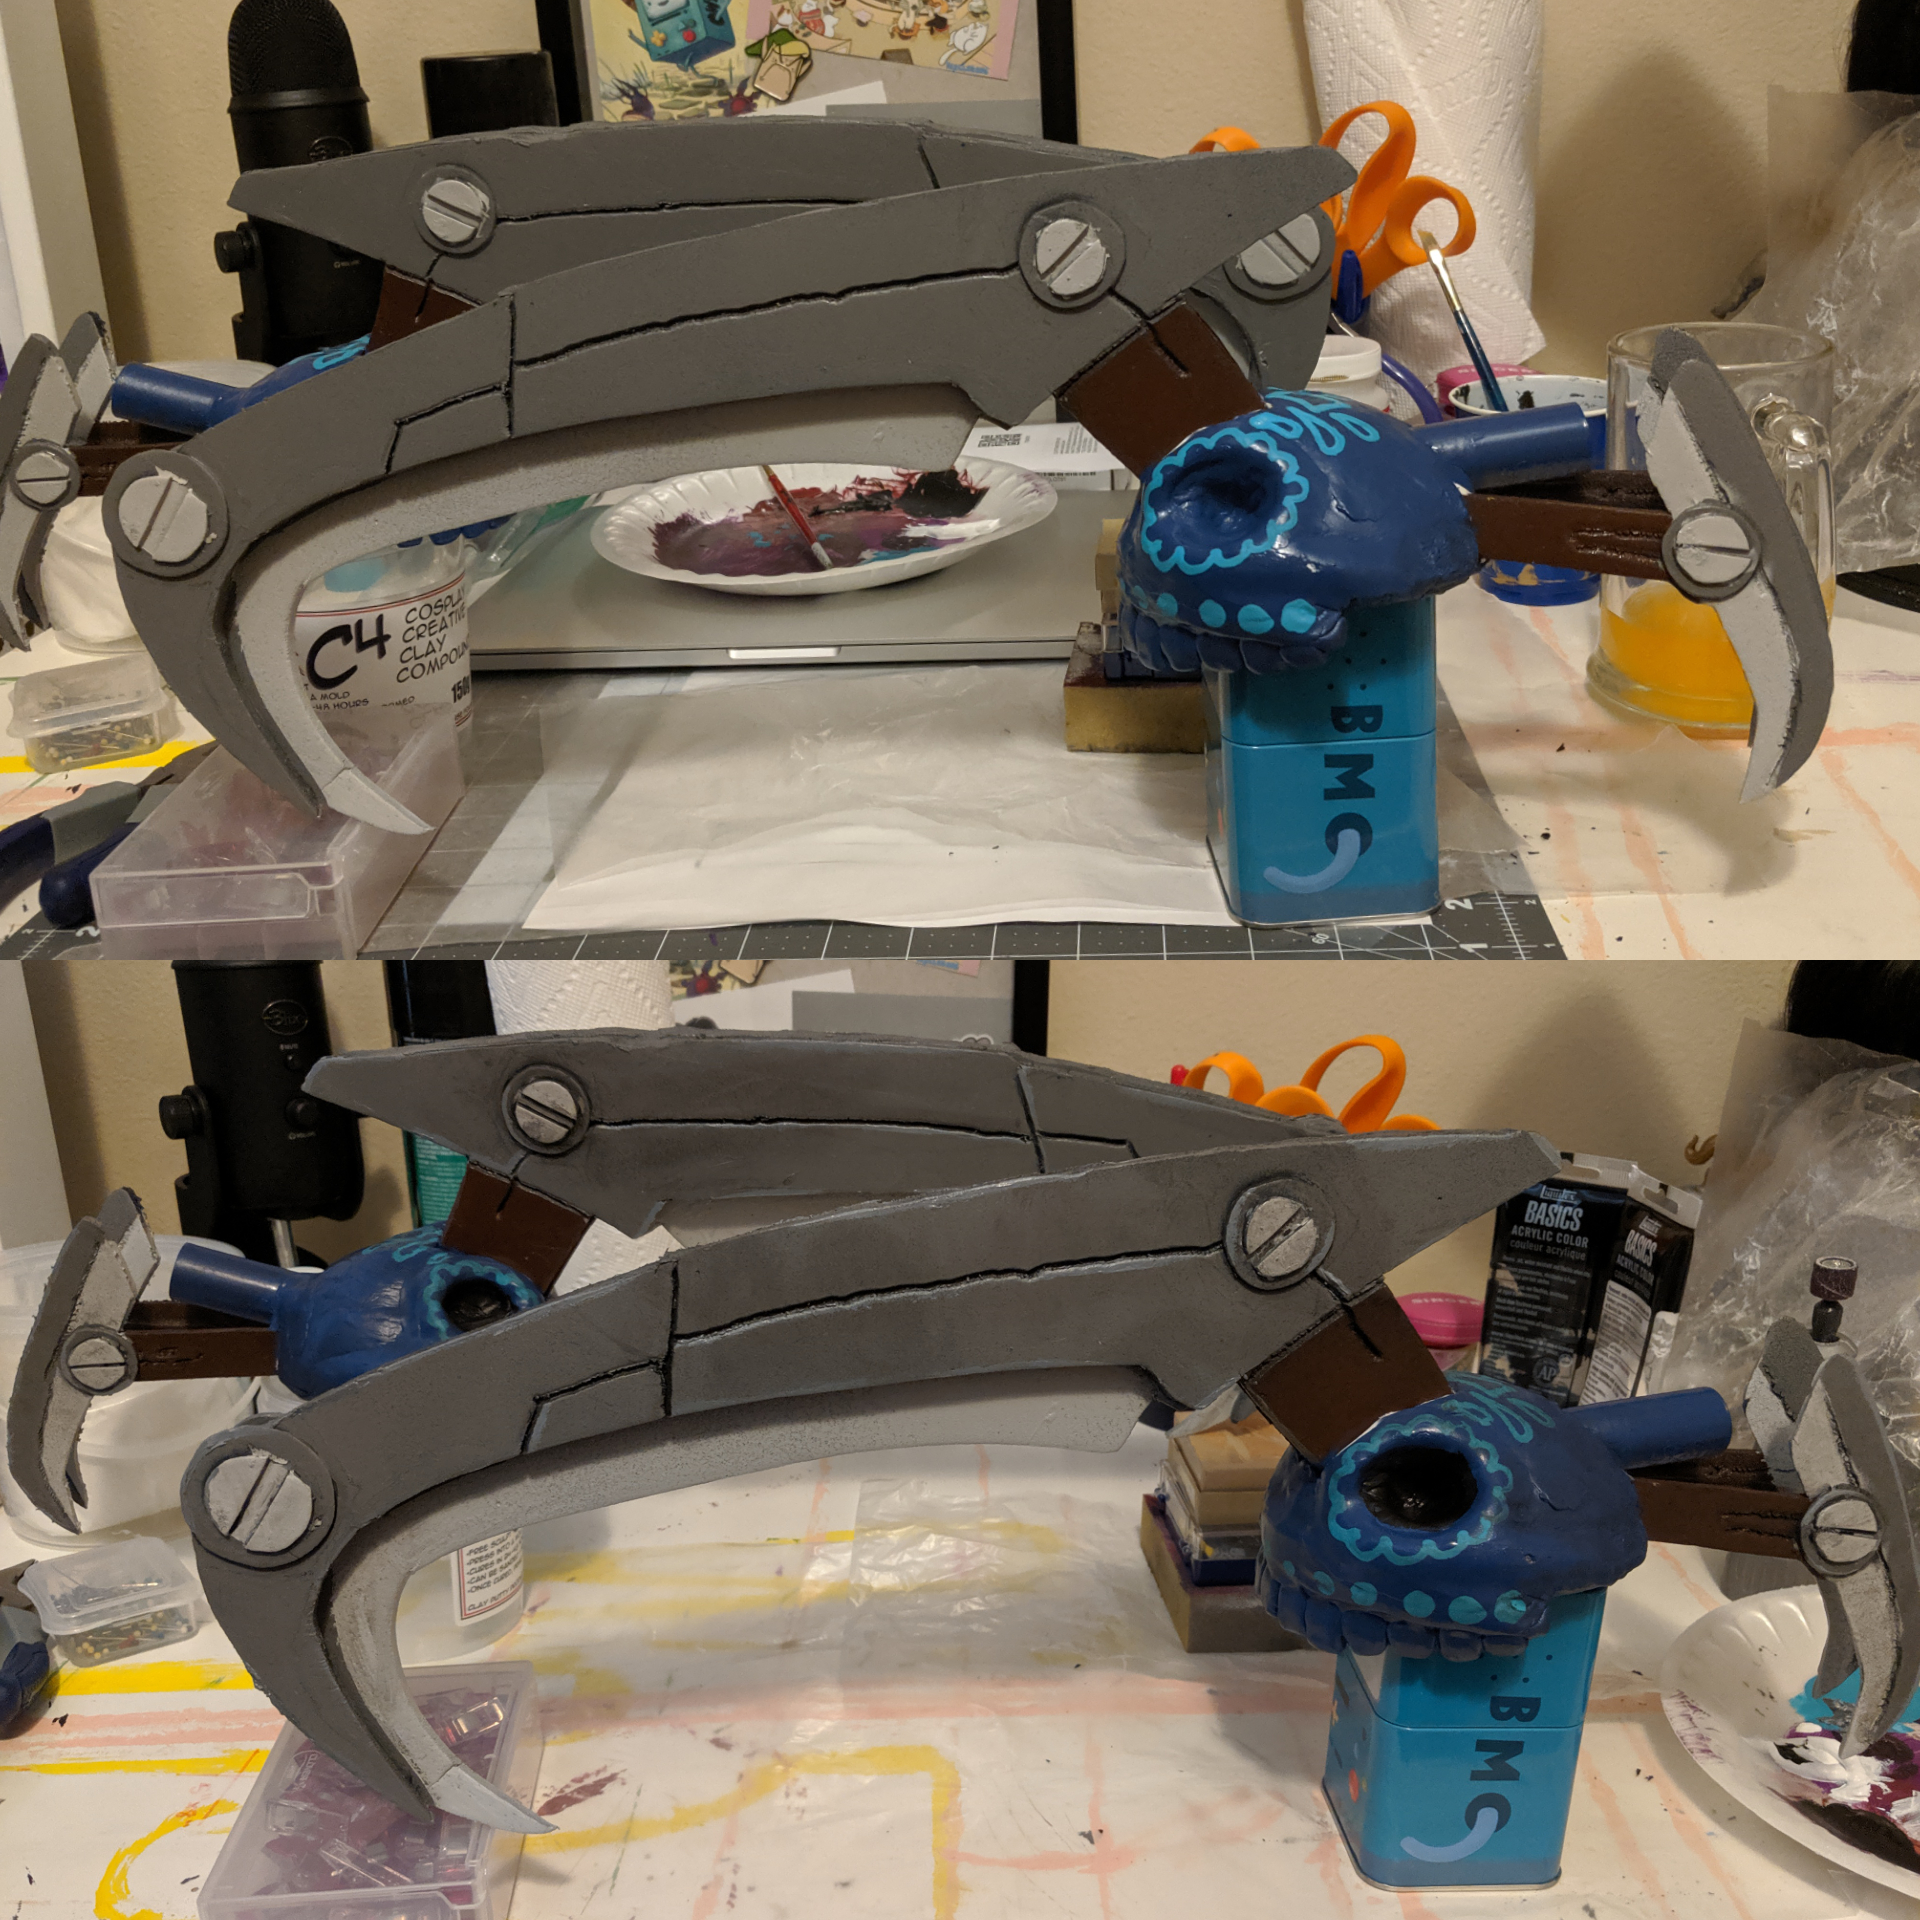
Once happy with the EVA foam bases of all the blades, I started painting. First, I primed every piece with primer. Then once that was done, I spray painted the wooden parts brown. After covering the now dry brown parts with painters tape, I painted the entire blade a dark gray. Lastly, I covered up the everything but the screws and the small 4mm blade with painters tape and spray painted the exposed parts a light silver. This was the result:
The final step for painting would’ve been to weather and then seal these blades, but I needed to move onto other parts of the scythes that were time-sensitive. I needed to start making the skulls out of foam clay, which means I needed enough time for them to fully cure before I could start using them.
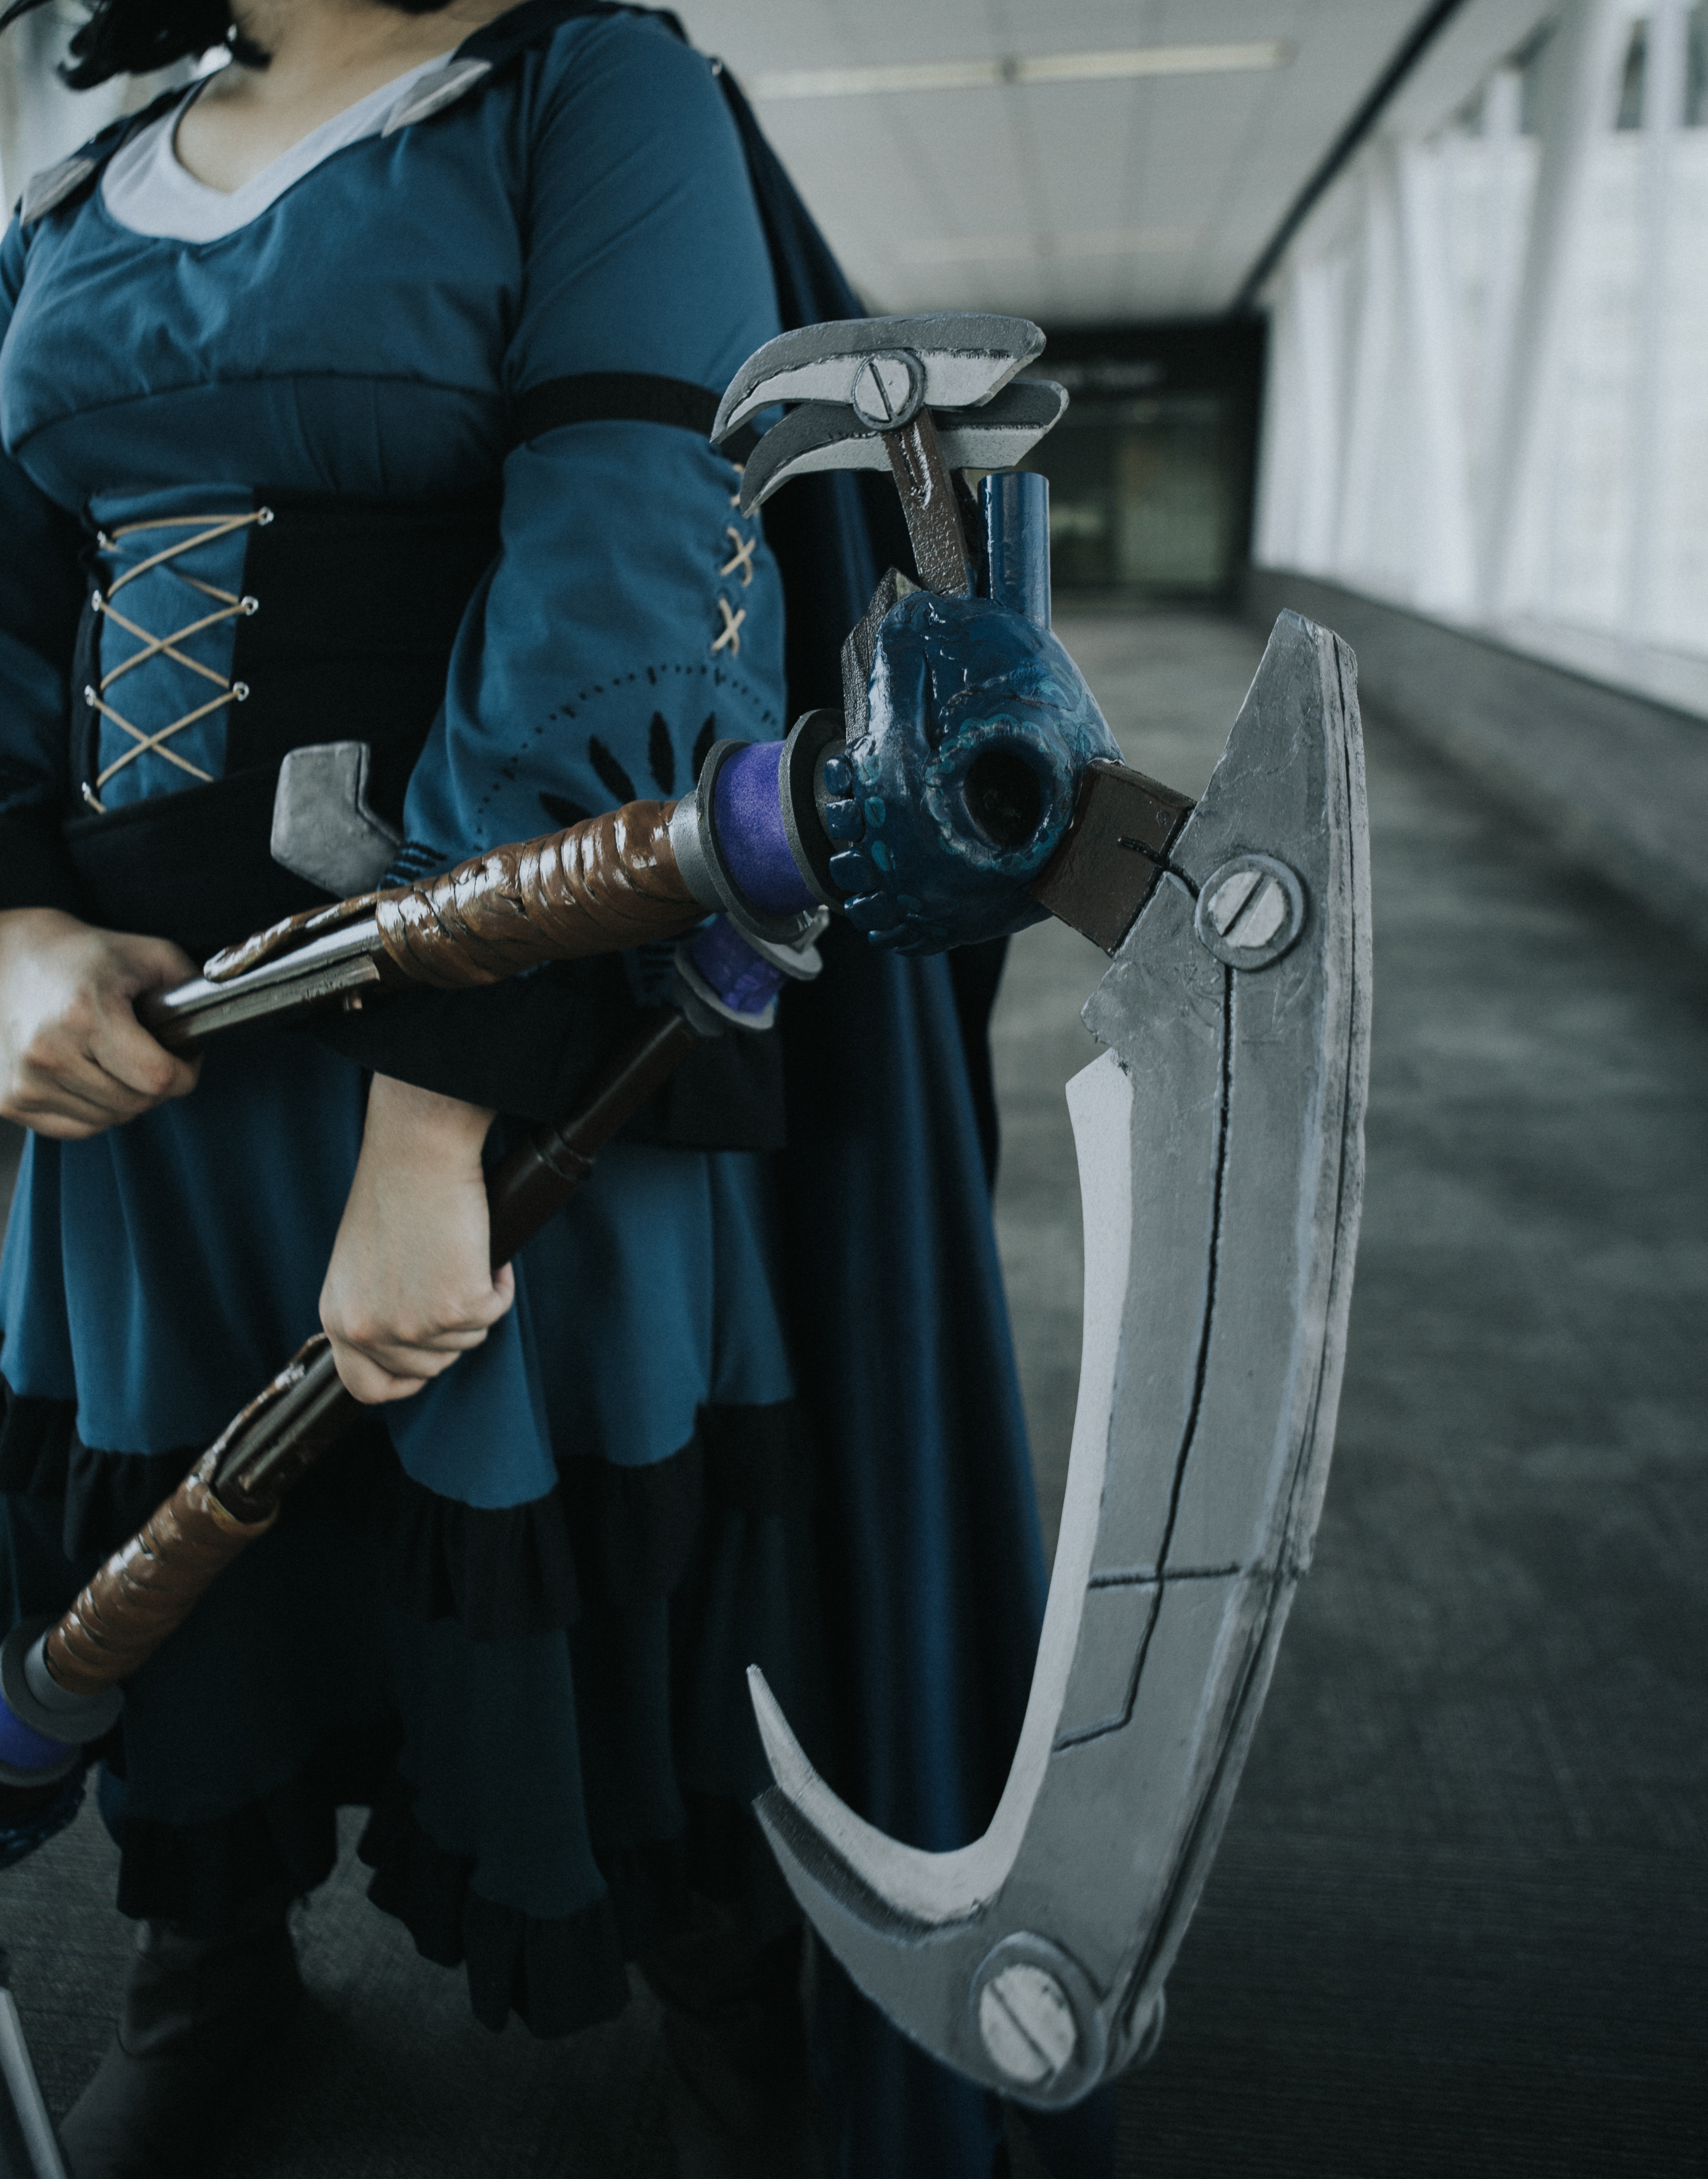
To make the skulls, I used foam clay. First, I made a big ball out of the foam clay that was close to the size of the skull, then I squished it down onto the tablet so that it had one flat edge and made a half-sphere. After smoothing it out, I carefully inserted the big blade and small blades into it. Finally, I took the small piece of PVC pipe that would go into the back and put that in as well. I would have left that in the skull so it could be stuck in place like the blades, but it was too heavy and kept drooping down. So, instead, I just put it in, twisted it a bit to make where it would go, pulled it out, and then smoothed that area so that it was a little hole for it. I would just have to glue the pipe in place later. Lastly for this step, I used my thumbs to press in the two eye sockets.
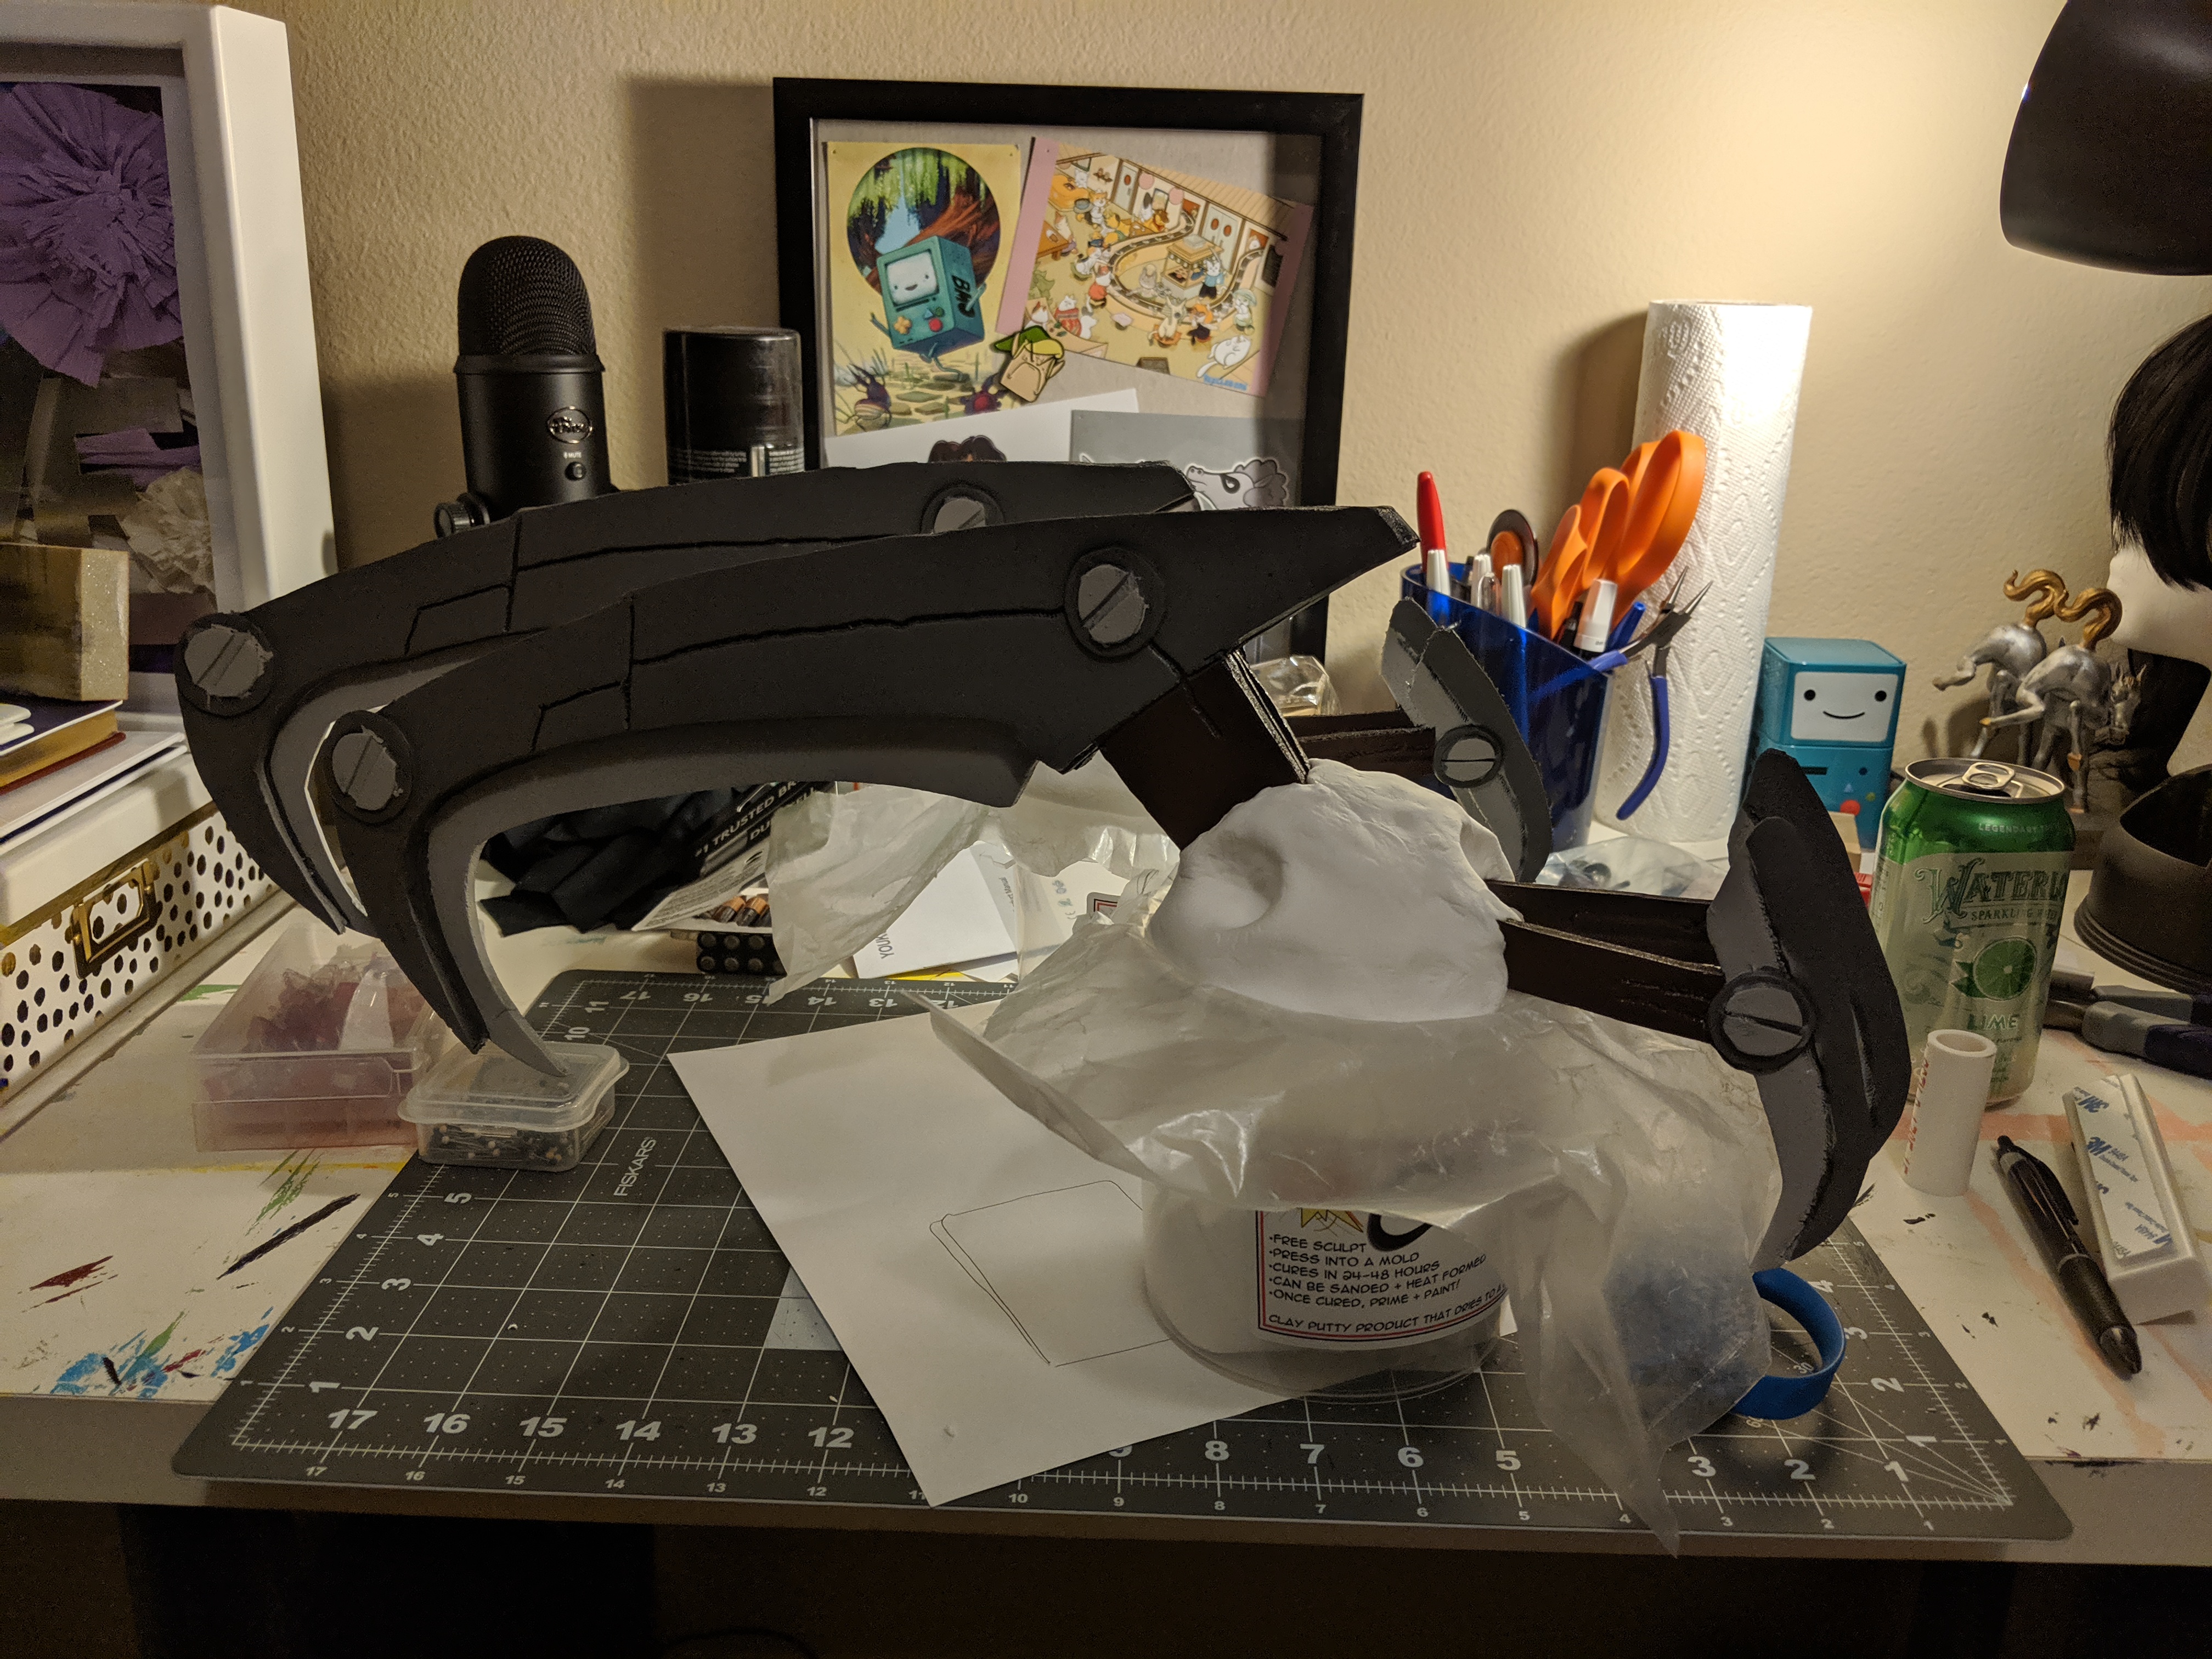
To hold this all together, I had to place the skull on top of a jar or bottle and then place things underneath the big blade so that it stayed in the right position; I didn’t want the blade drooped or falling out.
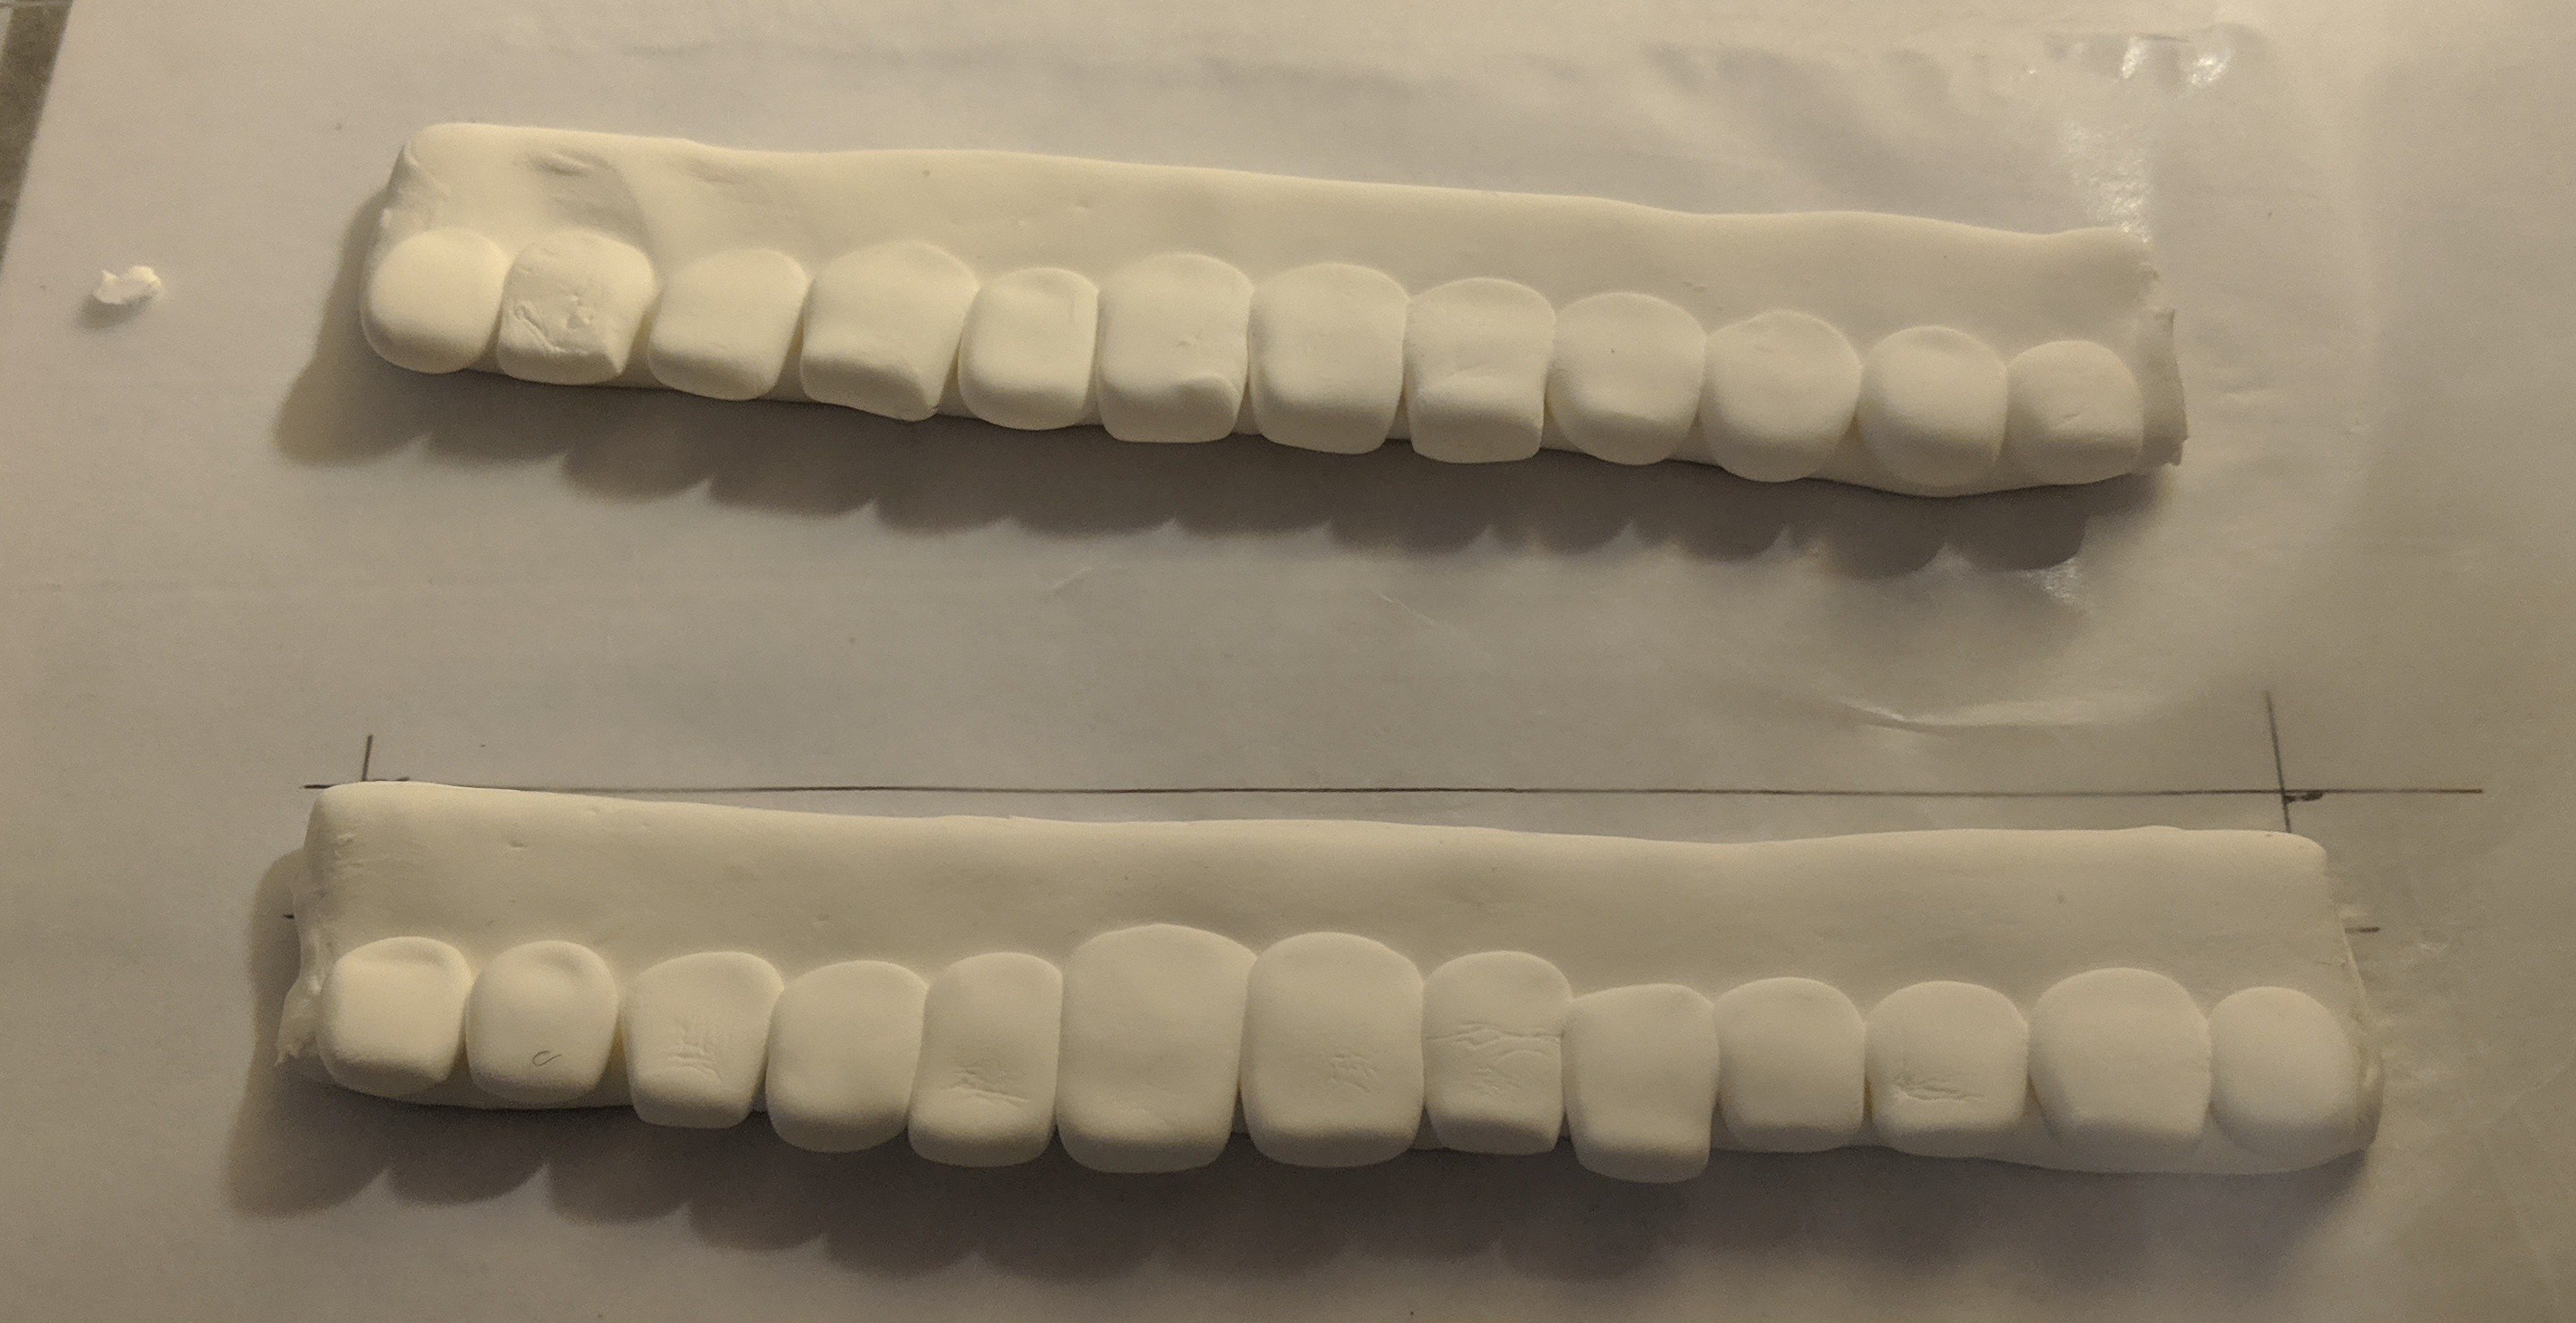
Next, I did the teeth. Foam clay behaves nothing like normal clay, so carving details is near impossible. Rather than carving teeth details, I made one rectangle of foam clay about 7″x1″ and then added about 12-13 teeth to them. The teeth were easy: roll up a small ball, flatten it, then press the edges so it made a sort of rounded rectangle. Once all the individual teeth were done, I pressed them into the 7×1 rectangle and smoothed the edges. Before it could finish curing, I carefully added it to the skull based I made earlier. I let it cure in the same position as before.
For the brows, I made little strings of foam clay and then placing it around the eye hole. Once happy with placement, I smoothed down all the edges so it blended in with the base. This helped give the brow definition.


The last piece for the skull was the little PVC pipe that’s on the back of it, above the two smaller blades. I had already made a hole for this, so all I needed to do was let the skull finish curing before sanding down the hole. After I made sure the pipes fit, I glued them in place with barge cement. For added structure (and my peace of mind), I added some more foam clay to the contact points of the pipe so that it could cure around it.
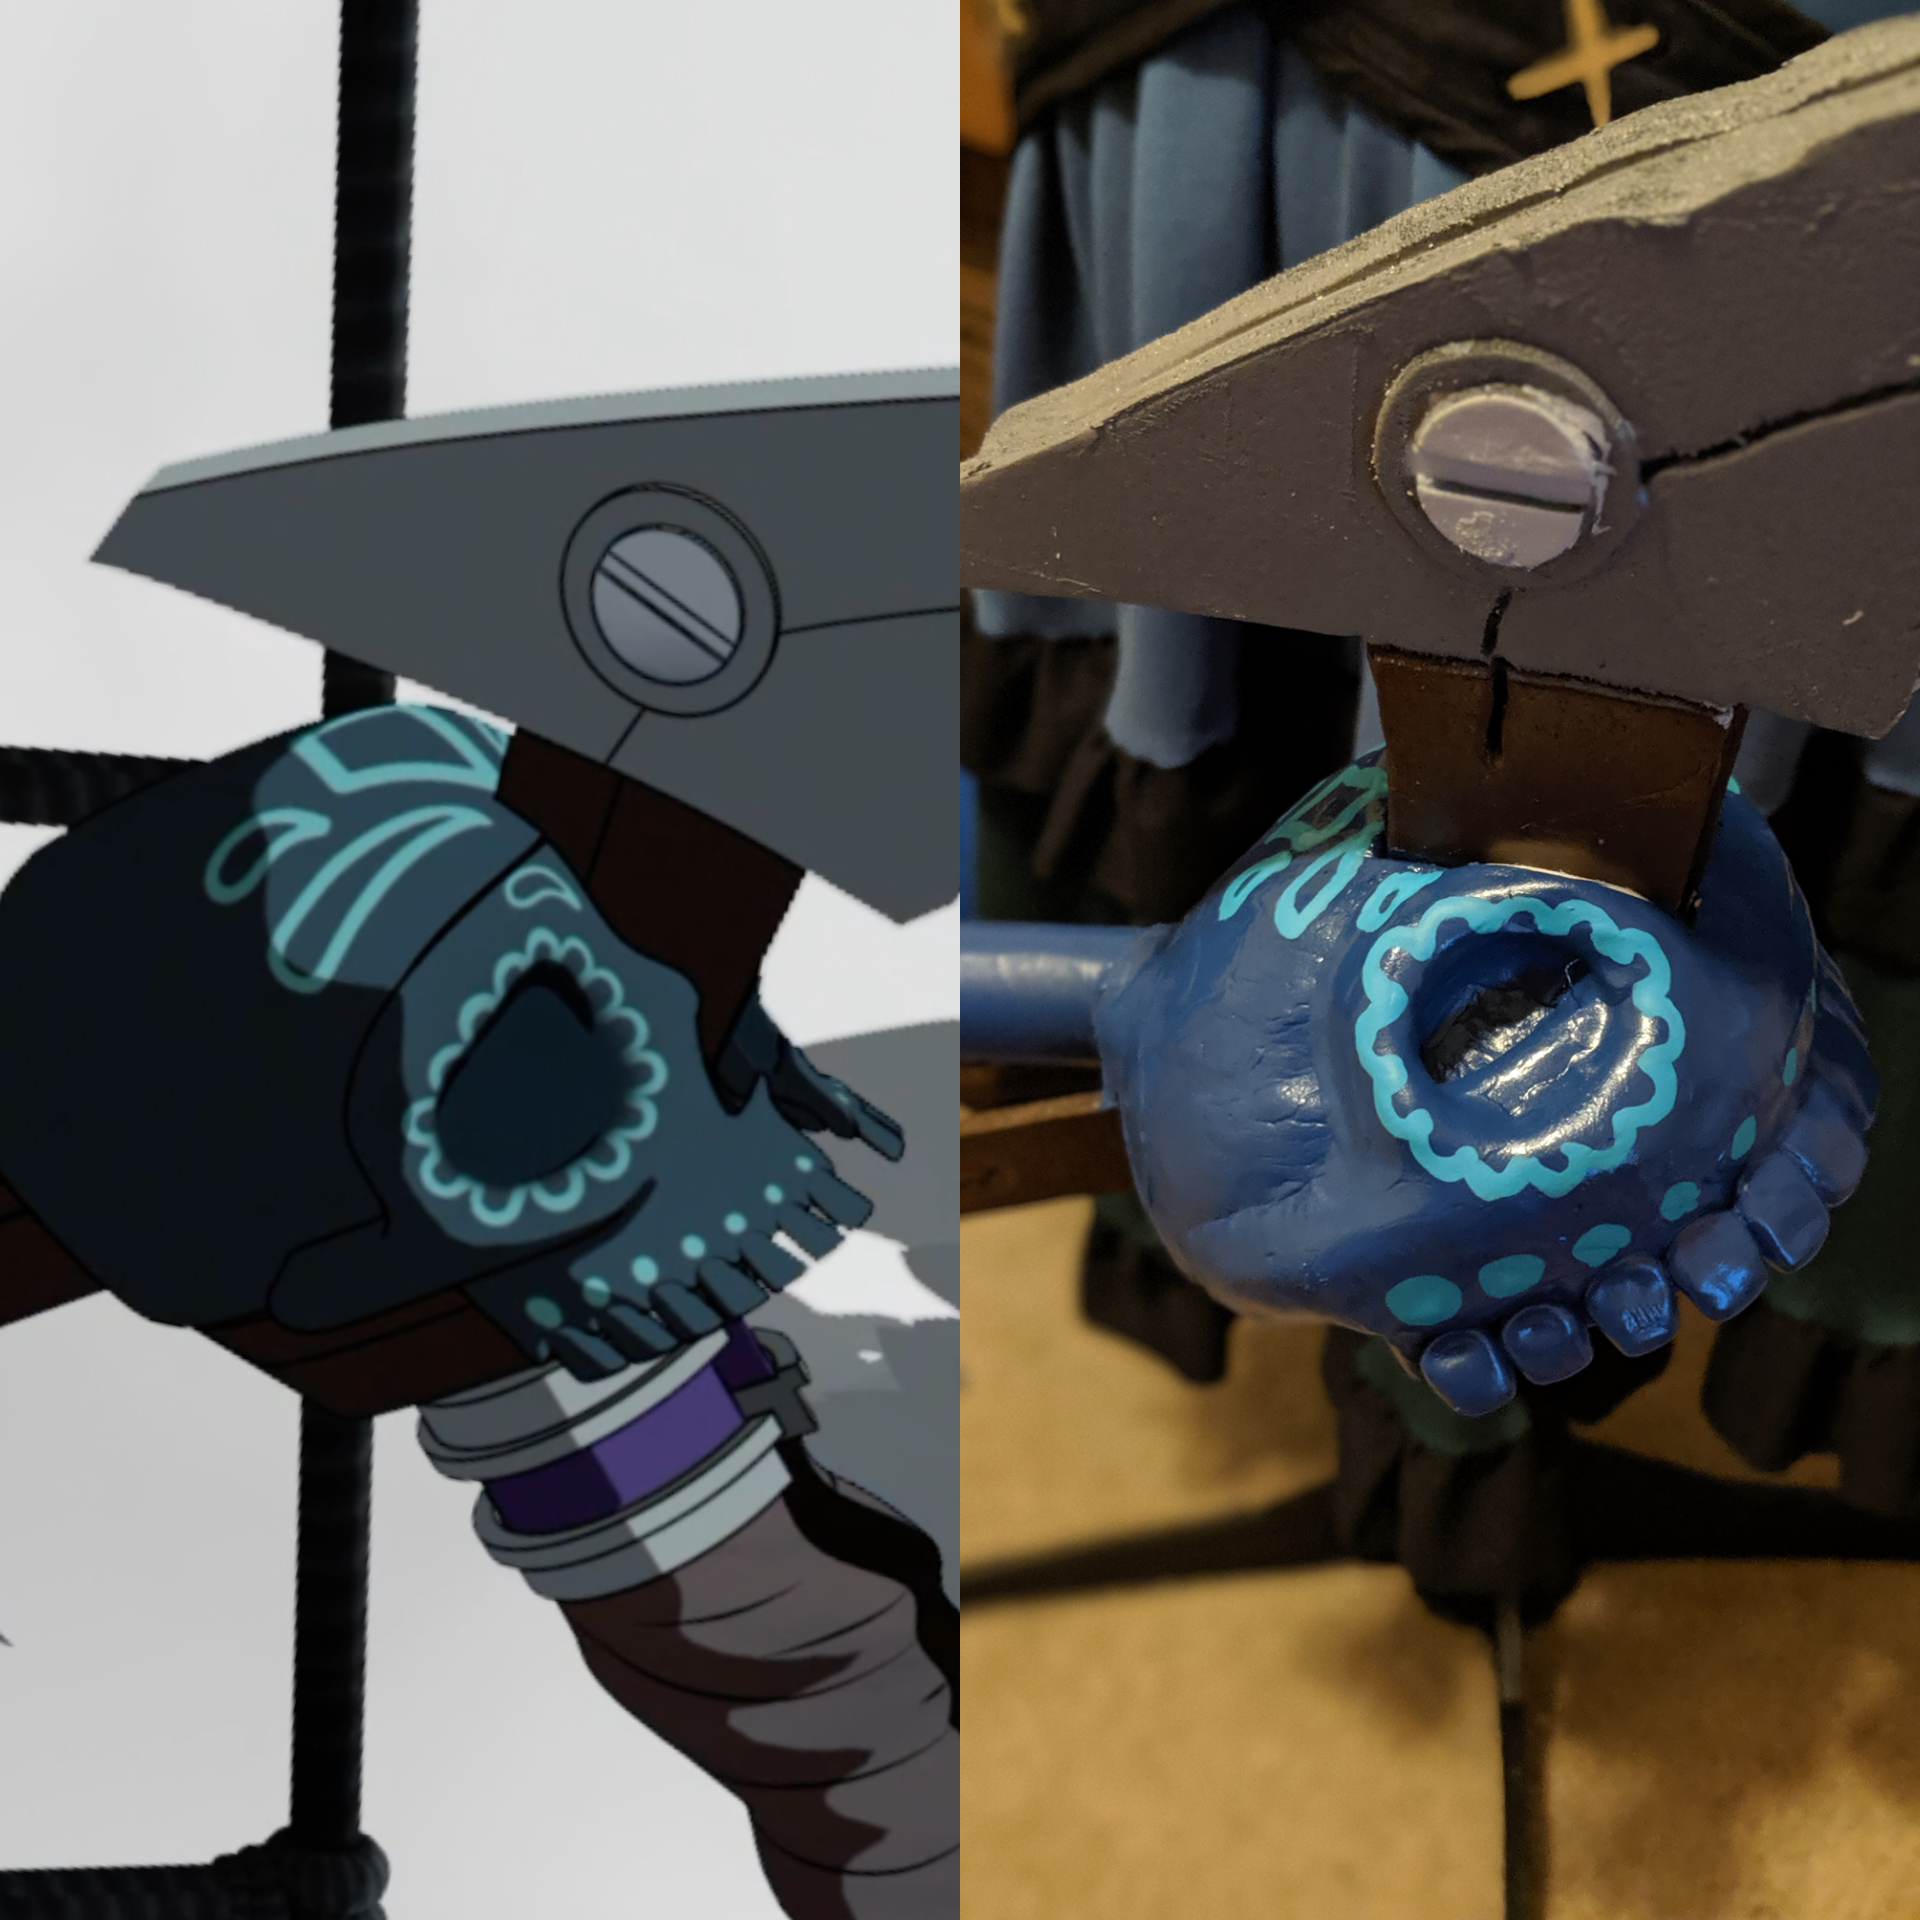
After covering the big blades with a plastic bag that was taped in place as well as covering the smaller blades with painters tape, I primed the skull and pipes for painting. I then used blue spray paint to paint the skulls and pipes.


I then used the non-brush end of a thin paintbrush to paint on the light blue details on the skull. I let that dry before moving onto weathering. I weathered the whole thing using the same method I did for the belt clips and painted the eye sockets black. Once it was all dry, I sealed it with sealant. The spray sealant I got was “satin” so it made the skull look chalky and like it was covered in dust, which I didn’t know at the time. To get the glossy finish back, I brushed on a thin layer of modpodge to seal it and that seemed to help.
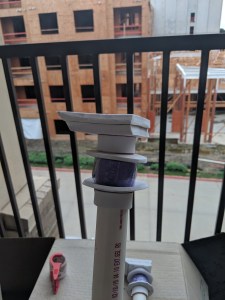
Next up was getting the staff part ready. I cut out 4 pieces of 10mm EVA foam to work as the base of the skull (2 per skull). I glued them together with barge cement and then sanded down the edges so that it made a nice diagonal line like the reference images. Next, I cut out 4 donut-shaped circles out of 4mm EVA foam for the details of the staff. I also cut out 4 strips of 4mm foam to go around those circles. Lastly, I cut out 2 rectangles of 4mm foam that would go between the big PVC pipe and the small PVC pipe. I glued these 2 rectangles in place using barge cement.
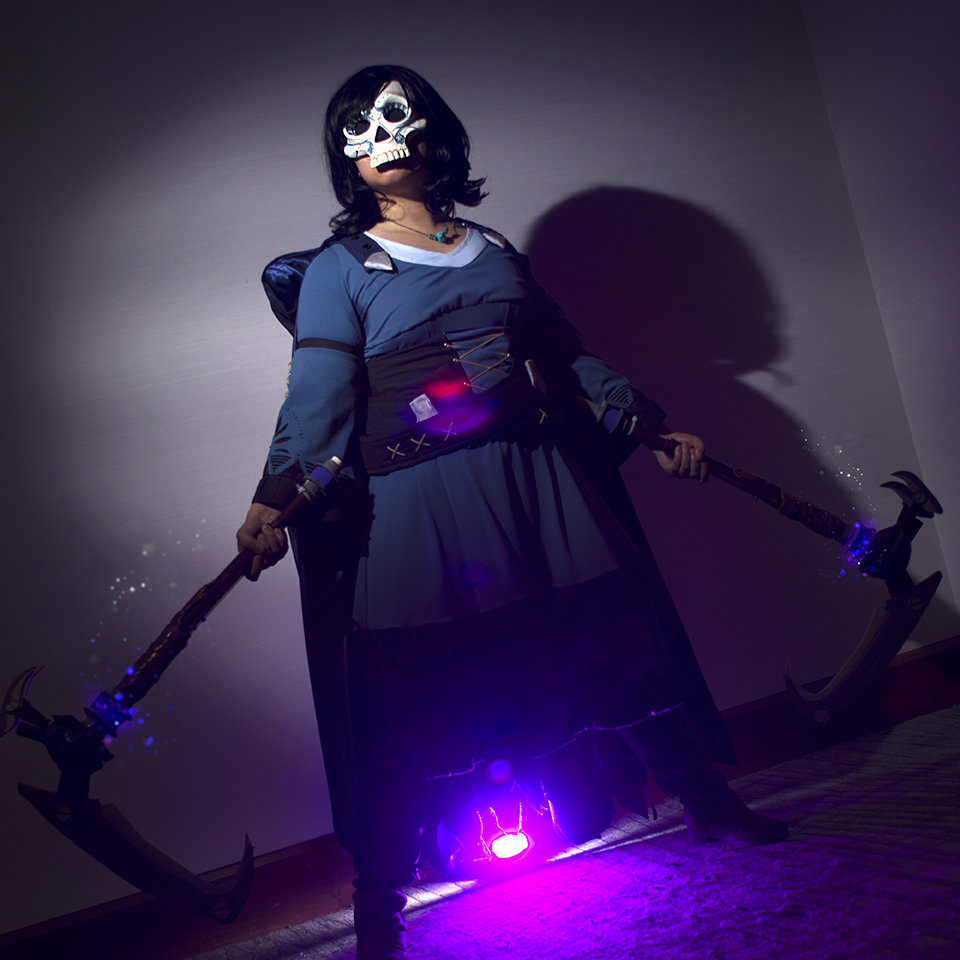
For the LED lights to be purple, I covered a piece of PETG with purple cellophane. Now, the cellophane I got was from amazon and I probably could’ve gotten a better one. I didn’t want to get a giant roll of it, so instead I bought a pack of “party bags” made of cellophane. Then I cut up the bags and layered 8 sheets of it onto the PETG. I used Spray 90 to attach all the layers. It took a while but 1 sheet definitely wasn’t going to cut it.
To drill the holes for the LEDs, I used my Dremel. I used the grinding bit which probably wasn’t the right way to go about it, but I was in a hurry. I ordered a set of cutting wheels off Amazon and the matching Mandrel for it so that I could cut out the rectangle shape that would house the battery pack and switch. The first pipe took a few tries because I didn’t measure correctly (I forgot to take into account the thickness of the pipe itself) but the second one went smoothly! I cut the rectangular holes and then using the sanding attachment to sand the edges.
After doing some measuring, I cut the LED strip to the right length and attached it around the pipe using the sticky strip that was included on it. Next would be gluing on the rest of the pieces. I first glued the battery pack in place. Then I glued the PETG on top of the LED strips. Barge cement, for once, failed me here, so I ended up just wrapping the entire thing in clear, glossy packing tape. Afterwards, I glued all the small foam details onto the staff around the lights.
Foam pieces done, I moved onto the wooden piece. I used foam clay to do this. To achieve the warped wooden texture, I rolled out small strands of foam clay and wrapped them around the pipe. I did not flatten them until all the strips were in place first so that they could fill in the gaps as they flattened. Once the foam clay cured, I used painters tape to cover the PETG and the battery pack to prepare for painting.


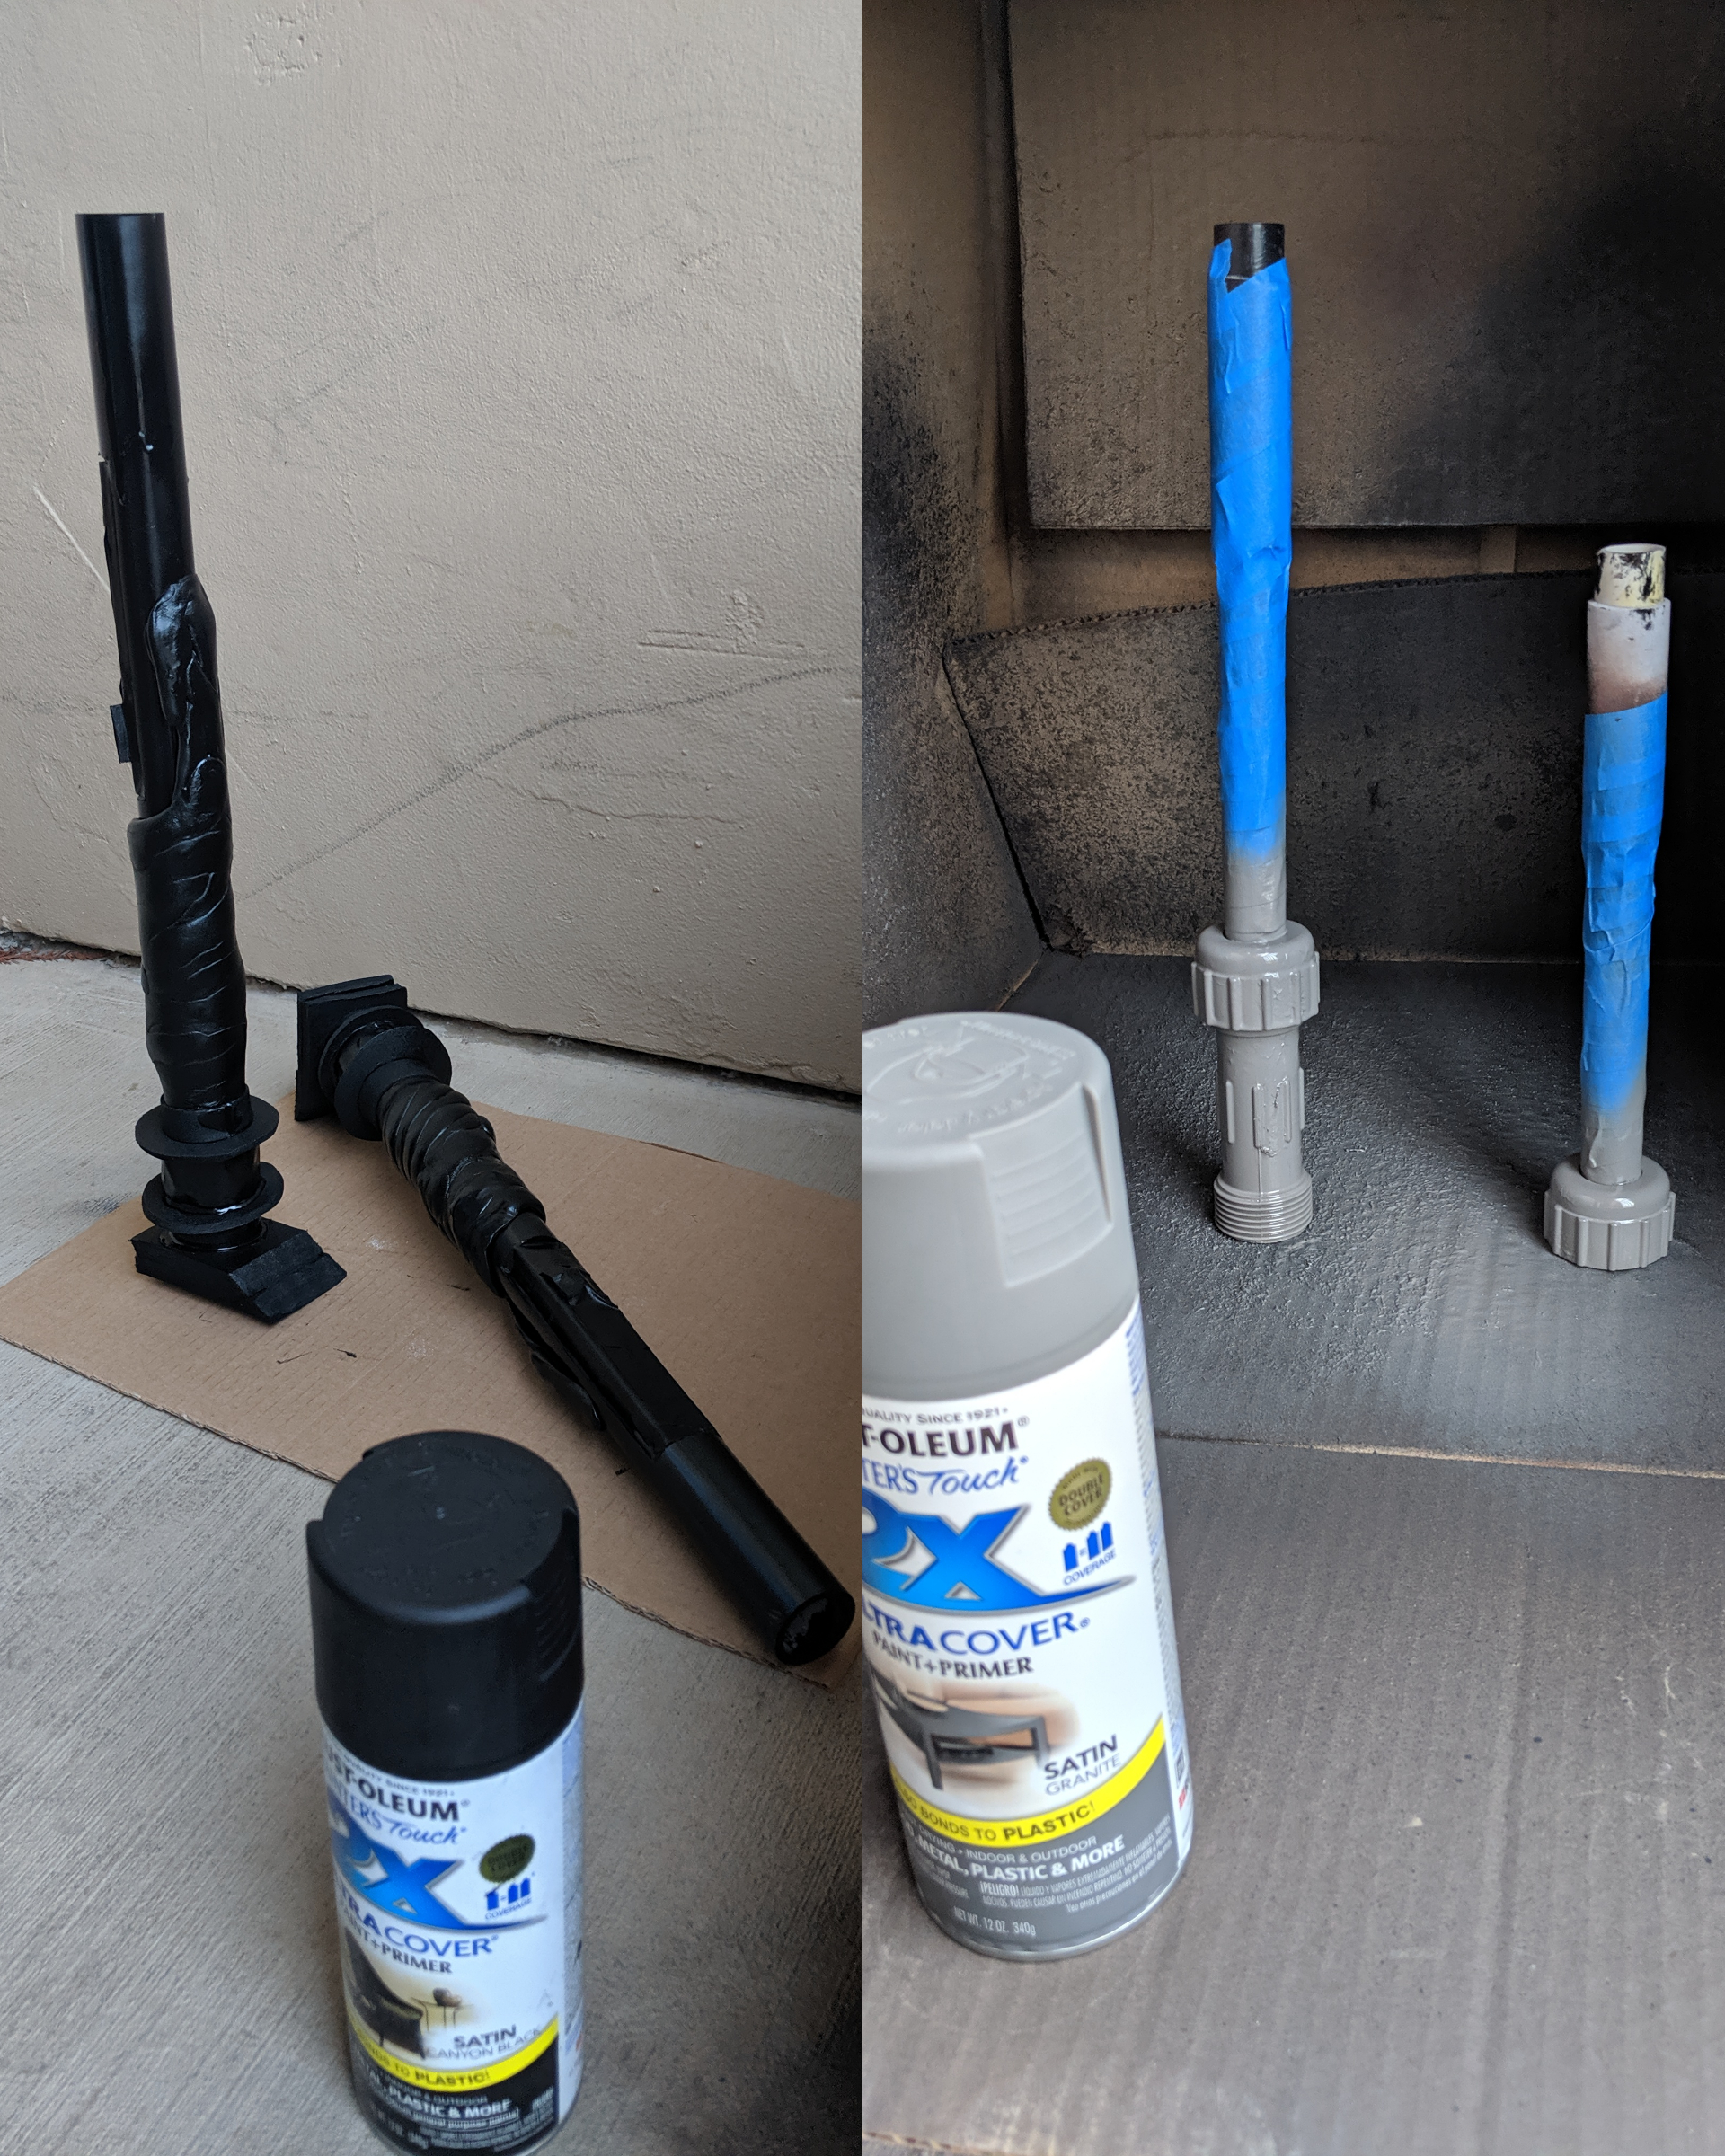
Once the foam clay was done curing, it was official paint time for everything! I started by covering the PETG and battery pack with painters tape and then primed both the big PVC pipes and the smaller PVC pipes. Next, I painted the small pipes brown, let them dry, covered the staff part with painters tape, then painted the coupling ends dark gray to match the foam parts that are on the big pipe.
Next, I painted the foam skull base on the big pipe as well as the pipe itself brown. I didn’t paint the foam clay brown because I had a slightly lighter brown paint that I was going to use for that. Once that dried, I covered the foam skull base with painters tape and painted the foam details around the LEDs the darker gray color to match the small pipe ends.
With everything dry, I painted the foam clay parts light brown. I couldn’t find the shade I wanted in spray paint, so I had to buy acrylic paint and paint it on with a brush. It took a few coats to get it right. After seeing it all together, I decided I didn’t like the battery pack standing out so much (especially since it’s so large), so I spray painted it dark brown to match the pipe.
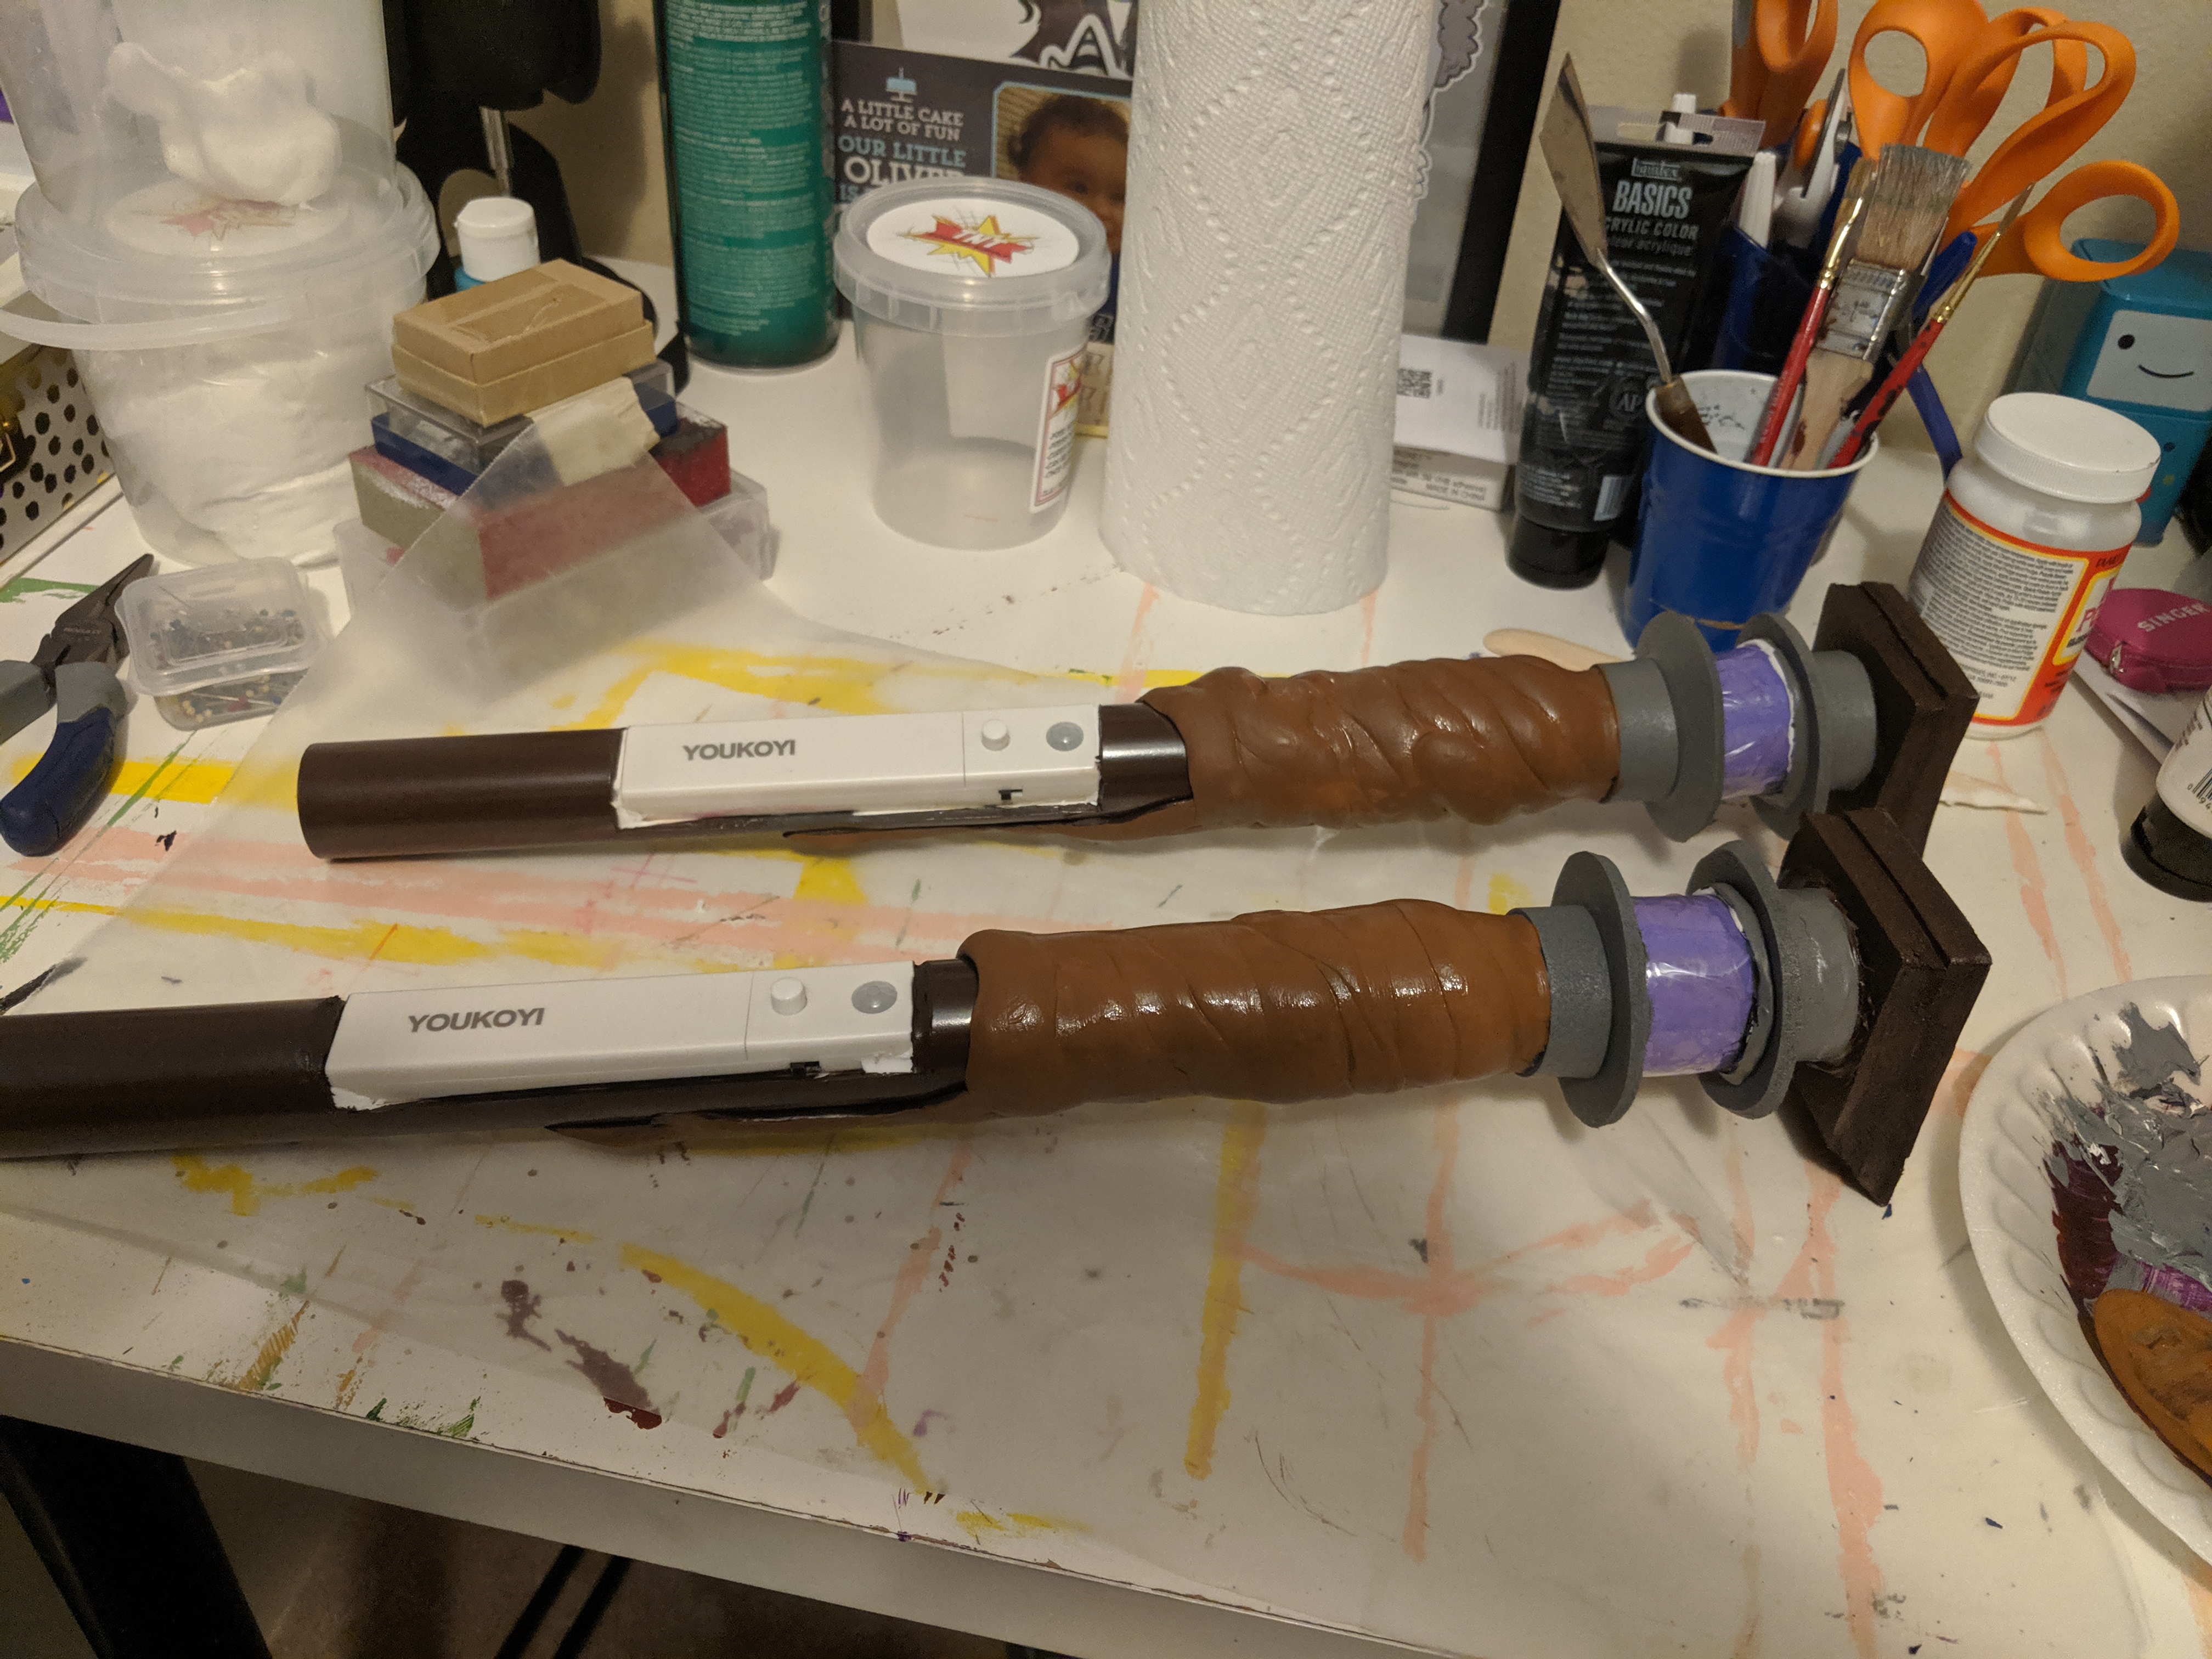
Once the “wood” paint dried, I added details to it to give it texture. I outlined the lines that were created with the foam clay with black paint and then added highlight with a mixture of the light brown paint and a bronze paint. The bronze paint ended up being just a little too bright/shiny, so once it was all dry, I lightly coated the whole wooden piece with the light brown again. This helped mute the bronze color a bit and blend it in.
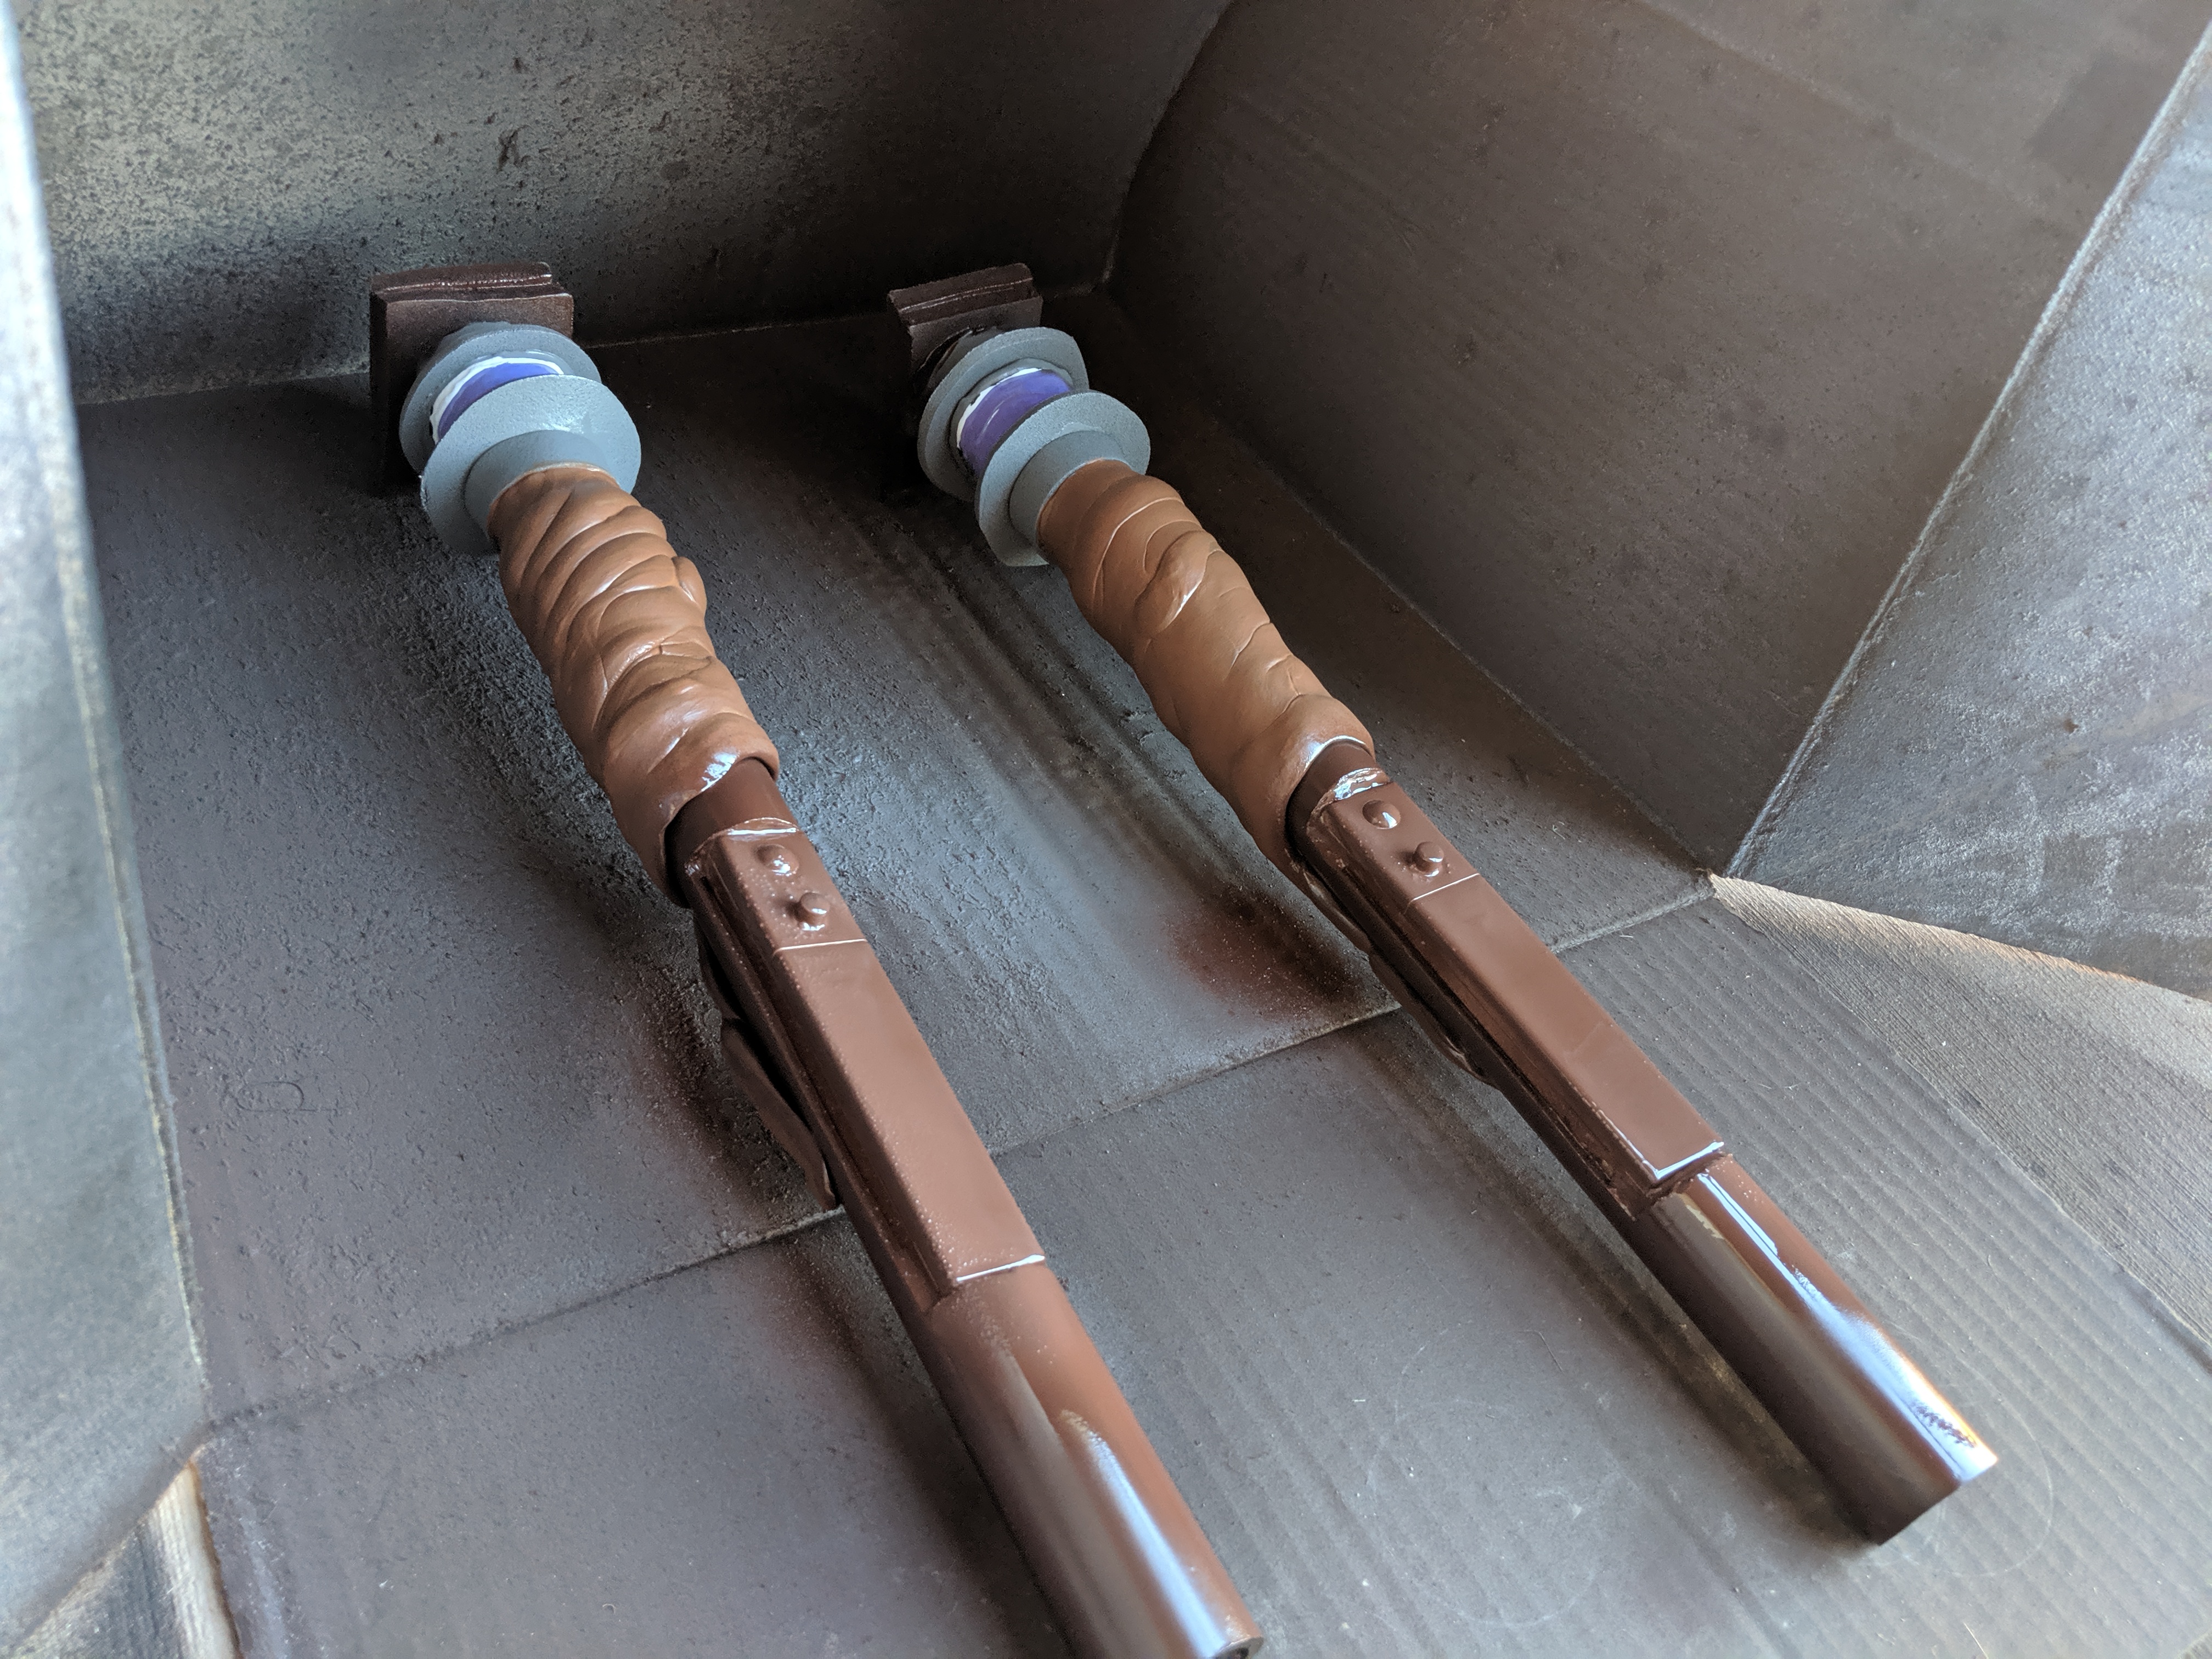
Once everything was dry, I carefully glued all the pieces together. First, I glued the small PVC pipe to the big PVC pipe with barge cement. Then, I glued the skull to the big PVC pipe. I did this for both scythes. Once everything was glued together, I went over both with some glossy sealant to protect the paint.
At this point, I could’ve called the scythes finished, but I wasn’t happy with how the LEDs were looking. I found out on twitter that you could diffuse lights by putting a sheet of plastazote on top, so I ordered some from TNT cosplay supply, lightly painted them purple, and then glued the strips on top of what I already had on top of the lights with barge cement.
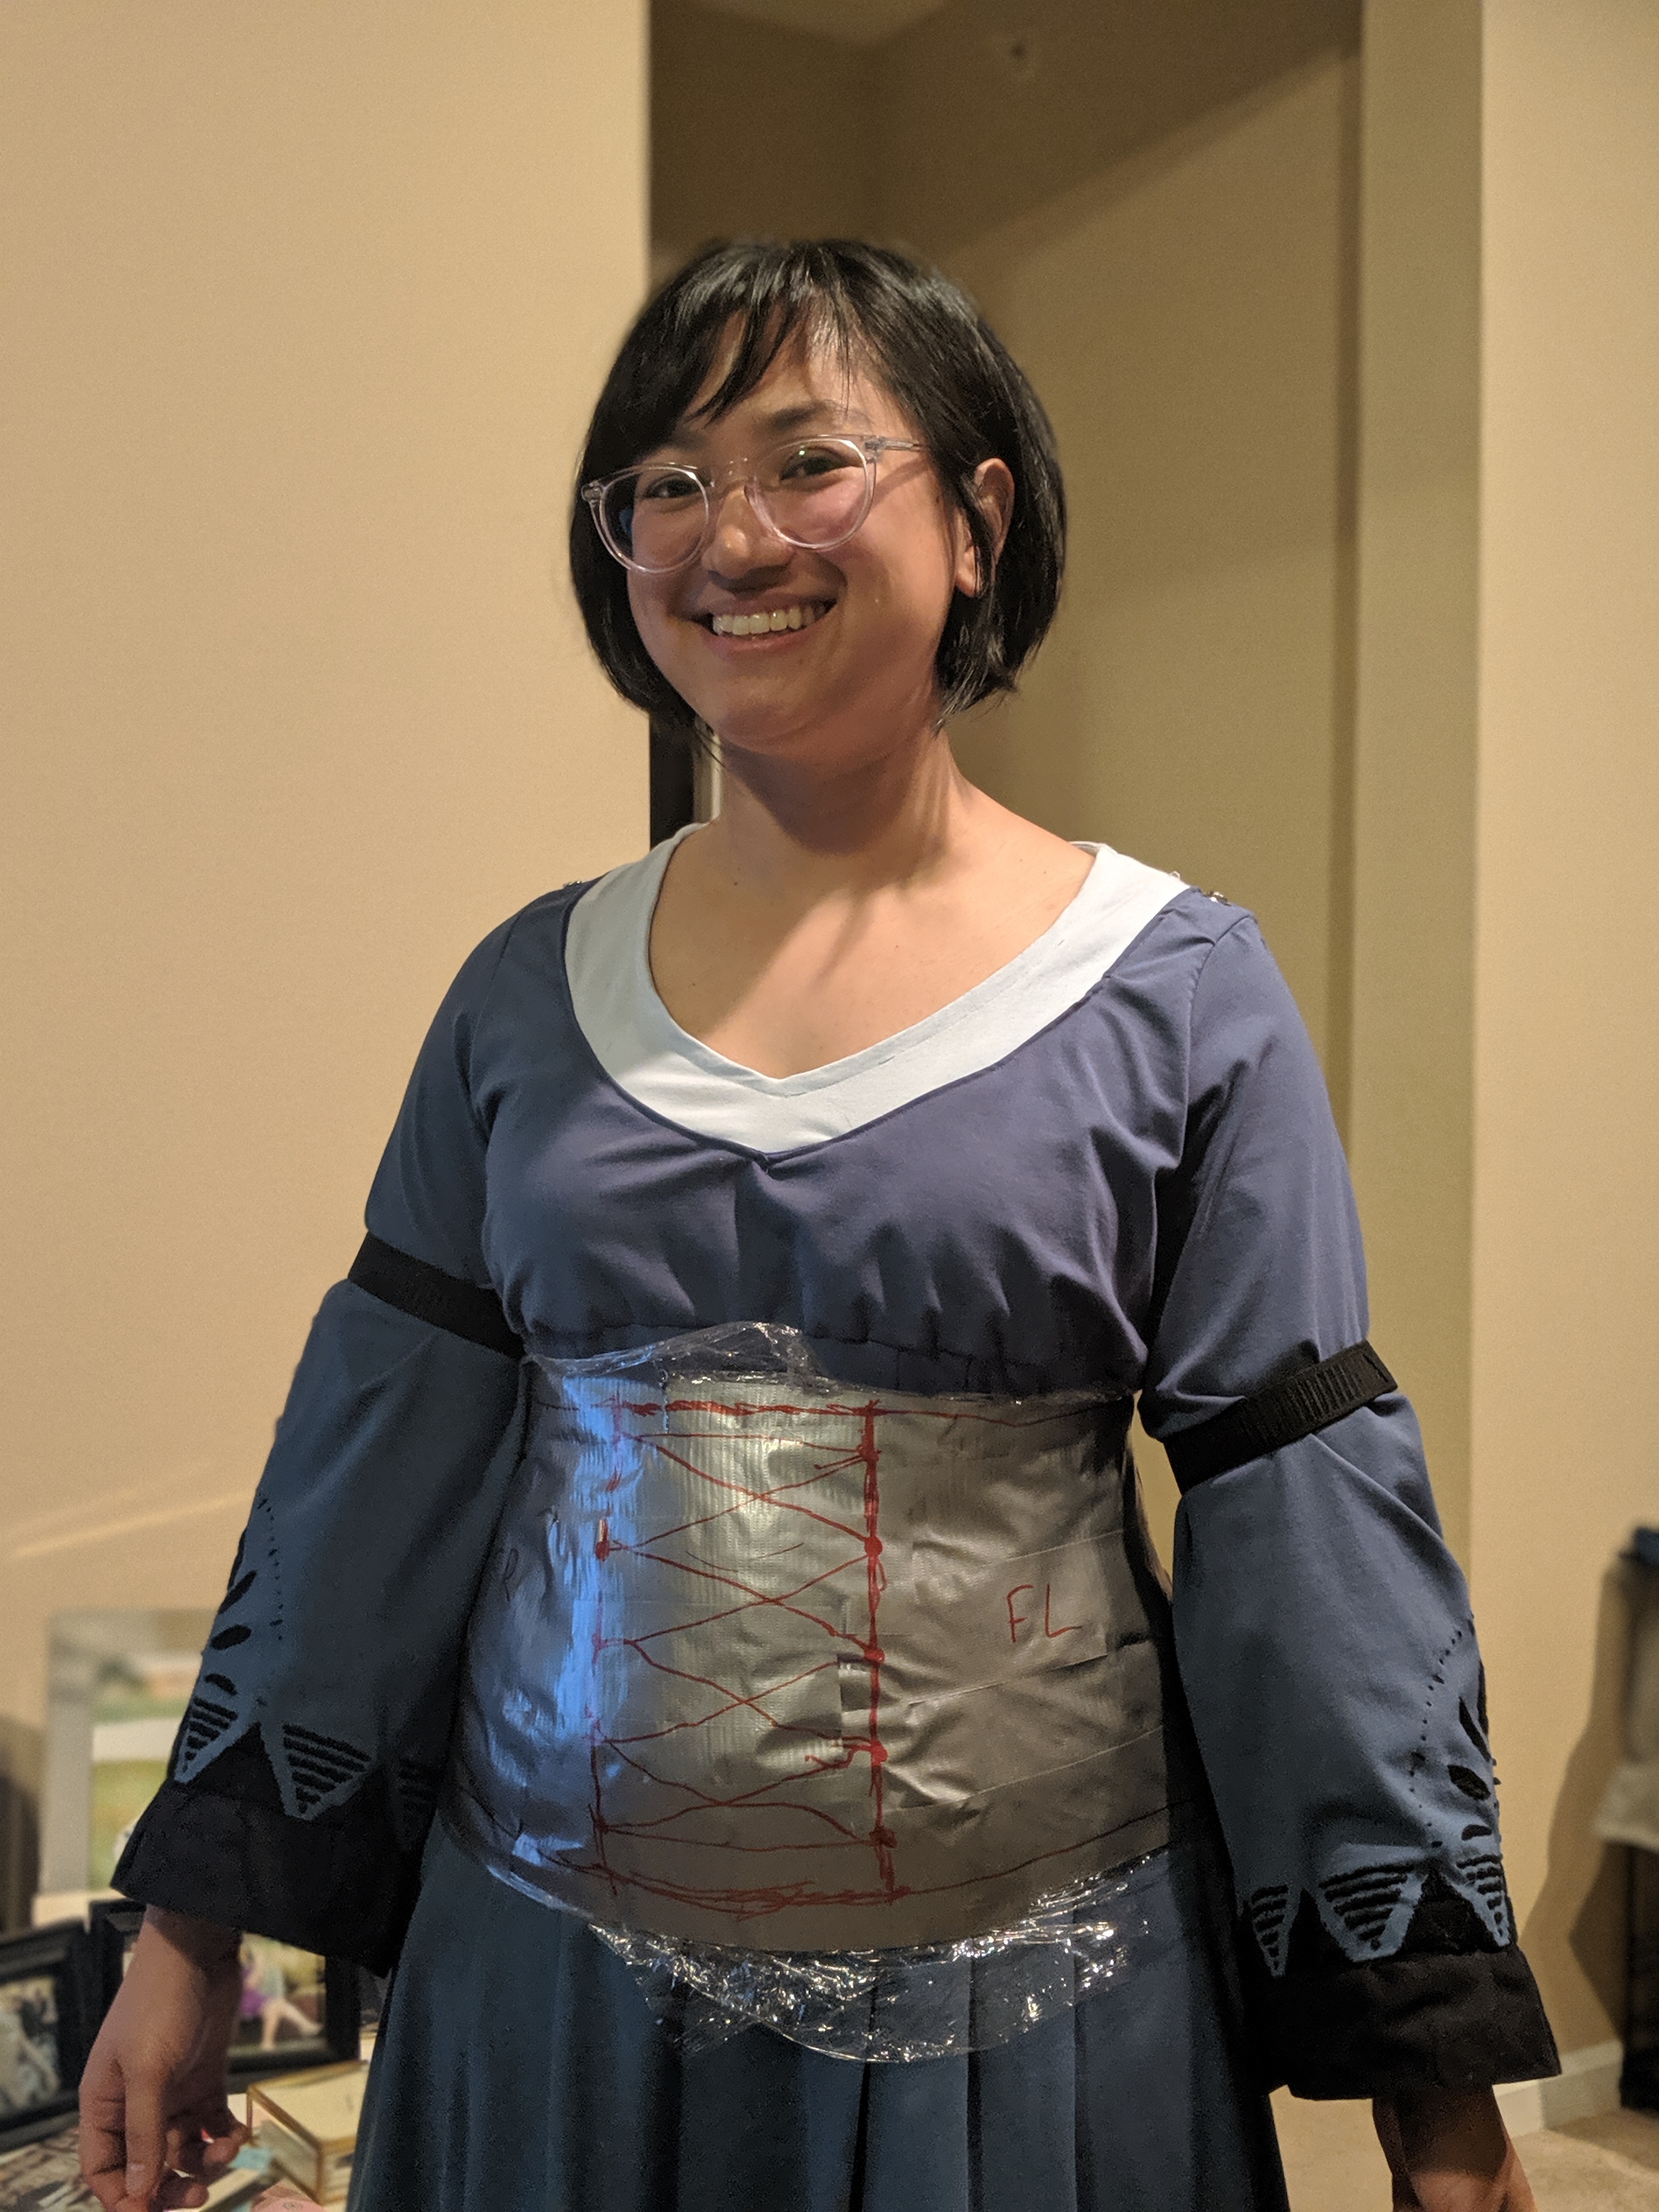
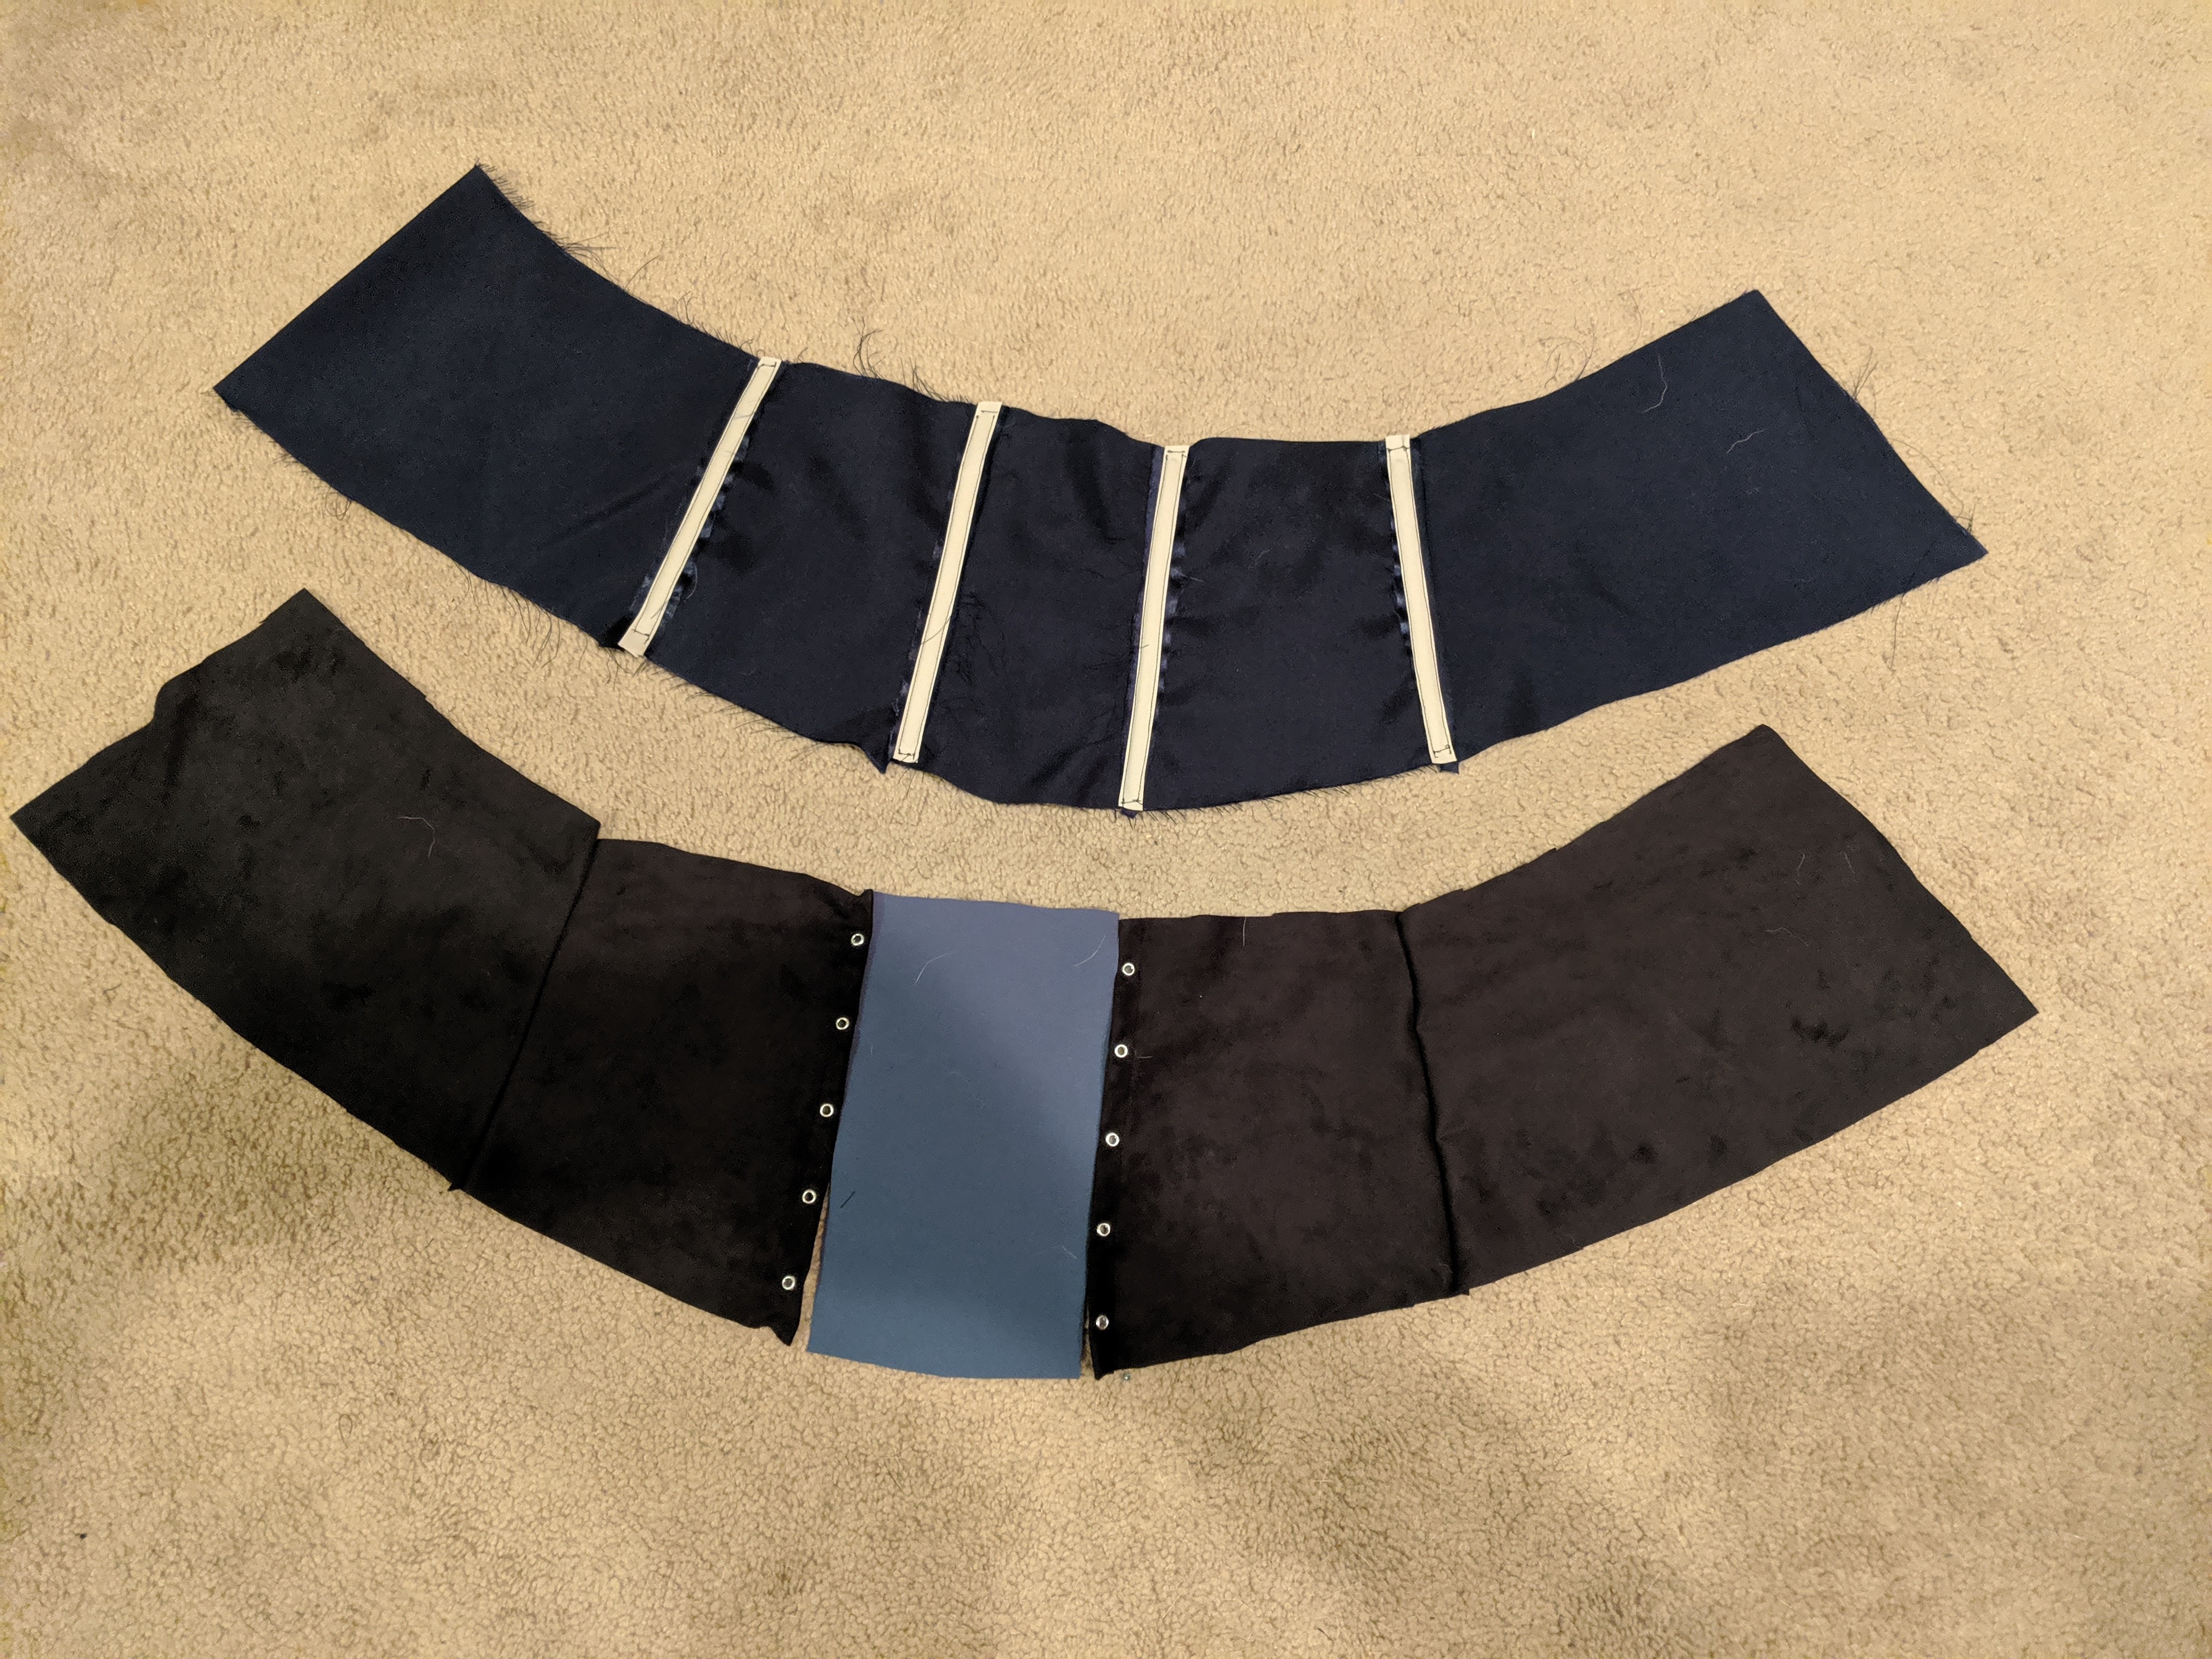
Corset
I wasn’t sure if I’d have time to make the corset and told myself I only would work on it once I finished the scythes. I wanted to prioritize the scythes over the screen accurate corset since I already had a good backup corset from Amazon. I thankfully managed to finish the scythes with enough time to start and finish the corset for RTX.
First, I had Jason wrap me in Saran warp and duct tape around my waist so I could make a duct tape pattern on it. After getting his help marking the panels, he cut me out of the duct tape. I then traced the patterns onto paper. I made some adjustments to it like adding 0.5″ seam allowances at the tops and bottoms. I didn’t add seam allowances to the sides because I wanted it to be pretty snug. I also added an extra couple inches of width to the back pieces so that they could overlap for the velcro. (The corset lacing on the front would be nonfunctional.)
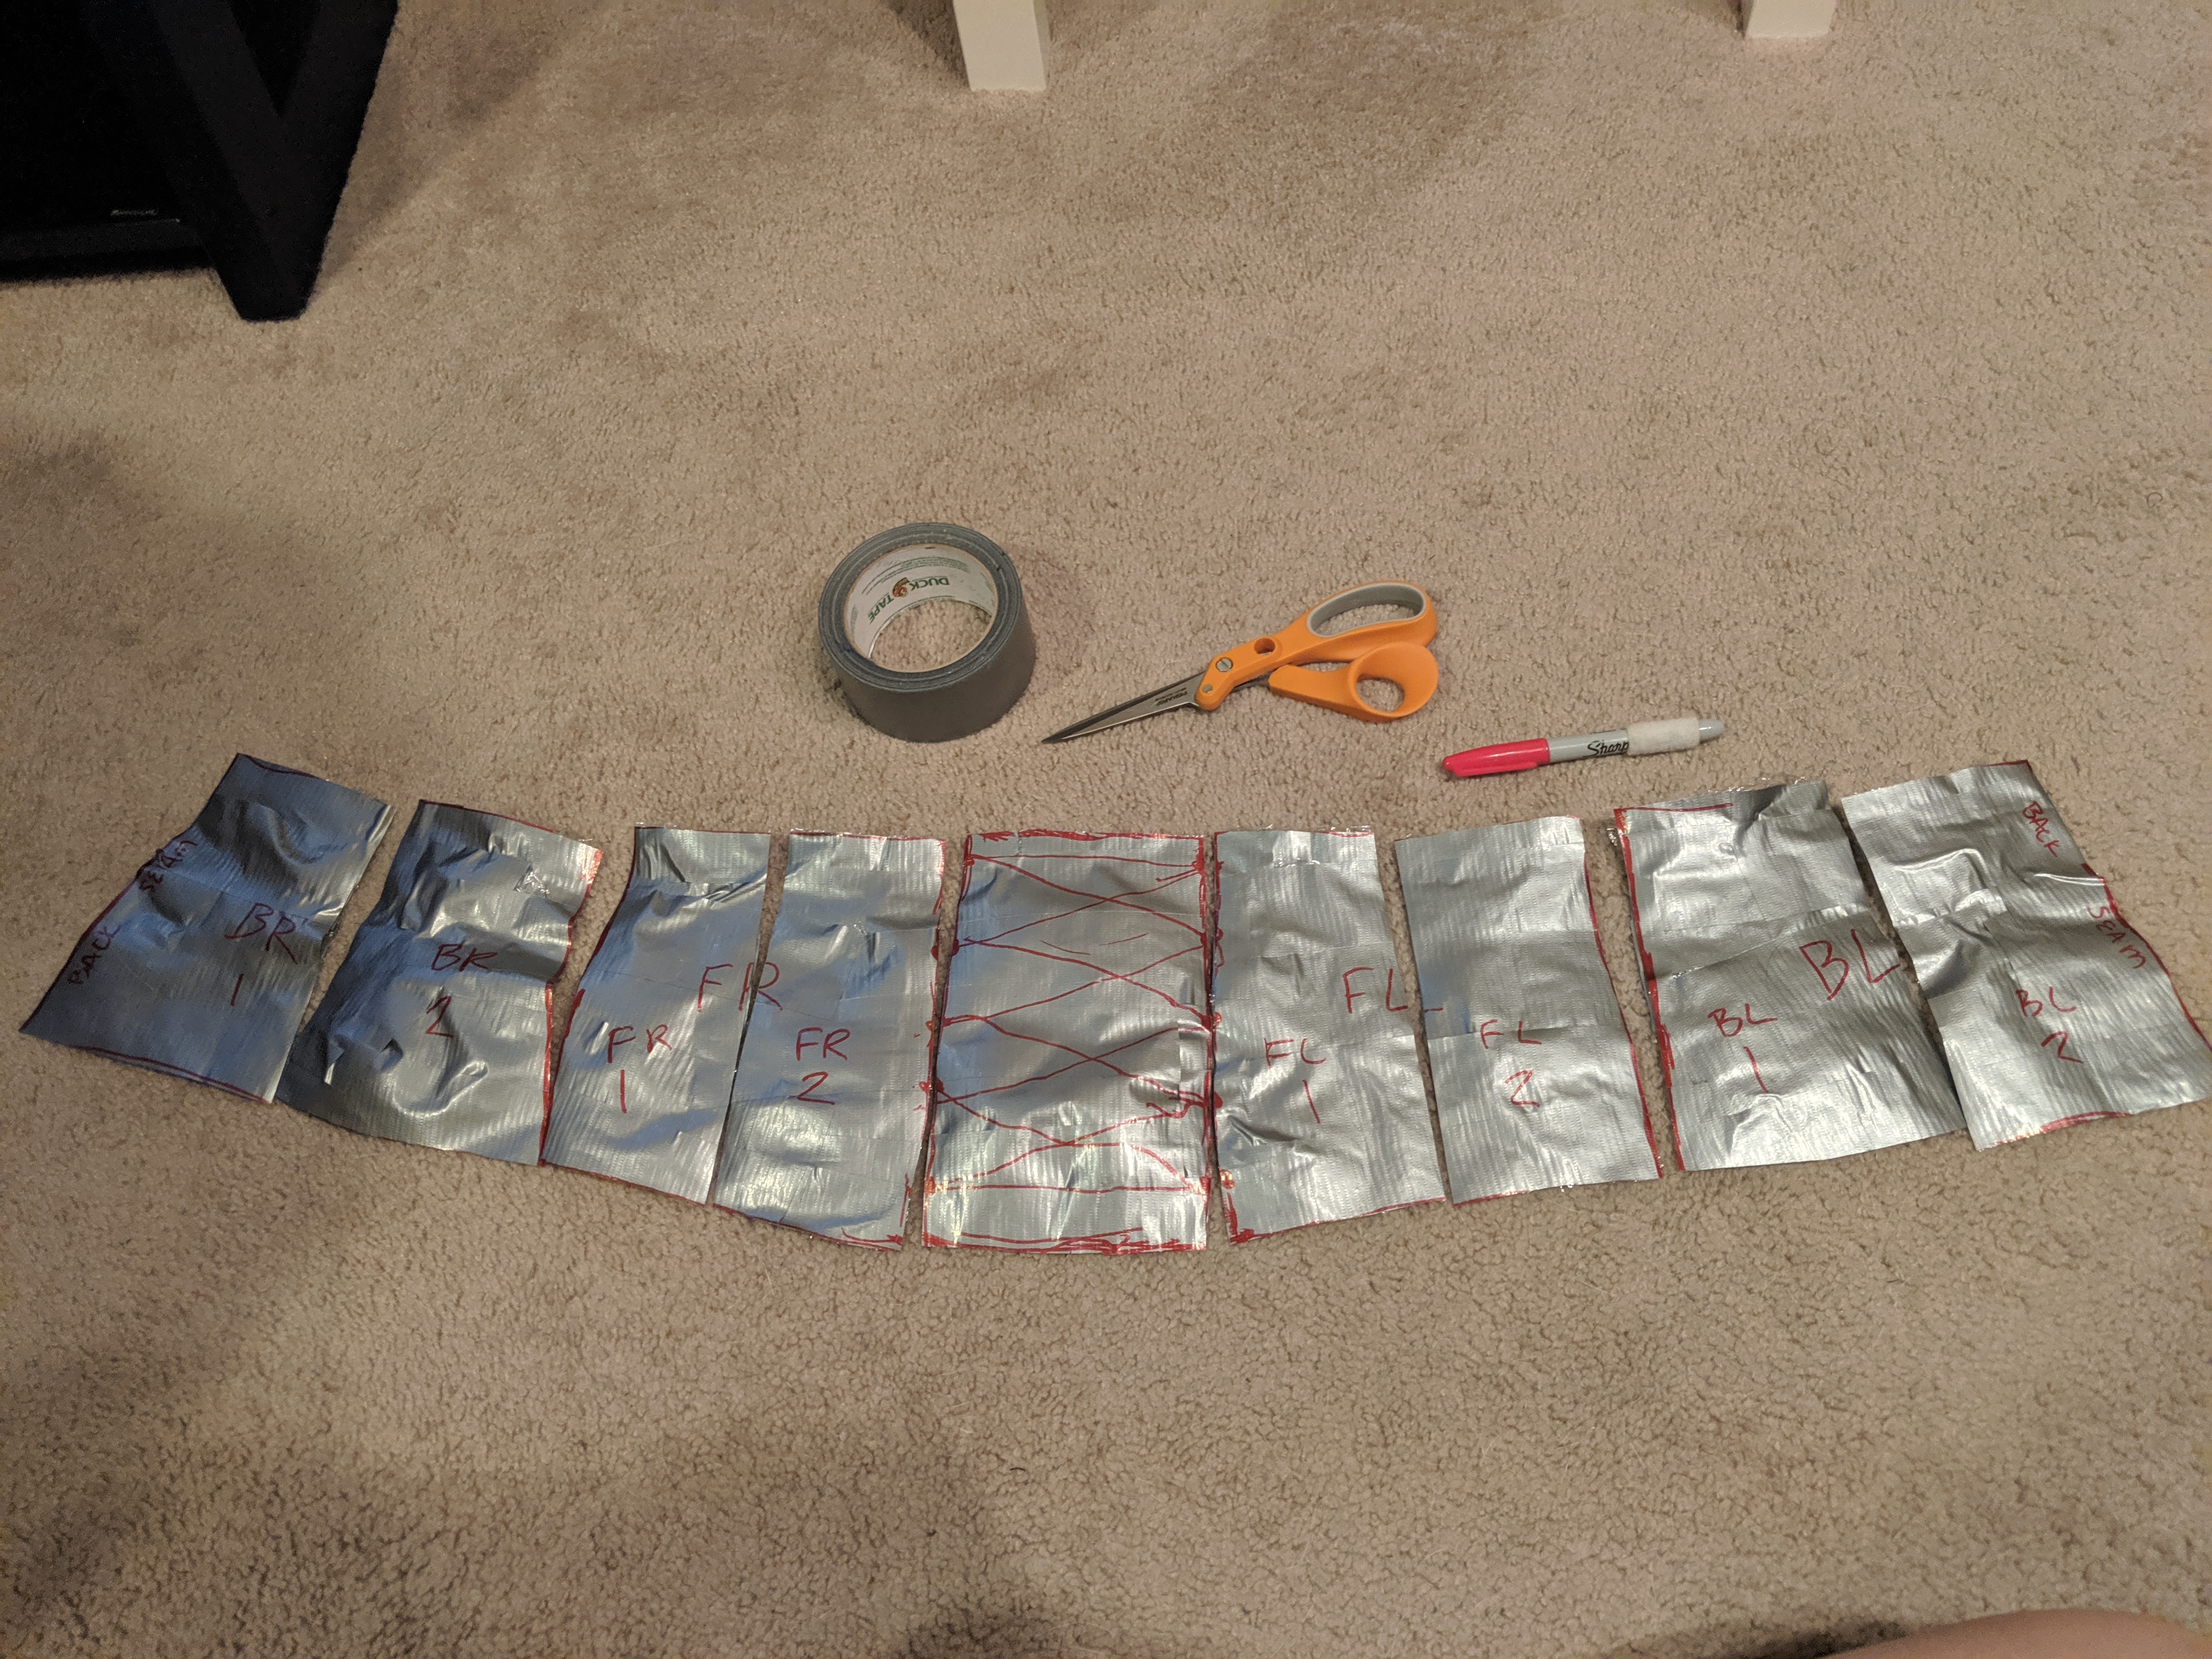
Initially, I had 9 panels. Front middle where the corset lacing would be, Front Right A, Front Right B, Back Right A, Back Right B (and then repeat for the left side). I ended up reducing it down to 5 panels after I cut and pinned together the 9 lining fabric panels and realized that I didn’t like the extra seams. After adjusting the paper pattern by combing the A and B pieces into one panel, I cut the lining fabric which would serve both as my mockup and my lining if it turned out well enough. I stitched the pieces together and wrapped it around myself to check that I liked it. Once happy, I ironed the seams, stitched on double-fold bias tape to the seams to create channels, and installed the boning.
The fashion layer would be a little different. First the front pieces that would touch the front middle panel would need to be lengthened to accommodate the eyelets for the lacing. Also, the front middle piece would have to be made from the same blue fabric as the dress so that it looks like there’s a gap between the corset. After making the adjustments to these pattern pieces, I cut the fabric out. (The black fabric is the same faux suede fabric used in the belts.)
For stitching, I first stitched the suede fabric panels together. This meant I would have two pieces, one for the right side and one for the left. Then, I folded over and hemmed the raw edge of the front panel that would house the eyelets. After carefully marking 5 holes, I punched small holes and then installed the eyelets in. I did this for both pieces. To finish the fashion layer, I stitched the blue front middle panel to the two suede pieces, leaving the fabric strip with the eyelets loose.
Next was attaching the lining and fashion layer together. It was simple enough: right sides together, stitch the top seam. Then, stitch right sides together, stitch the bottom seam. Then, I turned it right-side out and hemmed the raw back edges.
The next piece of the corset puzzle was the velcro. I stitched 2″ wide velcro to the back of the corset. (One would go on the fashion layer and the other piece would go on the lining fabric.) I ended up adding two strips of the velcro to piece that would be underneath so that I could really pull the corset closed tight.
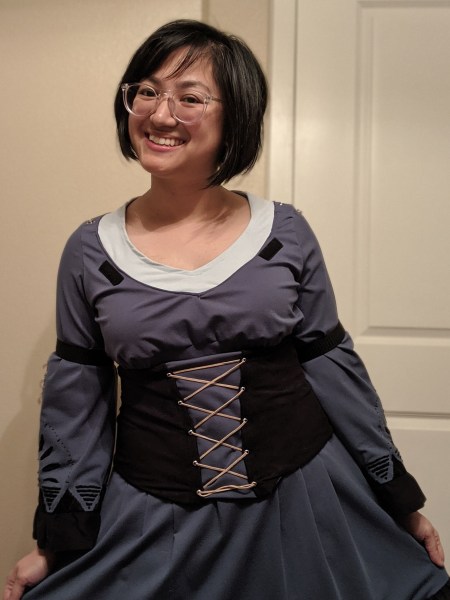
Lastly, I laced up the eyelets using the same faux leather string I had used for the X embellishments on the belt and dress. I copied the screenshot perfectly with how they overlapped and then tied a knot on the ends and cut the excess string.
Conclusion
Maria was by far my most ambitious cosplay ever, both for sewing and prop-making. I learned a ridiculous amount of new skills by making this one cosplay. Some things I learned for Maria that I had zero or very little experience with before include: gathering fabric to make ruffle trim; installing eyelets; cutting and sanding PVC pipe; gluing things together with barge cement; sculpting foam clay; making a duct tape pattern after sculpting a 3d object with foam clay; using a dremel to sand, carve, and cut EVA foam and PVC pipe; and I’m sure a few other new things.
I made a lot of mistakes along the way. I gave myself multiple tension headaches from poor posture during long sessions of hand-stitching the embroidery. I used a cheap cotton fabric for the cape at first which was a waste of money because of how easily it wrinkled. And lastly, I accidentally made our apartment uninhabitable for a few hours because I had tried to use barge cement in our poorly ventilated craft room, spilled some and thus filled the entire apartment with glue fumes.
Total, the time it took to complete Maria was 152 hours and 25 minutes. I stopped keeping track of how much money I was spending, but it was somewhere in the $400 or even maybe the $500 range. (Lots of supplies would end up either being not used or redone, so that increases the total price a bit.) That means I spent more time and money on Maria than I did my wedding dress!
I am deeply humbled and just ecstatic with the reception Maria got at RTX. I’m so glad I was able to wear her for 1.5 days. I’ve never been asked for so many pictures before. I’ve never gotten so many compliments. I obviously don’t make my cosplays for these things, but they’re a lovely bonus.
I loved making Maria. I have zero regrets with her. (Okay, except maybe the barge cement incident.) I’m glad I started early, took my time with her, worked on her in small chunks to avoid burn out, and didn’t settle on anything. I’m glad I reached out to RedBaranCosplay for her amazing mask (which constantly got compliments!). I’m glad I spammed all my social media accounts to build hype up for RTX. So many people told me they had seen me on twitter or the RT Cosplay discord channel or whatever.
Thanks for reading this far if you did and thank you if you took pictures of/with me! My heart is so full and happy from all the support I’ve gotten from the cosplay community. I just hope this write-up helps pay it forward and helps future Maria cosplayers!
If you use my write-up at all (or even if you don’t), please feel free to share your Maria cosplays with me! Long live our Grimm Reaper queen! Long live the Cashew Crew!
Use my build post as inspiration? Let me know!
If you followed along with my build post to help you make your cosplay, I’d love to see it! Leave me a comment or send me an email at ashweezcosplay(at)gmail(dot)com. If you’re comfortable with it, I’d love to showcase your cosplay photo(s) in the blog! I will of course give you credit and link to any socials you may have.
