
I’ve never played League of Legends. I’ll tell you that right now. I downloaded it once, played the tutorial, and then never actually played it because of all the horror stories I heard about playing it online. That, and, I don’t tend to like that style of game.
But my god, does Riot Games know how to market its game. With K/DA and their amazing character designs, catchy as hell songs, and iconic choreography, it’s hard to not fall in love with them. I’m no exception. I was late to the POP/STARS trend a couple years ago when that went around, but I did end up learning most of the full choreography. (I learned Ahri’s choregraphy for verse 1, the chorus, and the bridge. Never did get around to learning verse 2.)
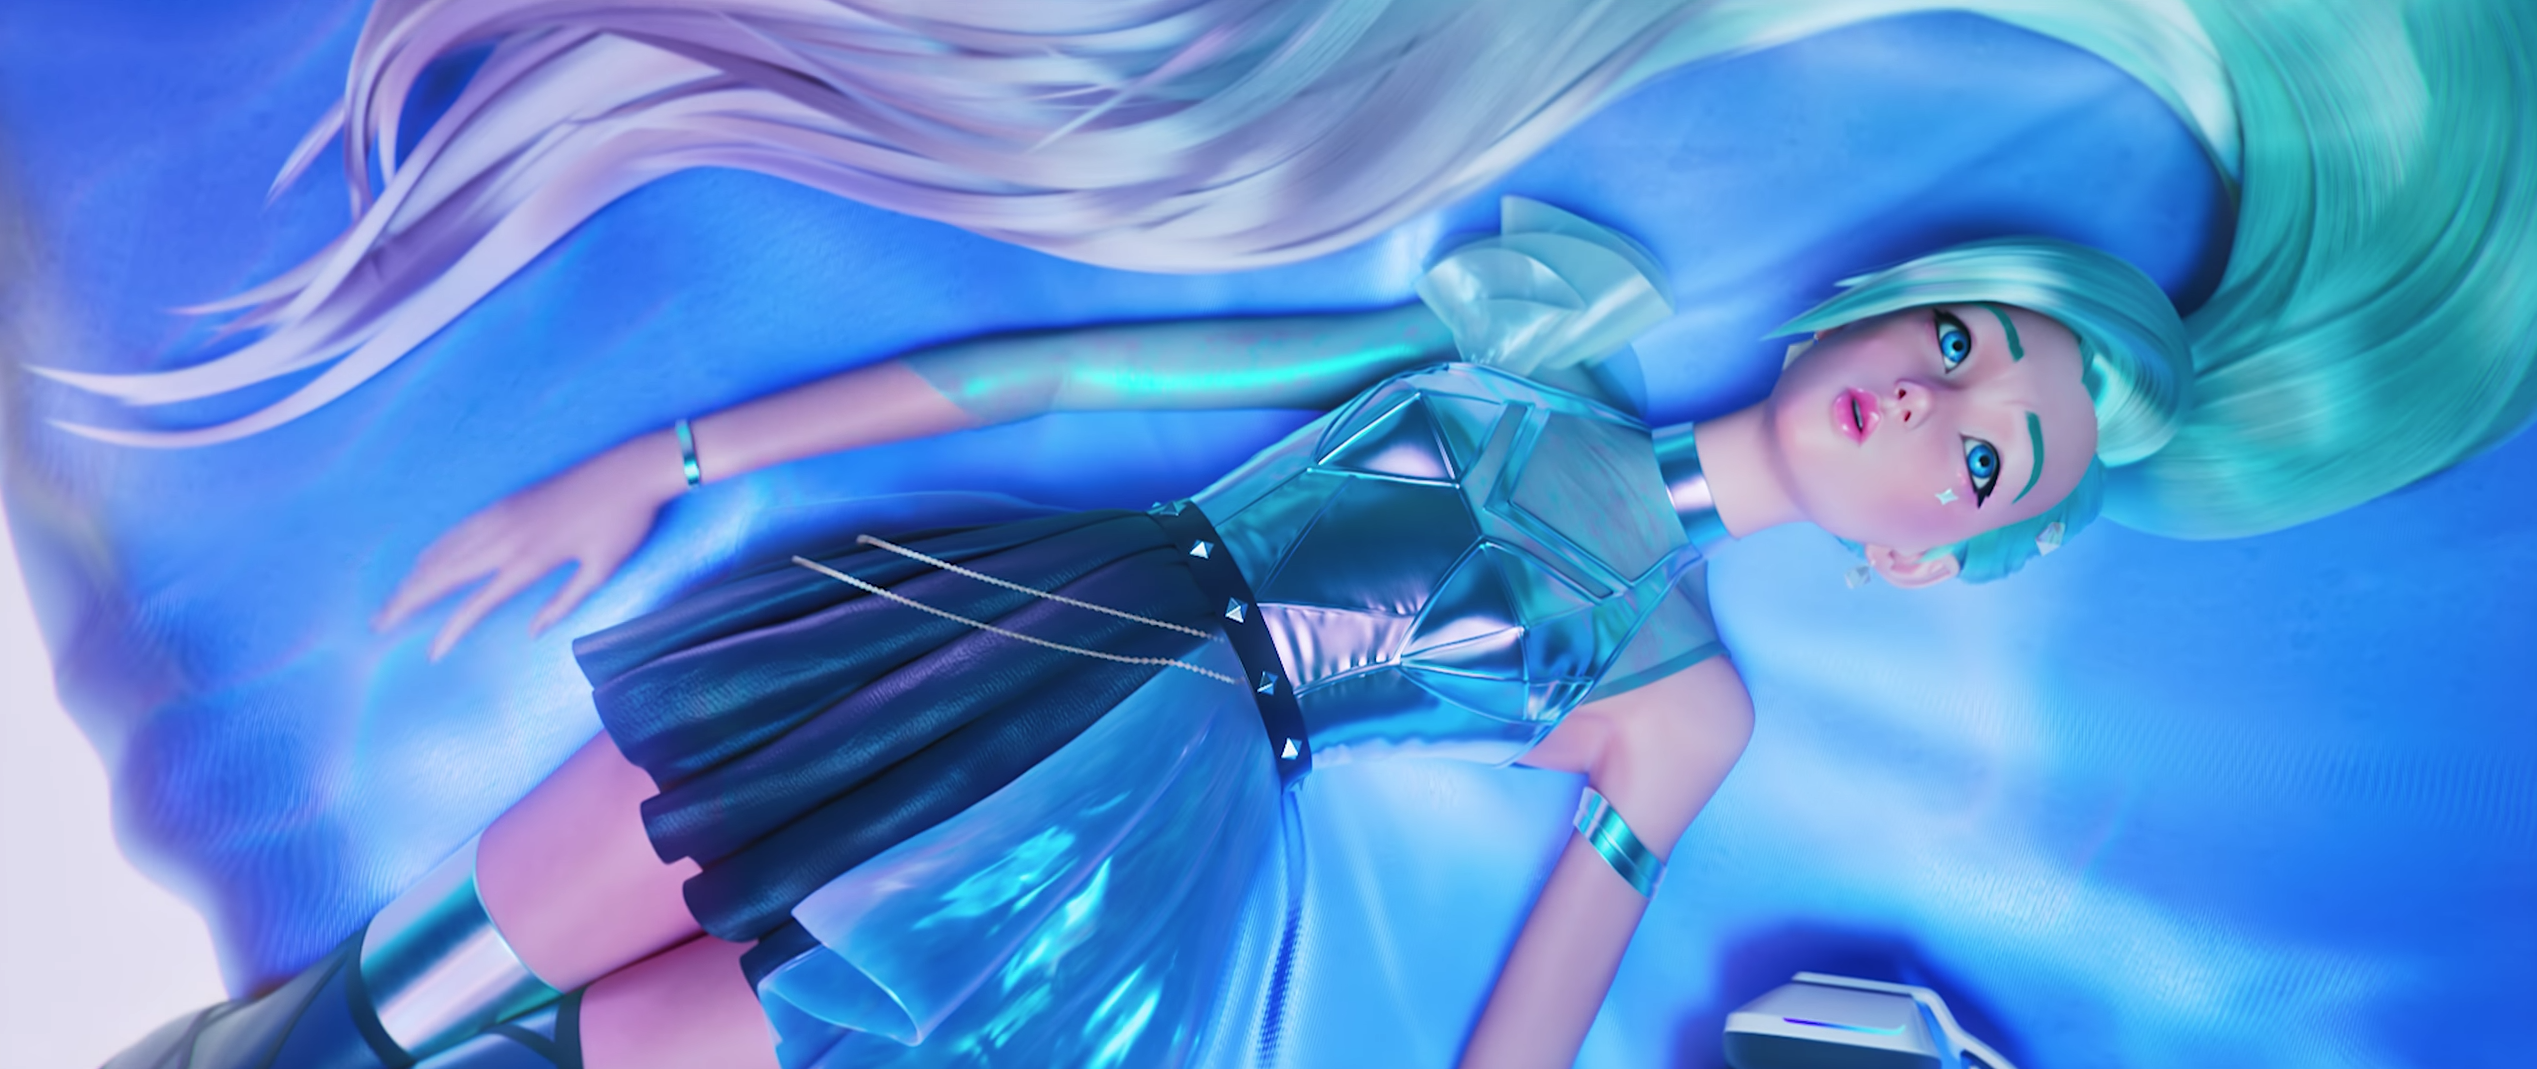
So when “More” came out—and the official chorus choreography was released as a tutorial—I jumped right in. After learning the chorus, I taught myself Seraphine’s dance solo. I thought of cosplaying her, but decided against it for reasons I don’t even remember anymore. But when Kaseydidwhat half-jokingly said in our Discord that she wanted to cosplay Ahri, I leapt at the opportunity. I claimed Seraphine. Xaeri got Akali. Finnthecosplayer had long already called dibs on Evelynn as she was already building her cosplay weeks before. Finally, Heather’s friend Kaydoescosplay joined as Kaisa. We had a full crew. So it was time to start building.


Items Bought
- Cosplay by Yaya Han 4 Way Stretch Fabric Metallic Cobalt
- Silver studs
- Invisible zipper foot for my sewing machine
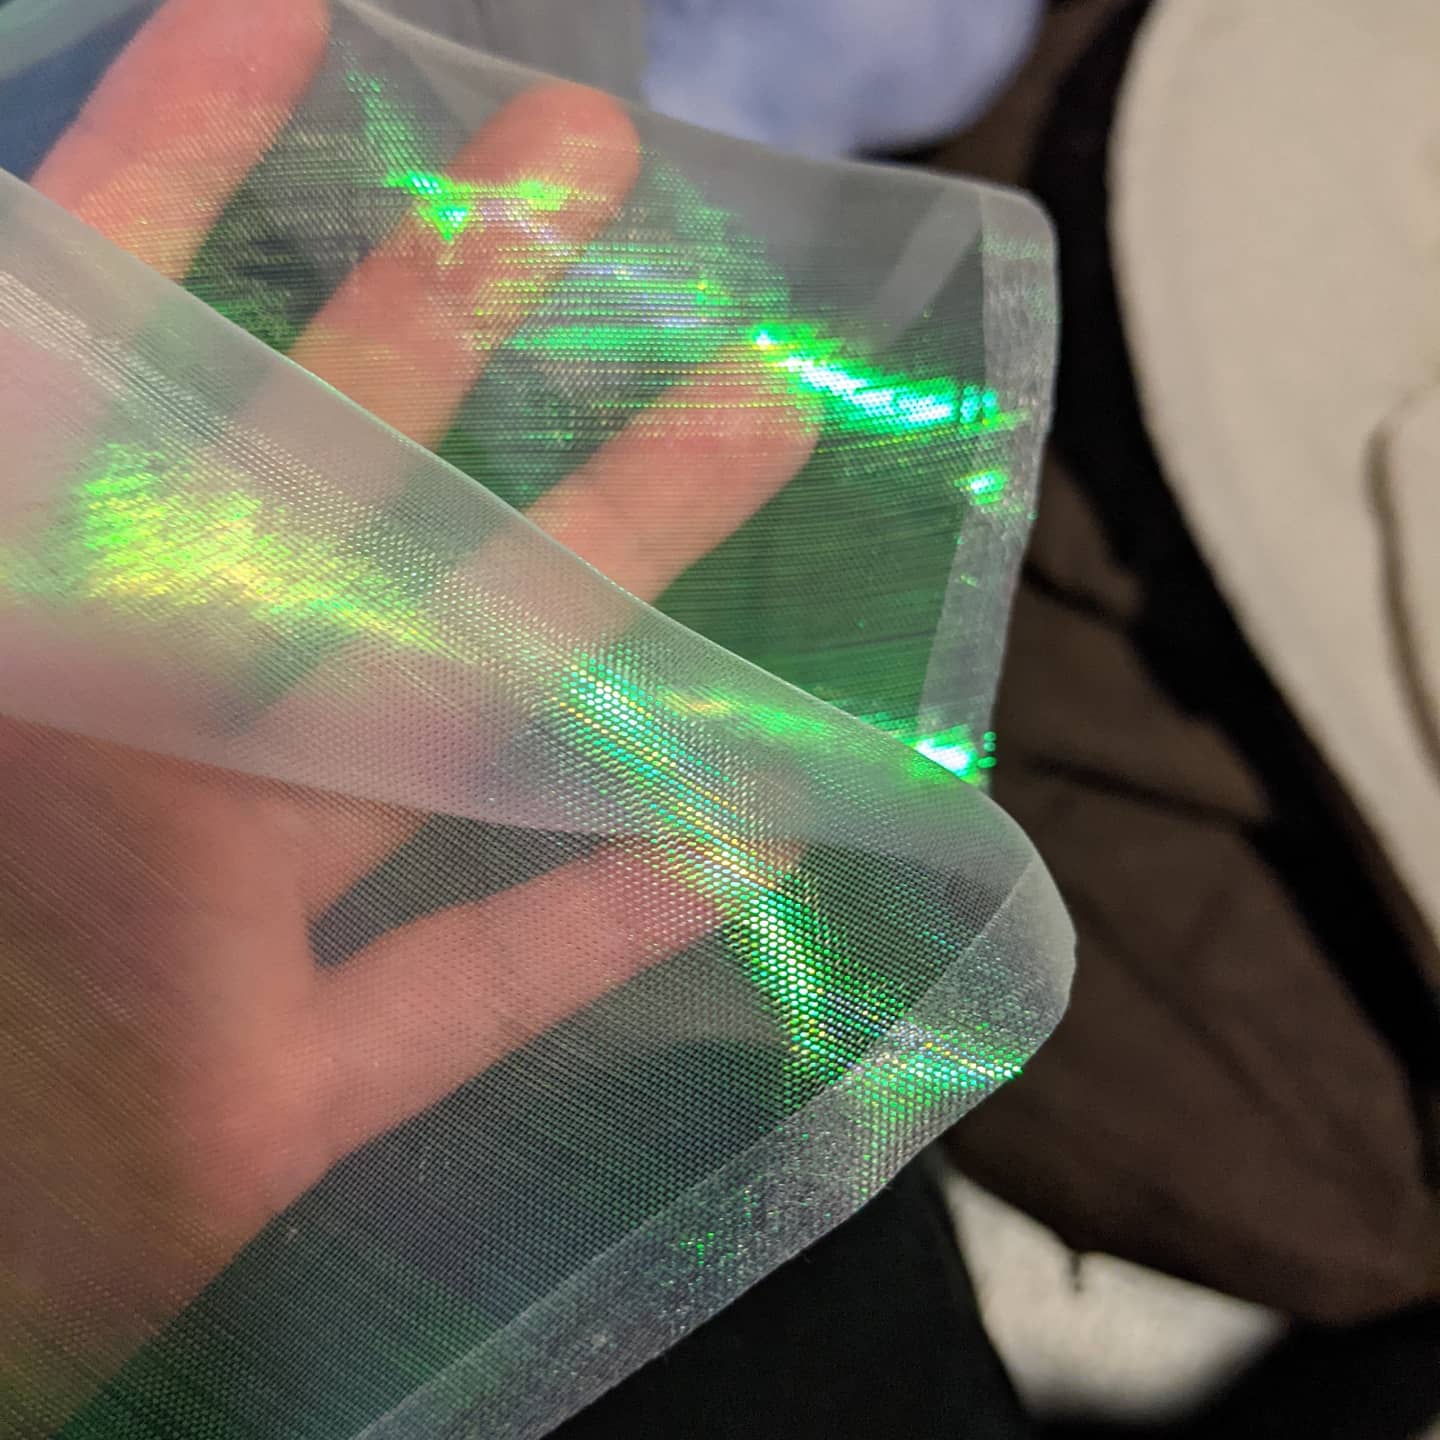
- Iridescent Holographic Gauze Fabric
- Long wefts in Pure White
- Jeannie Classic in Pure White
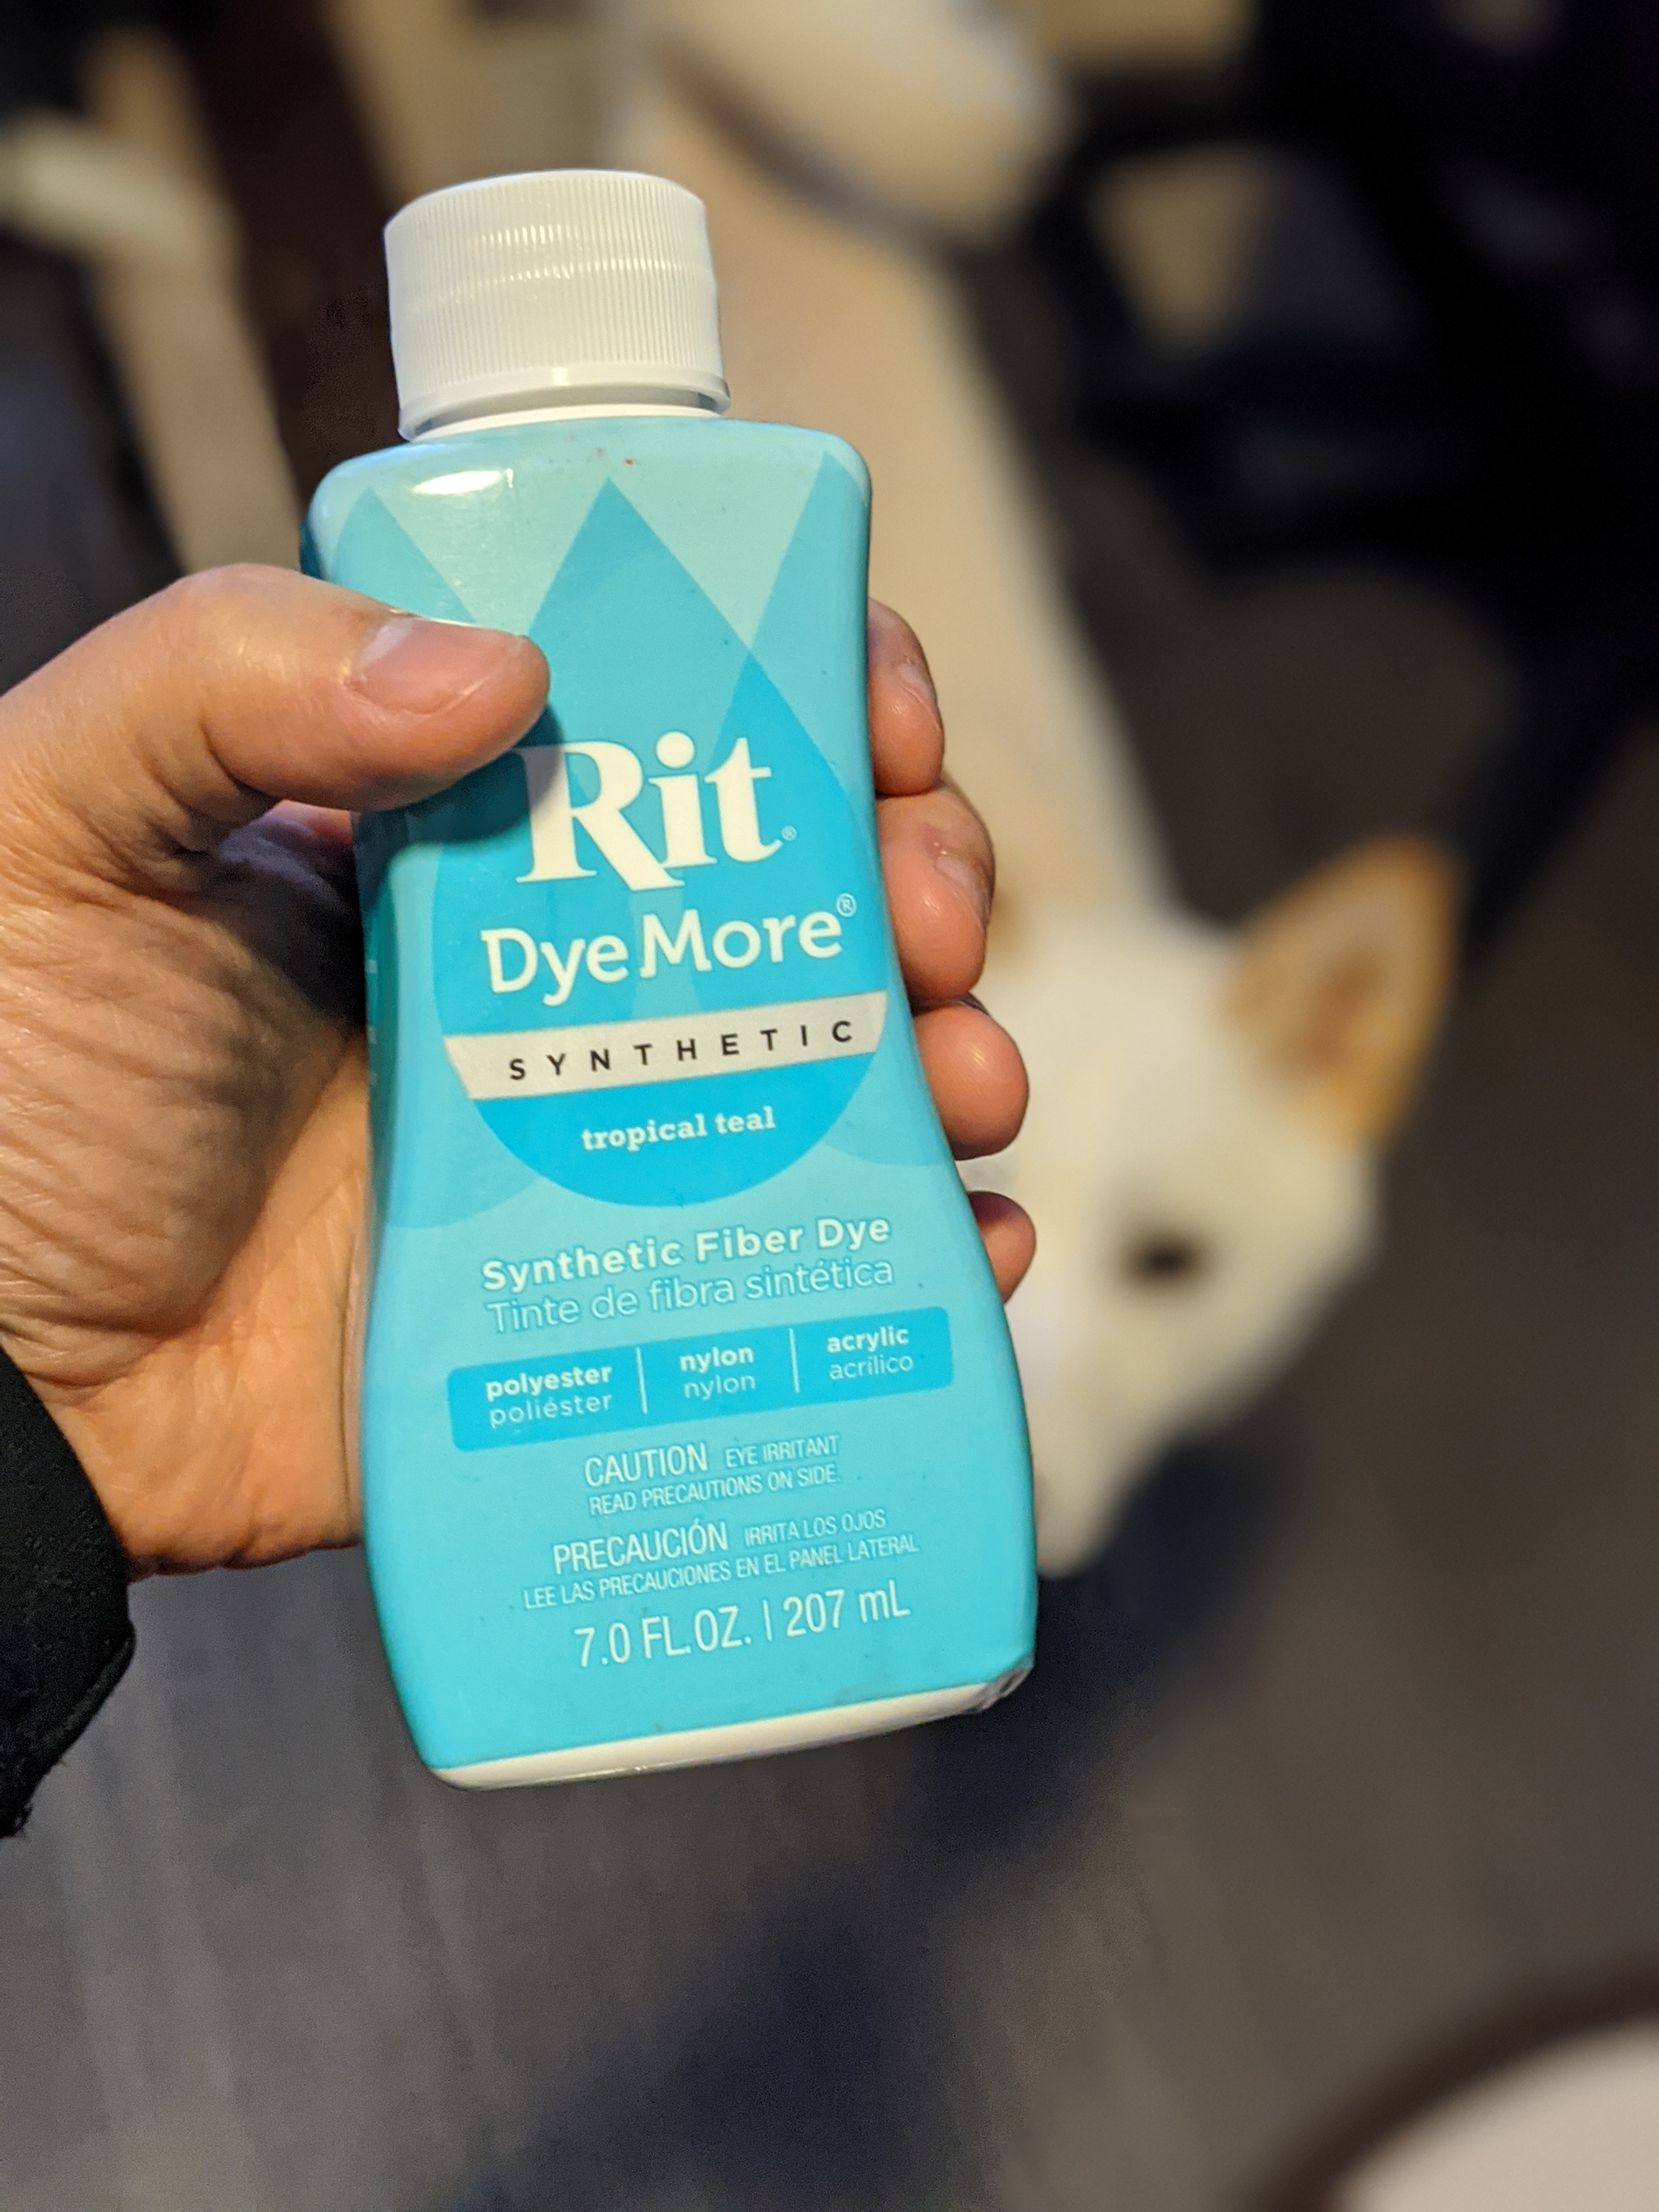
- Rit 7 fl. oz DyeMore Synthetic Fiber Dye in Sky blue
- Rit 7 fl. oz DyeMore Synthetic Fiber Dye in Royal purple
- Angelus Acrylic Leather Paint 1oz in black
- Angelus Metallic Leather Paint 1oz in silver
- Women’s Leatherette Wedge Heel
- 10 yds of 1/8″ cotton piping cord
- 3 yds Pellon Sew In Interfacing
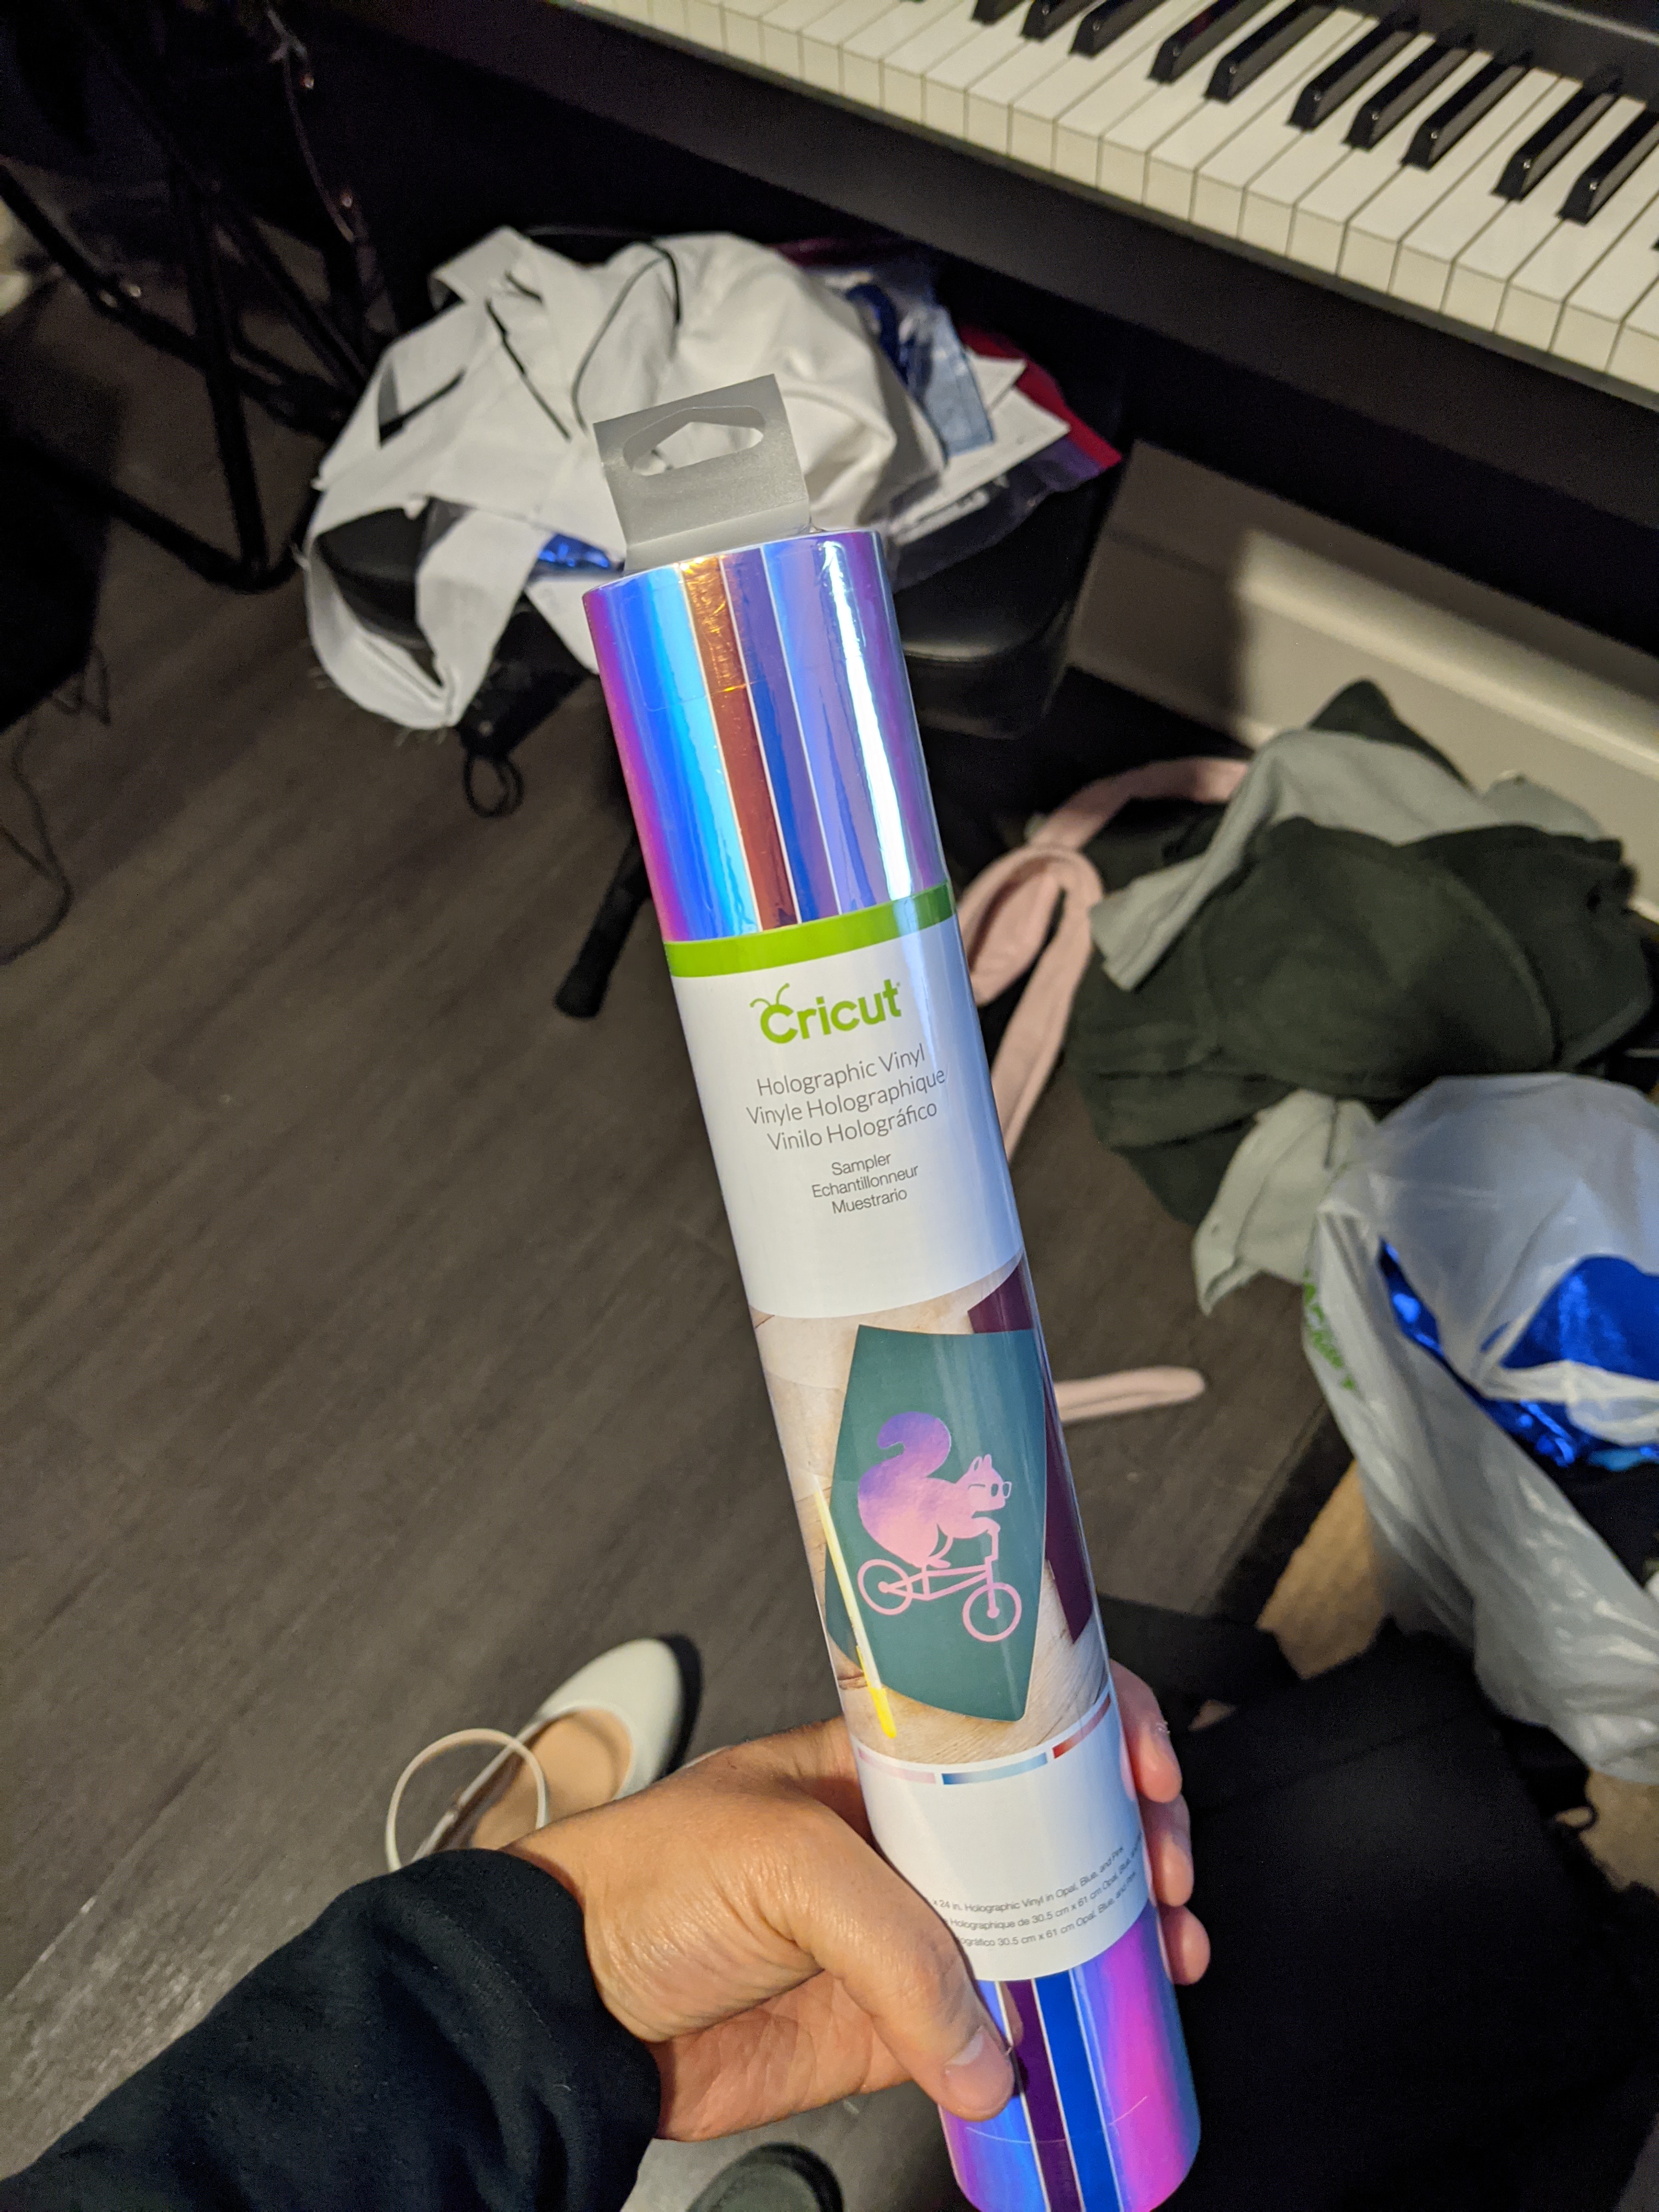
- Holographic vinyl
- Three 4mm chains with rhinestones
- 1″x48″ black leather strip
- Invisible zipper
- Black ultrapreme
- 4-way black metallic
- Silver jump rings
- Cam lock and nut set (these will be used for the blasters, which haven’t been made yet)
- Acrylic rods (for blasters)
Items I Already Had
- Some black Yaya Han pleather fabric
- PETG (for blasters)
- Jewelry pliers
- Snaps and snap installer tool
Pieces Made
Click an item to jump to its build section:
For a video showing a timelapse of me building this cosplay, check out my youtube channel!
Prep work

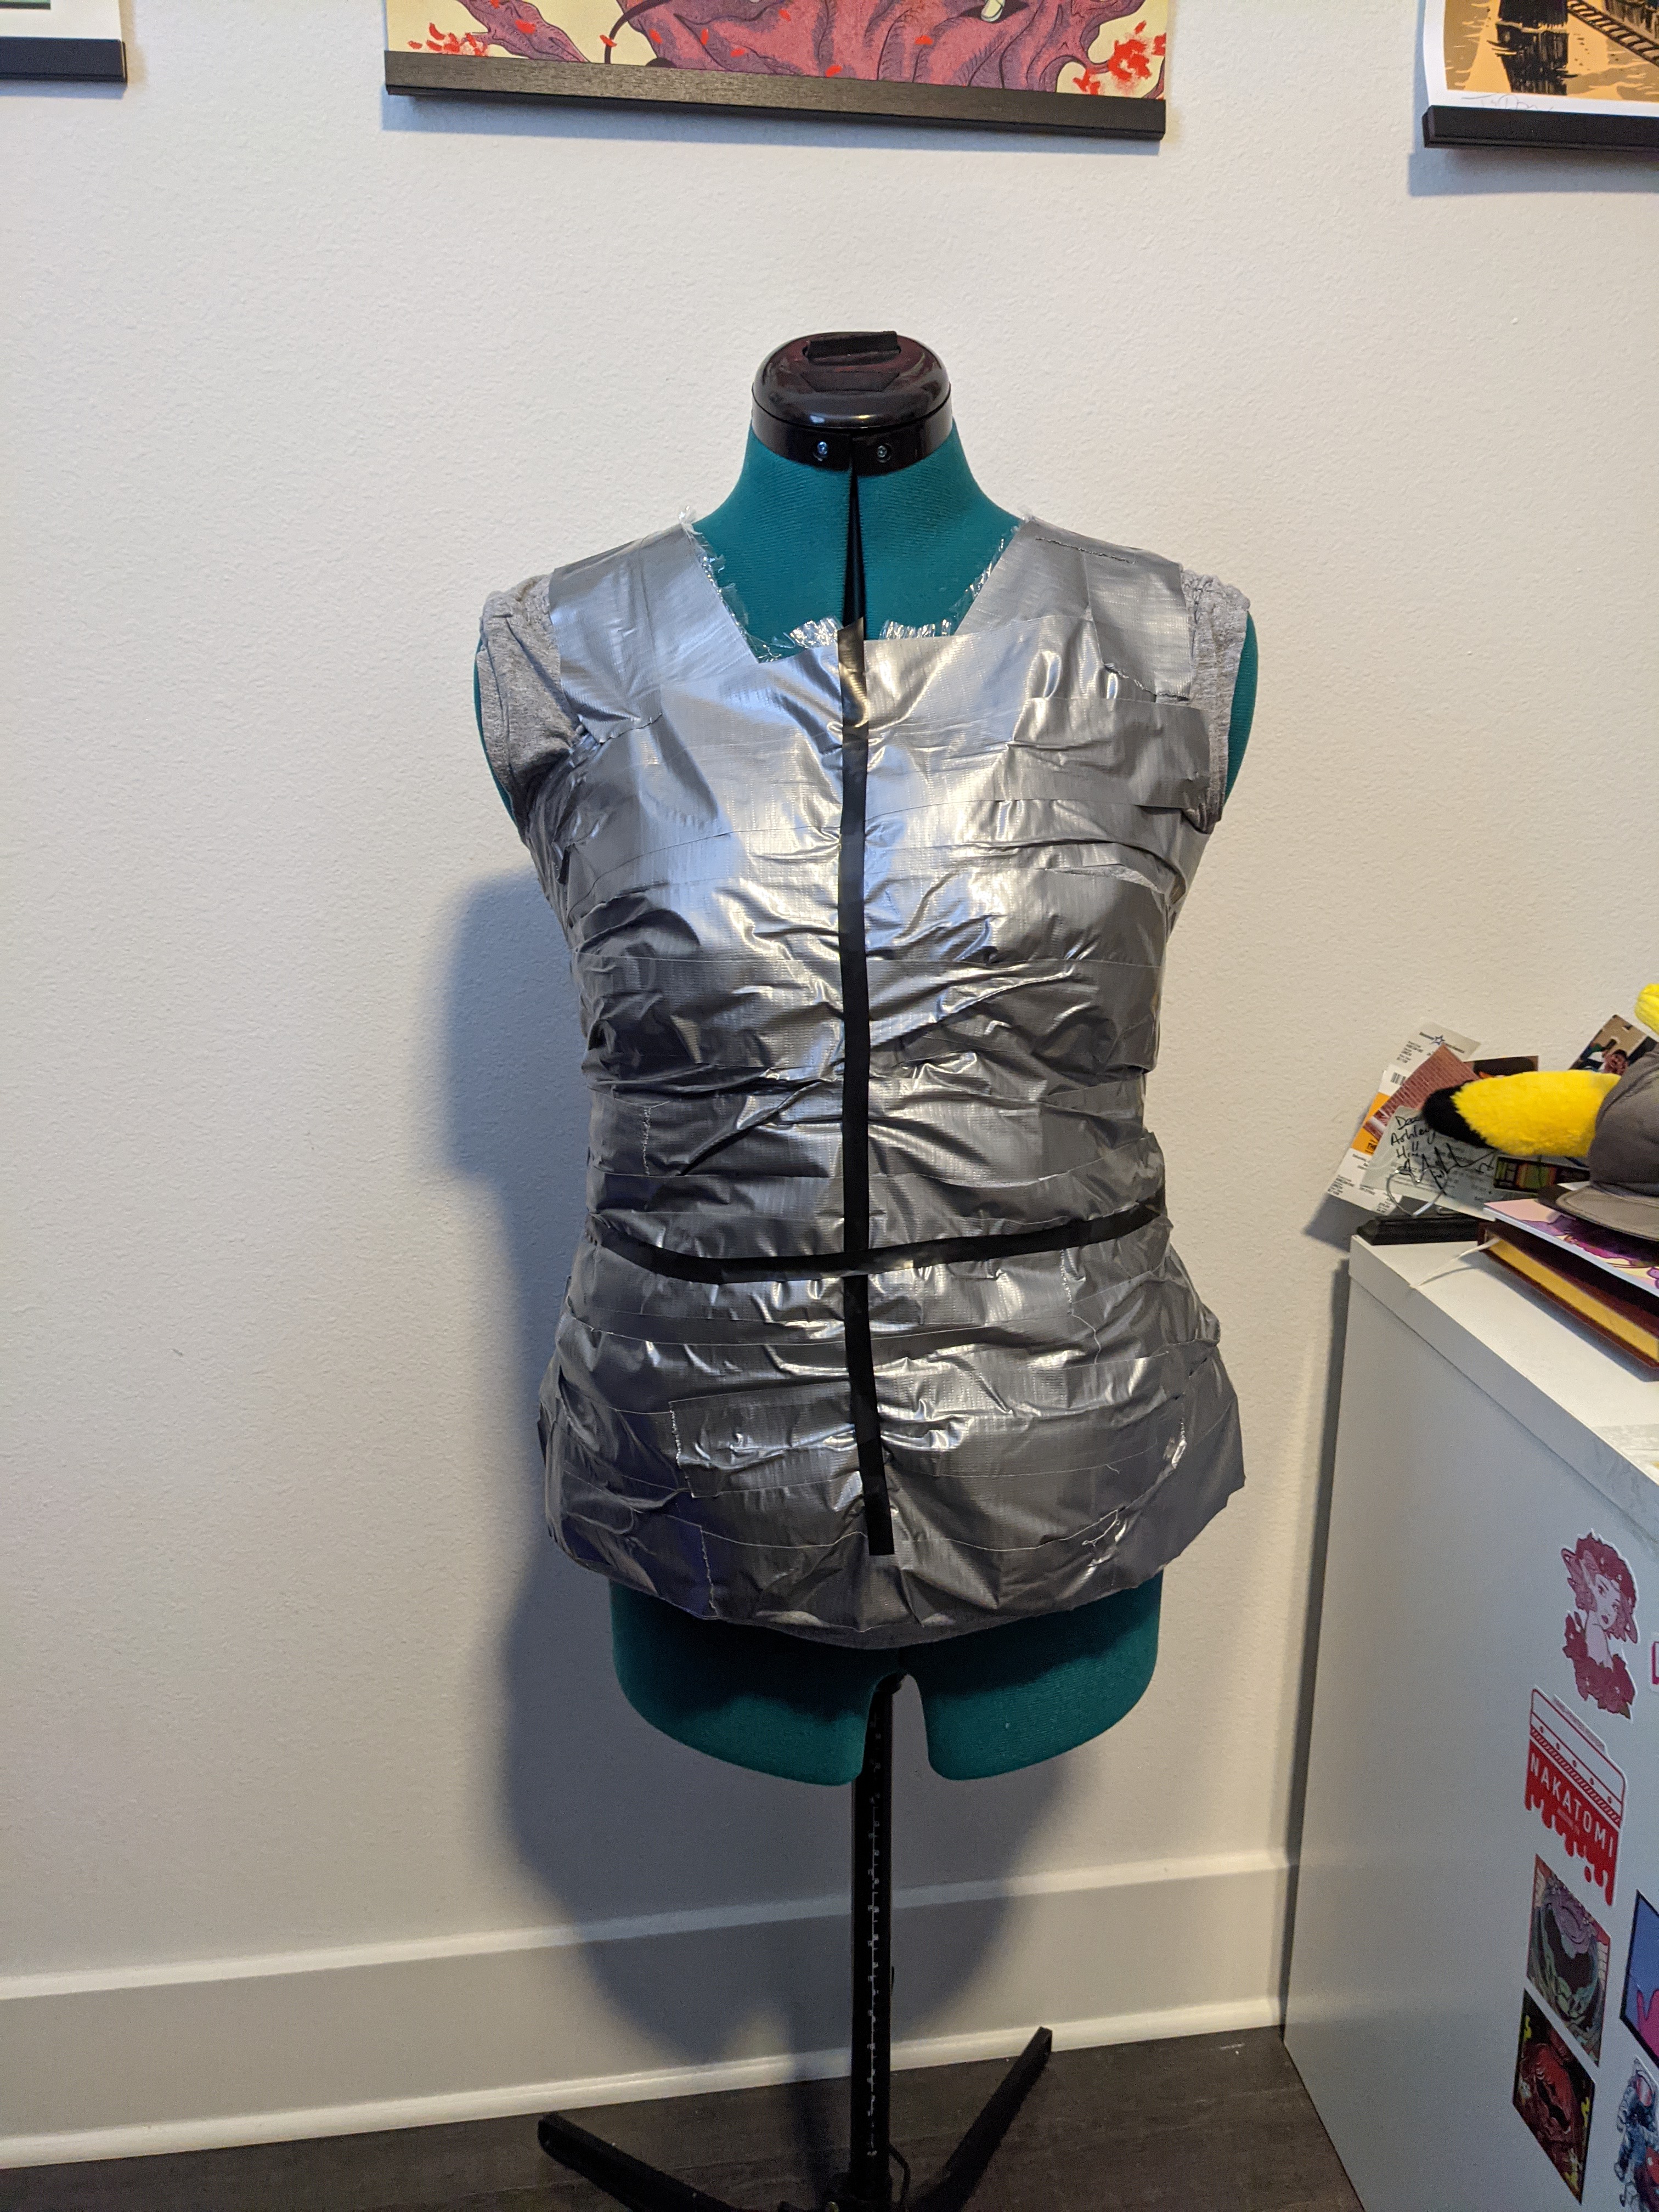
Before I could begin, I had to make a new dress form. My store-bought one was no longer accurate to my measurements, so I used the Duct Tape Dress Form method to make one, with the help of my husband. Once I released from my duct tape cocoon, I put the duct tape structure on top of my existing dress form. To fill it, I used strips of fleece fabric. (Because I didn’t know where my polyfill was. Or rather, I did but was too stubborn to sift through my very messy closet to do so.)
Dress

I decided to make Seraphine’s outfit into a dress. I initially thought of doing a skirt/top combo, but realized that I wanted the stability of a dress if I planned to dance in it (which I most certainly did). Having it be one dress would mean no chances of the top riding up or the skirt drifting too low and exposing my stomach. I opted to add an invisible zipper down the right side seam of the dress, so that I wouldn’t have to worry about how the flowy overskirt would look with a zipper.
Skirt
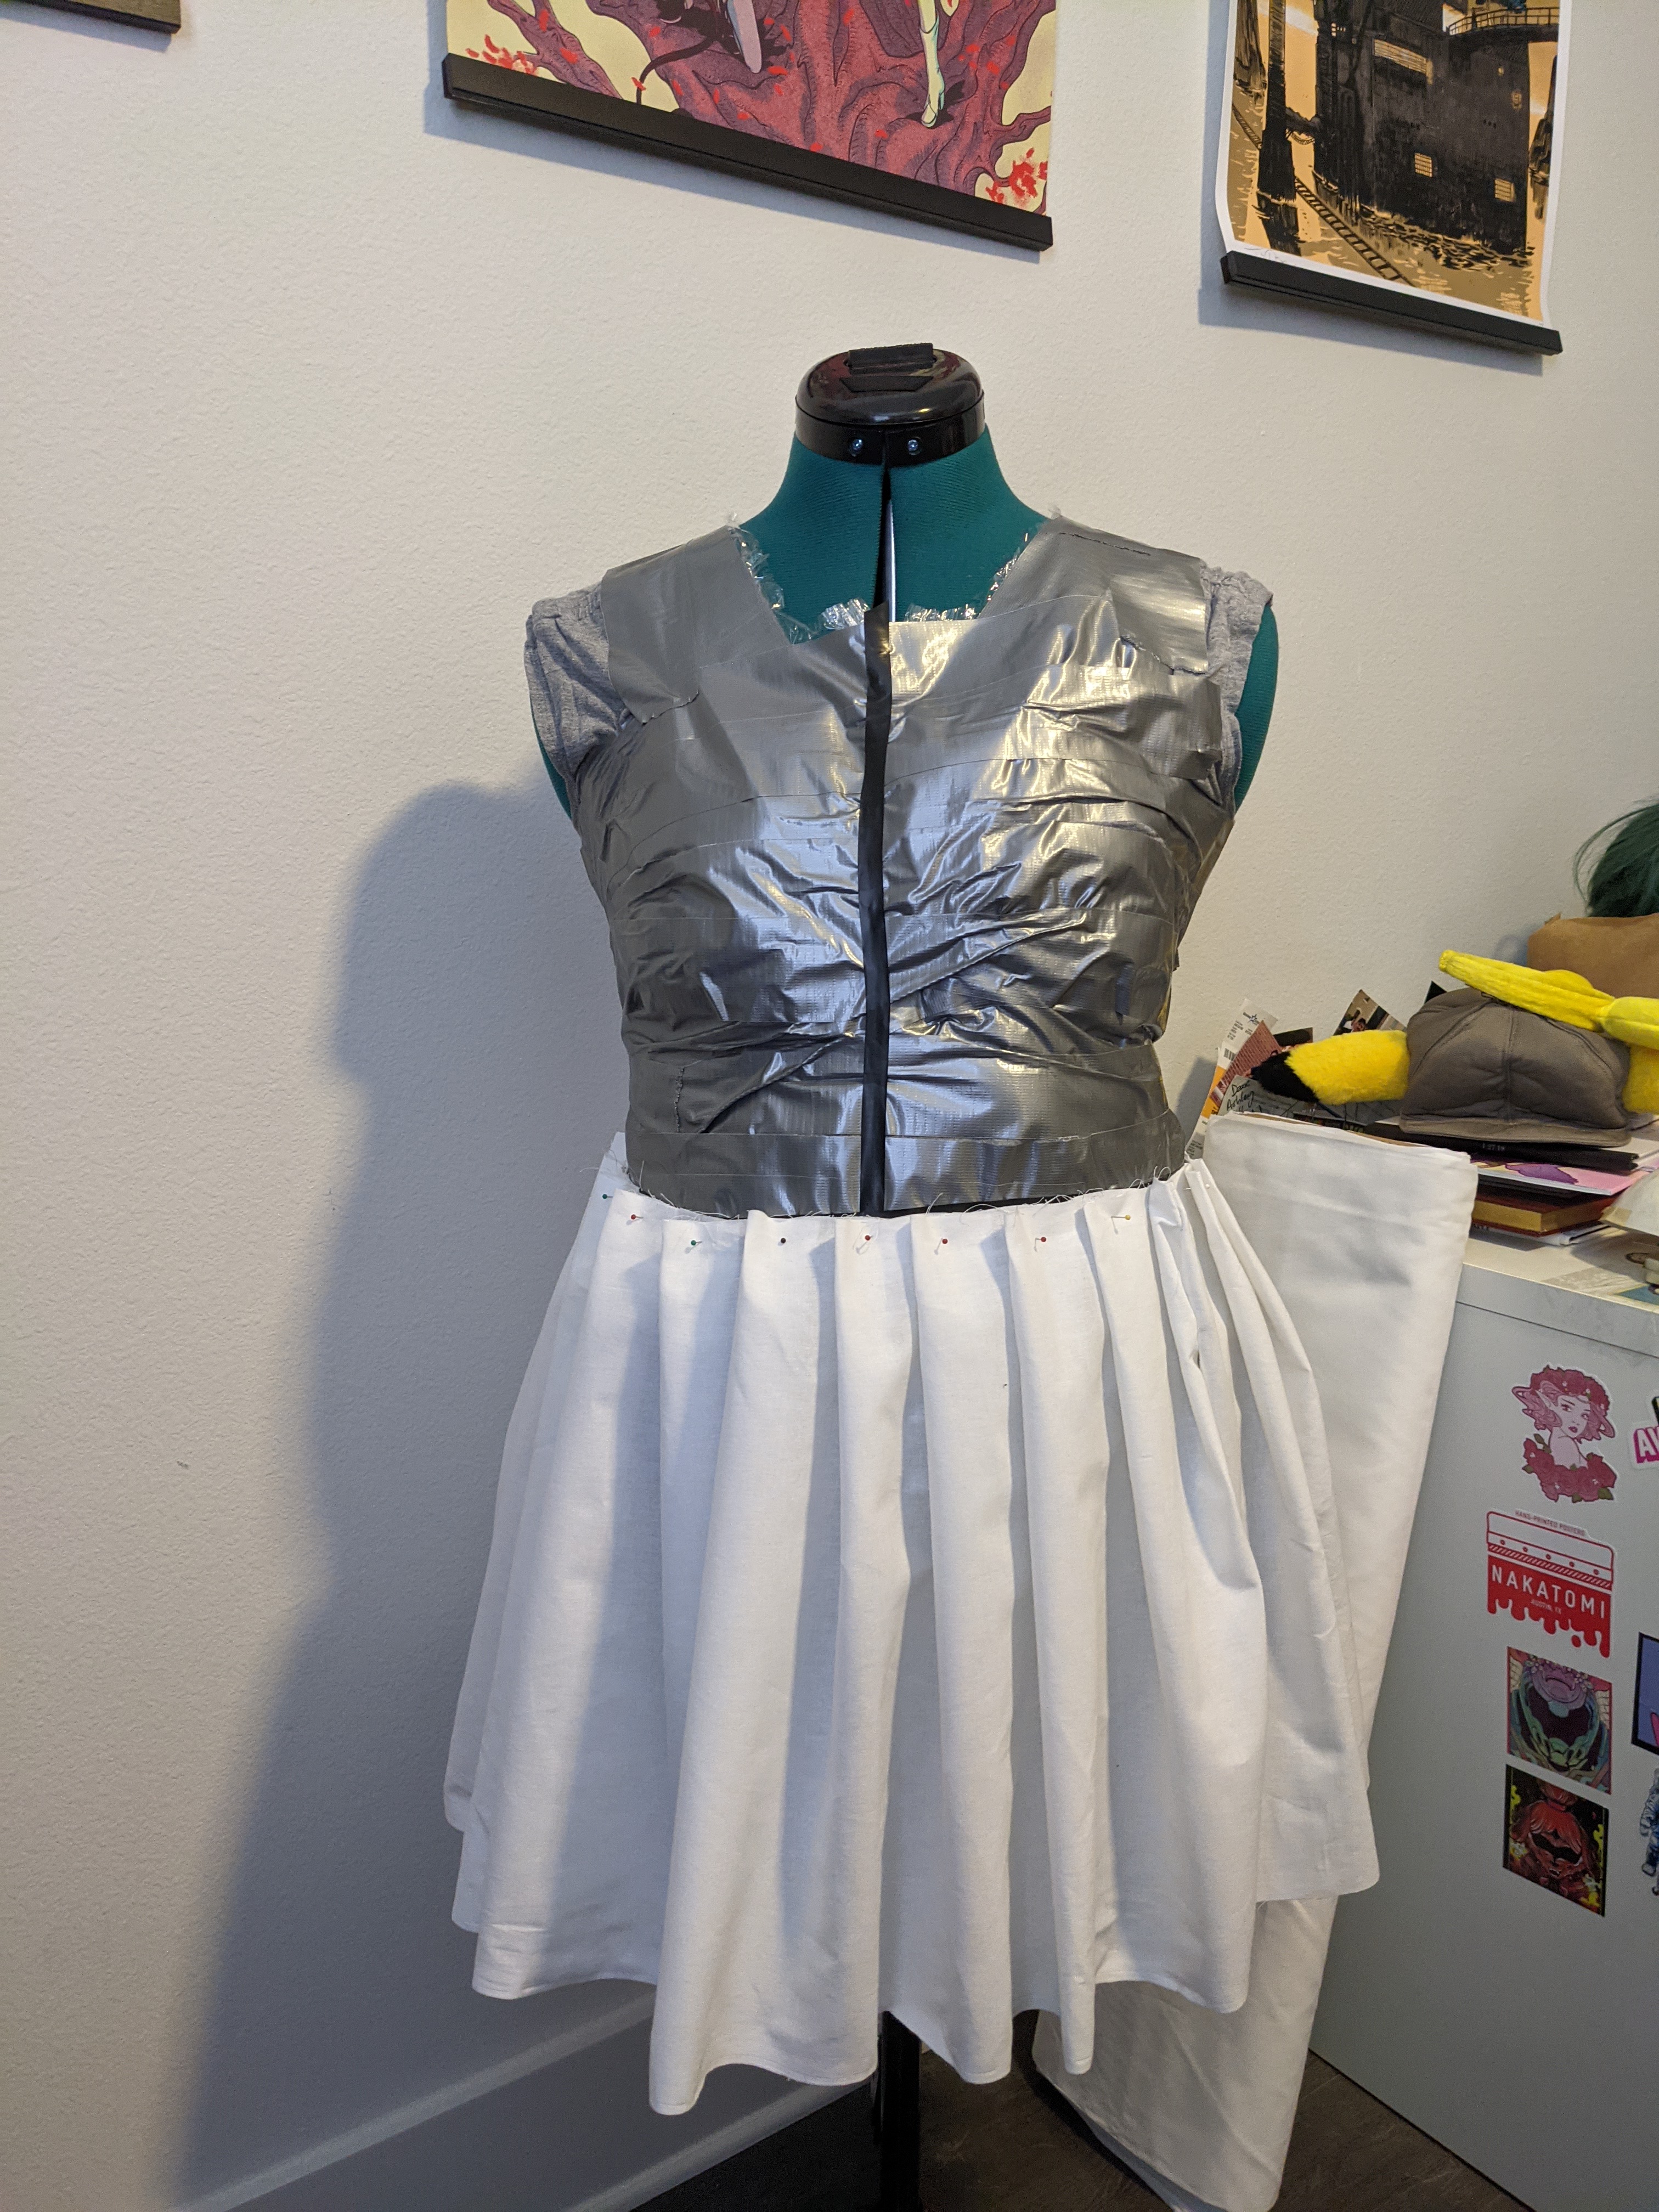

I started with the skirt of the dress. Using muslin fabric and a ruler, I carefully draped the muslin onto the dress form at the waistline. I used the ruler to measure out pleats 1.5″ wide. I did this all the way around the dress form, starting on the right side where the invisible zipper would eventually go. After doing this with the muslin fabric, I basted the pleats down and then unpinned it from the dress form. After “trying it on” (there was of course no zipper, so I was just holding it up to myself), I moved onto the fashion fabric.
The fabric is a black pleather from the Yaya Han collection. Rather than doing the pleats on the dressform, I sat on the floor and carefully pinned each pleat in place. I’d measure out 3″, grab the fabric, and fold it over, creating 1.5″ pleats. I did this for the entire stretch of fabric (2 pieces). At this stage, I also extended the back fabric piece by 2″, making it curve to meet the front piece edges. I did this to accommodate the booty area a bit better.

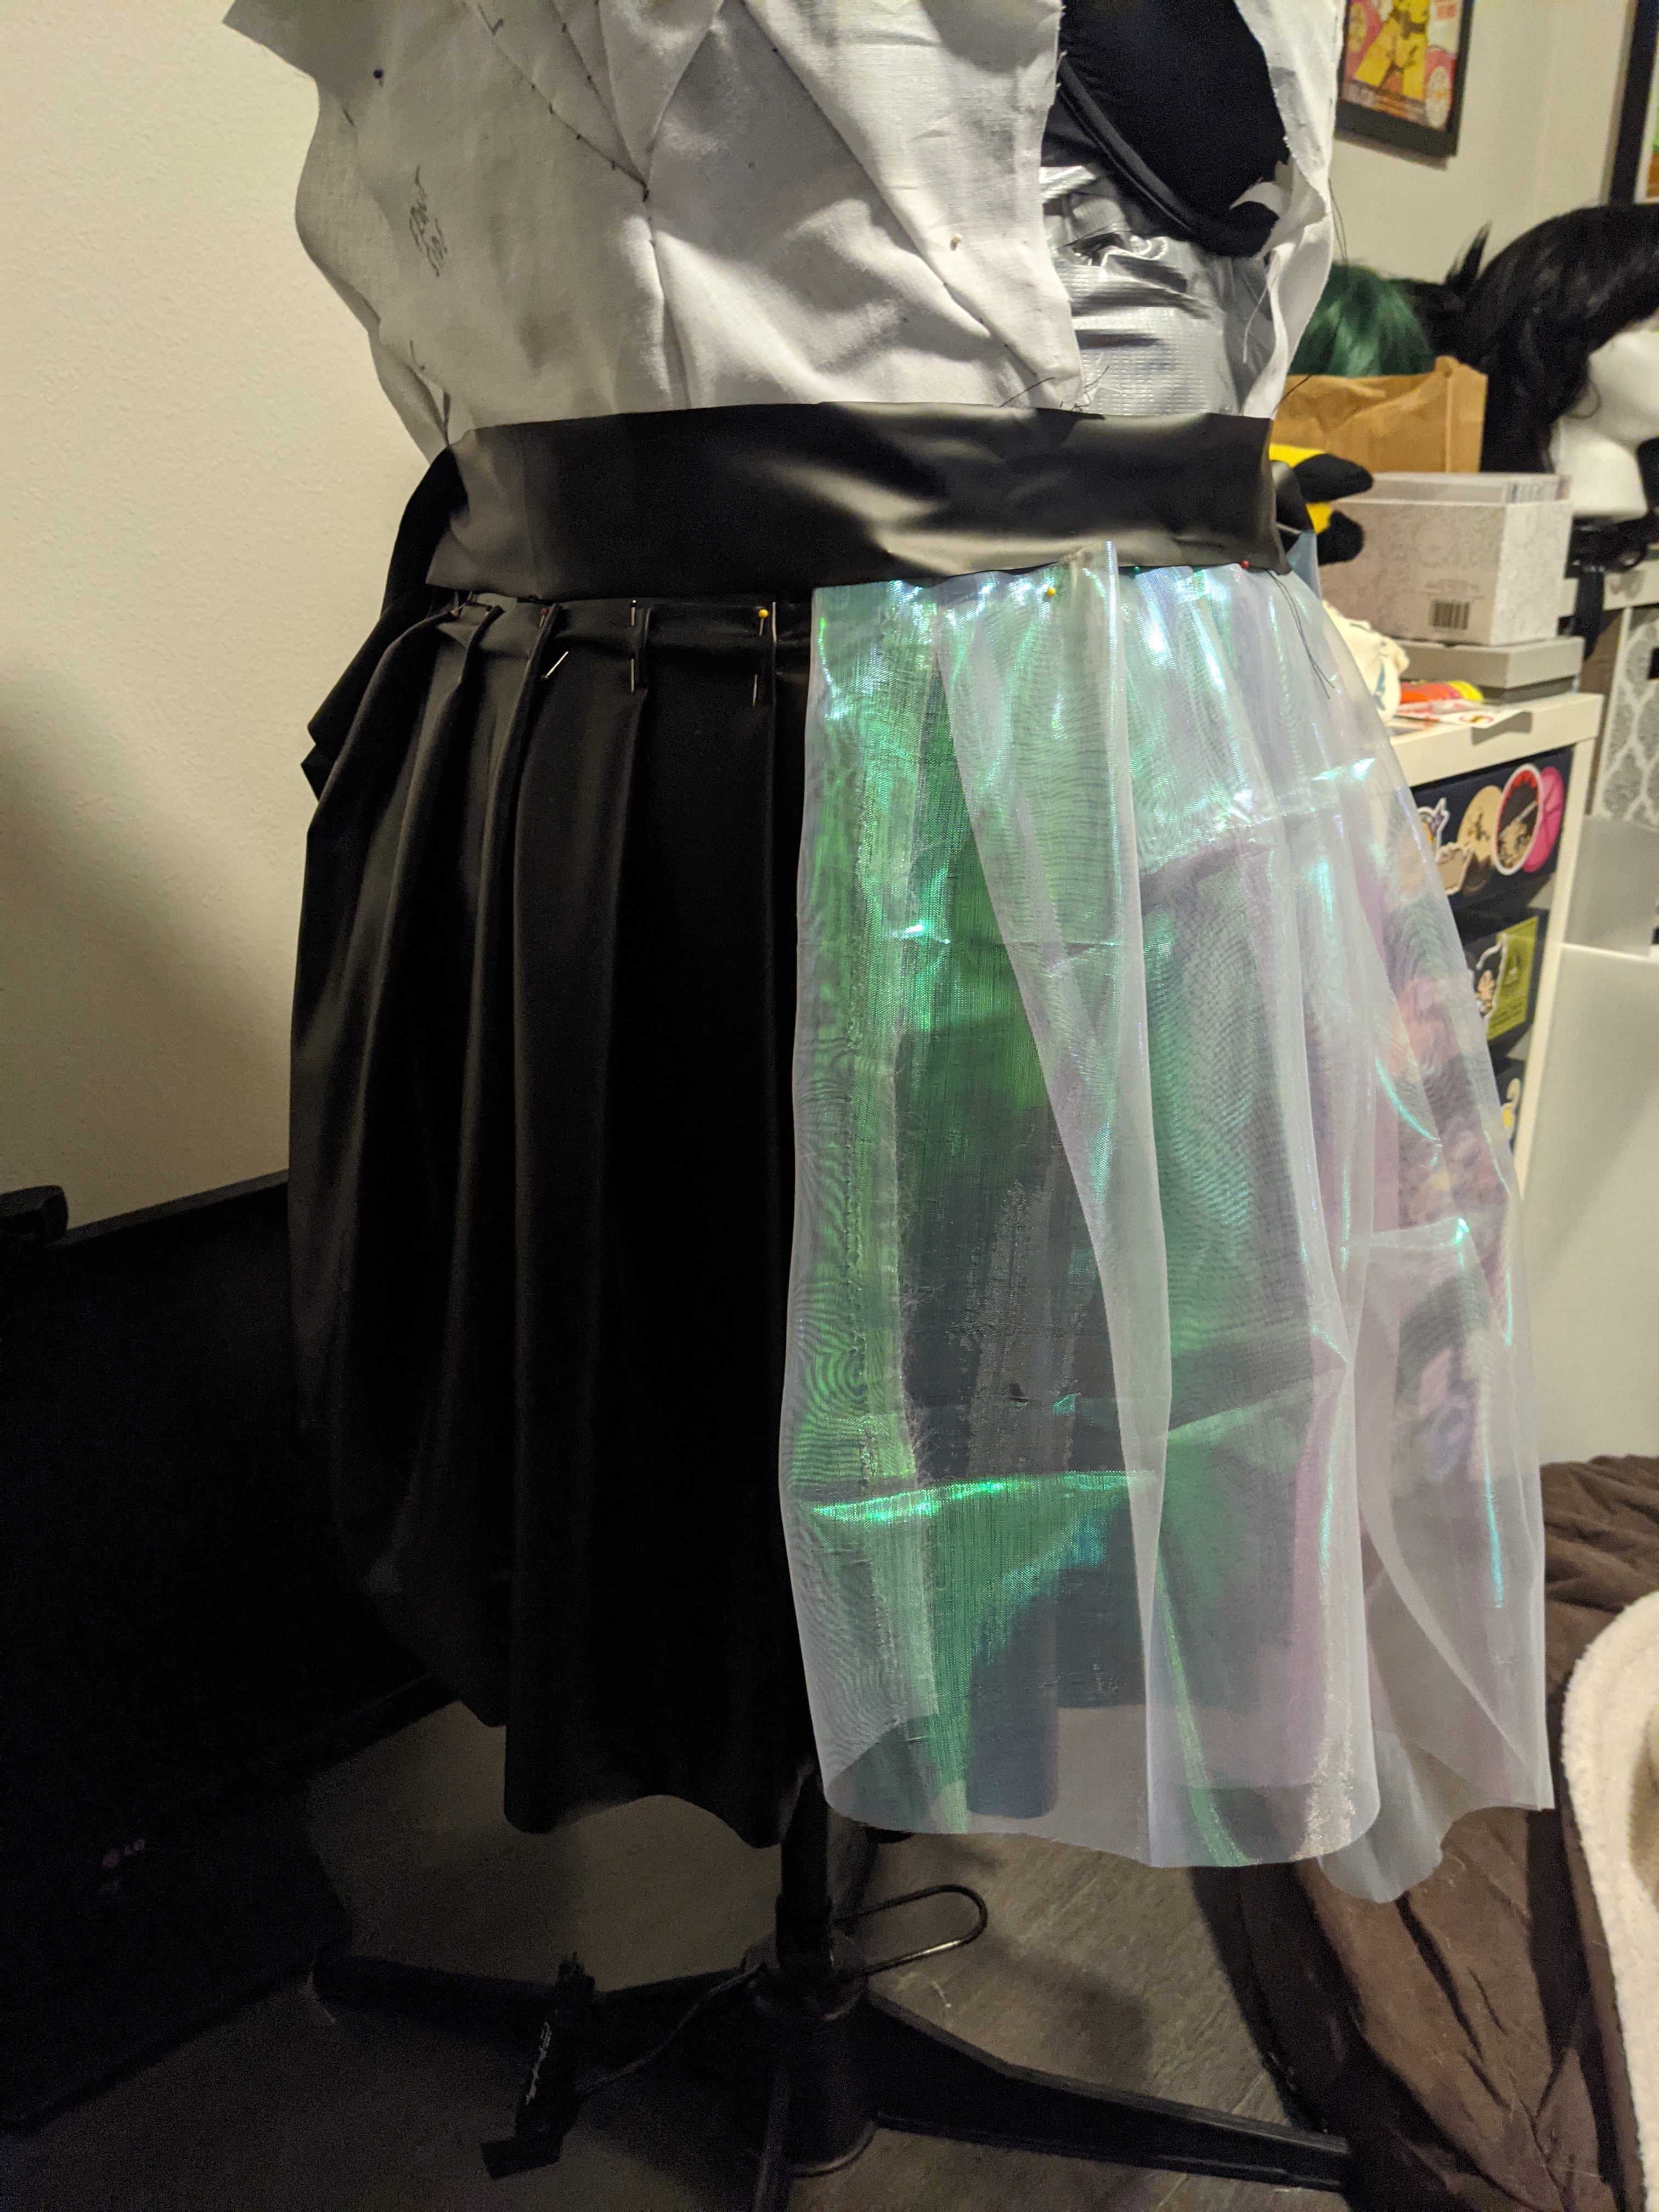
Next was the overskirt. This took two attempts at draping. The first attempt, I kinda just pinned and eyeballed cutting the bottom hem. This didn’t work very well. For the second attempt, I draped and pinned the muslin fabric to the dress form and then used a marker to mark where I wanted the bottom edge to be. After I was happy with it, I removed it from the dress form, folded it in half so it’d be symmetrical, then cut along the lines. Overskirt pattern done!
After sewing the pleats down on the black skirt, I stitched the overskirt to it, making sure to go over the pleats of the overskirt. (This was after using Heat N Bond to finish the raw edges of the underskirt.)
Bodice Mockup v1
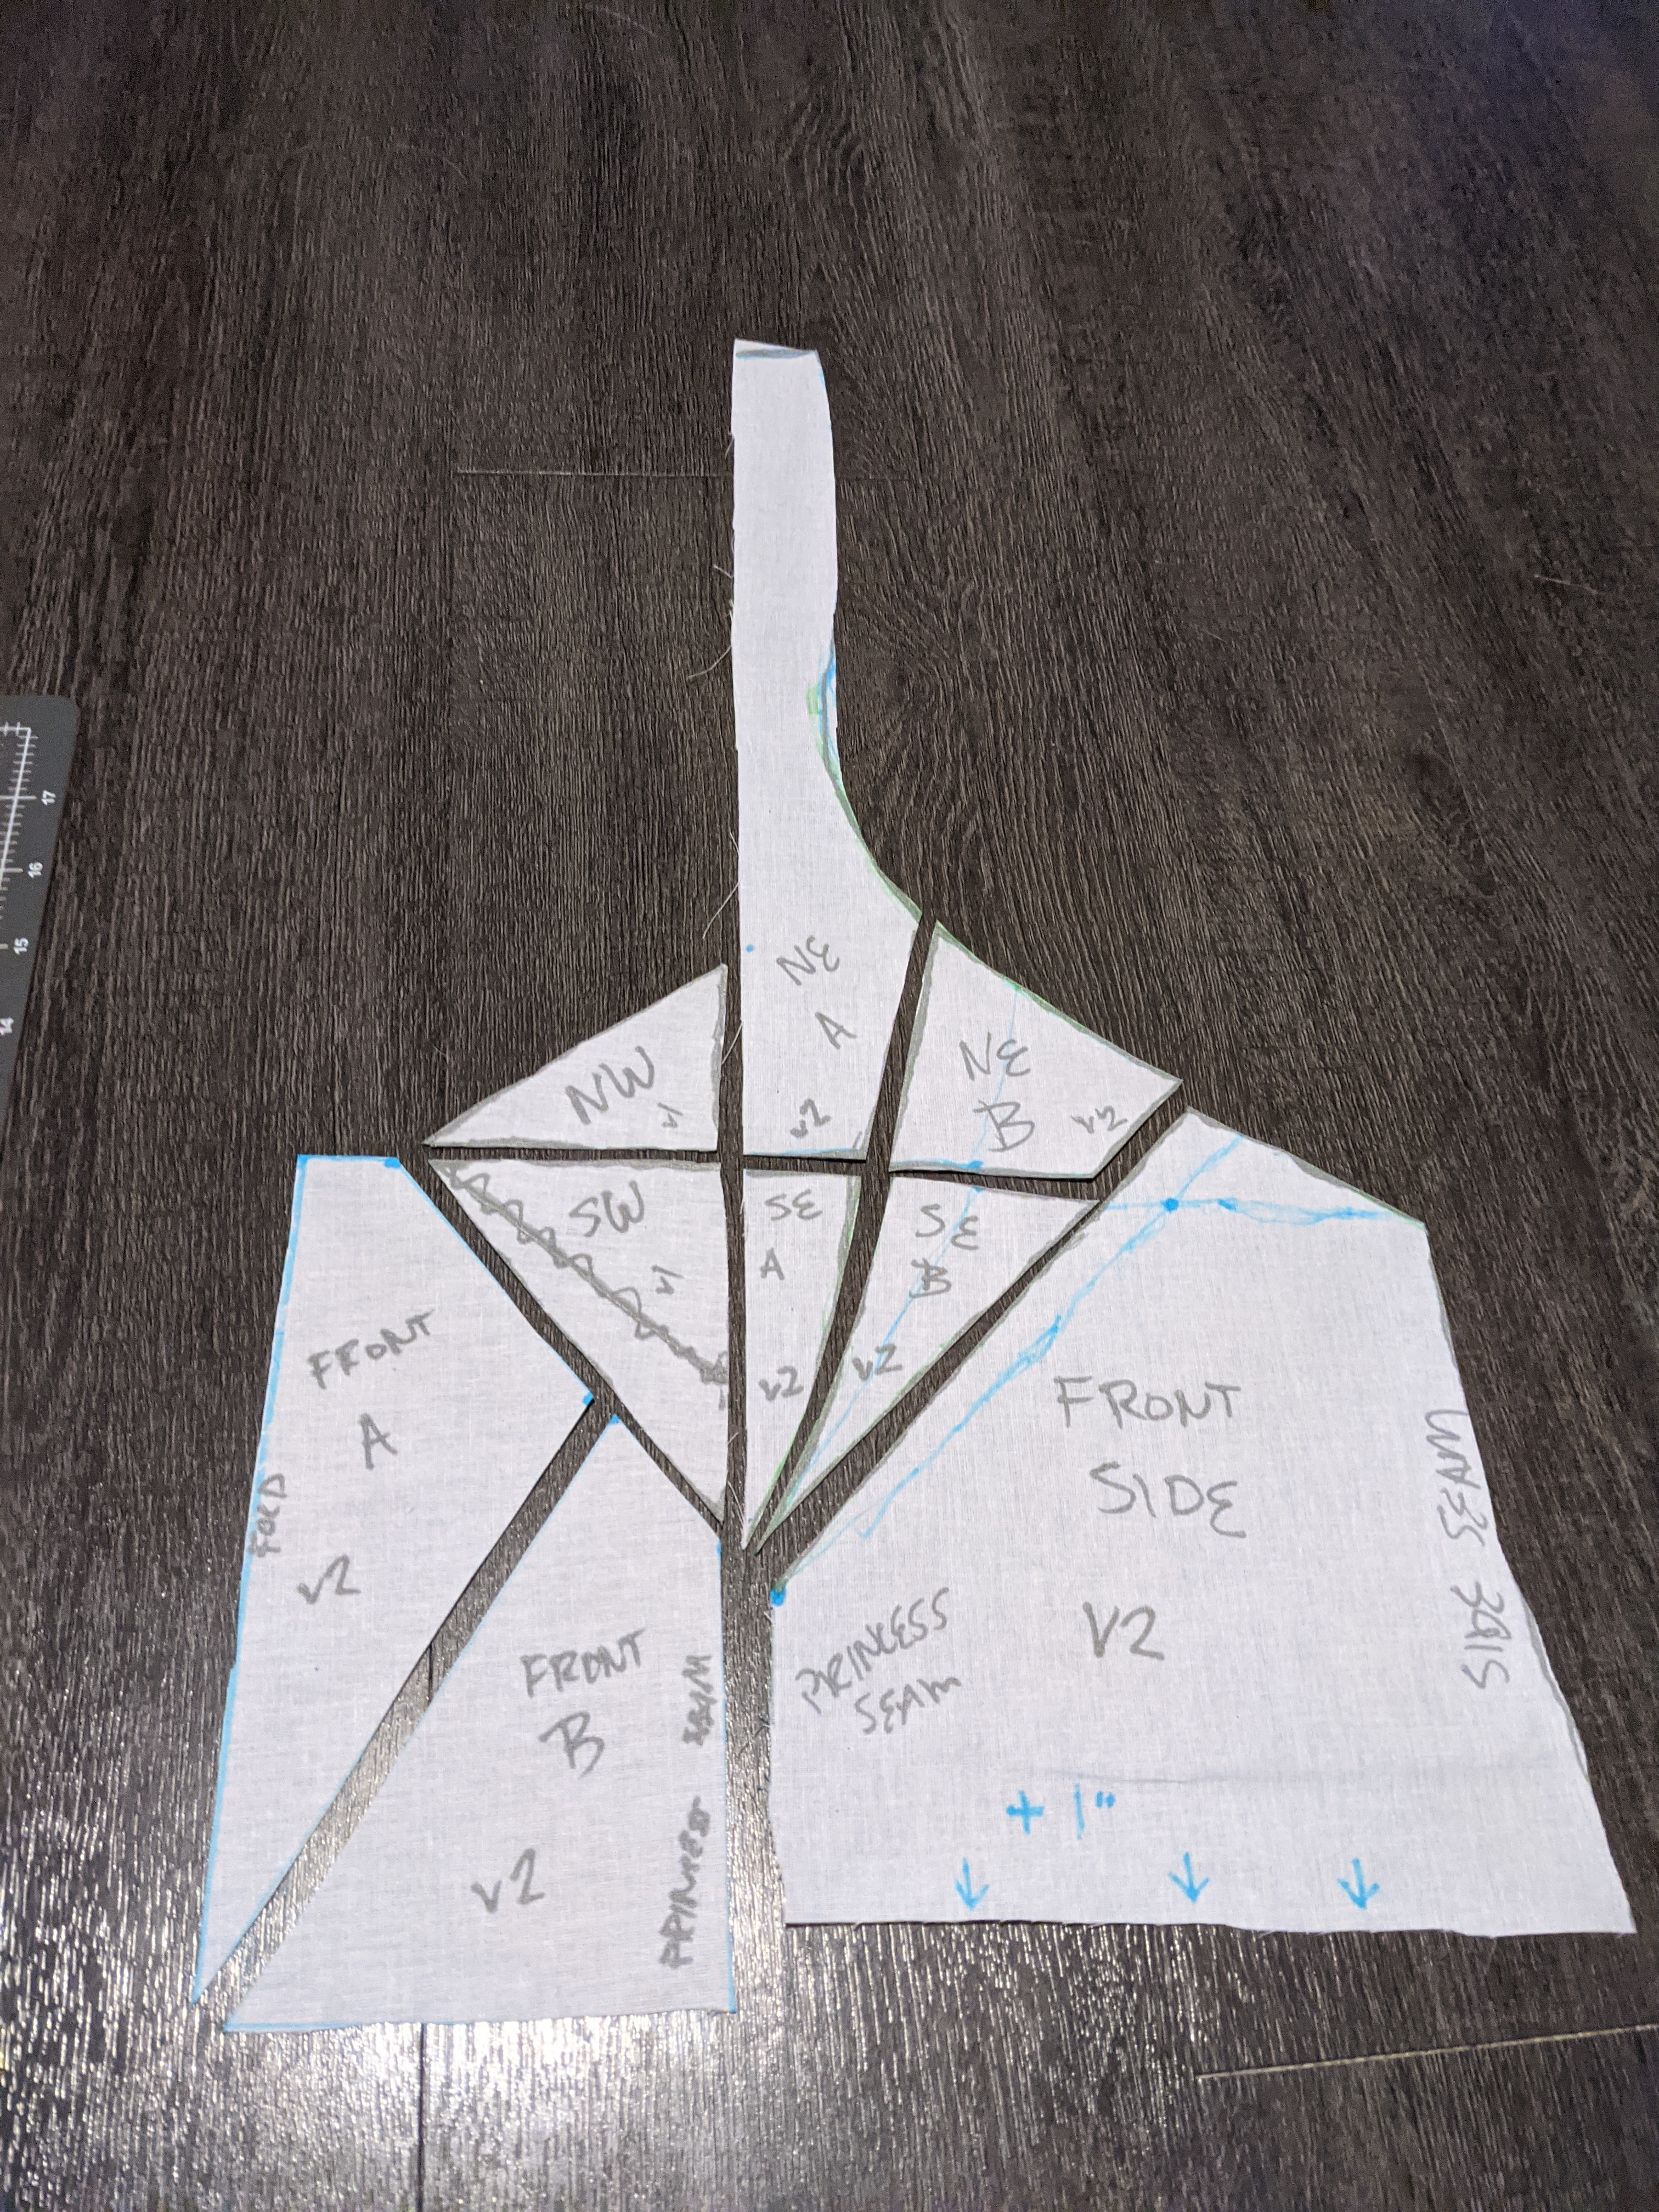
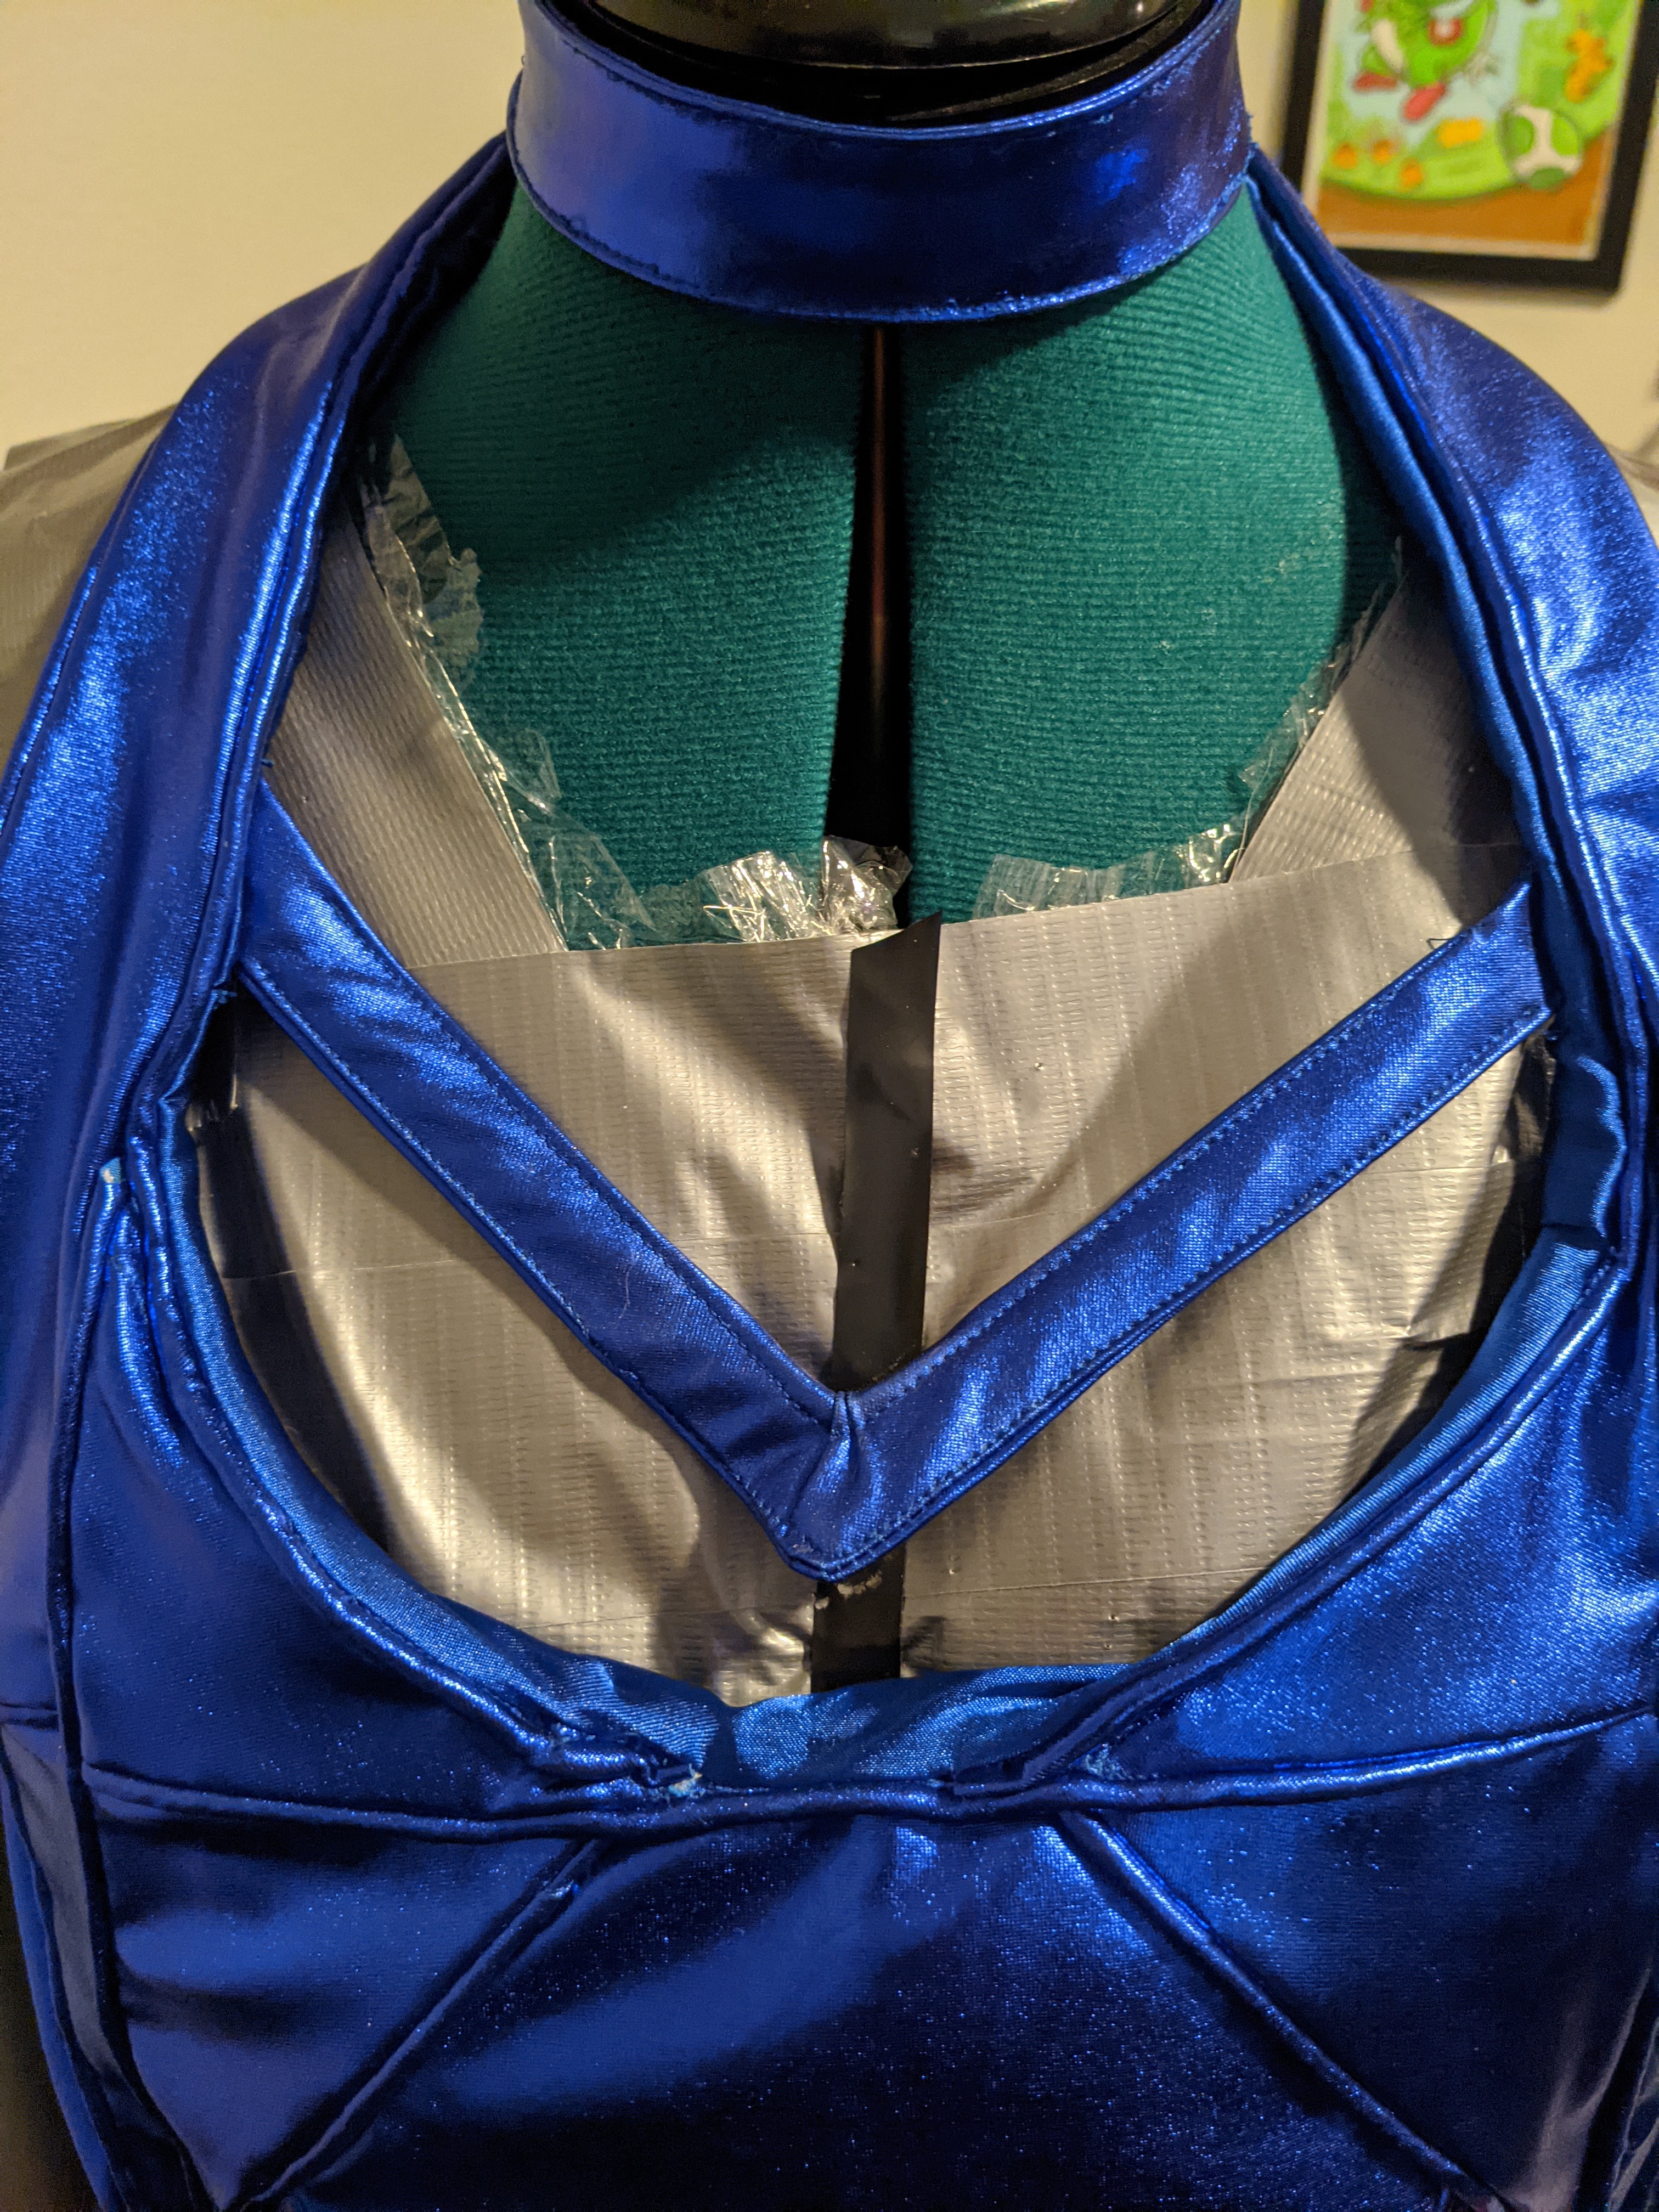
The bodice of this dress is by far the most intricate one I’ve ever done. The front alone requires 21 separate pieces, not including lining.


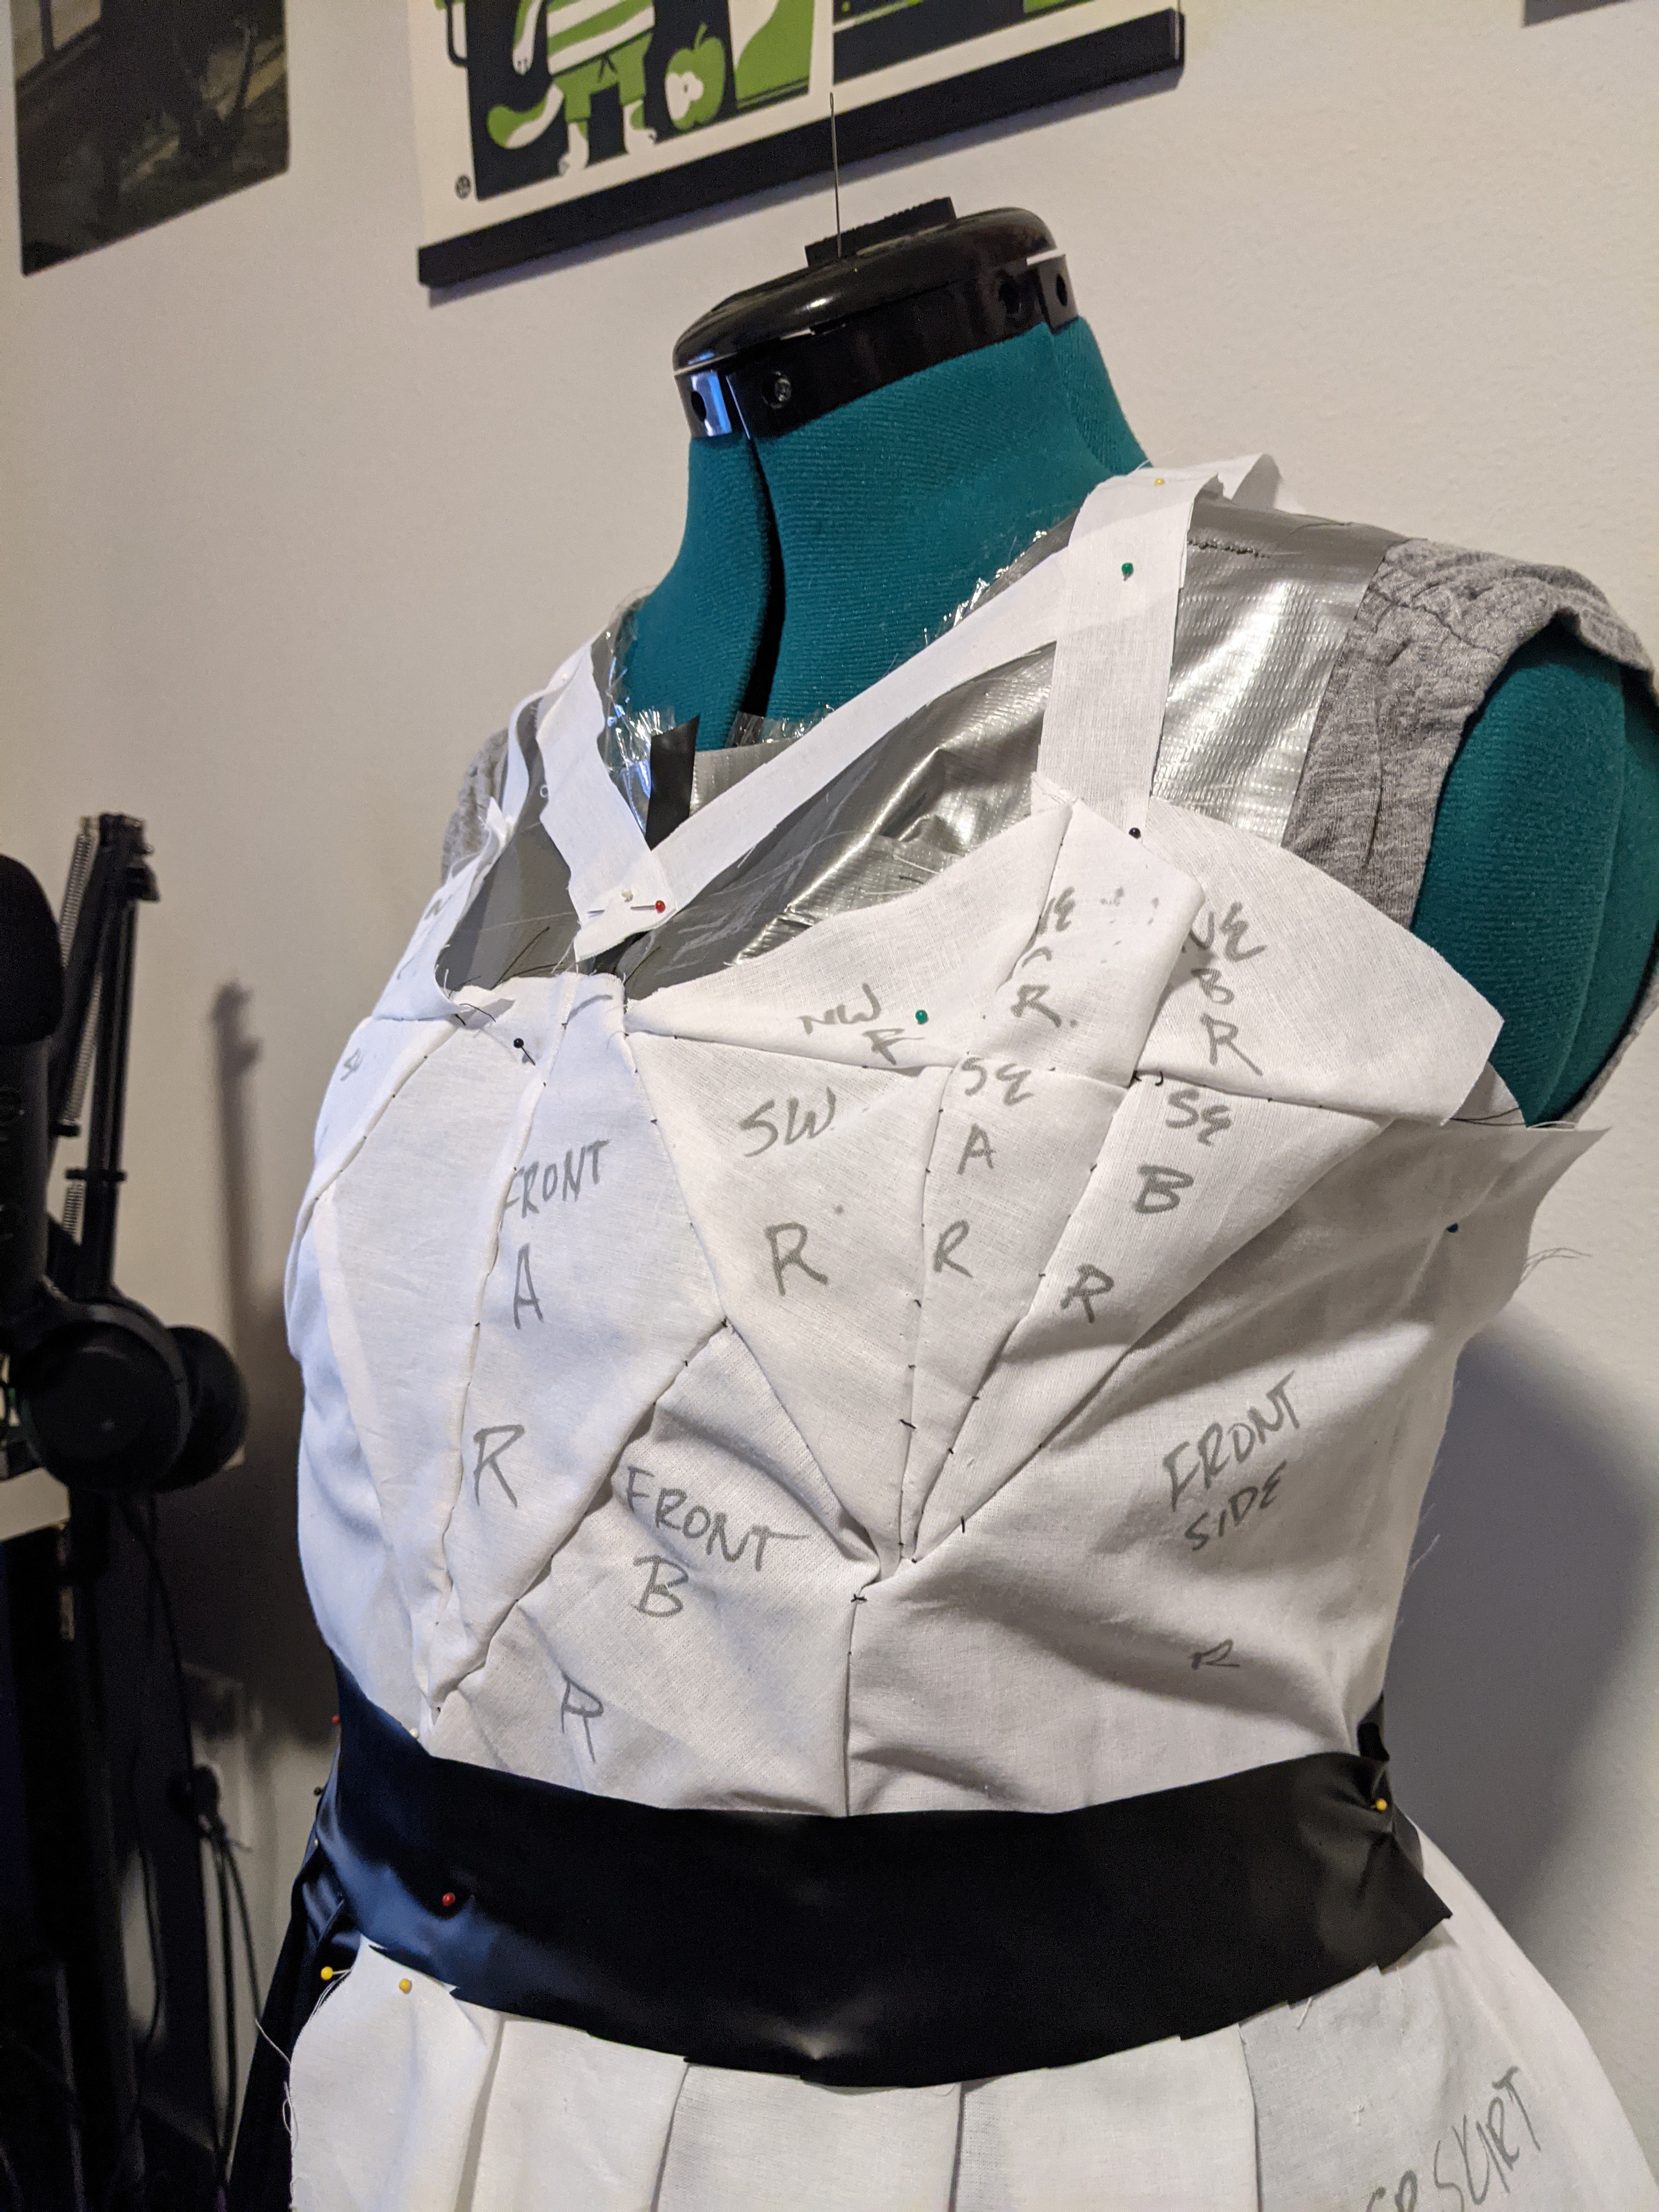

To start, we went with the trusty muslin+dress form process. After pinning some muslin in place on the front of the dress form (only the right half since it’ll be symmetrical), I used a marker to mark out where each of the pieces would go, carefully referring to the music video screenshots as I did. I also used a ruler to measure out some areas, for instance the diamond part. I needed to make sure it was symmetrical side-to-side, so I would mark out where the lines needed to end before drawing them on. I ended up making a minor change to the bottom portion of the breast diamond, because I wanted it to be longer (it looked too stout upon first drawing it). Using a marker wasn’t ideal, but my chalk pens are difficult to draw with. Once I was happy with all the seam markings, I labeled every piece. Then, I cut the pieces out. In total, these pieces added up to 10.
The next step was making the bodice mockup. I transferred the pattern pieces to more muslin fabric, this time adding a seam allowance around each of about 1cm. After cutting each pattern piece out twice, I was left with 20 tiny pieces. I hand-stitched them together with some black thread so that I could see how it all came out. I actually did the cutting and stitching in stages. I’d cut out a few pattern pieces, pin them together, then stitch them. And then I’d move onto the next ones. Splitting it up like this made it easier on my brain because then I just had one big piece of fabric that was slowly growing with each new piece, instead of 40 tiny little triangle fabric pieces scattered everywhere.
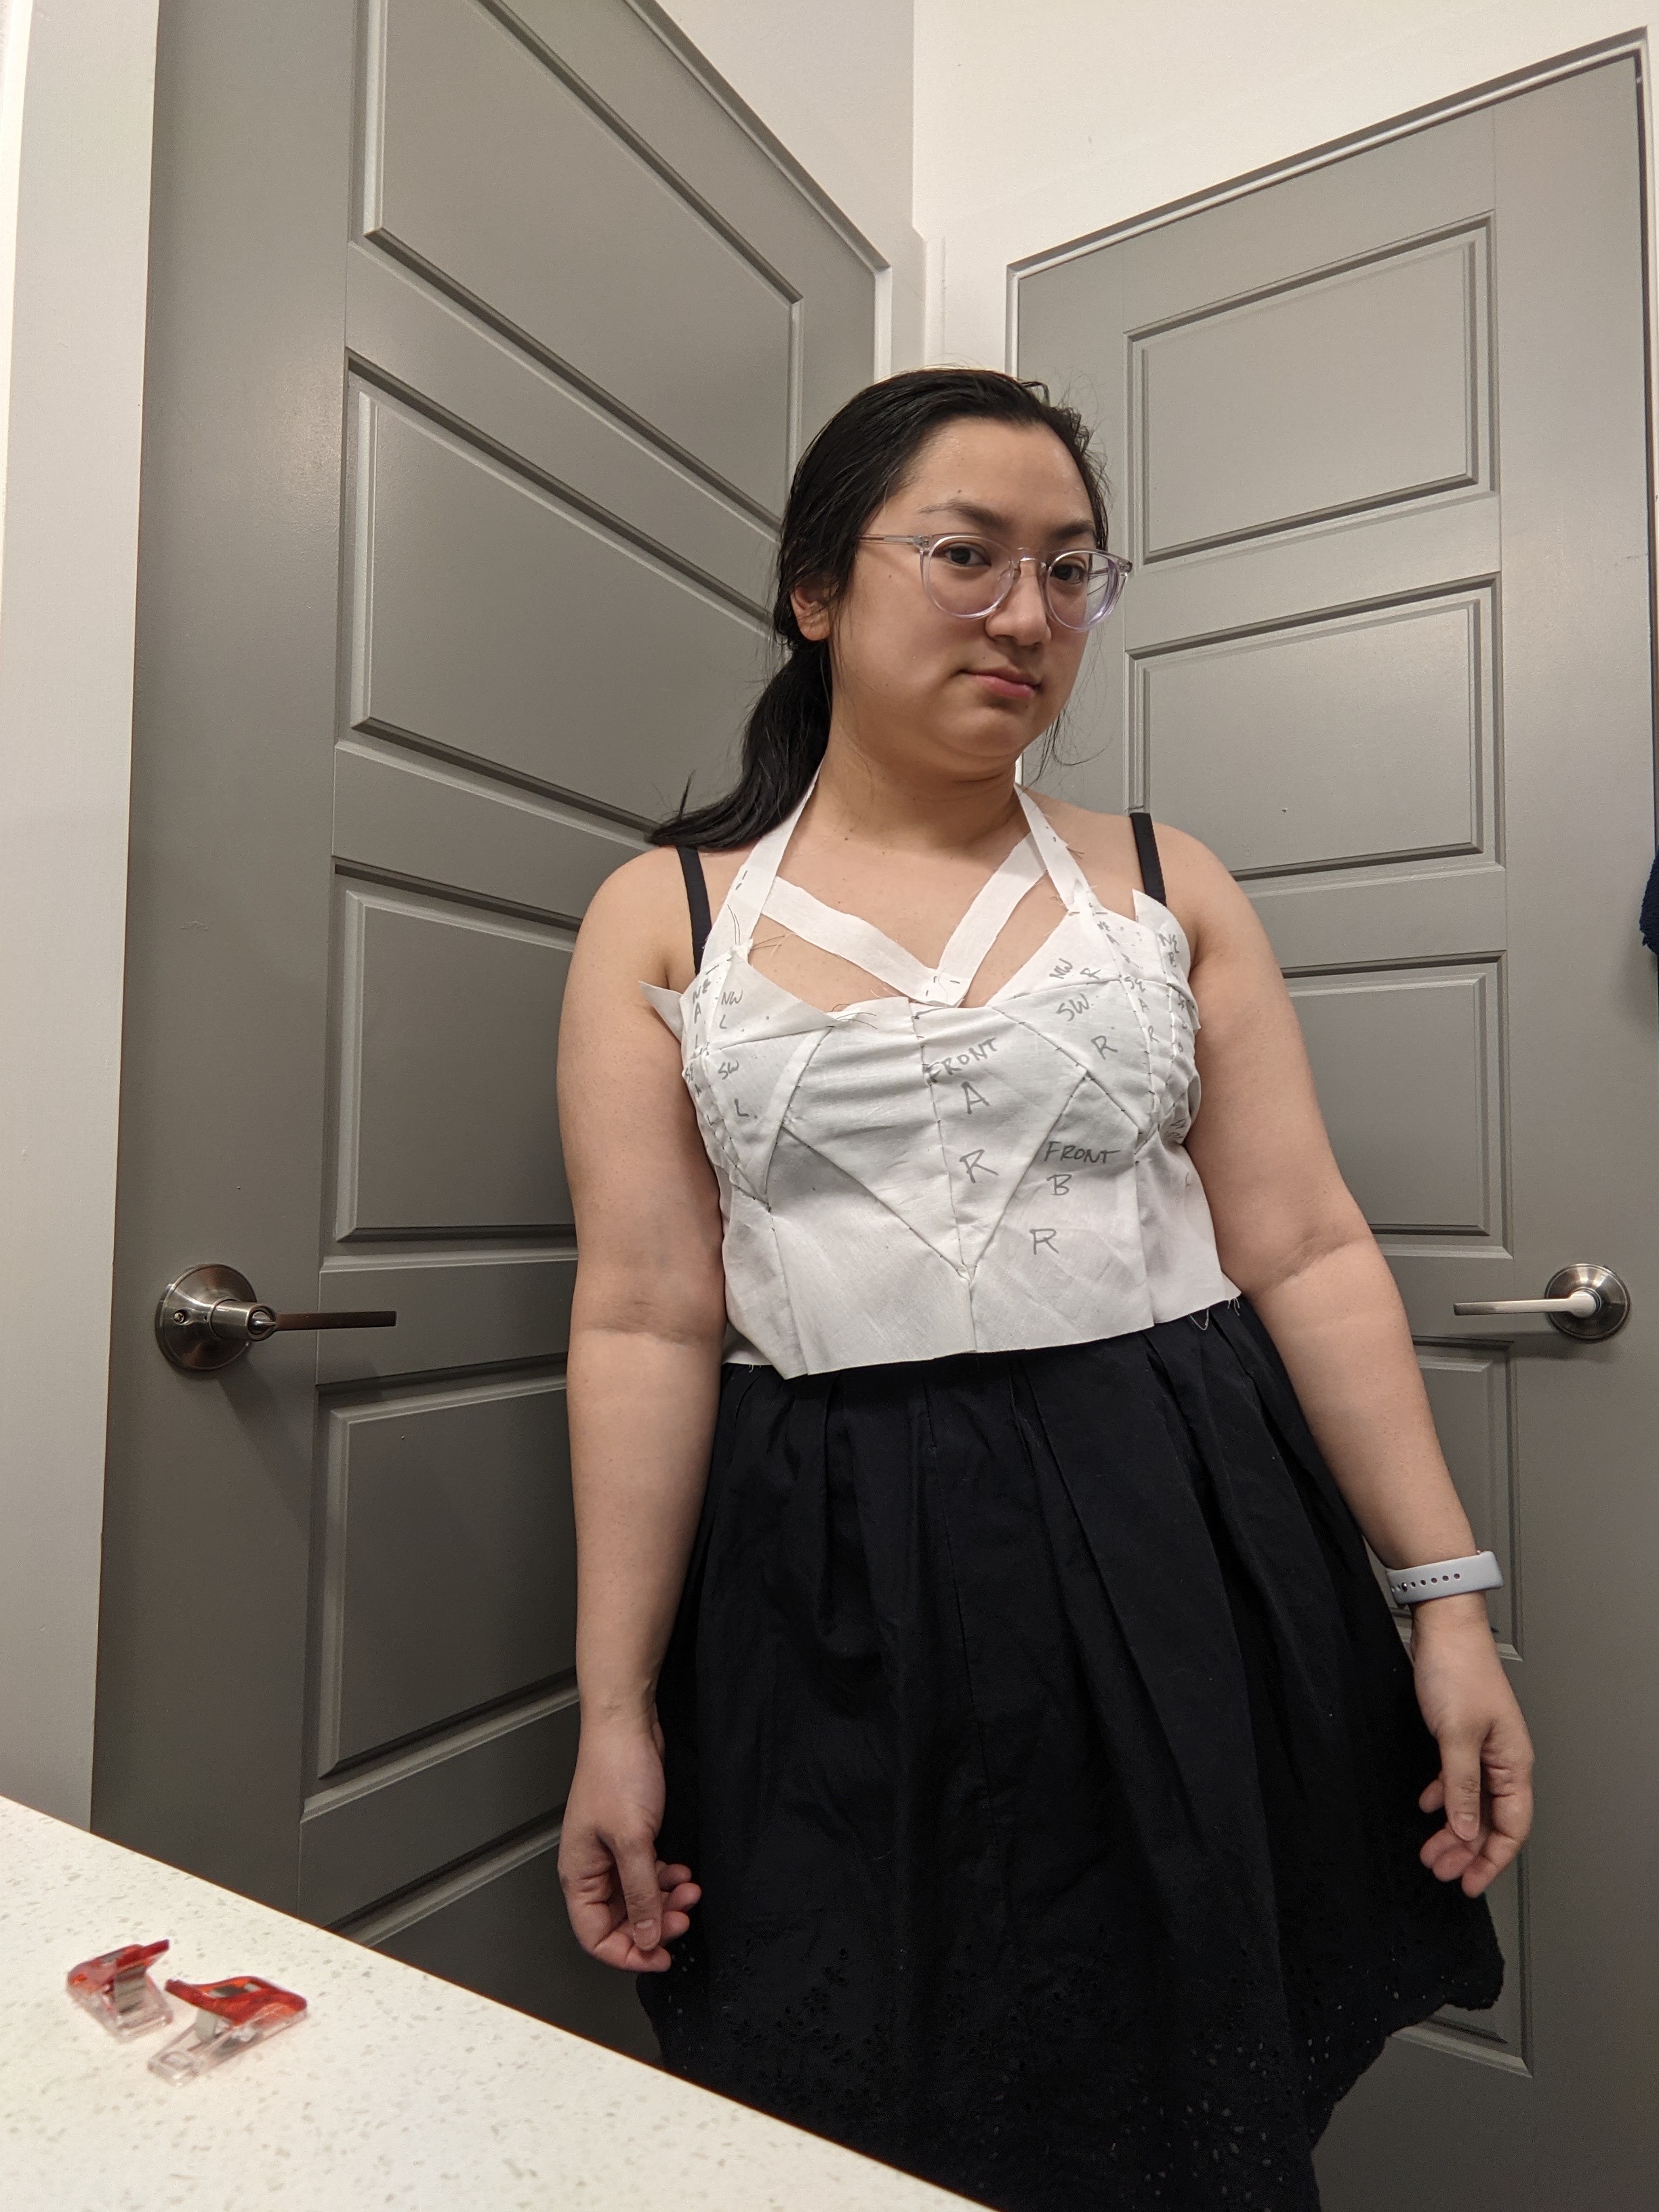
After Bodice Mockup v1 was done, I “tried” it on. Tried is in quotes because there was no way for me to zip myself in, given I didn’t install a zipper. I kinda held it in my place with my arms and got a few pictures that way so I could get a feel for fit. At this stage, I realized there were a lot of alterations to be made.
Bodice Mockup v2


I placed the version 1 mockup back onto the dress form, this time along with my bra. Trying it on previously made me realize that the diamond shapes weren’t really falling on top of the cups of the bra, so putting it on the dress form helped. I made notes on the old mockup with highlighter (which I had forgotten I had during v1) and used a new sheet of muslin fabric to draw out the pieces that really needed tweaking. Once happy, I cut them out and then transferred them all to paper for a v2 pattern.


I made the mockup using some scrap piping I had leftover from an old project. (One where I definitely did not know how to use piping at all. I followed this tutorial on how to install piping this time around.) I unfortunately didn’t have enough to use it on all the seams, but I had enough to at least get a good idea of how it would look. I did indeed like how it looked, so I would have to make my own piping for this bodice.
Pleased with this mockup, it was time to move onto the actual bodice, which would include piping, interfacing, and a lining layer. To pattern the lining layer, I combined all the front pieces into one big pattern piece. I did this by tracing latest pattern’s pieces onto some printer paper. I had to tape 3 pieces of printer paper together to get the right size. The other lining piece would be the back pieces which already had a pattern done.
Piping

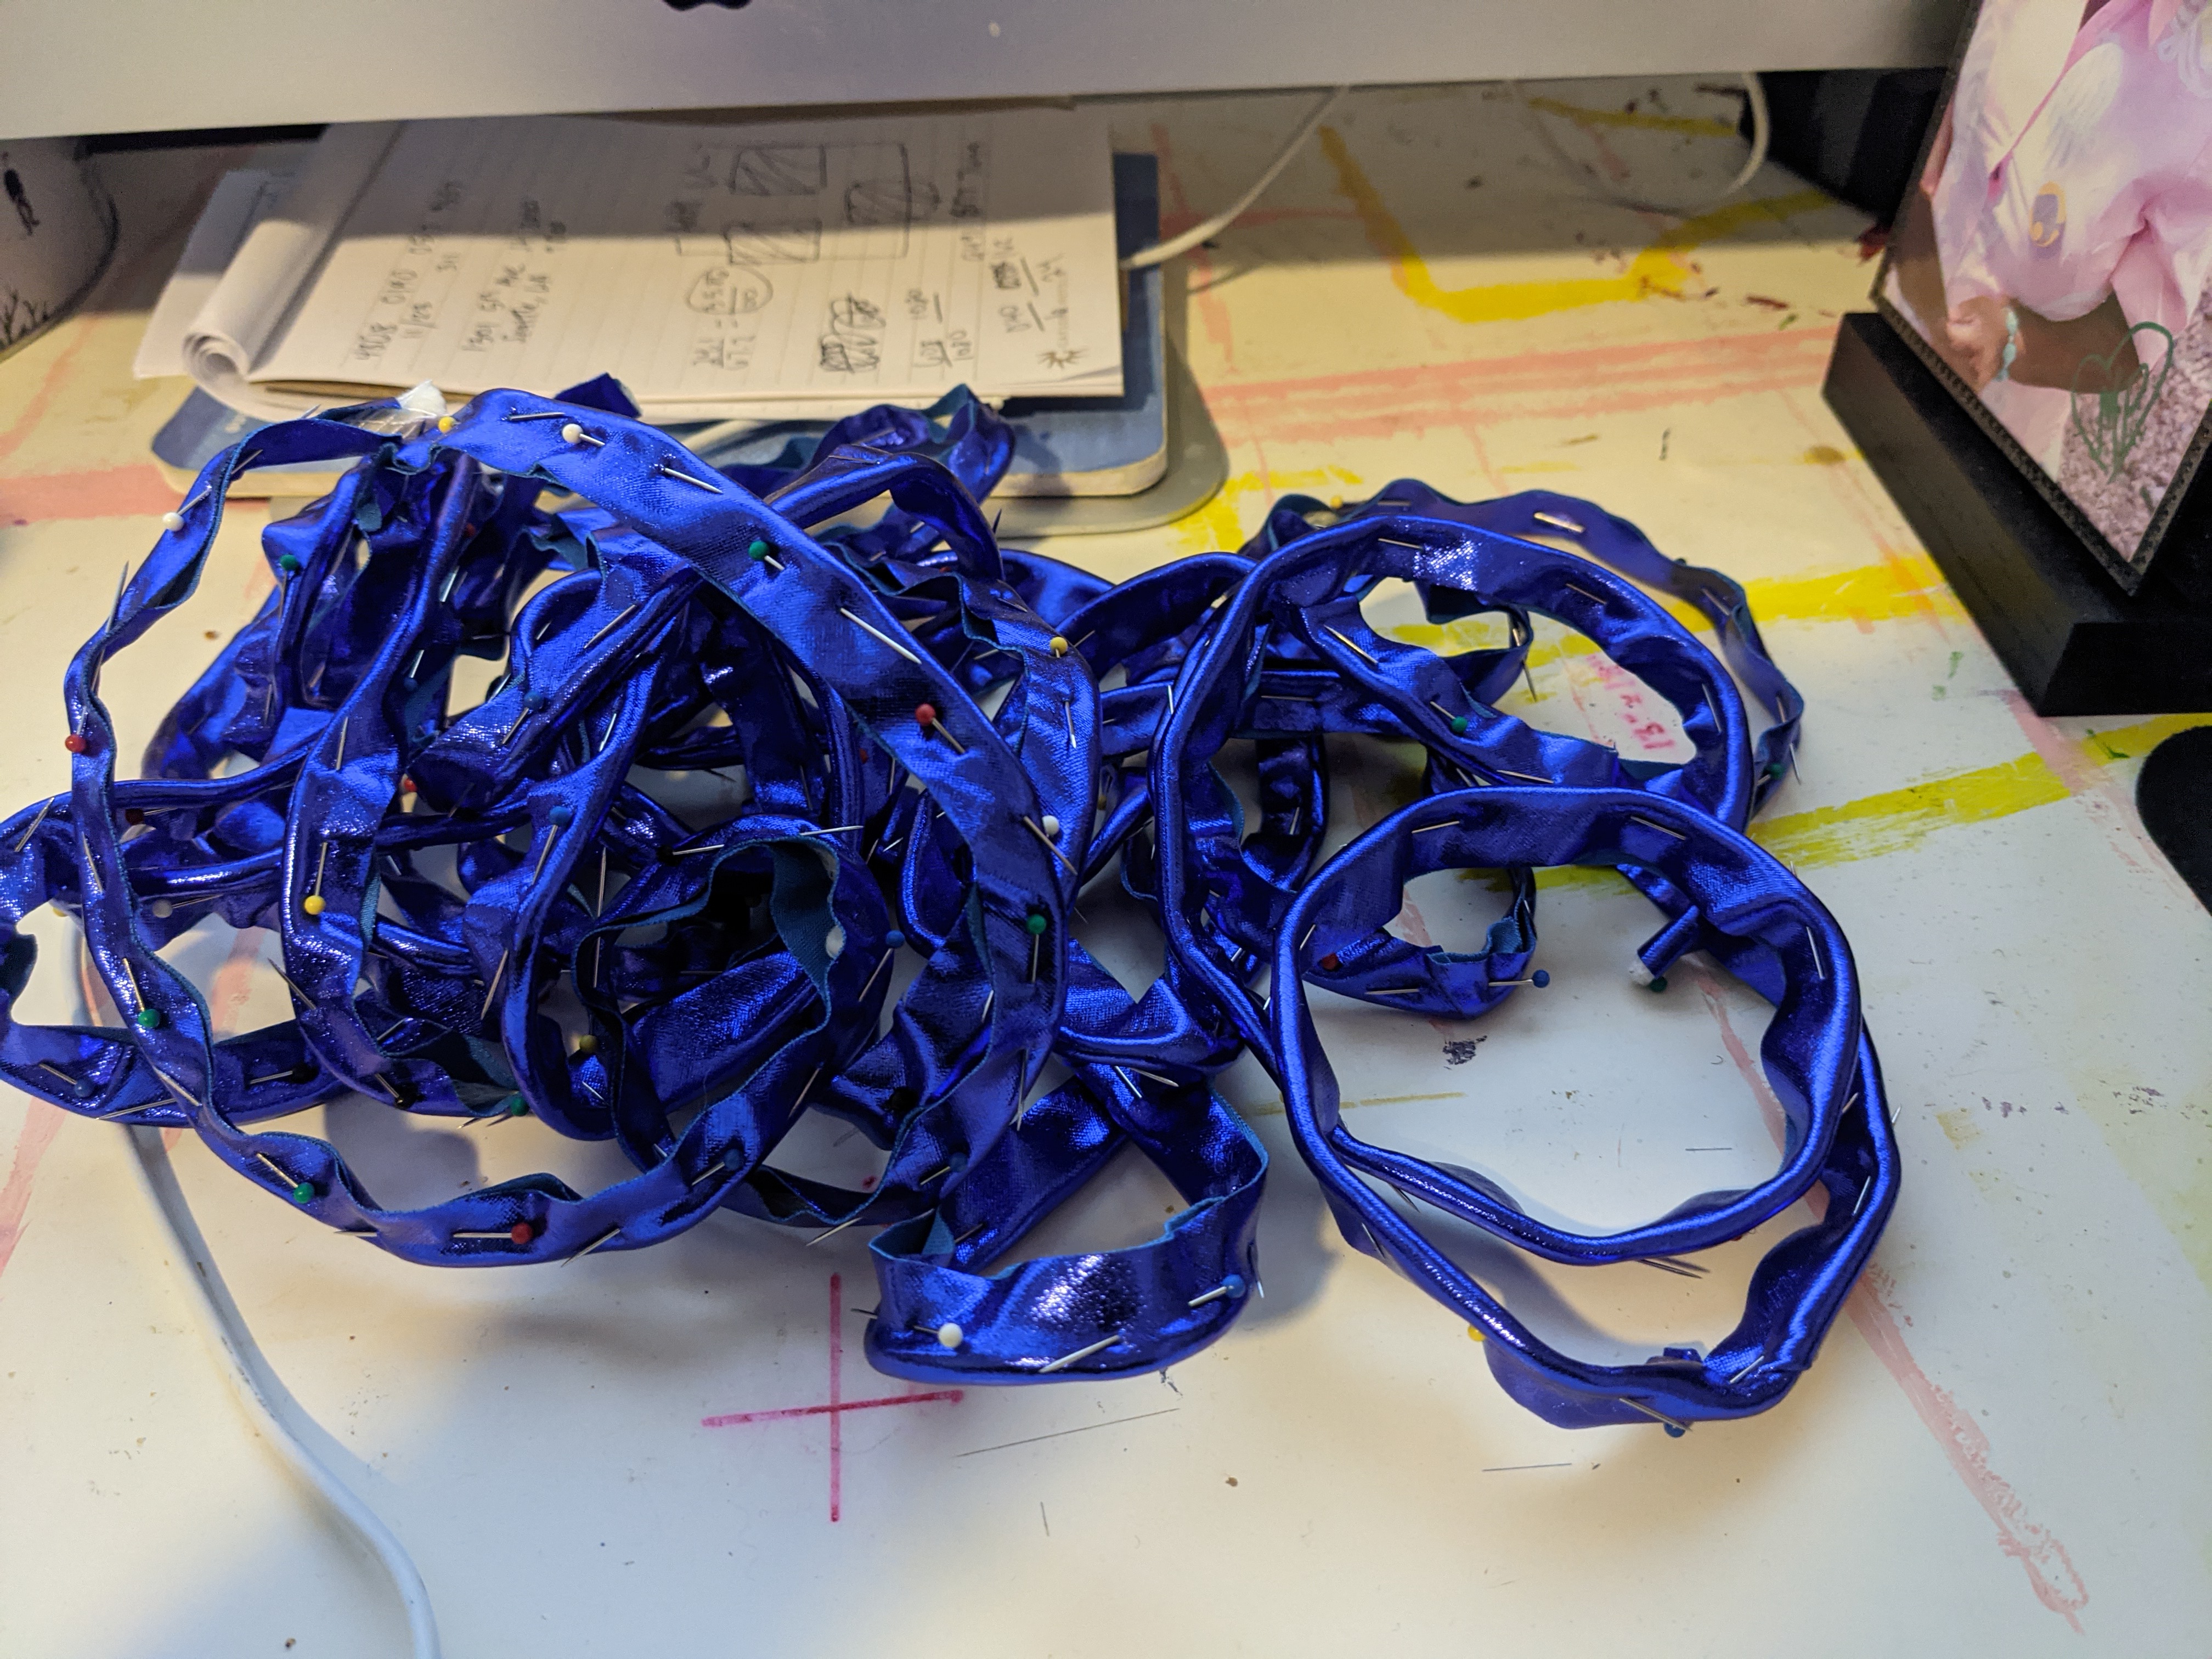
Before I could move onto the final bodice, I had to make piping using the same cobalt fabric used for the bodice. To do this, I followed this tutorial on how to make piping. I made my bias strips 1″ wide to accommodate cording that was 1/8″ wide. I cut out about 6 yards of it total, way more than necessary.
Once I received my cording in the mail, I started the tedious process of both pinning and sewing the cording into the bias tape. In total, the piping took 6 hours. Three of those hours were spent sewing the cording into the bias tape by hand because the stickiness of the fabric didn’t want to cooperate with my sewing machine. Even using tricks I saw online of using tissue paper or wax paper didn’t seem to fix the issue, so I resorted to hand stitching while watching TV.
Final Bodice
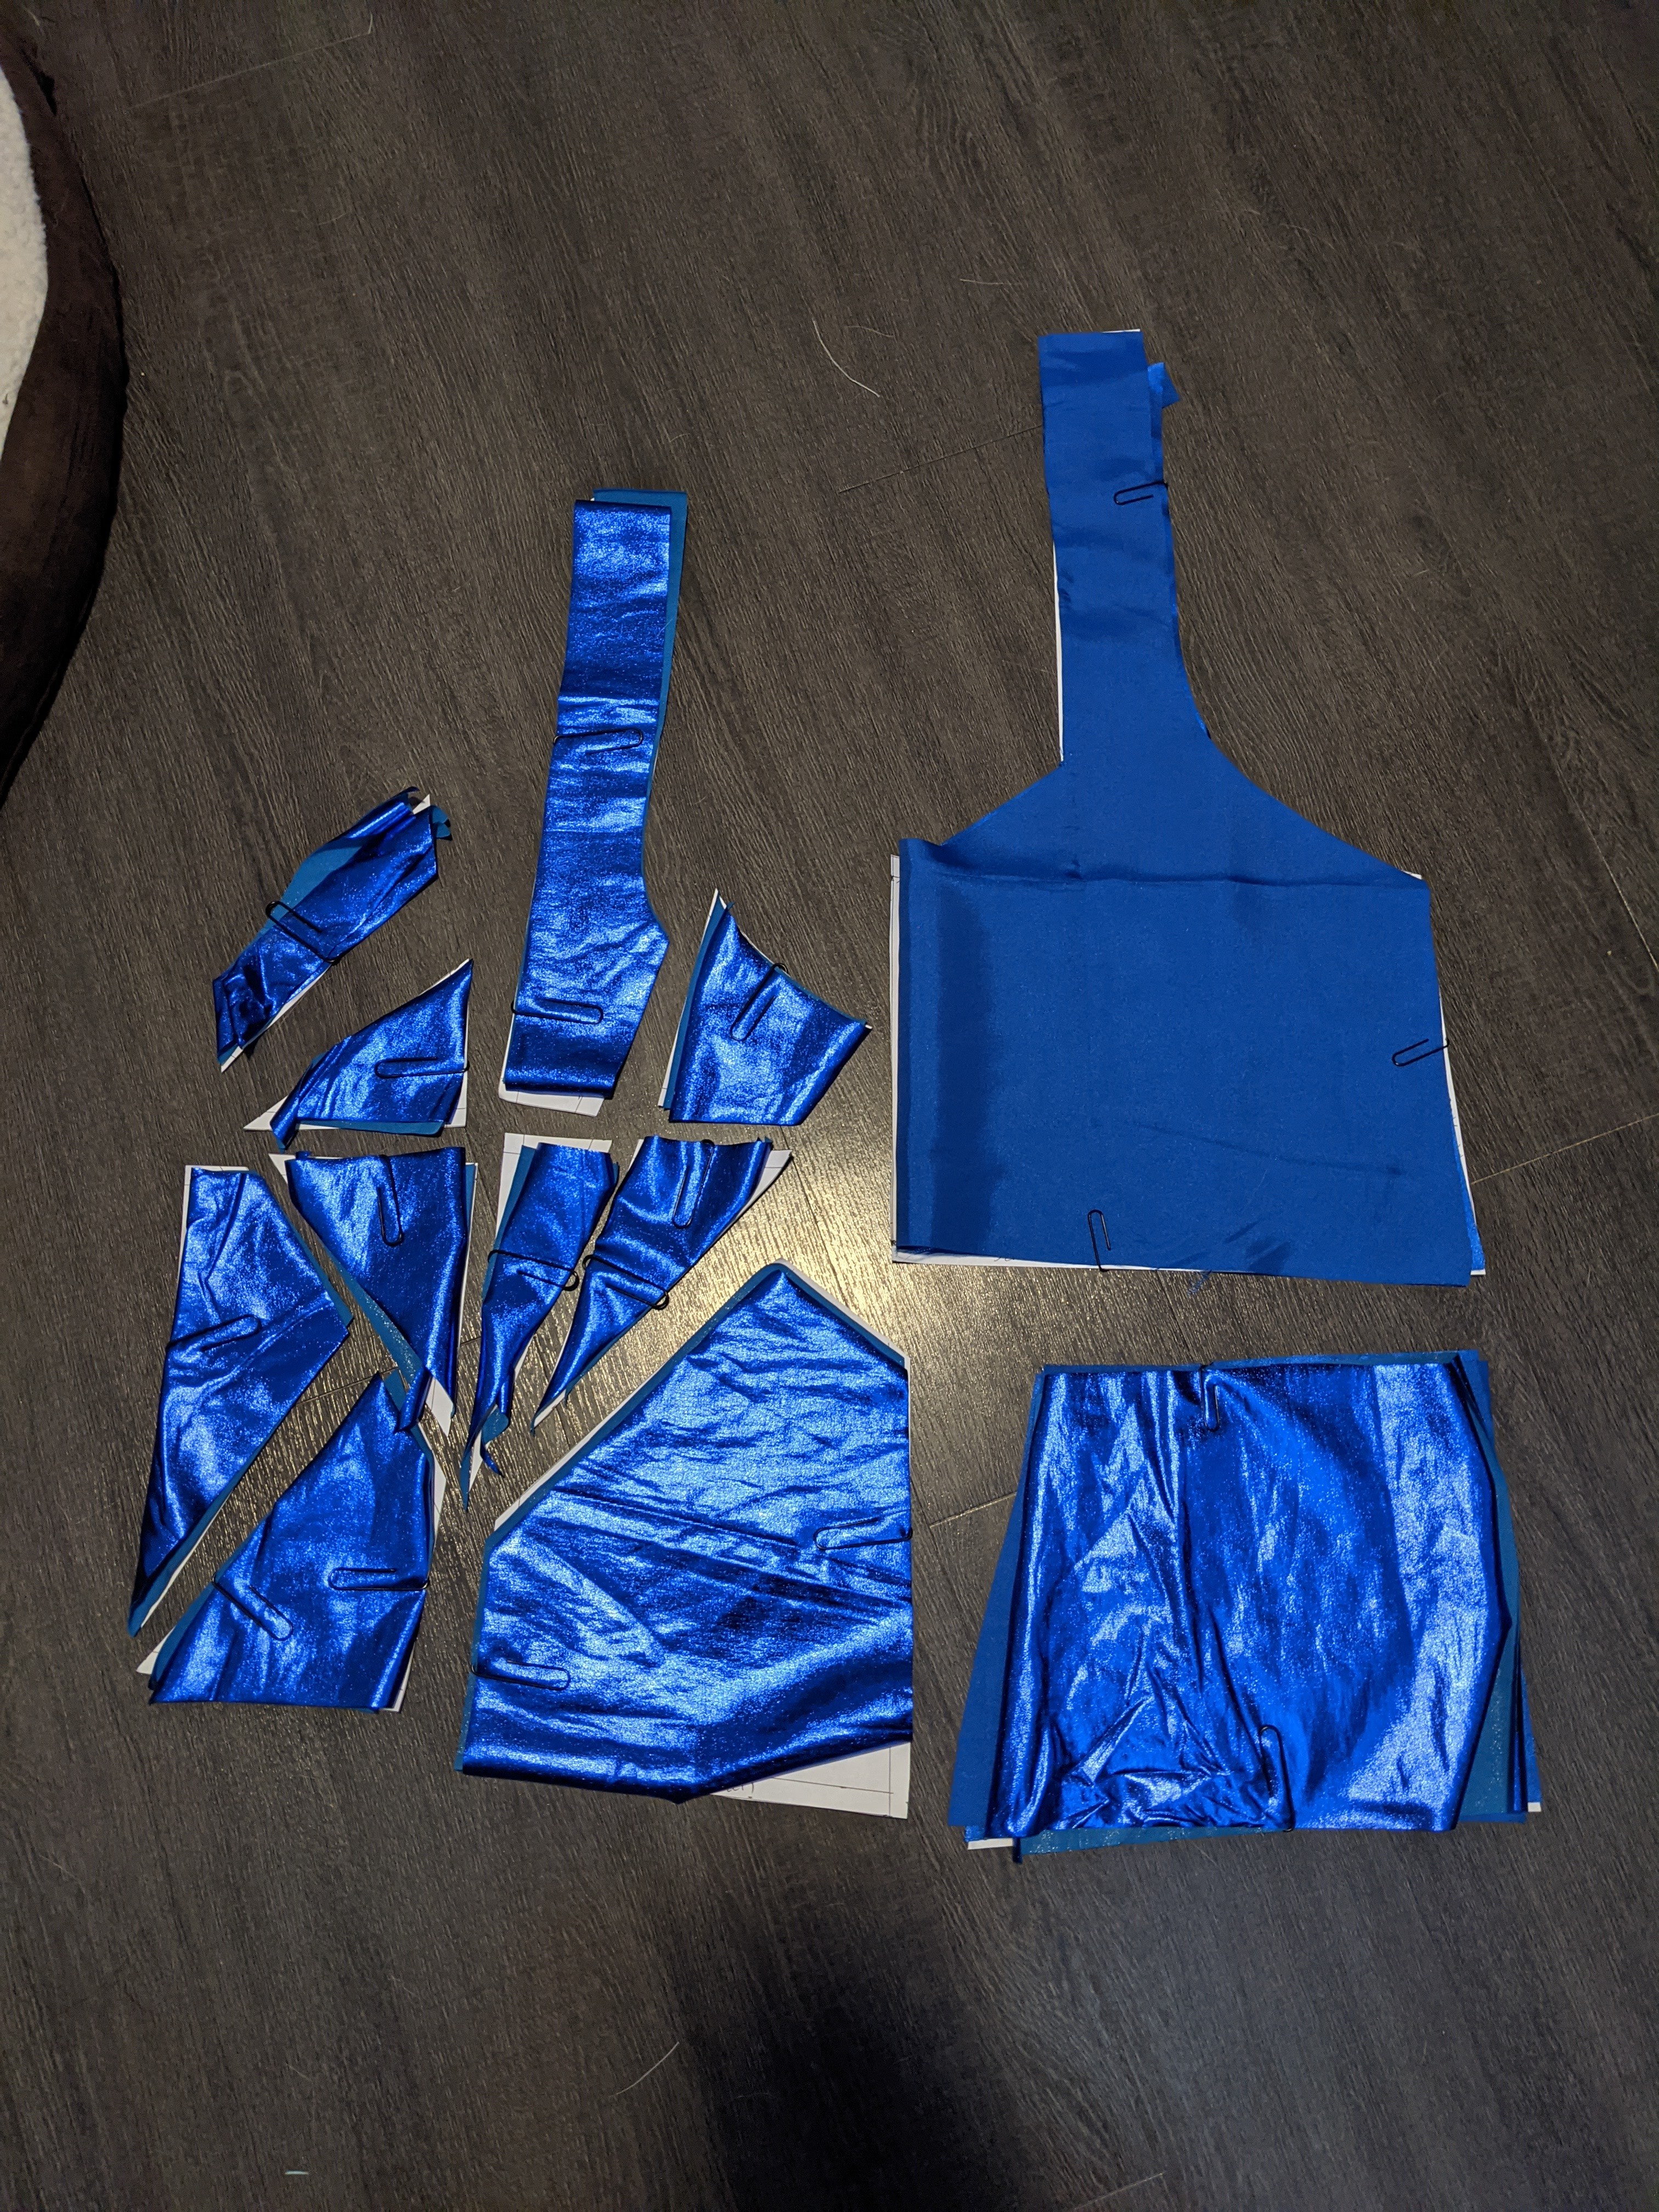
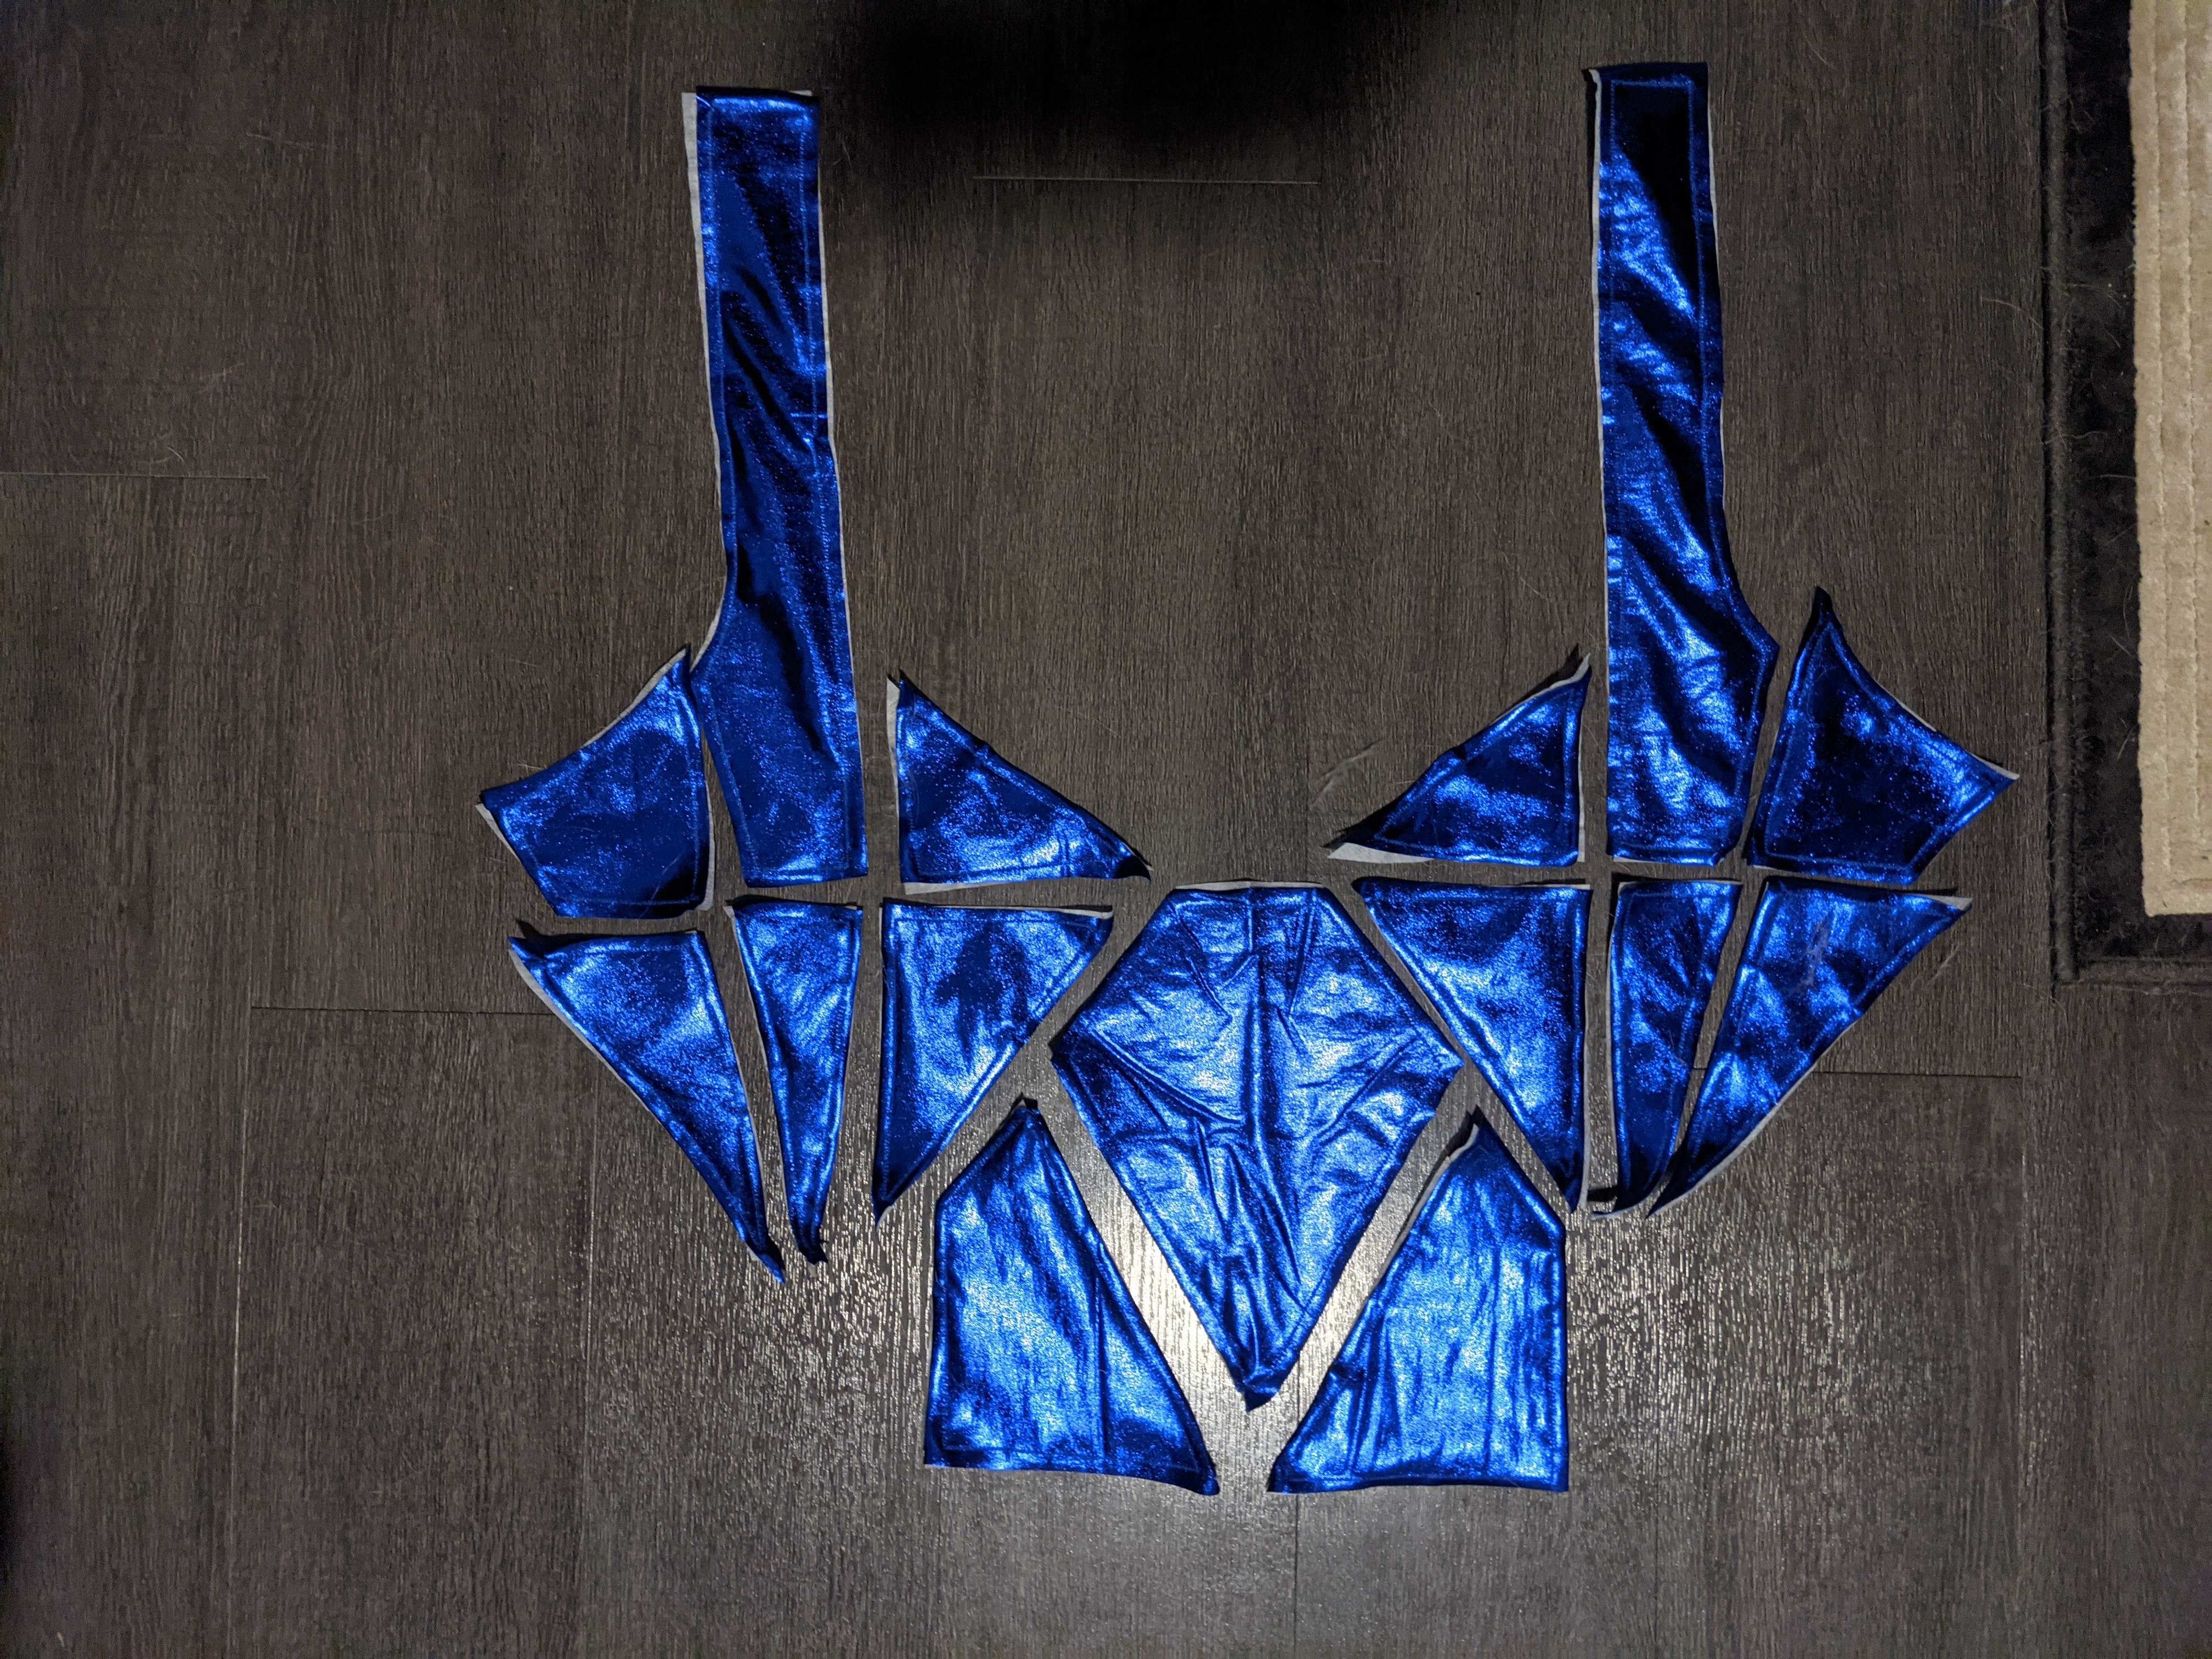
I carefully cut out all the bodice pieces. This meant 21 fashion fabric pieces, 3 lining pieces, and 20 interfacing pieces. The interfacing I used was the kind you stitch in, so I had to do that for all the pieces before I could finally start constructing the bodice together. Once the interfacing was attached to all the pieces, I started constructing the bodice from the front middle outward. This took twice as long as it would’ve normally if I hadn’t used piping because adding the piping between each seam meant I had to stitch along a seam not once but twice to finish it. It was all very worth it in the end because I love how clean the piping looks and it really adds a nice dimension to the bodice and keeps it from looking flat.
One tip to anyone who is using fabric that is kind of on the “sticky” side that I learned from another cosplayer: put tape on the underside of your sewing machine’s presser foot to help the fabric run smoothly through your machine. I was having issues with the blue cobalt fabric not wanting to move and adding this tape helped. I also used piece of printer paper between the fabric and the feed dogs to help. I also heard that having a walking foot helps with that, but I don’t have one of those (yet).


In certain areas of the bodice, I ended up stitching by hand. Some areas were just super thick (between the fashion fabric, interfacing, and piping) so I did them by hand because I didn’t want to risk breaking my sewing machine needle. I tried to also mitigate this by cutting the piping cording short in the seam allowances, but it only helped so much.

The last bit of piping that was needed was for the neckline/shoulders. Once that was added, I attached the lining to the whole thing, leaving the bottom hem unfinished. I then made and added the little V-strap that goes along the neckline. I did this by cutting two V-shaped strips, attaching one to interfacing, stitching the two pieces right sides together, then turning it right-side out. I laddered stitched the open ends to finish the raw edges, then ladder stitched them to the halter top straps. After this, I realized I wanted to topstitch them, so I did that afterwards. (If I had known I was going to do that, I would’ve topstitched it before attaching it to the bodice.) I added two hook and eyes to the halter top so that it can easily connect in the back.
Finishing the dress
Once the two skirts were combined, I then stitched them to the final dress bodice. I finished the seam with an overlocking stitch on my sewing machine (mimicking a serger) and cut the excess fabric in the seam allowance as close to the overlock stitch as I could get without cutting the thread.


The rest of the dress consisted of installing the invisible zipper, a hook and eye at the top of the zipper, and gluing on 5 belt loops along the waist of the dress so that the belt stays exactly where it needs to.
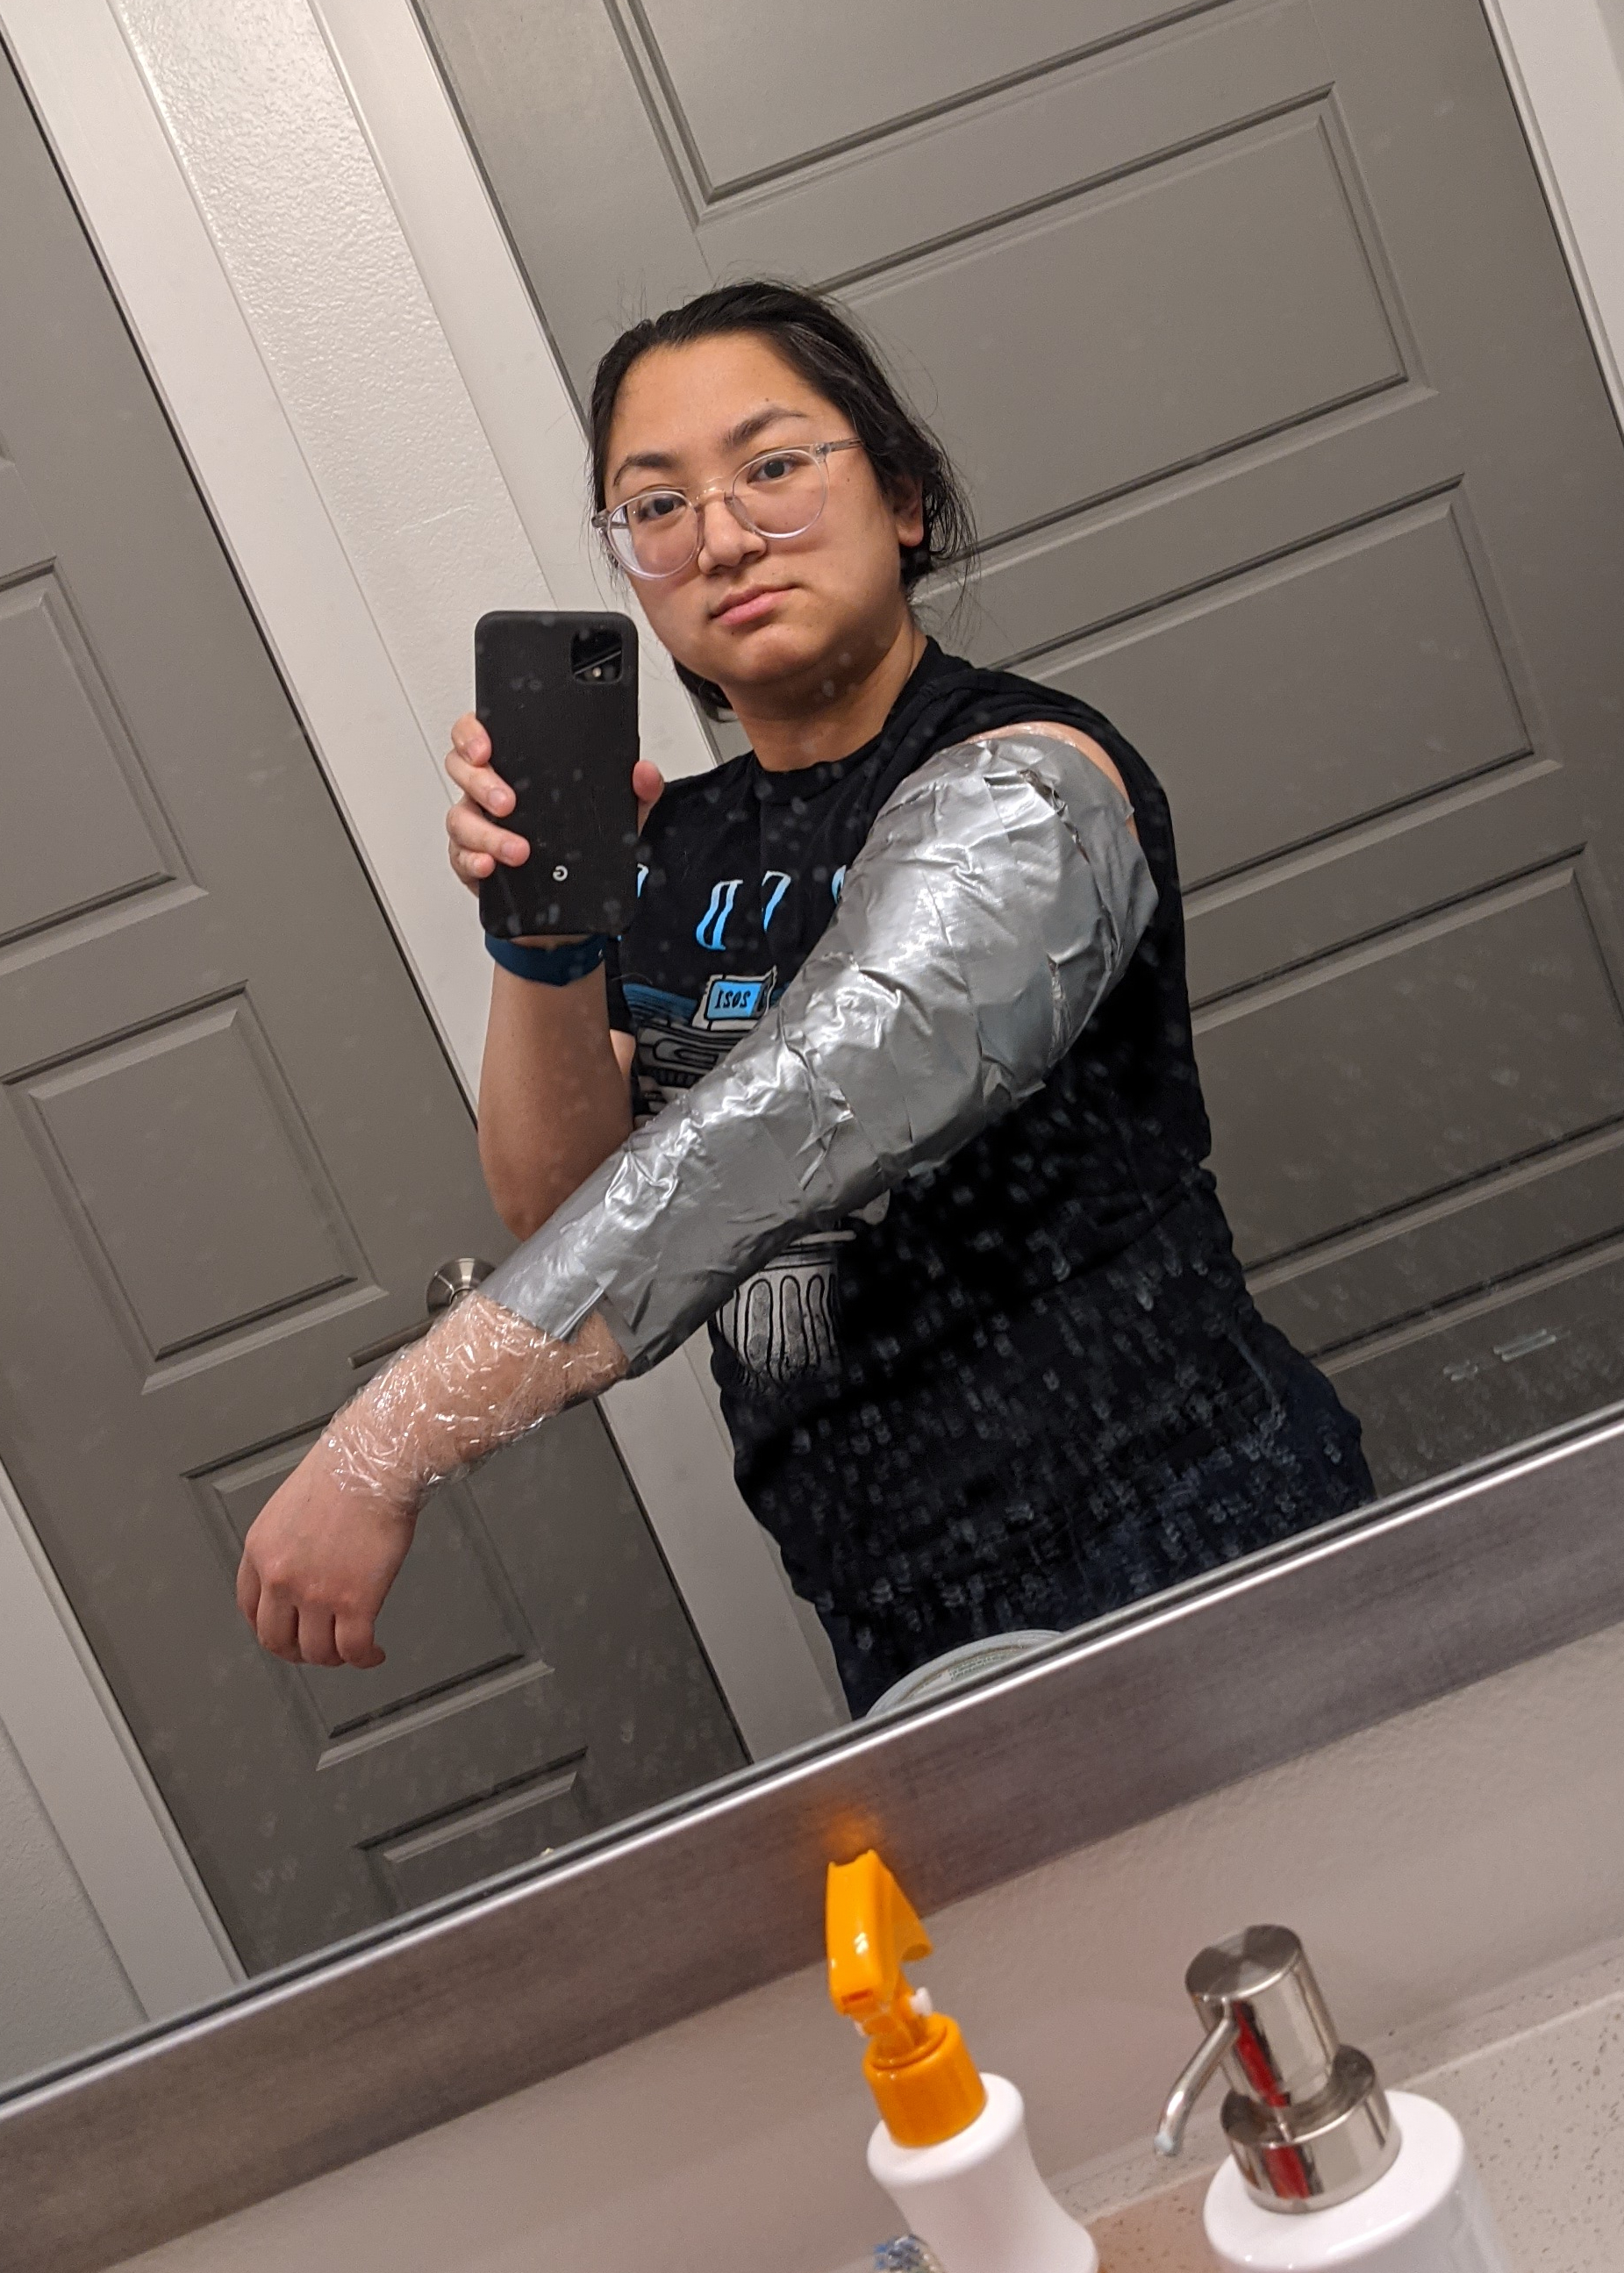
One-sleeve undershirt
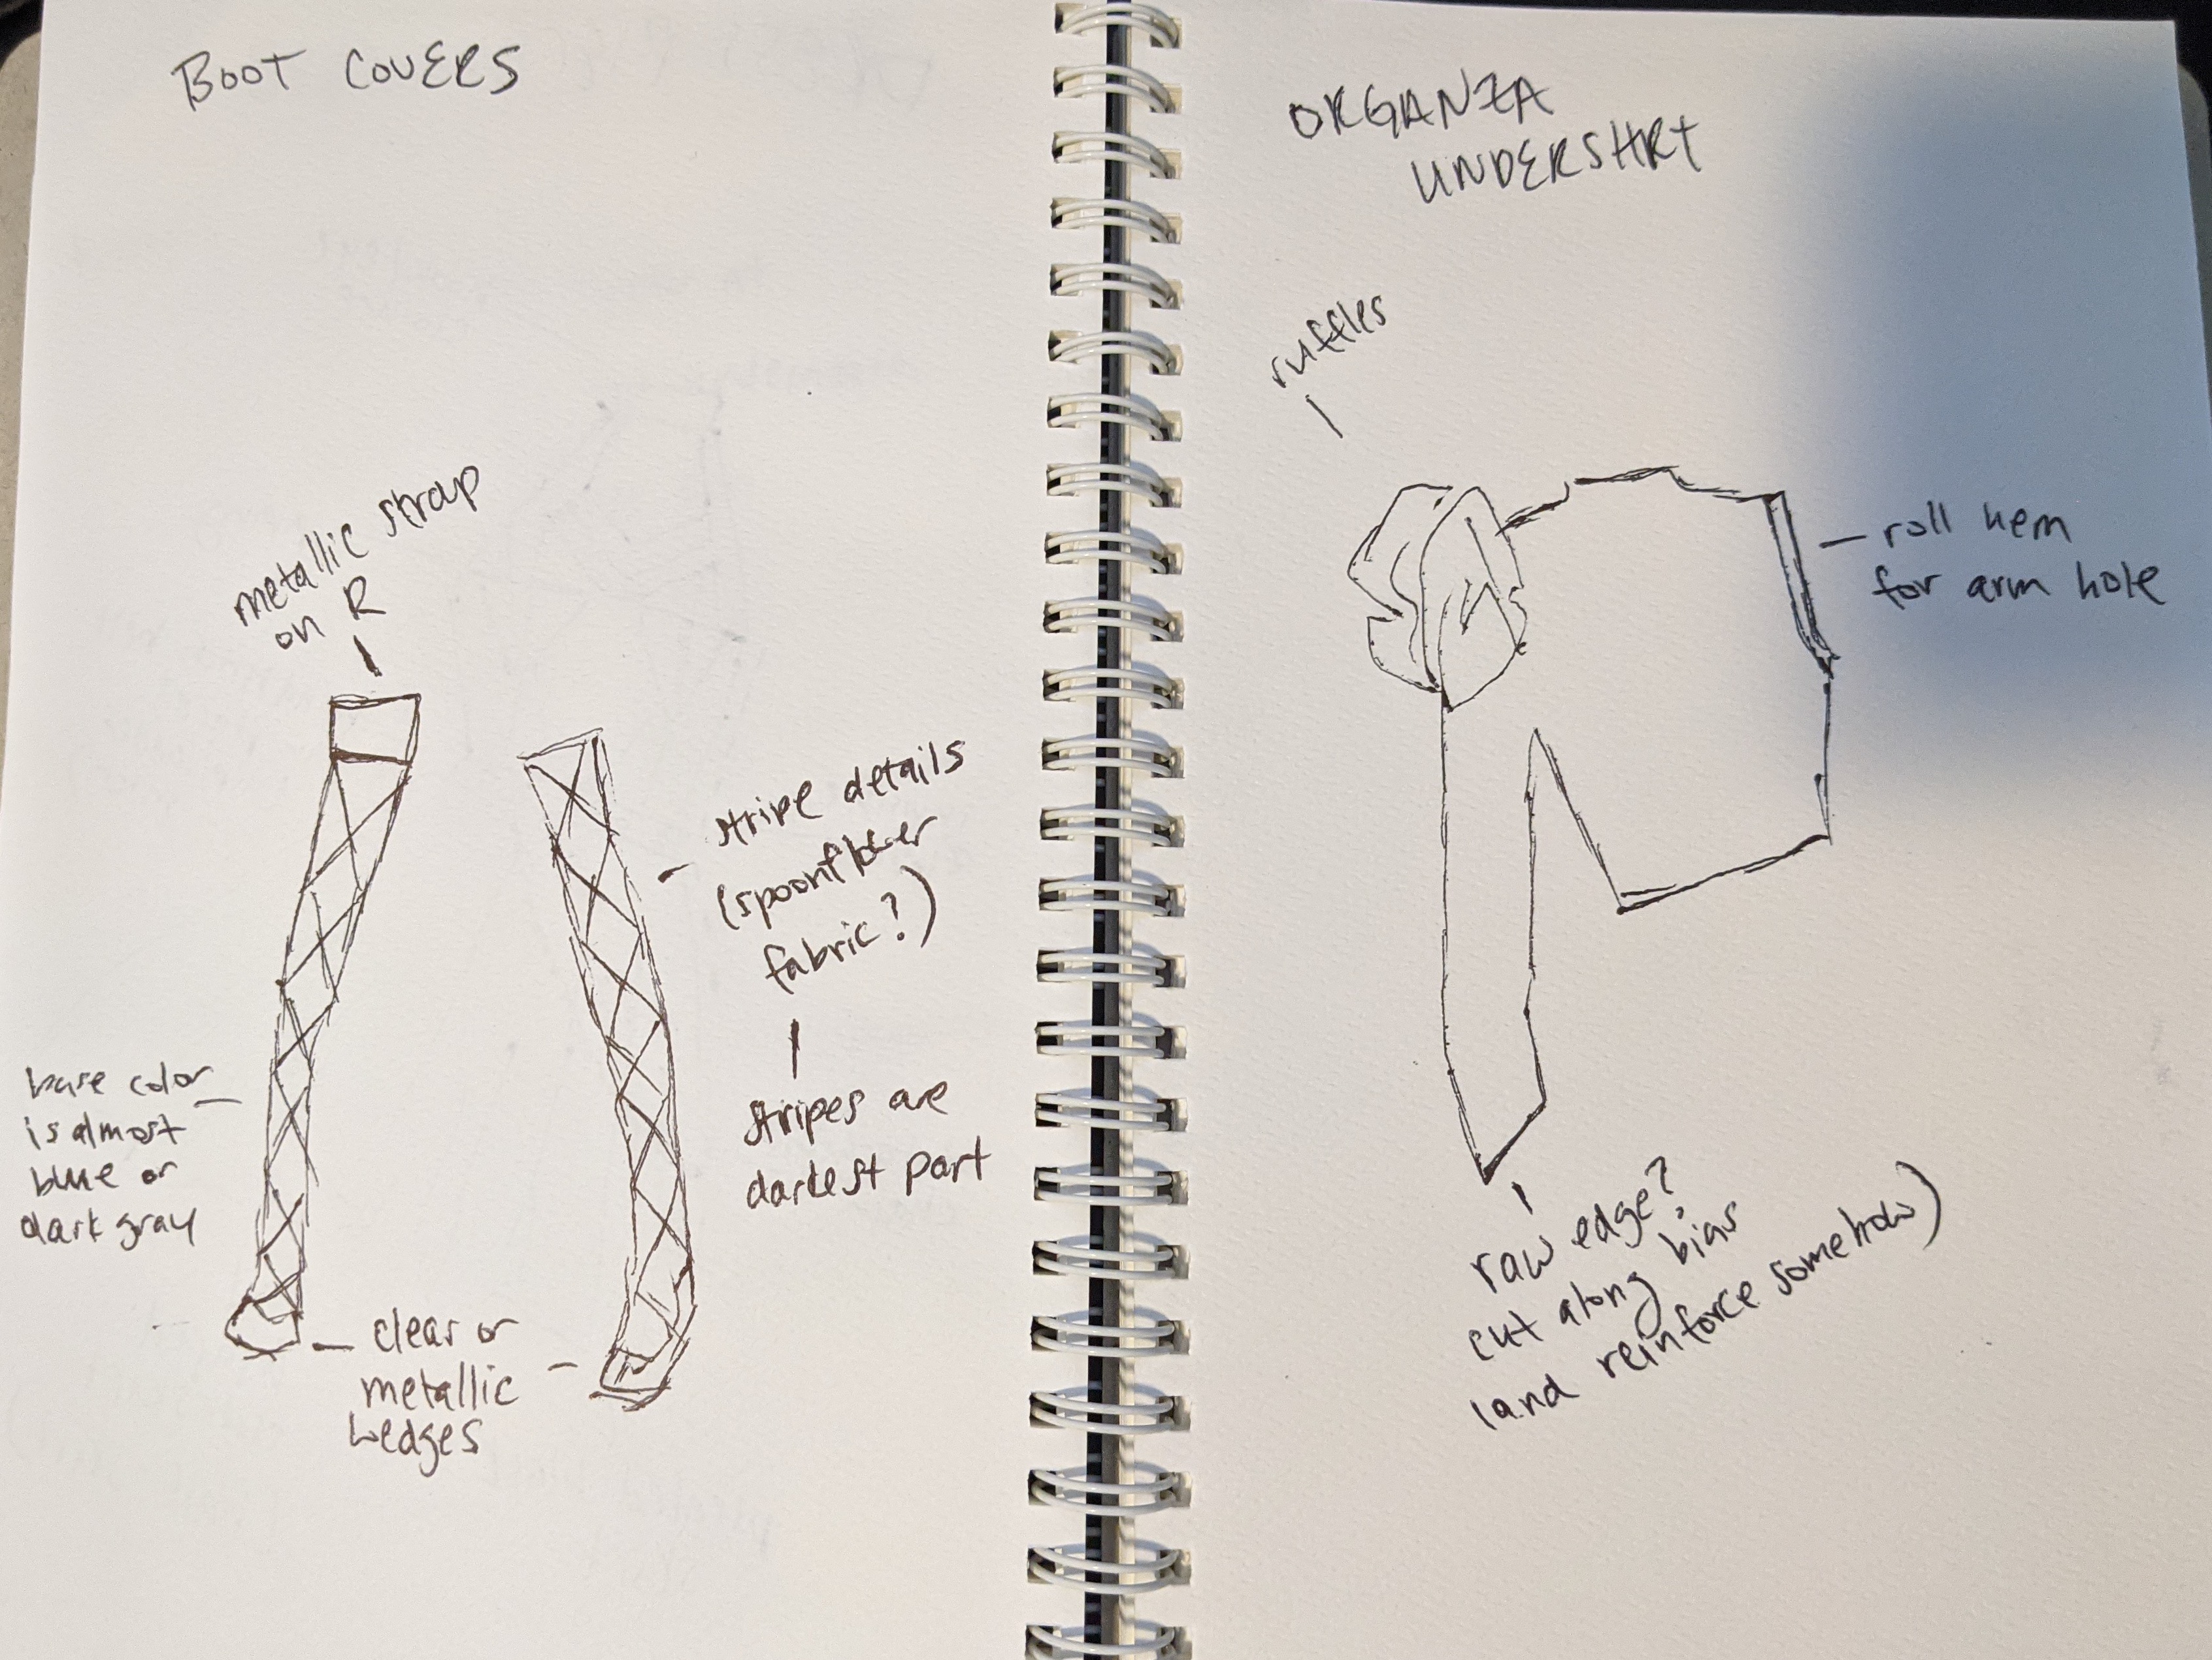


To make the undershirt, I first patterned the front and back pieces by draping them on my dress form. Once I was happy with both, I patterned the right sleeve. This involved covering my right arm in saran wrap and then duct tape. It proved pretty difficult around the shoulder. I drew a line down the arm around in the inside for the seam (poorly, since I am not left-handed) and then had my husband cut the duct tape off of me. That part proved difficult and very uncomfortable because the scissors were right up against my skin as he was cutting. I actually got very minor cuts along my arm in some spots, just because the tip of the scissors was so pointy. If I were to do this again, I would probably wear a thin long-sleeve shirt before adding the saran wrap and duct tape to avoid getting cut.
After transferring the sleeve pattern to paper, I made a quick mockup using blue organza fabric I already had. I was happy with the fit of it and moved onto the fashion fabric, an organza in “blue radiance” I had found at Joann’s. (That was more teal than blue, which I liked.) After attaching the front and back pieces, but before attaching the sleeve, I tried it on. Turns out I had not taken into account the level of stretch (or in this case lack thereof) of the fashion fabric. The teal fabric had zero give, while the mockup fabric had a little bit. This resulted in the top being very tight. I went back to my pattern, added about an inch all around, and tried again. This resulted in a much better fit and much easier top to put on.
To make sure the seams looked nice, I used french seams for all the seam work in the shirt. I liked how they turned out because they add the little line of teal where the fabric is folded over itself. For the hems, I just folded the edges over twice and stitched them down to encase the raw edge. For the bottom hem, I added a little teal ribbon to it as embellishment.

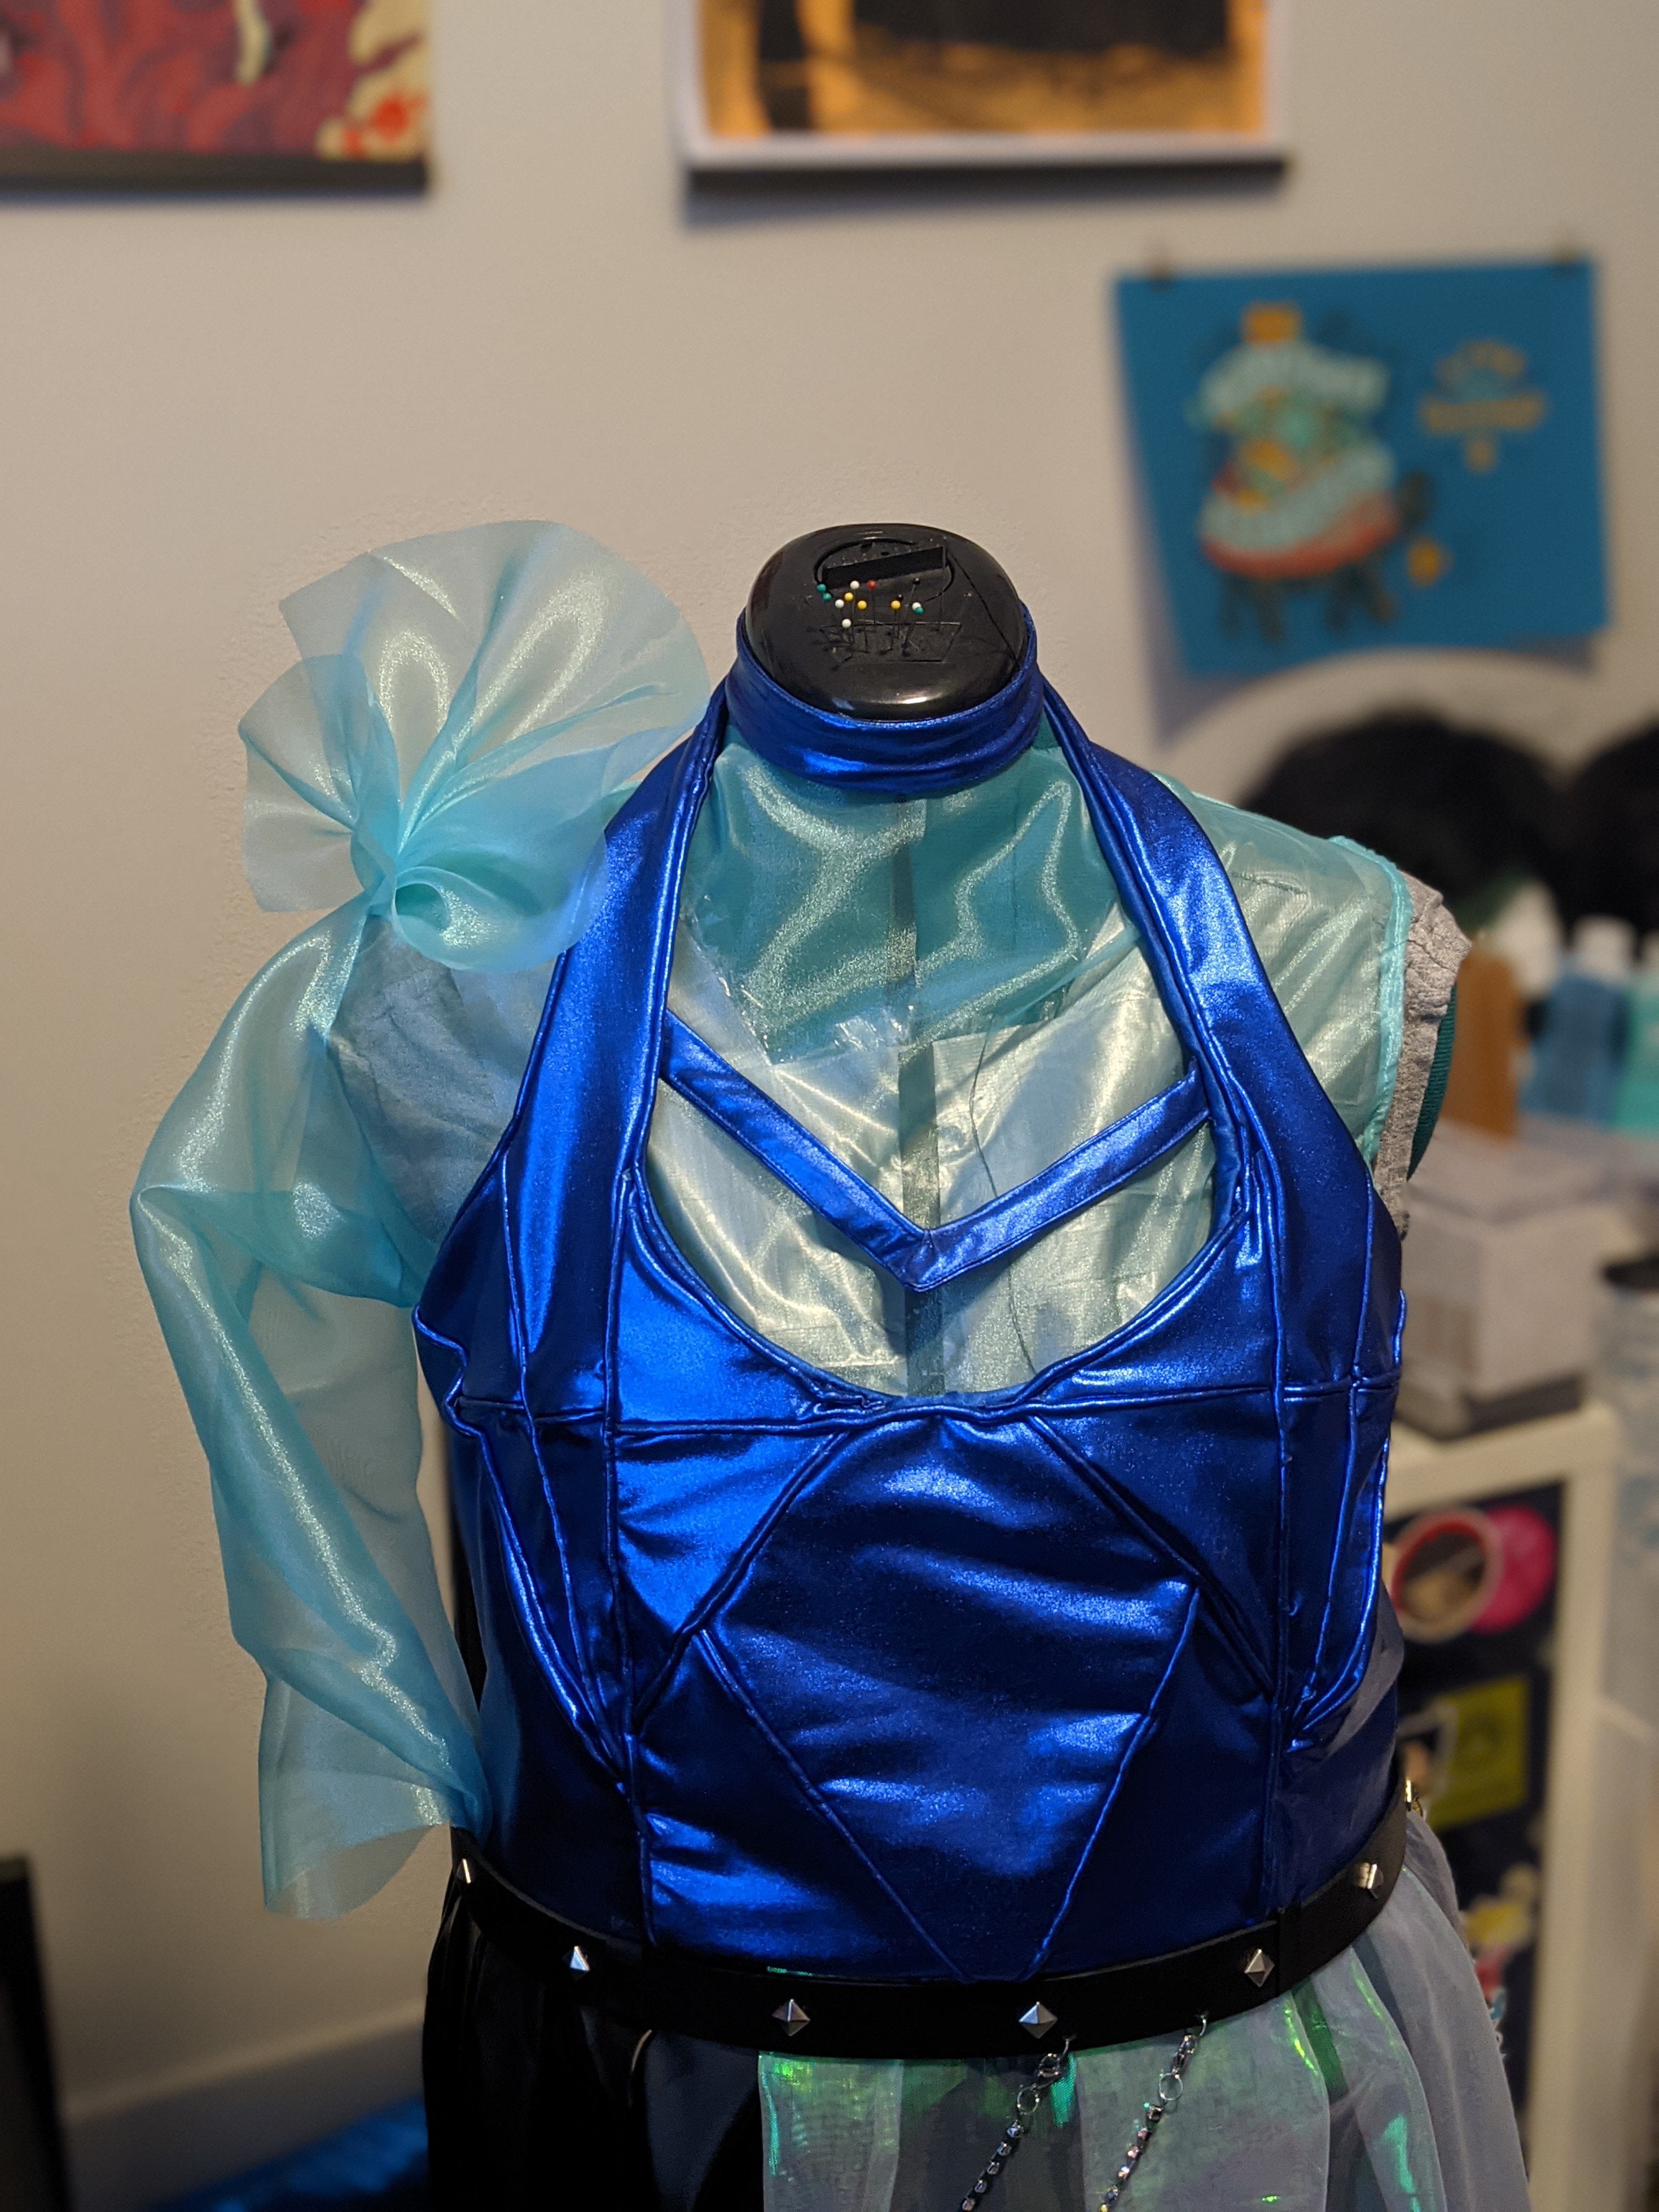
Before I could attach the sleeve, I had to make the ruffles. This involved cutting two strips of organza along the bias. It was at this point that I realized I should’ve cut the other shirt pieces along the bias too: that would’ve solved the issue with fitting my first time using the fashion fabric. But, considering I was already close to finishing this one and it already fit fine, I decided there was no need to redo it.
I cut two strips of fabric along the bias for the ruffles, somewhere around 12″x3″ for one and 10″x2″ for the other. (I didn’t measure at all, just eyeballed it.) Then, I freehand folded one over itself a few times to create the ruffles. When I was happy with the shape, I clipped it in place then stitched it down. I did the same thing for the second piece. Then, I stitch the two together. Once they were made, I attached them to the shoulder of the top. Once that was in place, I was able to attach the sleeve.
The back of the top consists of a small slit (to make it easier to put on) as well as a small button, which I added by hand. I used teal ribbon to finish the raw edges of the slit as well as the loop for the button.
Belt with chain
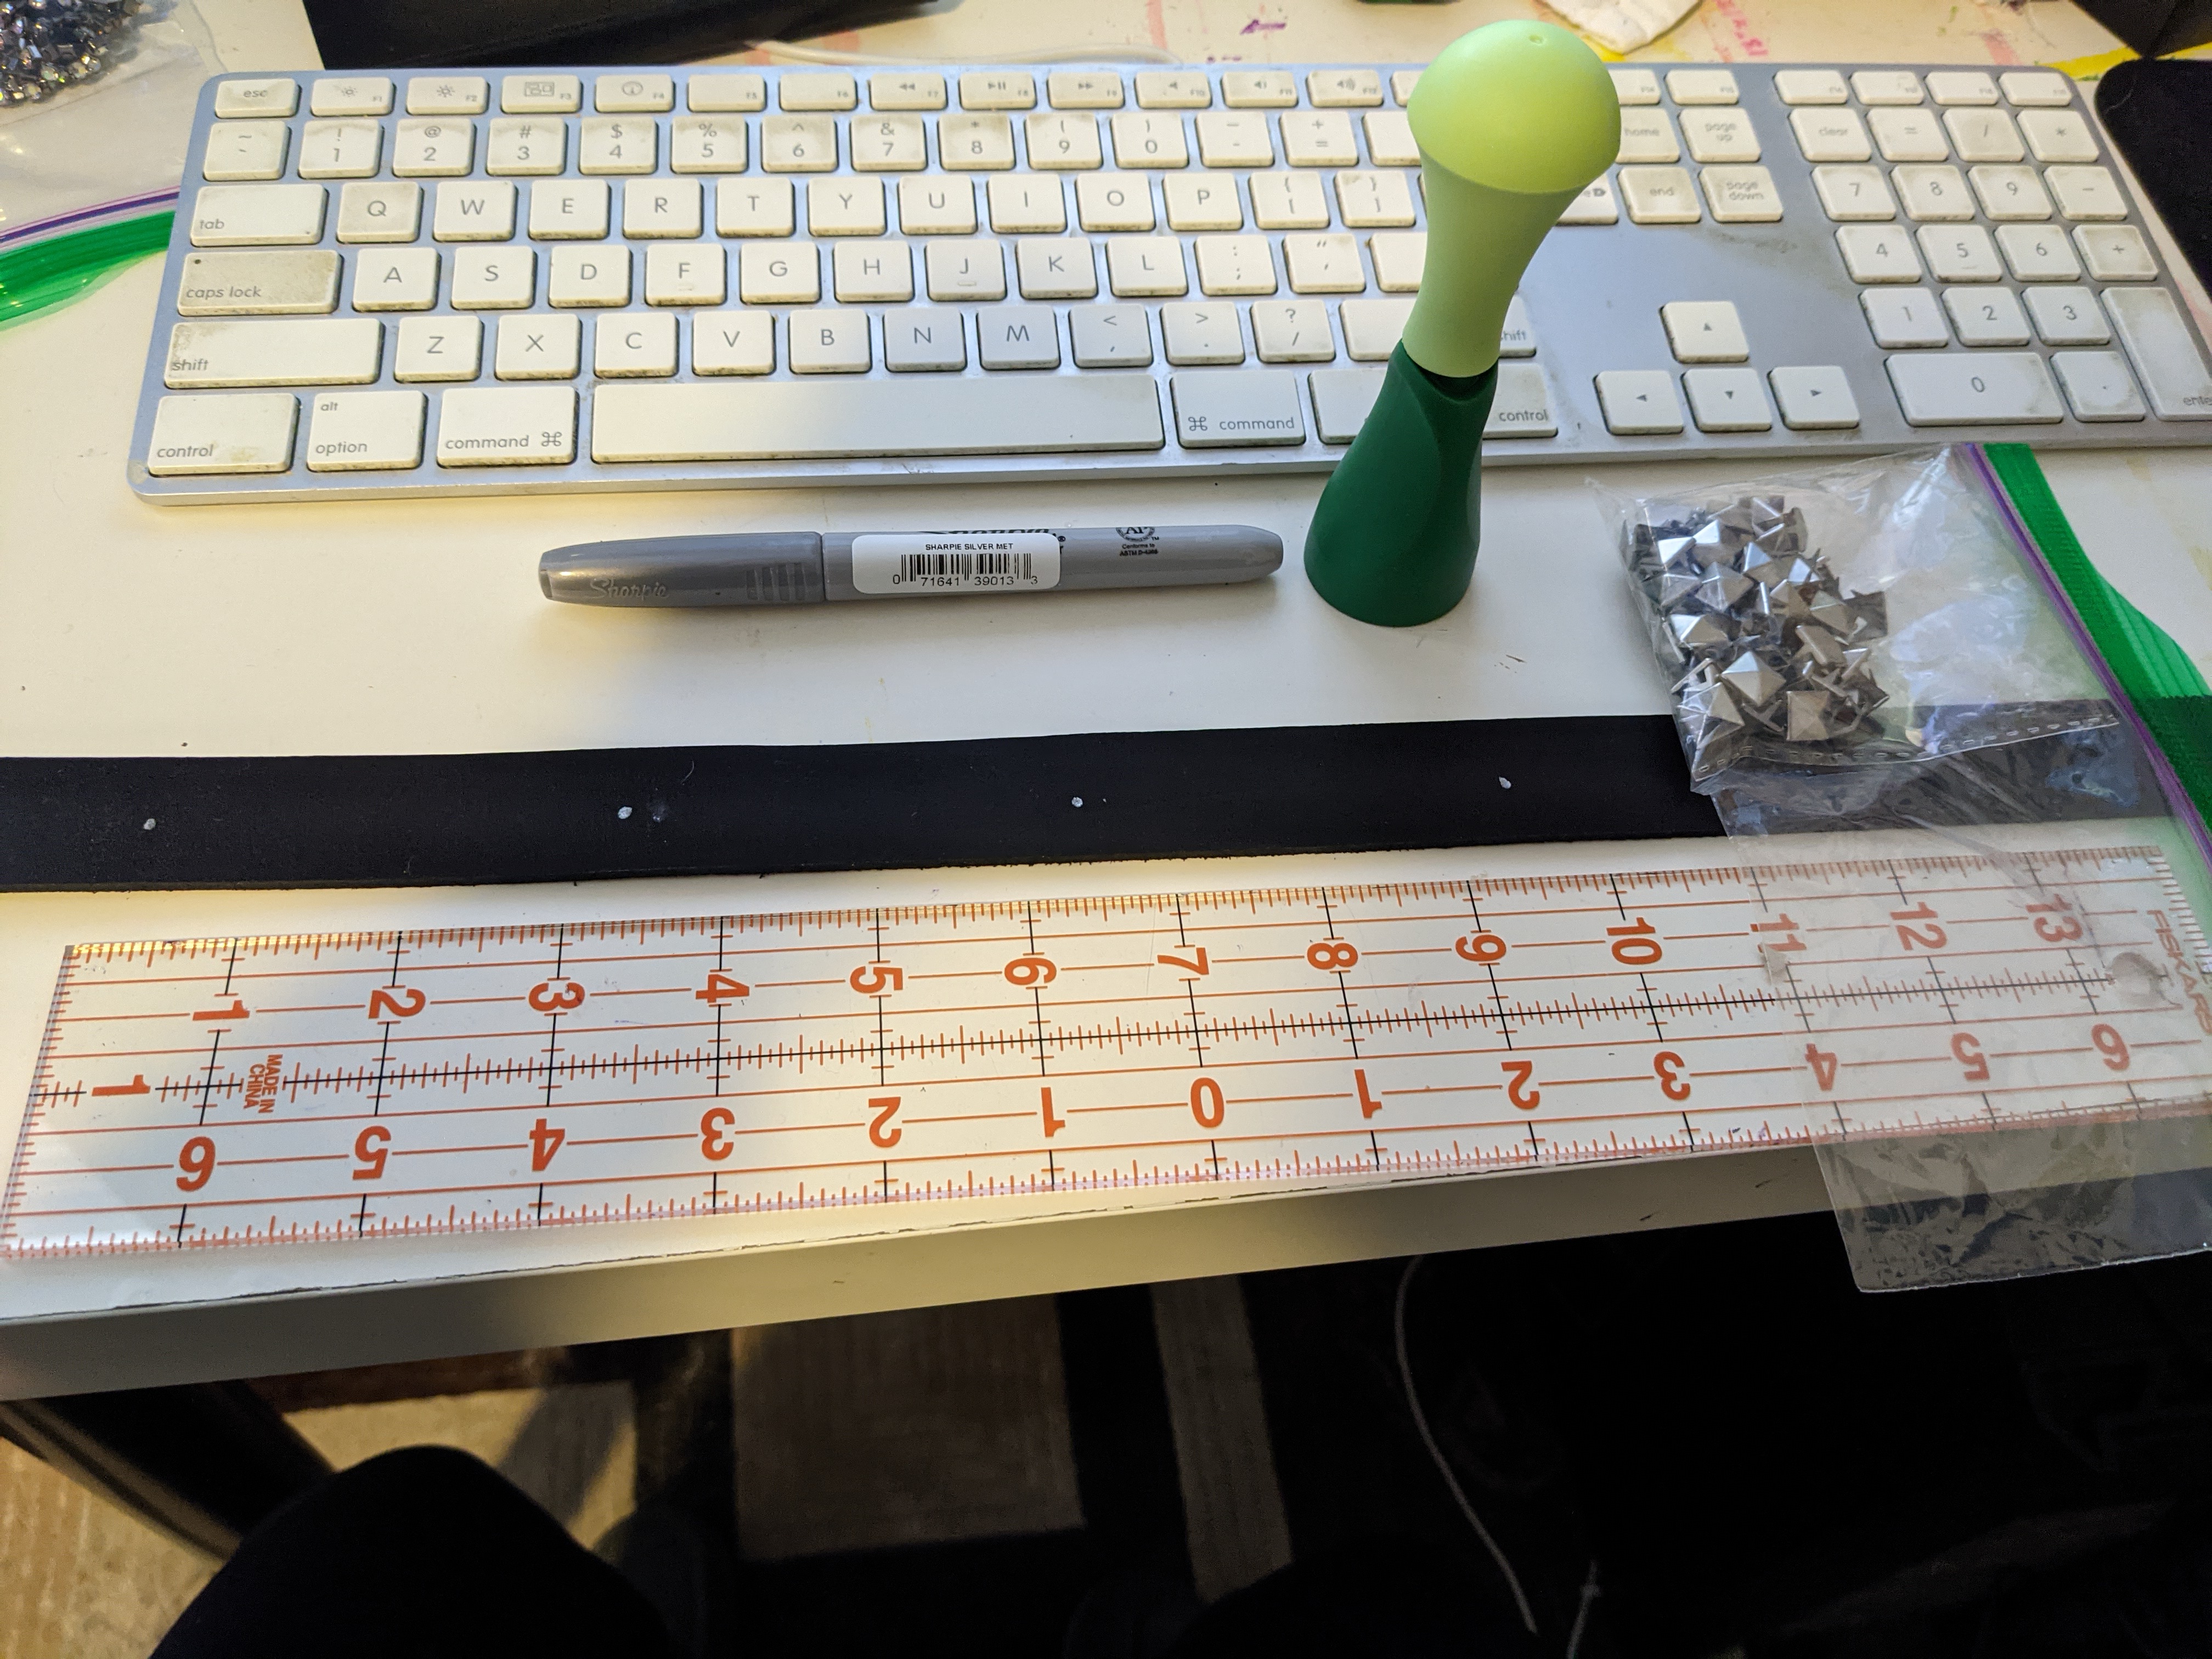
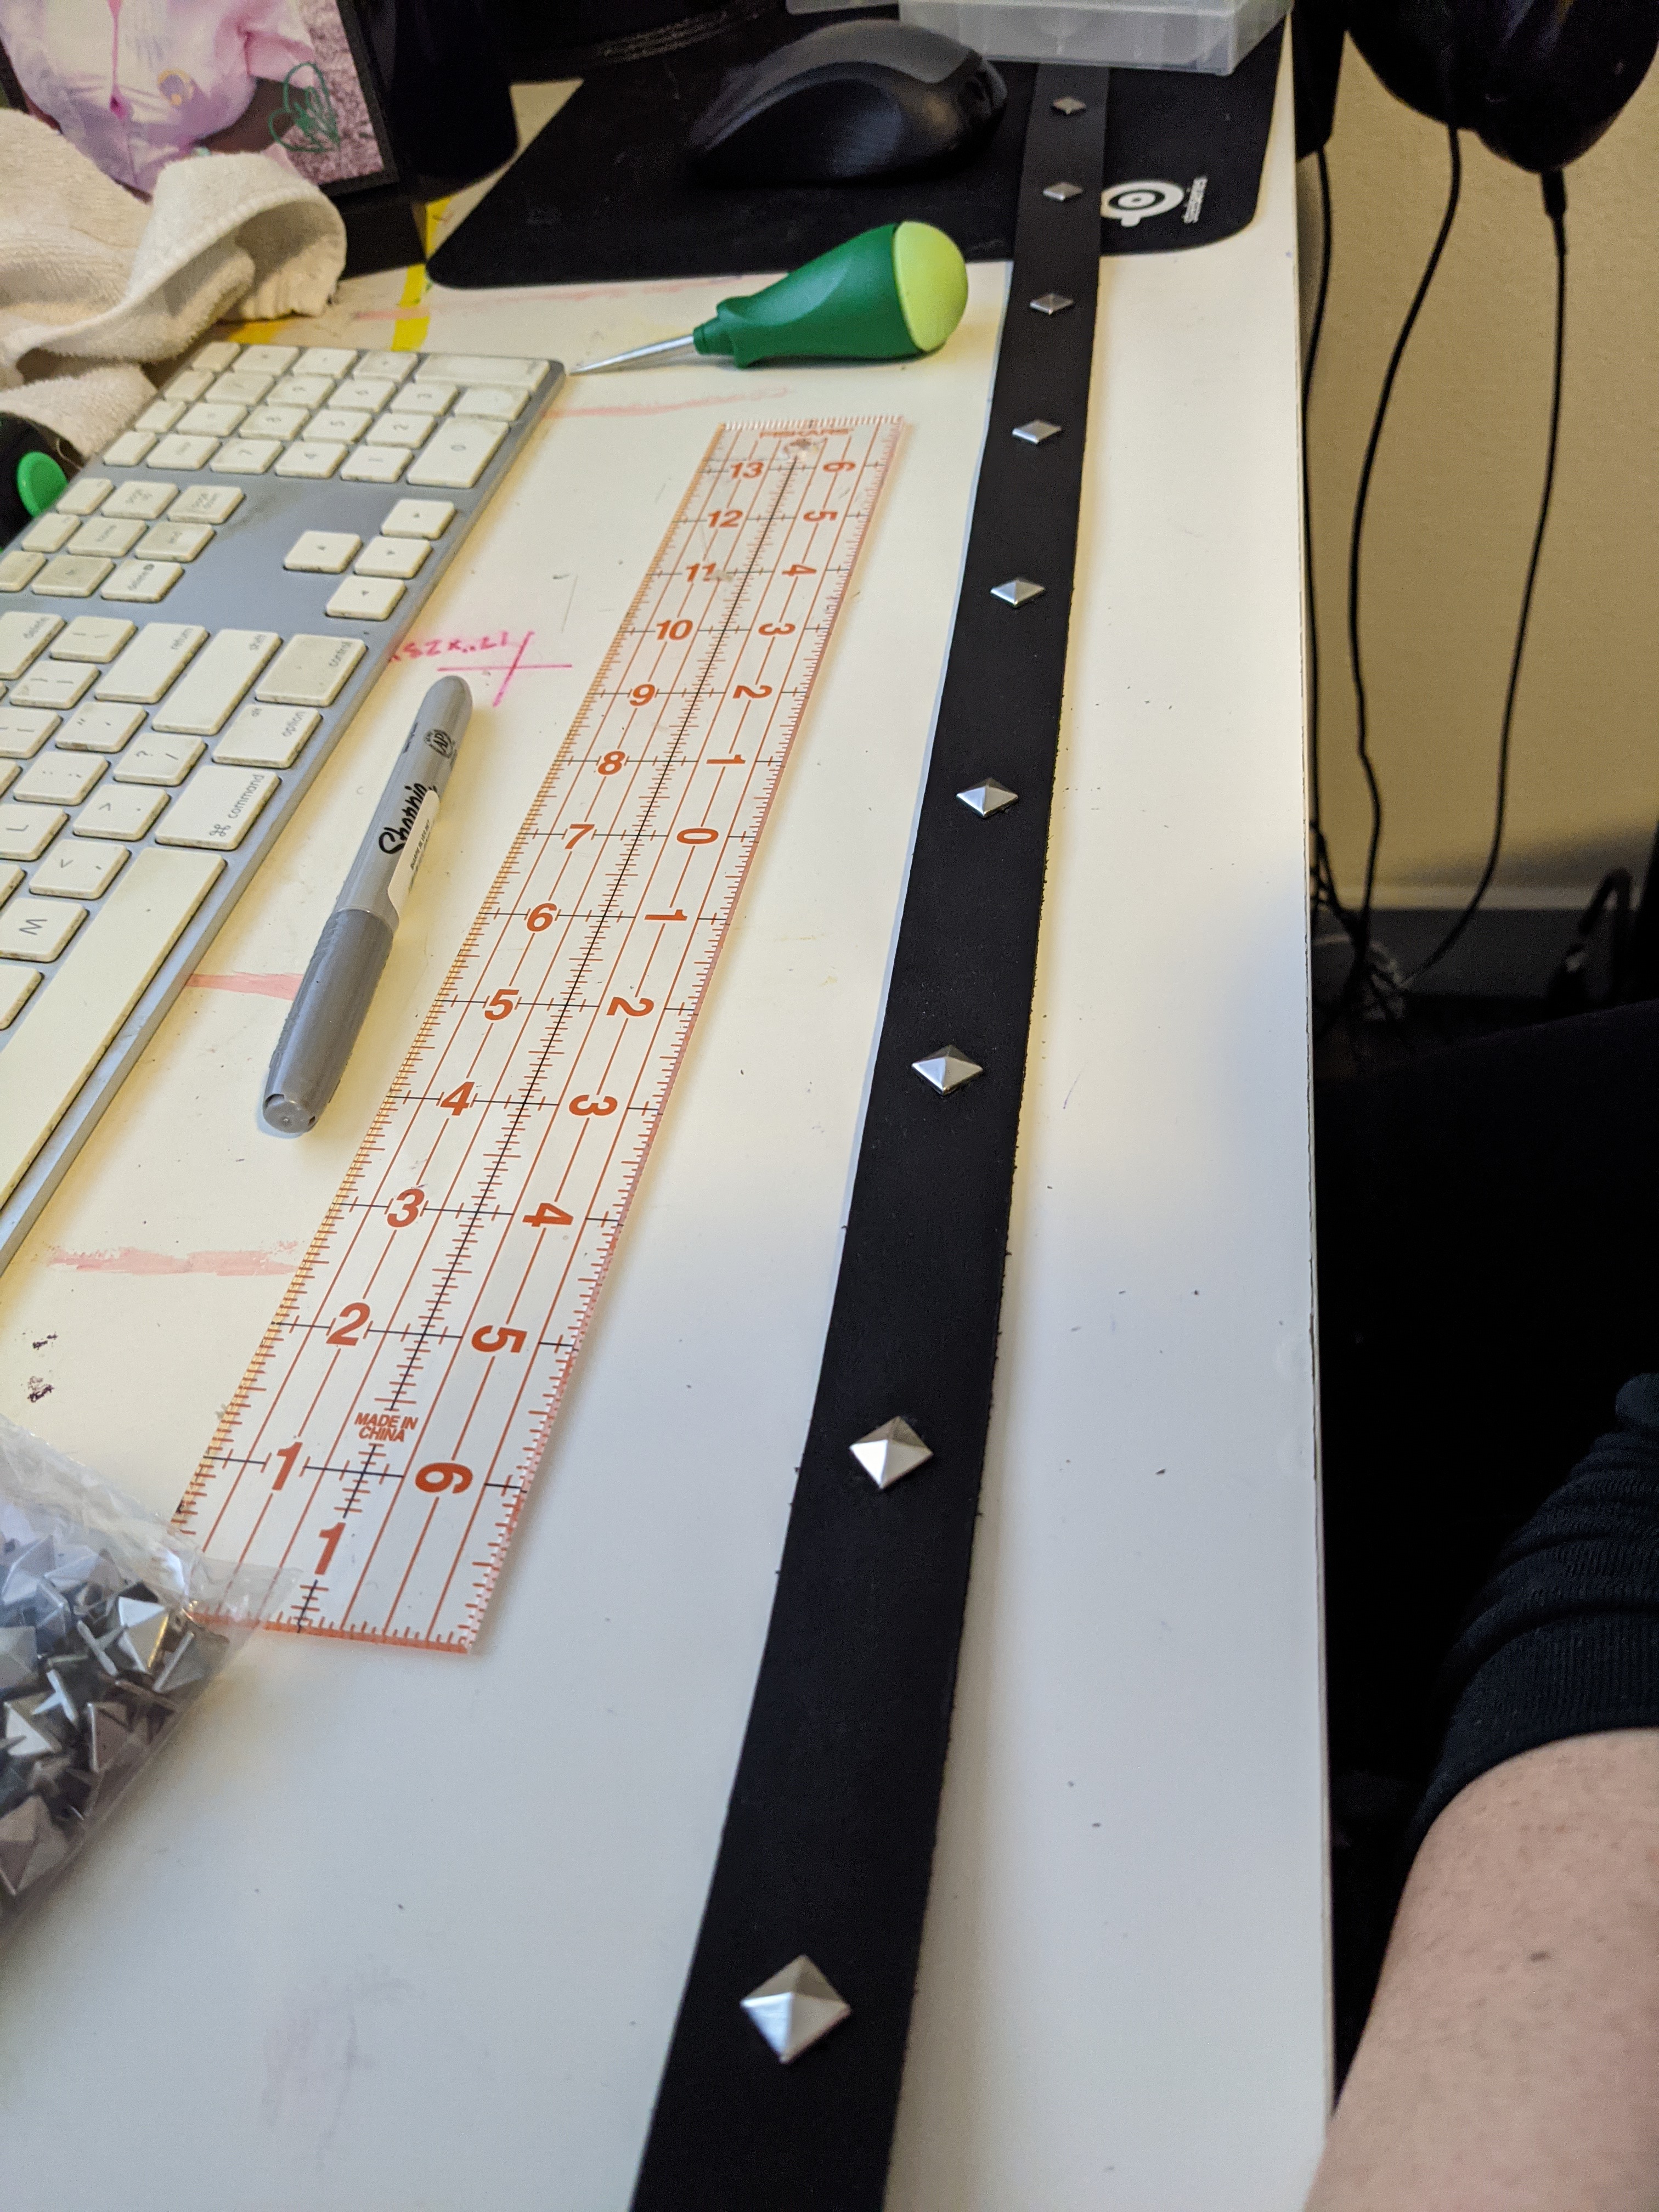

For the belt, I bought a 1×48″ wide leather strip from Etsy. Since I wanted to do it all myself and I didn’t want to go with the standard belt buckle style. I marked a dot on the belt every 3″ with silver sharpie to mark where to add the studs. Then, following this tutorial, I installed the studs by pressing the stud into the belt to get an indent, using an awl to make the hole at the indent, inserting the stud into the 4 newly created holes, and then pressing the ends into the back of the belt to secure it. Was pretty easy and looked nice!
In order to close the belt, I didn’t want to use a standard belt loop or velcro, so I used snaps instead. This process took quite a while because the belt itself was just a little too thick for the snaps I wanted to use. I ended up having to sand parts of the belt with a dremel to get the right thickness. Once that was done, I was able to use my heavy duty snap tool to install two snaps to close the belt.

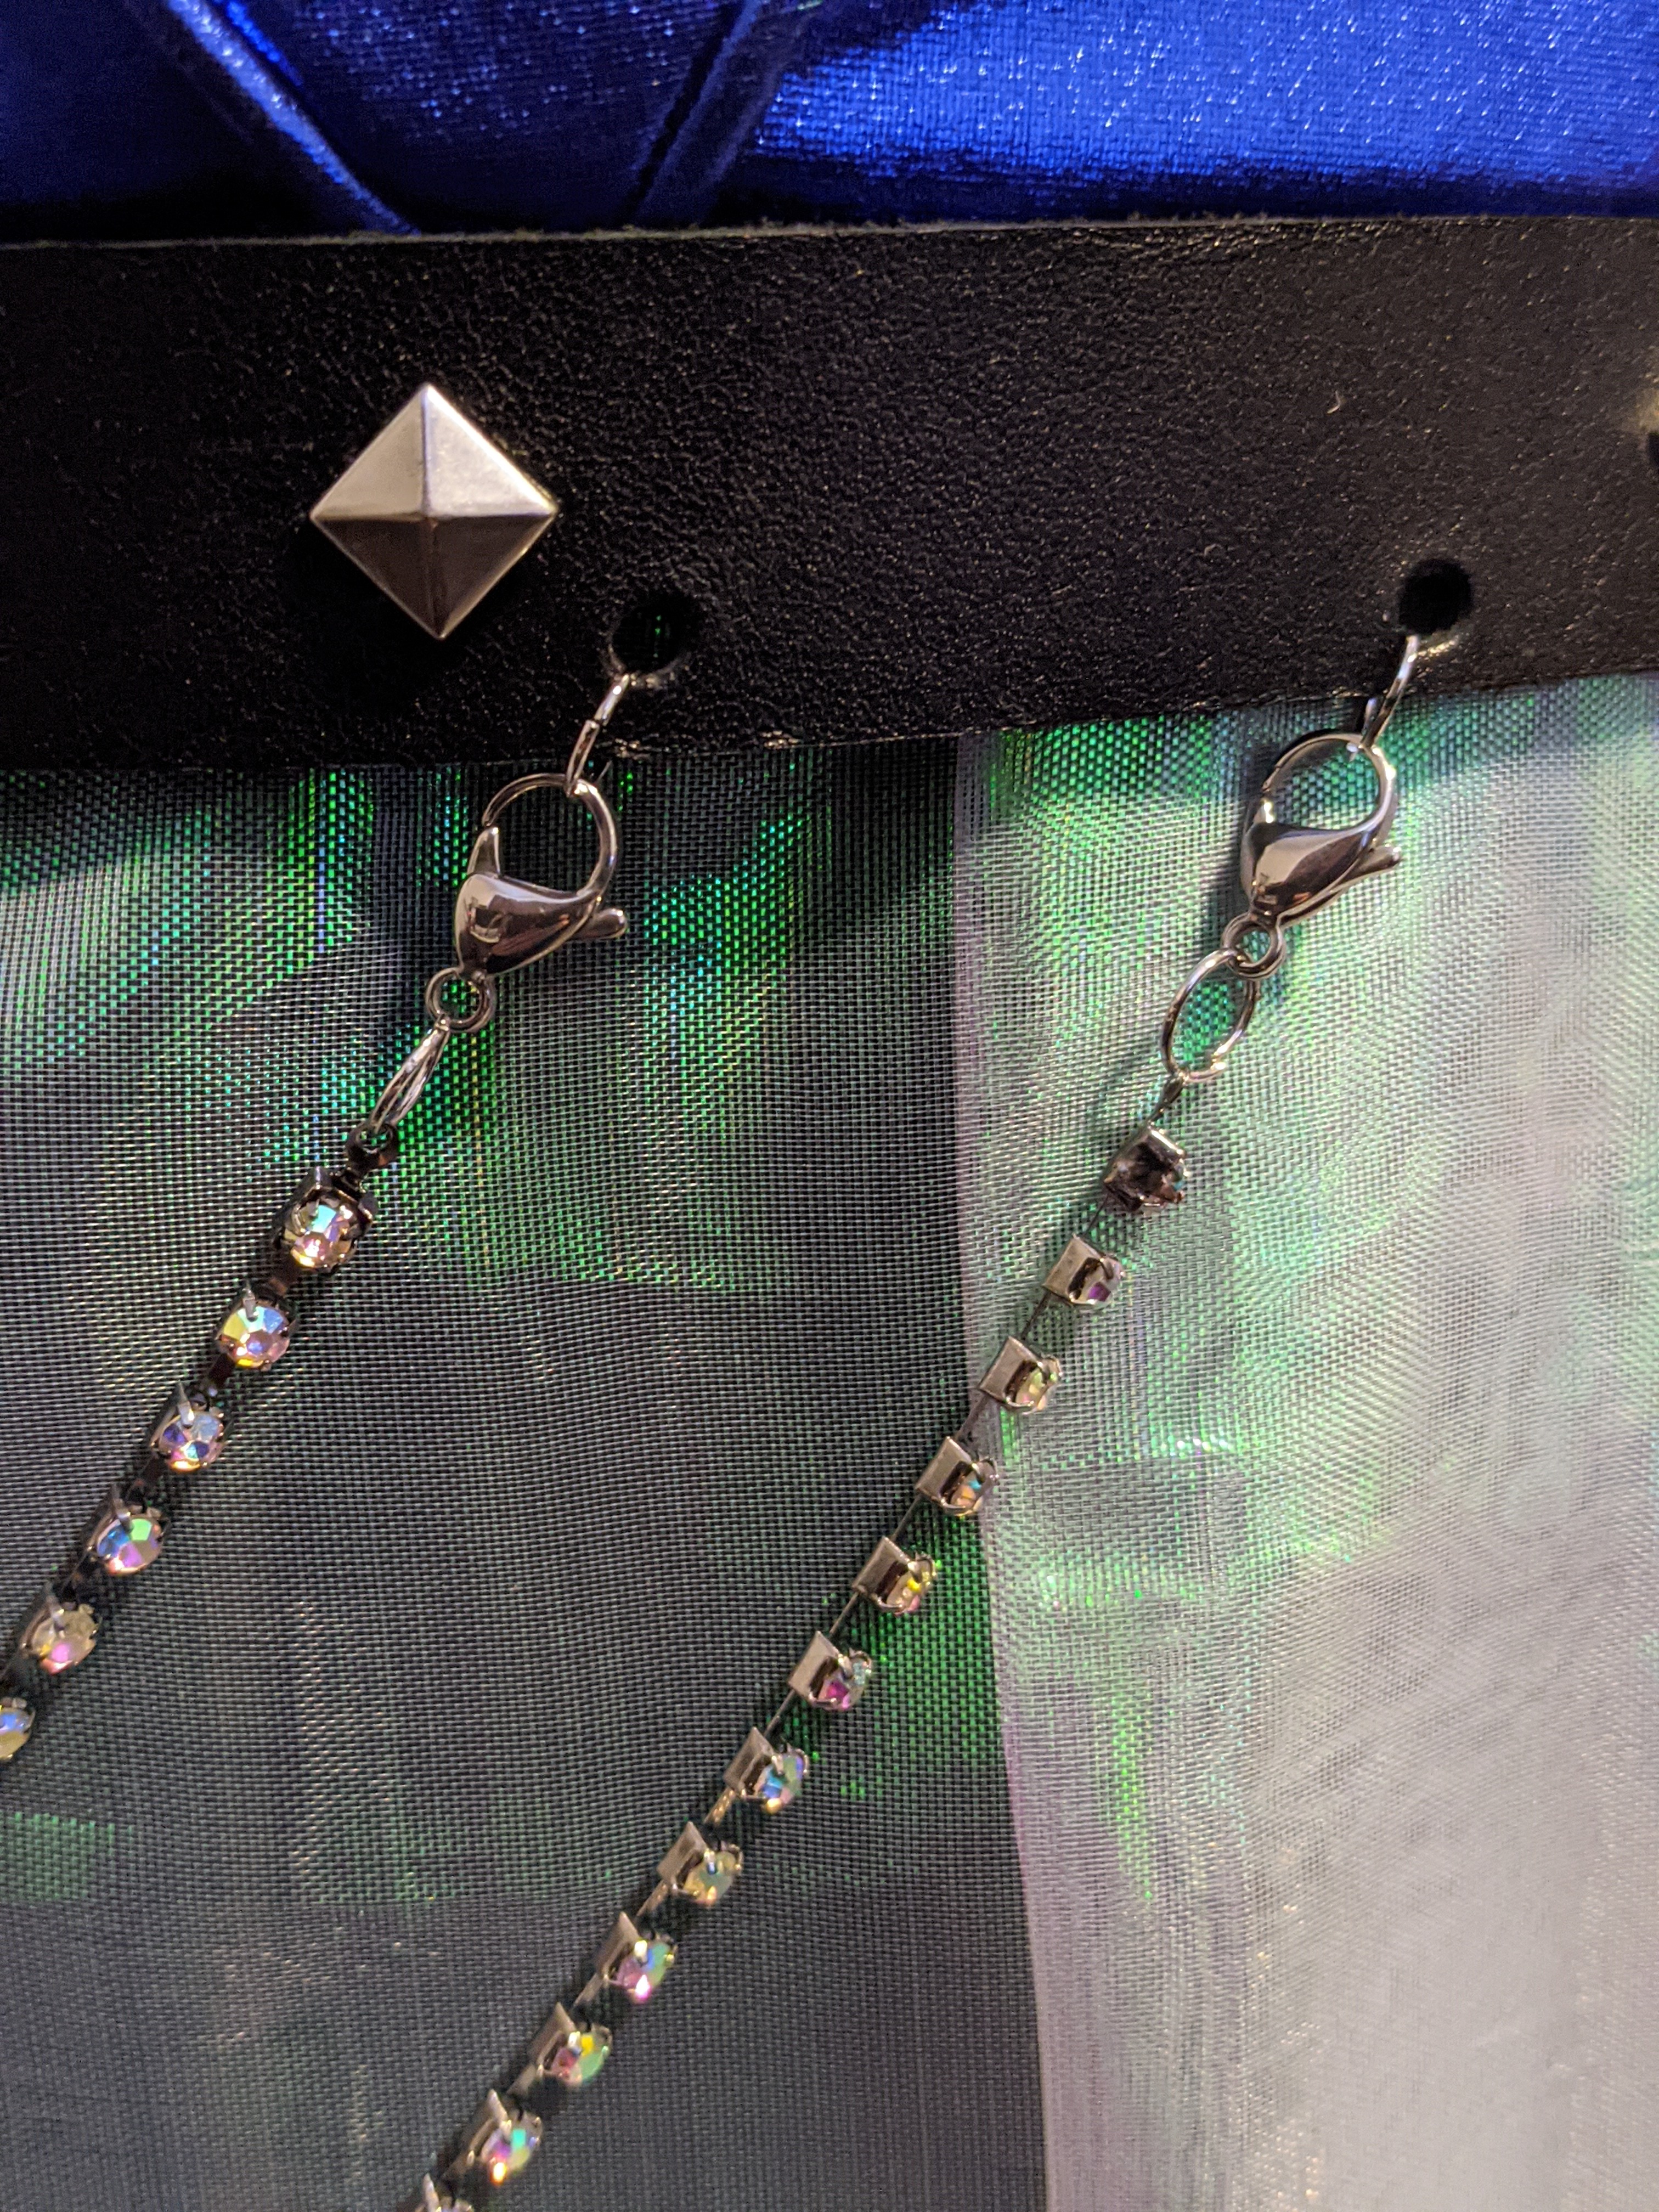
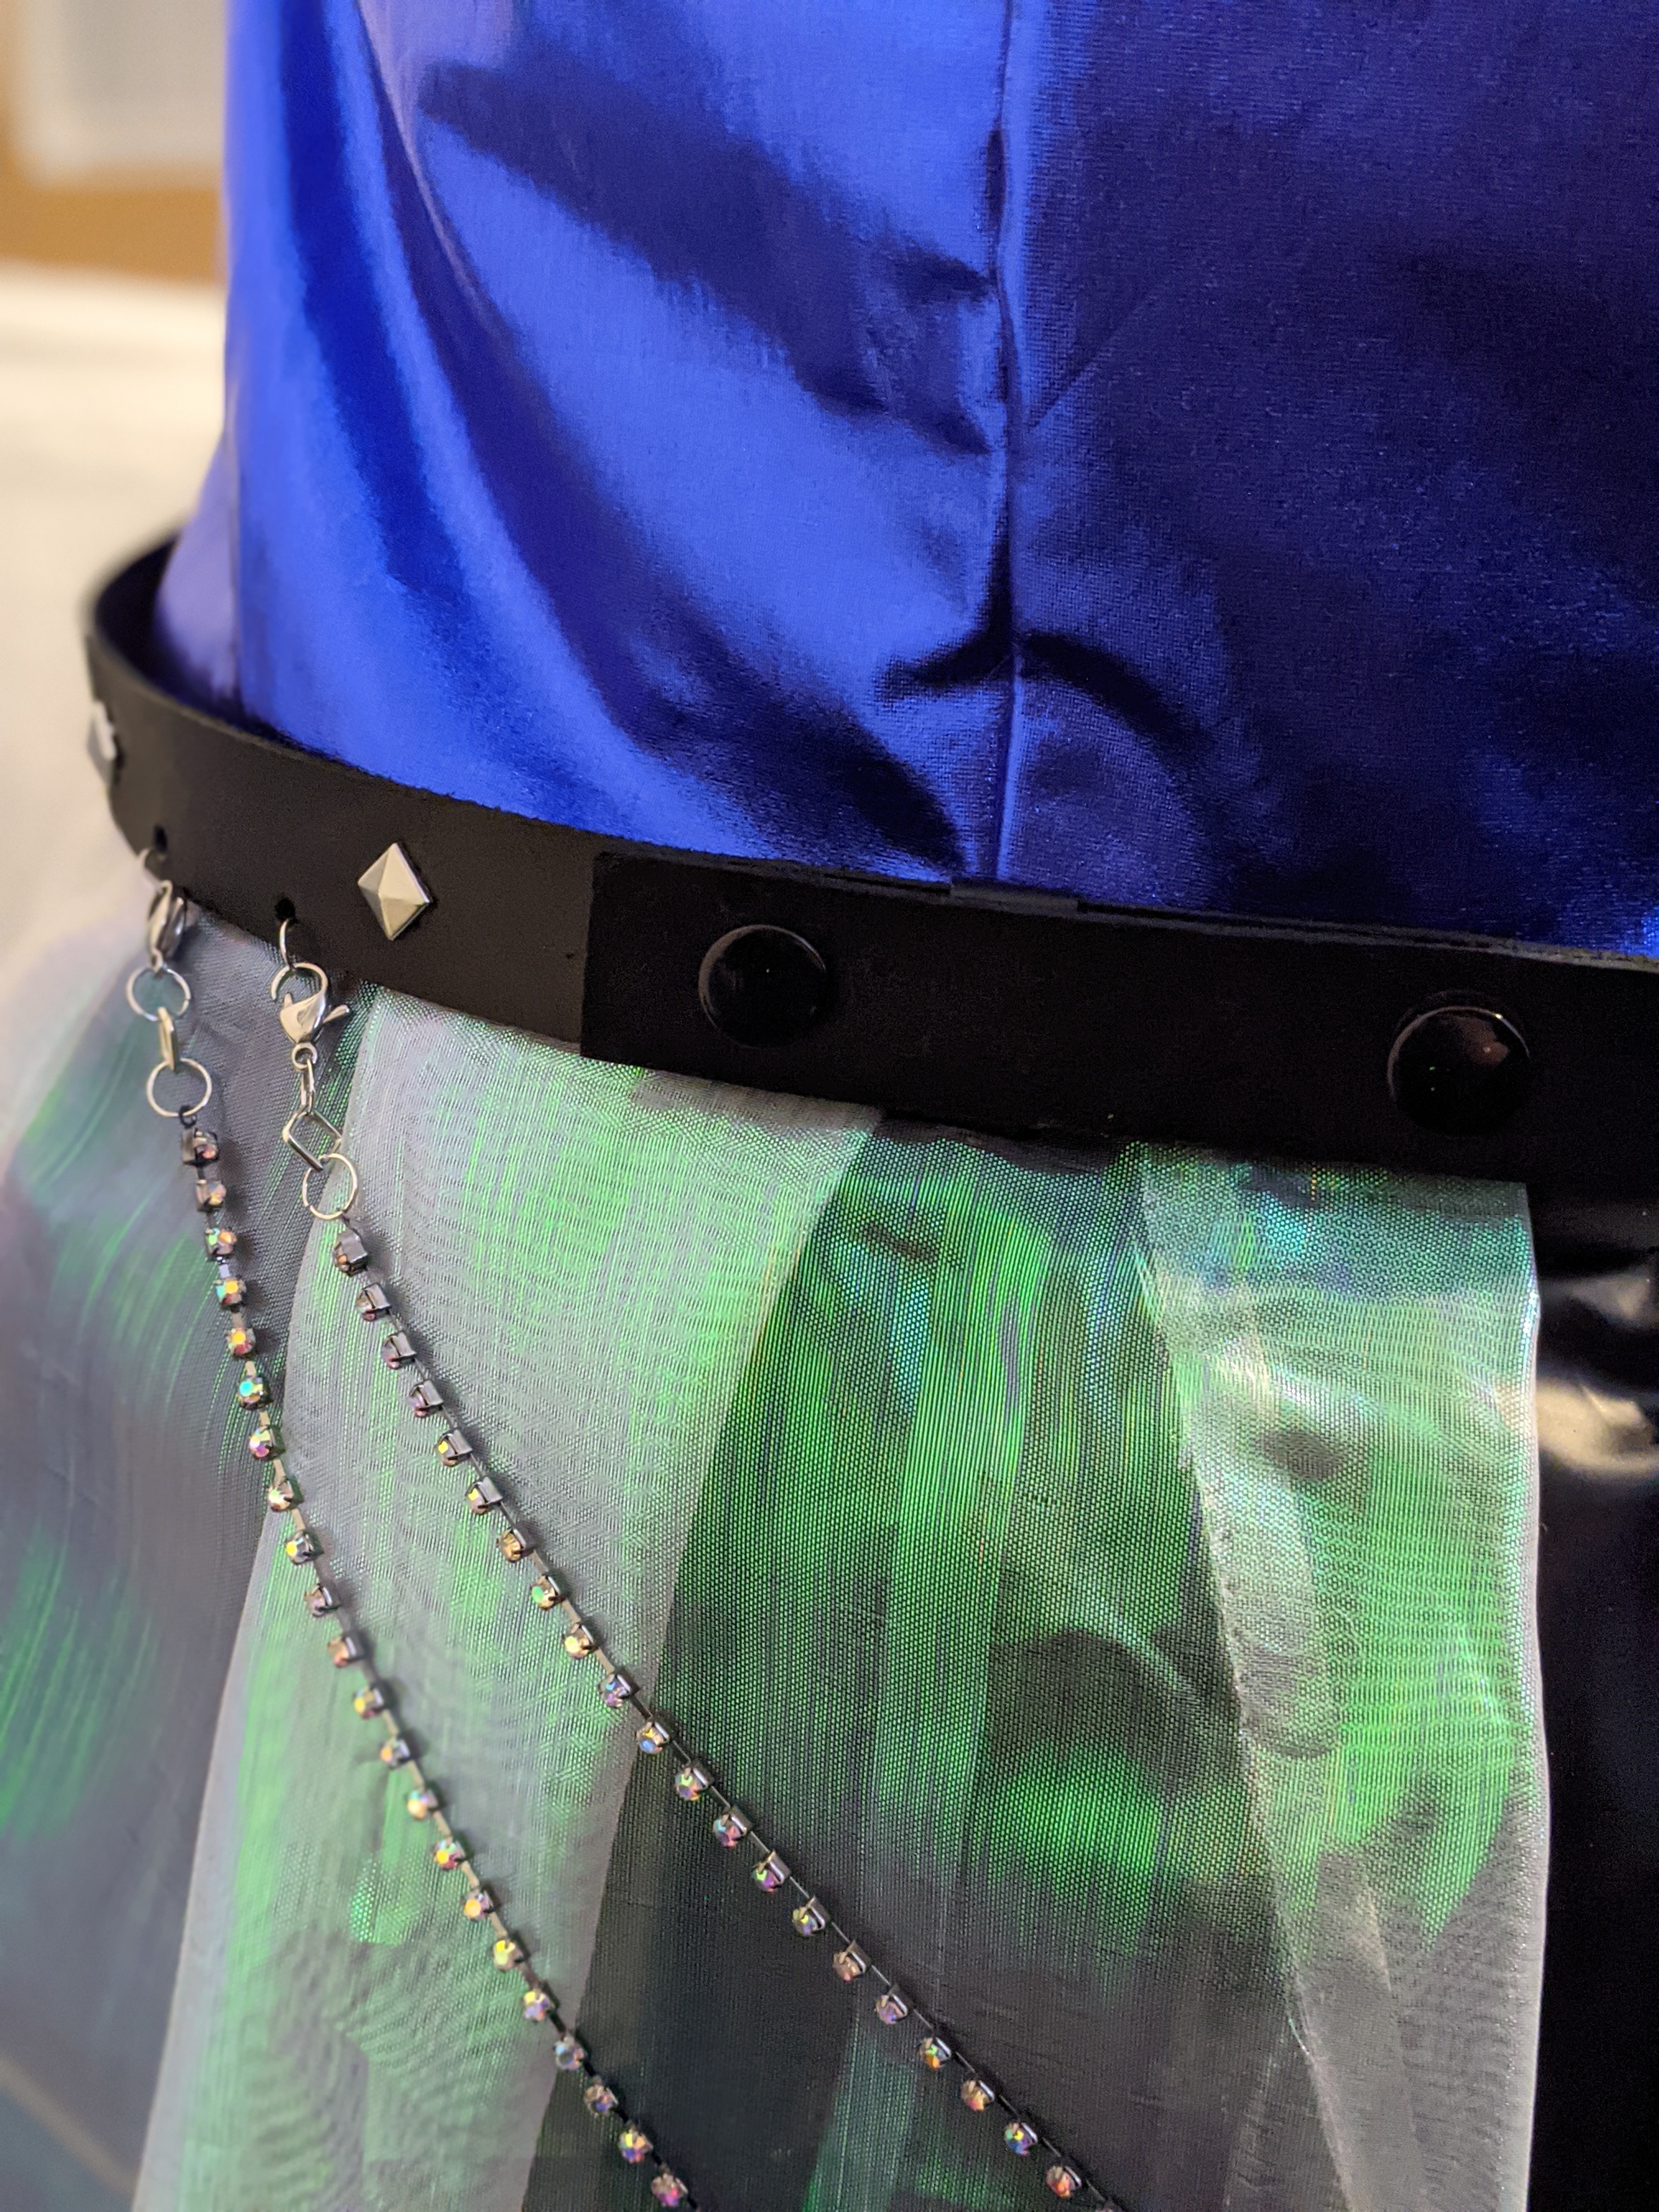
Next was adding the chains. I marked where I wanted them to go (this time on the backside of the belt so it wouldn’t show). I cut one of the chains shorter to be the correct length and then finished the ends of both with the crimp ends that came with the chains. After that, I added jump rings and lobster clasps to both ends of each chain. I wanted to be able to remove the chains completely. It helps that I bought a second pair of jewelry pliers to do this. (Use one set to hold the jump ring in place and the second to bend the jump ring open and close. Before, I would just hold it in my place with my fingers and that was very hard to do.) To attach to the belt, I used the same tool that I had used for the snaps to create four holes: two in the front and two in the back. I attached one jump ring to each of these holes. Then, attaching the chains was as easy as clipping them on!
Tights/sock


I decided to make my tights knee-high rather than thigh-high. I did this because:
1) I do not have super long legs like Seraphine.
2) My skirt is a little longer to accommodate my booty as well as make me feel more comfortable.
Because of #2, I wanted the tights to be shorter so that there was a definite gap between where my skirt ended and the tights began. (The Zettai Ryouiki or “ultimate territory” if you will.)
The tights were patterned with the trusty duct tape method.I did two seams down the sides and then one seam that was for the sole of the tights. After transferring the pattern from duct tape to paper, I cut it out with my fashion fabric. I started with just the right tights so I could be sure I was doing it right. (I was playing it a bit risky by skipping the mockup.) Thankfully it turned out fine! I stitched the two main pieces together but keep the area near the ankle pretty open so that it could still fit around the base of my sewing machine. I needed to do this because I would be adding the little 1/2″ strips of black ultrapreme fabric after the tights were constructed. (I could have done this before, but I didn’t trust myself to be able to match the strips along the seams perfectly. Adding the strips after meant I could guarantee continuous lines.)


After cutting half a dozen strips of 1/2″ wide strips of black ultrapreme (done along the bias to ensure stretchiness as well as avoid fraying), I put on the right tights/sock and very, very carefully pinned the strips where I wanted them in the criss-cross pattern. I did prick my legs a couple times, but not too terribly. Was worth it to ensure the strips were exactly where I wanted them.
I zigzagged stitched both strips onto the tights (I had one strip going one direction while the other went the opposite, to create the criss-crosses) and cut off any excess fabric off. Then, I finished constructing the sock by stitching on the sole piece.
The left sock followed the same method (but with the pattern reversed of course). It took less time because I was already familiar with the process. Finishing the left sock was as simple as folding over the top edge to hem it.
To finish the right sock, I cut off part of the top and replaced it with the same cobalt fabric I used for the bodice of the dress. Yes, I could’ve easily just not made that top part so I wouldn’t have to cut it off, but I had it made completely before because I wanted to make sure that the height for both socks was good. And I needed to finish the left sock first before adding the blue strip to the right one because I needed to cut my paper pattern along the strip’s line.


Once both socks were completed, I attempted to pin and sew them to tights so that they wouldn’t slip when walking/dancing. This proved difficult. Pinning was uncomfortable but manageable. Hand-sewing was tedious and near impossible for me given that the tights needed to stay stretch while sewing. So, I attempted to do it with my machine. I managed to sew them on, but once I tried them on, they didn’t look good and the tights—most likely due to how sheer they were—started running in lots of places. The tights were ruined before even setting foot at a con. So, I decided to seam rip the tights off.
My husband actually suggested adding elastic to them to help keep them up and that’s exactly what I ended up doing. Using the small channel that was created in the socks by folding over the edges for the hem, I inserted a small 1/2″ elastic band. To do this, I pinned a safety pin on end, pinned the other end in place so it wouldn’t get lost, then used the safety pin to help guide the elastic through the channel. Once successfully inserted, I stitched the two elastic ends together by hand and then closed up the channel. The final results ended up working pretty well! They’re not perfect and don’t stay up above my knees, but they settle into place in a good spot that I’m happy with.
Shoes


The shoes are one of my favorite pieces of this cosplay. I bought a beautiful pair of white wedges online. After using cotton swabs and rubbing alcohol to remove the varnish (there wasn’t much), I painted the shoes black with leather paint. At first I painted just the top part with the intention of painting the wedge itself silver. But after putting on one coat of the silver paint, I realized it would take forever and I didn’t like the results. So, I opted to paint the entire shoe black for even coverage.


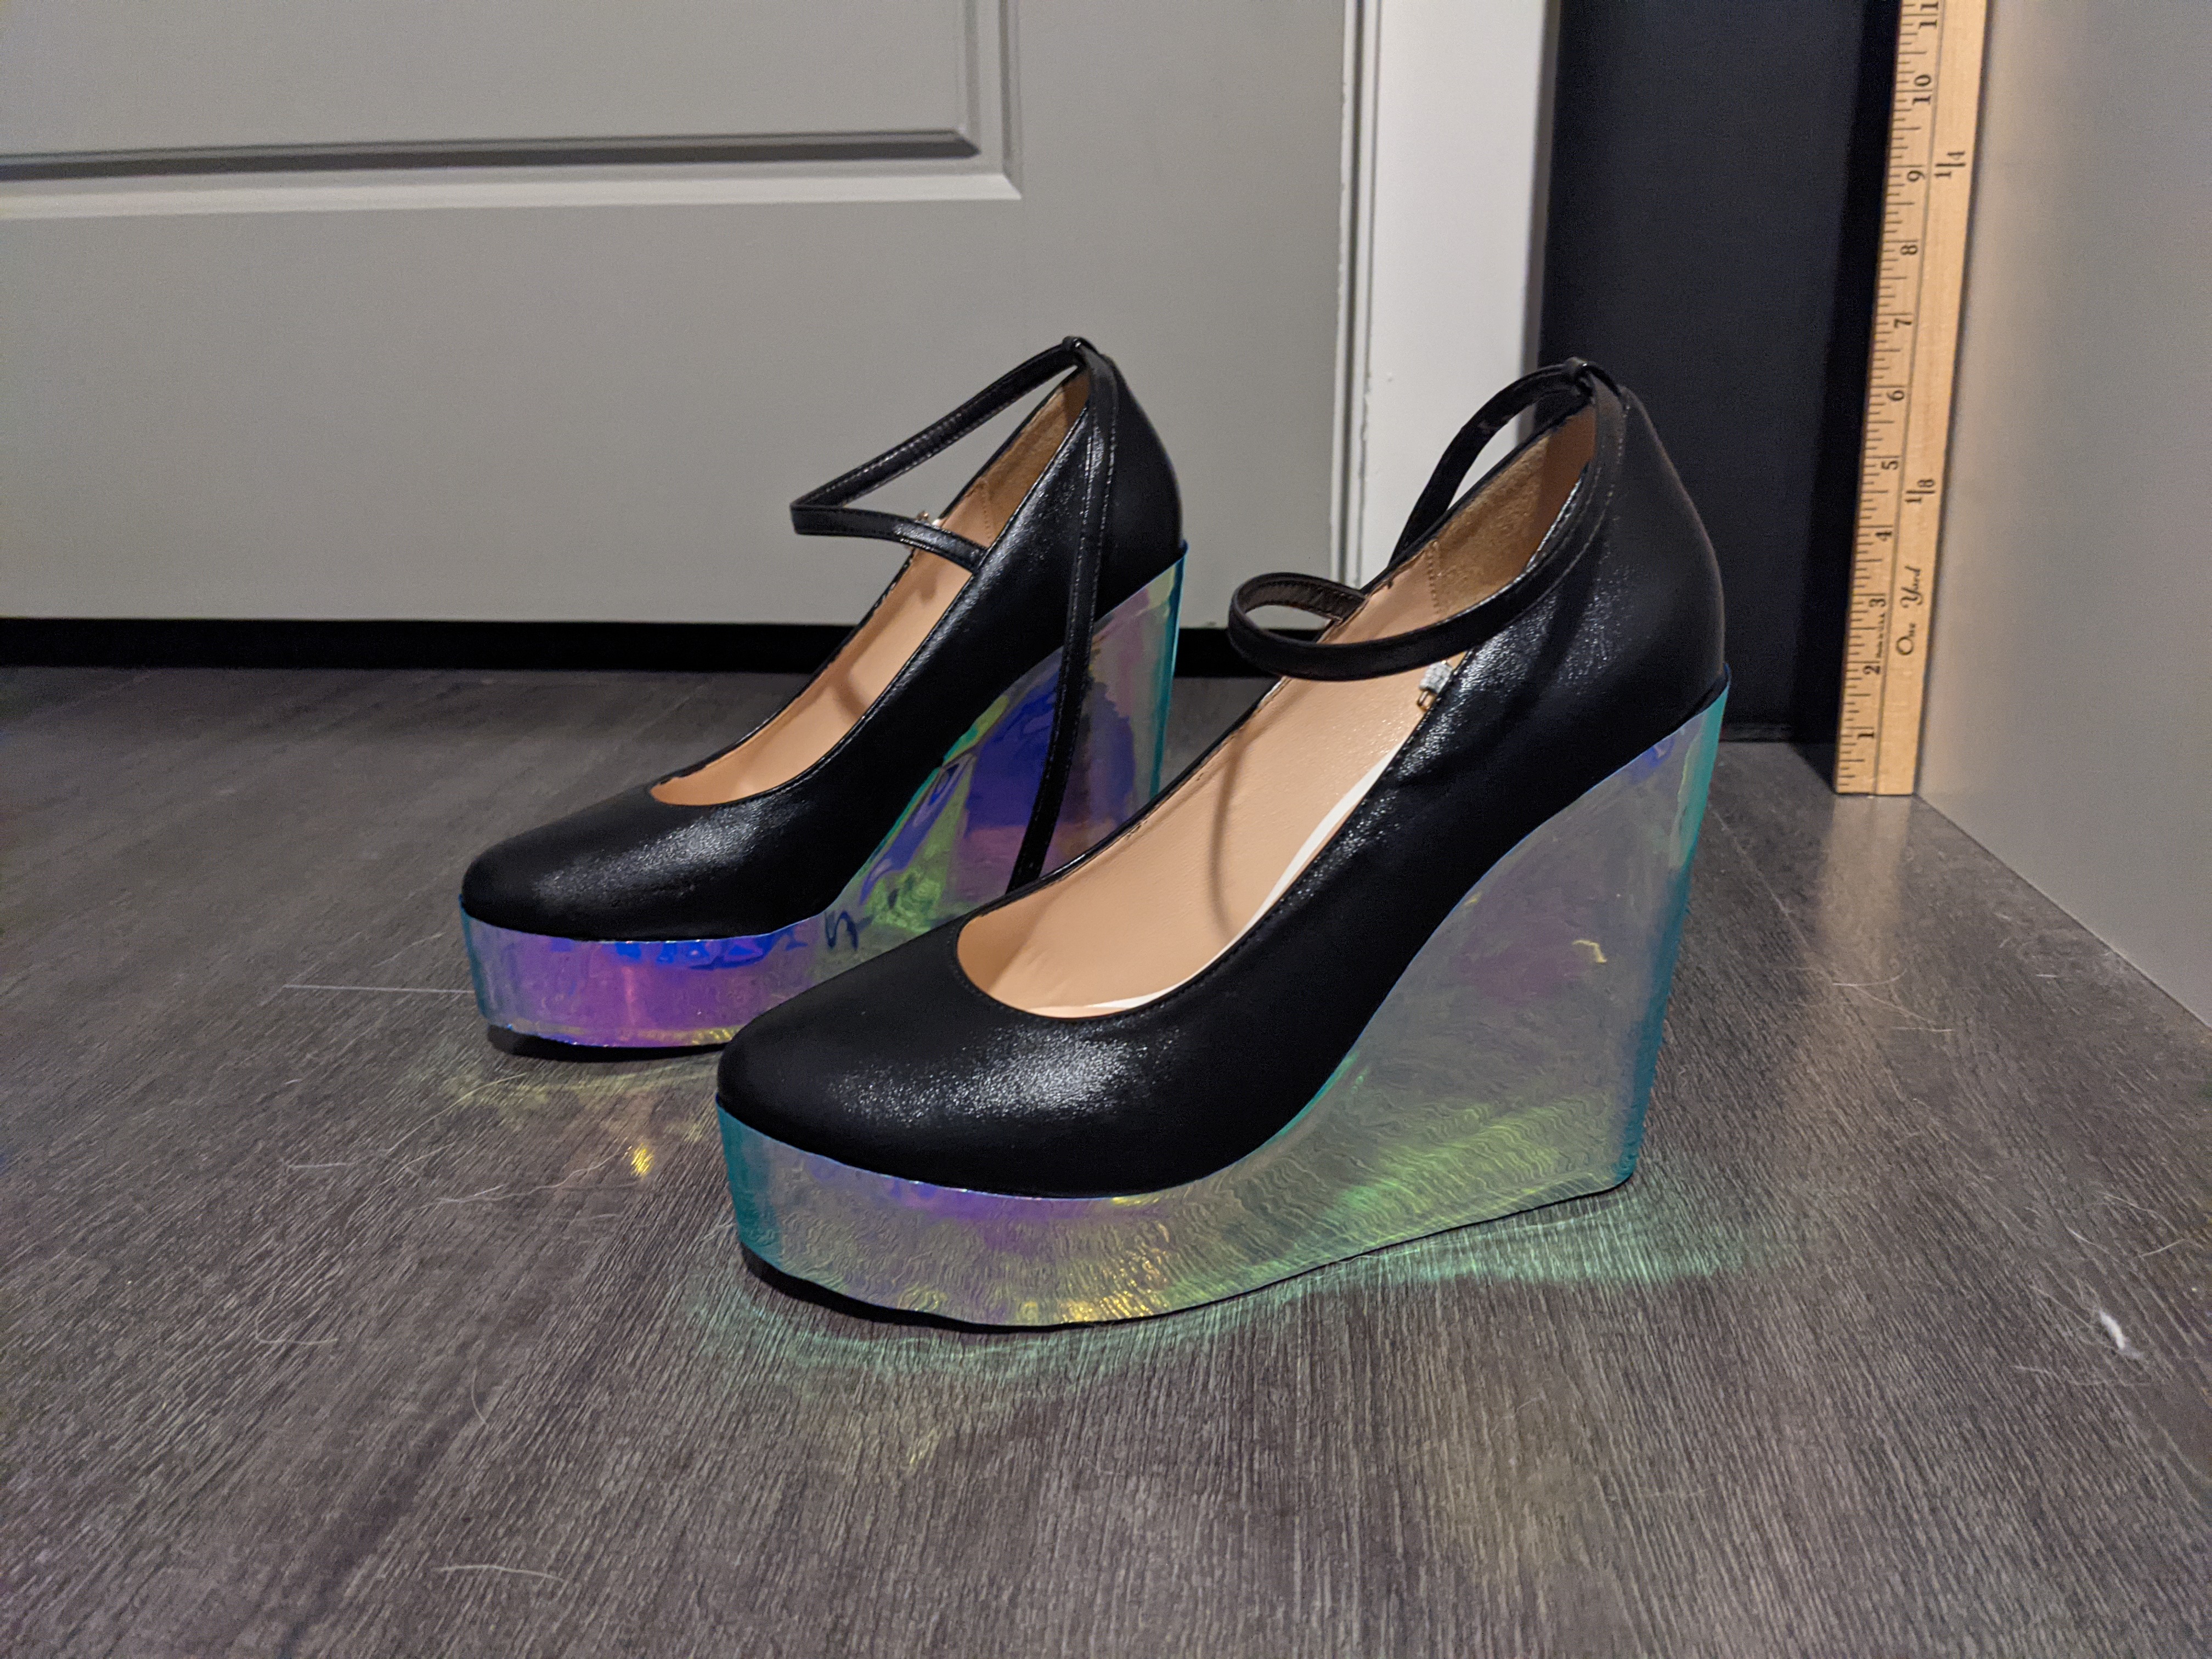
Once the paint was dry, I wrapped it in saranwrap and patterned it using – you guessed it – the duct-tape method. I made a pattern for the wedge of the shoe and then cut it out on Cricut blue holographic vinyl. The vinyl already has its own sticky backing, so I used that to attach it to the shoes. It came out so beautifully! The wonderful thing about these shoes, too, is that the straps on them create the same X or criss-cross design used in the tights, so it matches perfectly!
Accessories: Choker, armbands, bracer
When it comes to these type of accessories, I have a tendency of just winging it and not being super precise with measurements. There’s lots of eyeballing involved.
Choker
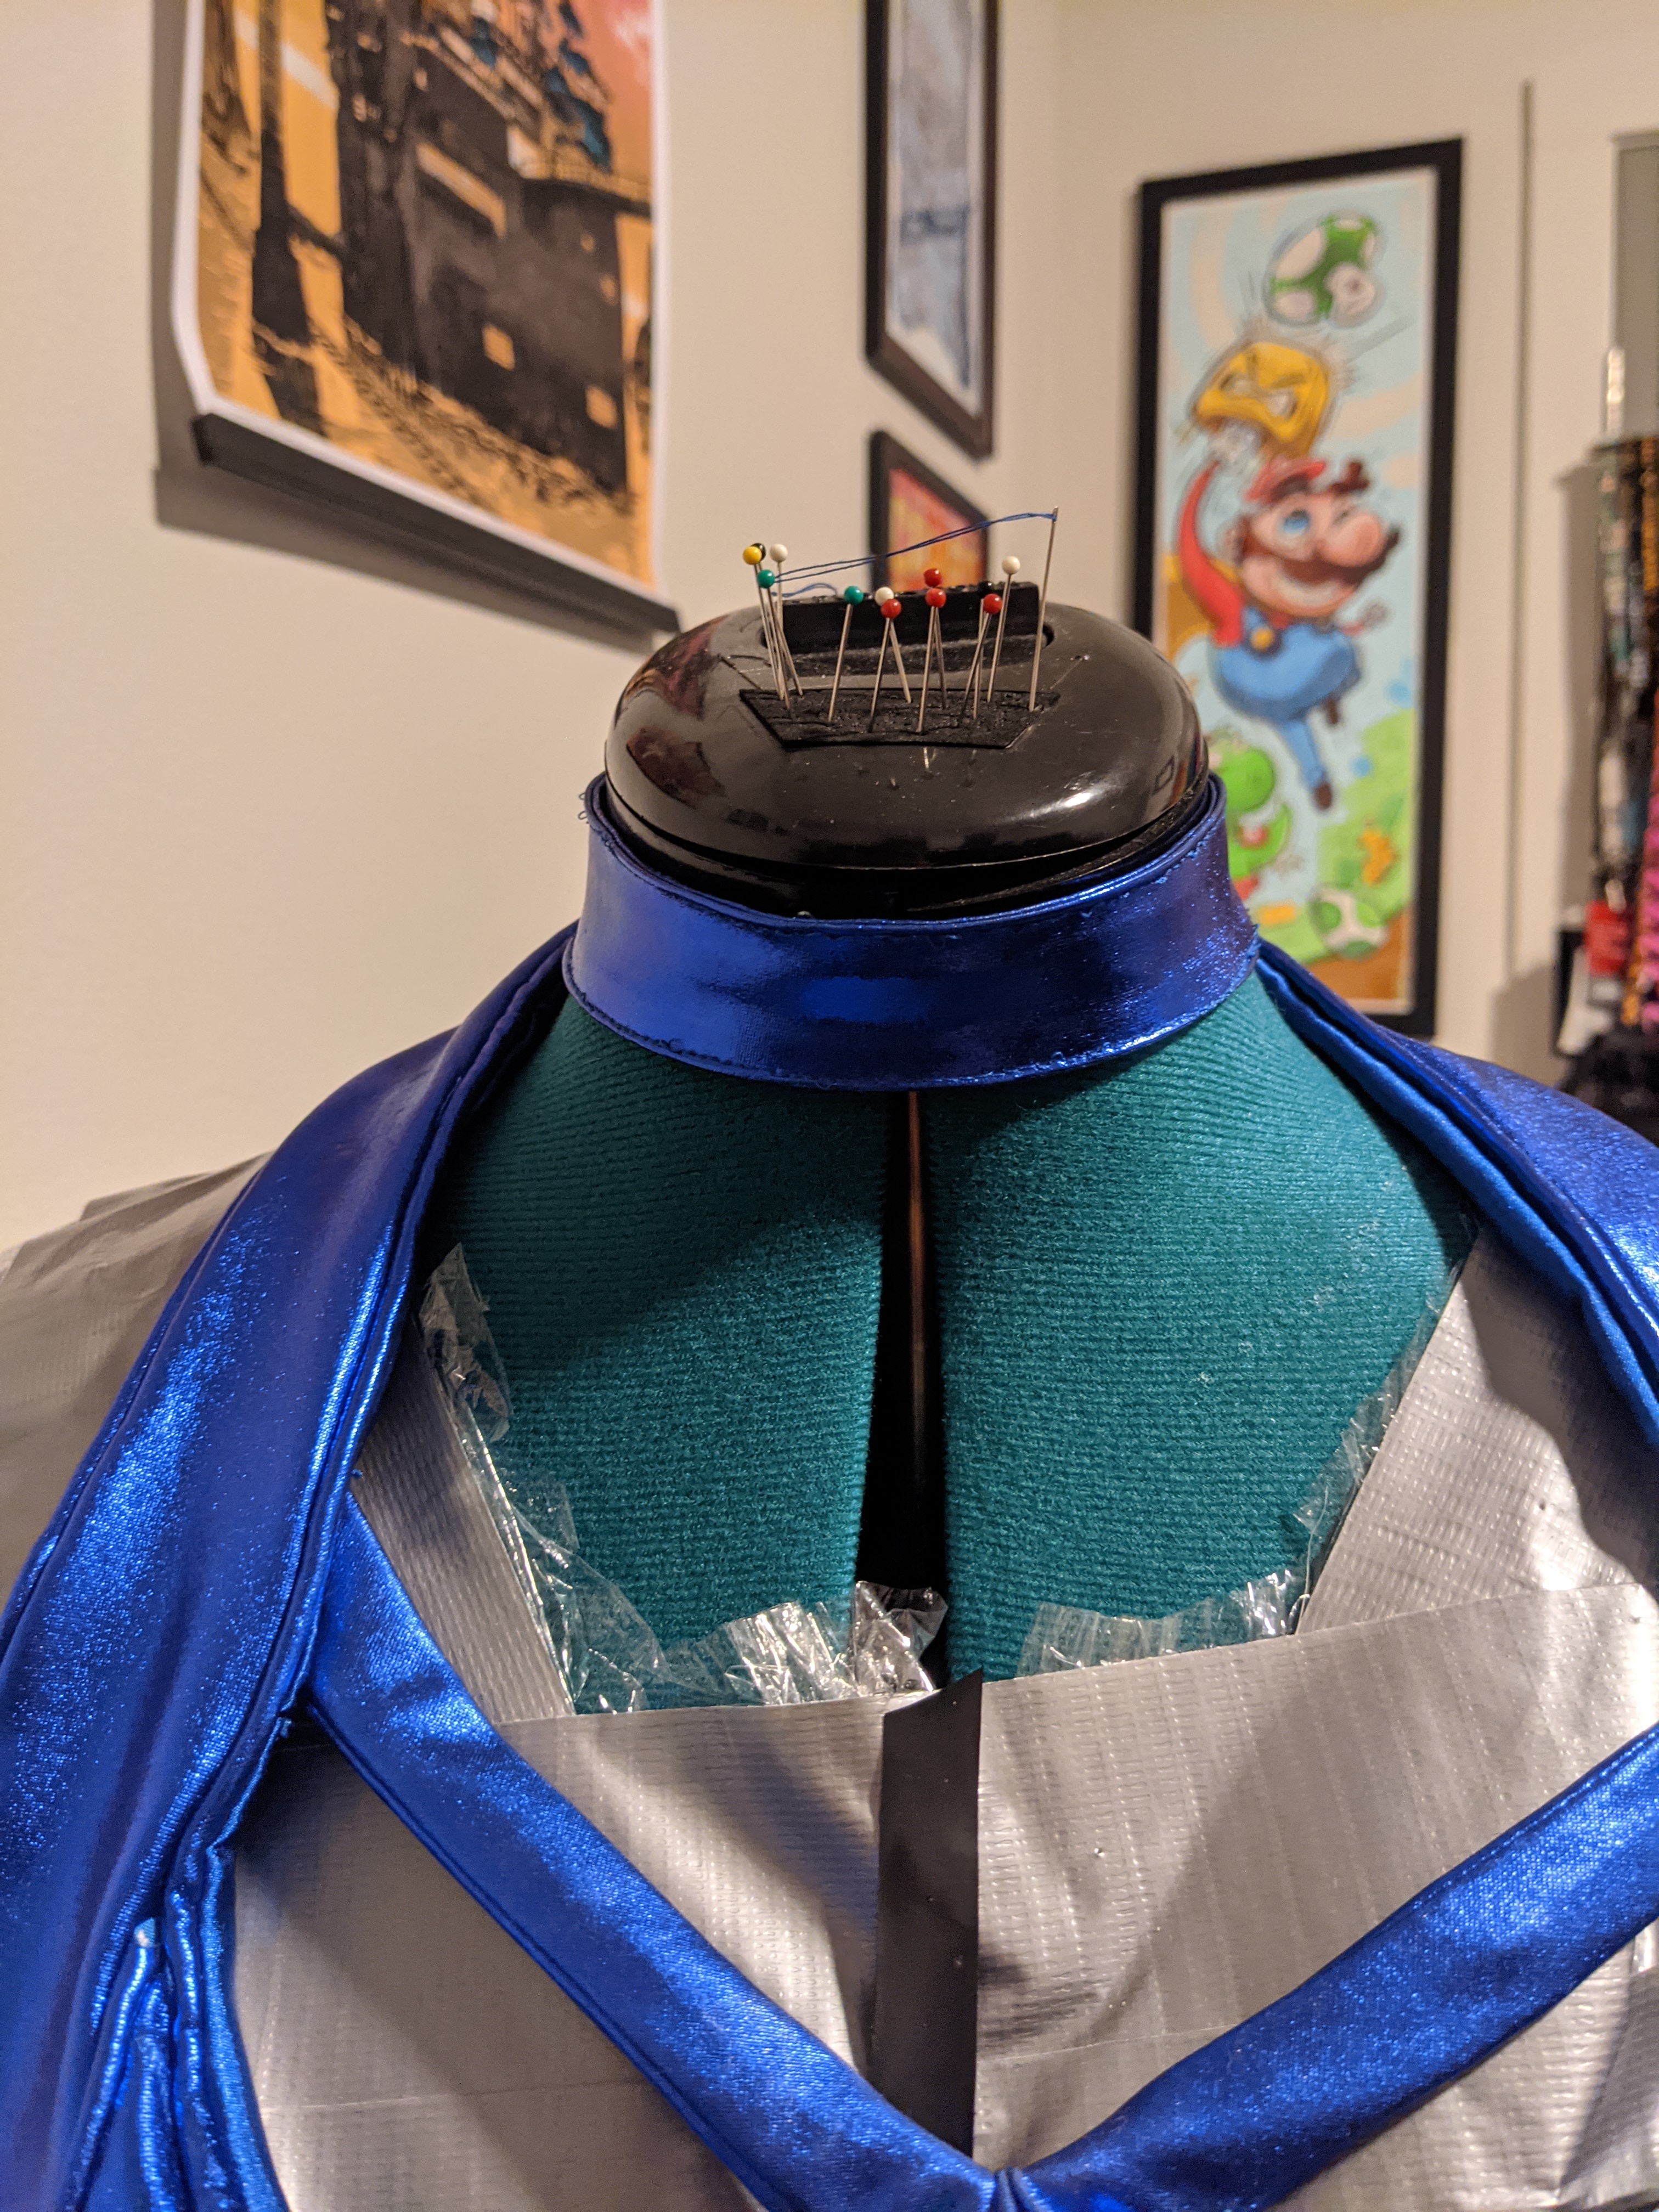

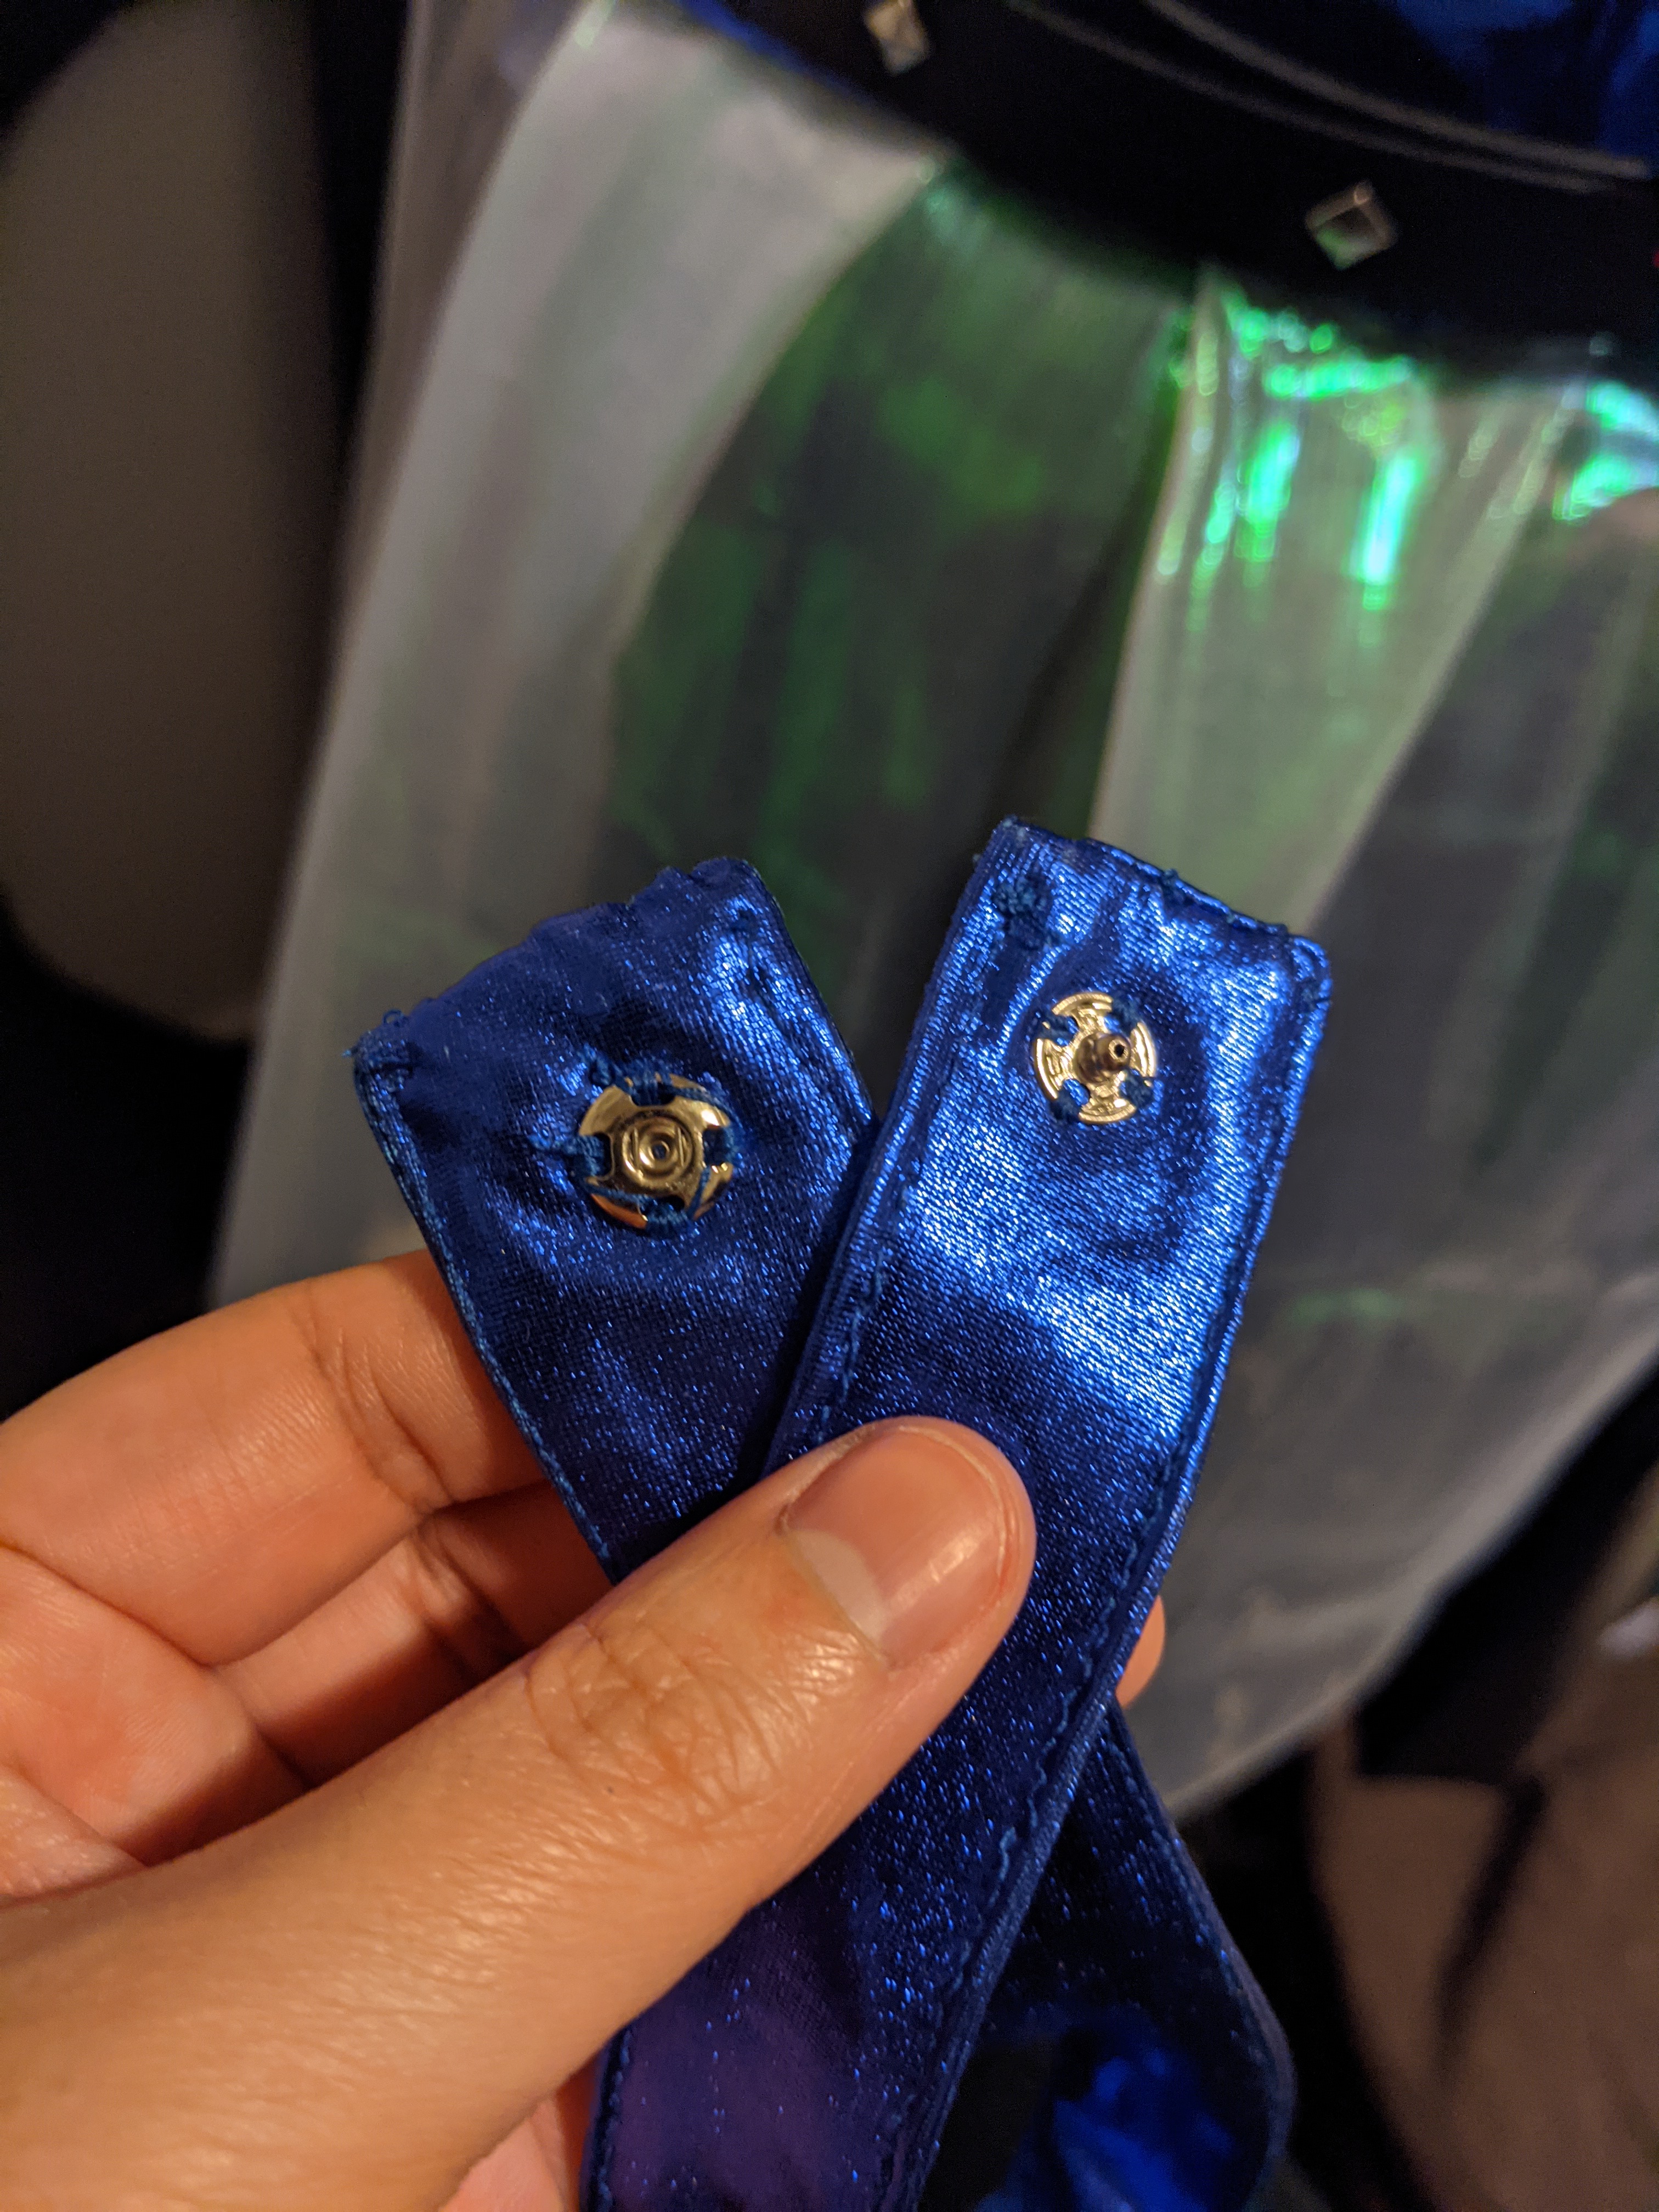
For the choker, I cut one long strip of blue fabric that was twice as wide as what I wanted the choker to be. After folding it in half (to simulate the final width) I wrapped it around my neck and found out where both ends intersected. Once I figured that out, I added about 1/2″ to that length for the seam allowance. I cut the fabric in half, along the long side so that I had two long, thin pieces. Stitched them together right sides together along the long edge, then turned it right-side out. (This process would be repeated again for the armbands.) I finished the two open ends by ladder stitching, then topstitched along the long ends to flatten the choker (and also give it a nice finished look). Finally, I added one snap to the ends of the choker for easy attachment and removal.
Armbands: Right wristband and left shoulder band
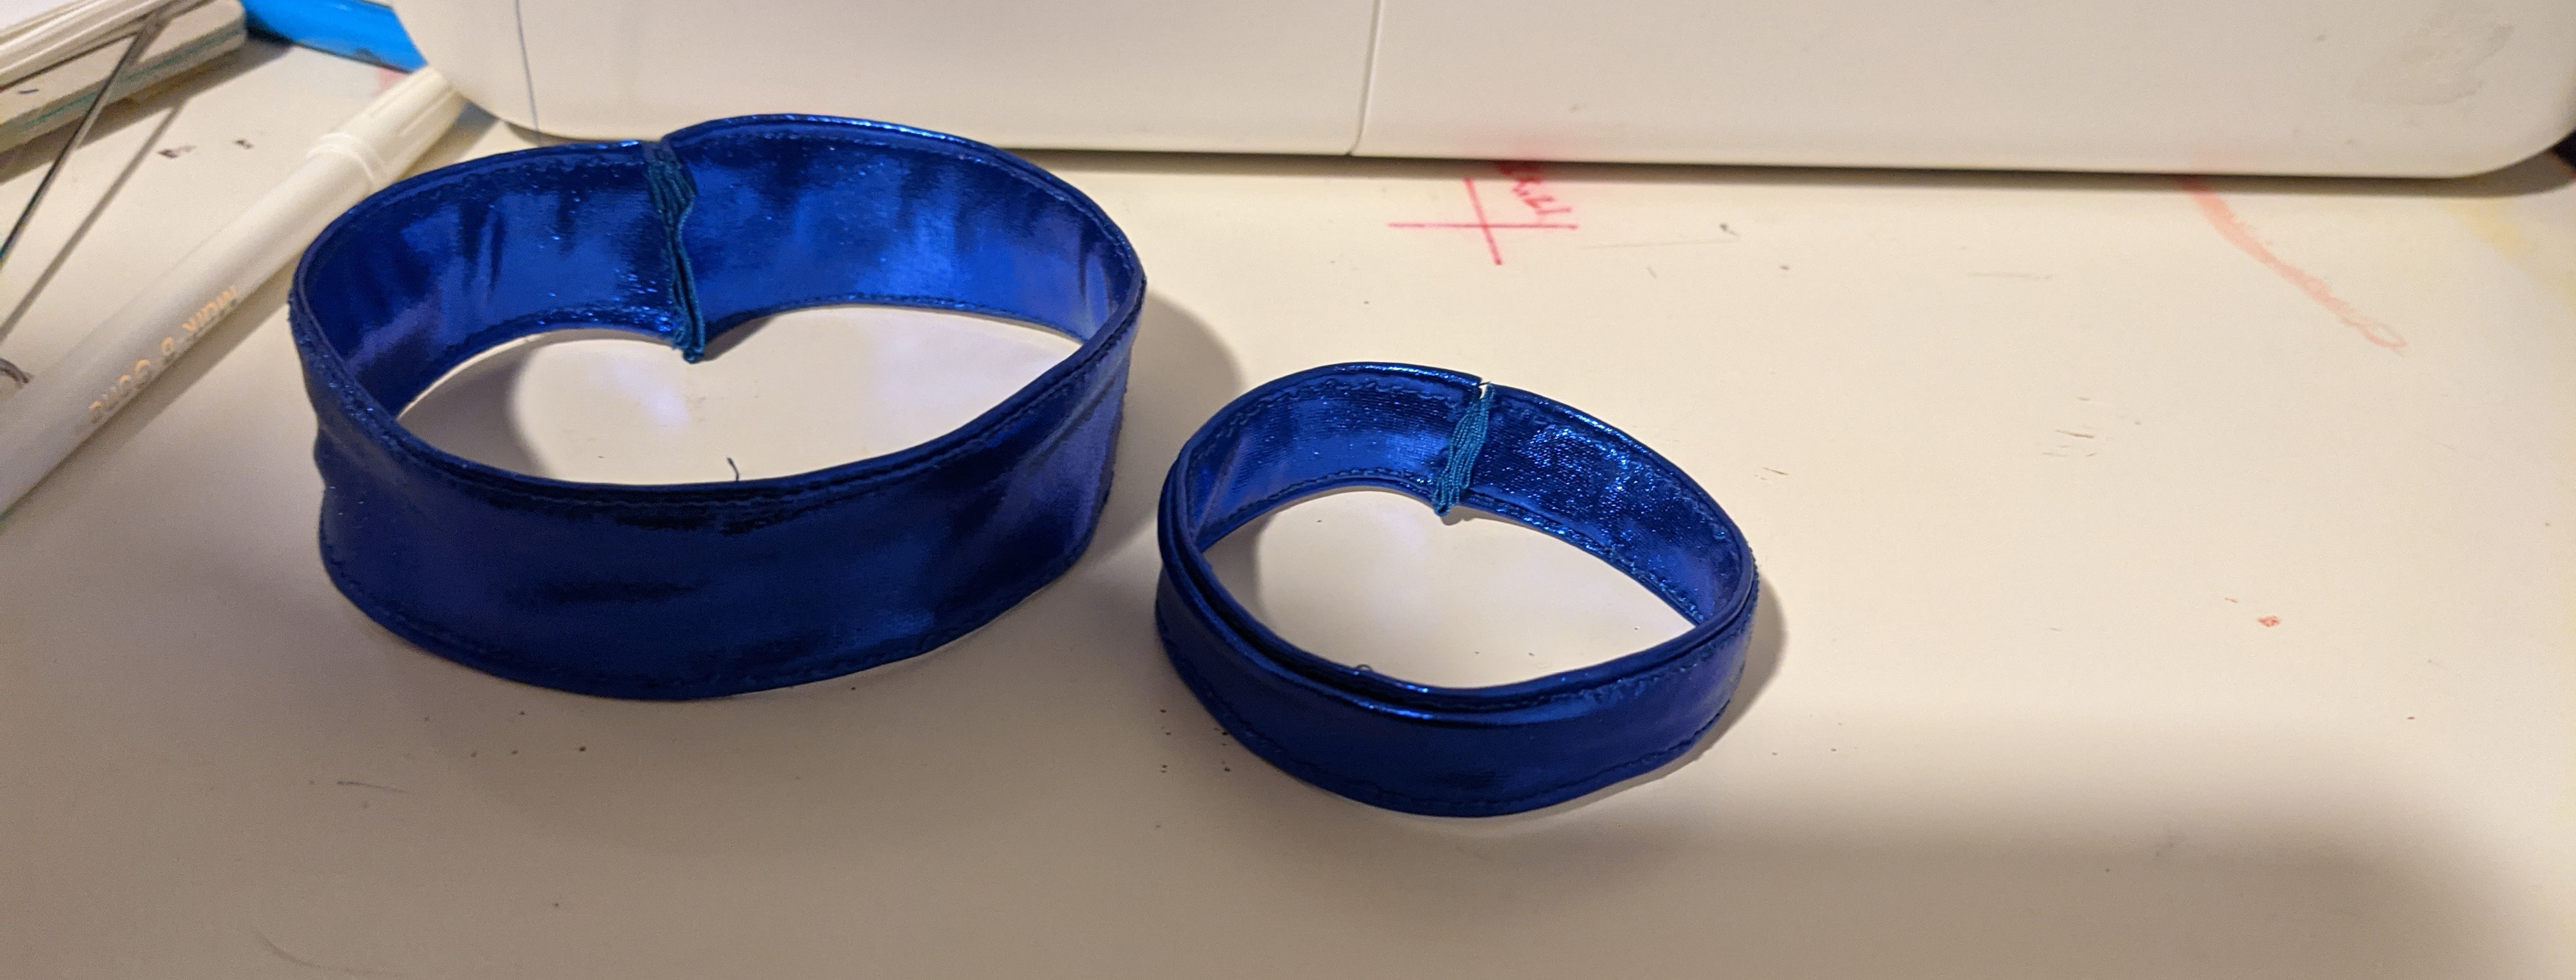
The two armbands follow the same process as the choker of cutting strips, comparing to my body, then adjusting. However, instead of using a snap to finish the ends, I simply stitched the ends together, making especially sure for the right wristband that it was wide enough that I could fit it over my hand. (But before I stitched the ends together, I top stitched the top and bottom edges for a flat, clean look.)
Left bracer
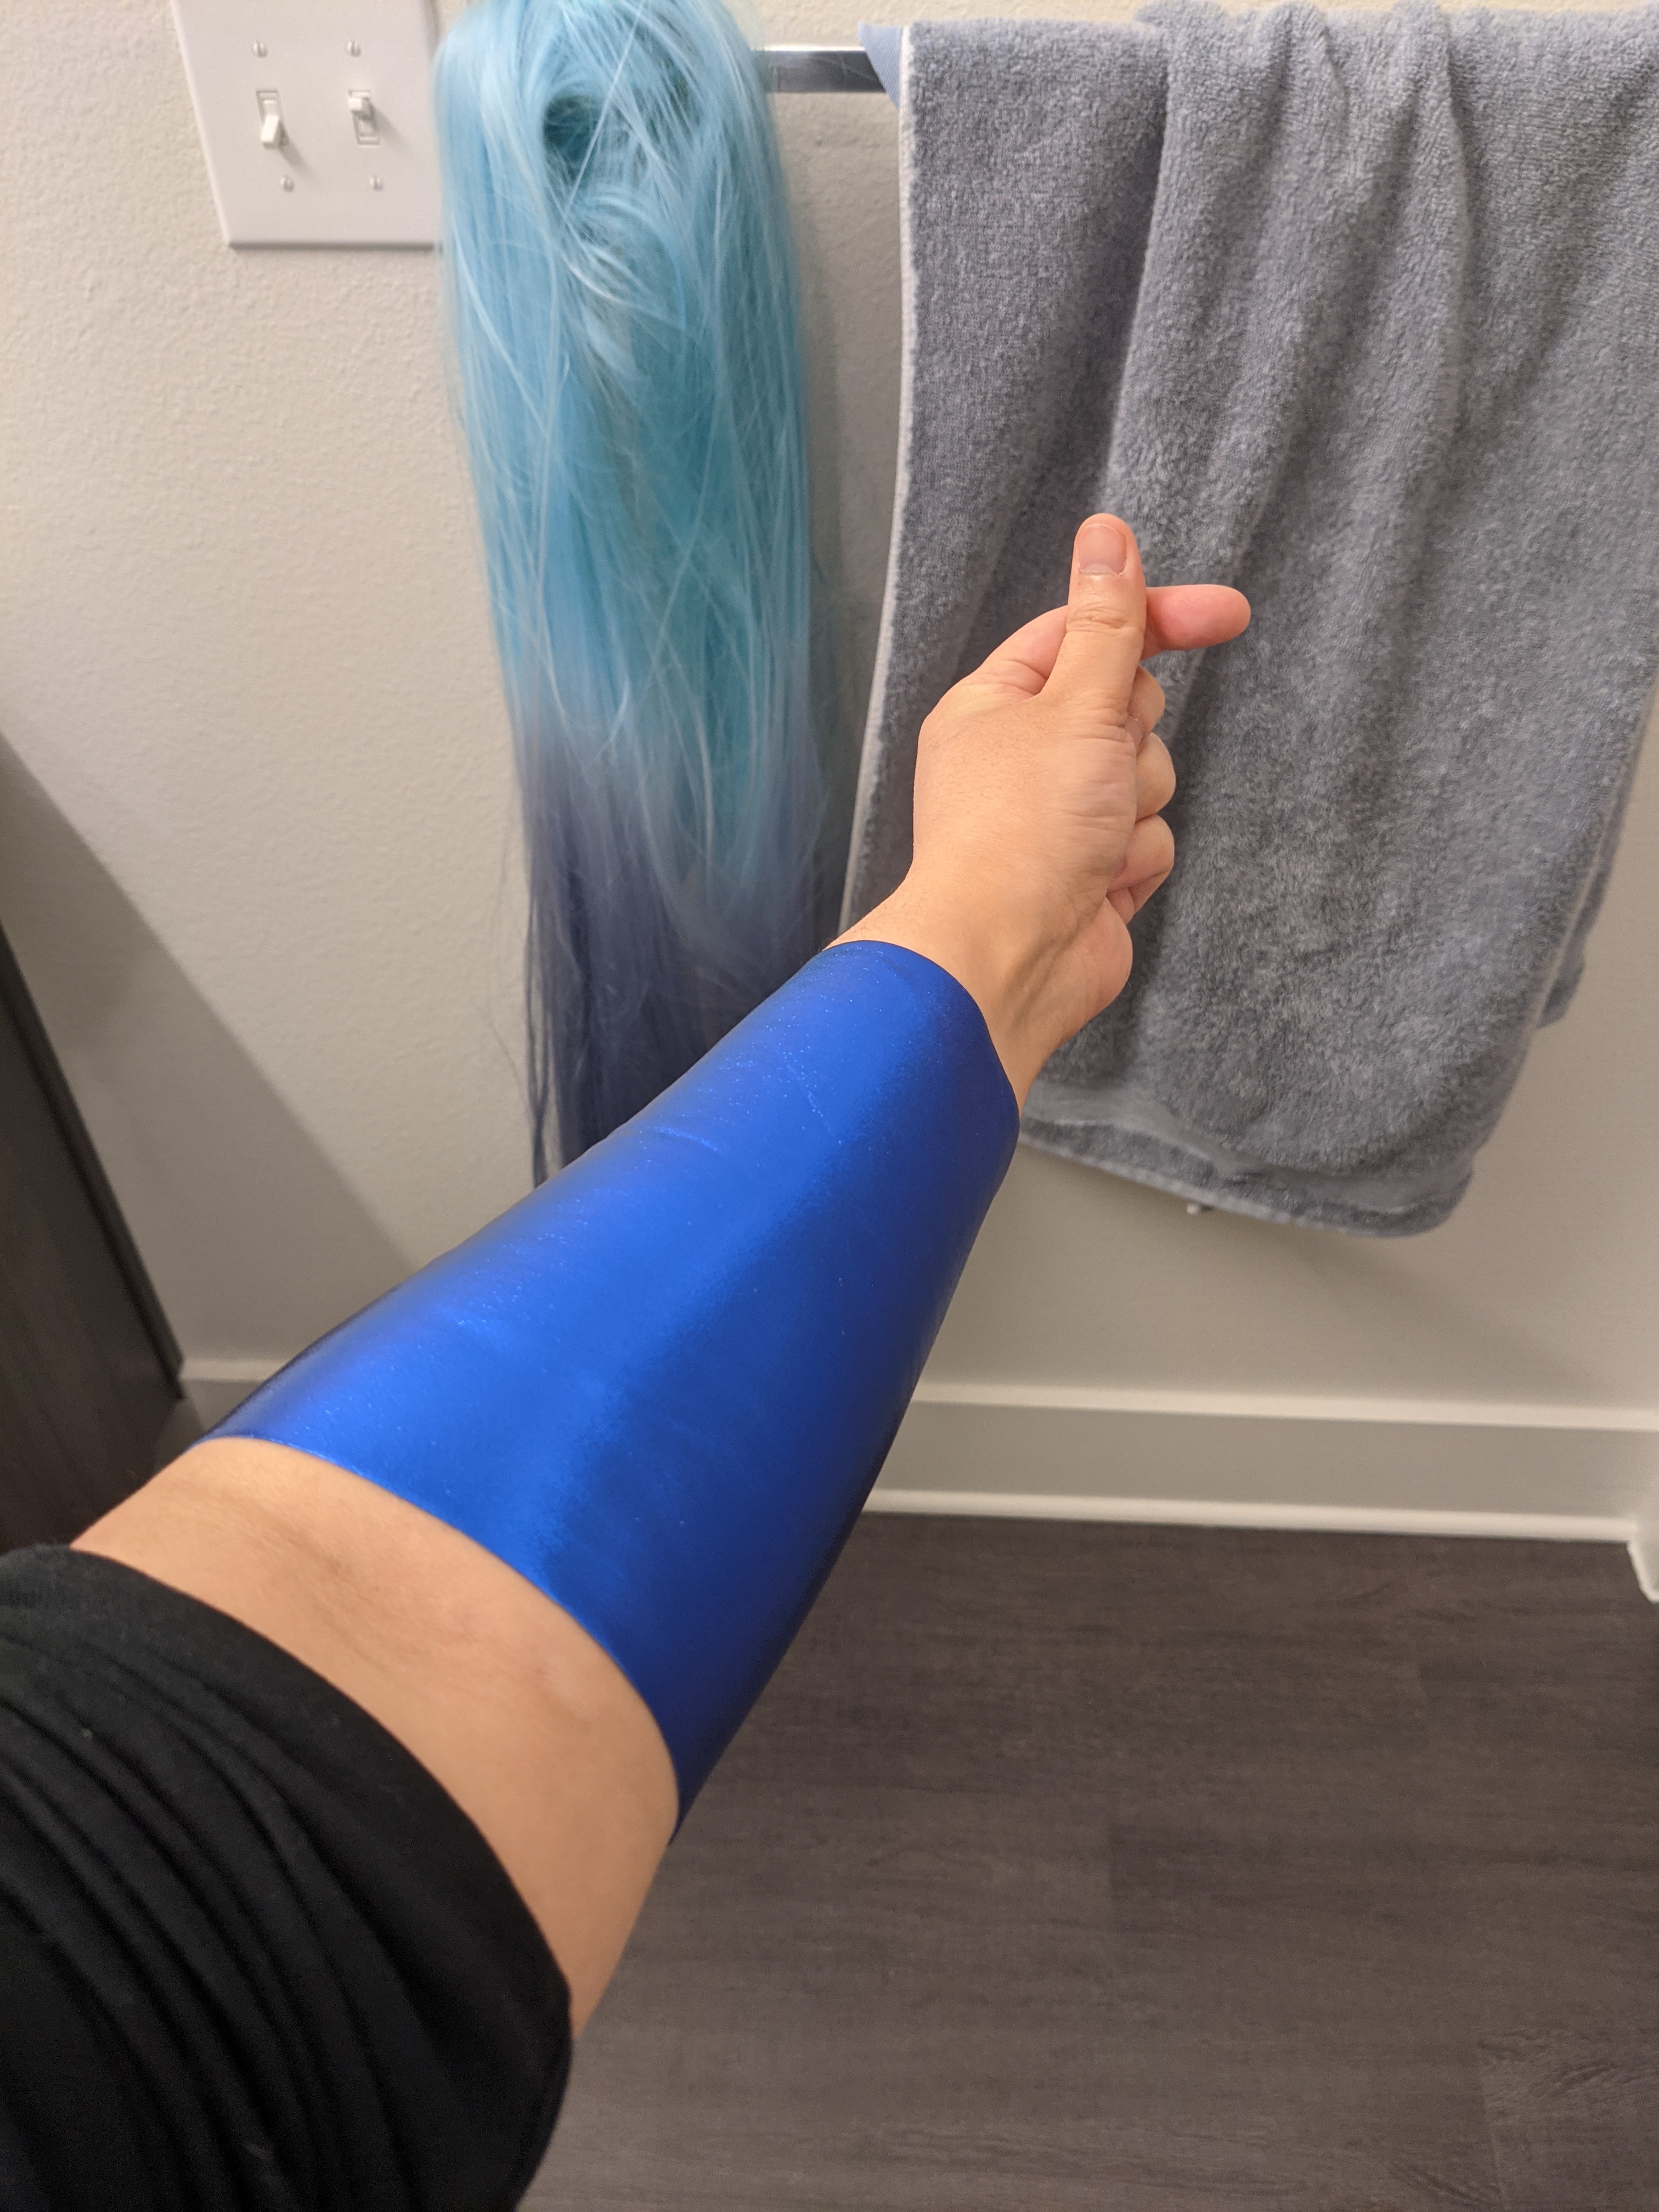

The left bracer consisted of cutting a piece of the blue fabric larger than my wrist and then pinning it in place. I made sure that it was snug enough to not be loose, but big enough that I could just slide it over my hand. The rest was the same as the other armbands: stitch the ends together. I opted to not topstitch the bracer because I liked the flat look of it.
Wig
I heavily borrowed from Kinpatsu Cosplay’s Seraphine wig tutorial on Youtube. I did, however make some minor modifications to account for cost as well as dancability, a word I made up just now to say that I wanted the length to be shorter/lighter so that I could more easily dance with the wig on. This wig would end up weighing just shy of 2lbs.
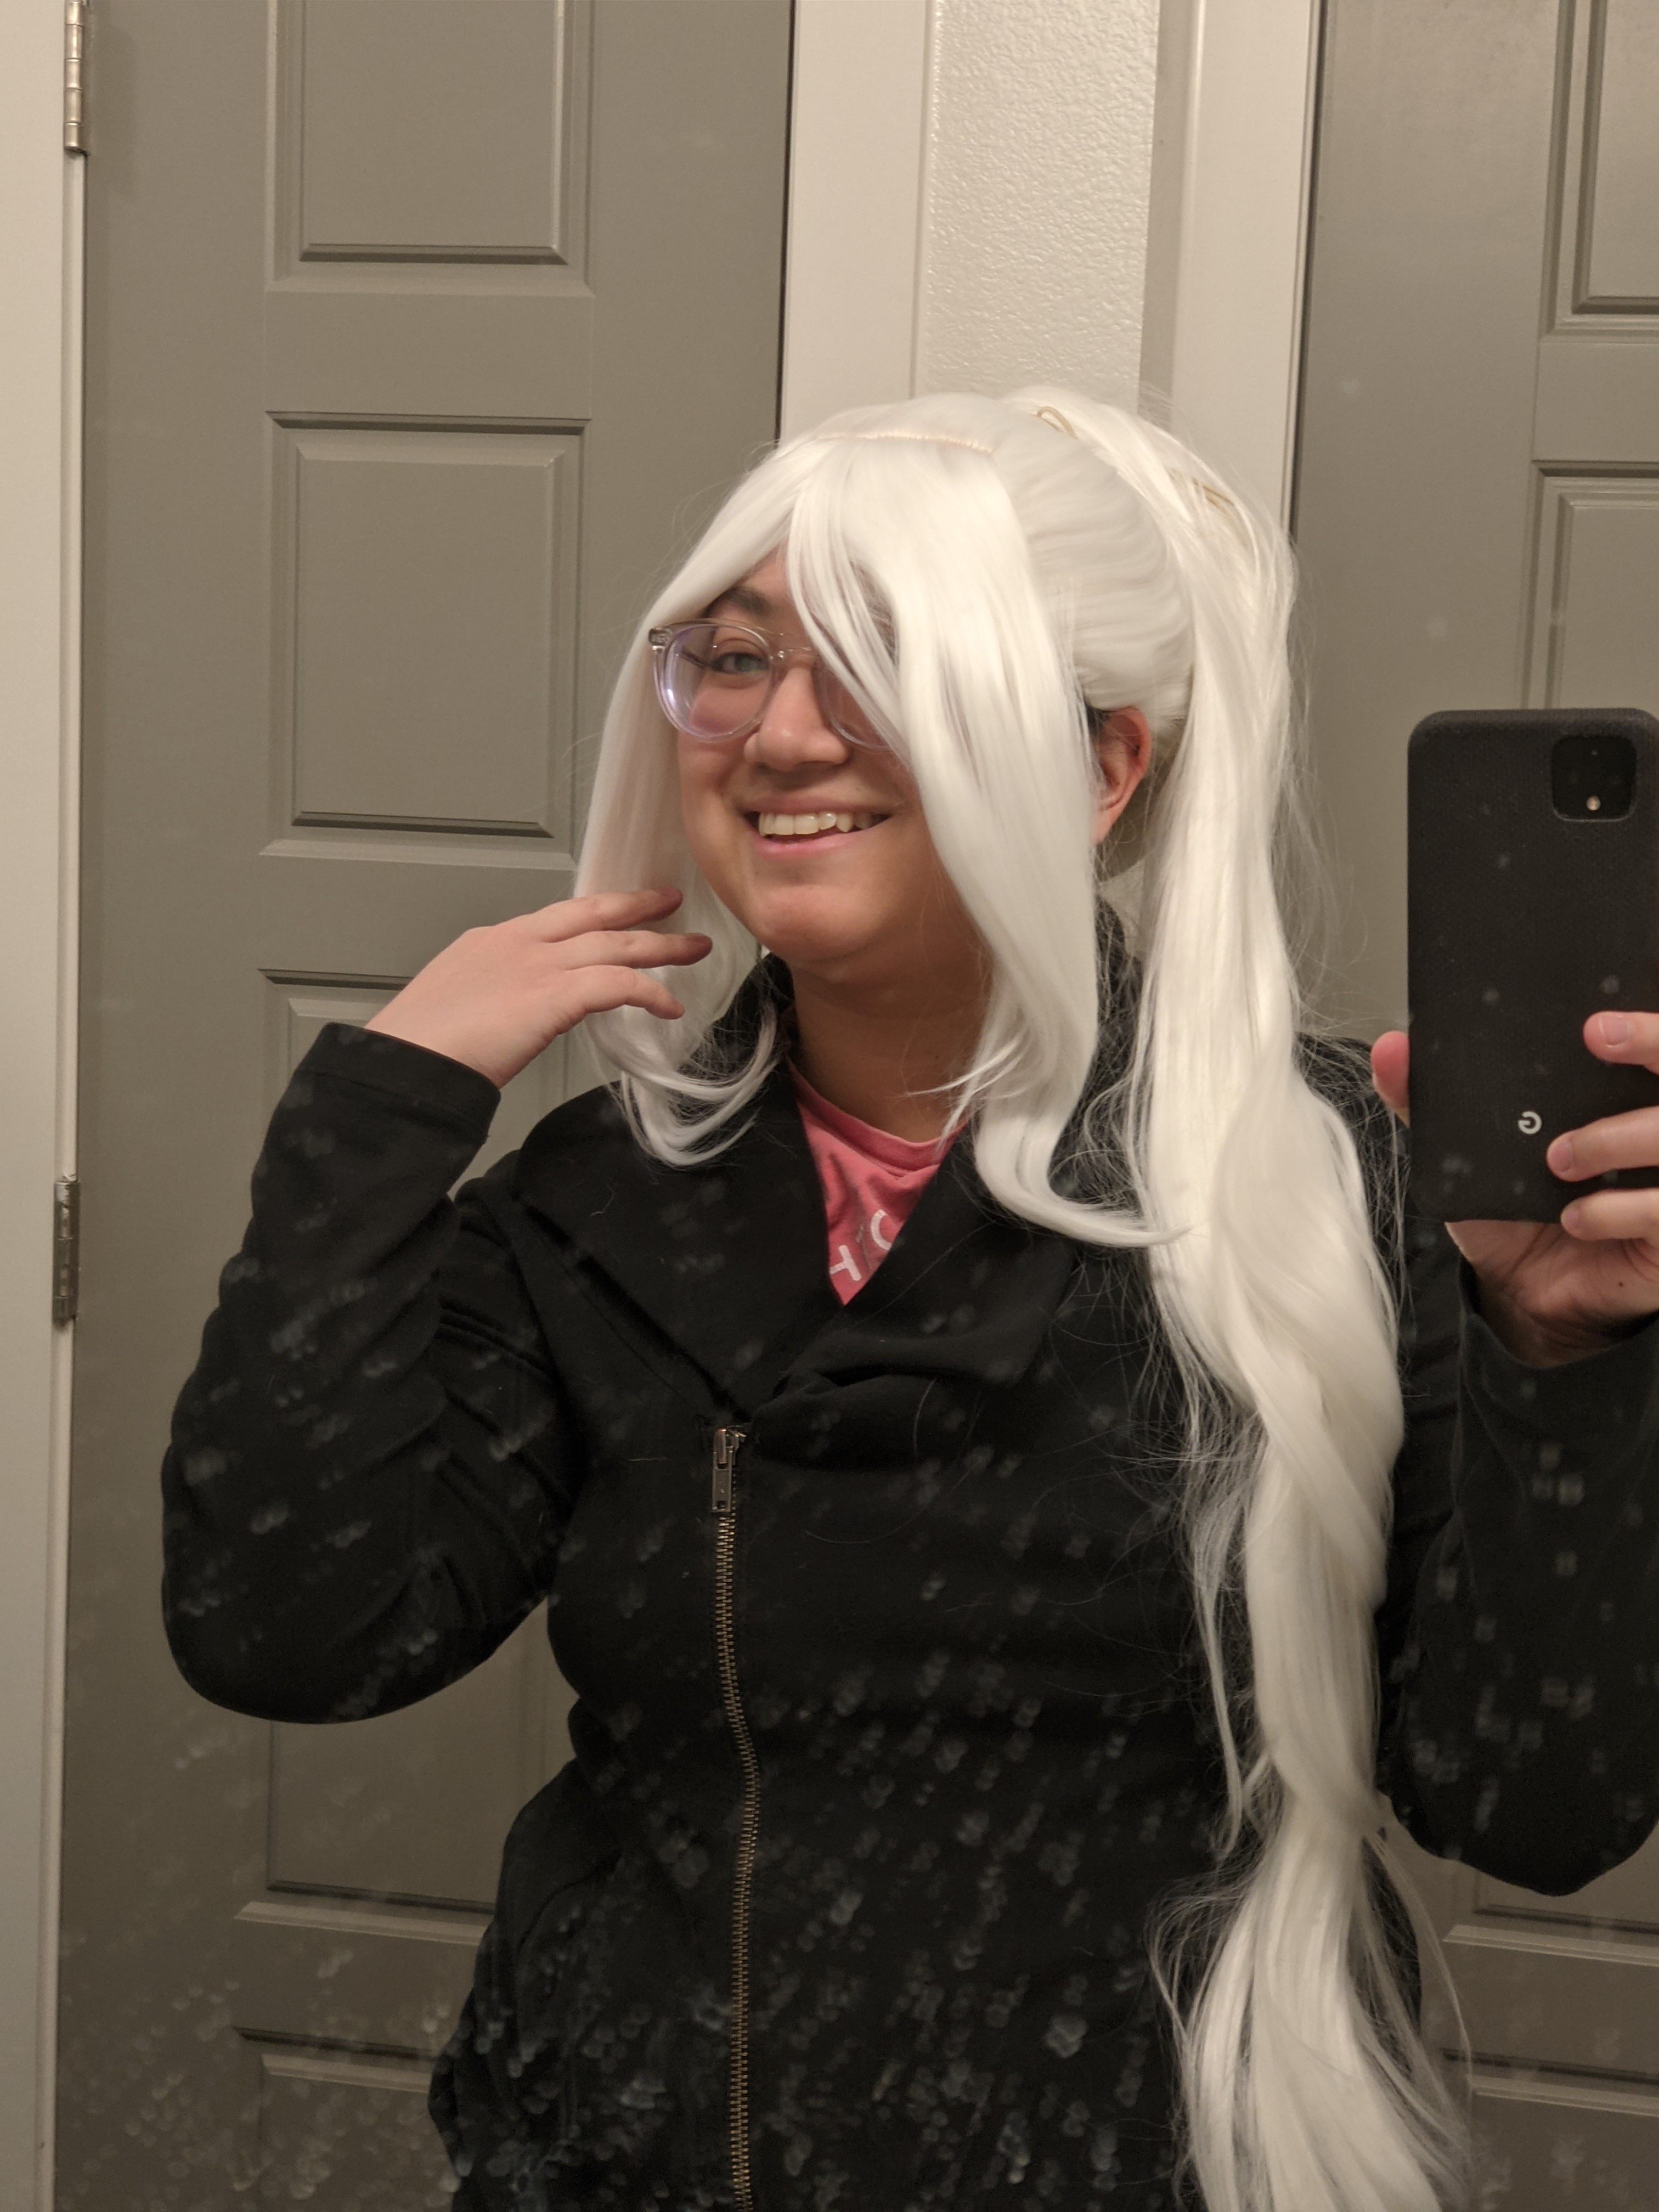
Kinpatsu recommended these for the wigs: a pure white Viktor Classic wig and a pure white Delilah Classic wig, both from Arda Wigs. But seeing as the Viktor is a $110 and the Delilah is $75, I opted to go with a different, cheaper Arda wig. I still went with pure white, but I got the Jeannie Classic instead. Like the Viktor, the Jeannie is a ponytail wig. The difference is that it isn’t a lacefront, making it a much more affordable $50. I threw in a set of pure white long wefts while I was at it, just in case I needed more wig fibers. The Jeannie Classic wig also had the added benefit of coming as two separate pieces: the base that goes on your head and the ponytail piece with a jaw clip already attached.
Wig 1.0
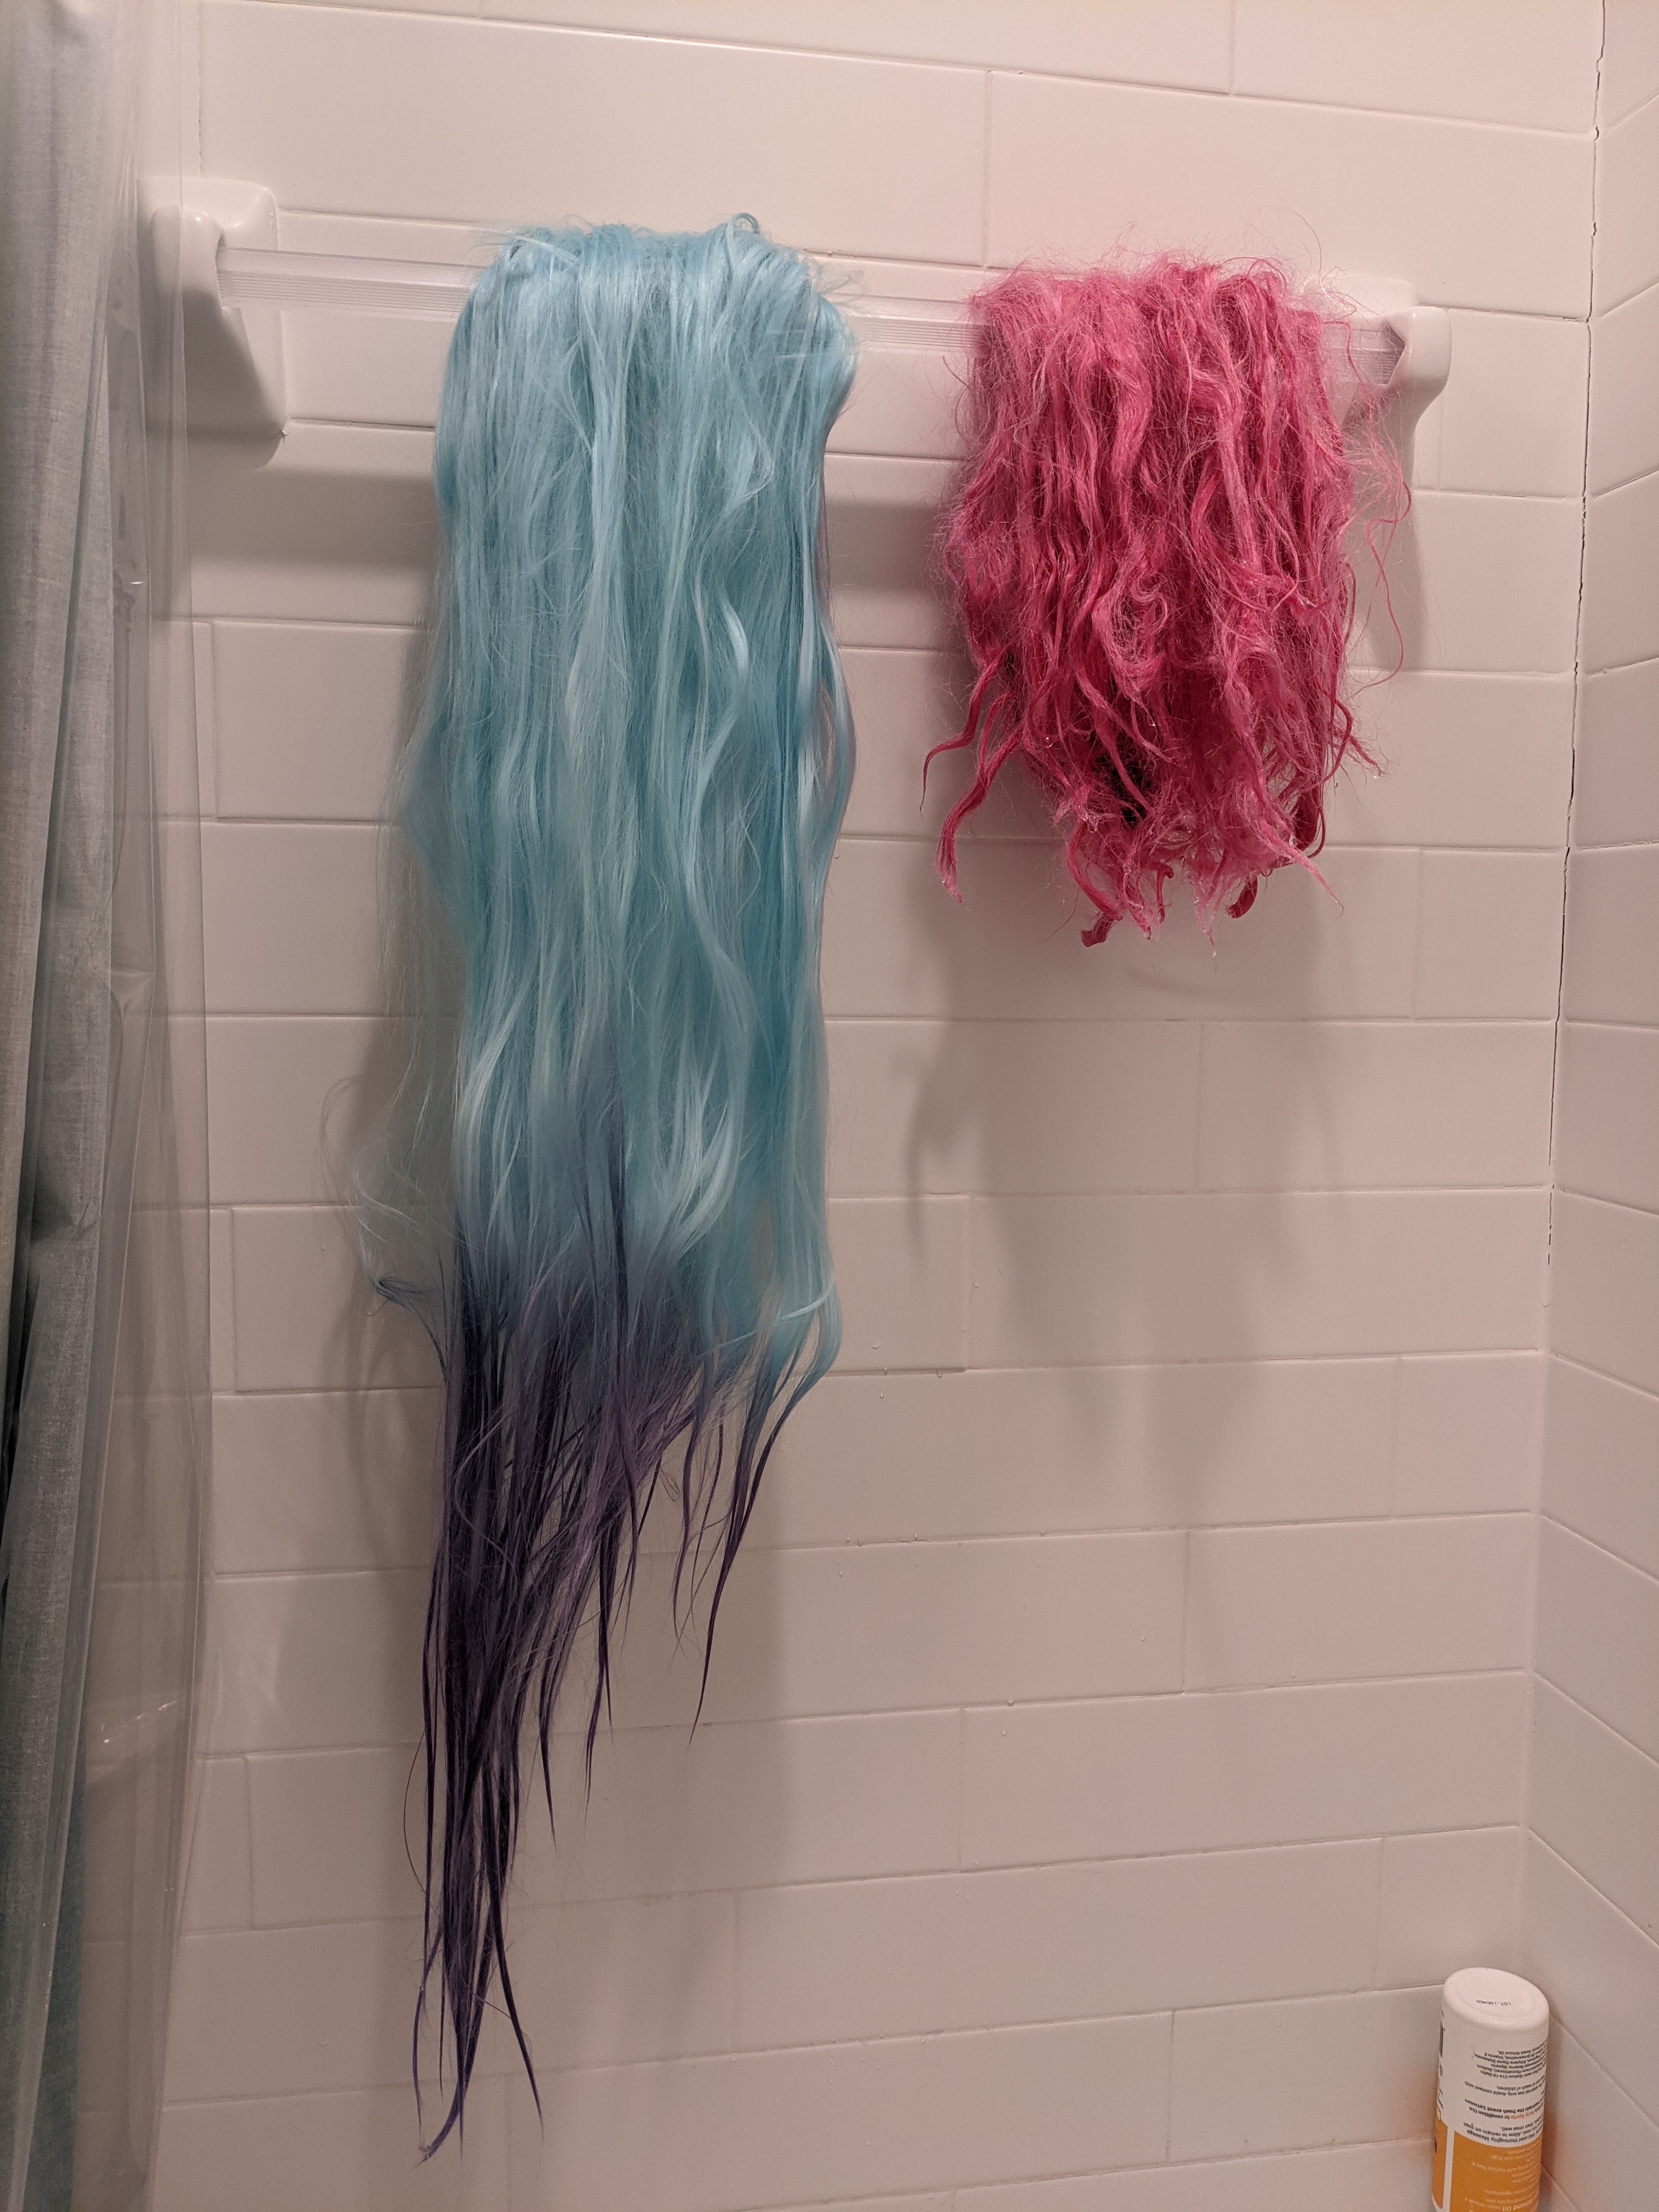
Following the Kinpatsu tutorial, I dyed the wigs. I tested the blue Rit Dye out on some wig fibers from the extra wefts first before dyeing the base wig, the ponytail, and then the wefts. I ended up having to do the base wig and ponytail twice because I thought the blue wasn’t dark enough after the first time. After a second dip in the dye pot, it looked much better.

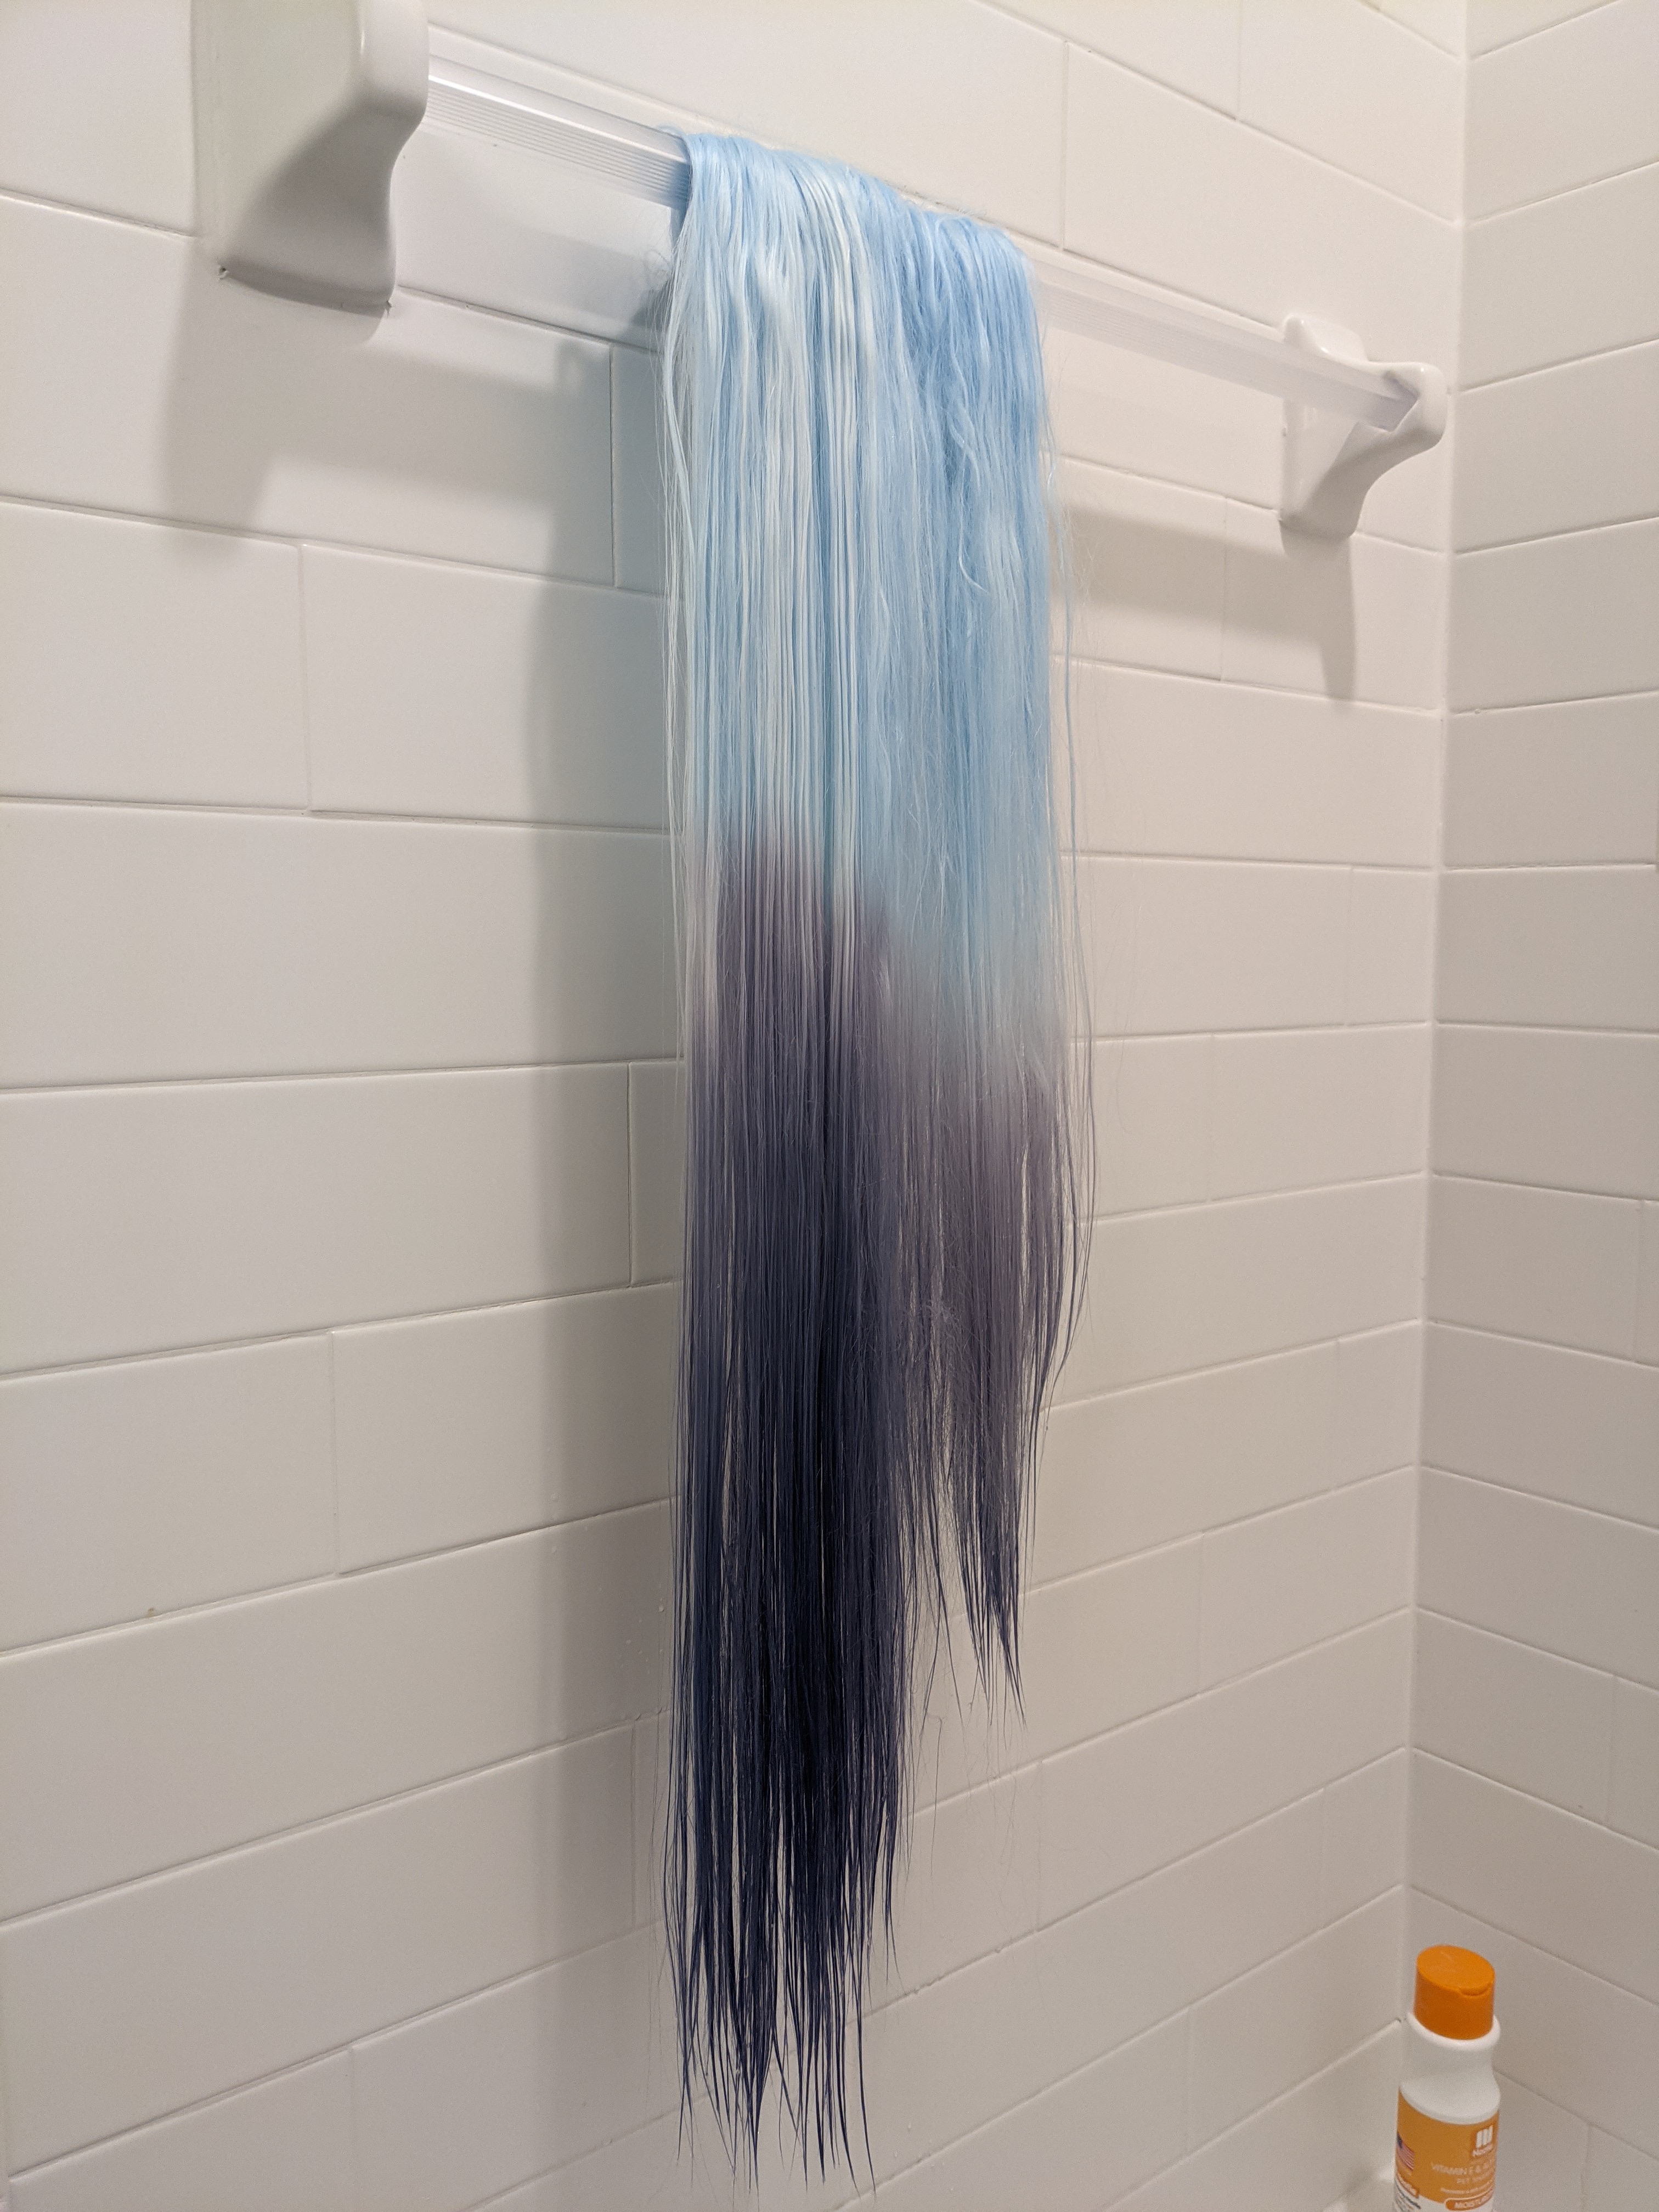
After dumping out the blue dye water, I refilled the pot with water and added the purple dye. This time I only dyed the ponytail piece. My shoulders definitely got tired from having to hold the piece up so high to make sure only the bottom parts I wanted were submerged in the water. The whole dyeing process took about an hour and a half.
After detangling them with a wide-tooth comb, I let them airdry in the bathroom. I ended up doing the whole process again because I didn’t think the color was deep/dark enough. After this second round of dye, I learned from our group’s Evelynn (who is also making a Seraphine cosplay) that there is in fact a teal dye. Using the same dyeing method as mentioned before, I added teal dye to the blue parts of the wig. It took two separate sessions to finally get it how I wanted. I’m really happy that I didn’t settle for just the blue. I knew I wanted that hint of green in it from the teal. Now, would it have probably looked better had I just used the teal from the start on the white wigs? Probably. (Spoiler alert: it does.) But I wasn’t about to buy a brand new set of wigs just for that. (Oh, that’s what you think, Past Ashweez.) So there’s your pro-tip: exhaustively research all the different dye colors you can buy before starting the dyeing process.
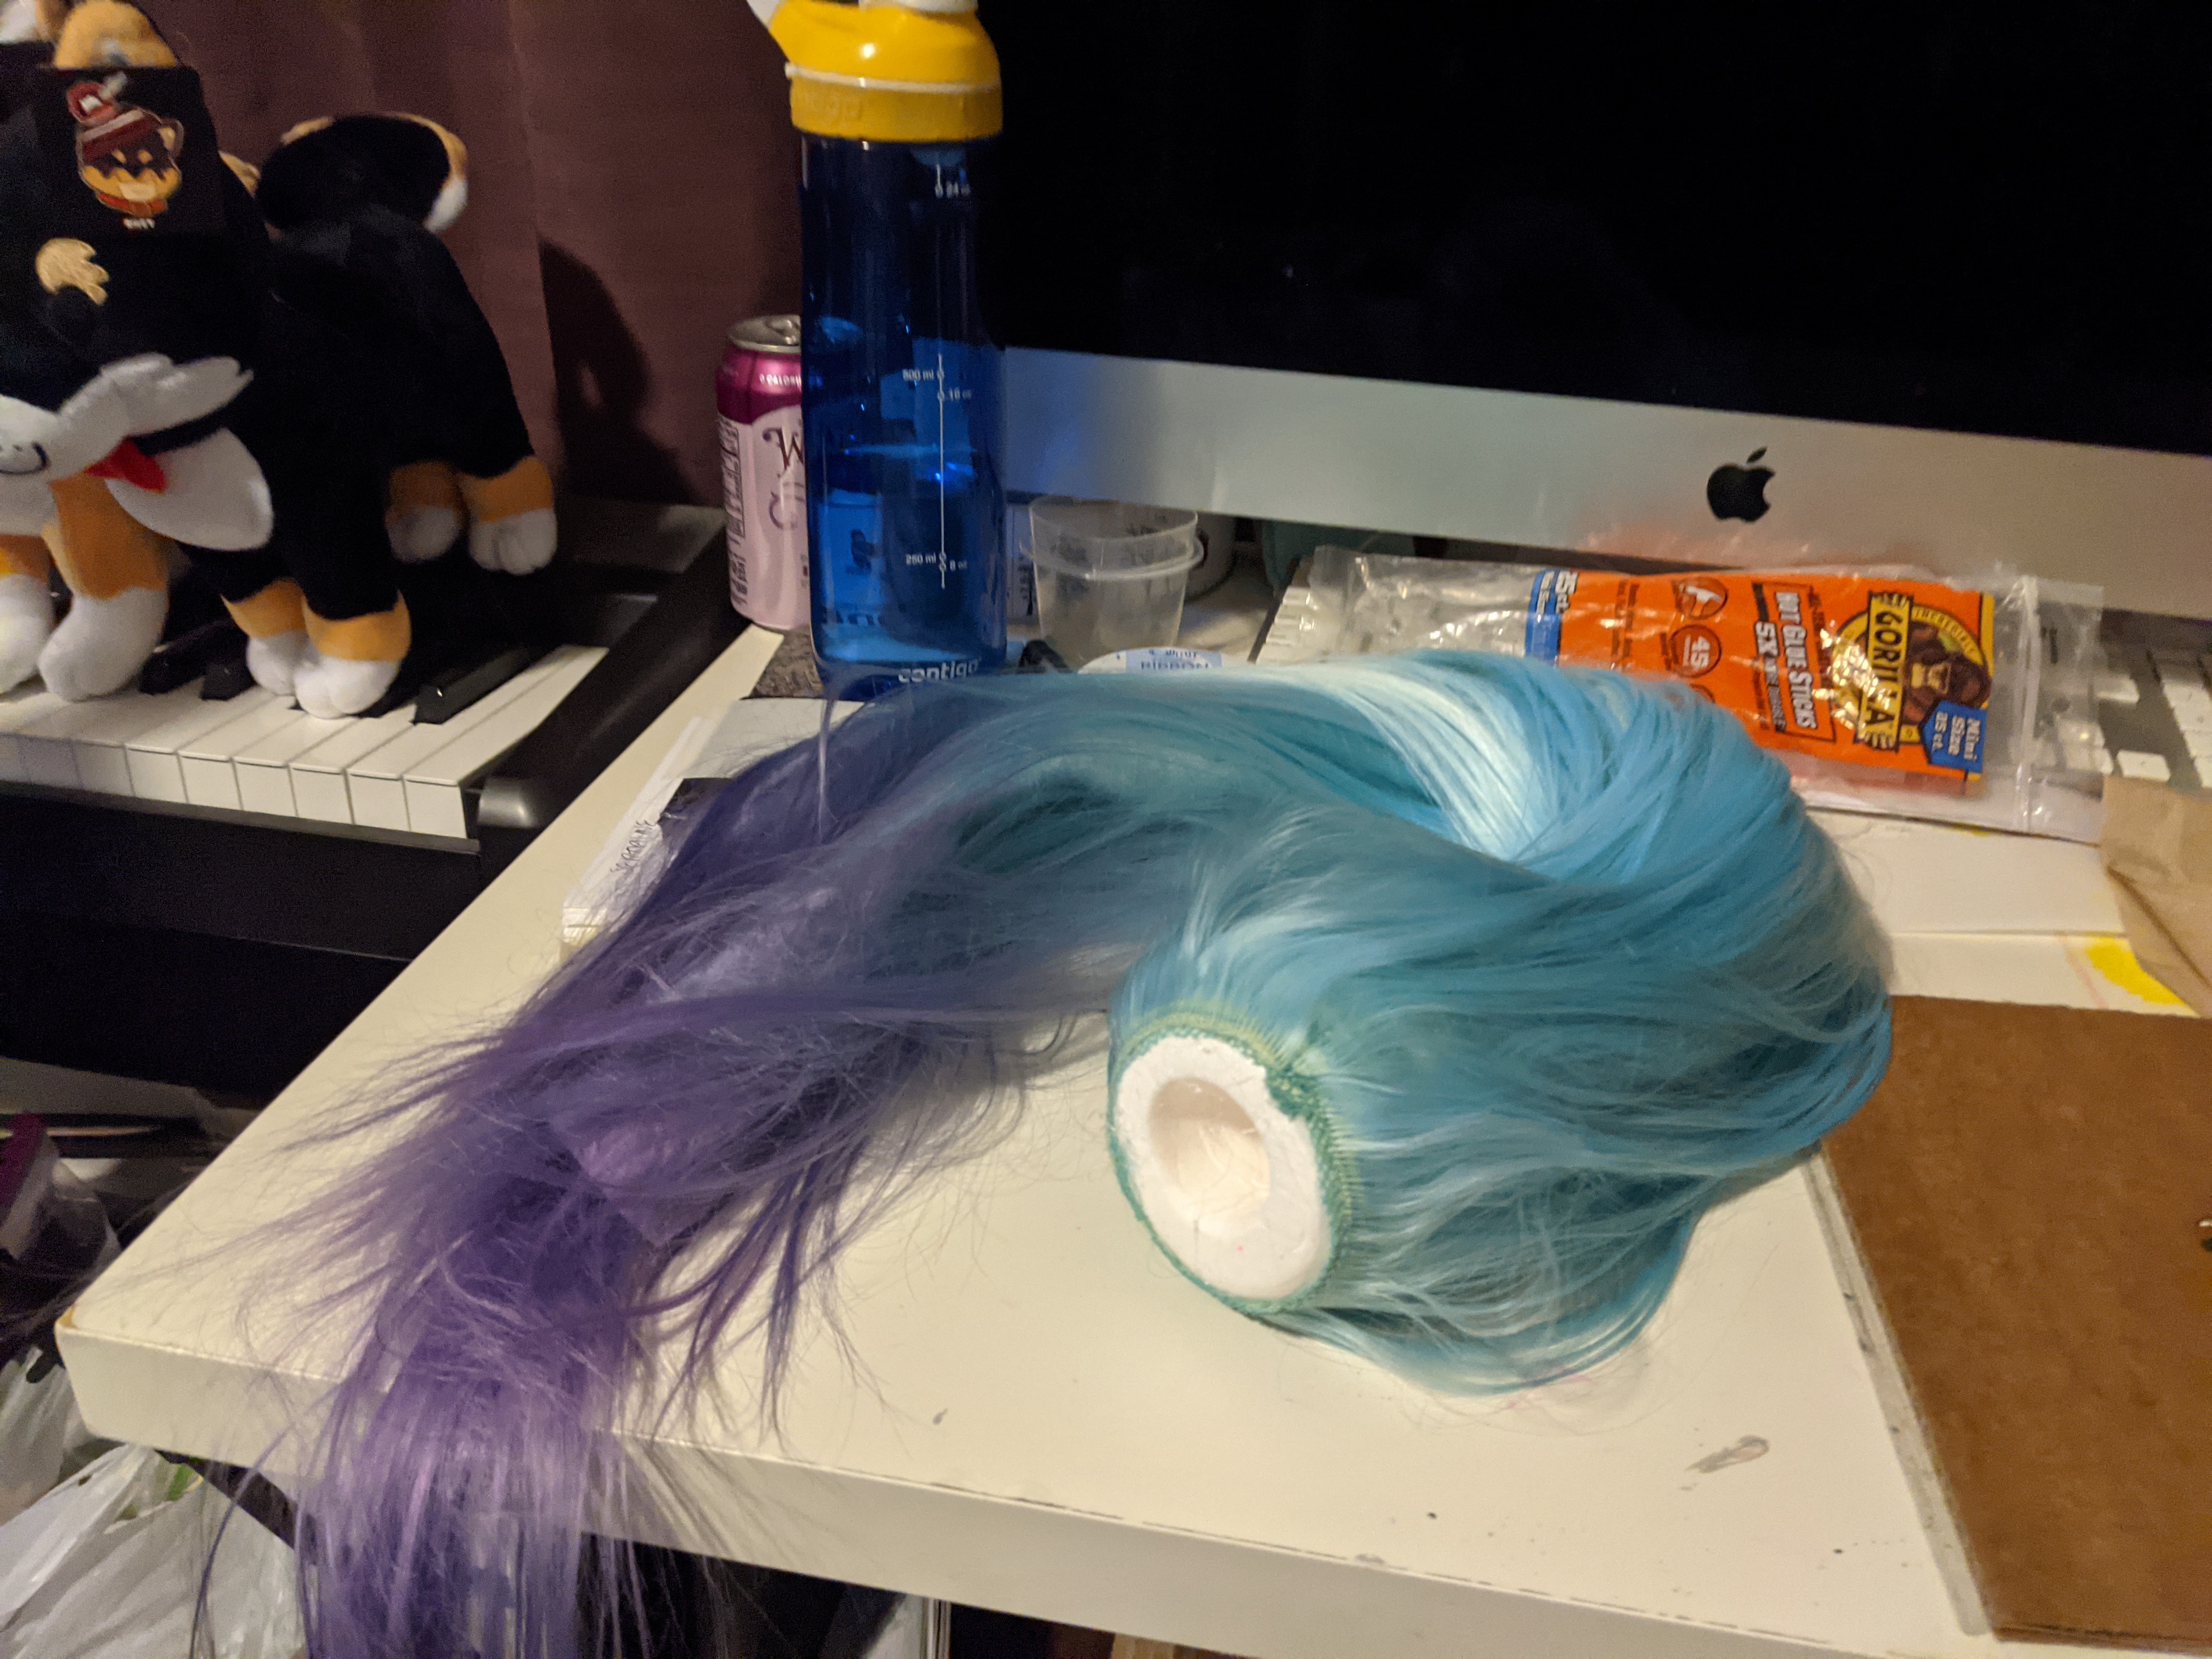
Once I was finally happy with the dye job, I straightened both the ponytail and the wig base. It was here that I would end up failing and having to start over. I had skipped the part in the Kinpatsu tutorial where you make the wig head the same size as your head. This proved to be a fatal error, because as I hot glued the ponytail ends up for the base, I was slowly making the wig too small. By the time I finished, it was too late: no matter where I wore the wig base, my hairline showed. Not only this, but I had used hot glue as my main method when I should’ve been spraying it and then using hot glue on the ends once I had completed setting the wefts in place.
So, now knowing that I wanted to do the dye differently and I needed to follow the tutorial more closely and not take shortcuts, I set out to do it again. But better.
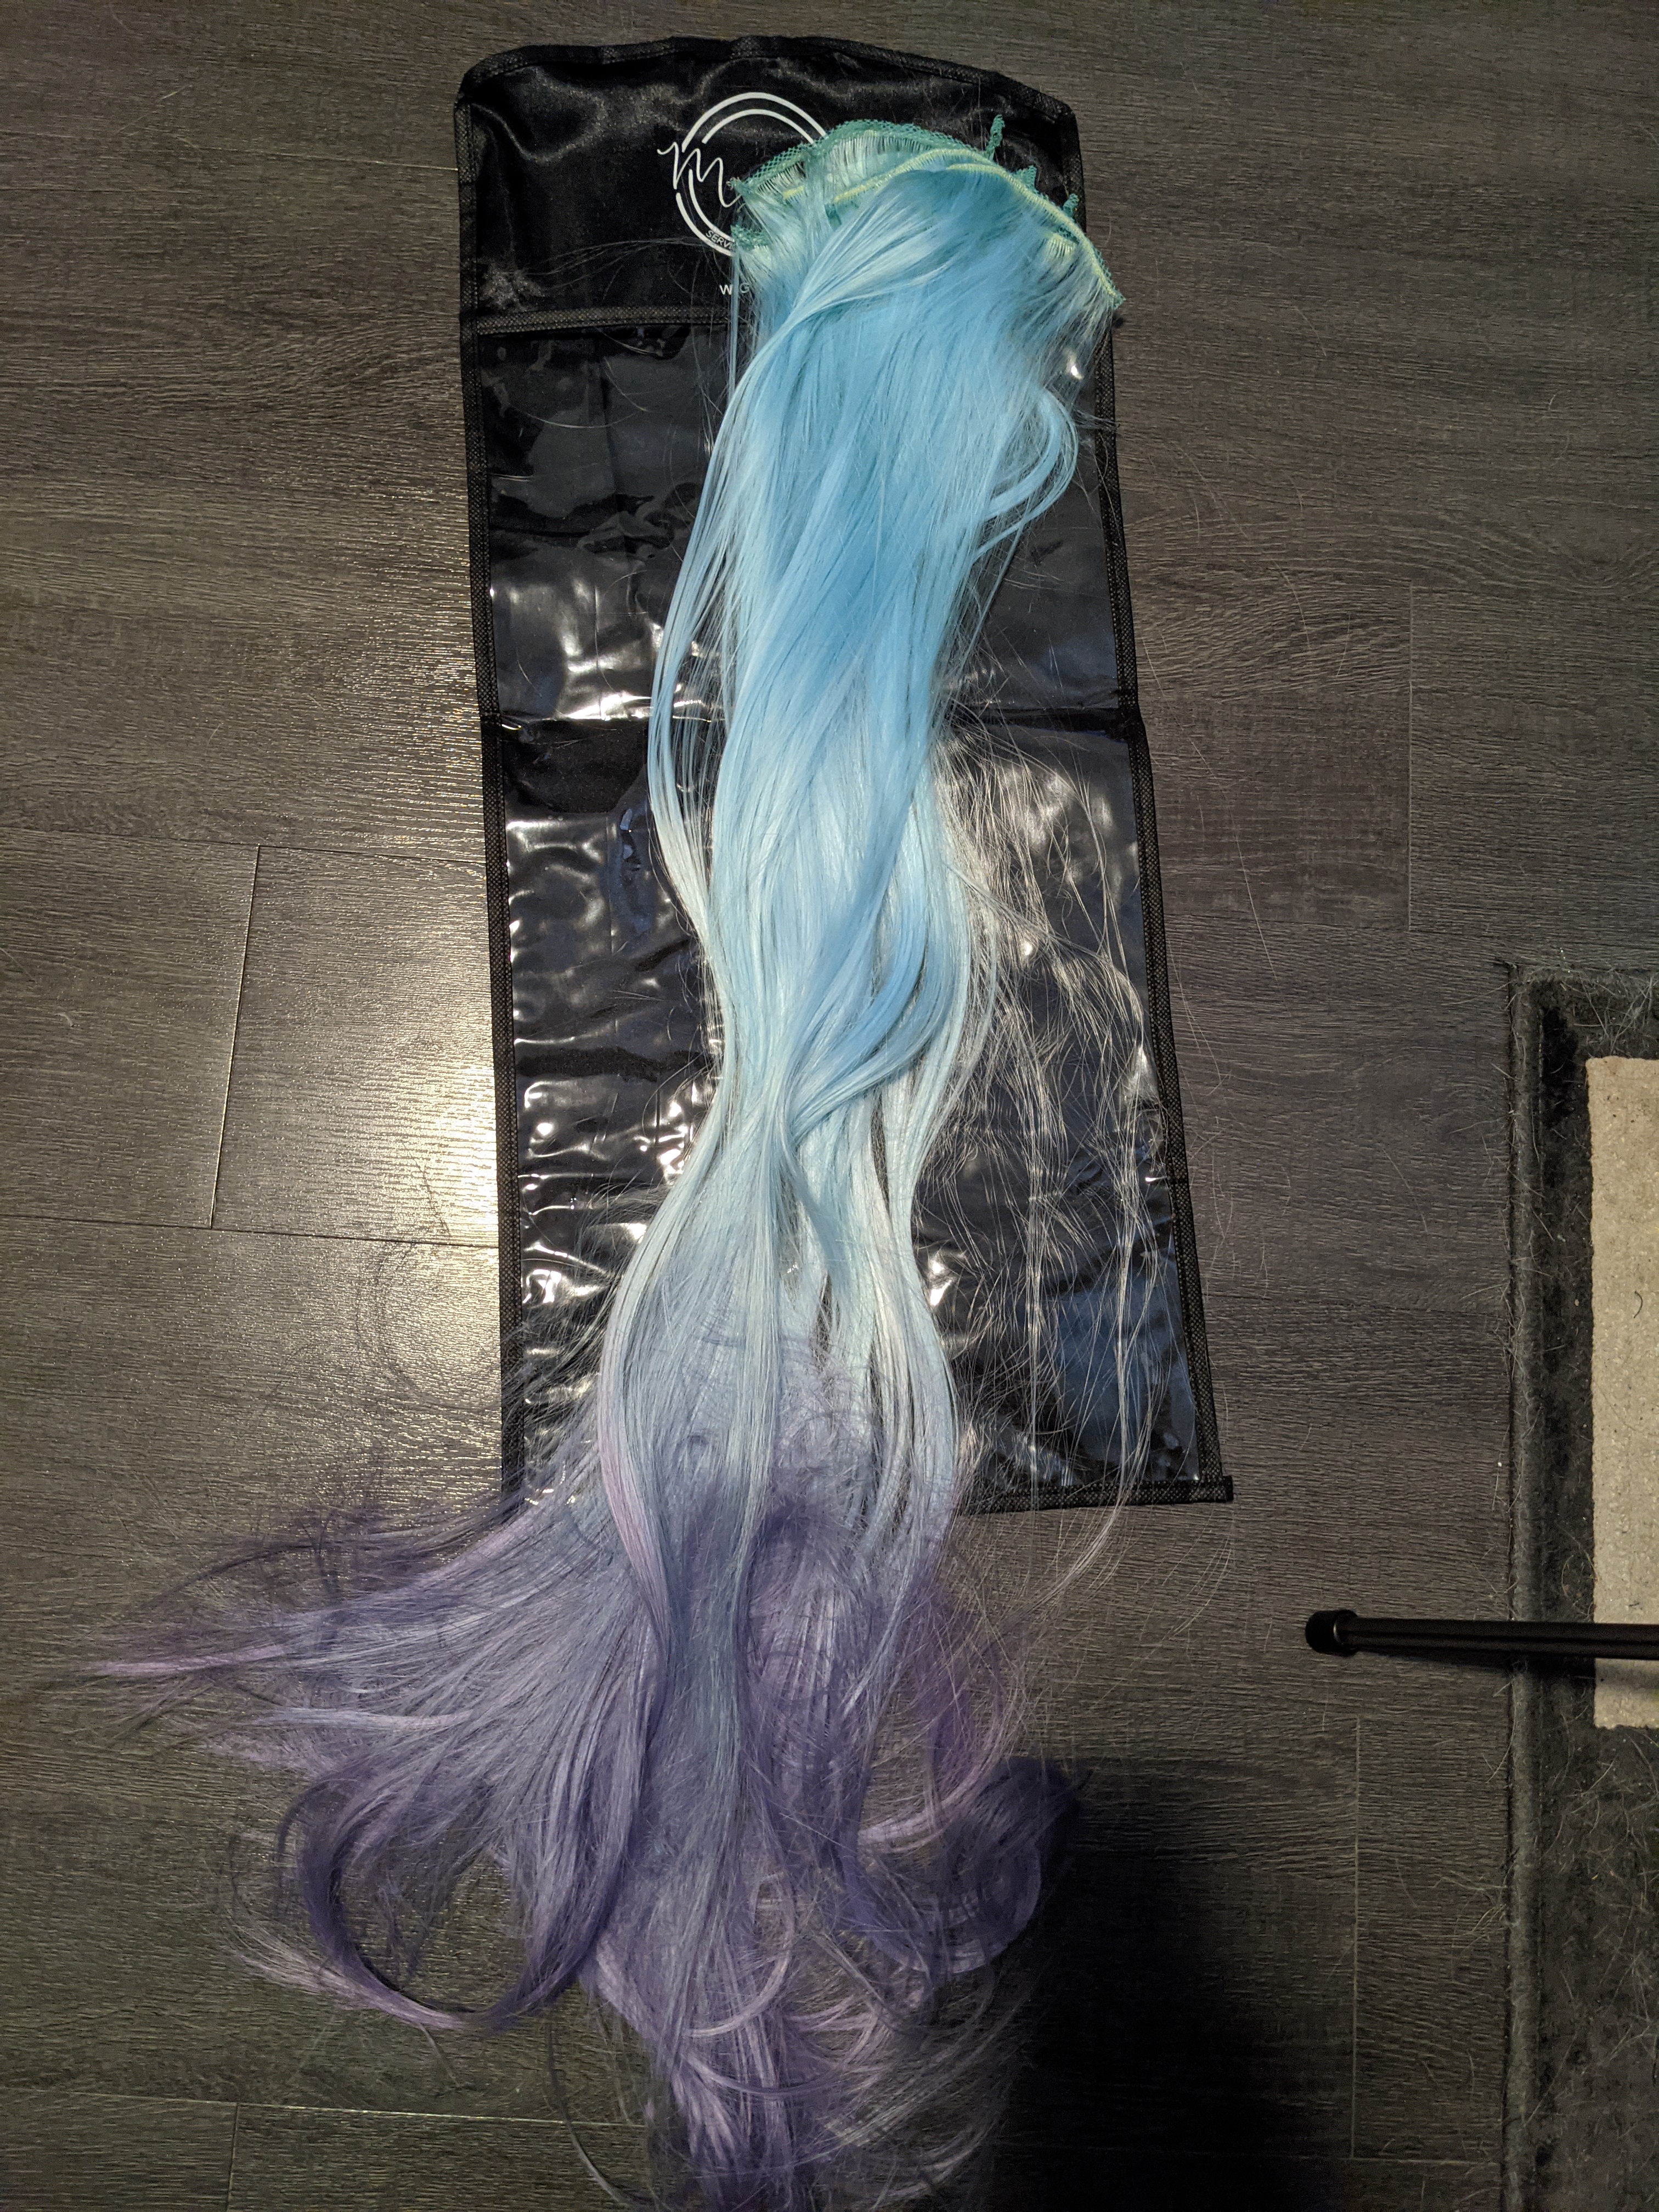
Wig 2.0
I ordered the exact same wig set as last time, but this time didn’t bother ordering extra wefts. I still had plenty of dye from last time left over. Same as last time, I dyed the wig pieces. But this time, rather than dyeing it blue and then teal, I only dyed it teal. For the purple, I dyed the ends purple and then afterwards added super pink dye to the purple parts to bring out the vibrancy. Without the pink, the purple looks more blue than purple.
Wig 2.0 would be made using a combination of the aforementioned Kinpatsu tutorial and another tutorial: the Cosplay Shop Kobracast custom wig head tutorial. I would use this Kobracast method to make the base (or helmet, I’ve been calling it) to hold the PVC pipe.
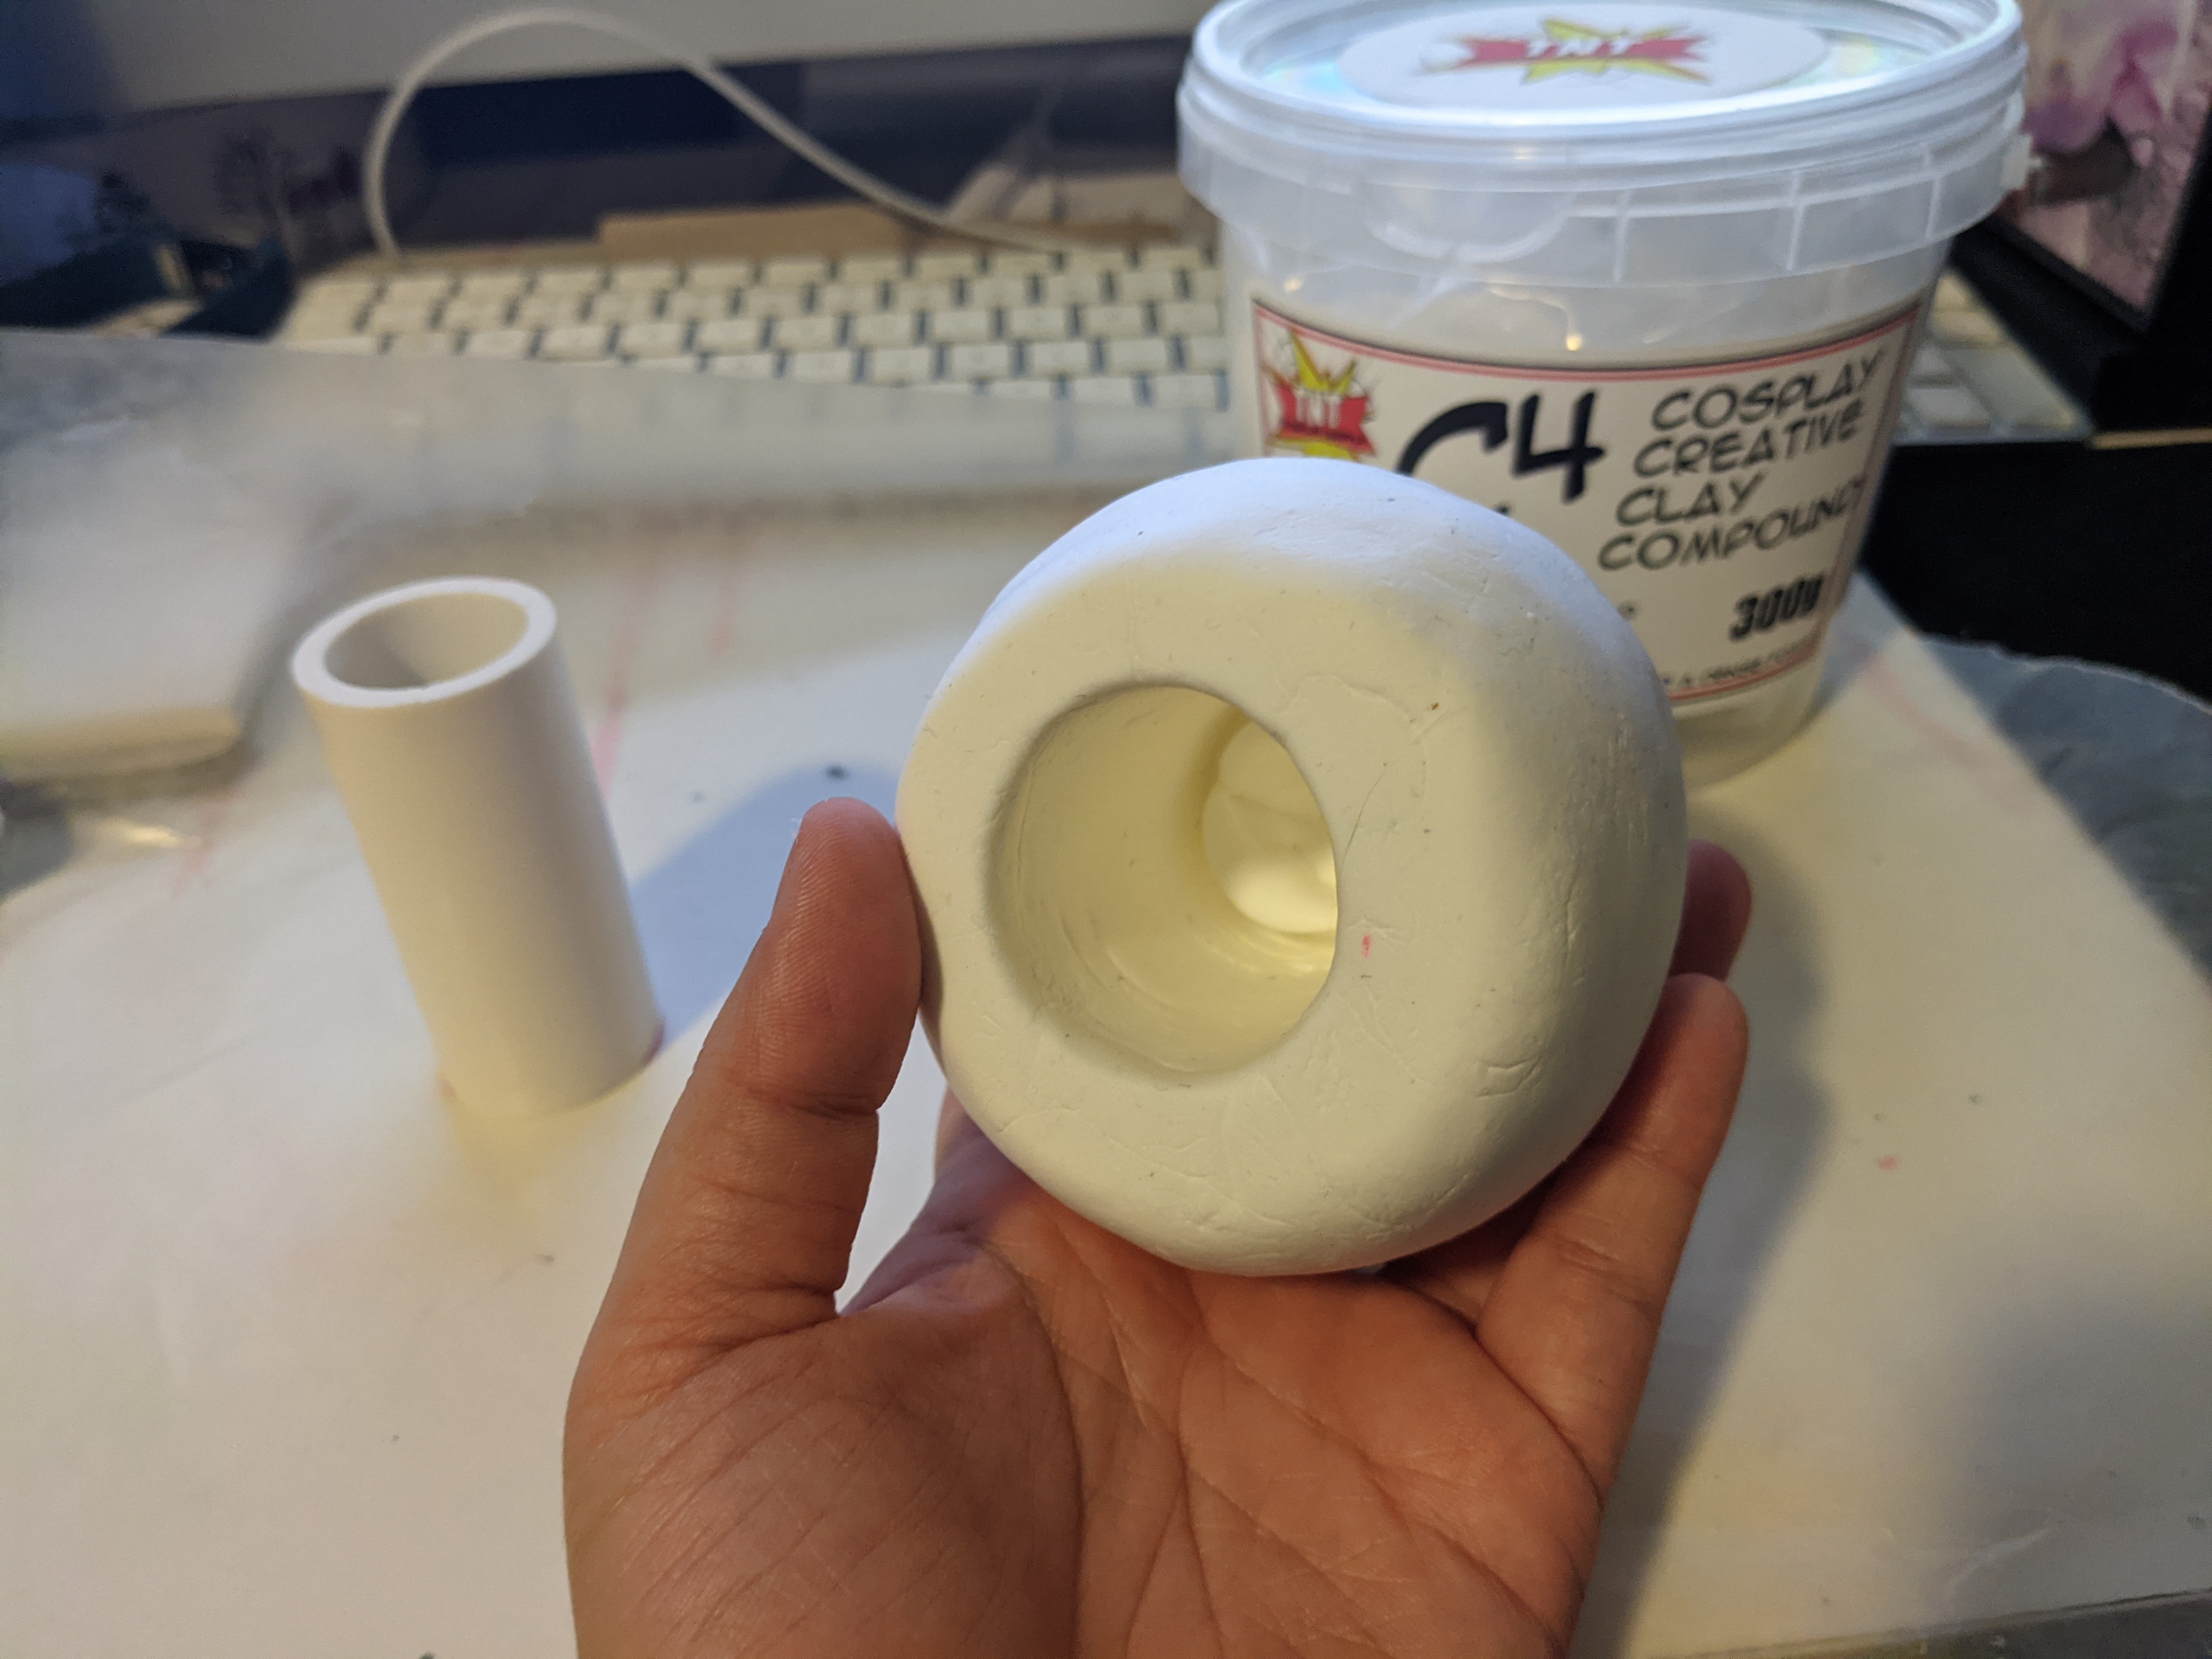
But before I would make my base, I actually made the ponytail first. I’m glad I did this because I was able to test my Kobracast helmet and pipe placement by putting the ponytail on. To make the ponytail base, I followed the Kinpatsu tutorial, but I used foam clay instead of insulation foam since I already had plenty of it handy. This made the base a bit heavier than what the insulation foam probably would’ve been, but it still worked. Then, I used hot glue to attach the long ponytail wefts to it. I used batting too, but ended up not liking it, so I cut it off. I wanted to make the ponytail as light as I could and I didn’t think the batting helped too much with the volume, so I opted for getting rid of it.

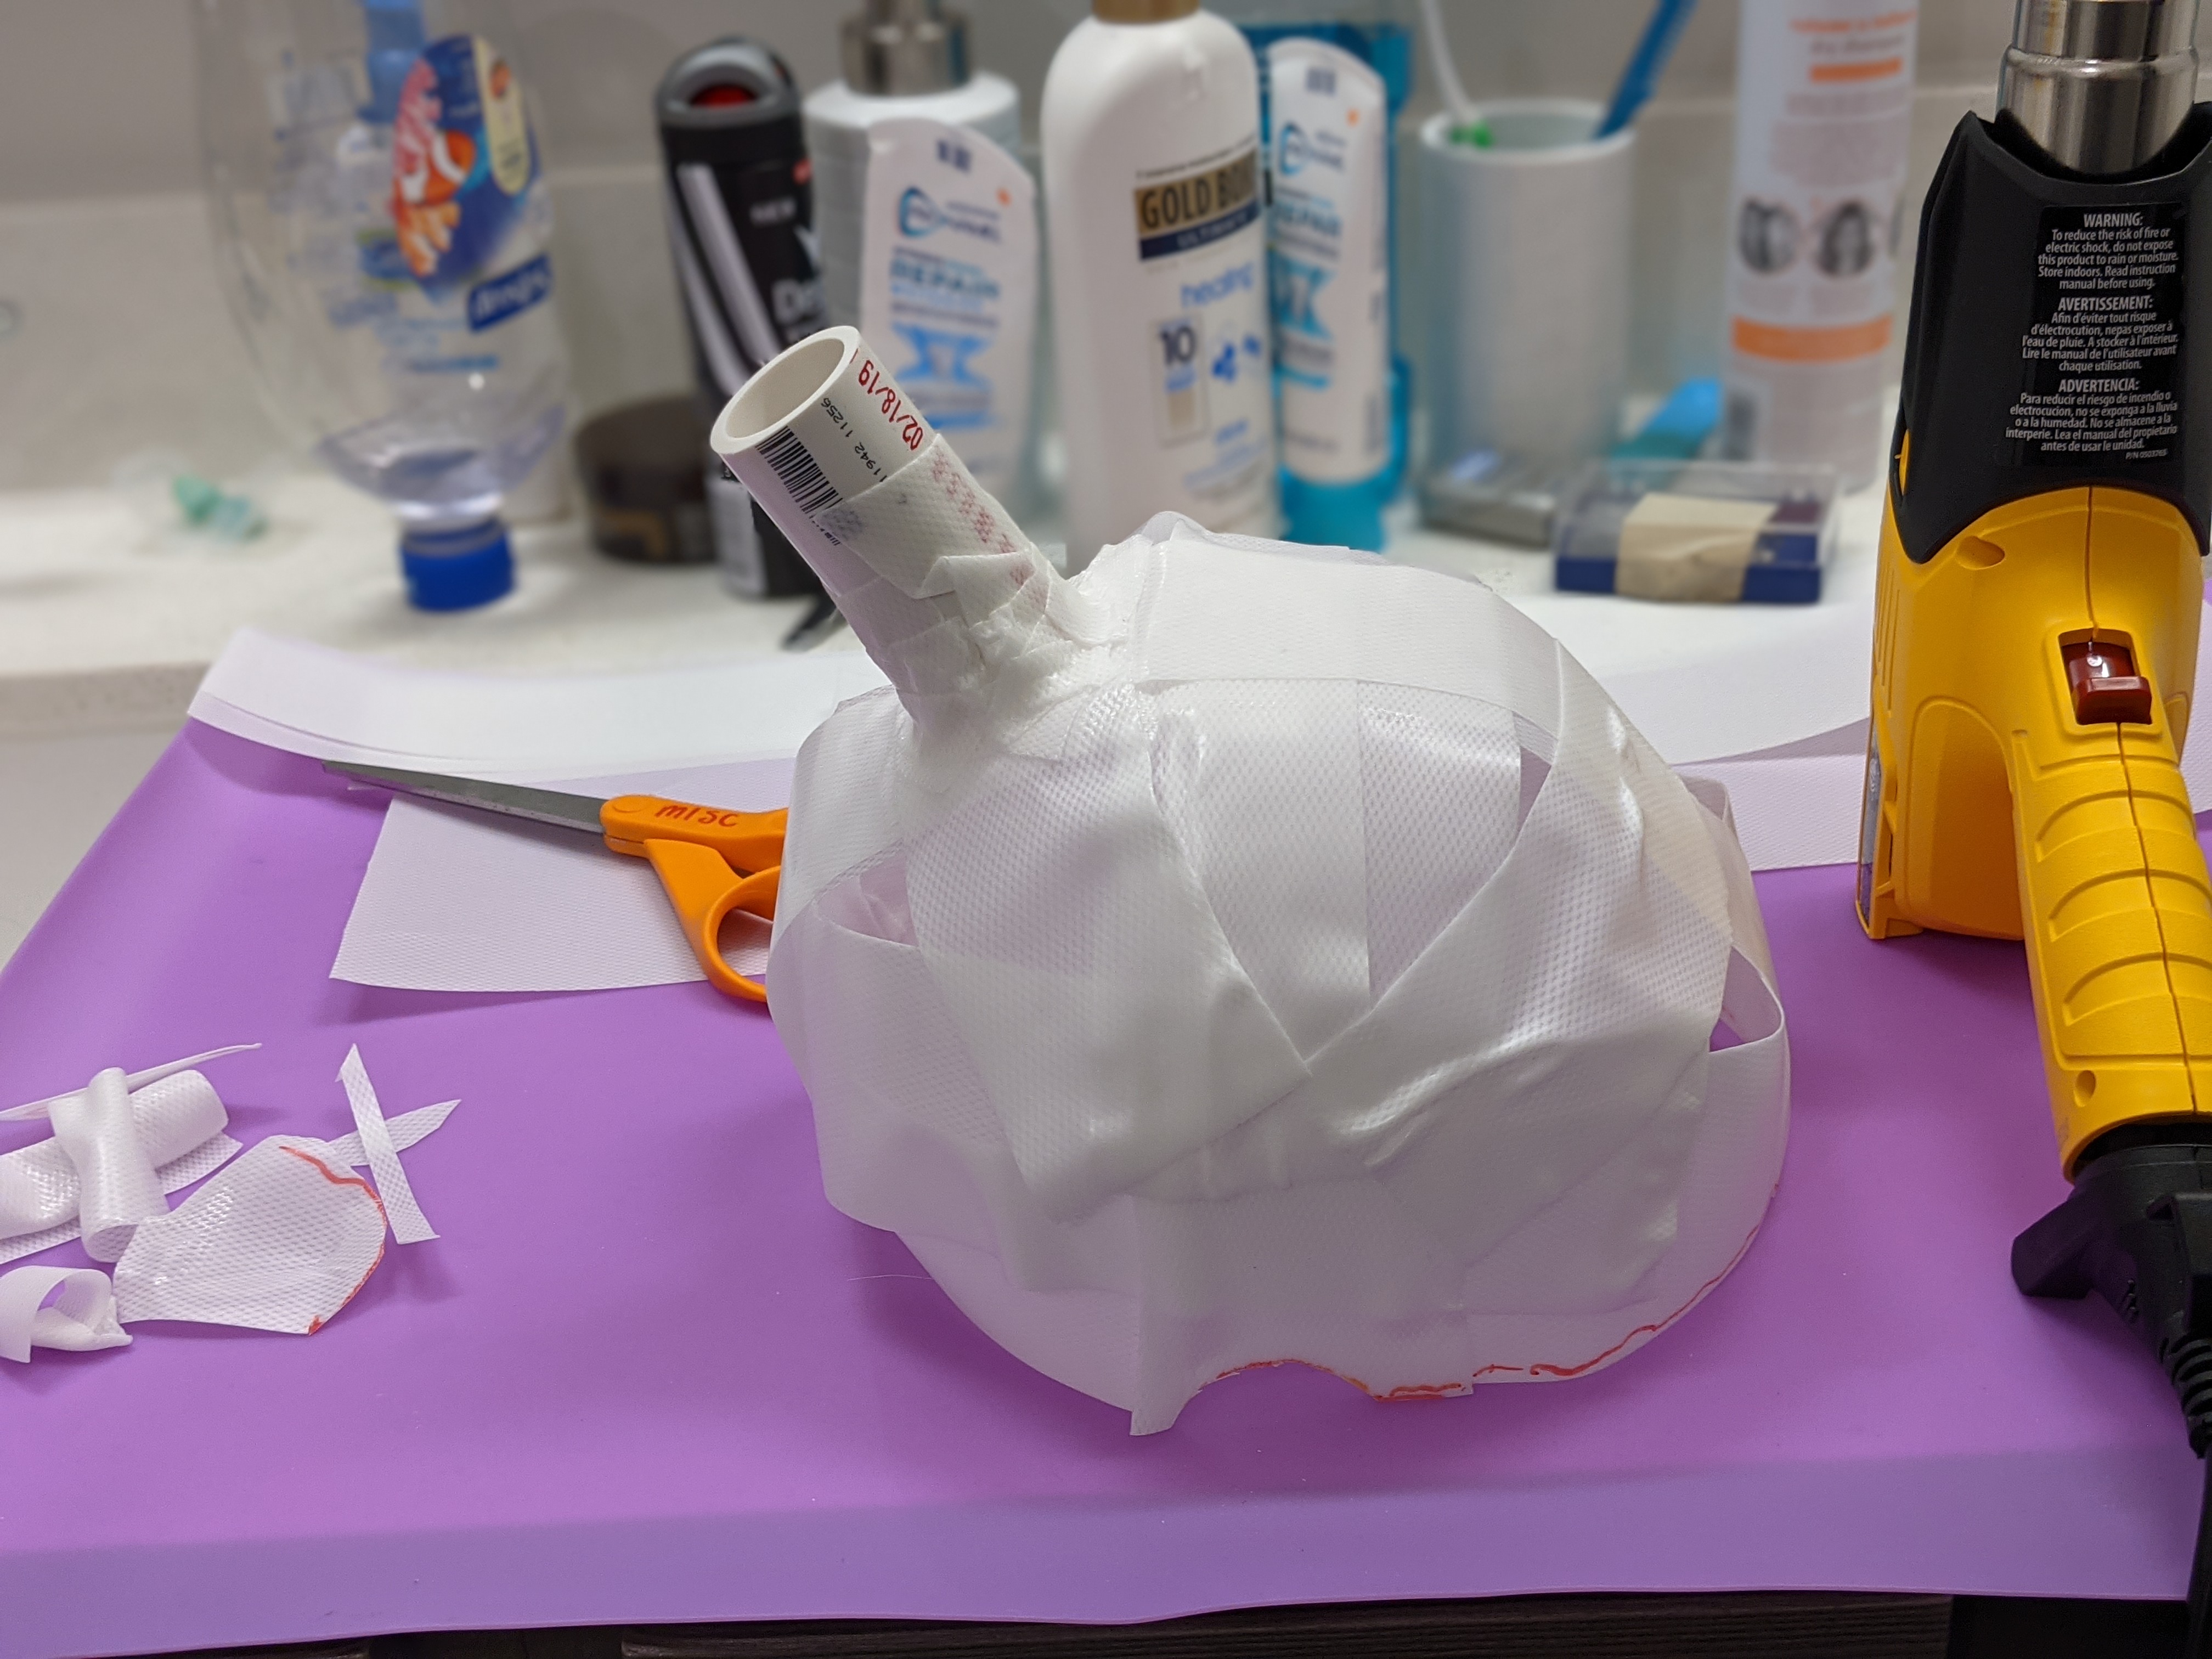

Switching over to the Cosplay Shop tutorial, I made a helmet of Kobracast based on my own head. This took two attempts because the first time I did, my brand new heat gun wasn’t working. Once I got a replacement heat gun, we were in business! I attached the PVC pipe by wrapping the bottom of the pipe with a strip of Kobracast then heating it up before placing it on. I struggled to reinforce it by sewing like in the video, so instead I opted for wrapping the “seam” with more Kobracast. Next, I cut a hole in the base wig and put the PVC pipe through it.
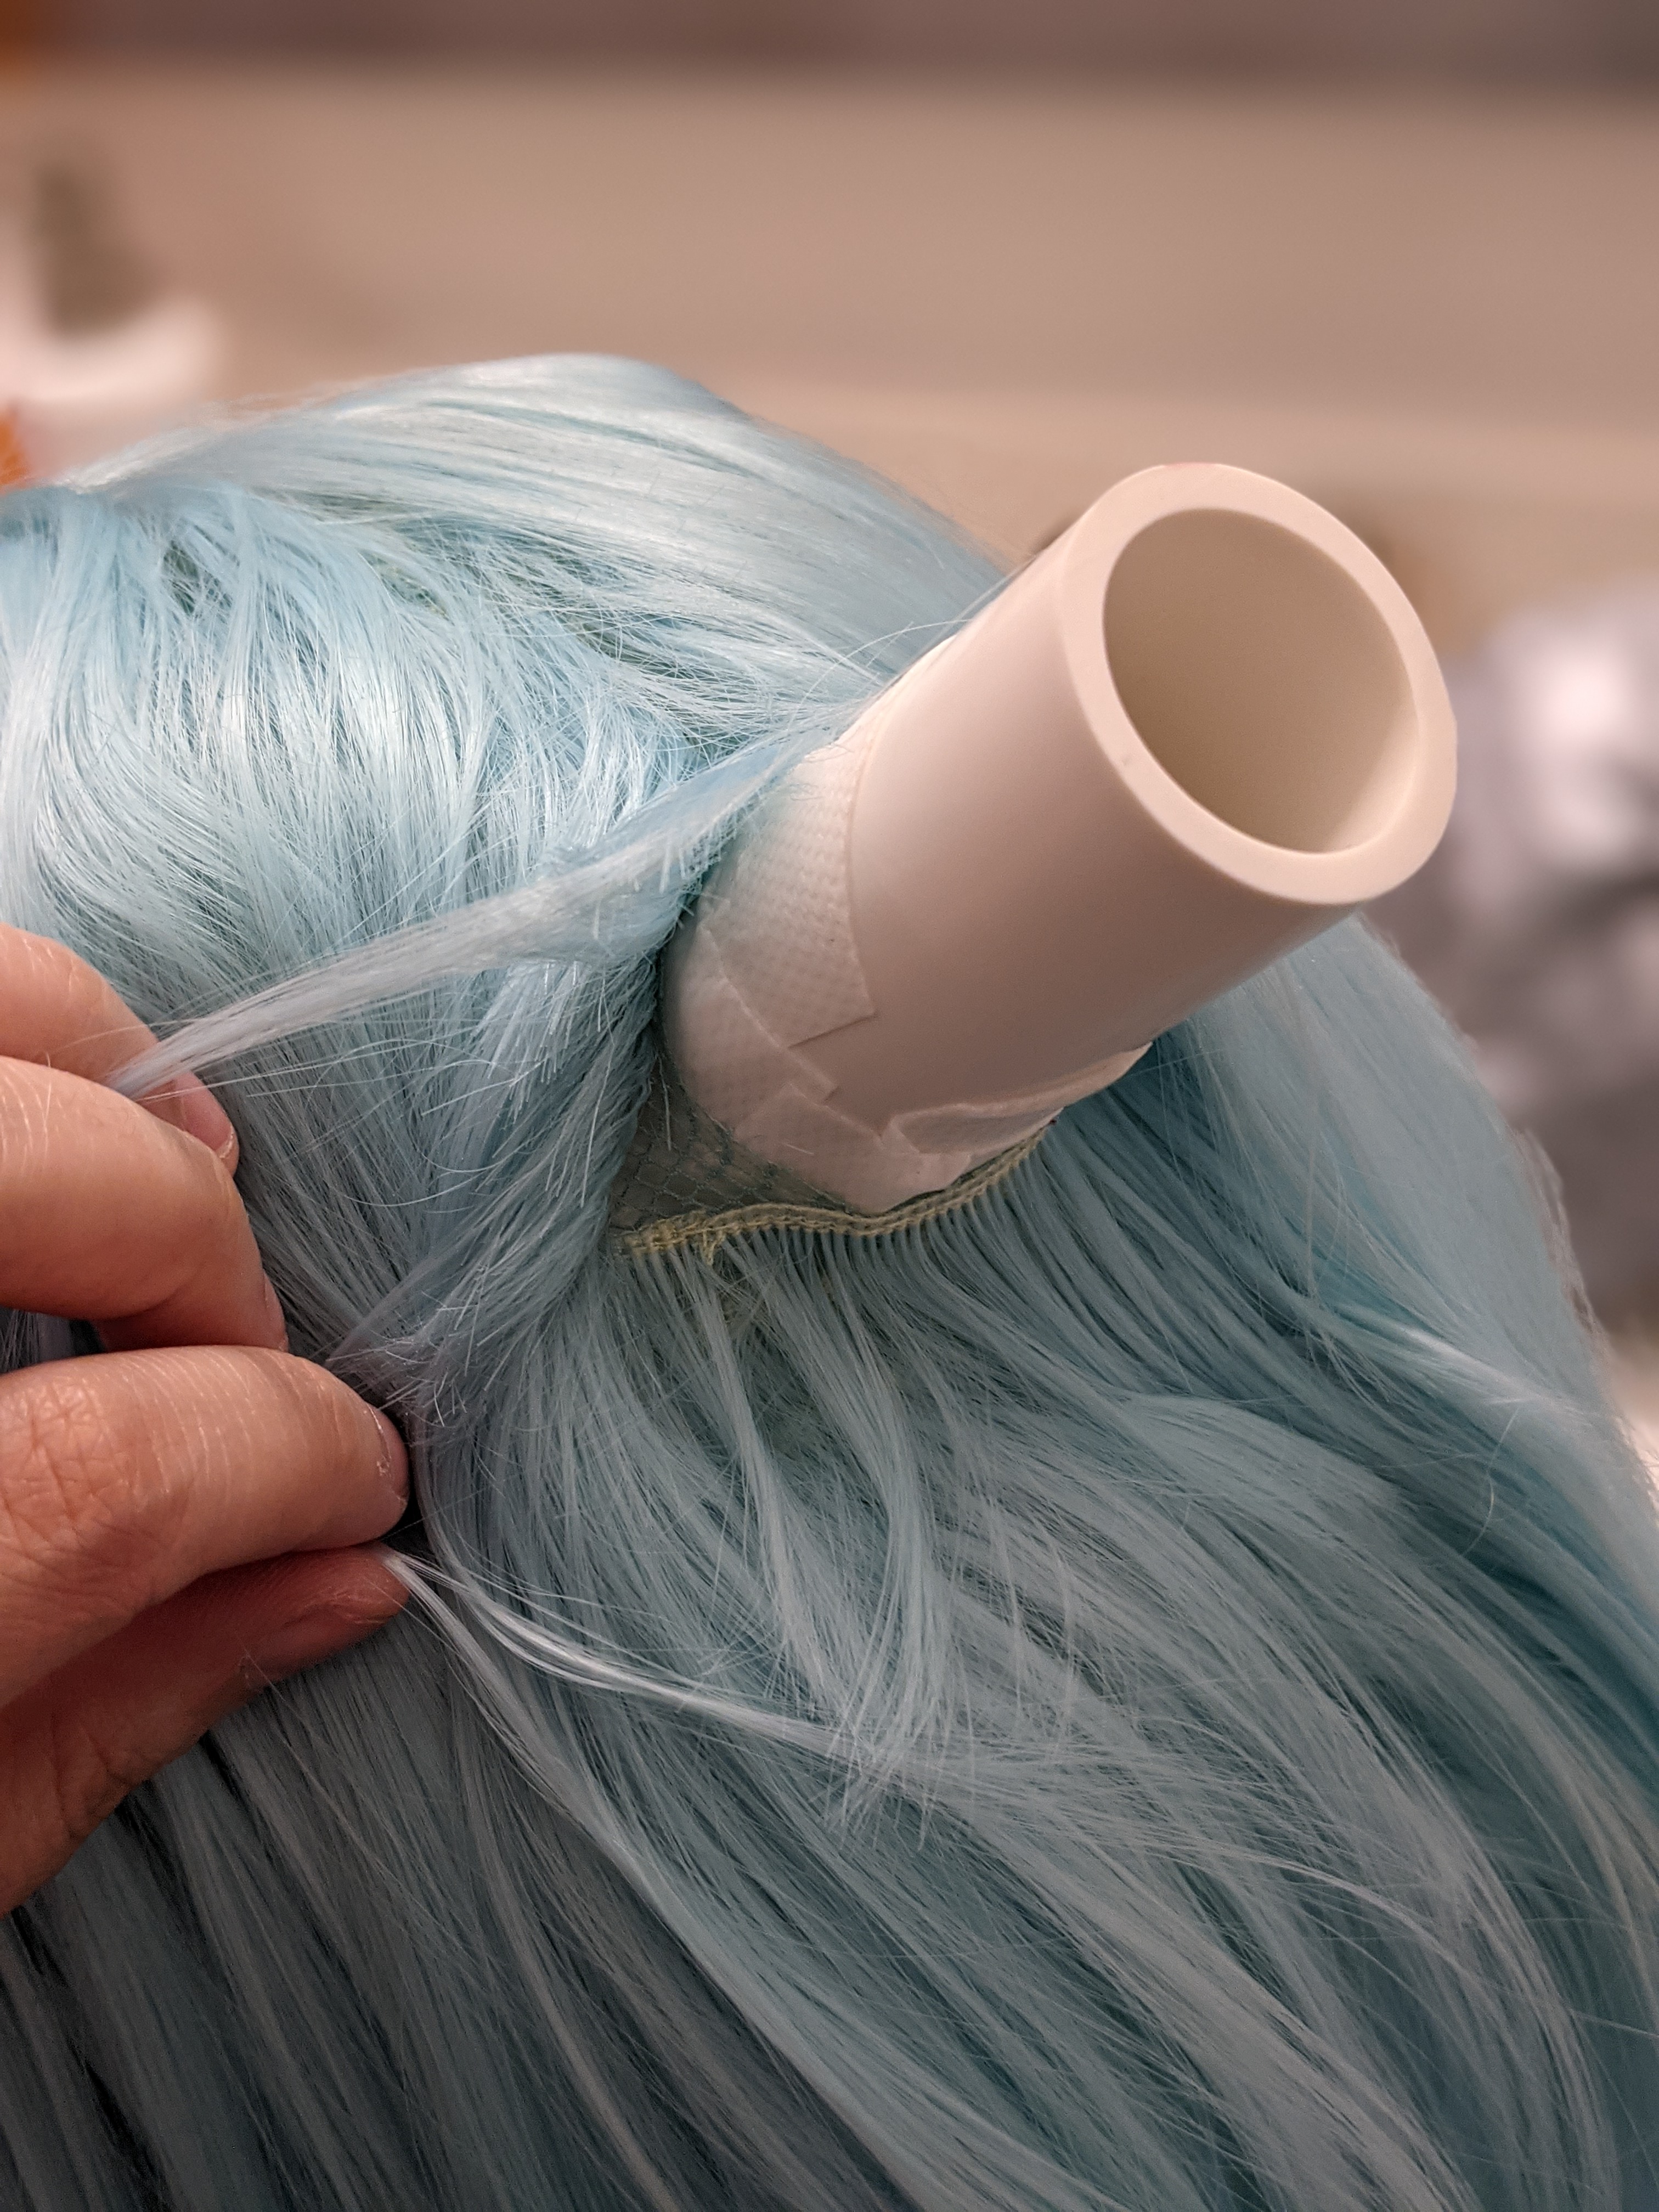
At this point, I tested out both pieces together. I slid the ponytail piece onto the pipe and put the whole thing on my head. It would not stay on without me holding the front of it. With this in mind, I decided I needed to move the pipe further up (closer to the front) so that the weight distribution would be a little better. Since I reinforced the pipe so much, this meant I couldn’t remove it. So, I added more Kobracast to the back of the helmet and then cut the front. By doing this, I was able to “shift” the pipe’s placement. I also reinforced the front with a few more strips of Kobracast to make it heavier, hoping this would help counterweight the ponytail. (Thankfully, it did!) Happy with the helmet and the pipe placement, I switched back over to the Kinpatsu tutorial.


I styled the base wig using Got2b hairspray and my hairdryer. It took about 2 hours to get through it, but it looked much better than the hot glue method I did in Wig 1.0. Once I finished the little ponytail nub with hot glue, I wrapped it in one strip of Kobracast. At this point, the hole in the ponytail foam clay base was too small for the now-thicker PVC pipe (because of the attached wig fibers and Kobracast), so I used a dremel to shave off some foam on the inside of the base to widen the hole. This worked perfectly! After that was done, I followed Kinpatsu’s video for how to style the floofy bangs in the front. The results were pretty good for my first time doing it!


After sliding the ponytail in place onto the base piece, I used—you guessed it—a strip of Kobracast to reinforce it. I then wrapped a piece of EVA foam with the same cobalt fabric I used for the dress bodice using hot glue and then attached it to the Kobracast (also using hot glue). Some more hairspray everywhere, and this ponytail was good to go!
Conclusion
I learned so many new things with this cosplay, which is exactly what I was hoping to do. When I picked this, I set out to level up my sewing and crafting.
New skills learned
- Wig dyeing
- Wig styling
- Making and installing piping
- Drafting patterns from scratch (previously, I would draft using other garments as reference)
- Draping fabric
- Installing studs into leather
- Making tights/socks
- Working with organza
- Making ruffles that stand up on their own
- Using Heat N bond
- Using Kobracast
Not only that, I got to incorporate and practice some techniques that I already knew. I feel like getting the chance to practice skills I already have is a good way to keep me from stagnating or forgetting.
Old skills practices
- Making pleats
- Using interfacing
- Topstitching
- French seams
- Cutting fabric along the bias
Challenges
All this learning wasn’t without its own share of challenges of course (which, if you read the full build, you should know the extent of said challenges!). I experienced the challenge of getting cut out of a duct tape patten more than once, the challenge of working with a particularly stubborn fabric (only to learn that cleaning my sewing machine helped fix this immensely), and the challenge of doing something new for the first time and failing (as was the case with Seraphine’s wig).
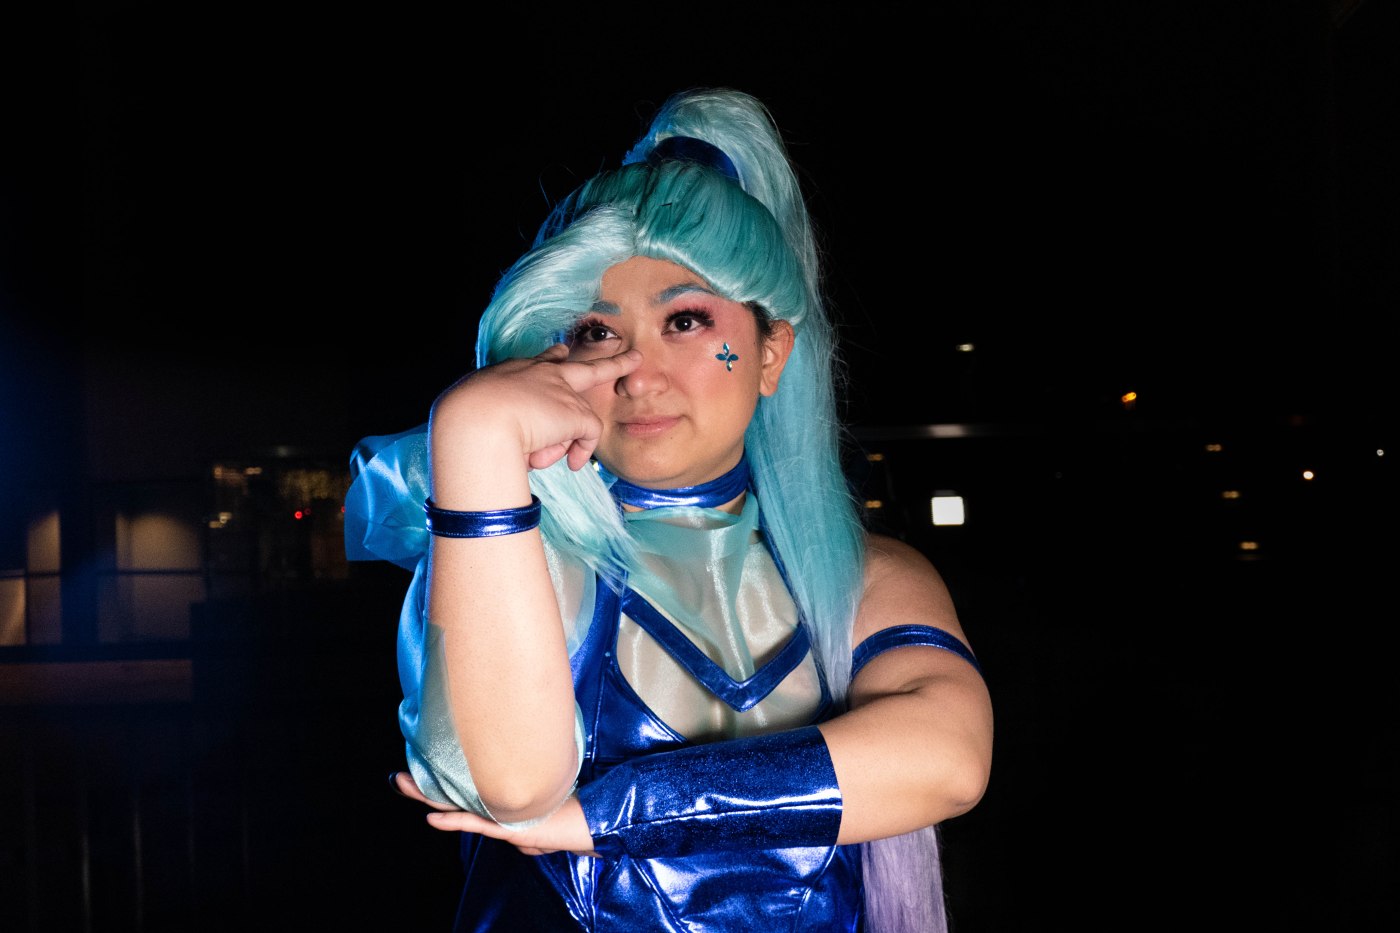
All in all, I wouldn’t trade this build experience for anything. I feel like I’ve grown a lot in the past few months working on Seraphine. I’m glad I took a chance with her, a character that I would not have cosplayed a while ago. (I had a rule that I would never cosplay something I don’t personally watch or play, but while I’ve never played LoL, I do watch the K/DA music videos constantly.)
It’s been a super fun journey and I cannot wait for conventions to come back so I can wear her and dance with my friends! I hope to make her blasters and earrings soon, too, so I’ll be updating this build post once I do. But for now, thanks for reading and here are more photos!


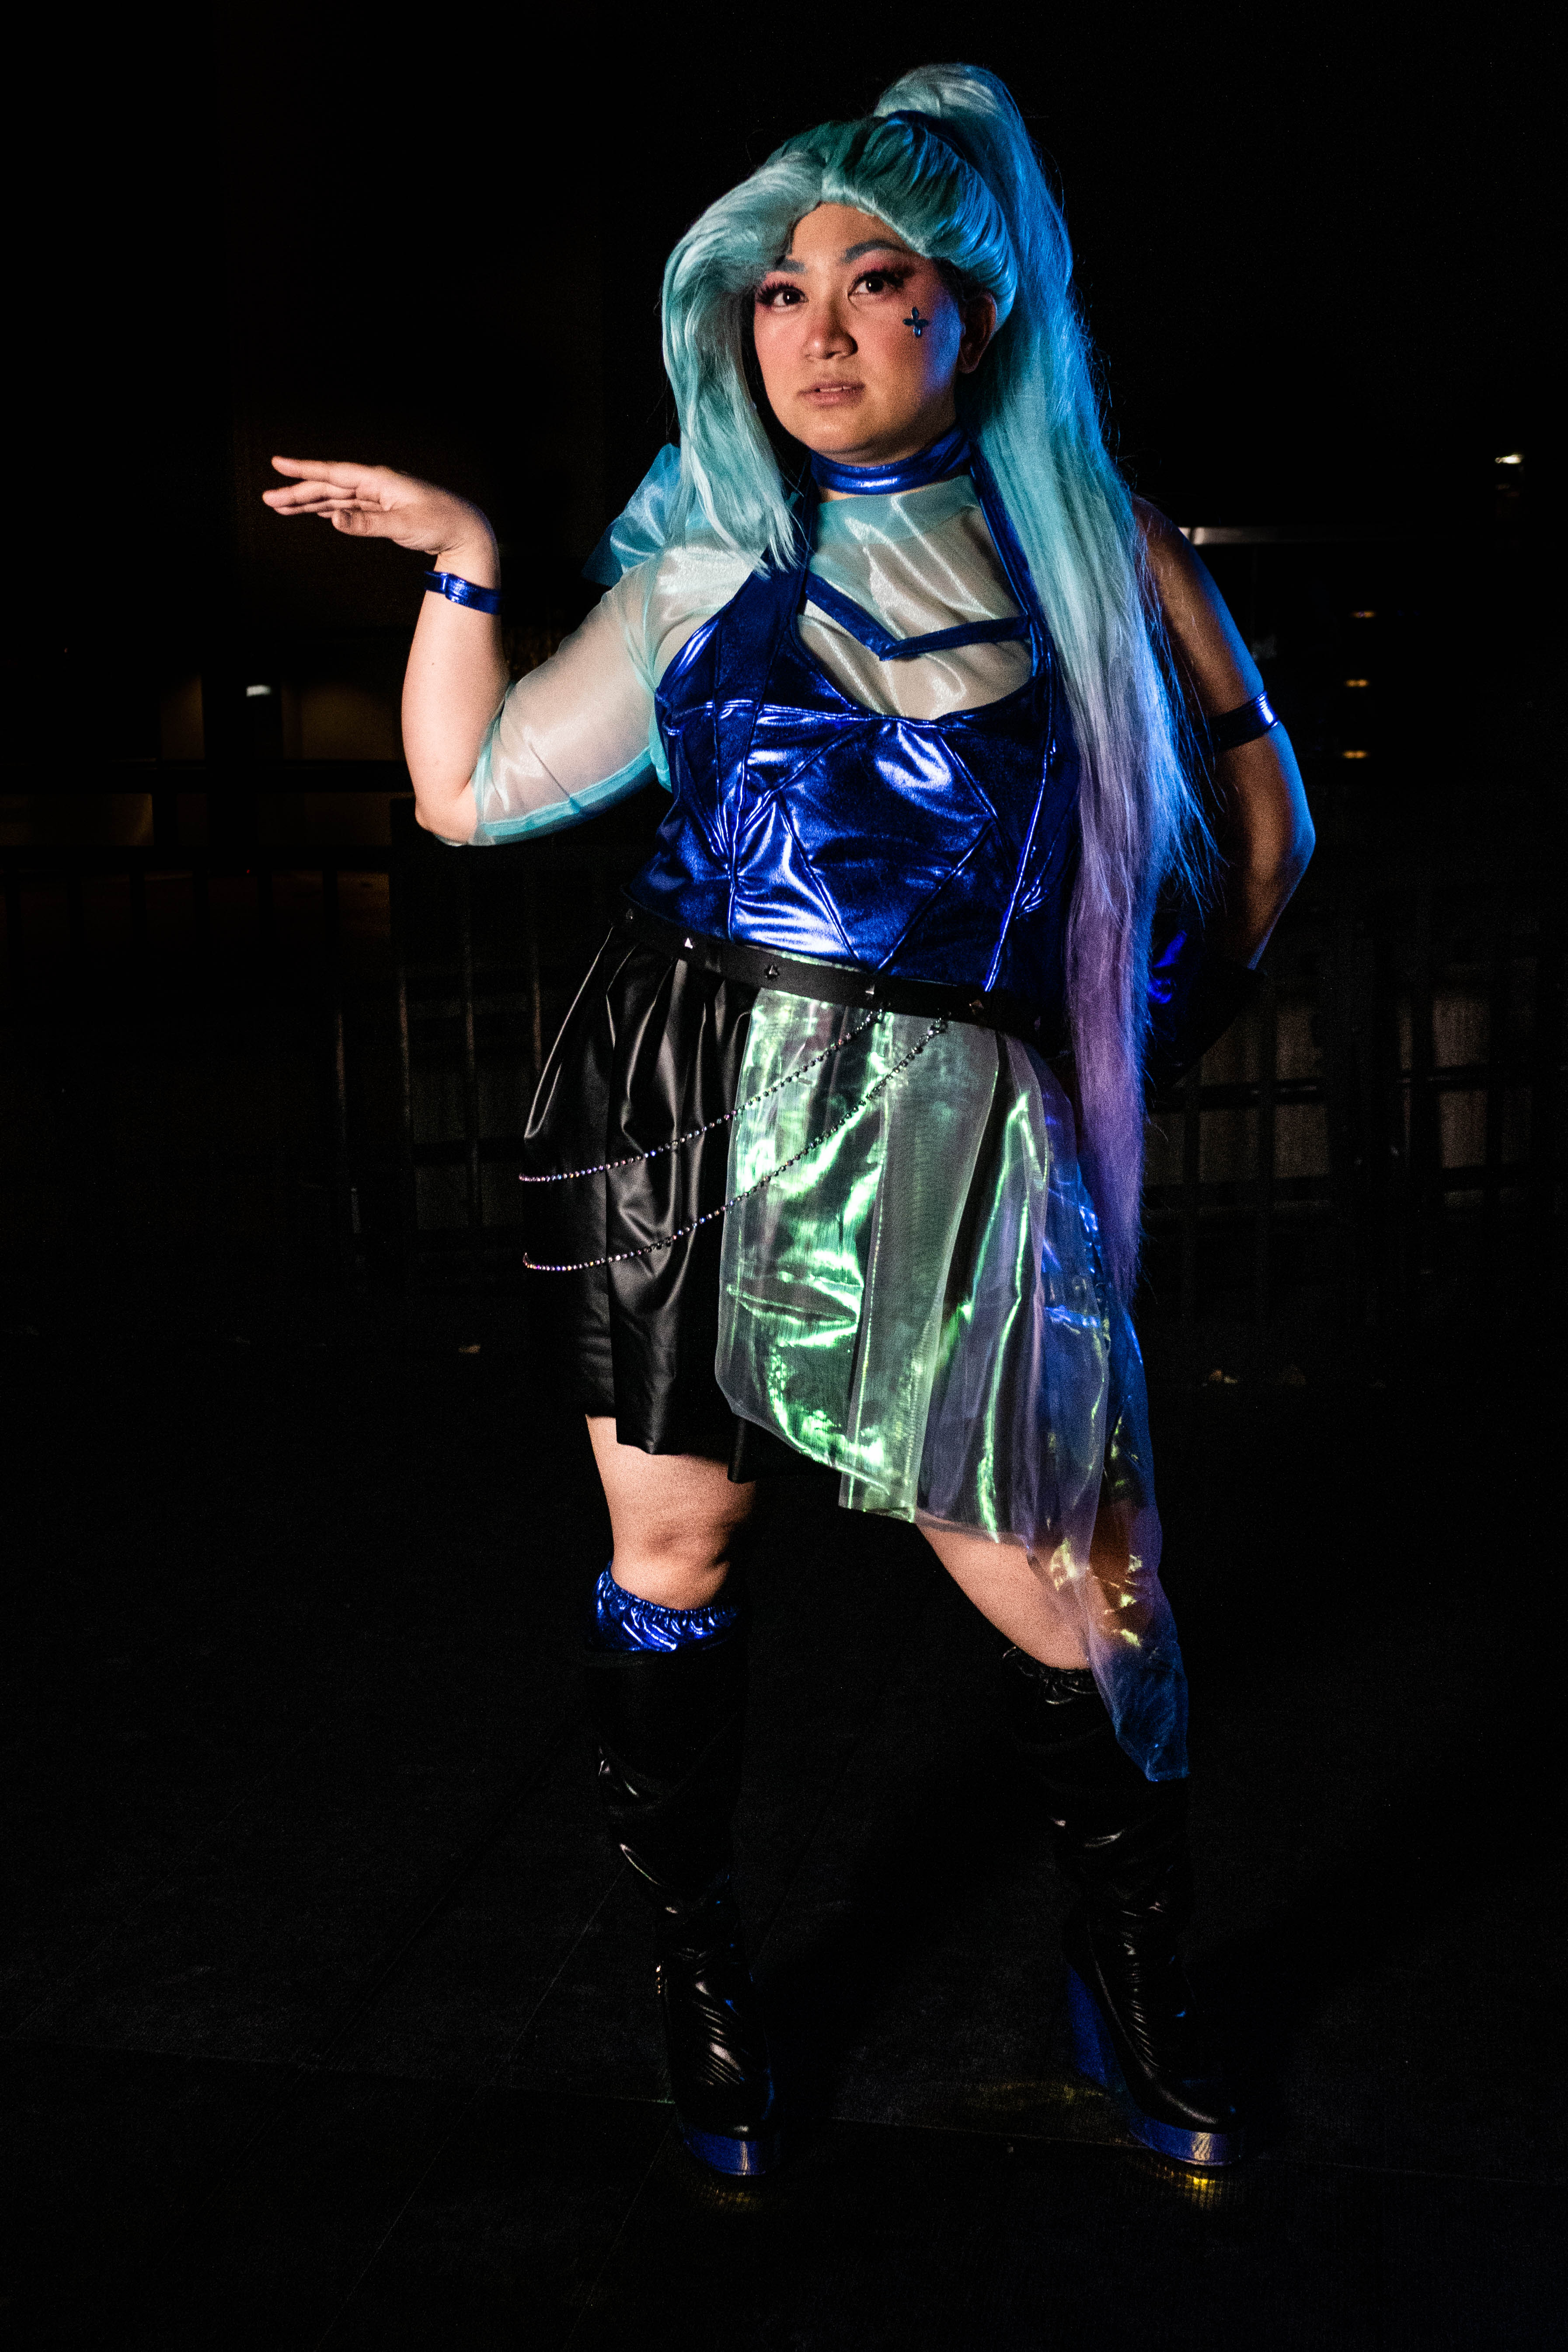

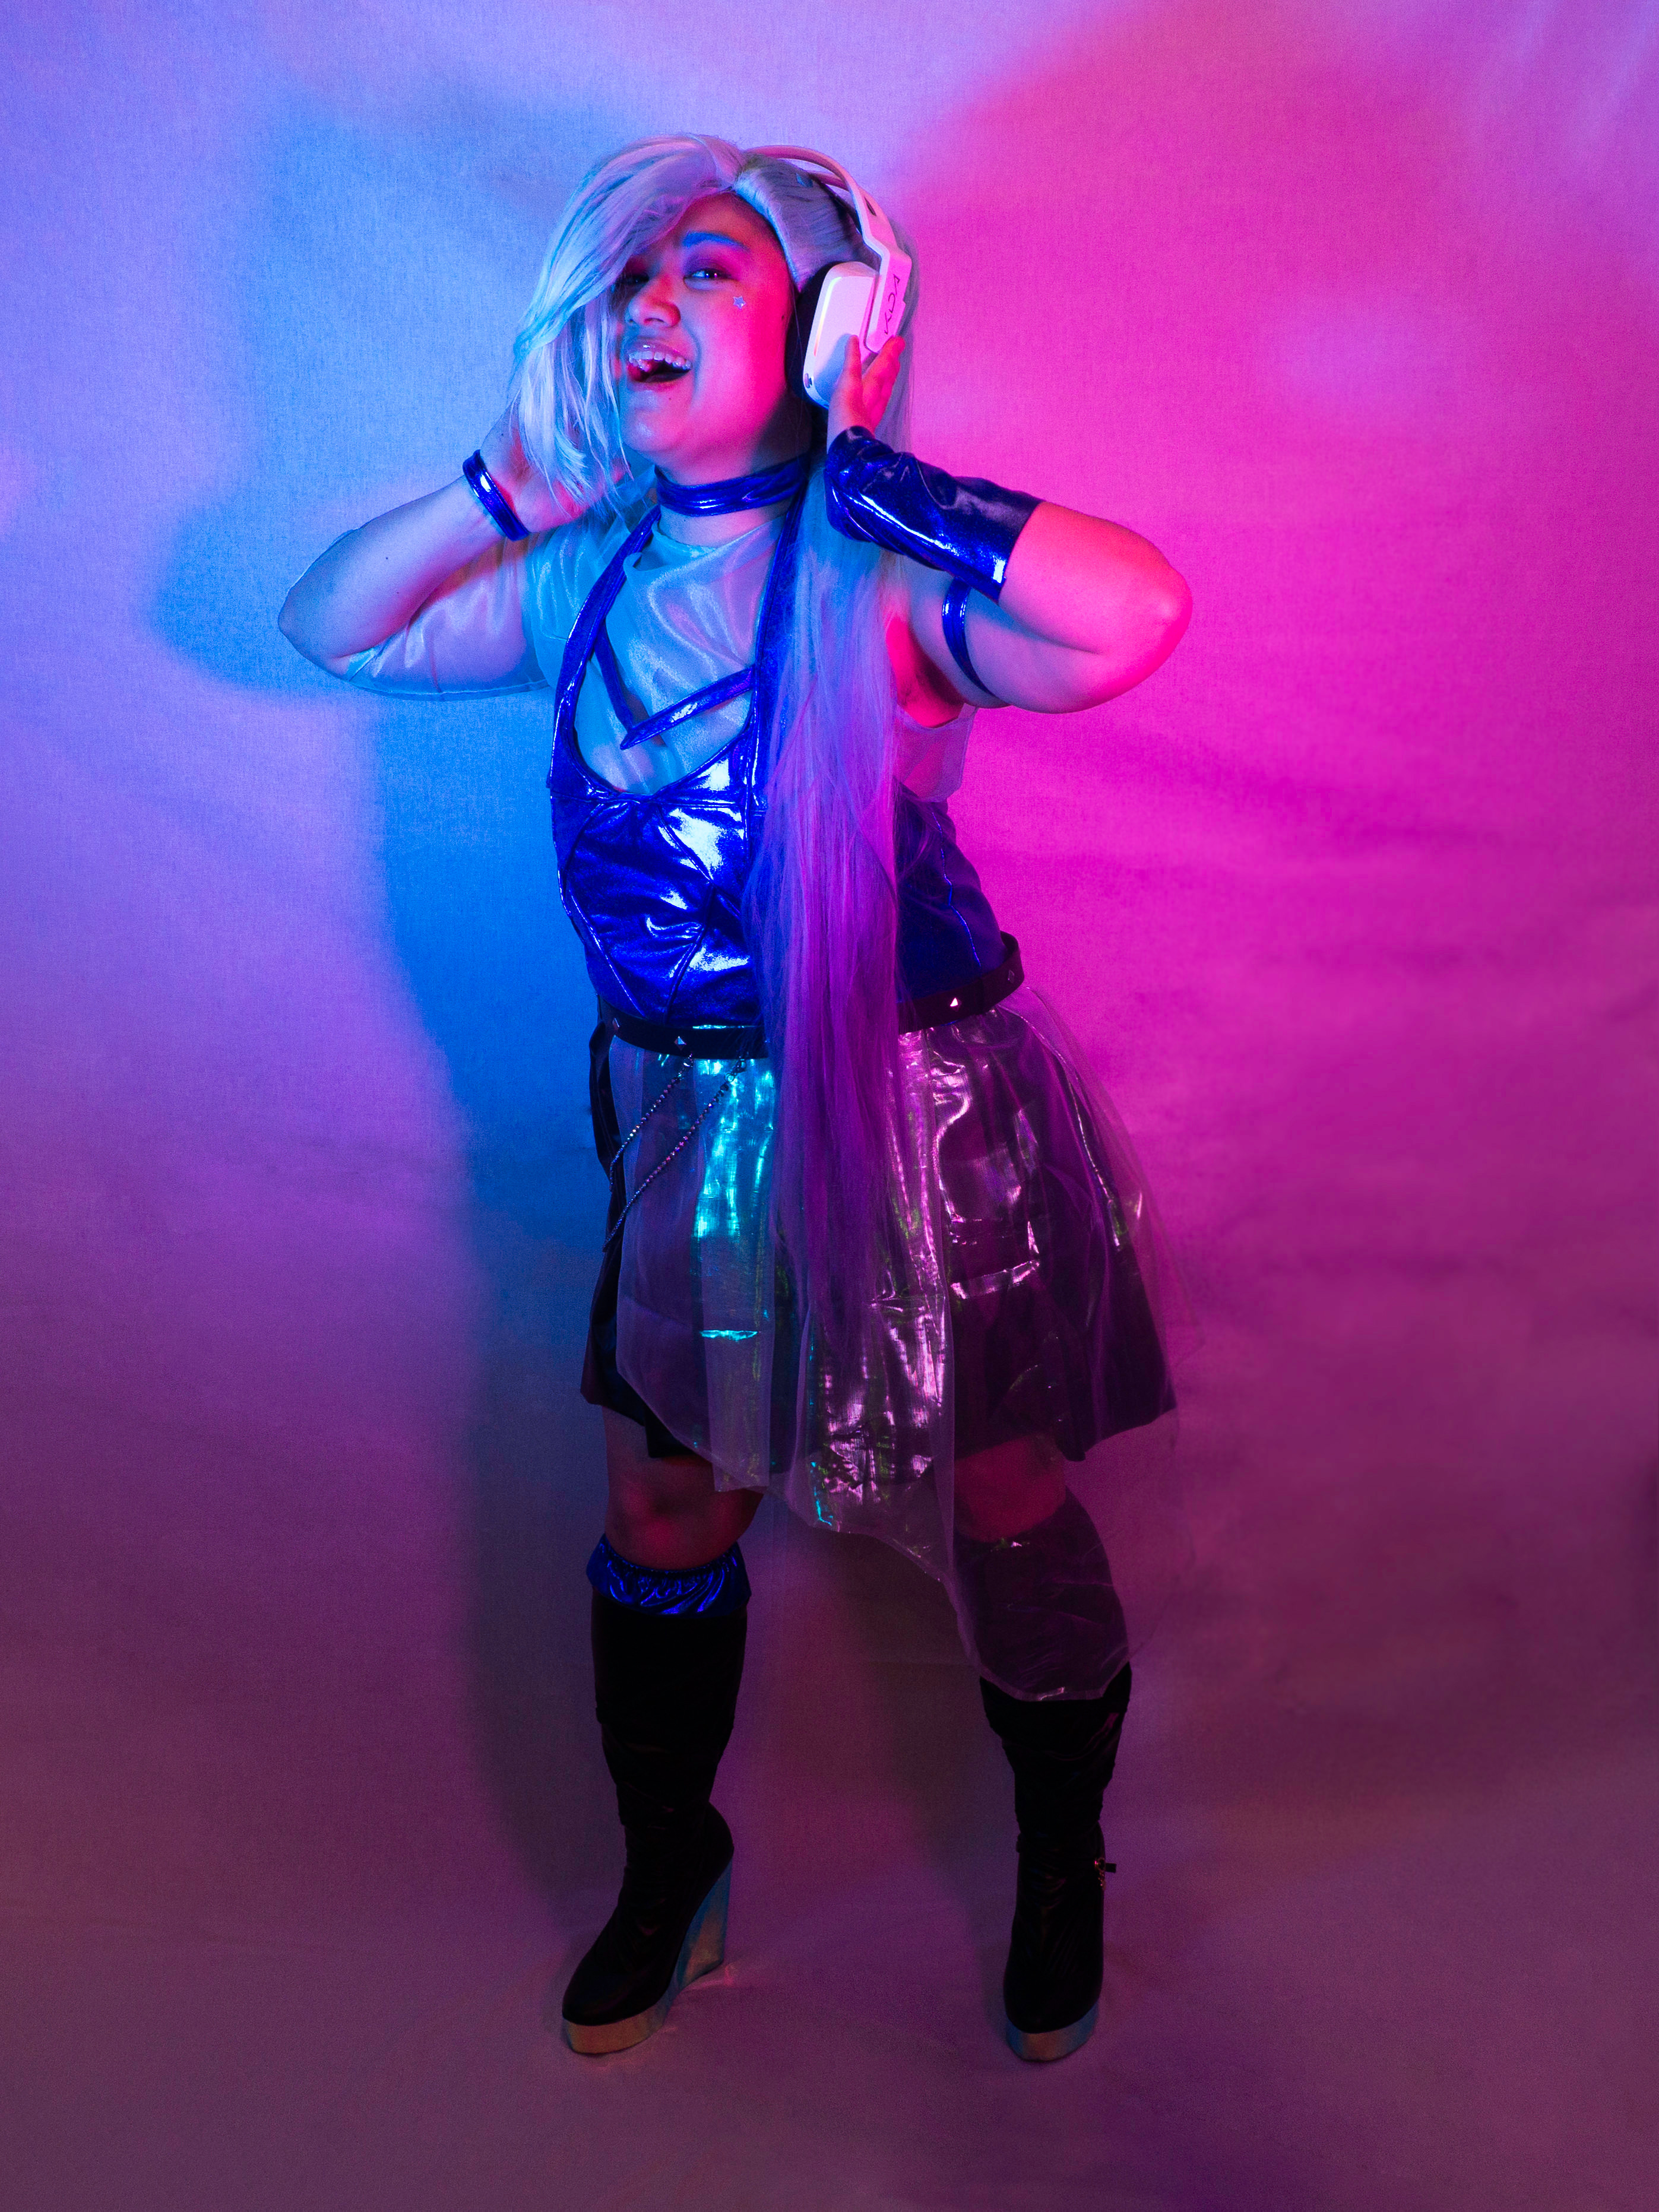

Above photos by me.
Use my build post as inspiration? Let me know!
If you followed along with my build post to help you make your cosplay, I’d love to see it! Leave me a comment or send me an email at ashweezcosplay(at)gmail(dot)com. If you’re comfortable with it, I’d love to showcase your cosplay photo(s) in the blog! I will of course give you credit and link to any socials you may have.
