
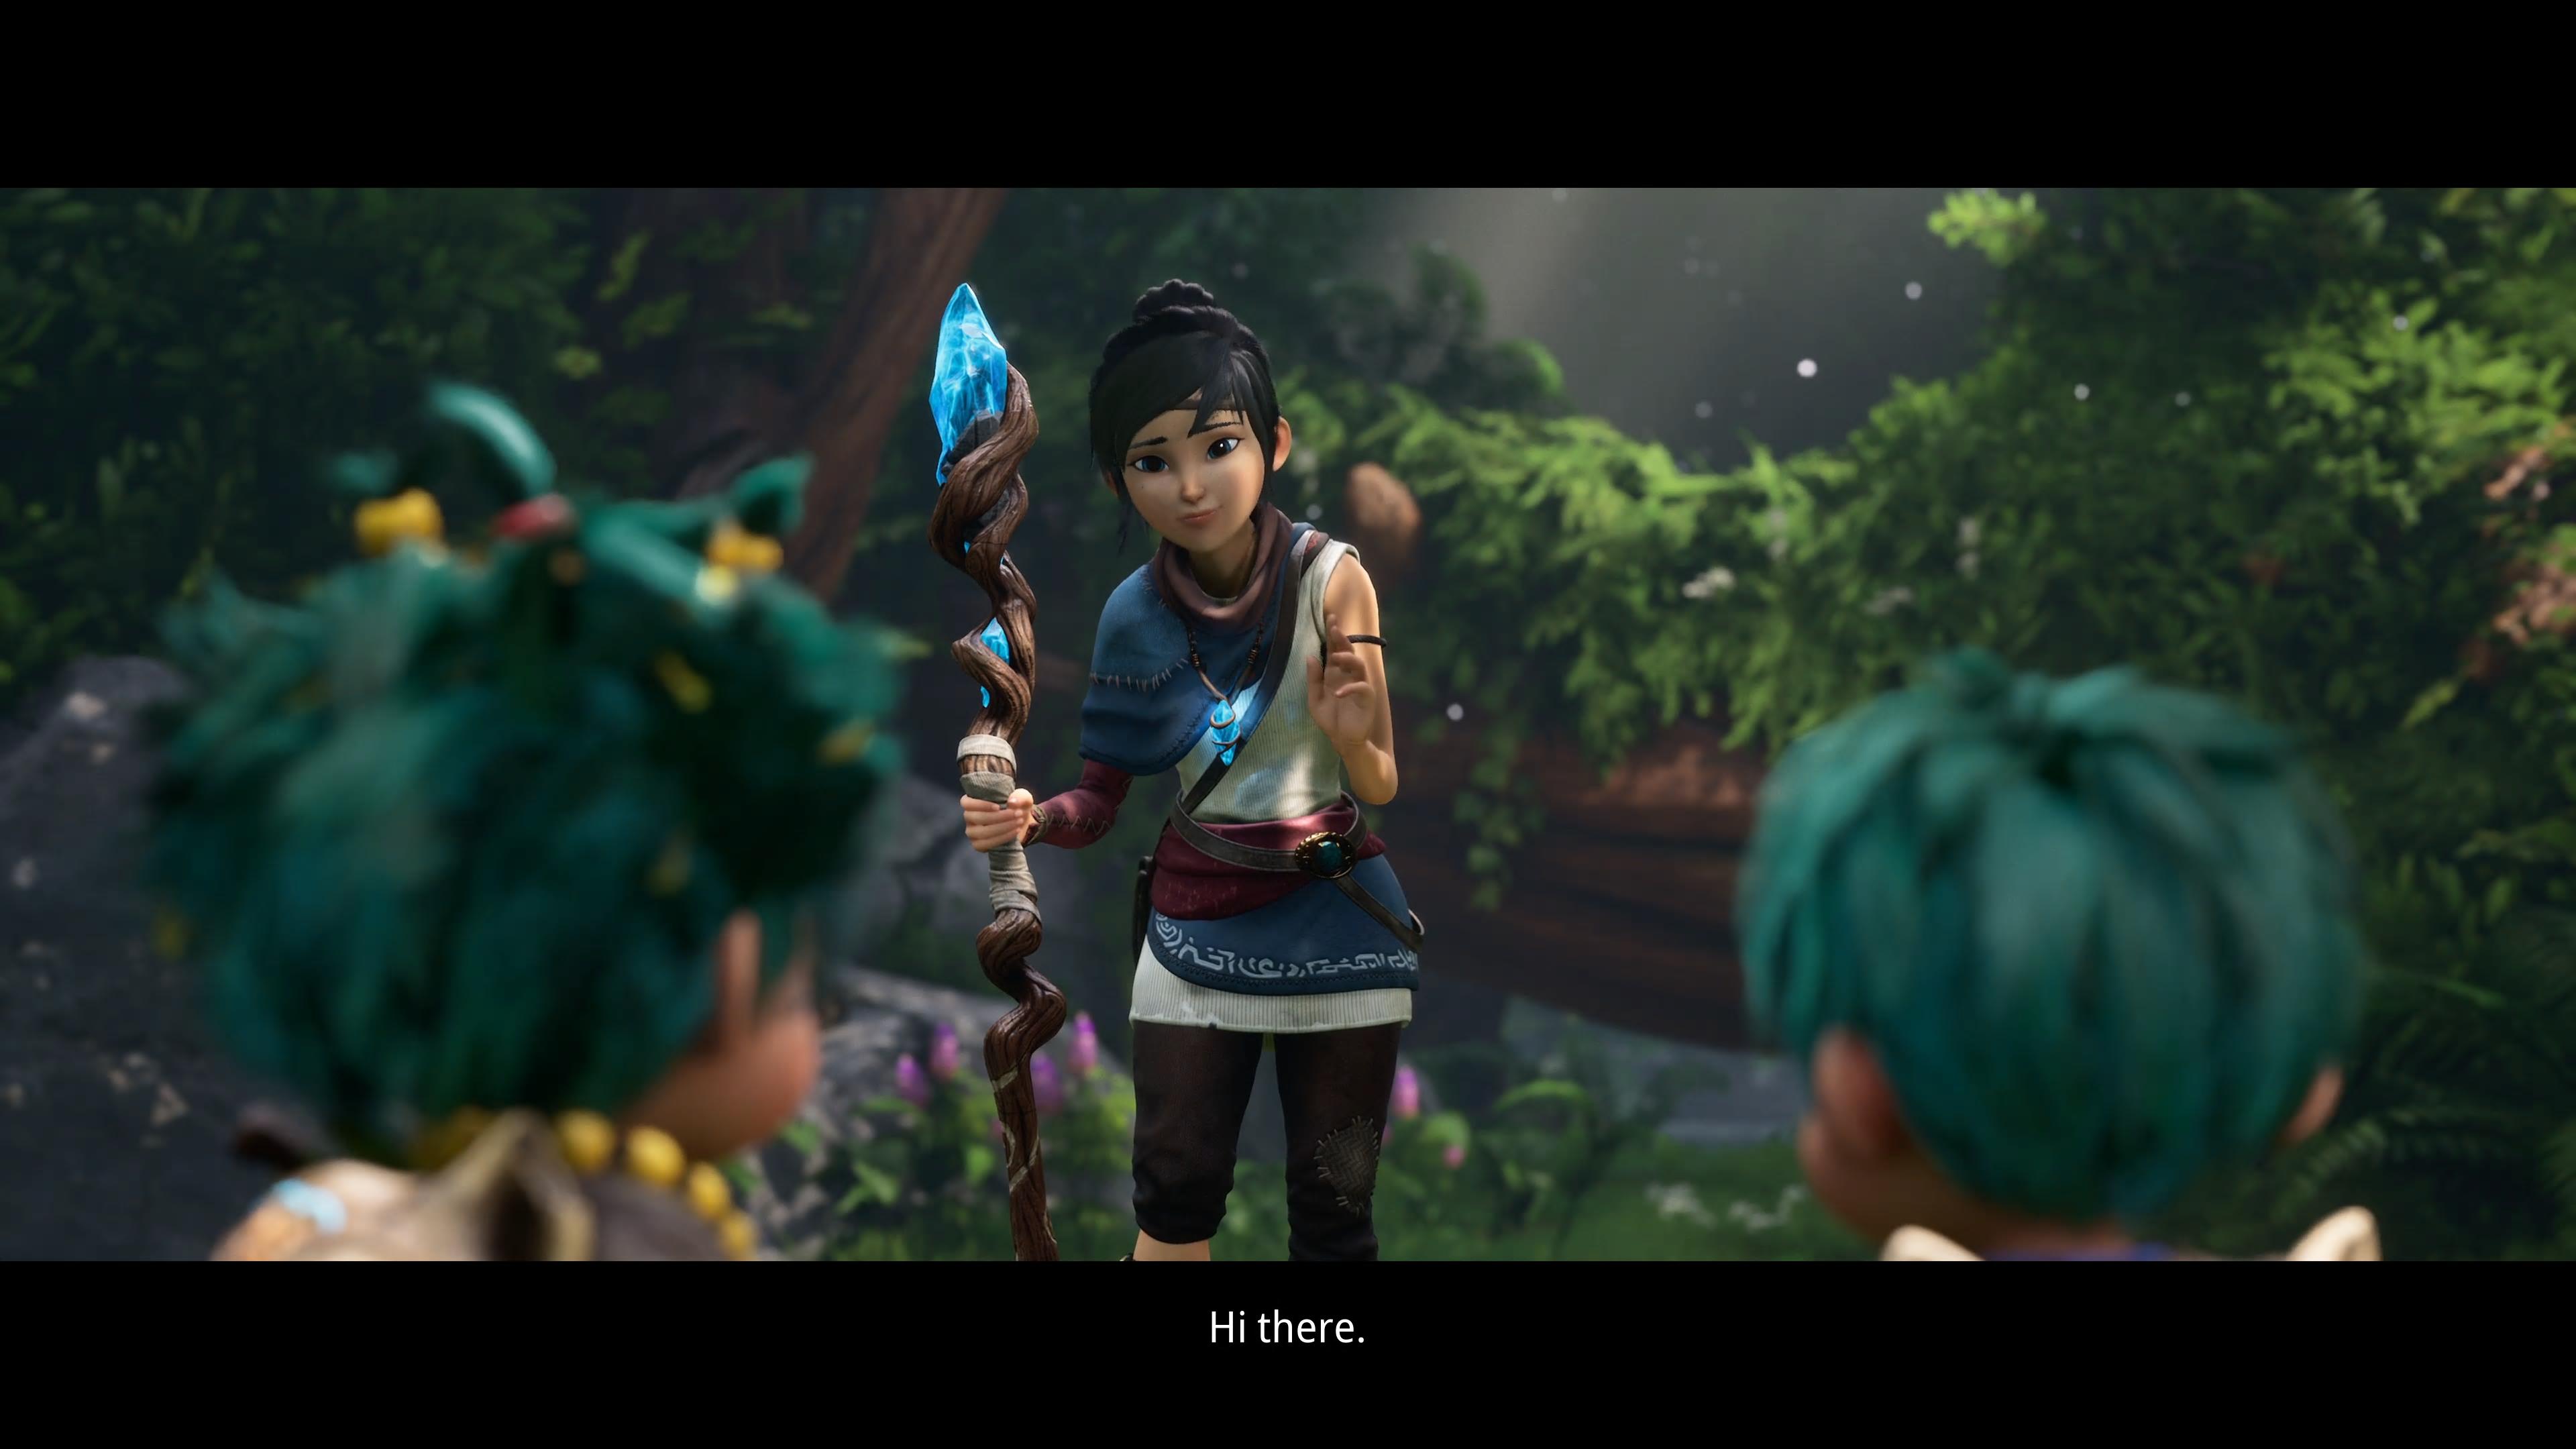
Kena: Bridge of Spirits came out September 21. September 22, I picked up the game and immediately fell in love with it. The aesthetics, character design and story so beautiful, the gameplay immersive. I knew instantly that I wanted to cosplay the titular character, Kena.
I opted for saving money on this one so, I raided my fabric stash, hit up a thrift store, and set to work. I told myself the goal was to save money so accuracy would be sacrificed, but in the end, I couldn’t help myself and ended up going for accuracy anyway.
This will not include building Kena’s staff or necklace! For how I made my necklace and staff, check out Part II!


Items I Bought
- Black slacks (Thrift store)
- Maroon pants (Thrift store)
- Brown pants (Thrift store)
- White sweater dress (Thrift store)
- More white embroidery floss (Joann’s)
- Rot plush from the Ember Lab merch store
- Leather bag from Target
- Remnant fabric for knee patch (Joann’s)
- Foam clay (TNT Cosplay Supply)
- Wig (Amazon)
- Wig bun (Amazon)
- “Spice” Leather Dye (Angelus)
- Wool daubers (Amazon)
- 22mm rhinestones (Joann’s)
- Center Release Buckle (Joann’s)
- 1.5″ D-rings (Joann’s)
- 1″ Polypro belting strap (Joann’s)
- 22mm round rhinestones (Joann’s)
- Brown leather remnant (Joann’s)
What I Already Had
- Leftover blue fabric from my Maria cosplay
- Rejected blue fabric from my Korra cosplay
- Boots from my Korra cosplay
- Embroidery floss in cream, brown, and white
- Embroidery hoop
- Parachute buckle
- Matching thread
Pieces Made & Modified
Click an item to jump to its build section:
Scarf (1 hr, 10 mins)
To make the scarf, I first had to harvest the fabric from my thrift store haul. At first I attempted to seam rip the pieces. But after 5 minutes and only 1 inch’s worth of seams ripped, I said “To hell with this” and just took pinking shears to the brown pants. I cut as close to the seams as I could and cut most of the pants panels out.

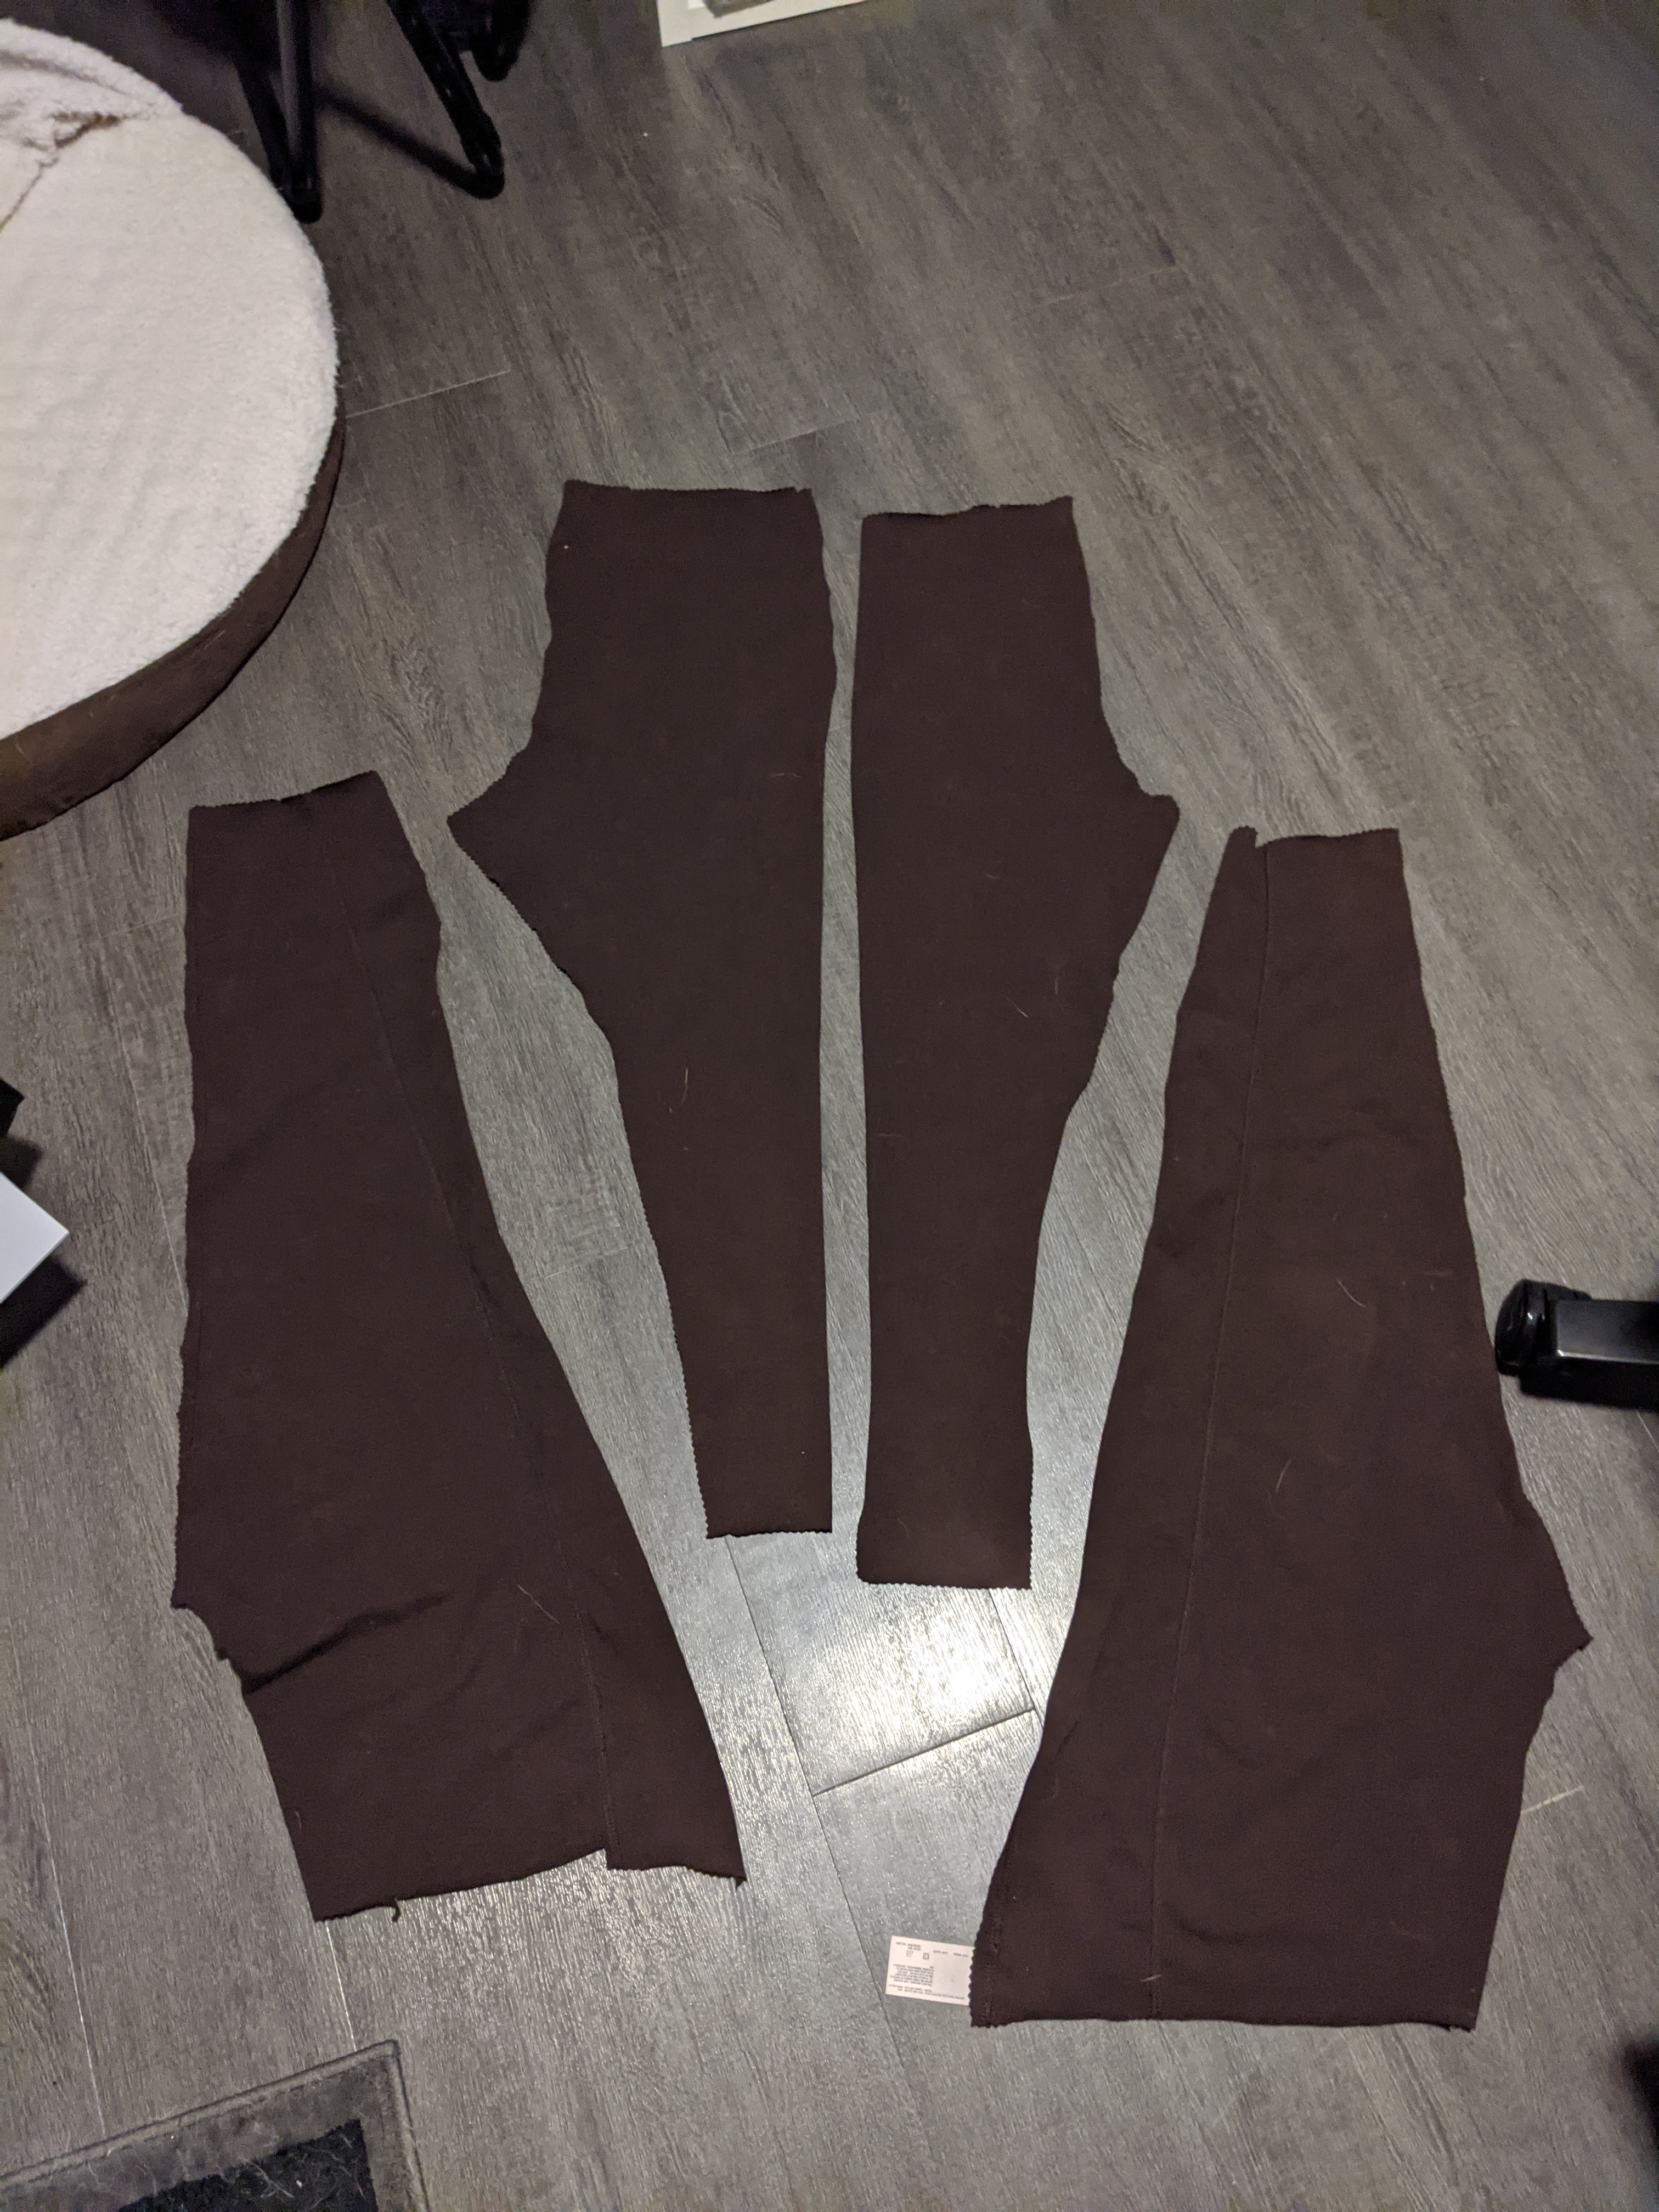
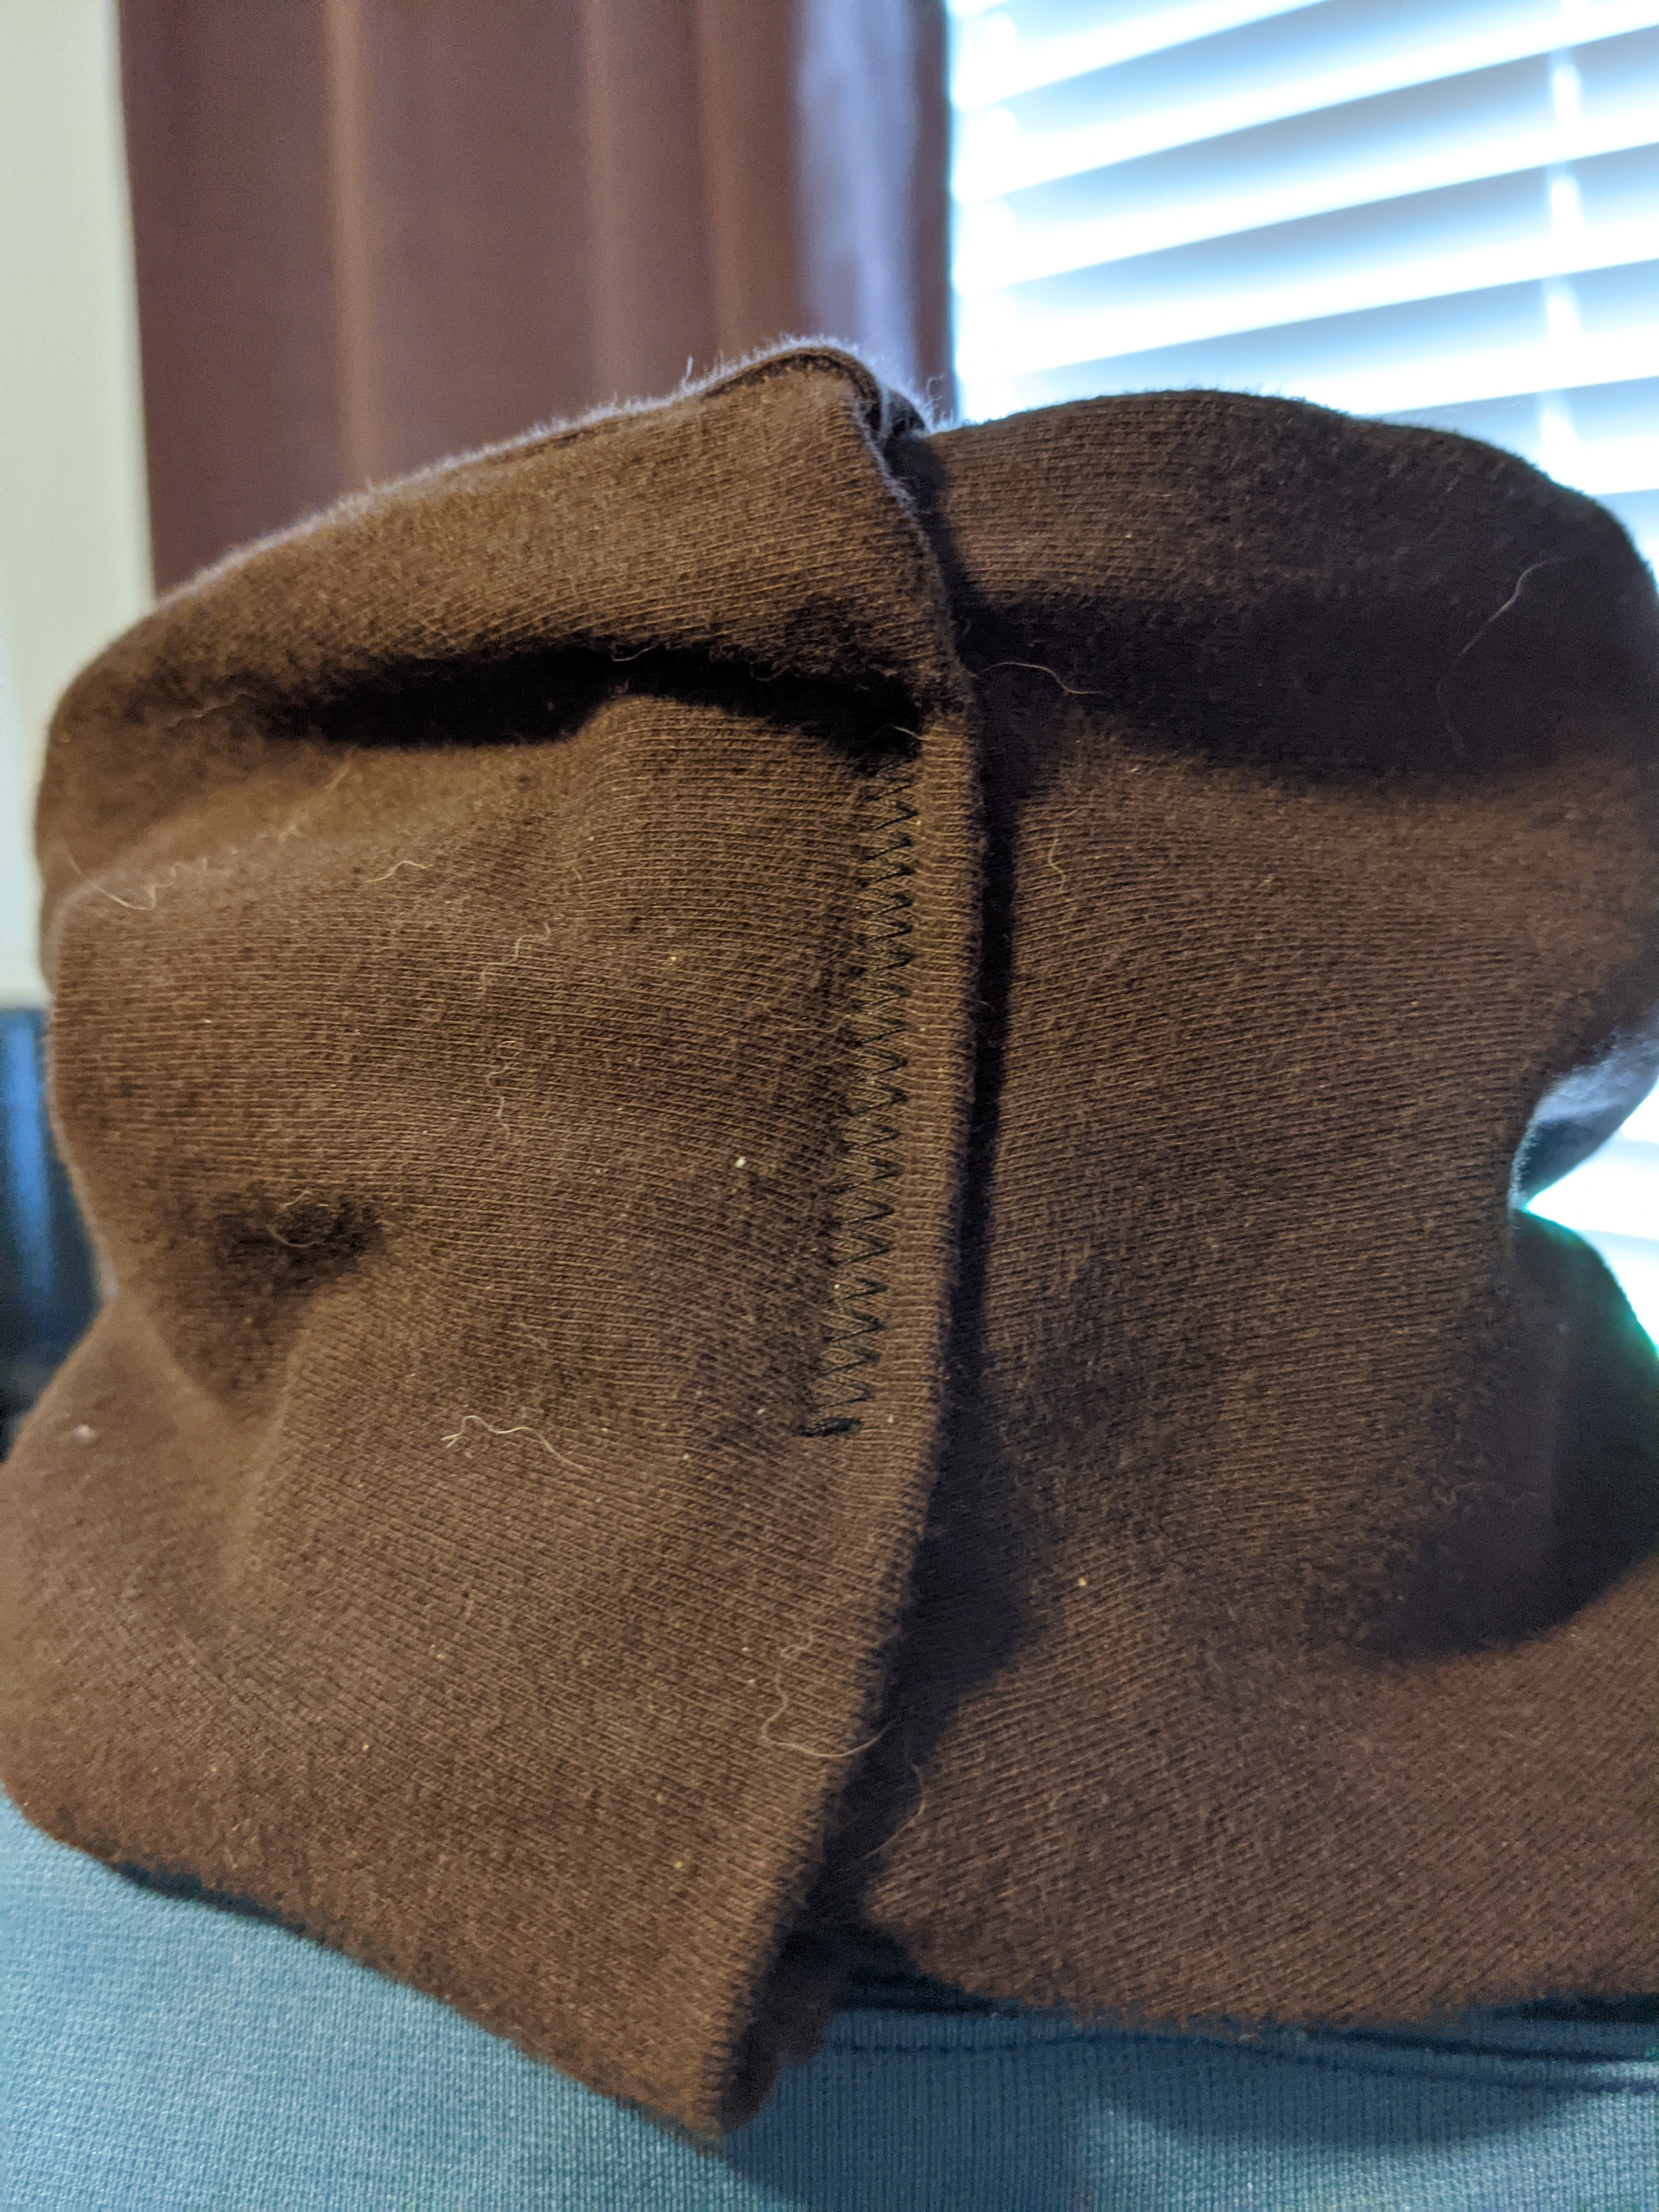
Once that was done, I took the two back pant panels and clipped them right sides together. Doing that, you end up with this:


I sewed the two pieces together following the clips and then turned them right side out. Happy with that, I flipped it back inside out again and close up one end of the scarf. I clipped the corner seam allowances to remove bulk, then turned it right side out again.
To finish the other end as well as close the loop. I was pretty dang lazy about it. I tucked the finished end into the end with the raw edges, folded the raw edges down so that they were hidden, and then simply stitched a line down the whole thing so it would both connect the two ends and hide the raw edges. It does mean that the stitching is visible on the outside, but since this was the back, I didn’t really care.


Capelet (6 hrs, 20 mins)
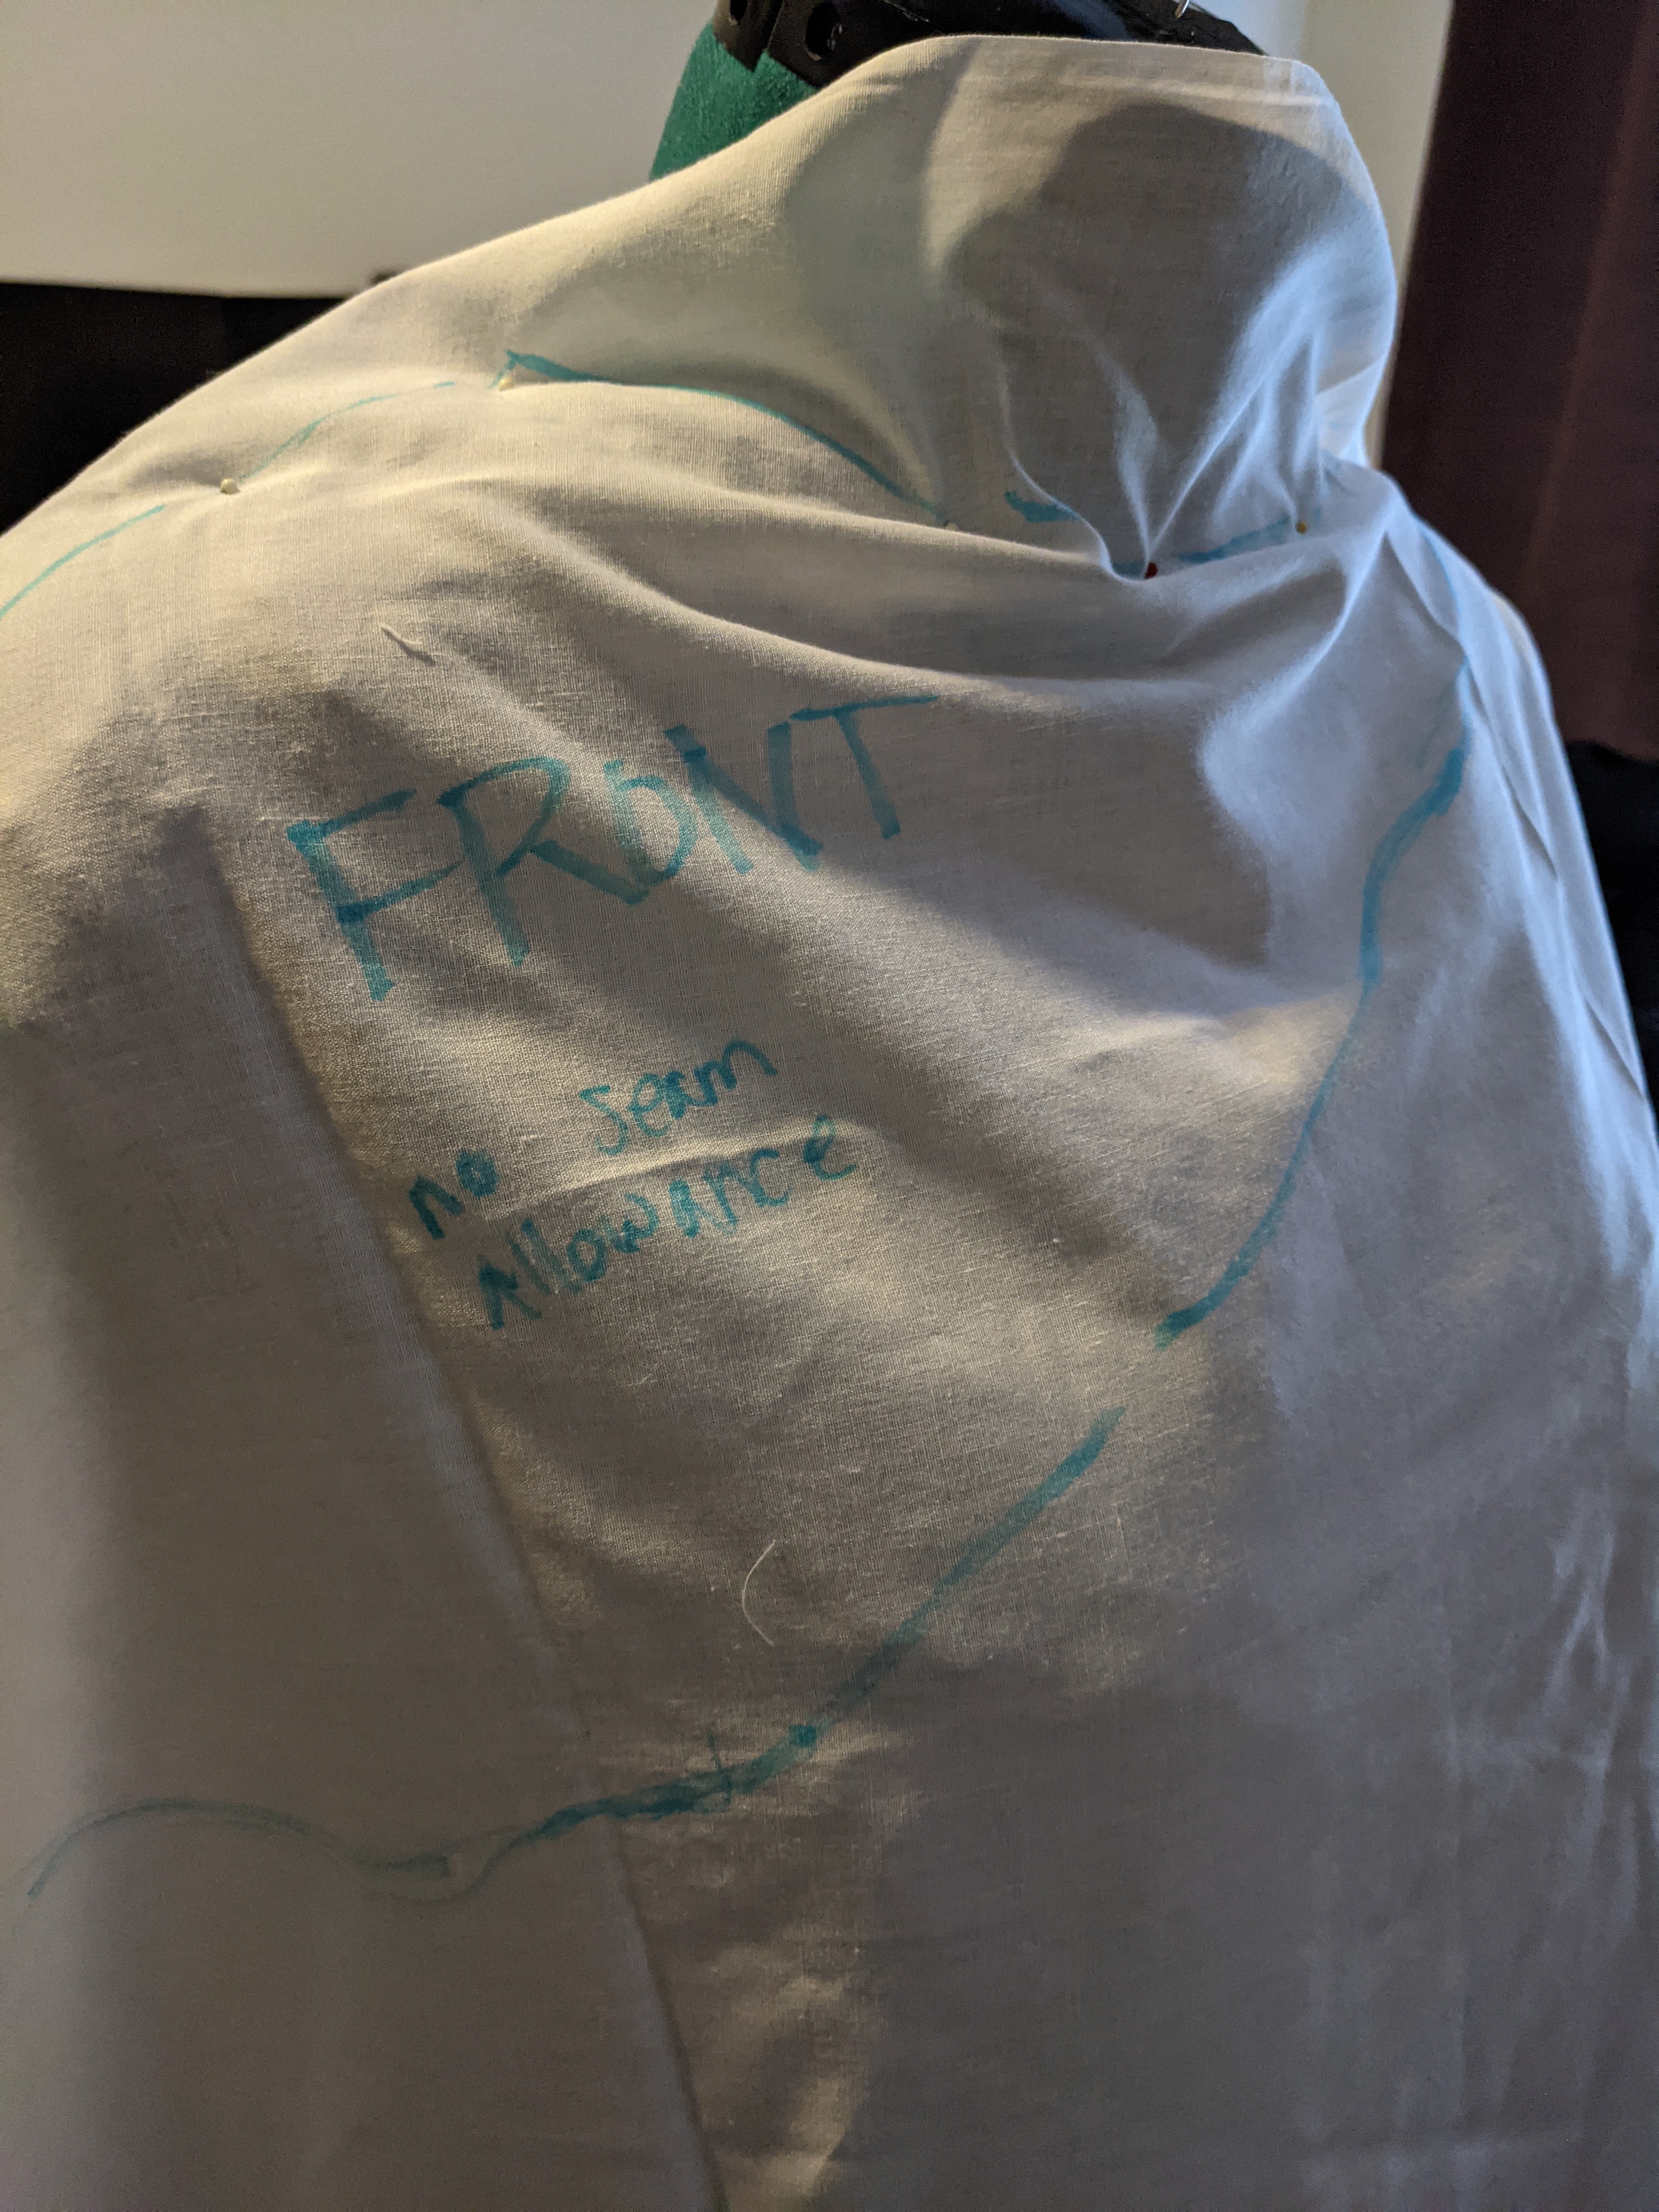
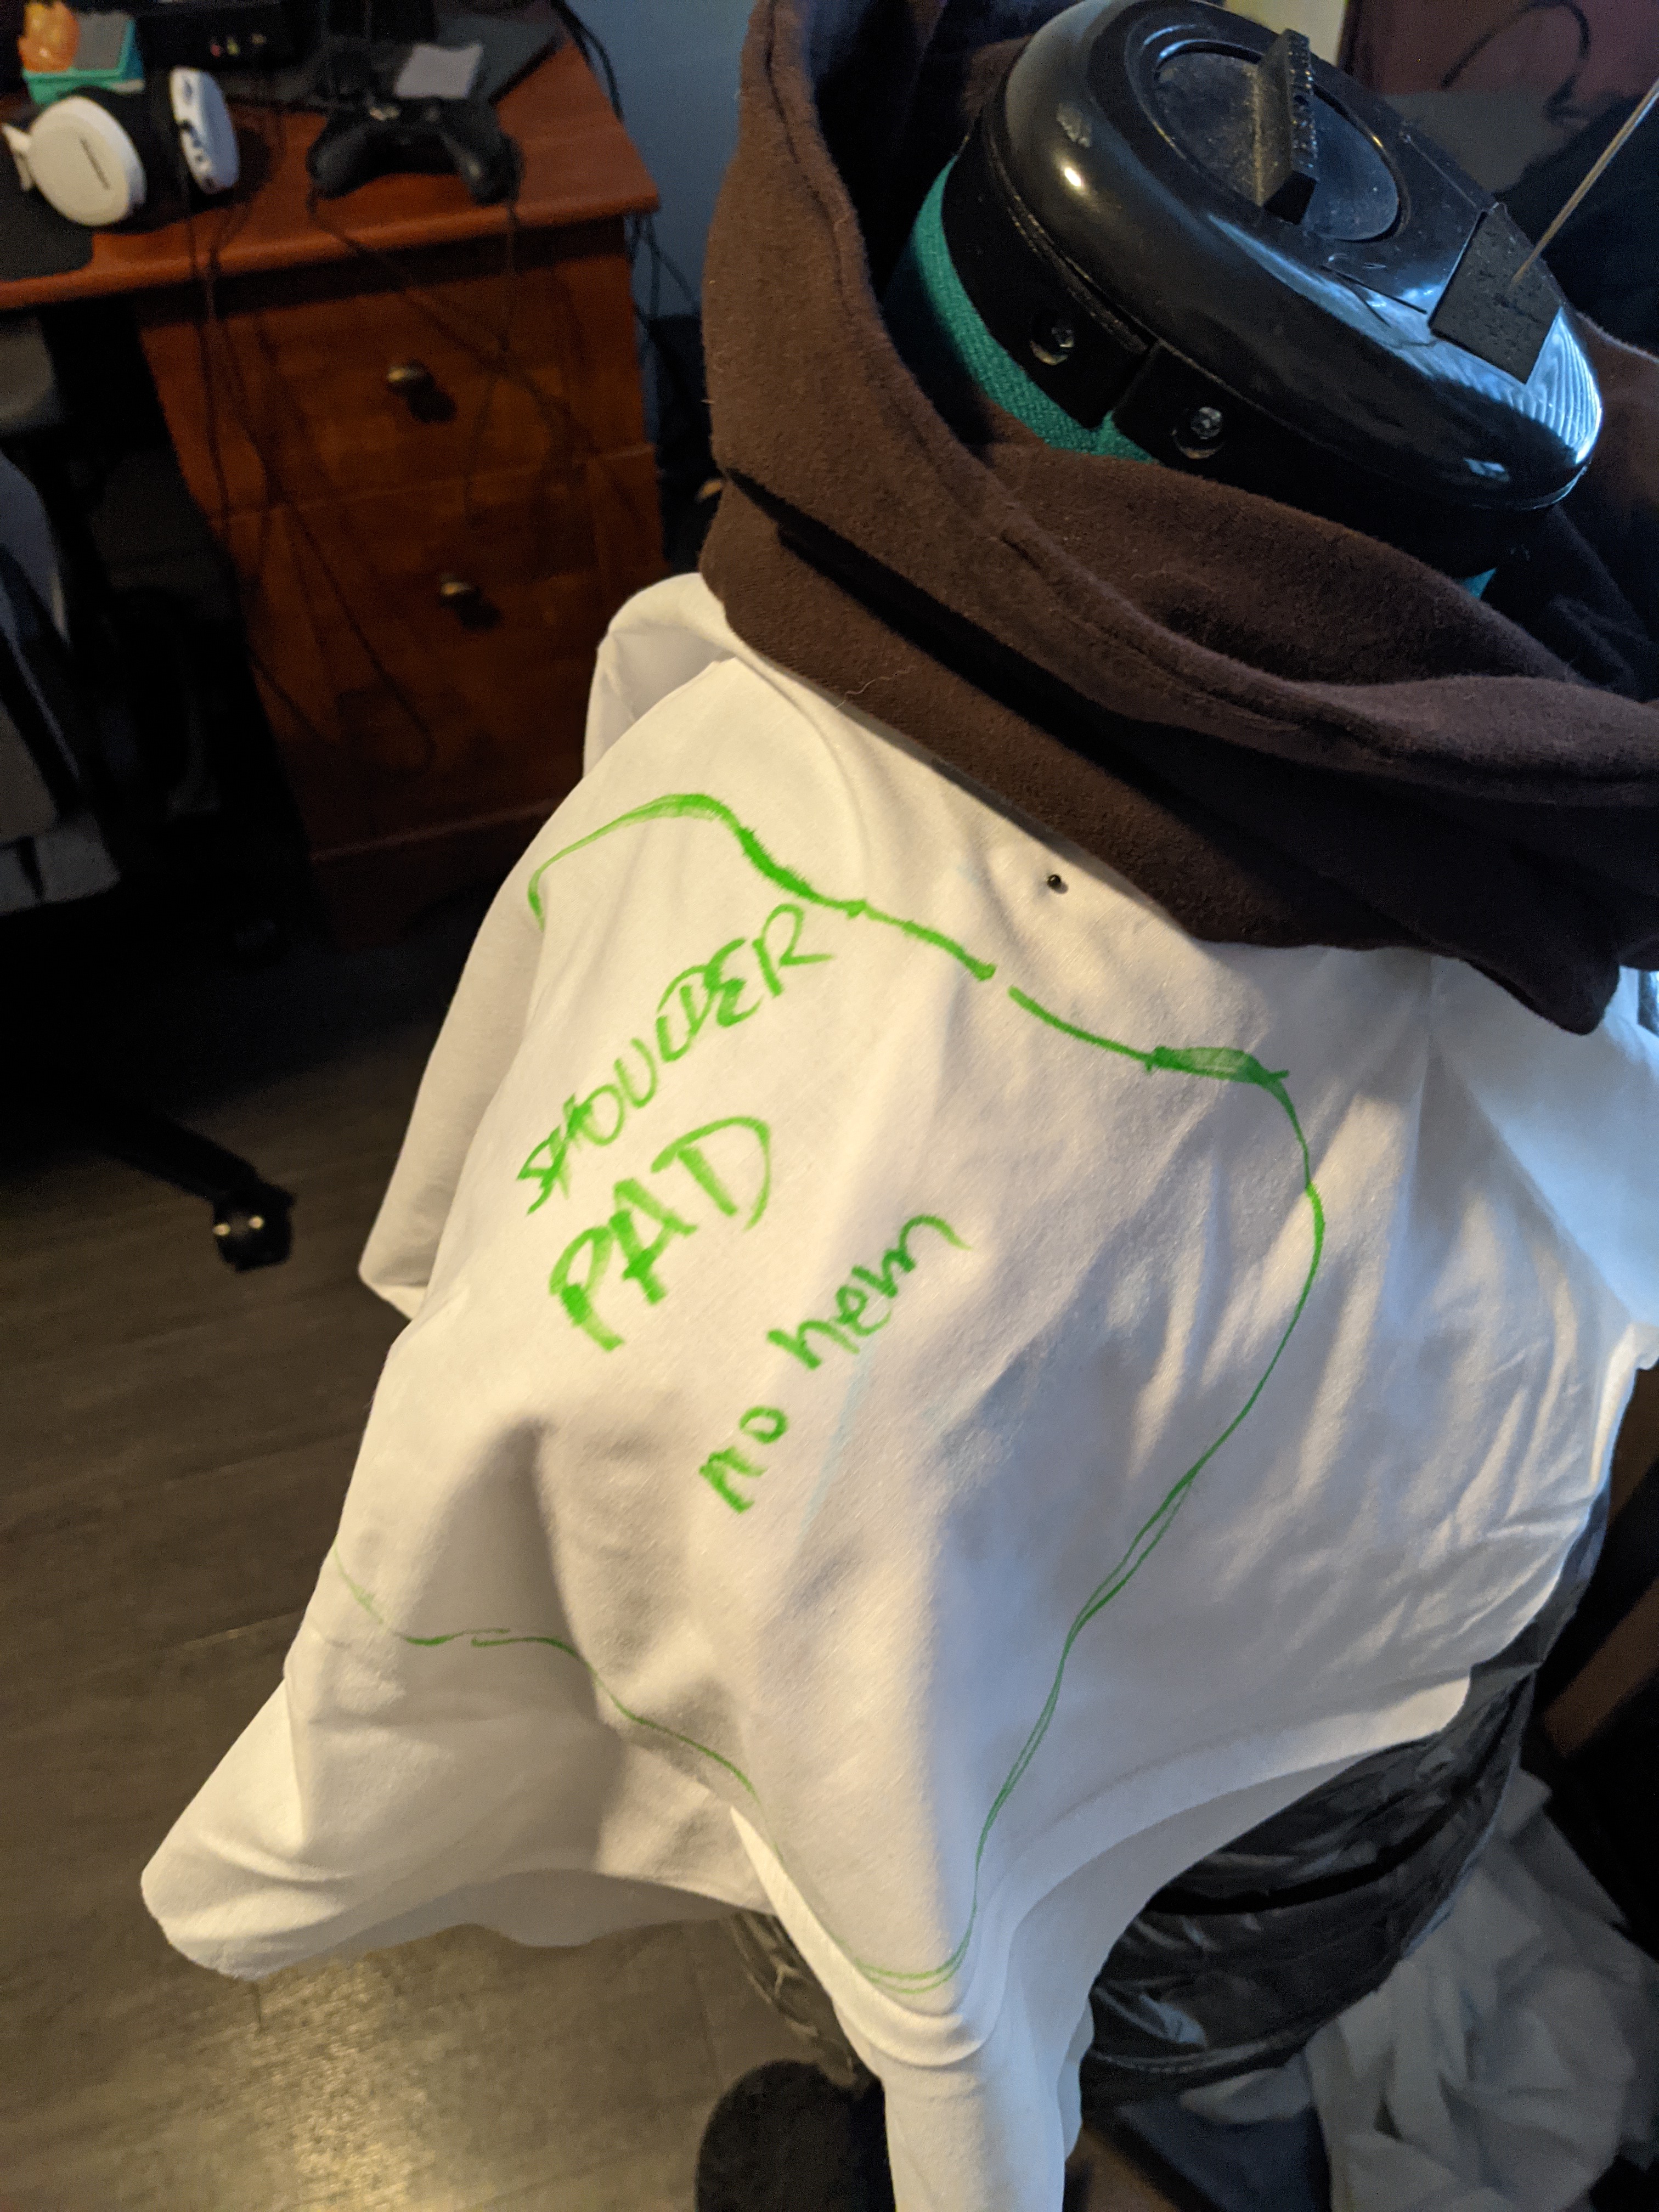
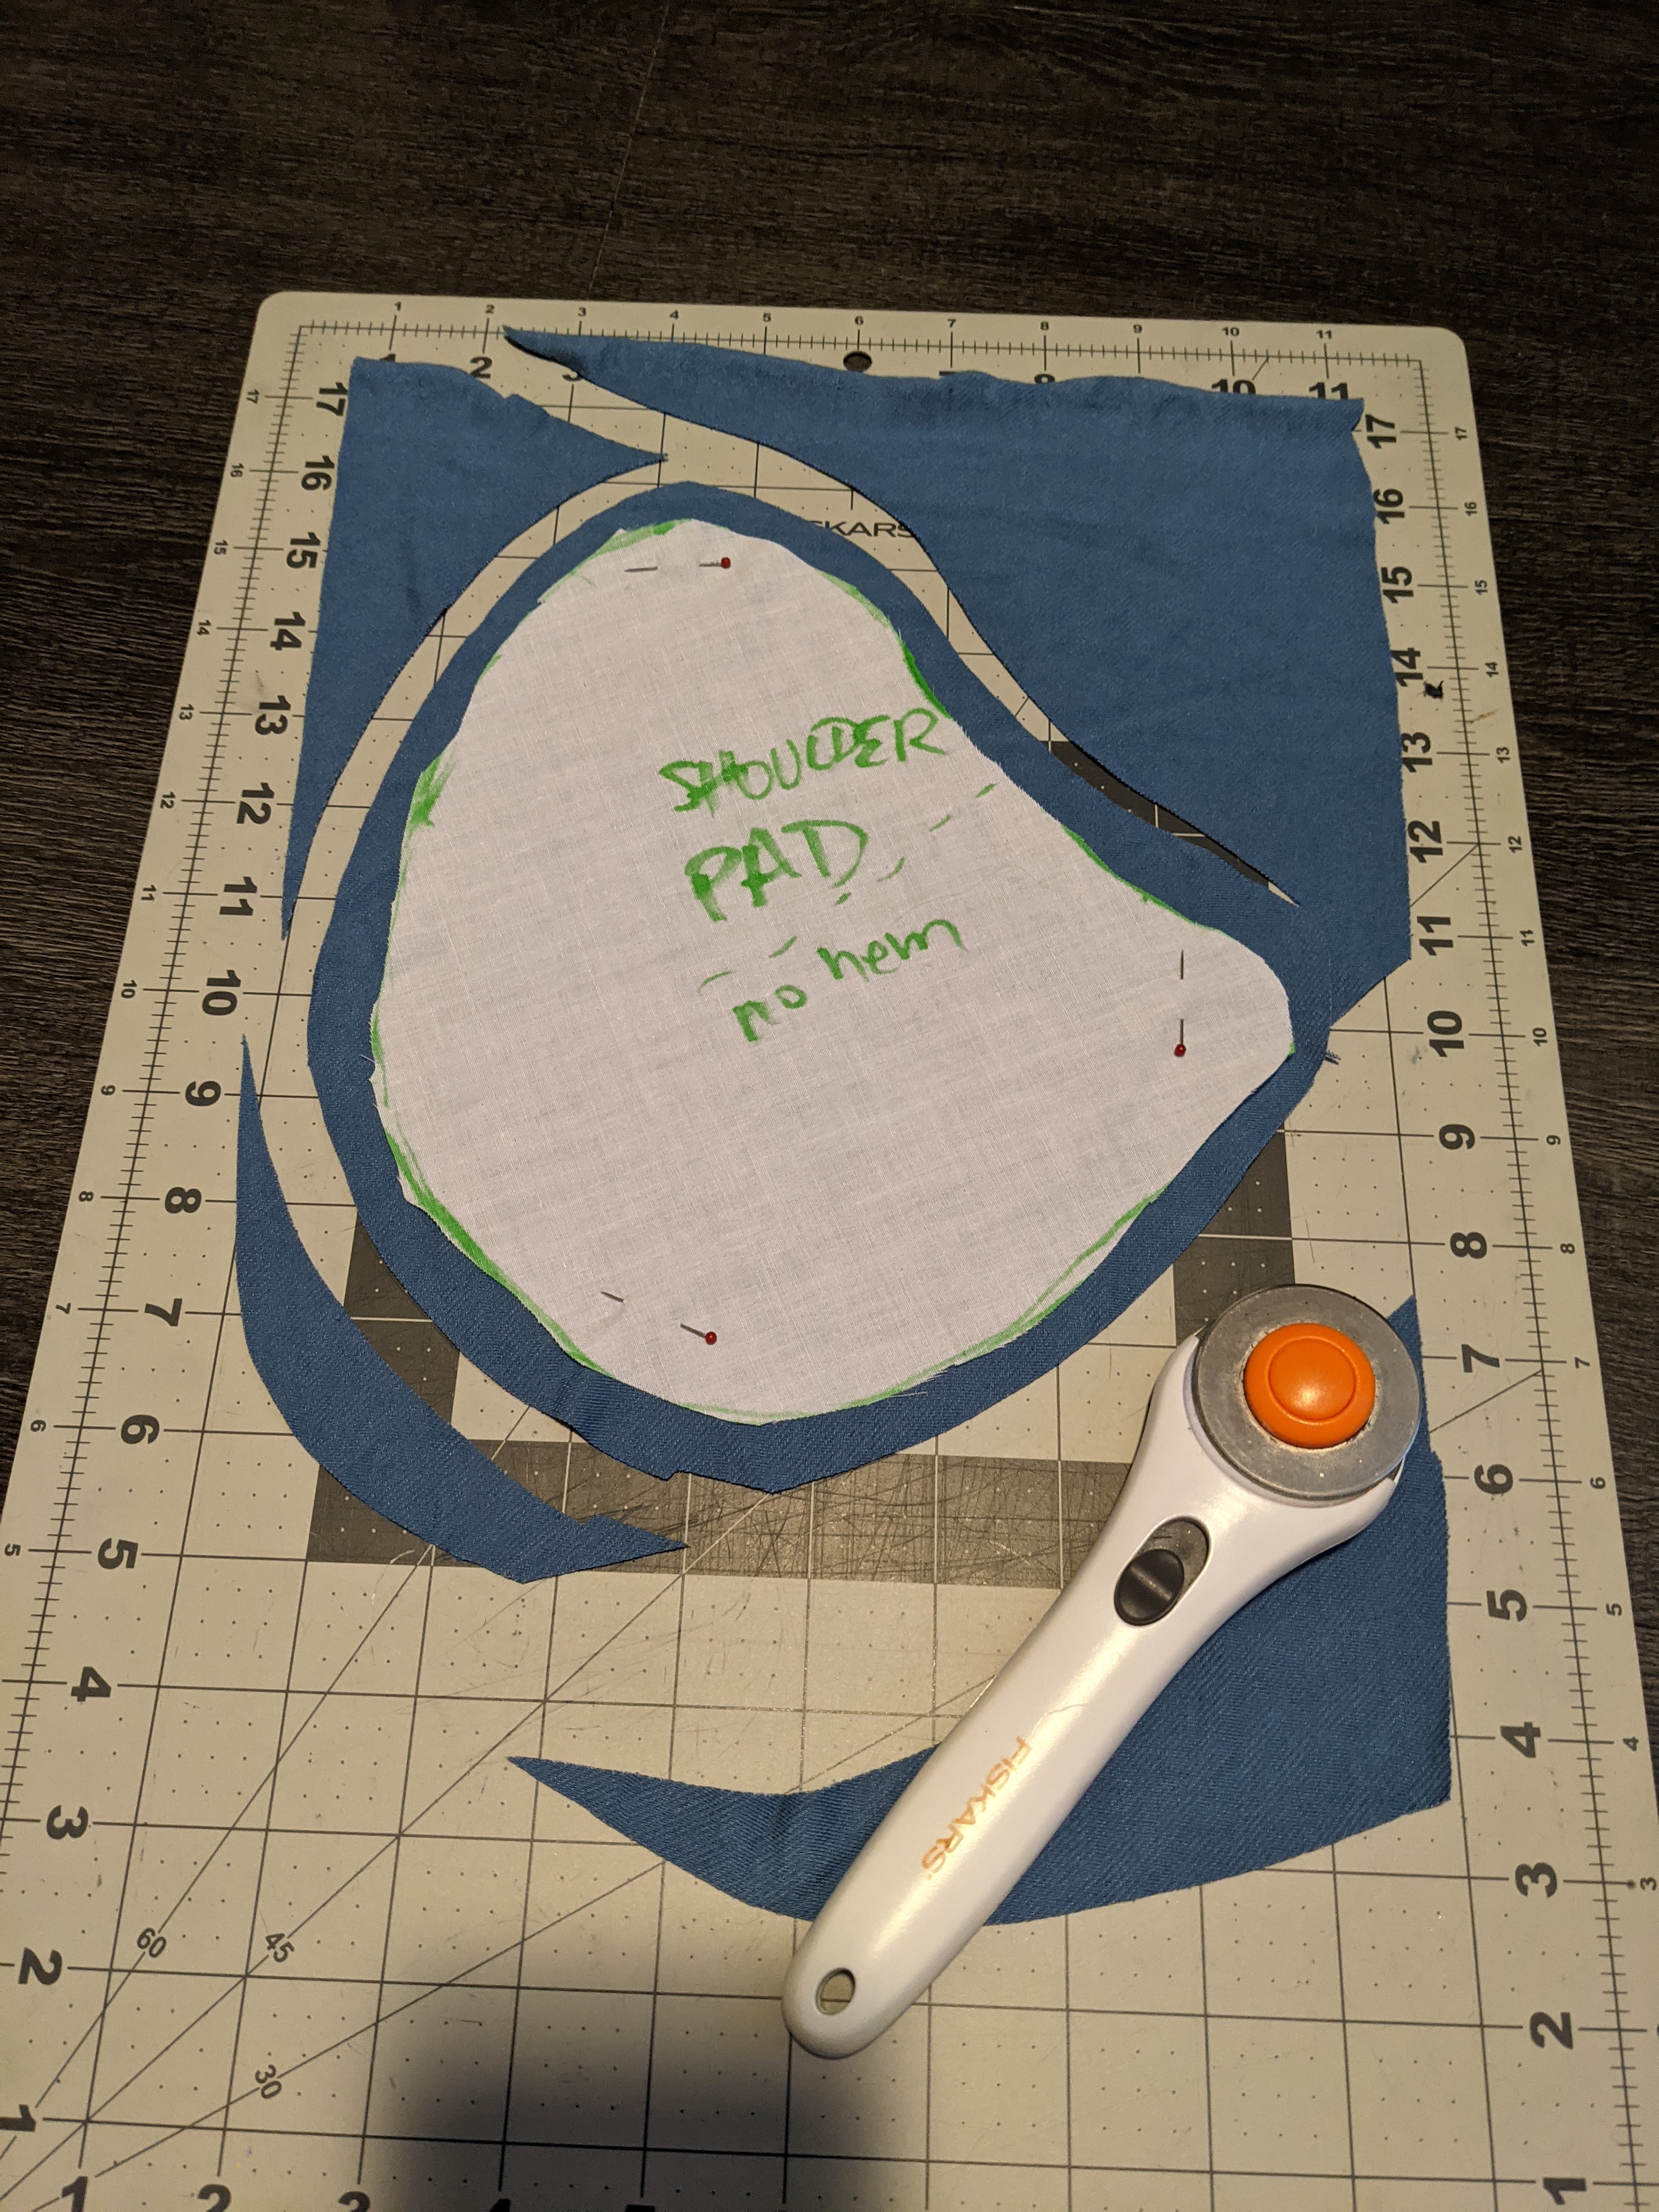
For the capelet, I patterned the front and back pieces via draping. I left the finished scarf on the dress form so I could see where it would lay in relation to the capelet. After patterning the front and back pieces, I used a third piece of muslin to pattern the shoulder pad. All of this was done with highlighters.
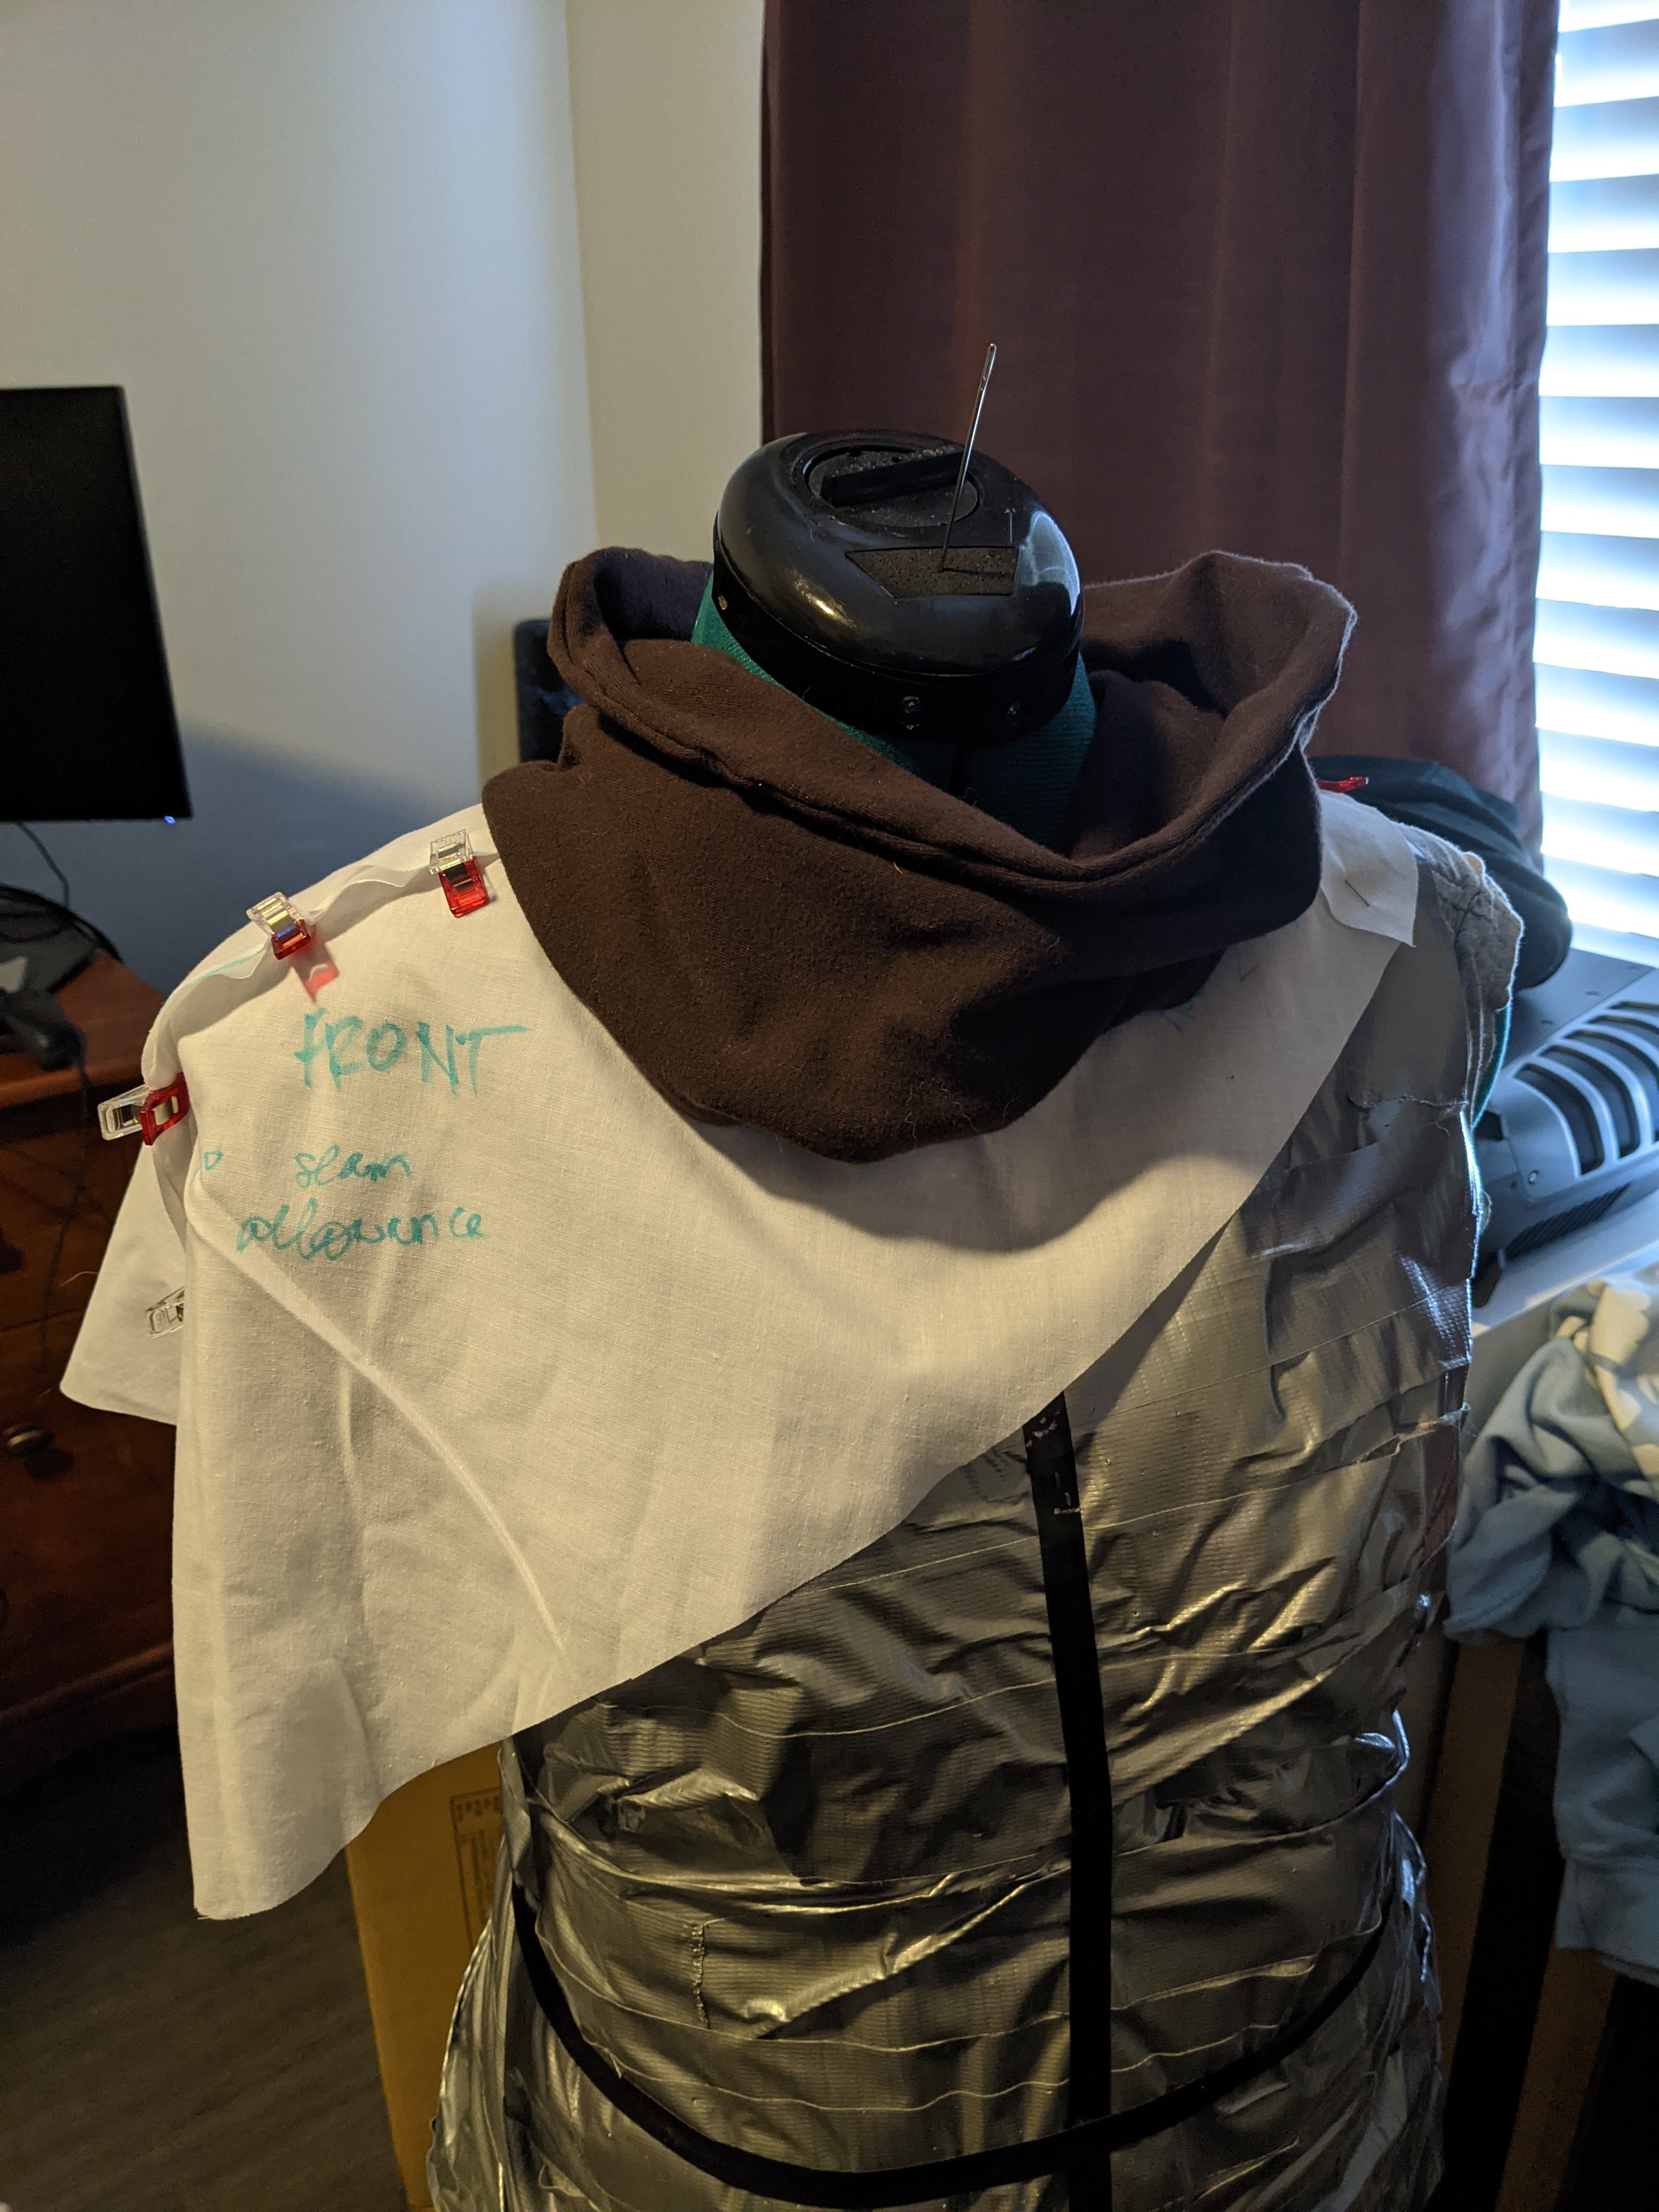
Once I took the pattern pieces off the dress form, I pinned them together and tried them on myself because sometimes the dress form isn’t as good at showing how it’ll look.
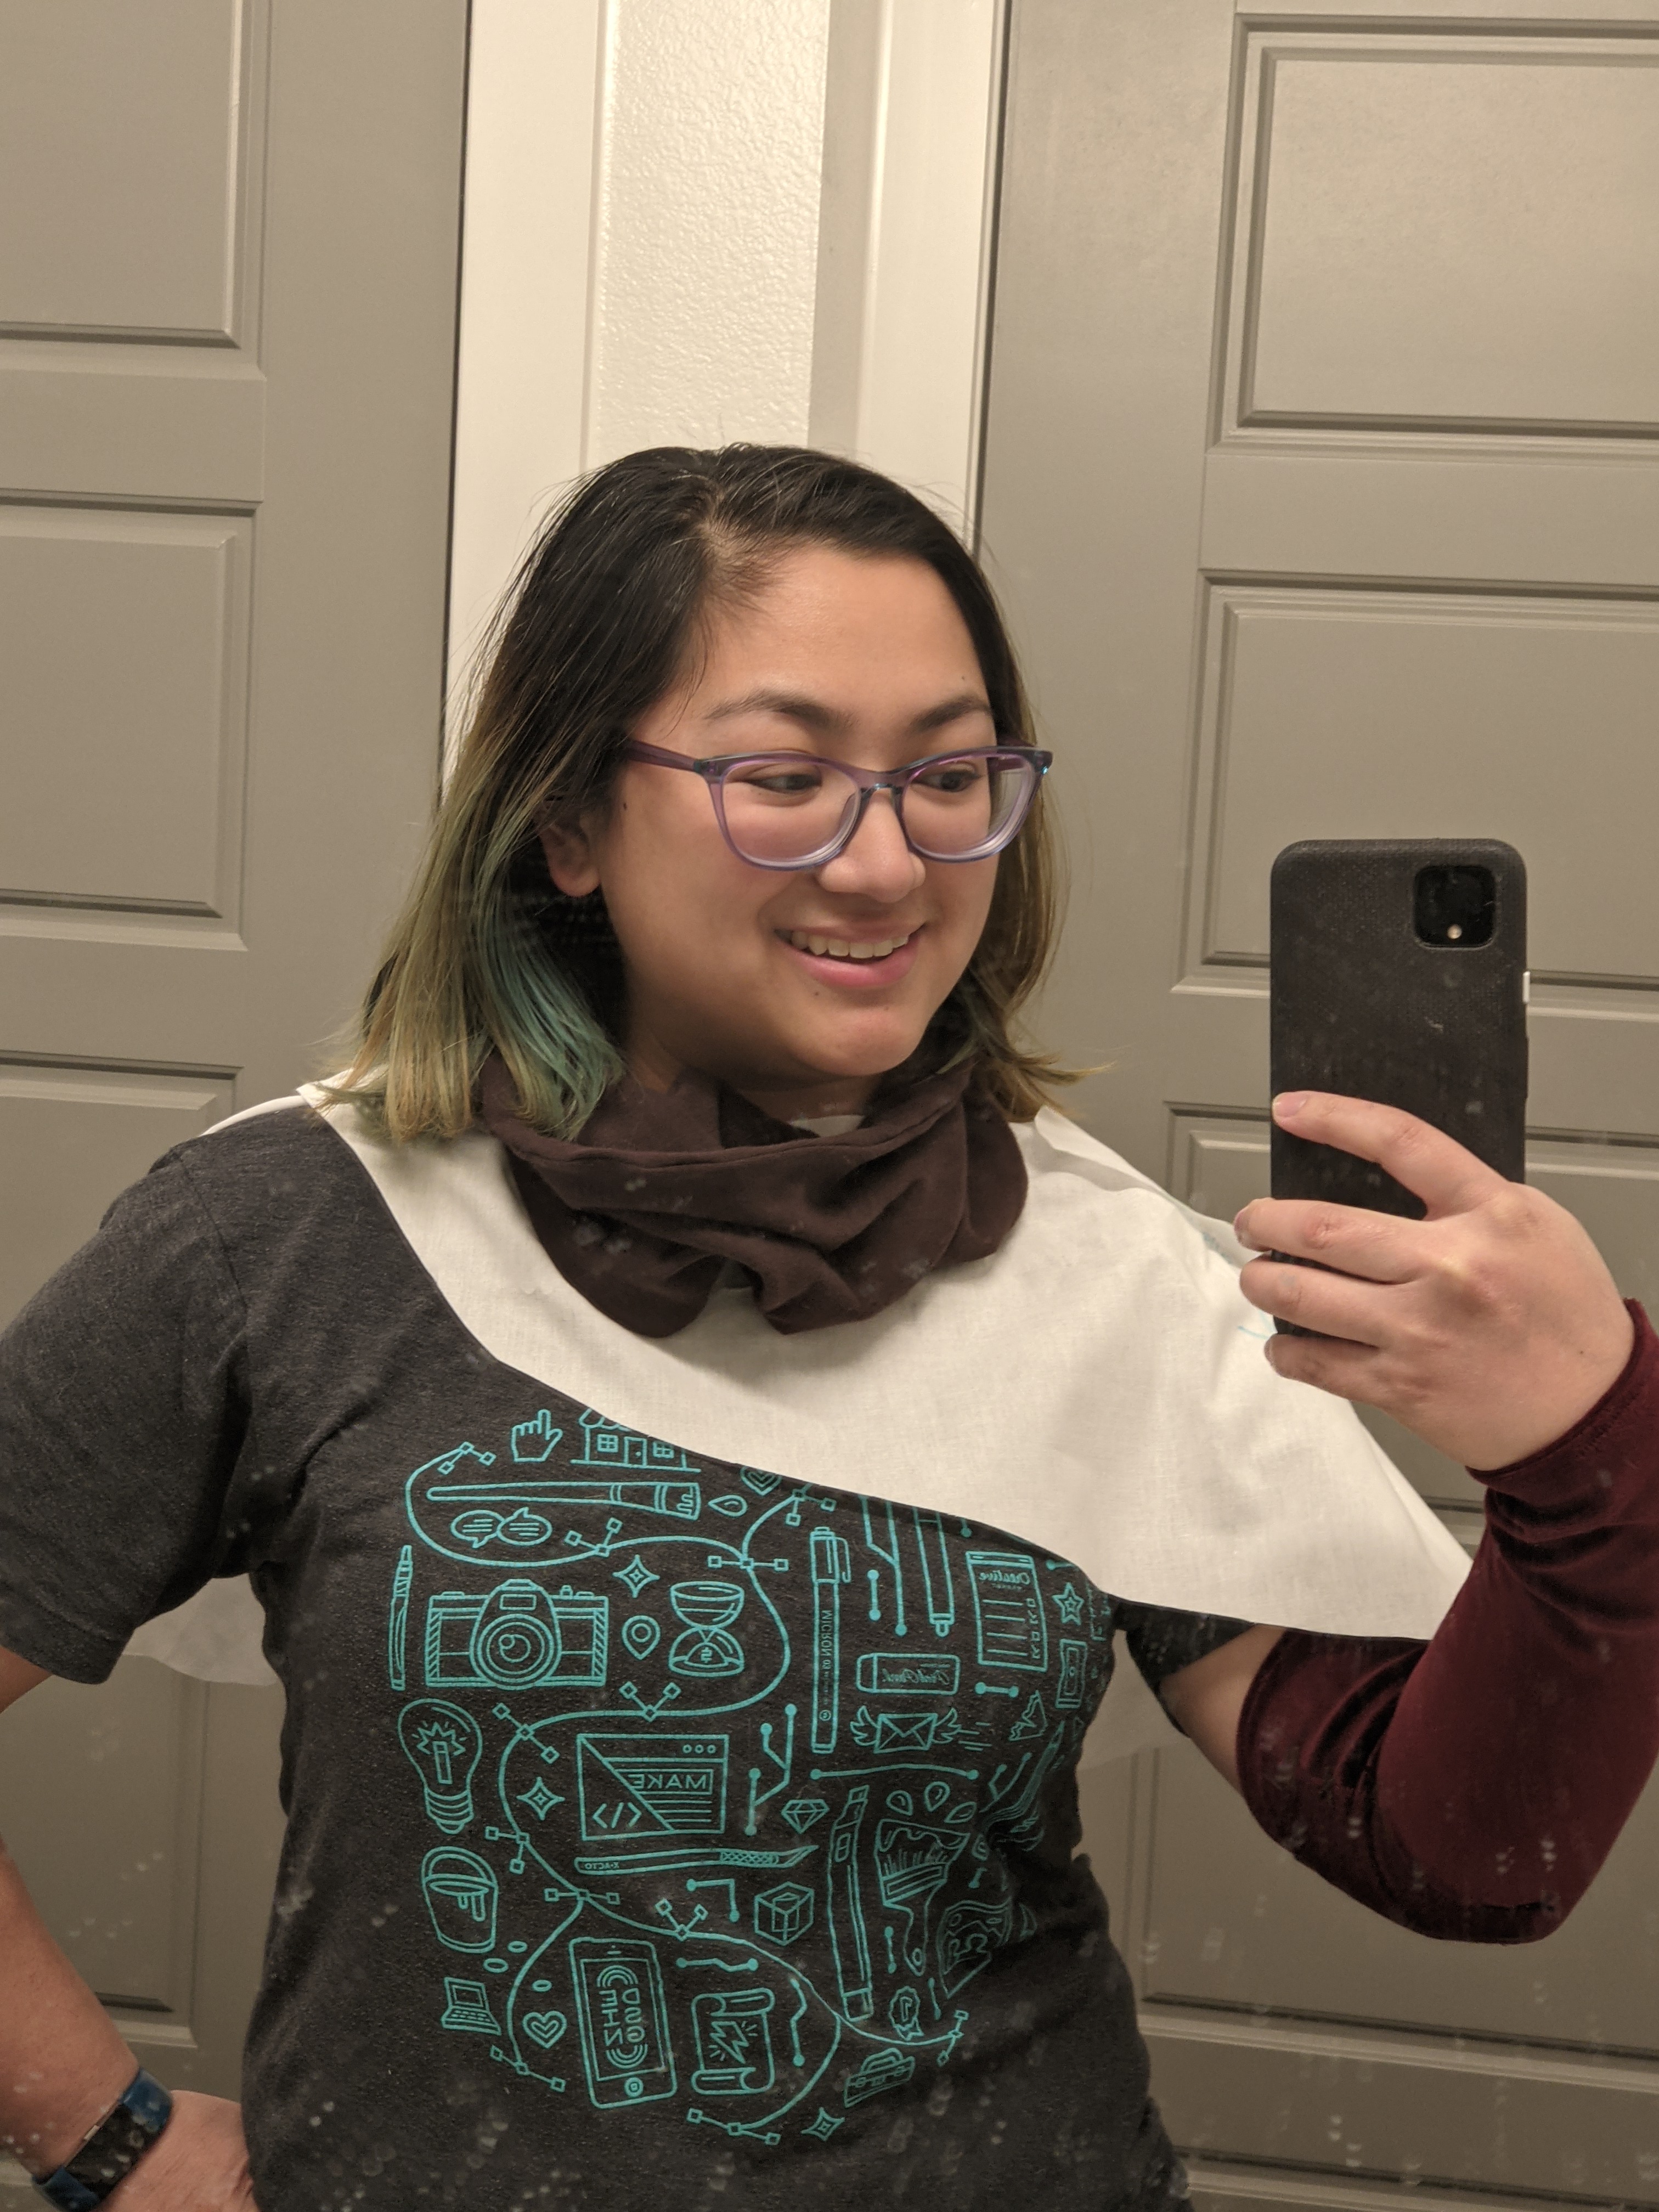
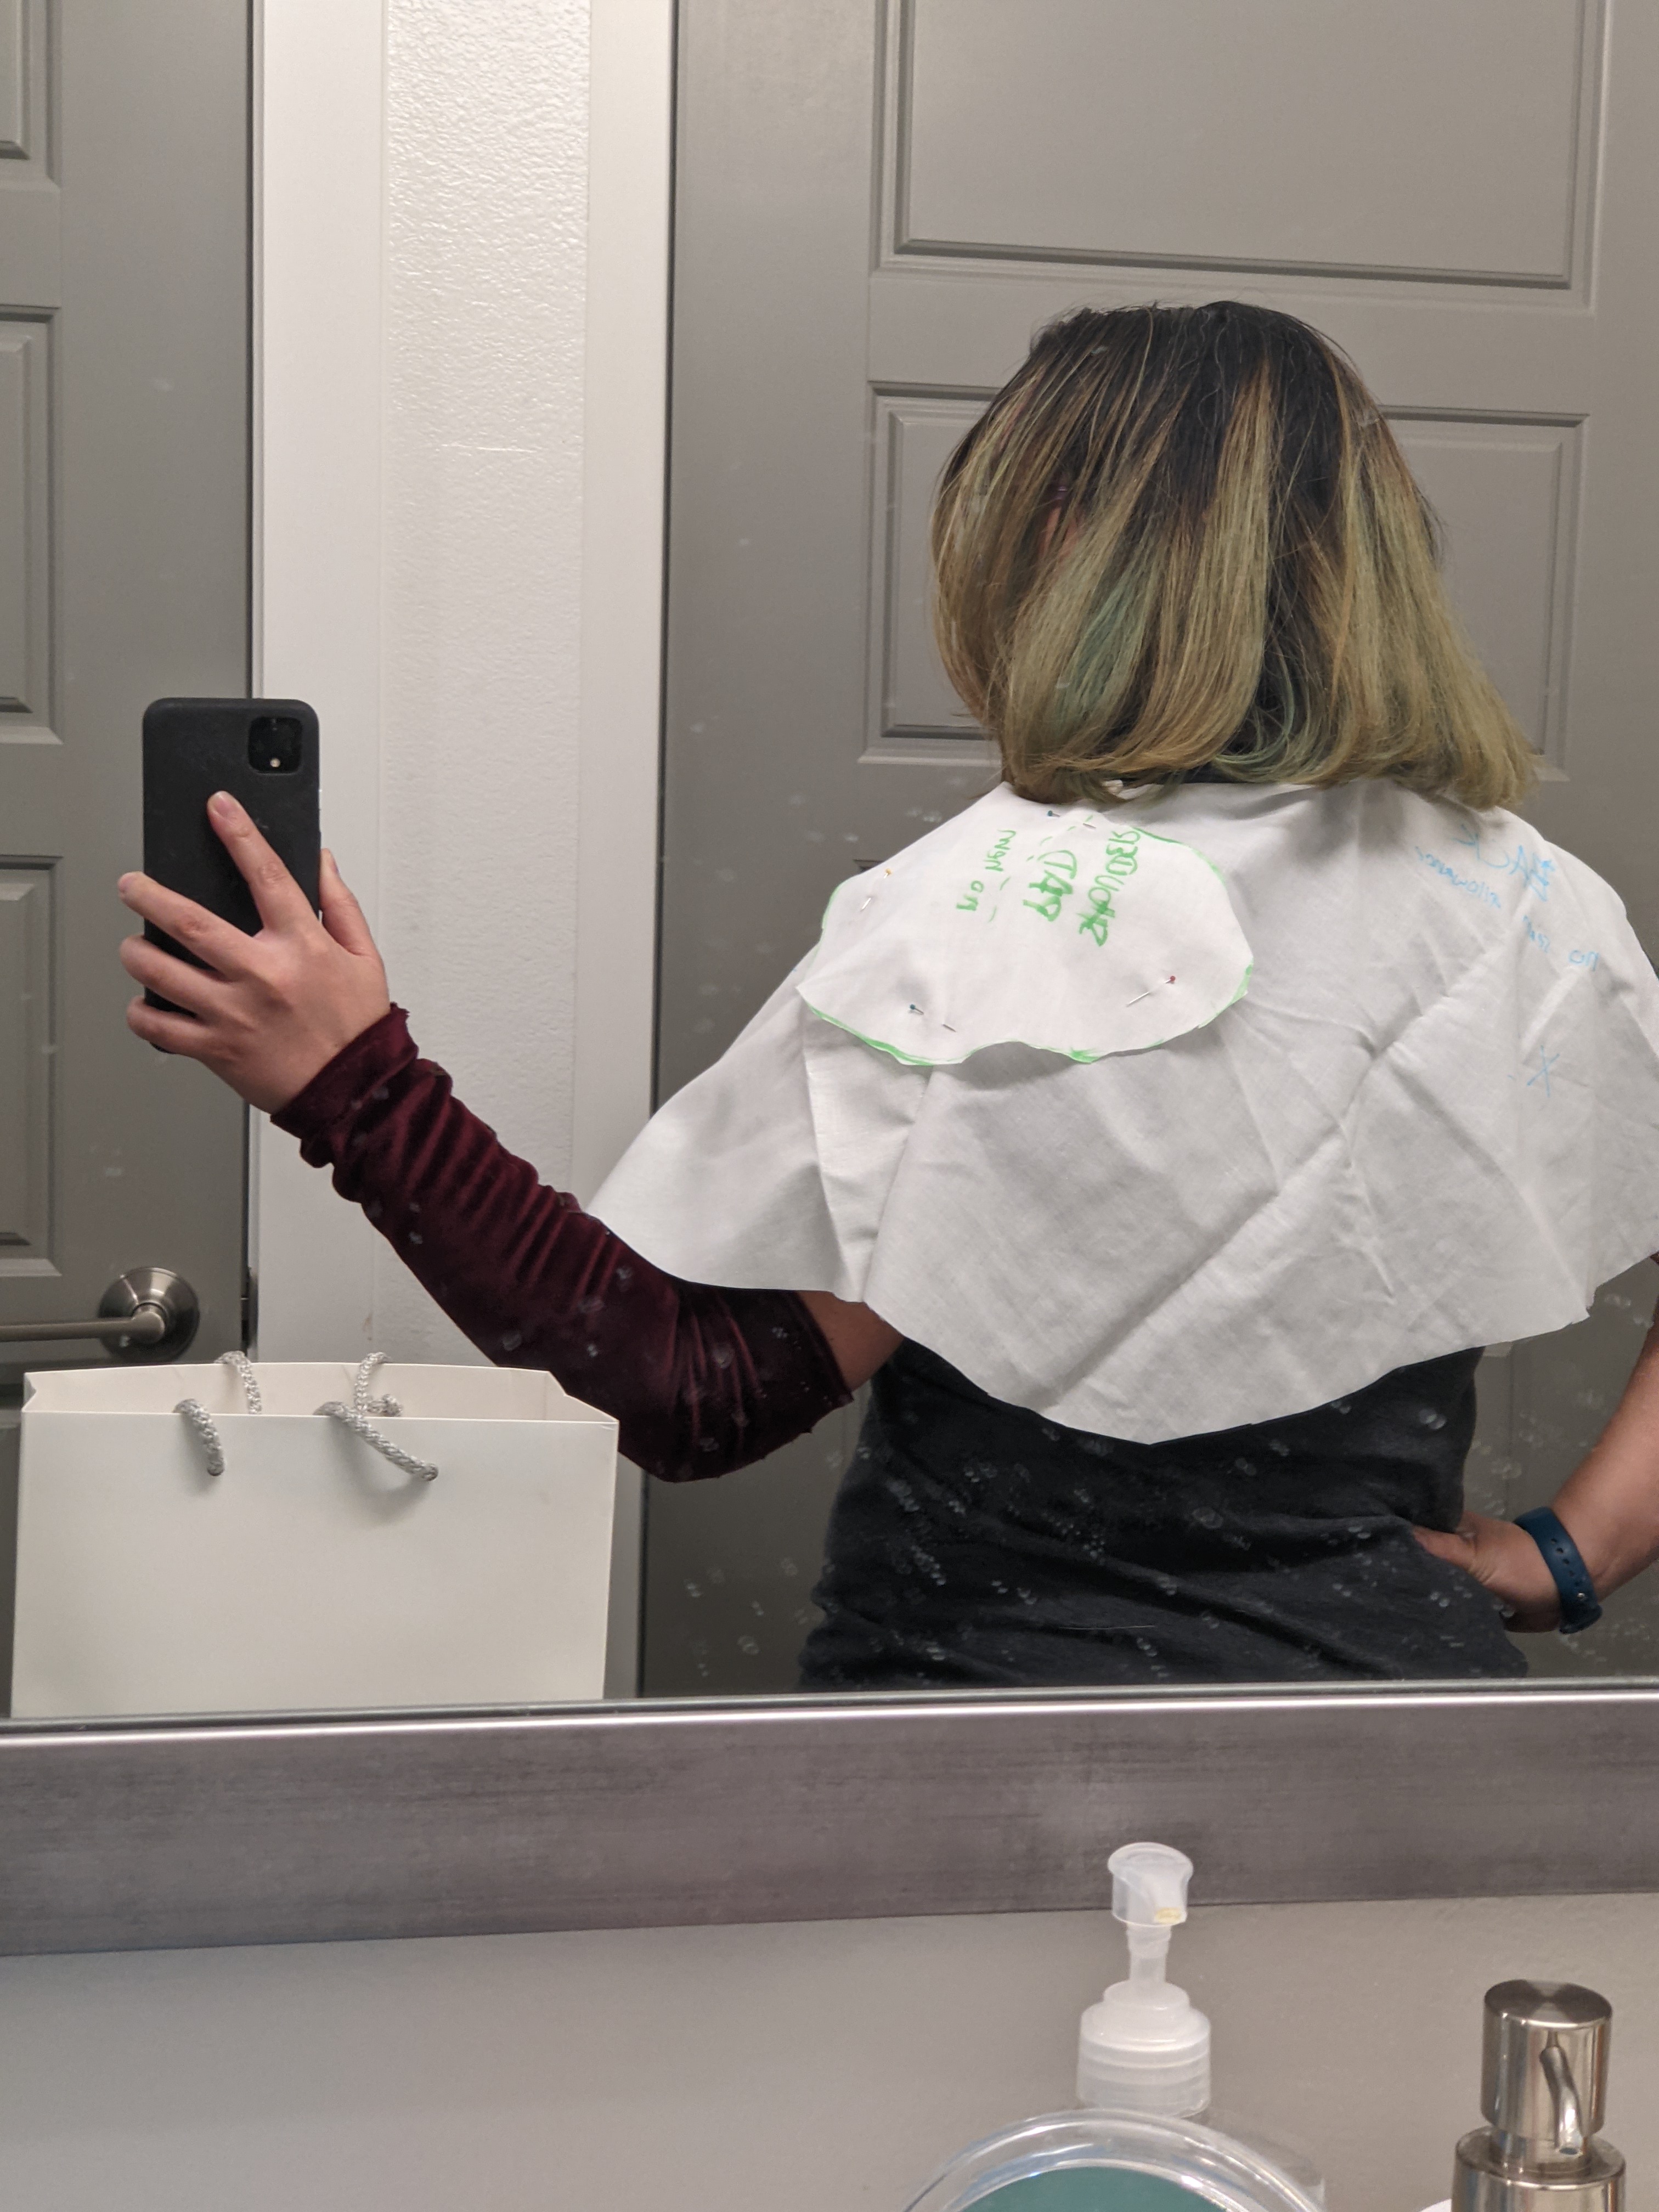
I realized here that the capelet was too short, so I made a note to add 2″ to the bottom hem all around. I also extended the top of the front pieces left shoulder piece so that it would overlap with the back piece.


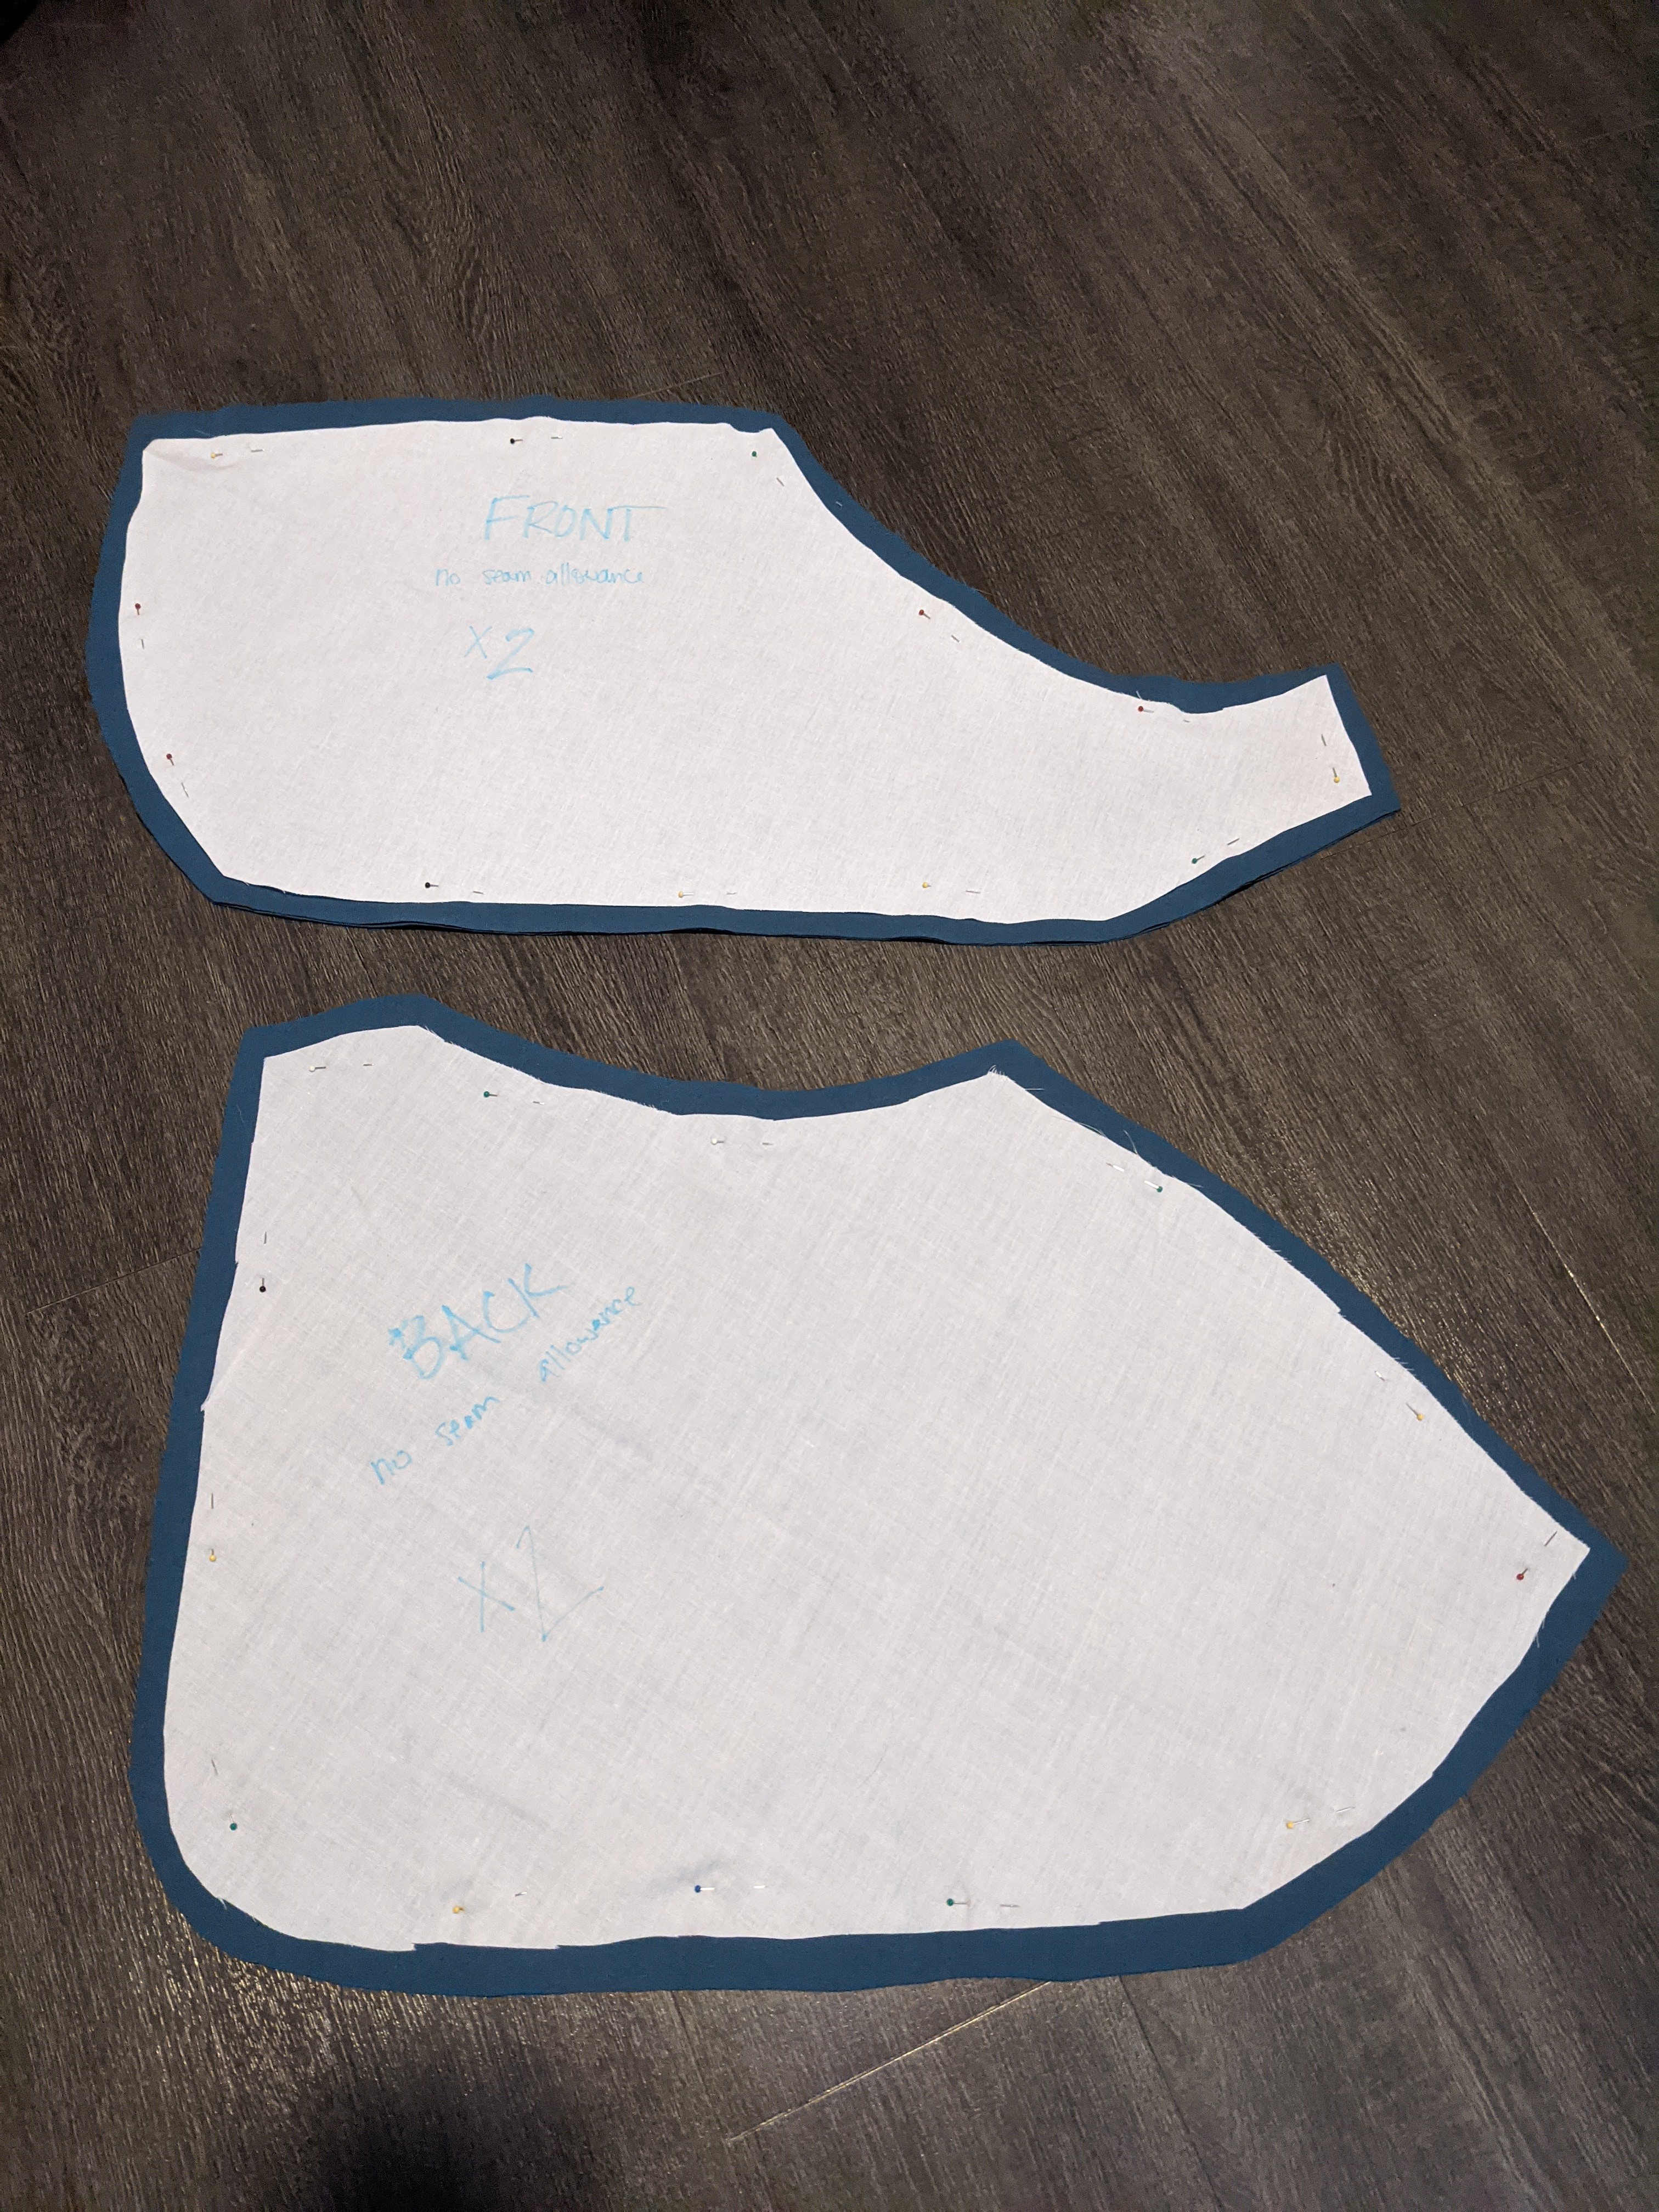
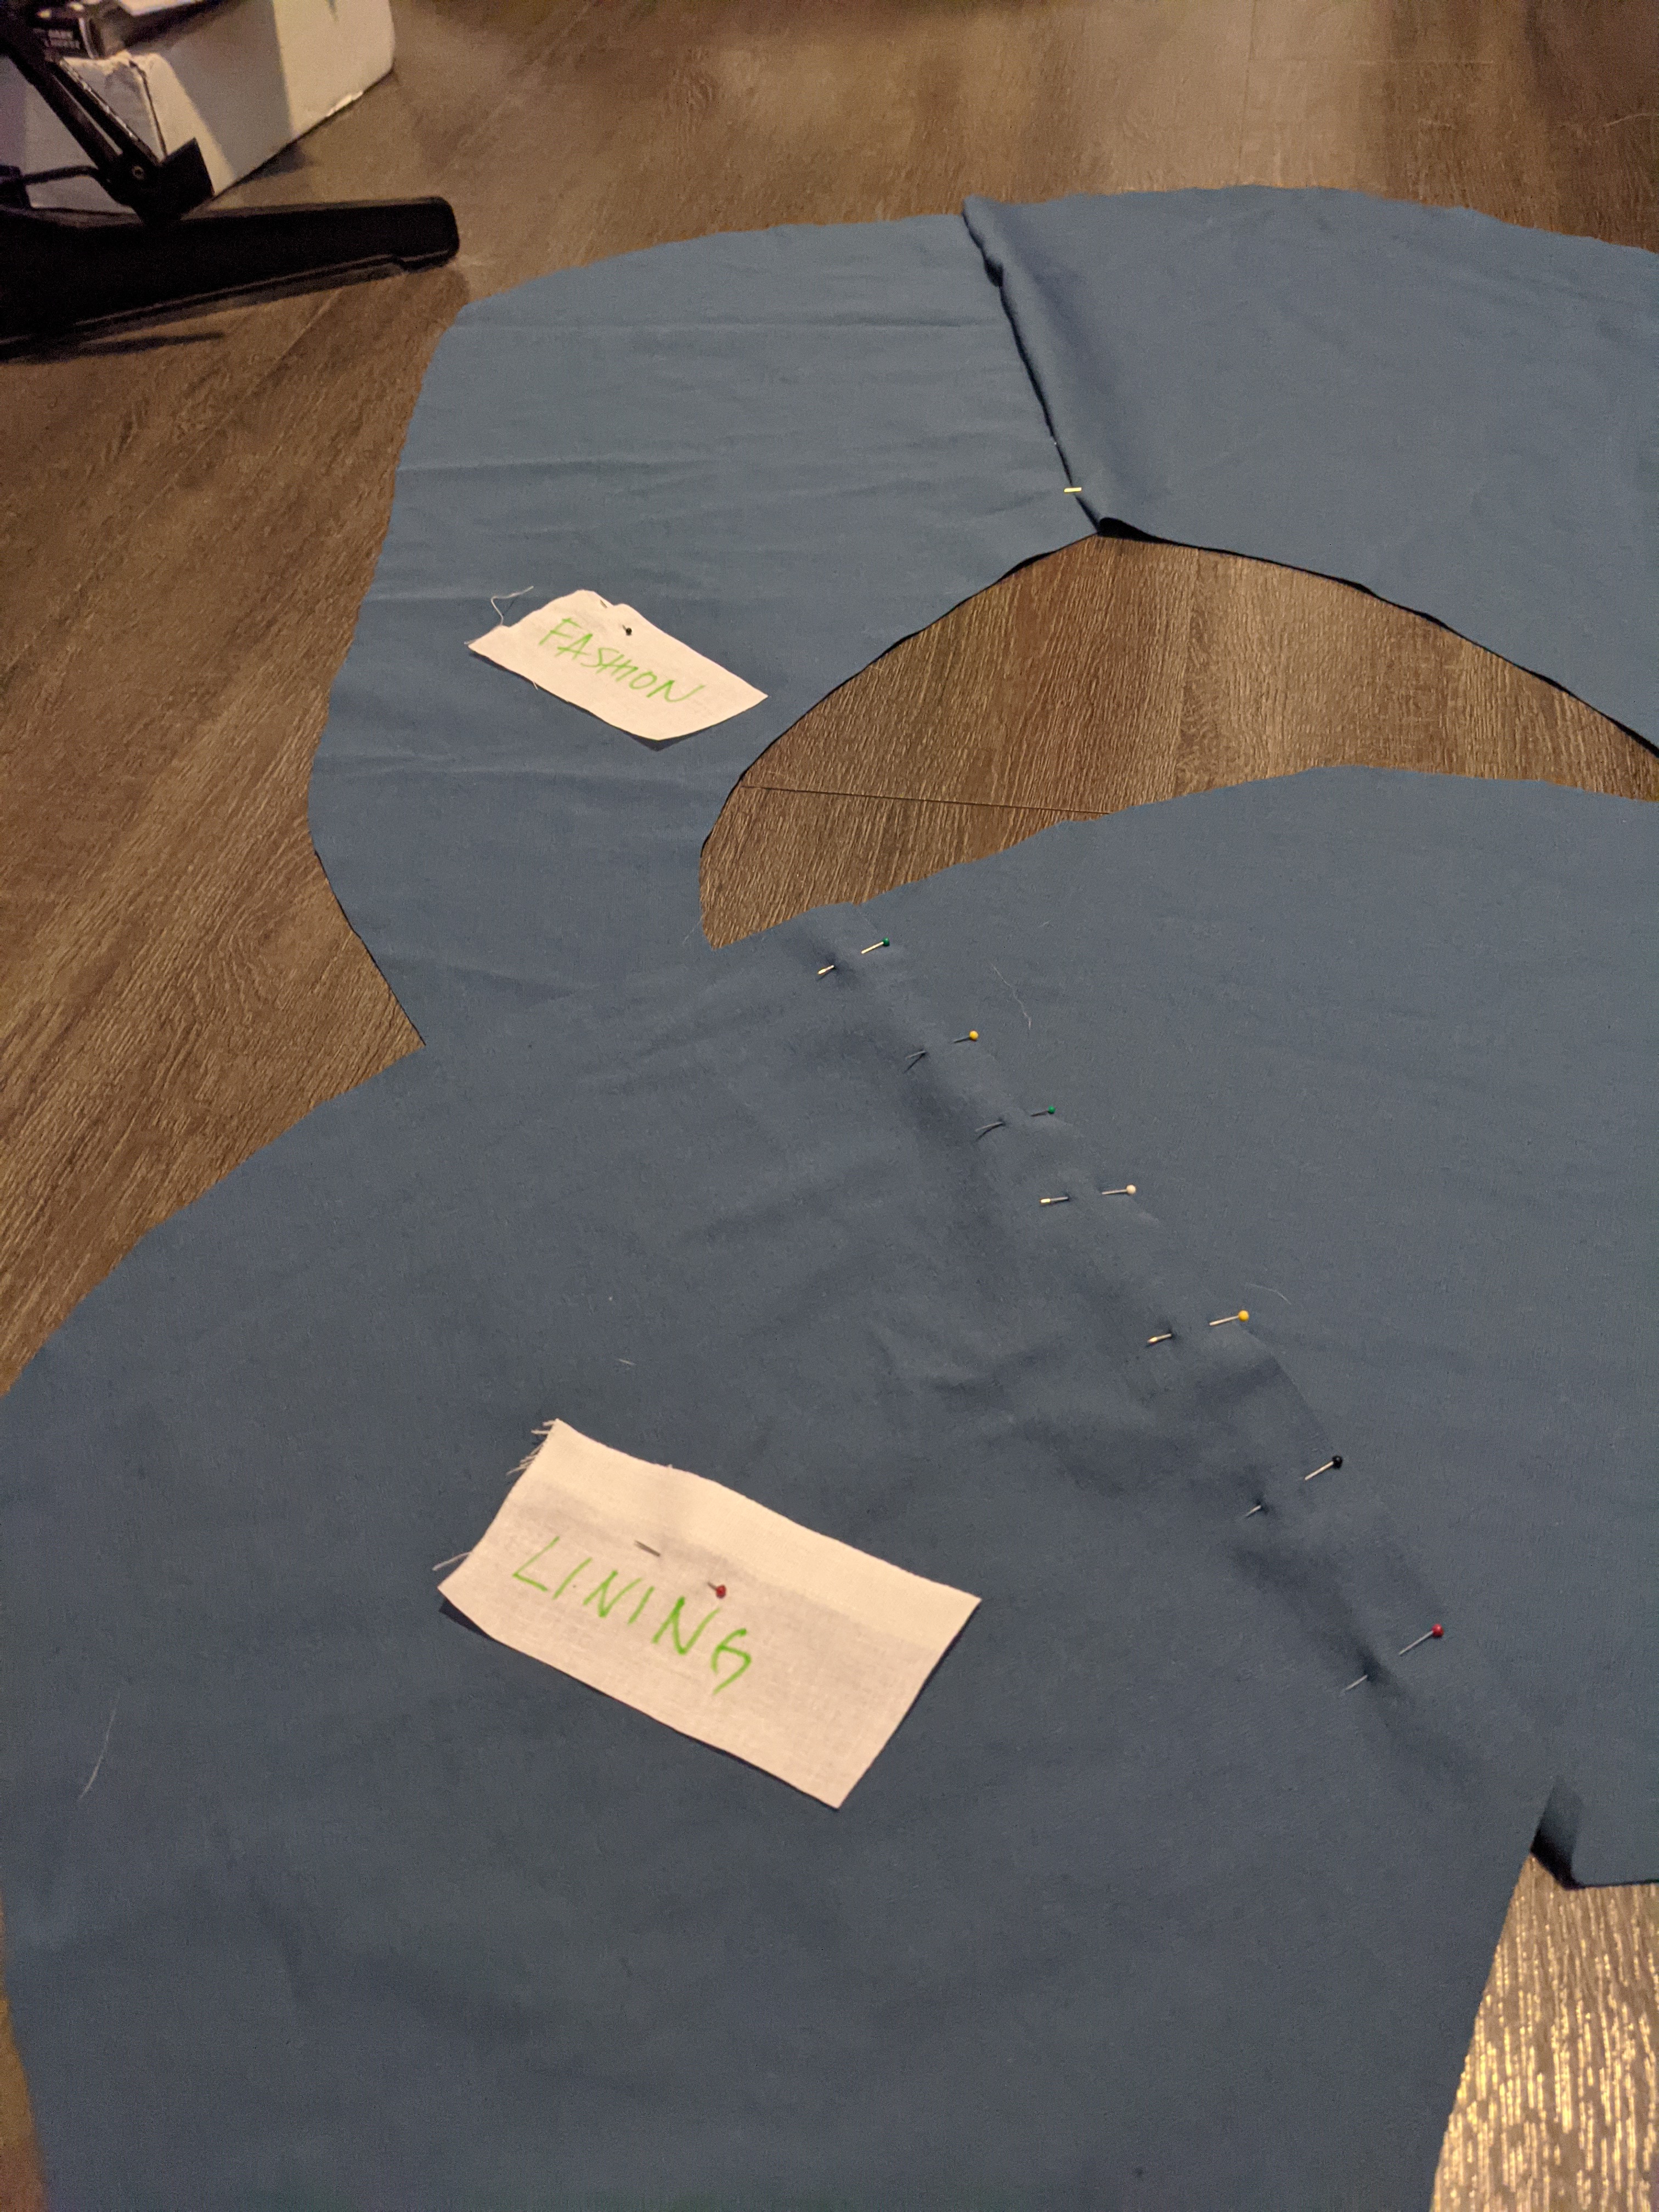
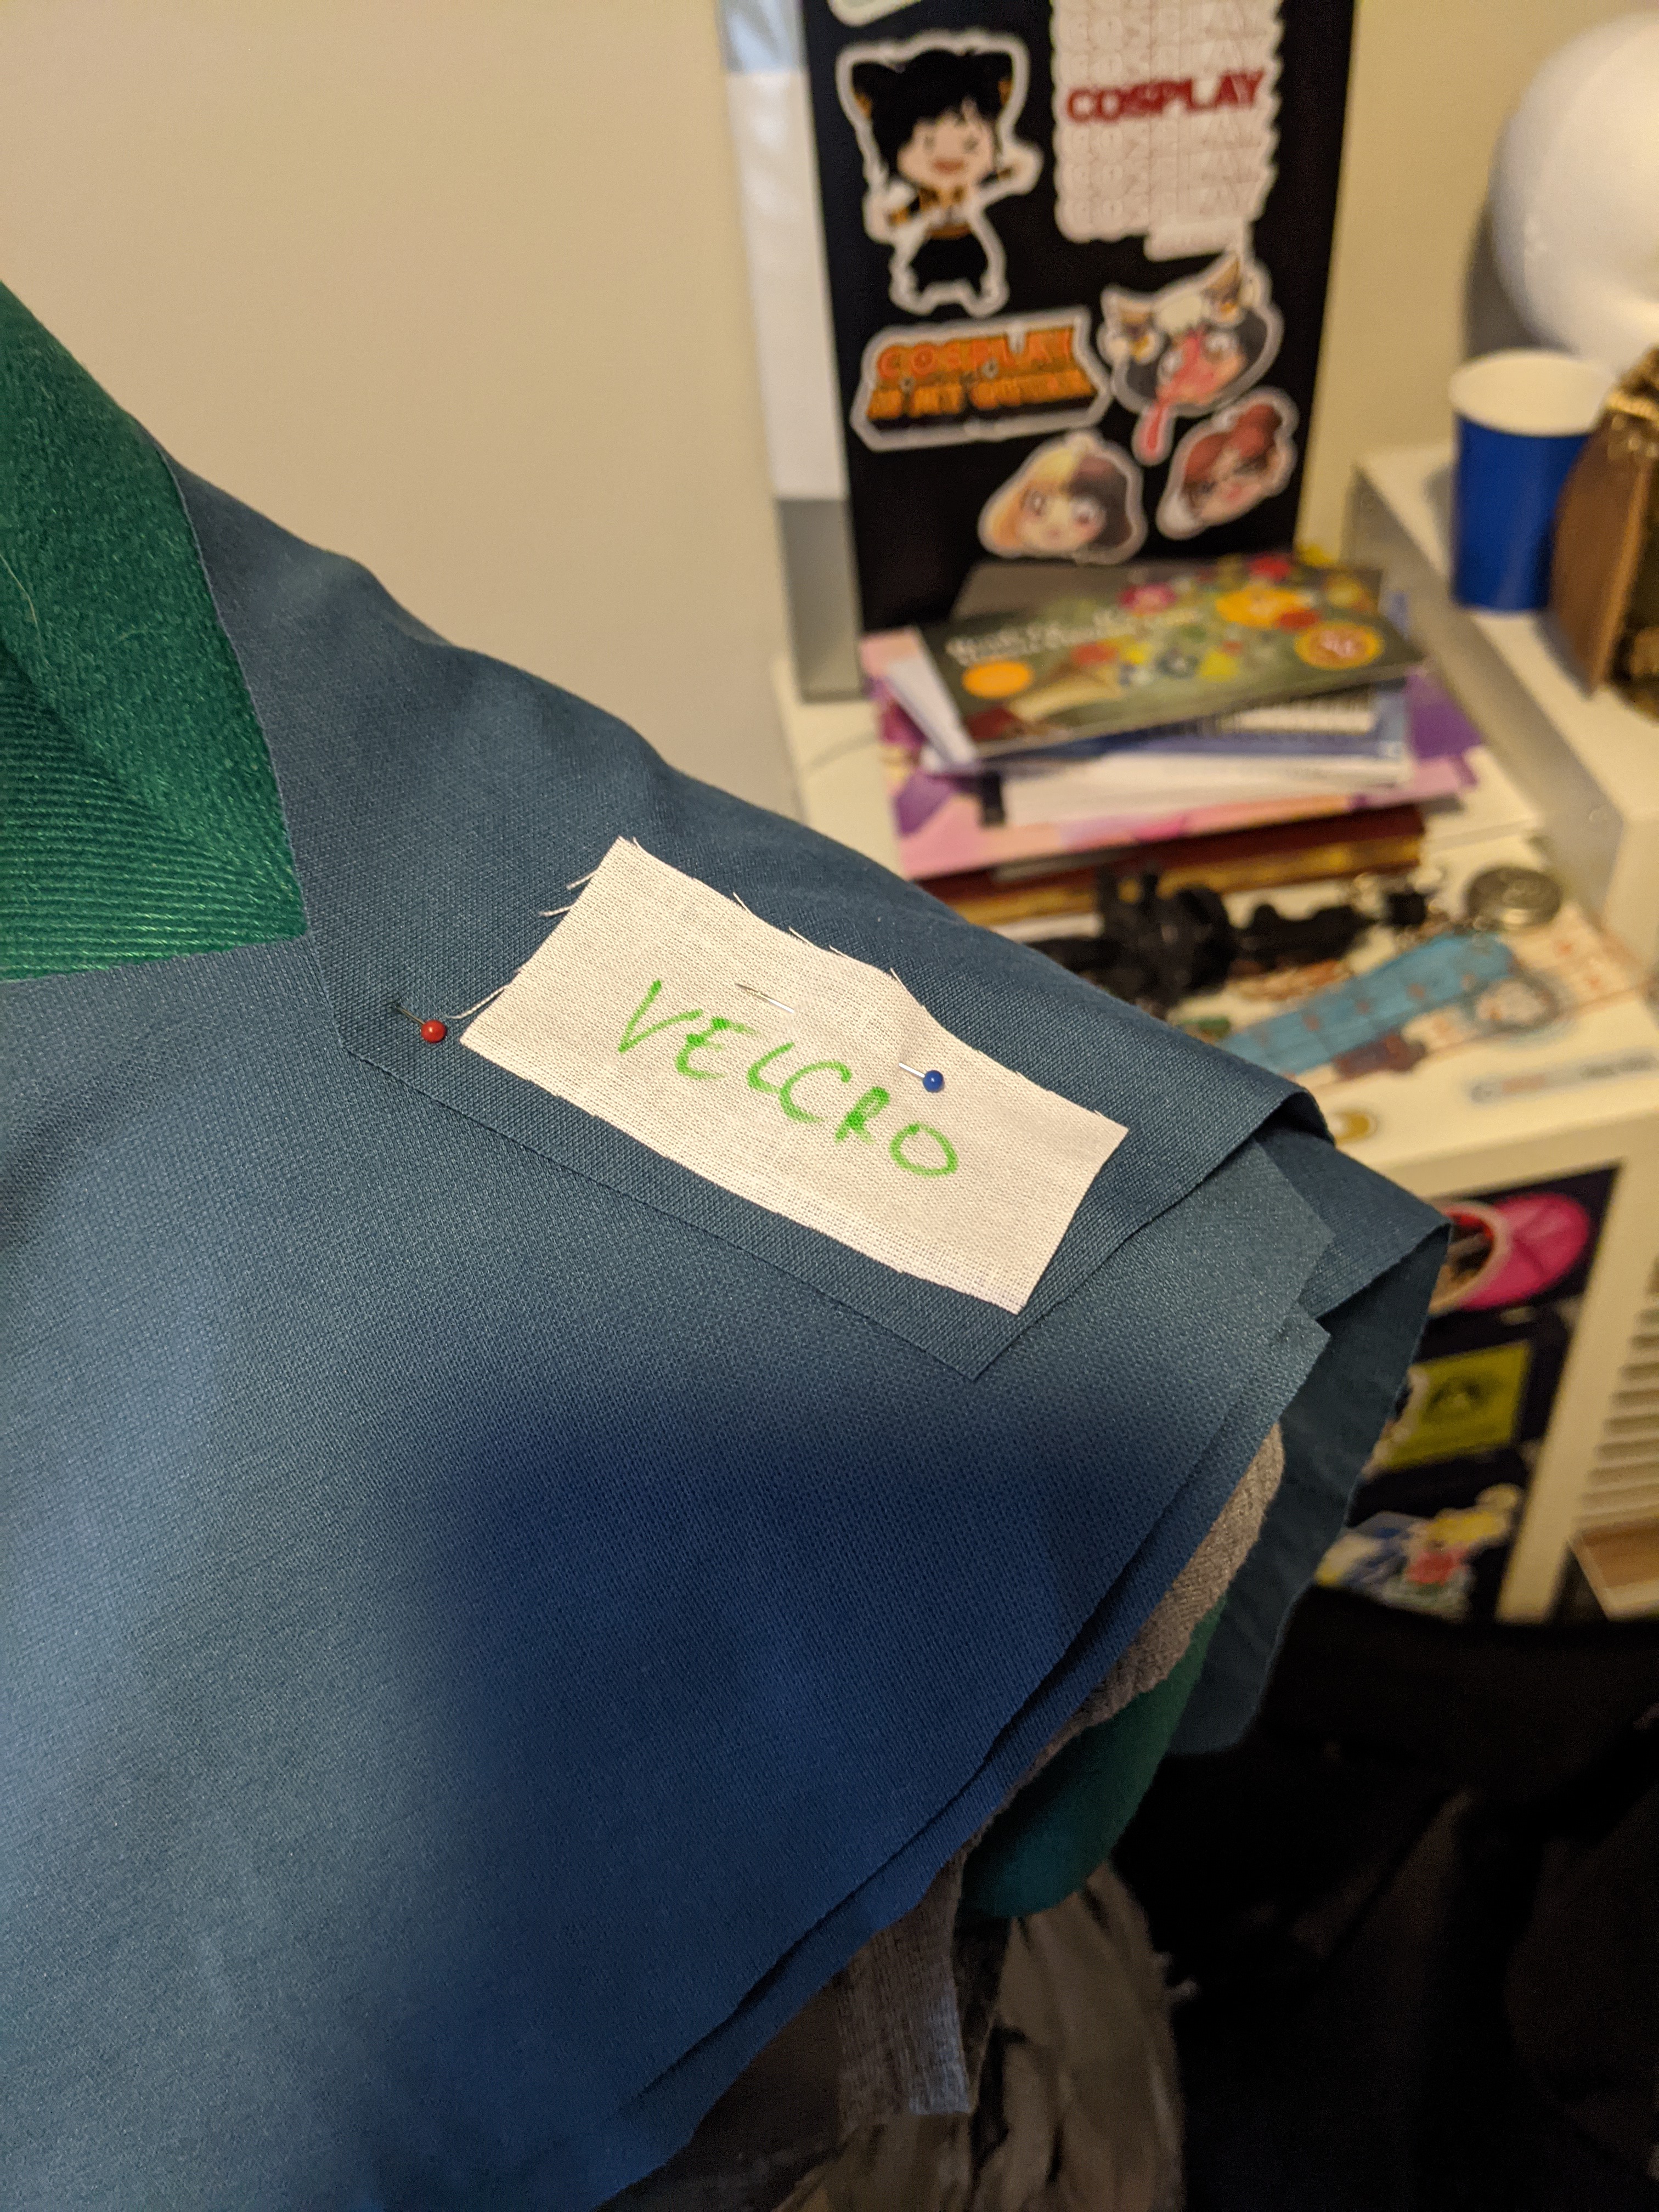
Once happy with the updated pattern, I transferred it to the final fabric, adding about a 1cm seam allowance all around. I cut out the pattern twice, once for the fashion layer and once for the lining. After pinning the front and back pieces together, I marked which was the fashion and which was the lining so I wouldn’t get them mixed up. I also marked where the velcro pieces would be going on the front lining and the back fashion layers. I marked by writing on muslin and pinning them in place.
For both the fashion and lining pieces, I stitched the front and back pieces together. Then, after stitching on the velcro in the necessary spots, I added the shoulder pad to the fashion layer. I did this by first hemming the raw edges (folding all the edges over then straight stitching it down)and then pinning in place and zigzag stitching it on.
To finish the neckline hem, I folded and clipped over both the fashion and lining edges, tucking them inside, then top-stitched it in place. Both connecting the two layers and hiding the raw edges.


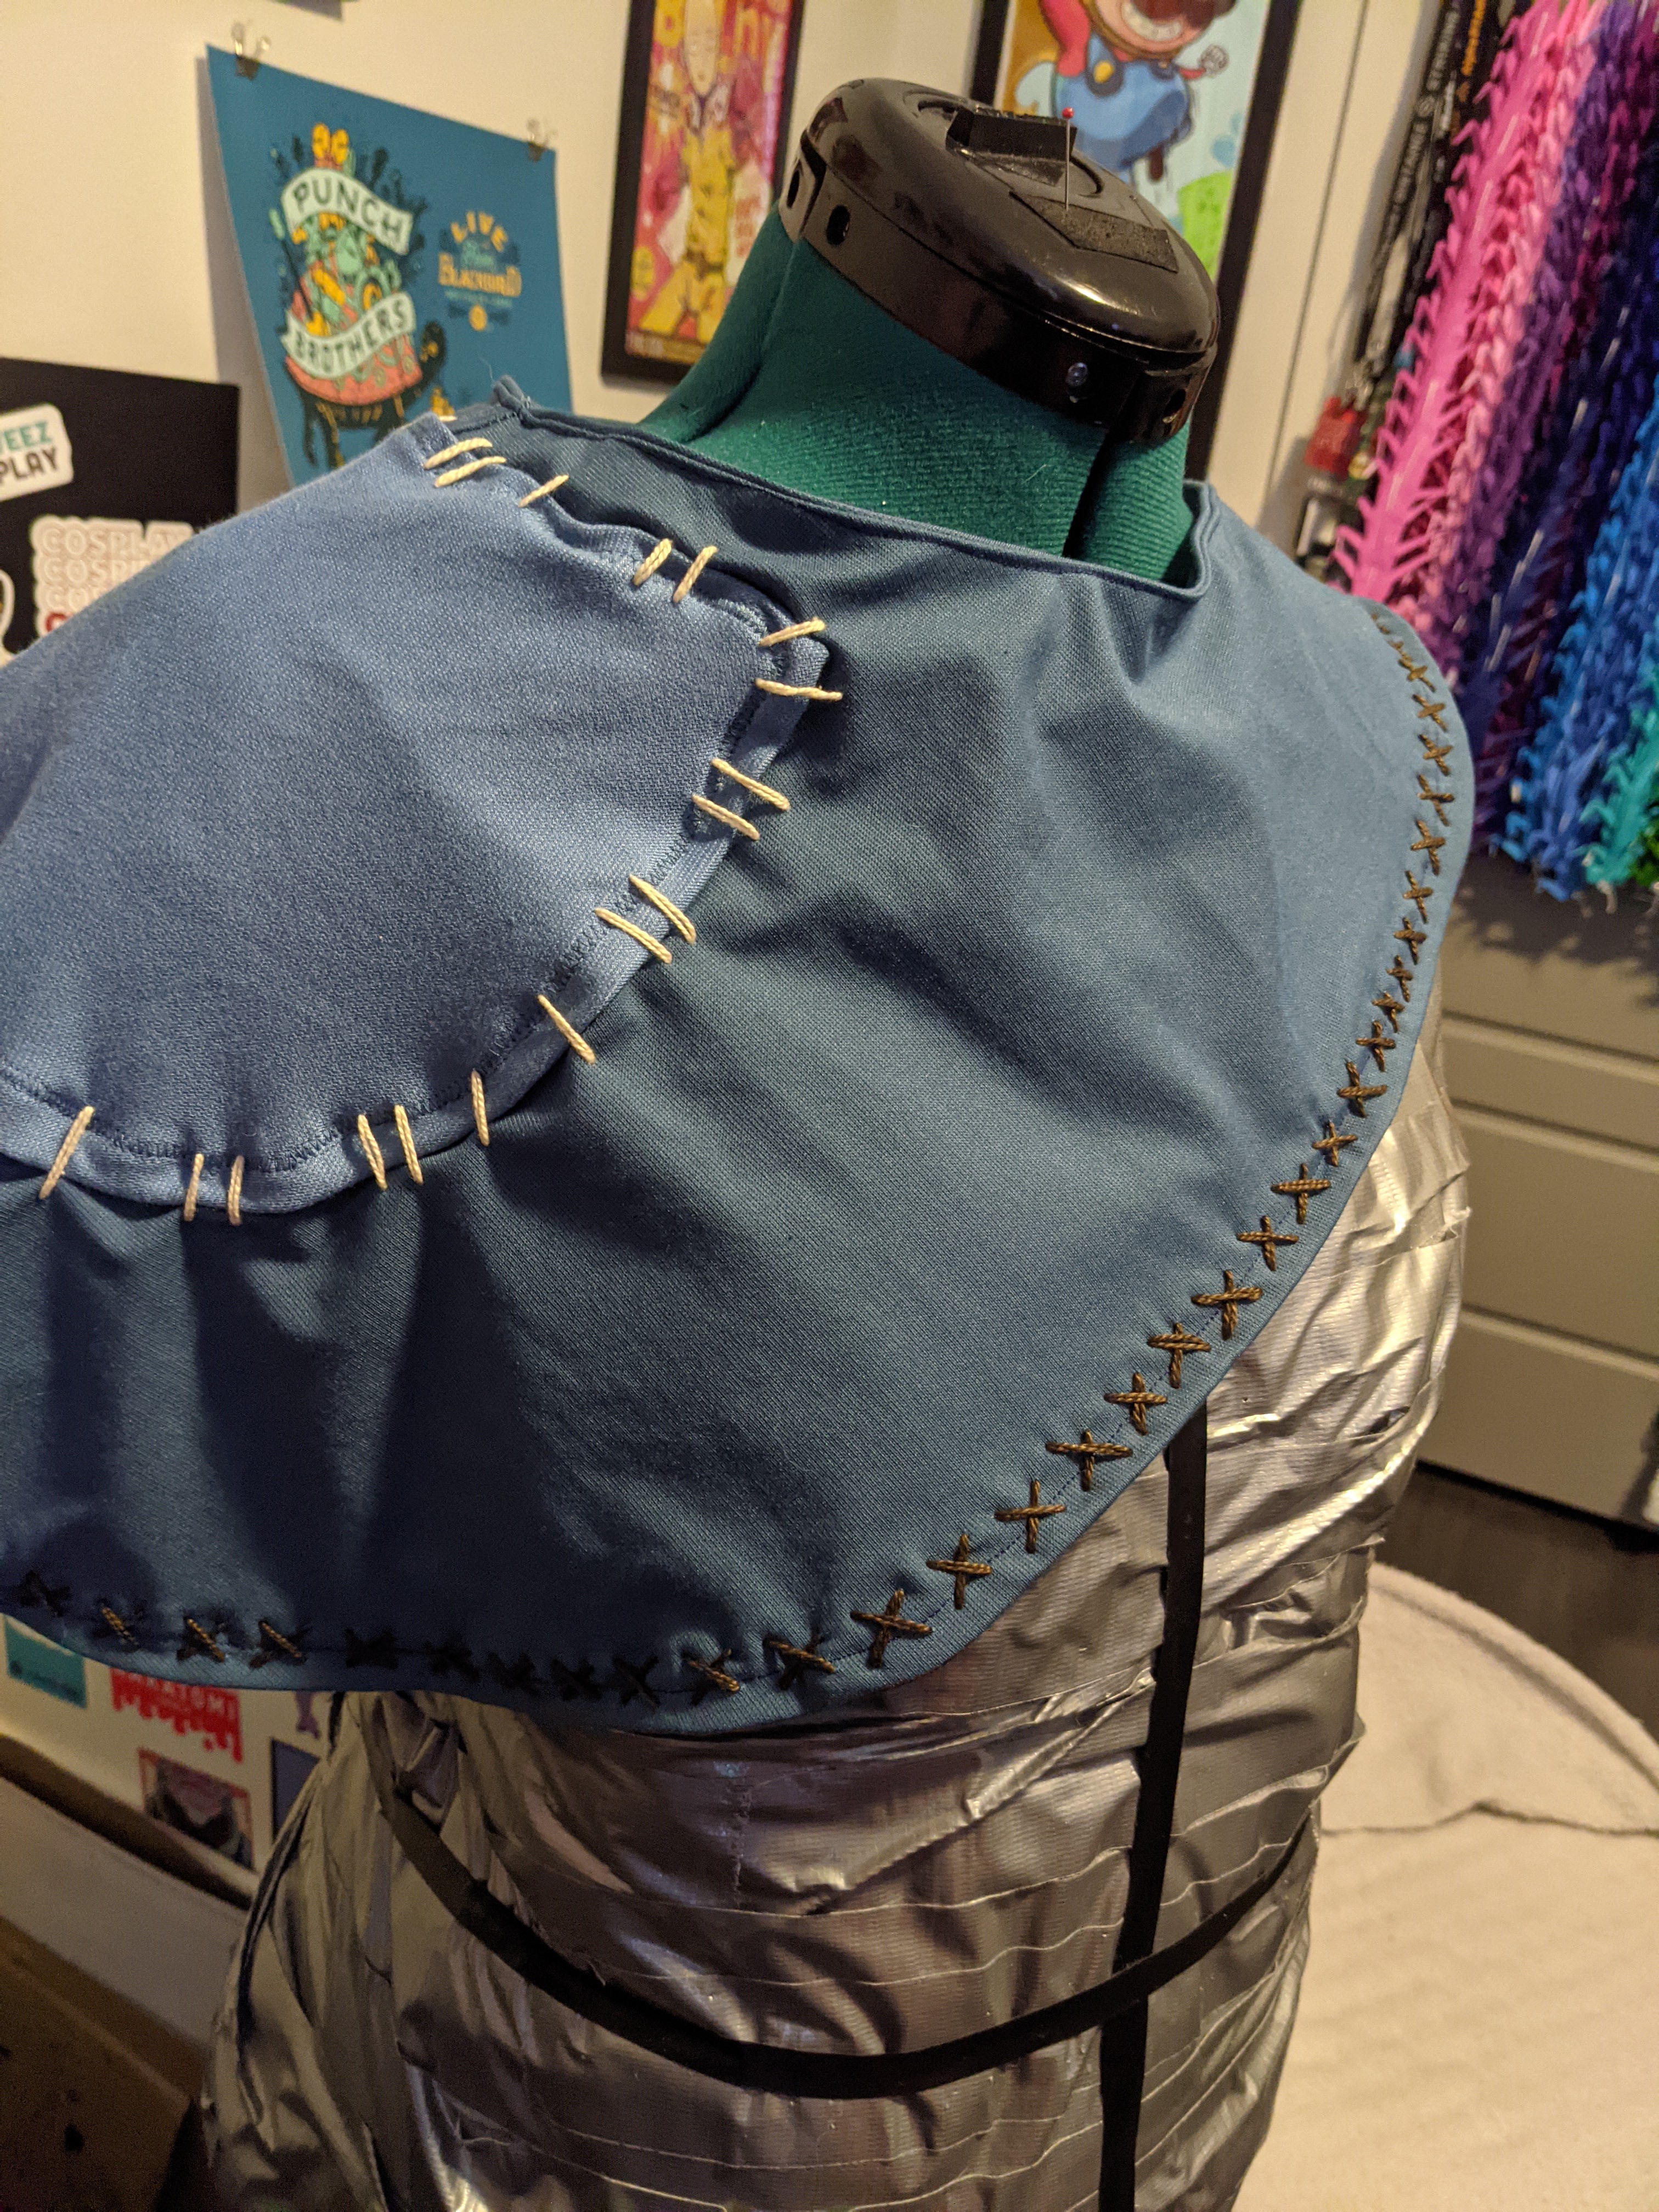
The finishing touches for the shoulder pad involved using cream embroidery floss (doubled-up for added thickness) to add hand-stitched details around the pad’s edges.
The next step involved sewing the fashion and lining layers together—right sides together—with a zigzag stitch. Then, after clipping the curves at the seam allowances, I turned it right side out and top stitched the bottom edge down with a straight stitch and blue thread.


The capelet was almost done but was still missing one final detail: more hand-stitched embroidery. This time using doubled-up brown embroidery floss, I made small little X’s along the bottom edge, following the line of my top-stitching from the previous step. Total, there were 91 X’s.
With that, the capelet was done!

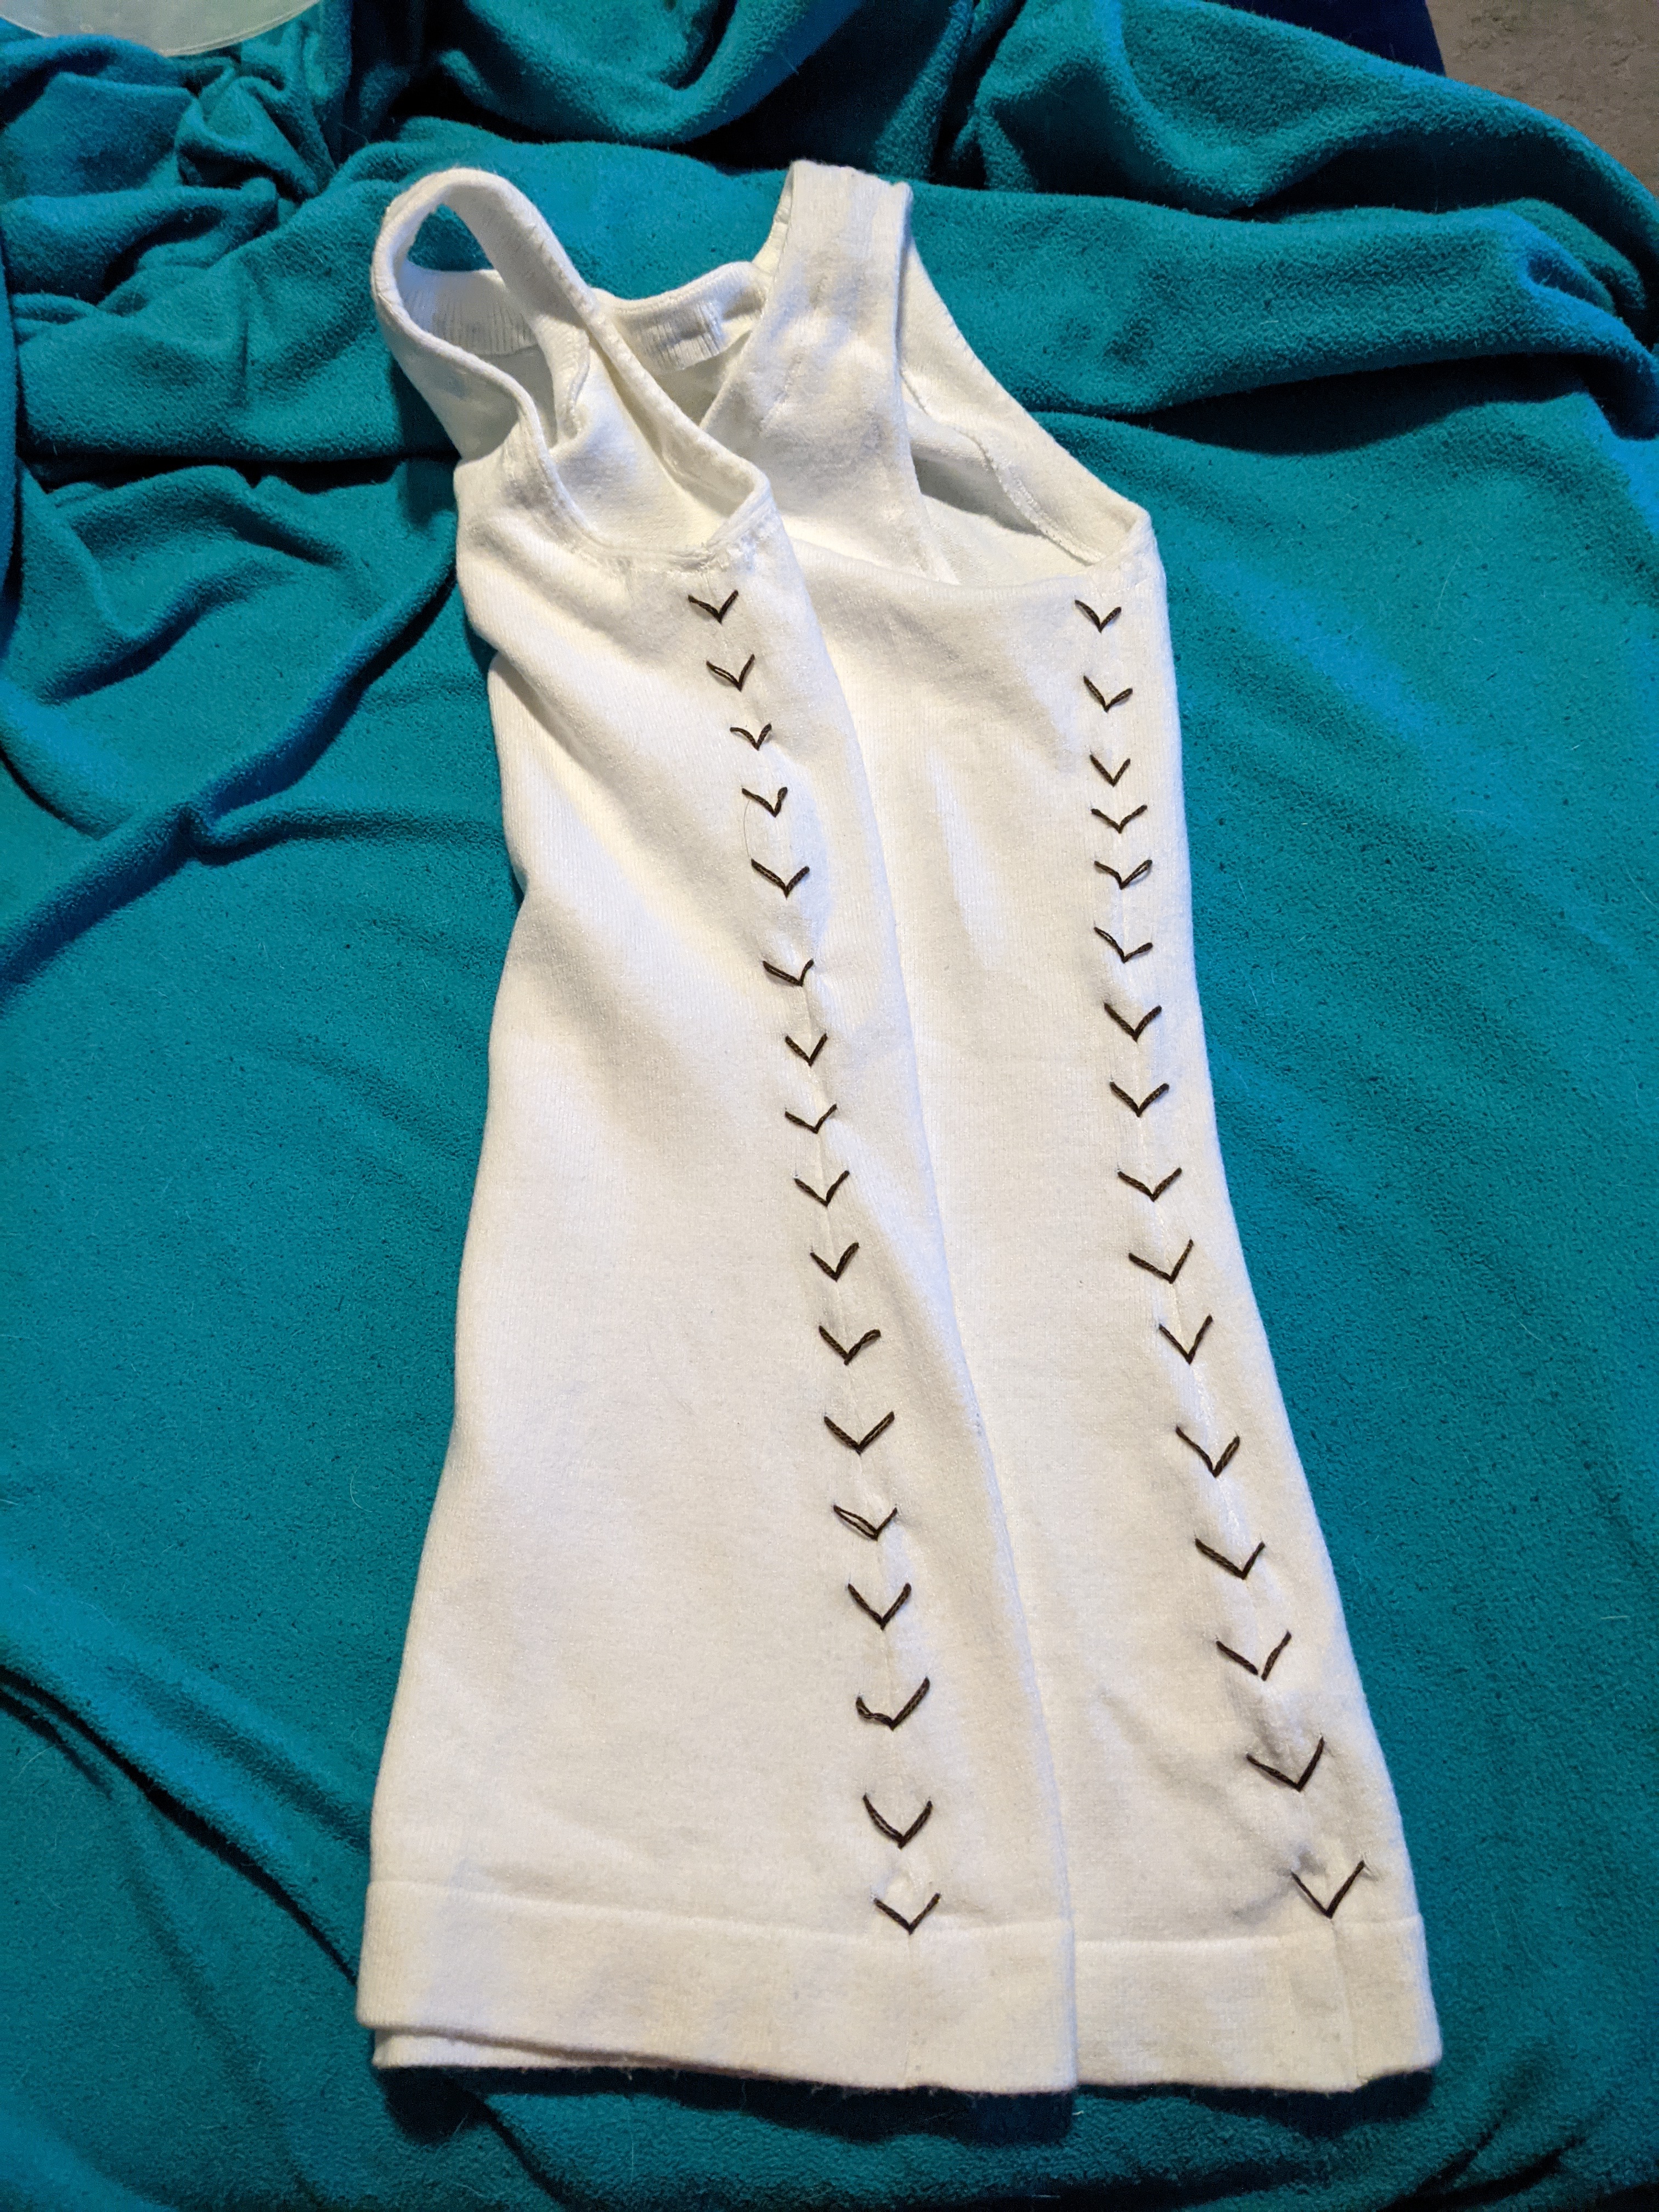
Dress (1 hr, 50 mins)
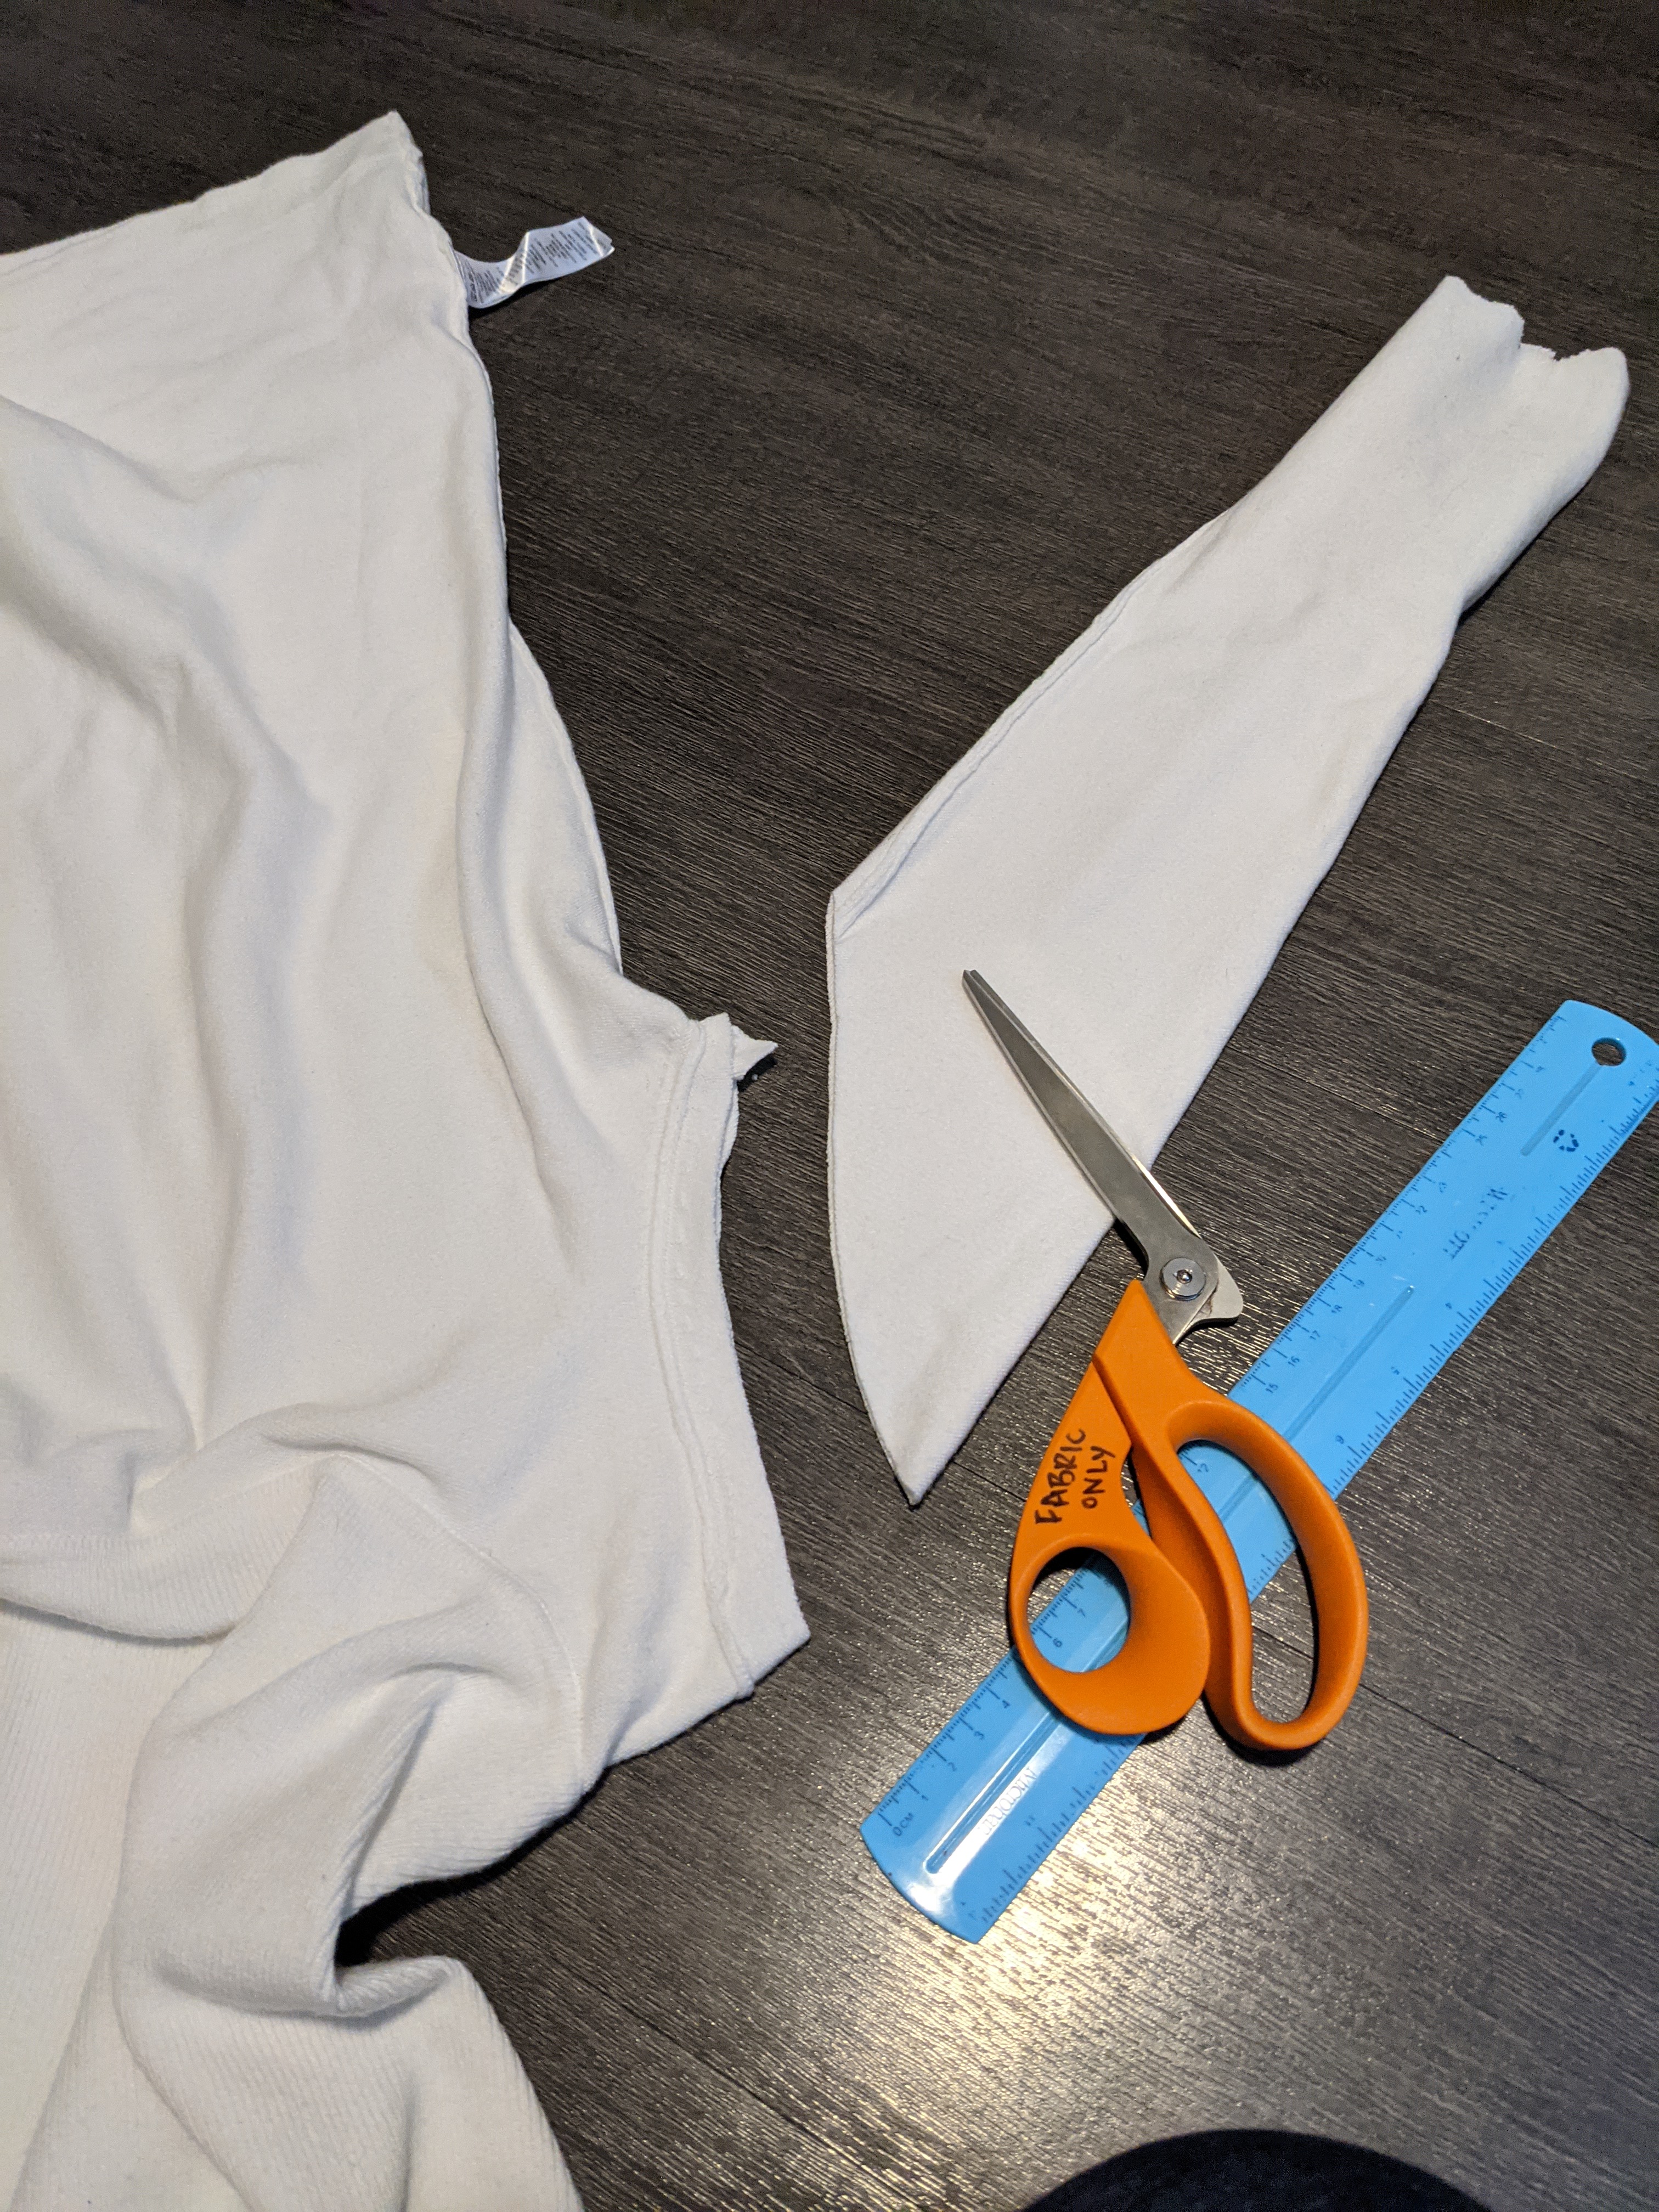
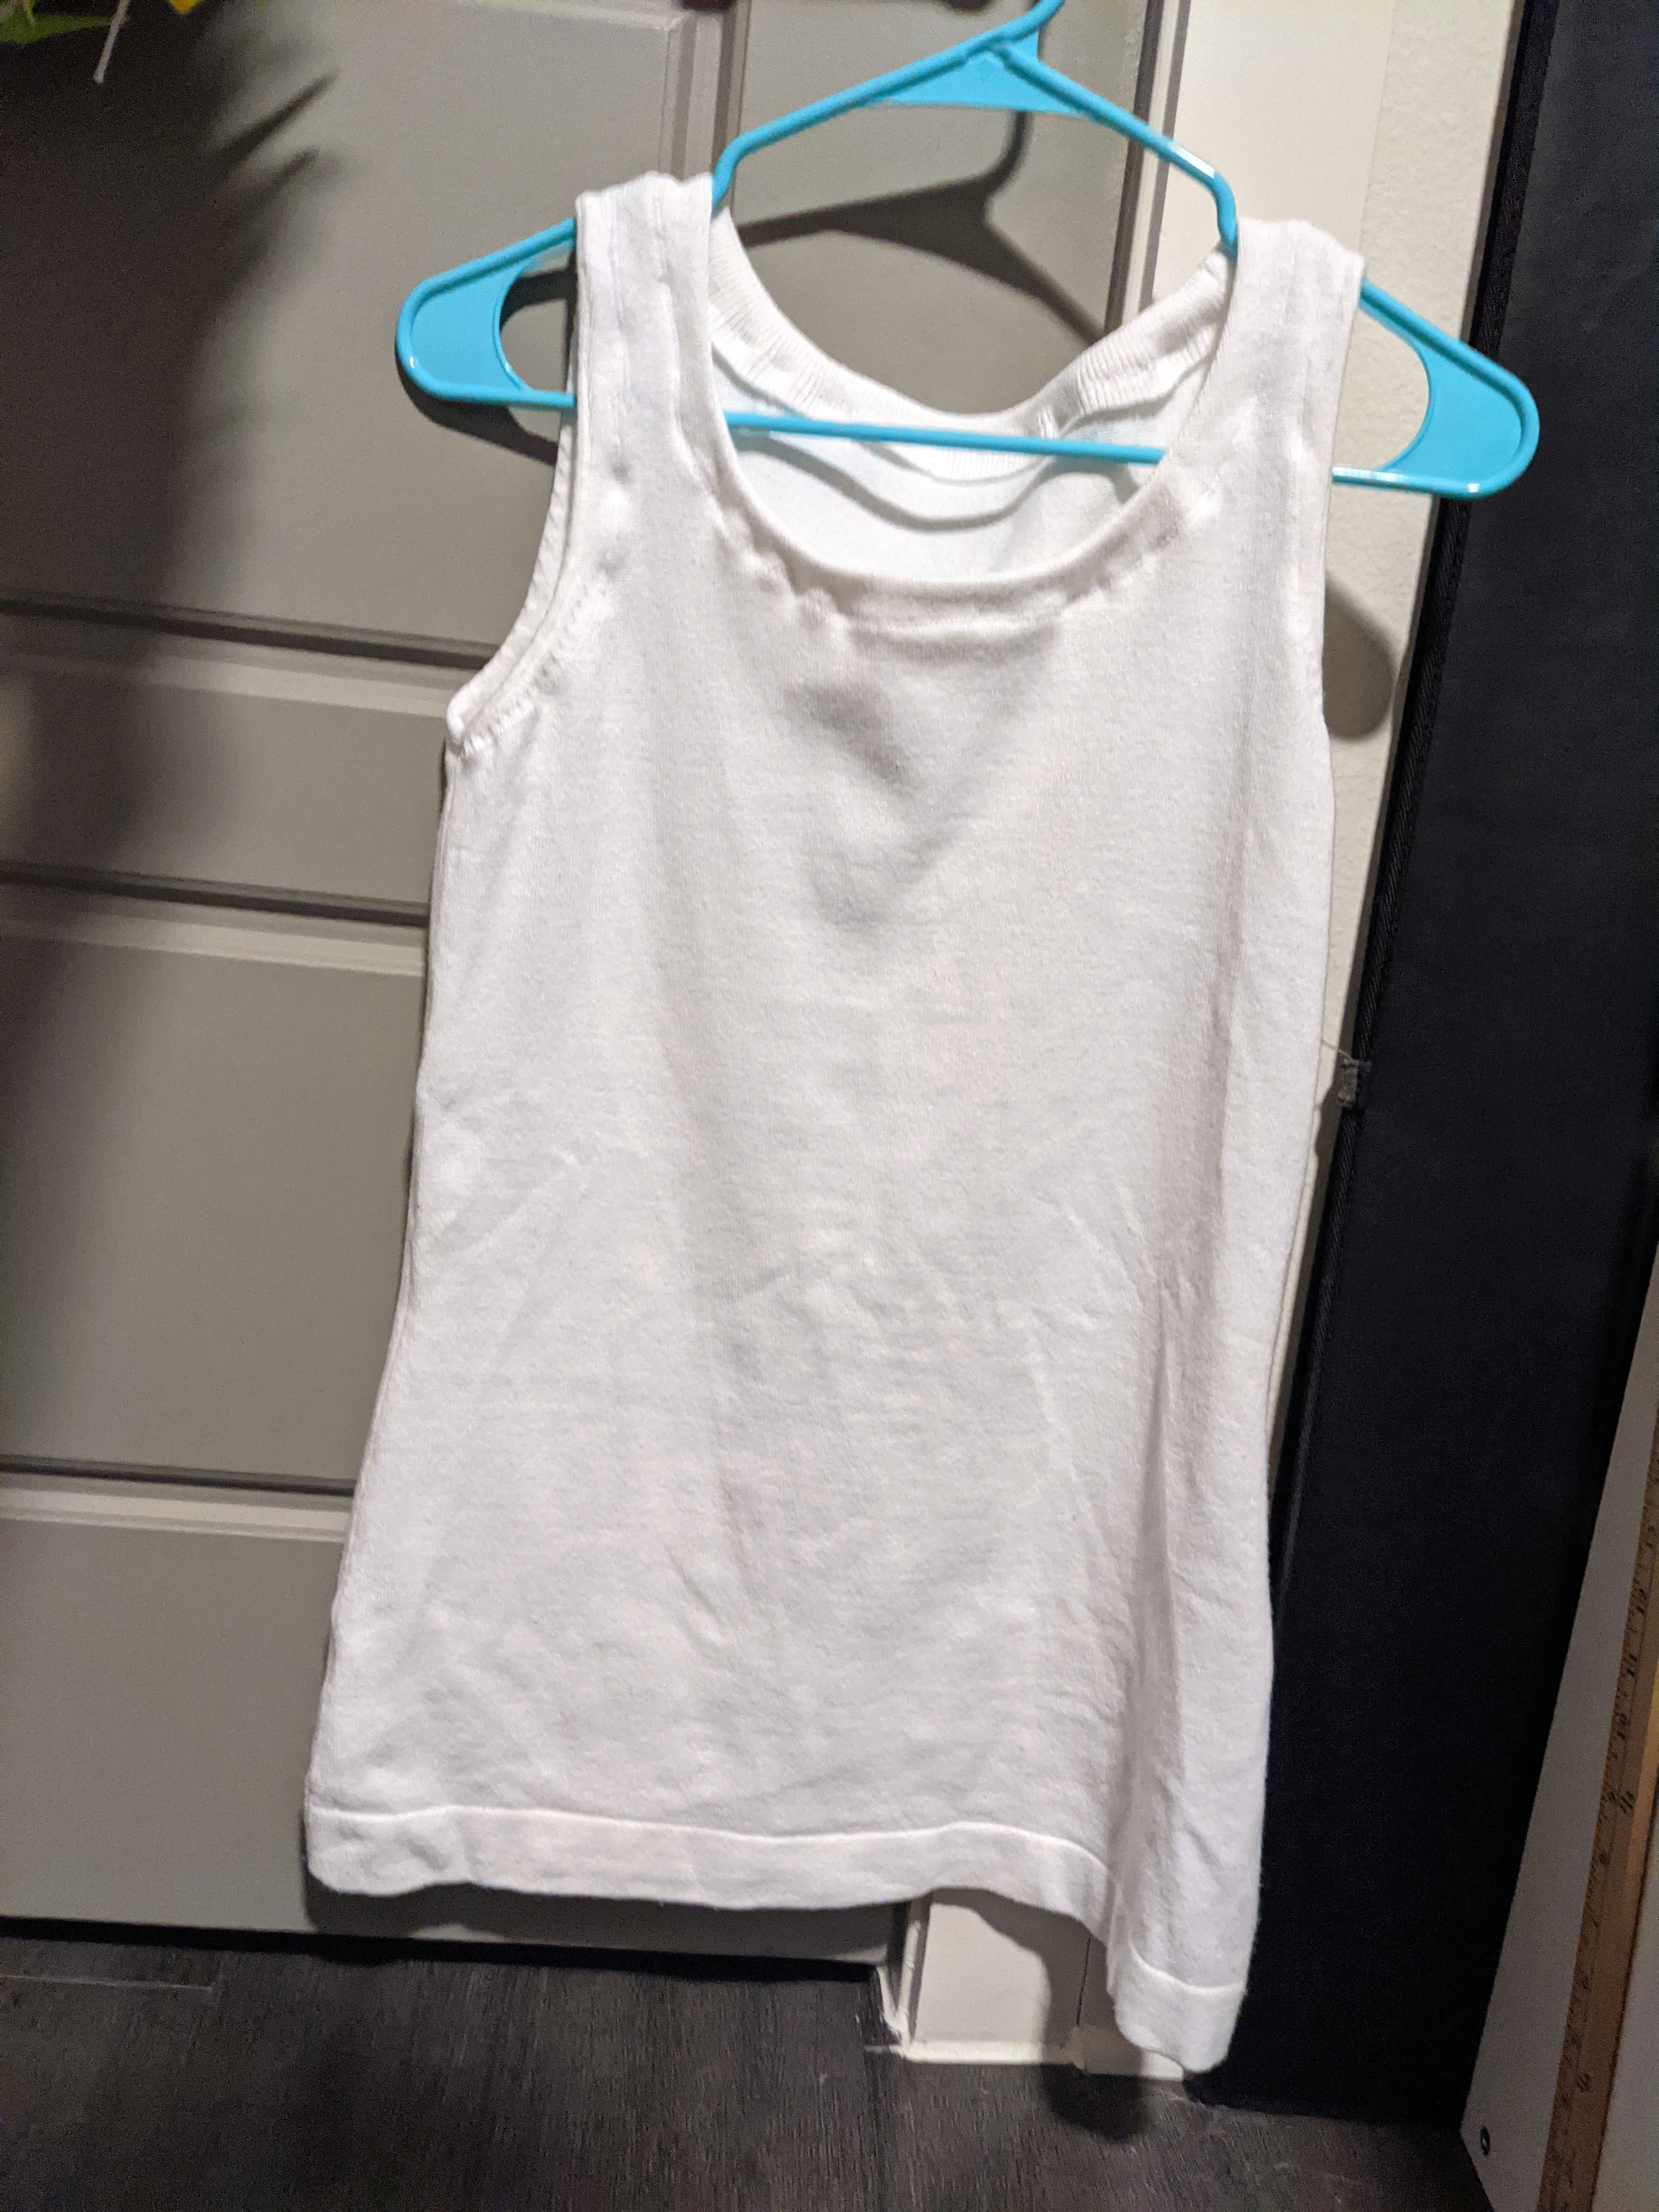
I got super lucky with my thrift store find. Not only was the color and fabric type perfect, but the cut of the fabric was as well! This dress was just a simple matter of removing the sleeves and the long scarf-life collar.
I cut about 2cm away from the armhole seams on each of the sleeves, then folded them over and pinned in place. I did the same thing to the collar and neckline.


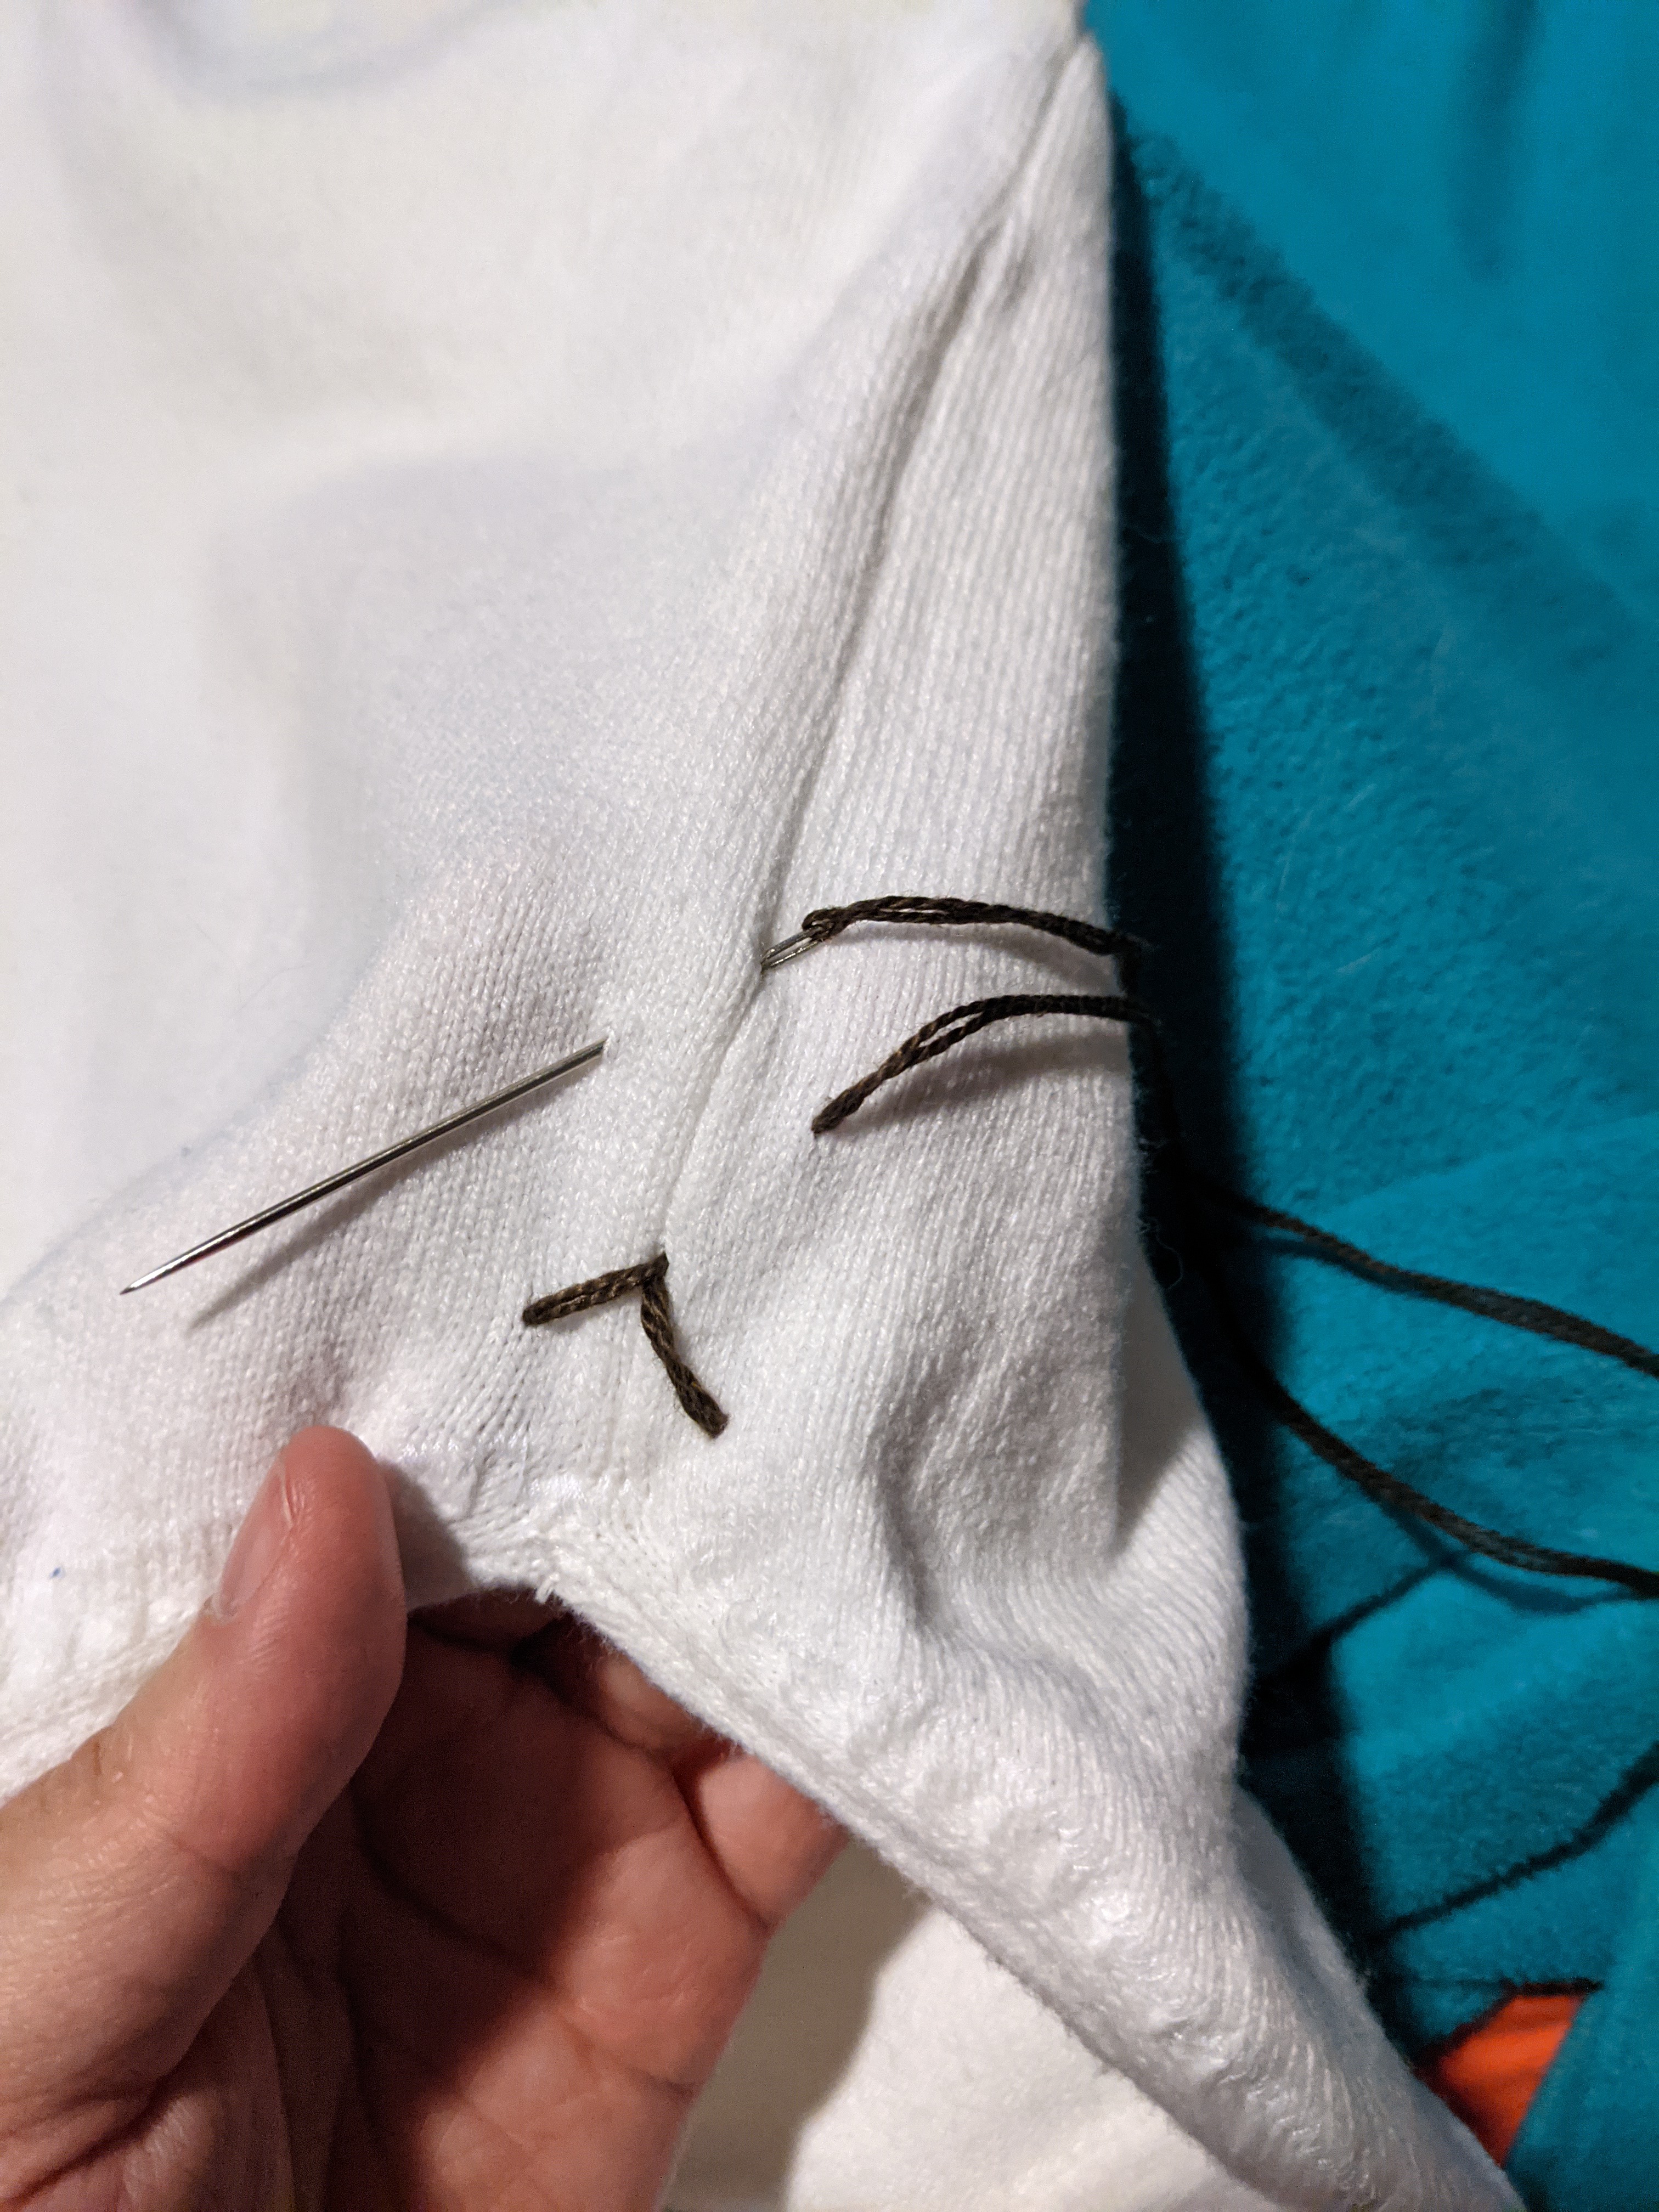
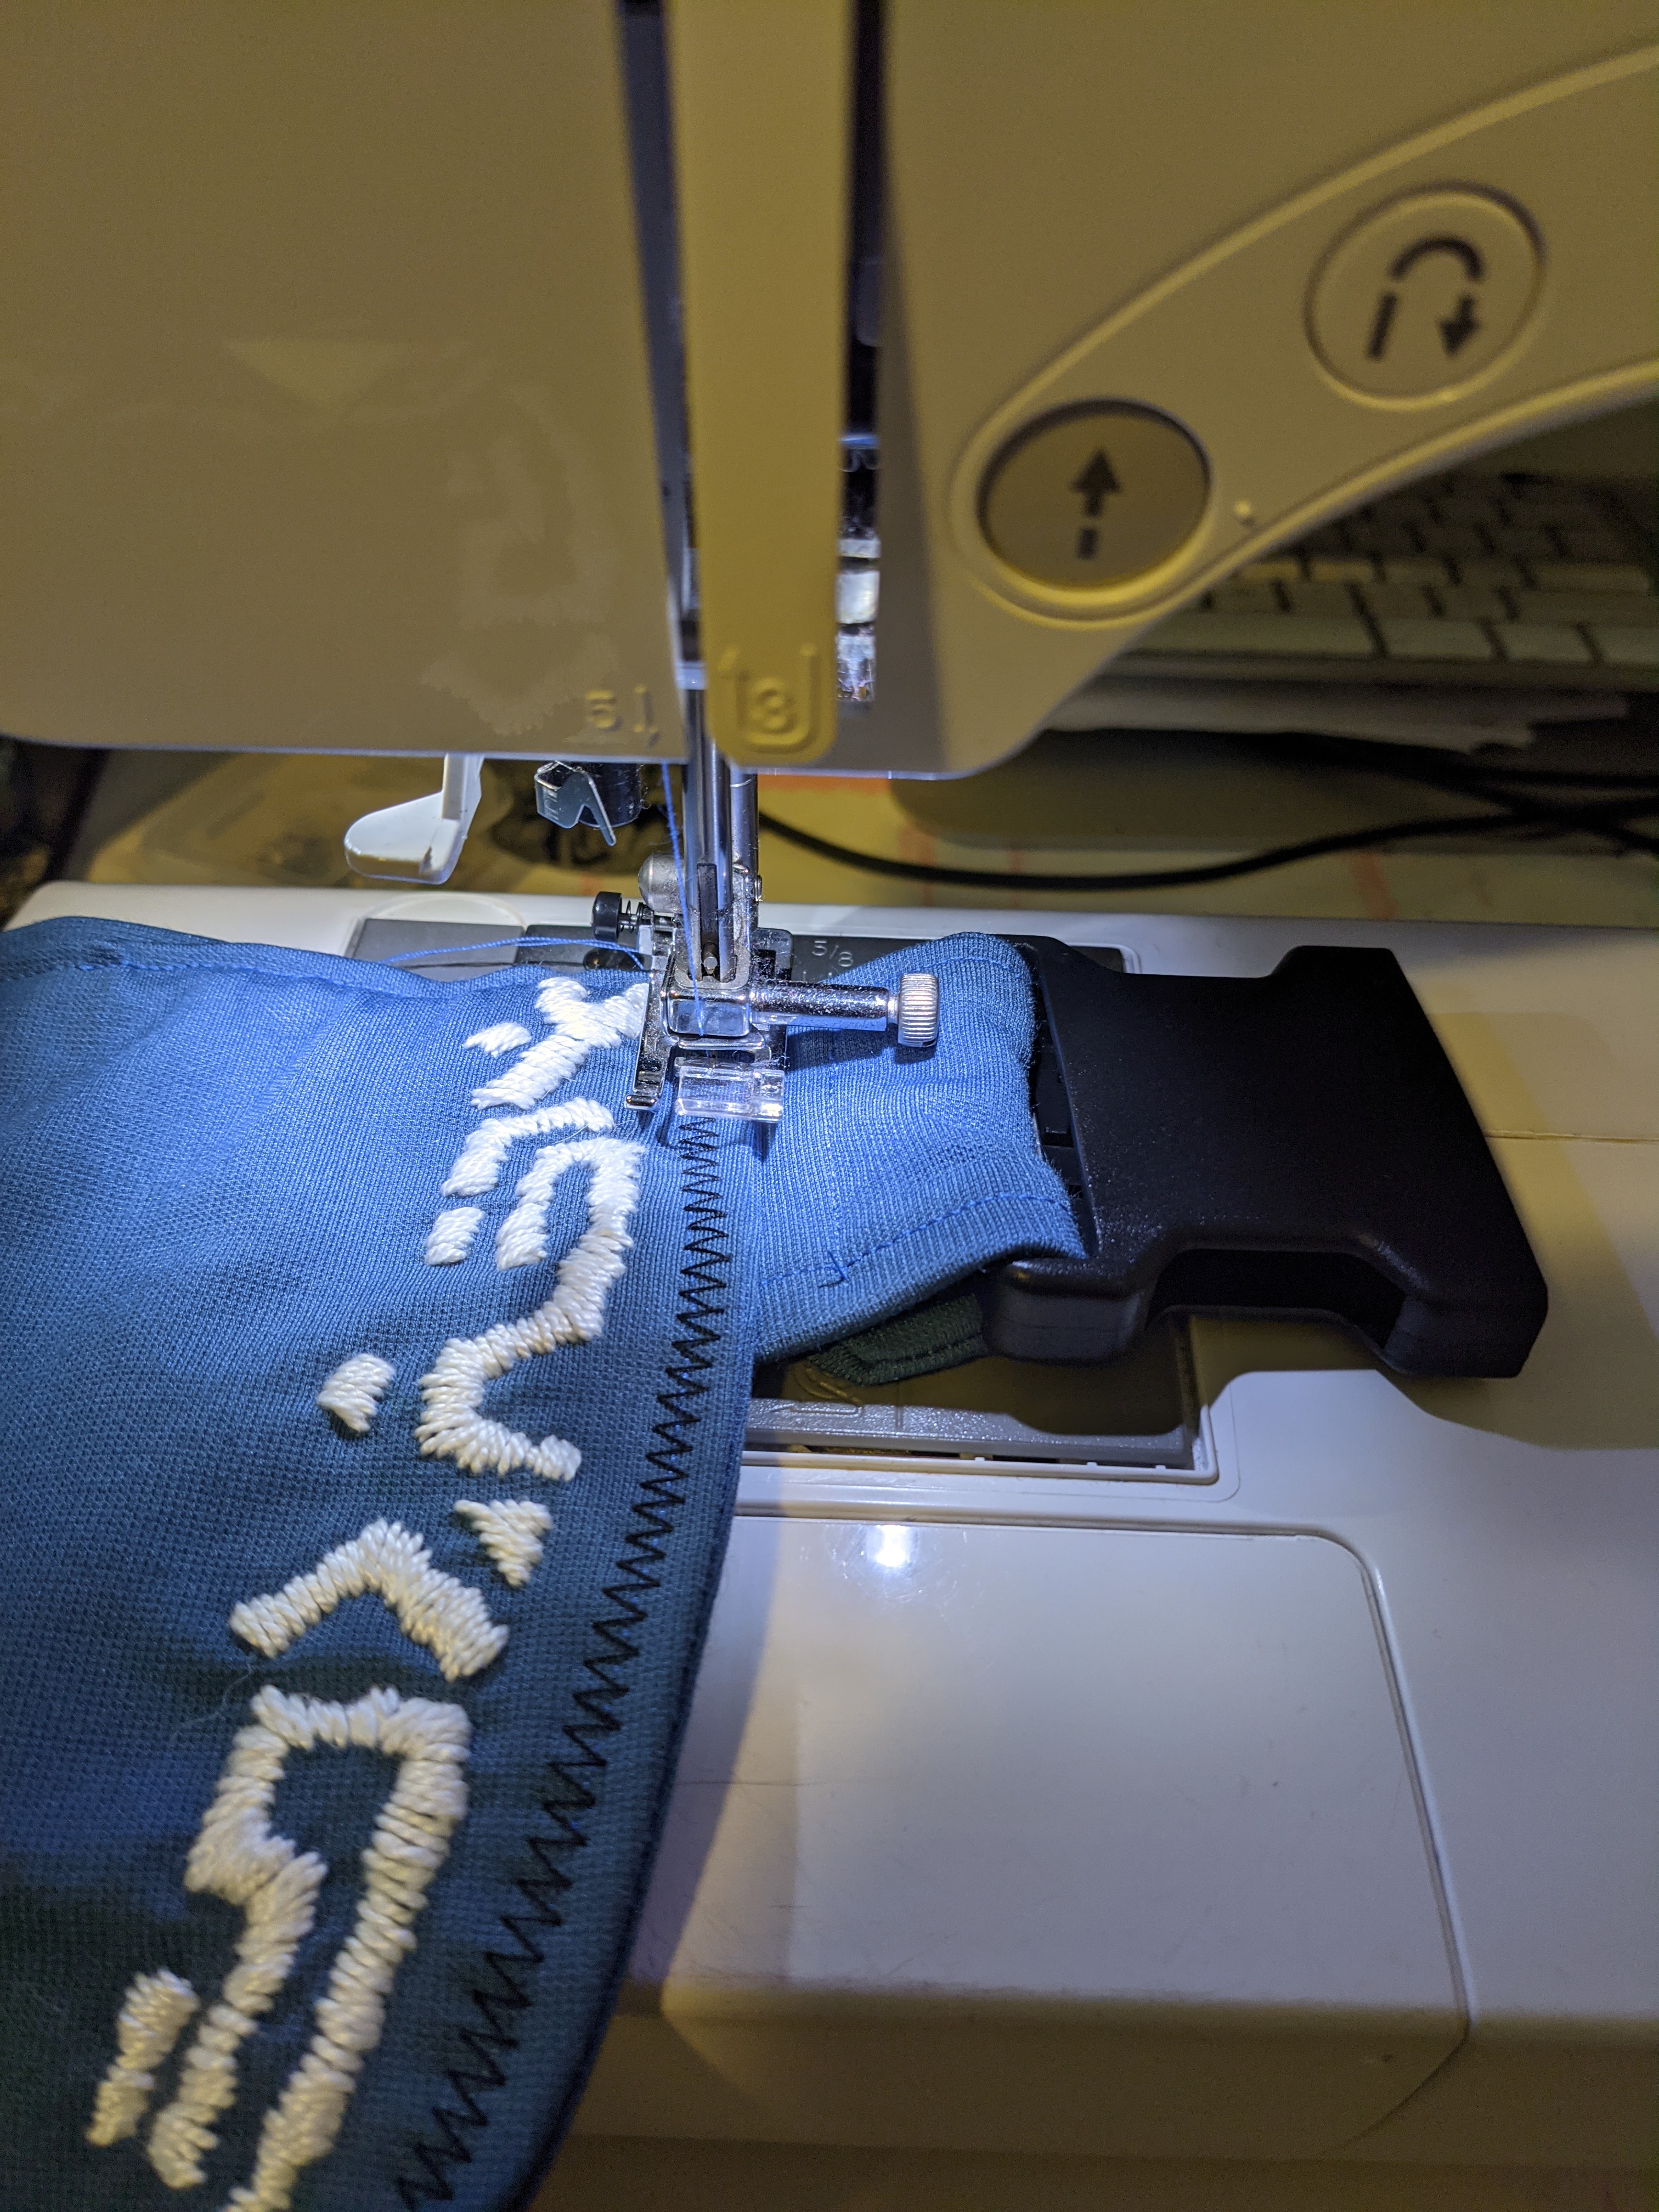
I stitched the edges down with a simple straight-stitch and thought I was done. Until I started messing around with photo mode in the game and realized that Kena actually has these little details along the side seam. So, taking some brown embroidery floss (doubled-up for thickeness), I stitched on little V’s all along the side seam. Very simple but effective! And really adds a nice detail to the dress.
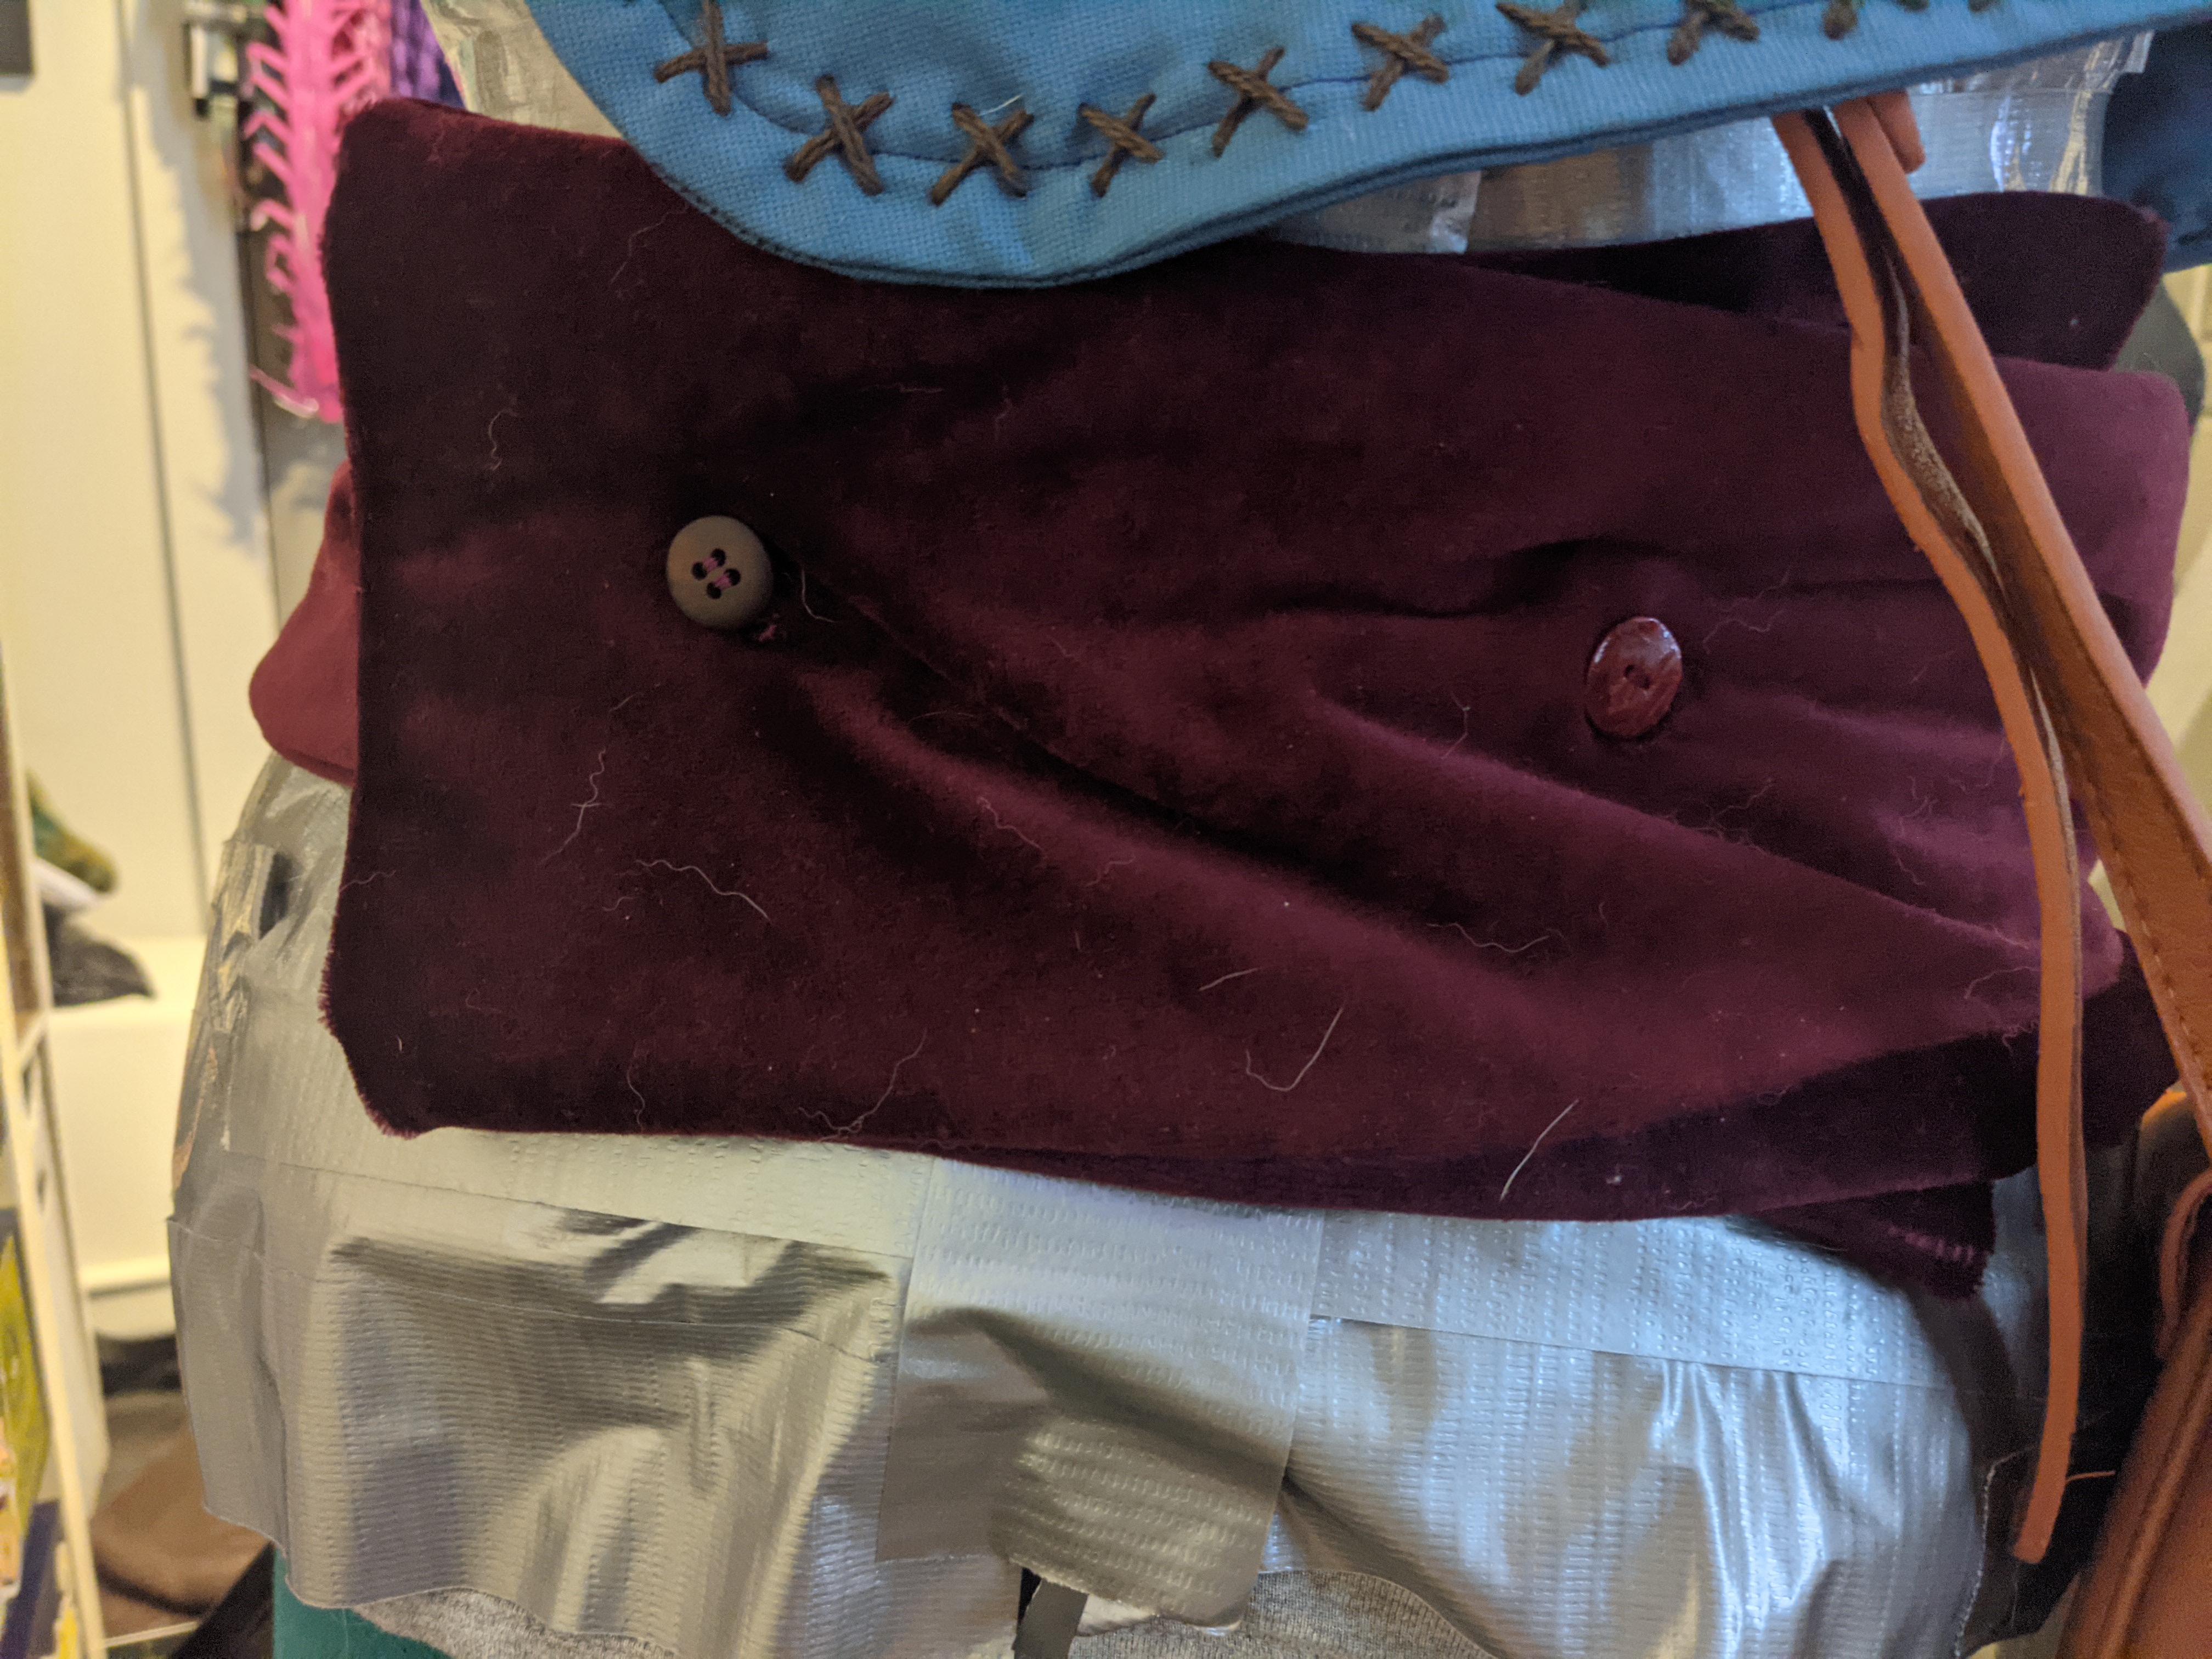
Sash (1 hr, 30 mins)
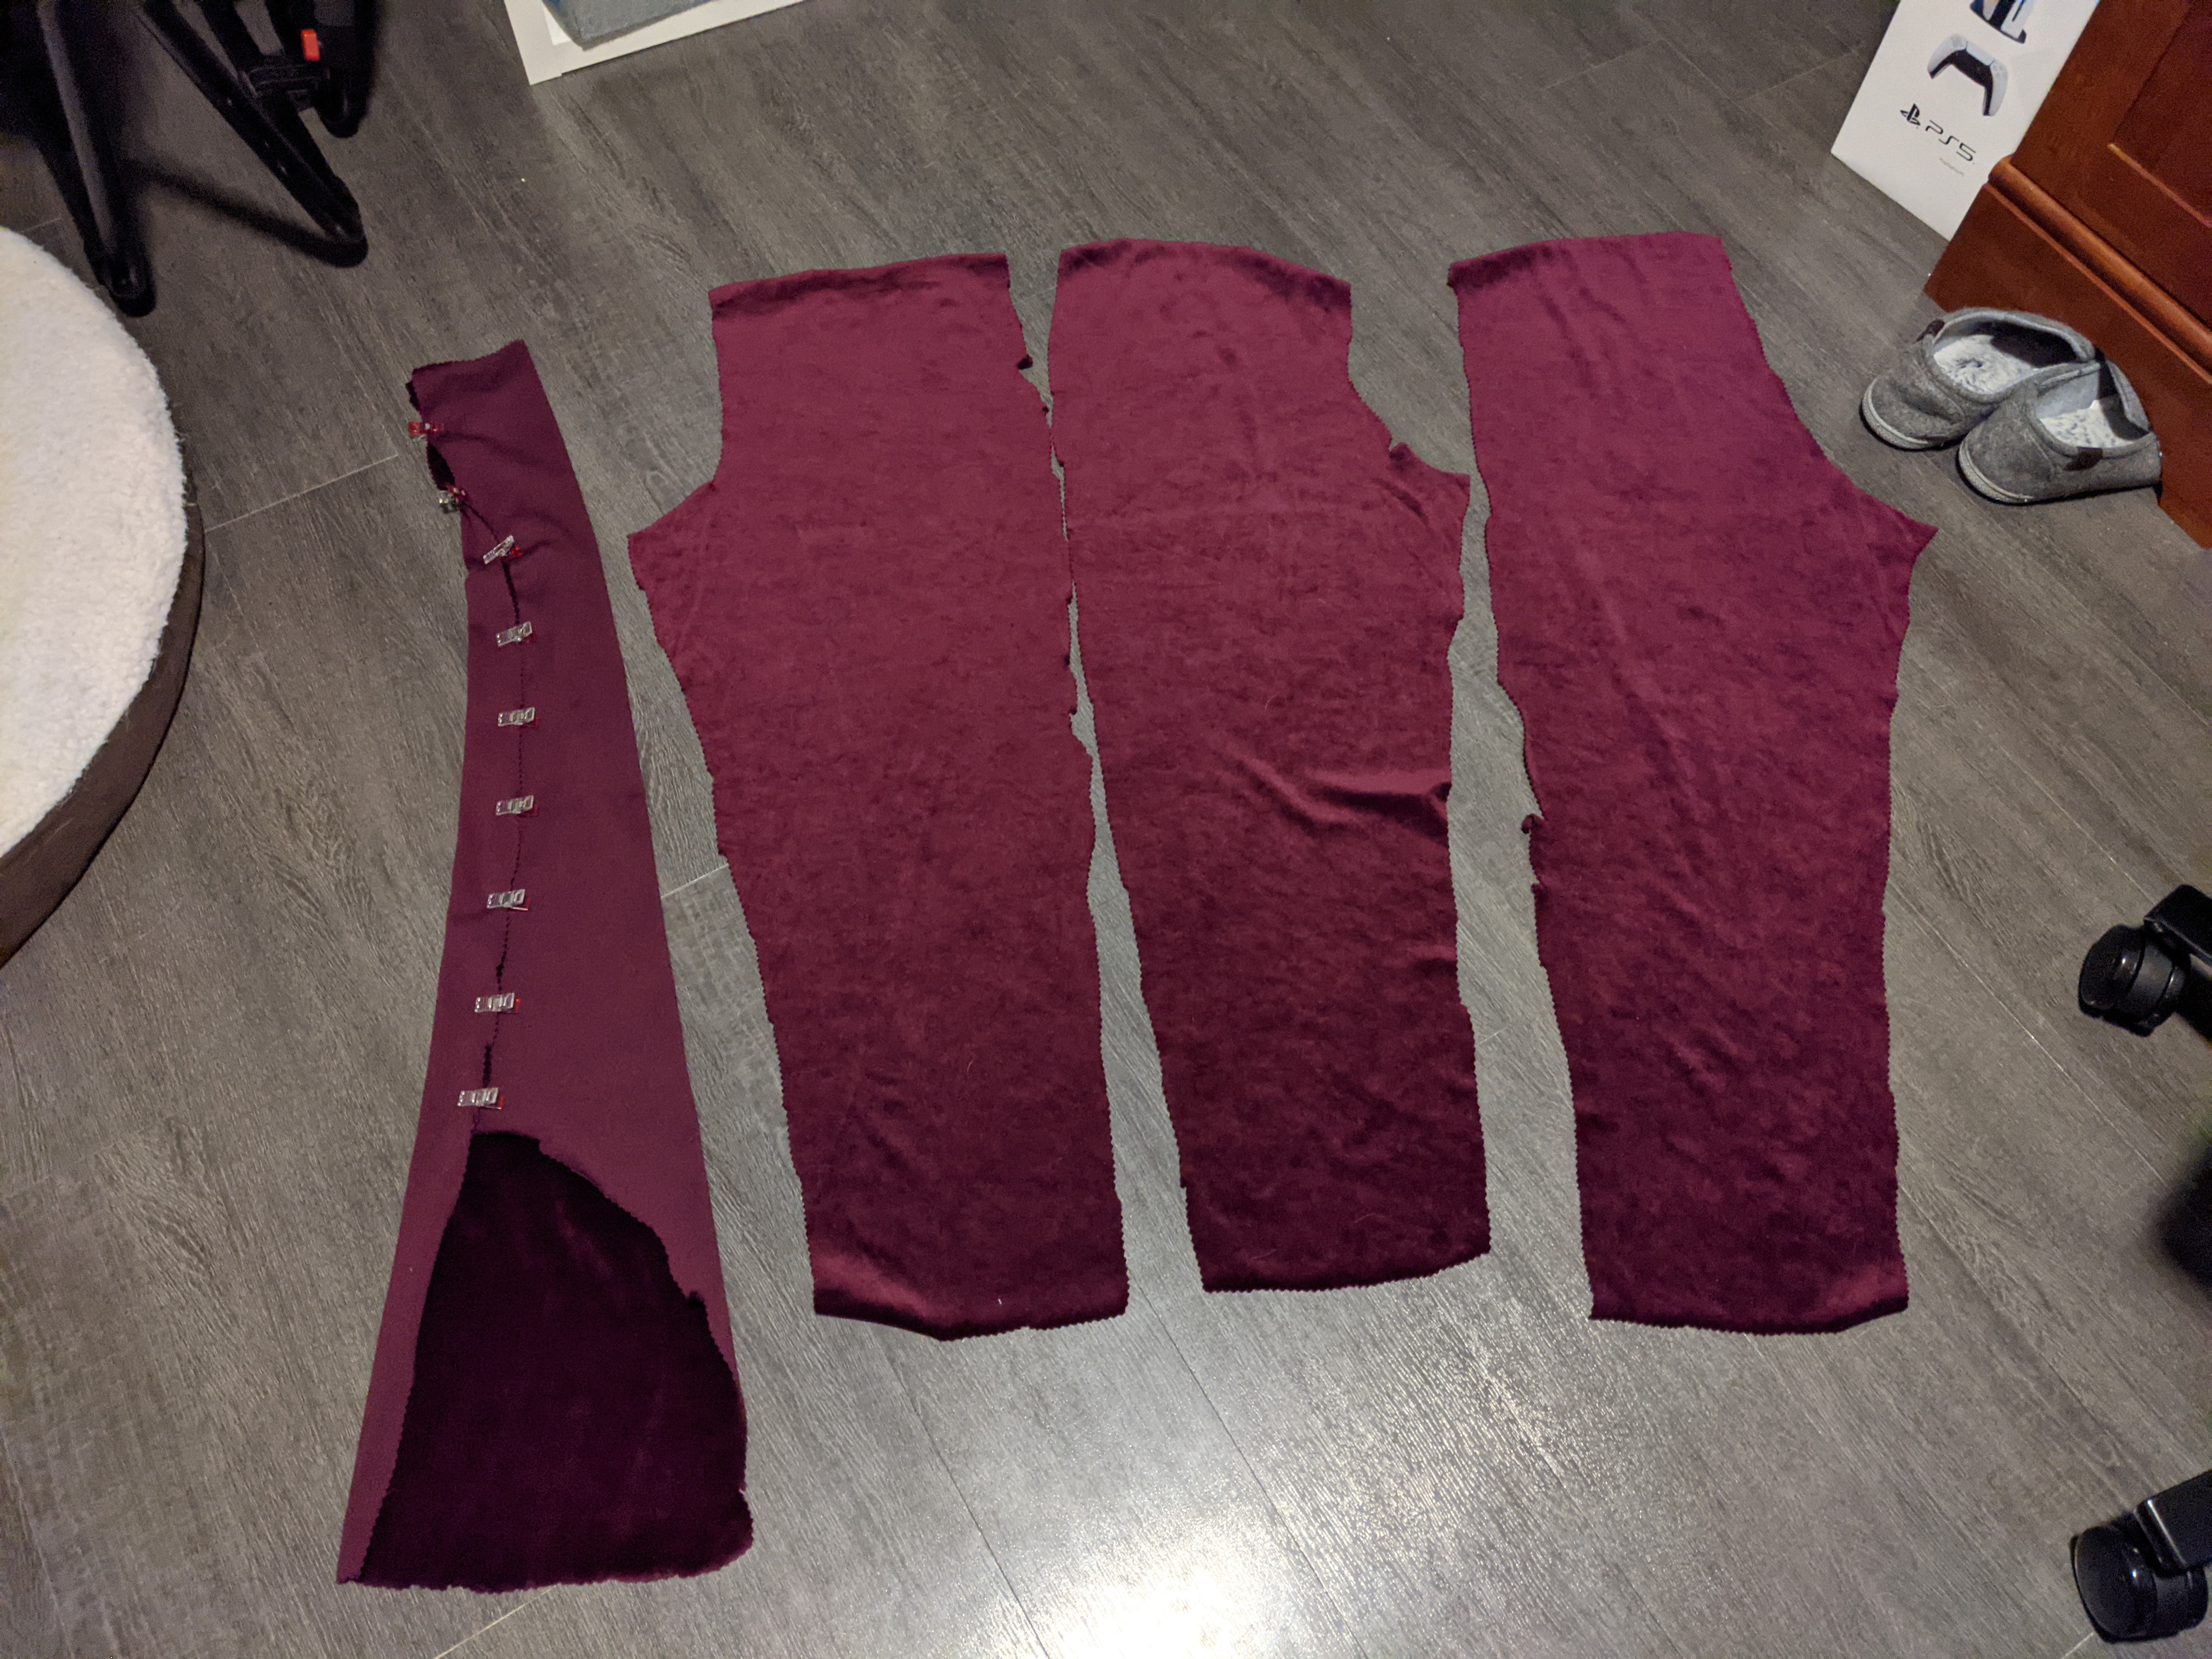
Using the same fabric used as the right armband, I used the remaining 3 pant pieces to make the sash. This involved cutting the pant pieces into rectangles (sort of) to get rid of the weird pant shape.
Apologies for this section because I forgot to take better pictures as I went.


In order to make the sash long enough to go around my waist (and then some), I ended up cutting one of the pant pieces in half. I then made two long straps by sewing pieces together rights sides together. I then stitched those two long straps together (also right sides together) using a zigzag stitch. After turning it right side out, I had one long tube of fabric. To finish the ends, I folded the raw edges down and into the tube then top-stitched that edge. (If you’ve been reading every section so far, you should notice a pattern of how I finish the last raw edges lol) I did the same for the second side.
At first, I thought I would just tie it around my waist to wear it. But I wasn’t happy with that, so I raided my button stash and found two red/maroon buttons. I stitched them on by hand then cut matching holes and stitched the holes over so they wouldn’t fray. (Could I have done this sooner? Yes. Could I have done this with my sewing machine? Also yes. But I didn’t feel like it.)

Apron (23 hrs)
As with all the other pieces, this started with patterning via draping on my dress form. My first go at it left the apron too short, so I added more length. The pattern shown below shows a dart, but I ended up not really needing it. The apron ended up just a sort of rounded rectangle shape.


The next step is why this apron took 23 hours instead of just a couple. It’s the Ashweez signature cosplay move: embroidery.
Previously with Kali and Maria, I patterned the design digitally in Adobe Illustrator, then printed it out, transferred it tot eh fabric, the hand-stitched the embroidery. Well, this time, I didn’t feel like designing it digitally. I don’t know, I just wasn’t in the mood for working on the computer. So, I did it by hand. And I didn’t have the carbon transfer paper I had before with Kali or access to my coworker’s lightbox like I had with Maria, so I opted for something else to get the design on fabric.
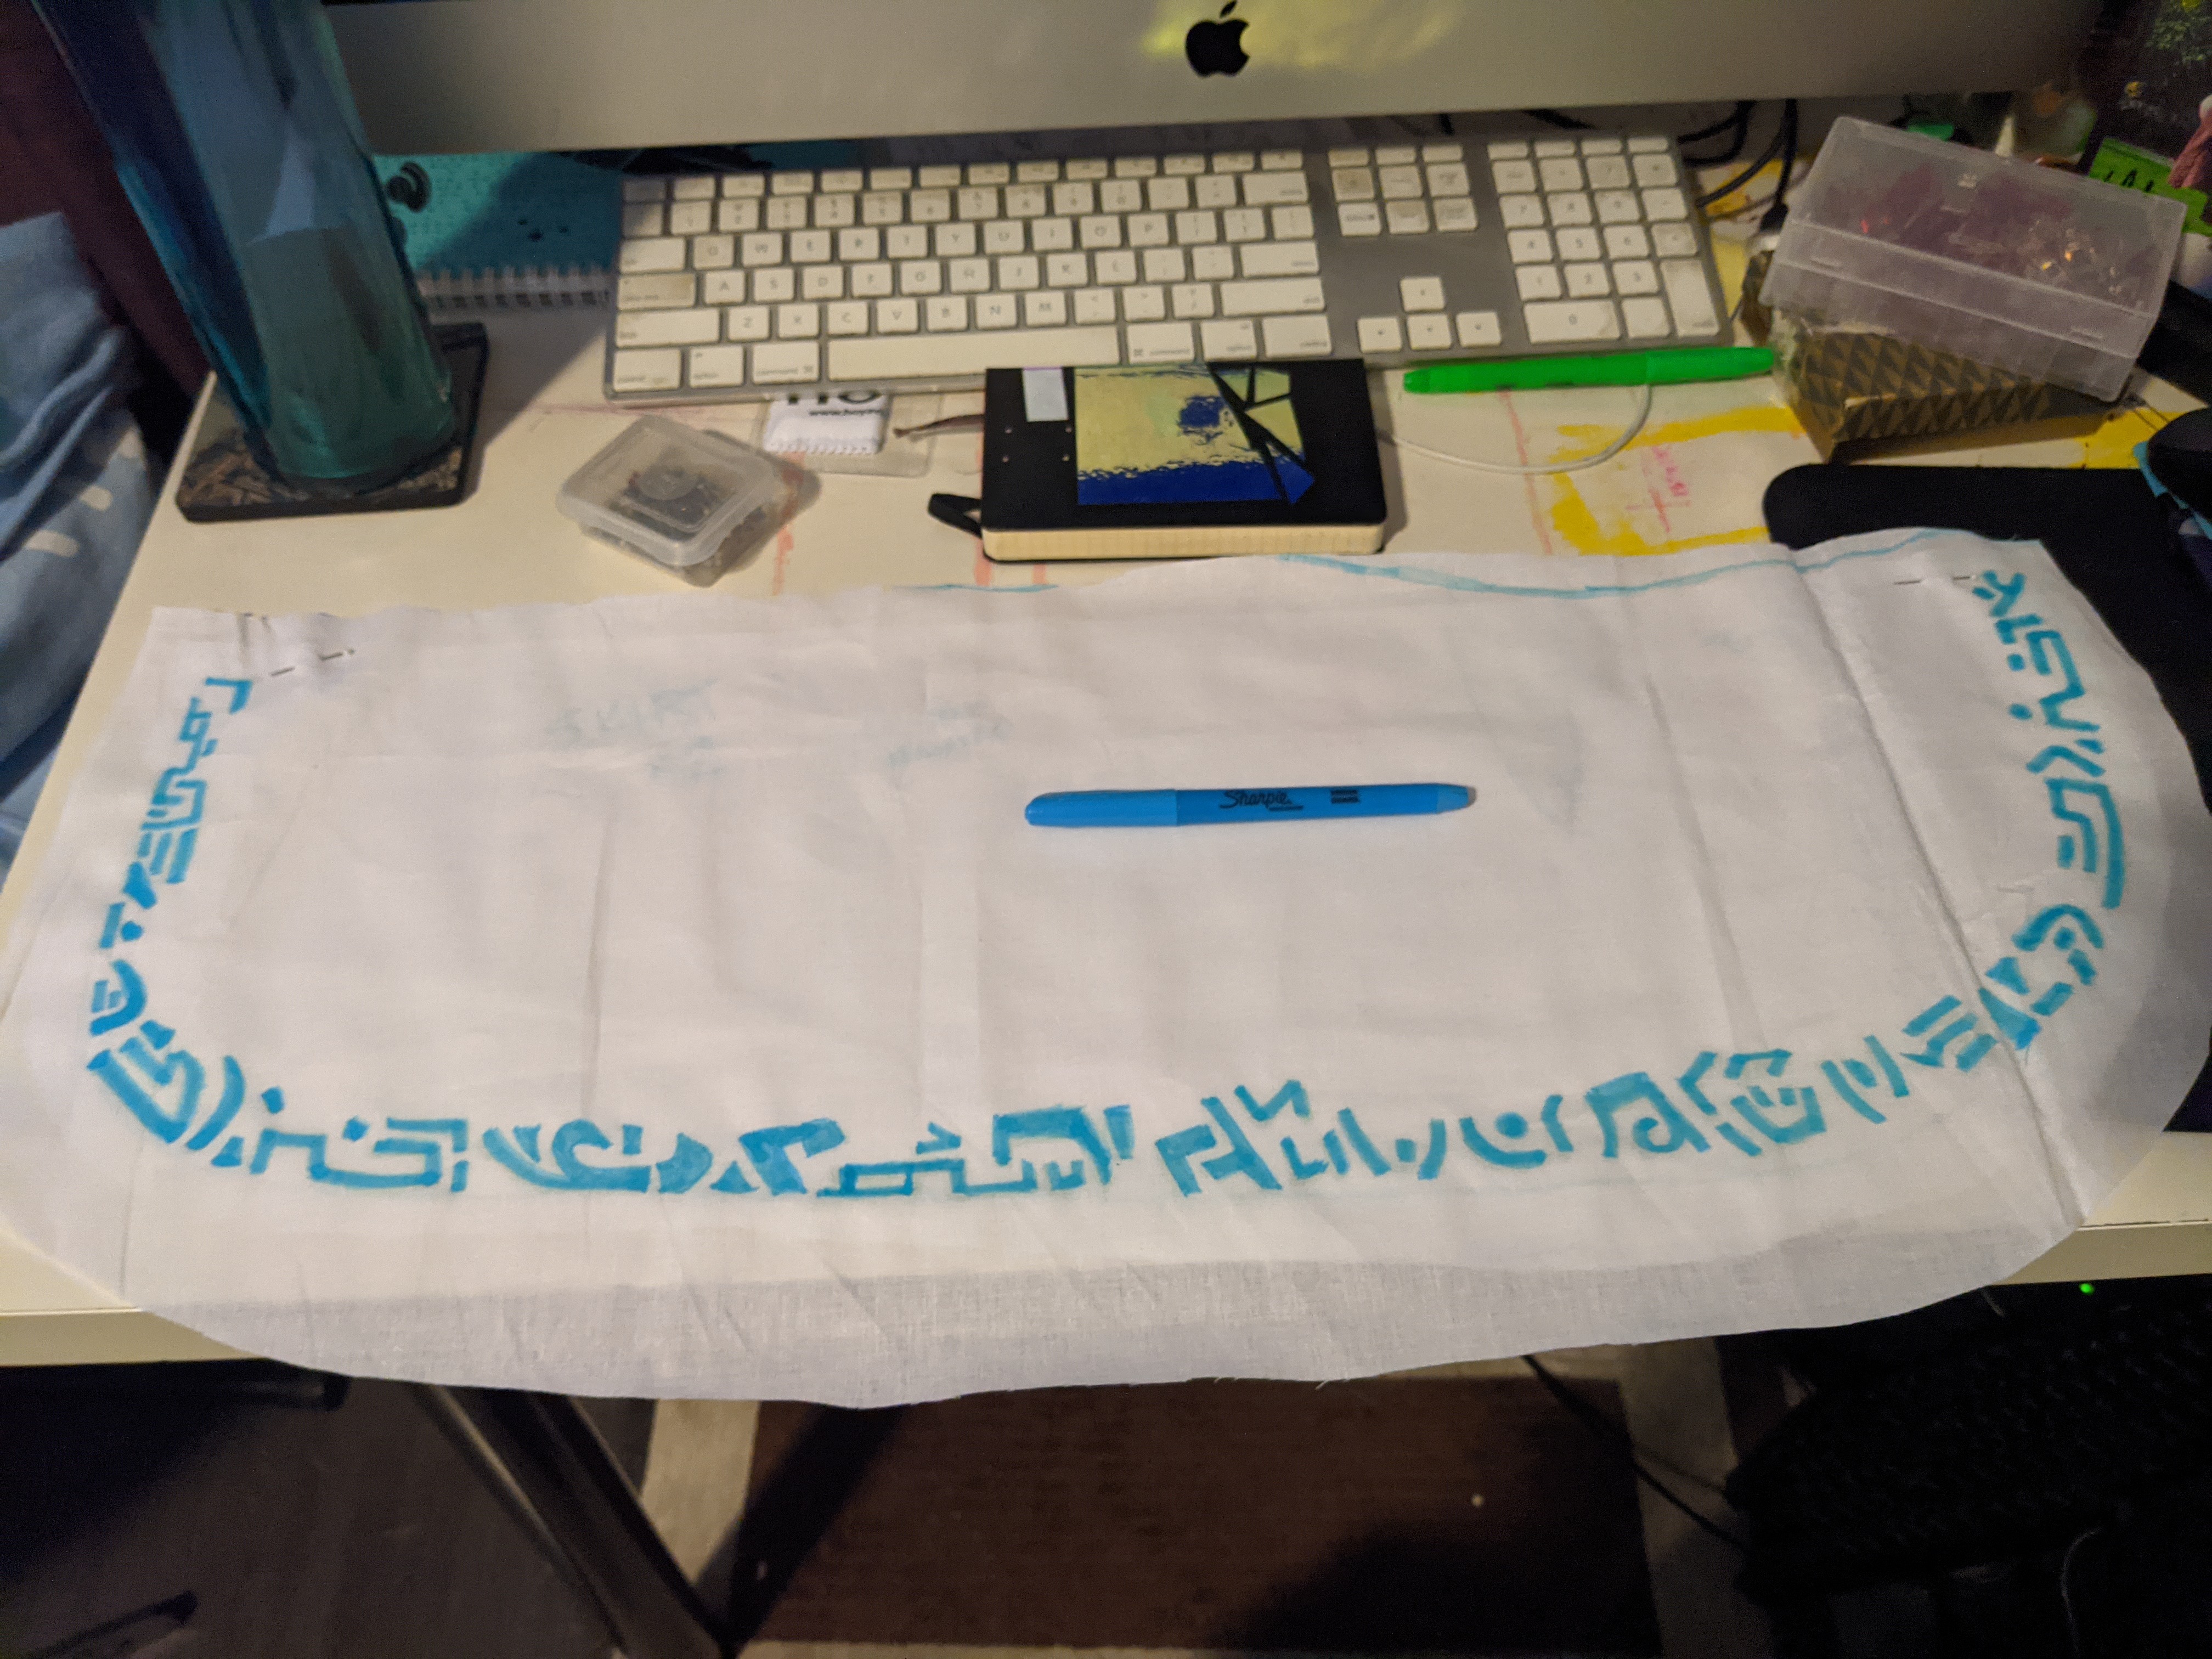
Using the muslin fabric that had been my pattern, I drew out the design with a green highlighter, looking at the reference screenshots the entire time. Because I’m wider than Kena is, I ended up having to repeat the pattern a bit to make it go all the way across the bottom hem. But the same sort of pattern “language” was there, so it worked out nicely!
Once I was happy with that, I cut out another piece of muslin, this time the same size as my apron. (The pattern doesn’t have seam allowance.) Using blue highlighter this time, I traced over my original green highlighter design. This would work as both my sort of stabilizer fabric and as my reference.


Stitching the outline was a funny thing because the design itself wasn’t on the front like previous times, but on the back. So I would follow the pattern on the muslin and then look over to the fashion layer to make sure it looked okay. This step took 6 hours.
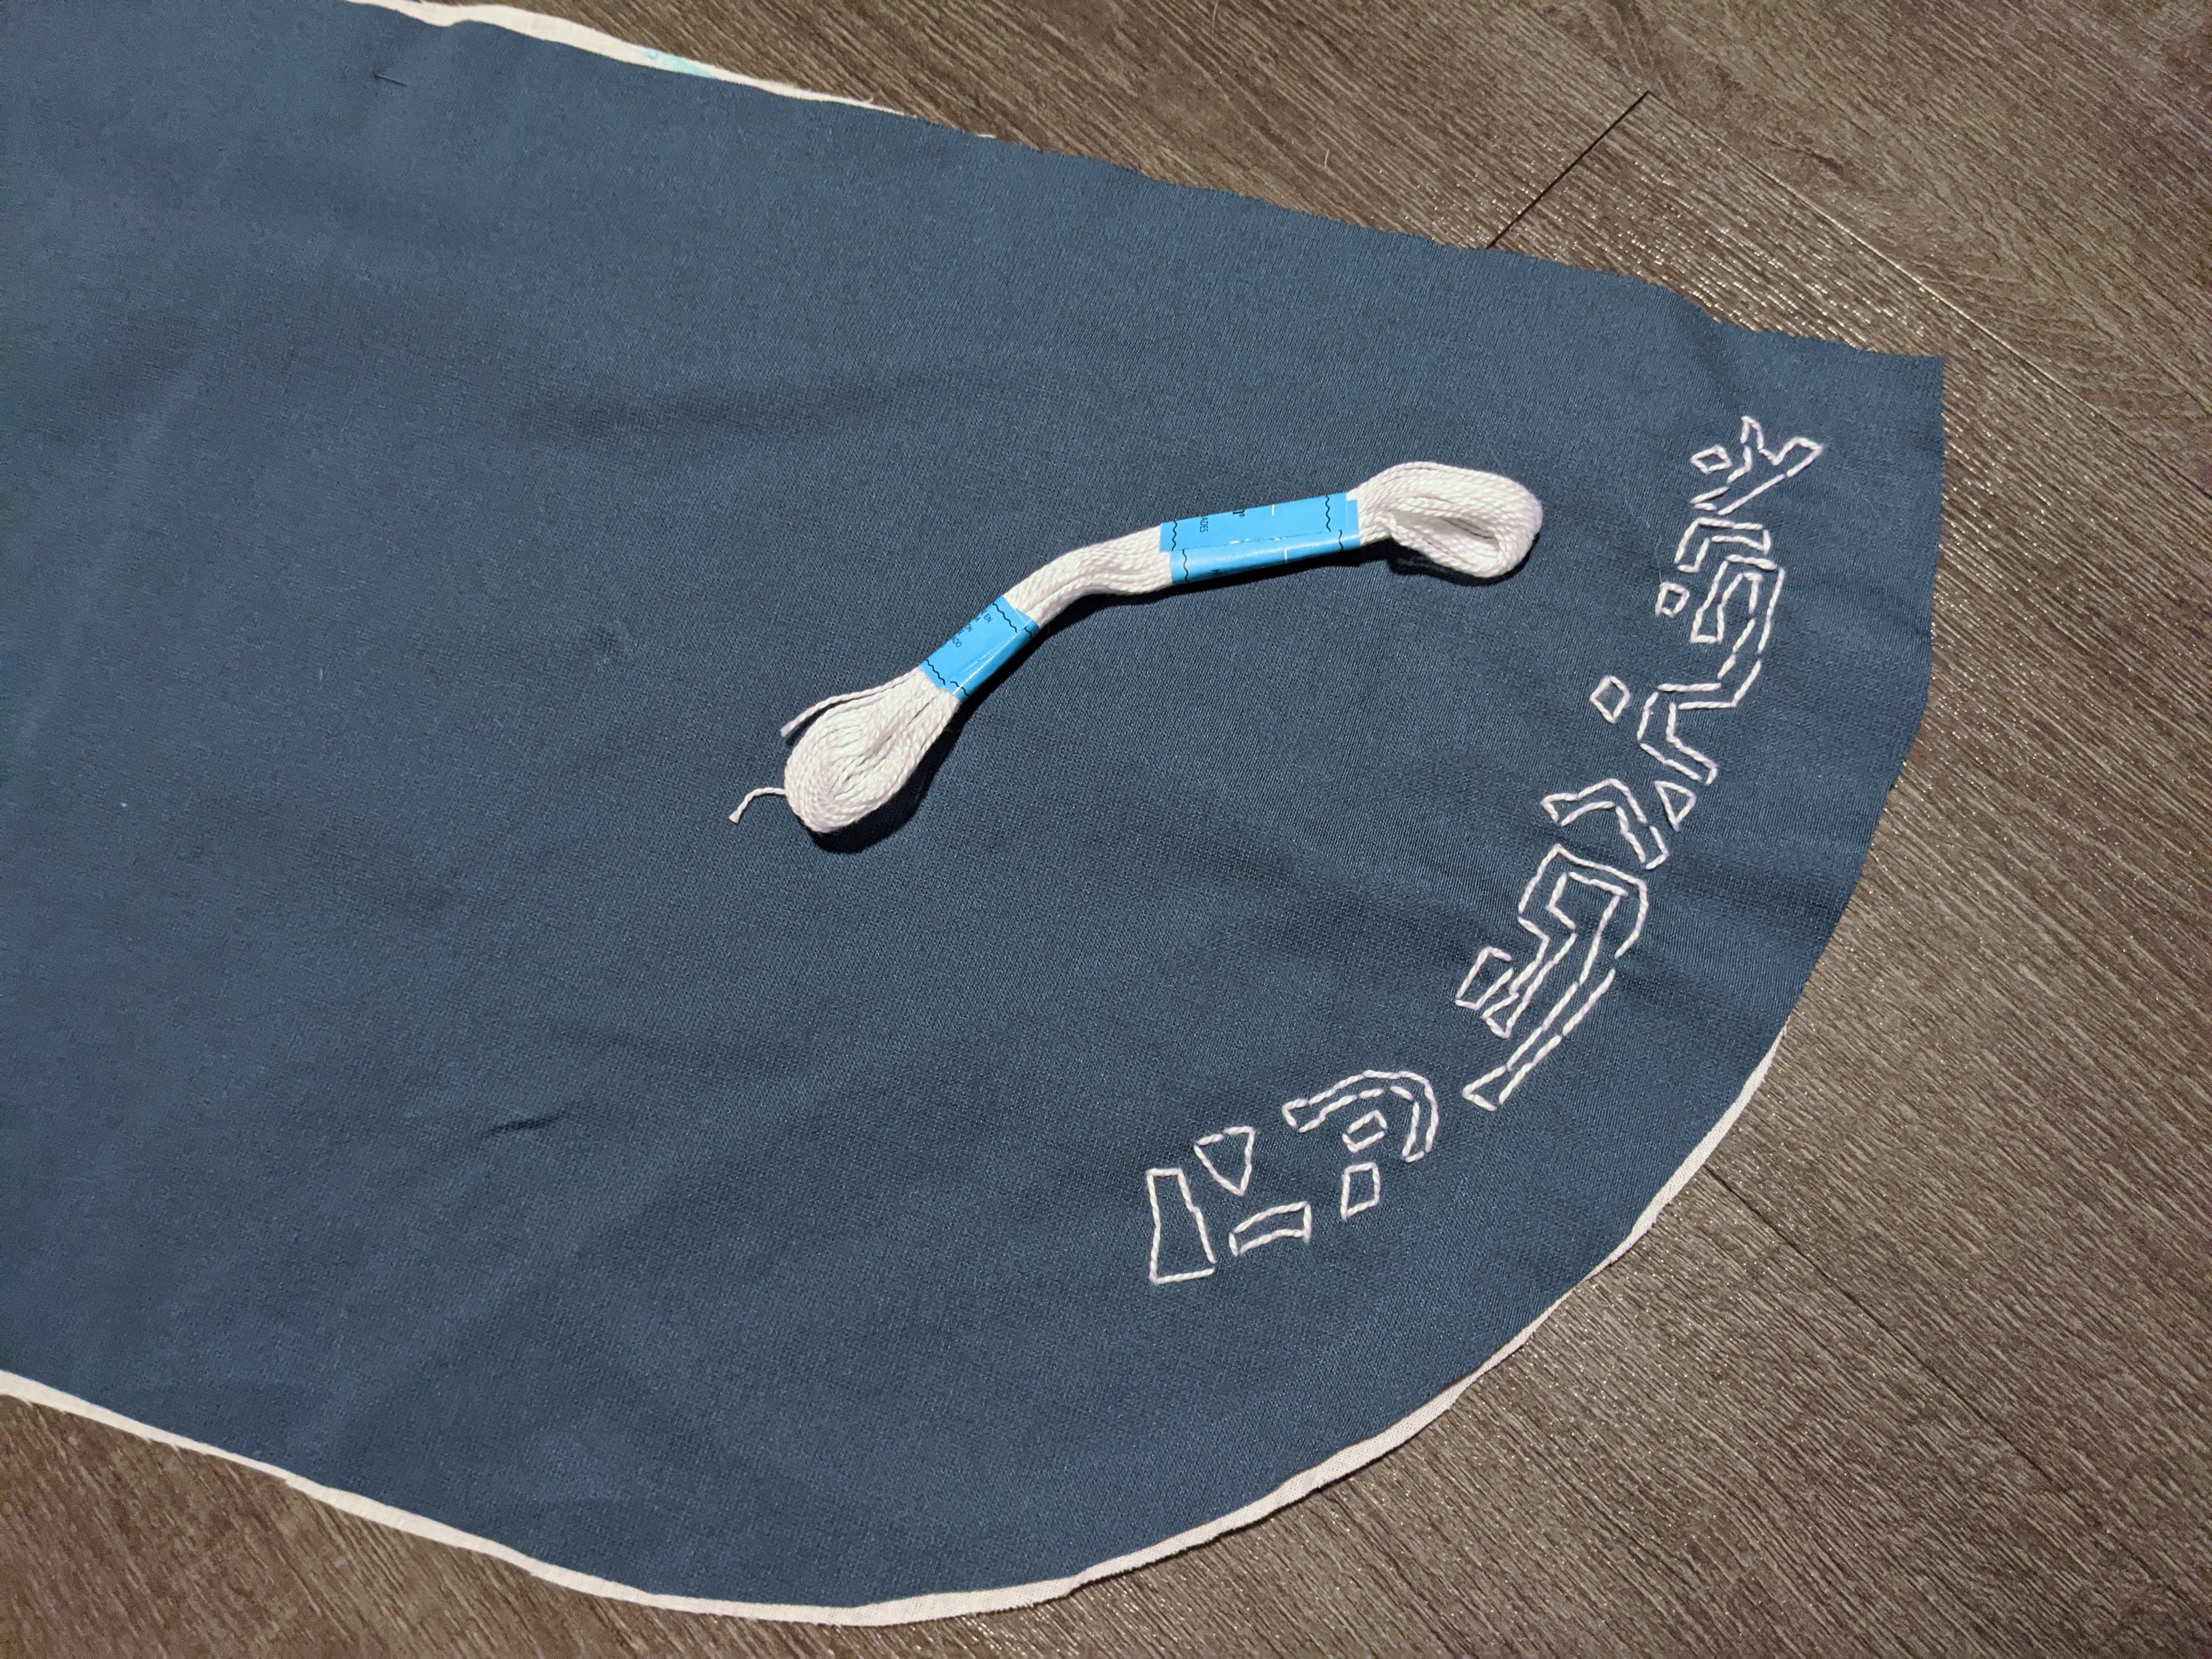

Pleased with my outline, I set to satin stitching. This was more straight forward because now the design was set, I could just embroider as normal from the front. I got super close to the end before I had to run to Joann’s to pick up one more thing of white embroidery floss. My stash had served me very well! Satin stitching took me 14 hours, 20 minutes.


Embroidery all done with a total of 20 hours and 20 minutes, it was time to finish constructing the apron.
First I stitched the fashion and lining pieces together, right sides together. After clipping the curved sections of the seam allowance, I turned it right side out and top stitched it down with a straight stitch. Then, because it’s me we’re talking about here, I top-stitched again but this time with a black thread and a wide and long zigzag stitch to match the in-game screenshots.


To wear the apron, I made a strap for it. Using the same blue fabric, I cut out strips 3″ wide and as long as I could make them. This was so that I could fit them into a 2″ wide parachute buckle I happened to have handy. (The straps have 1/4″ inch seams.)
I first made one small strap that would go in the back. This one came out to about 4″ long. After making the strap in a very similar fashion as the maroon sash, I top-stitched all along the edges.


Then, I looped the small strap through one of the buckle ends and folded it over. I stitched it down so that the buckle was secured and then stitched the other end onto the back edge of the apron.
For the front strap, I made one as long as I could then pinned it in place on the front. I clipped the two buckle ends together and then tried everything on so I could see how long the front strap needed to be. (I would use my dress form but I think I may be a little bit wider than it is now.) Once I figured out how long it needed to be, I trimmed it and followed the same steps to attach the remaining buckle end.


Now the apron was done! And the maroon sash would hide the strap and buckles perfectly.


Armbands (2 hrs, 45 mins)
As before, first step is harvesting thrift store fabric. Using pinking shears, I cut off the seams so I was just left with the fabric.


Taking one of the back pants panels, I folded it over itself (right sides together) and clipped it in place. I put it on my arm to make sure the length was okay. It was more than enough. So, I haphazardly cut off the excess so that it ended at my wrist.


Before I could sew the ends together to form the loop, I had to add the elbow patch. I cut out a small rectangular piece out of the same maroon fabric. To make the patch obvious, I used the reverse side of the fabric so it would have a little contrast. After playing around with it a bit but pinning it in place, pinning the edges together and trying it on, I eventually nailed down the size and placement of the patch.
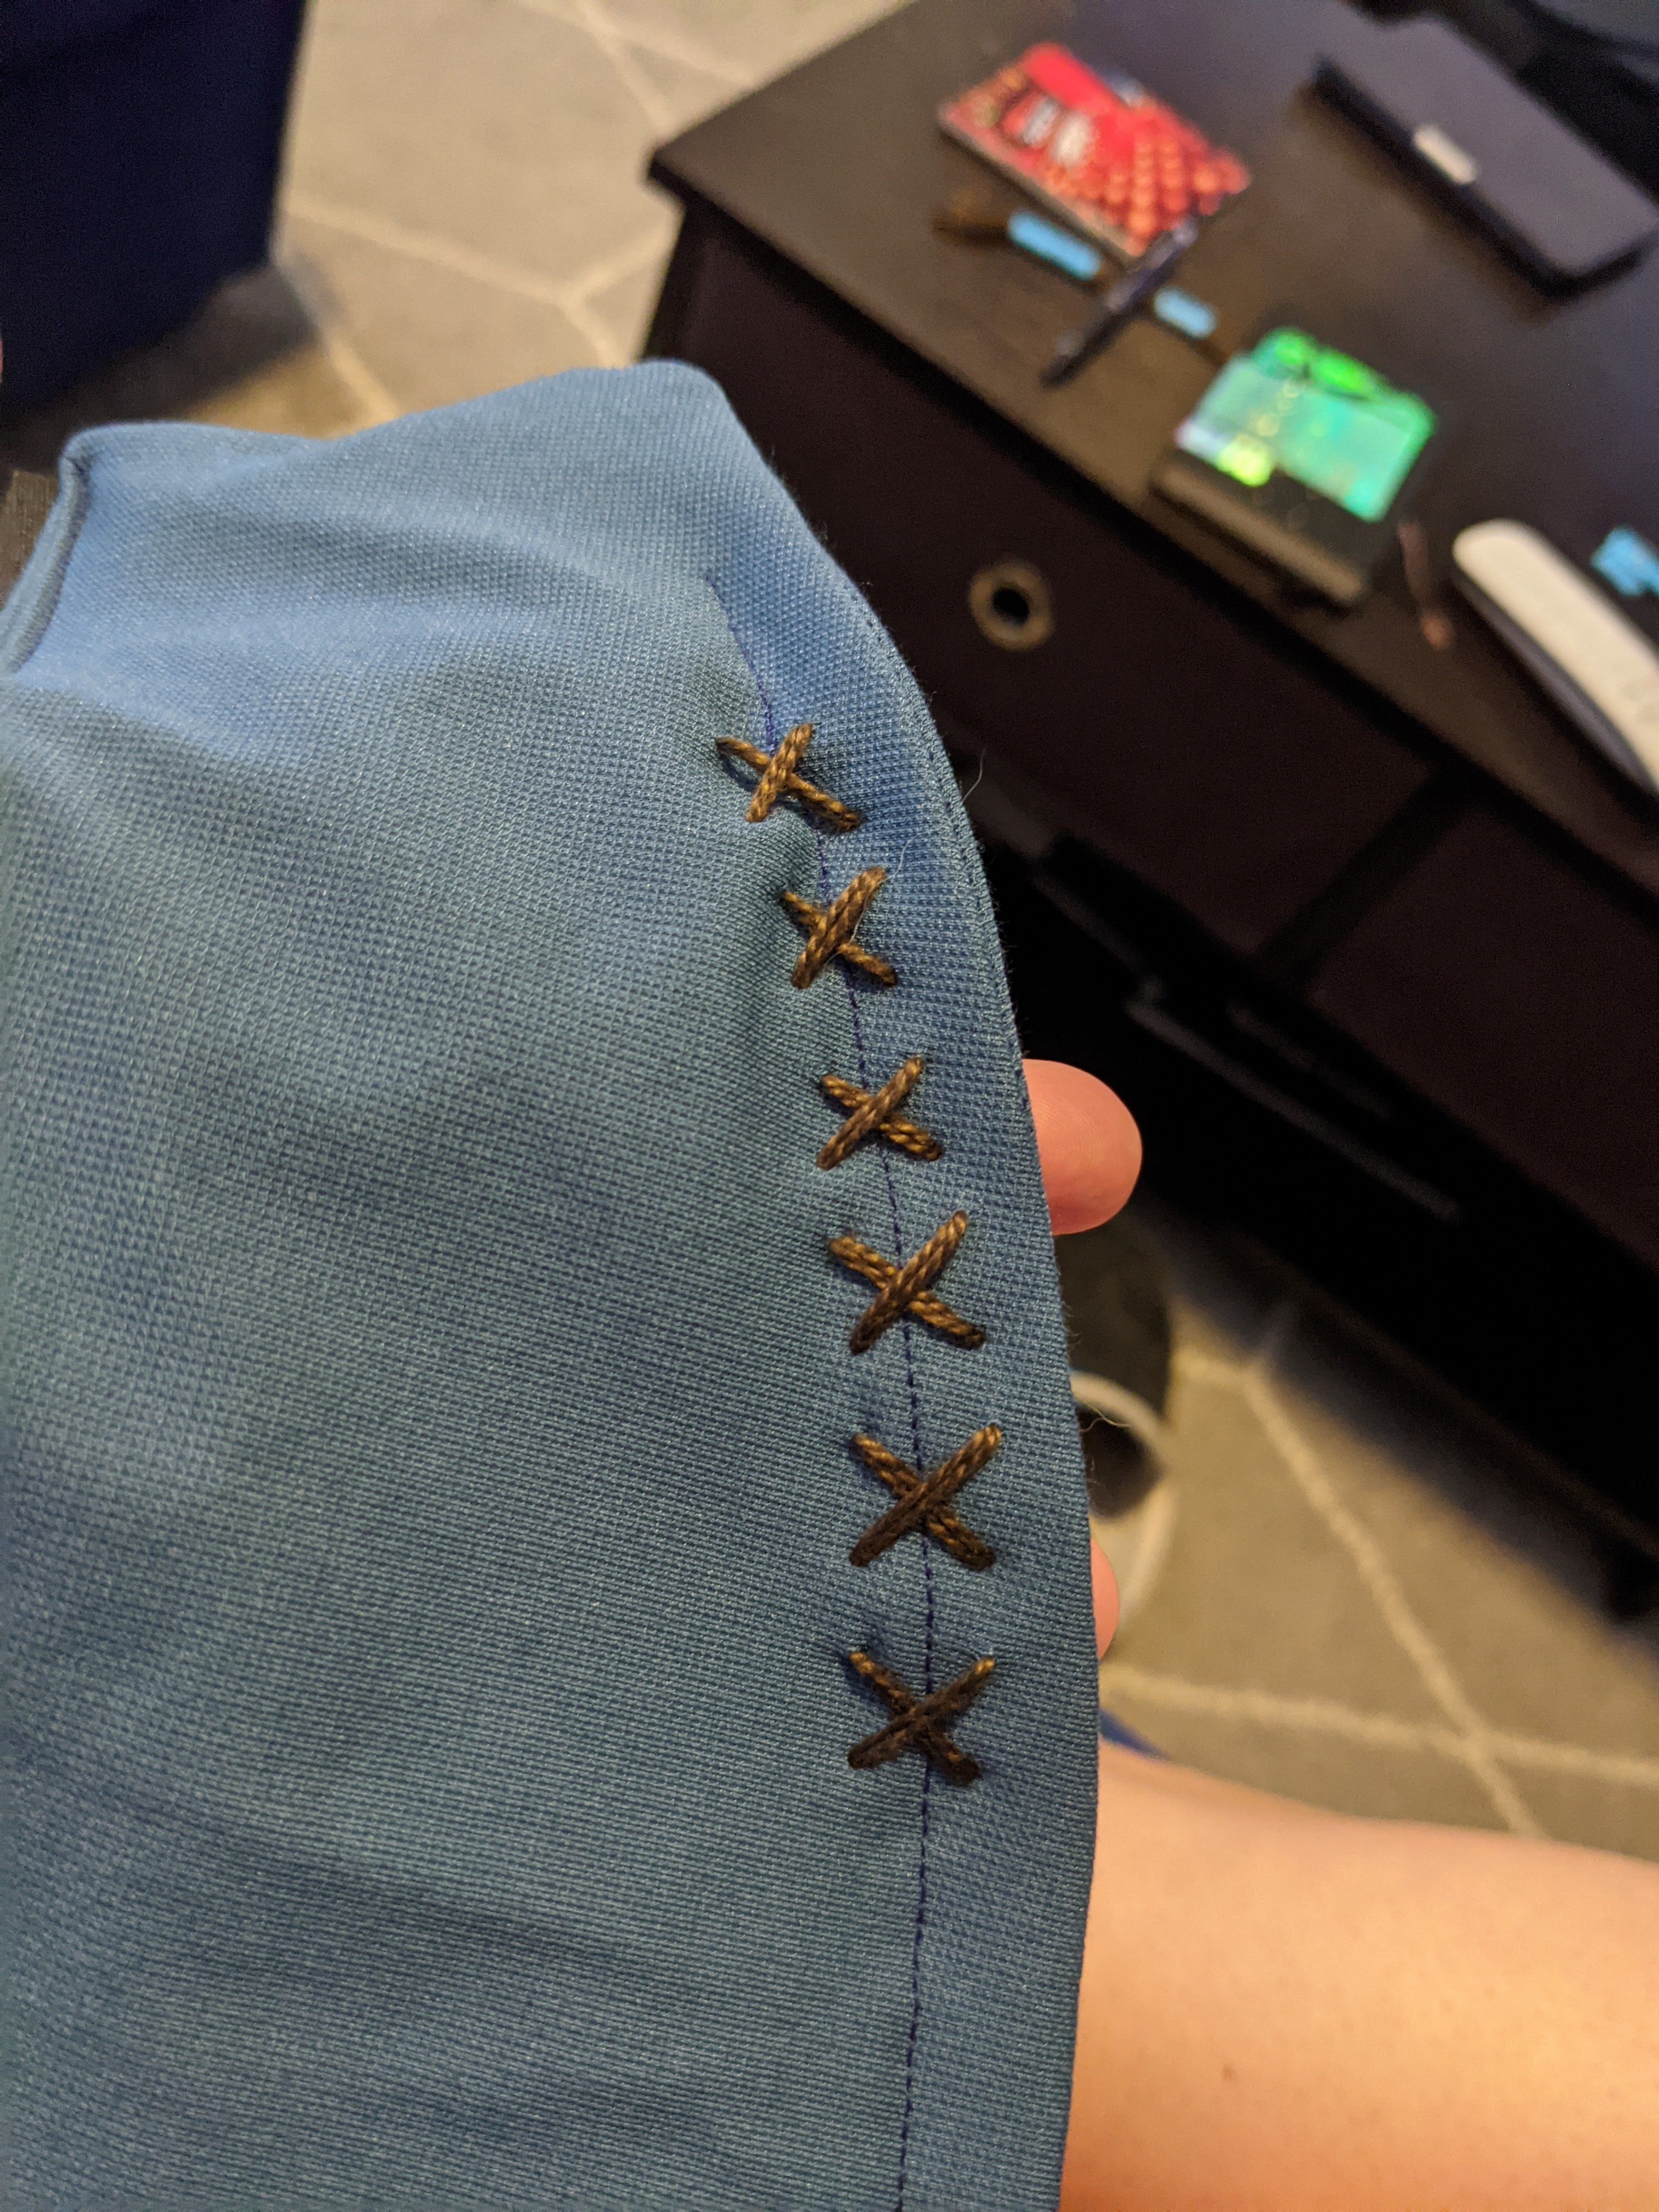
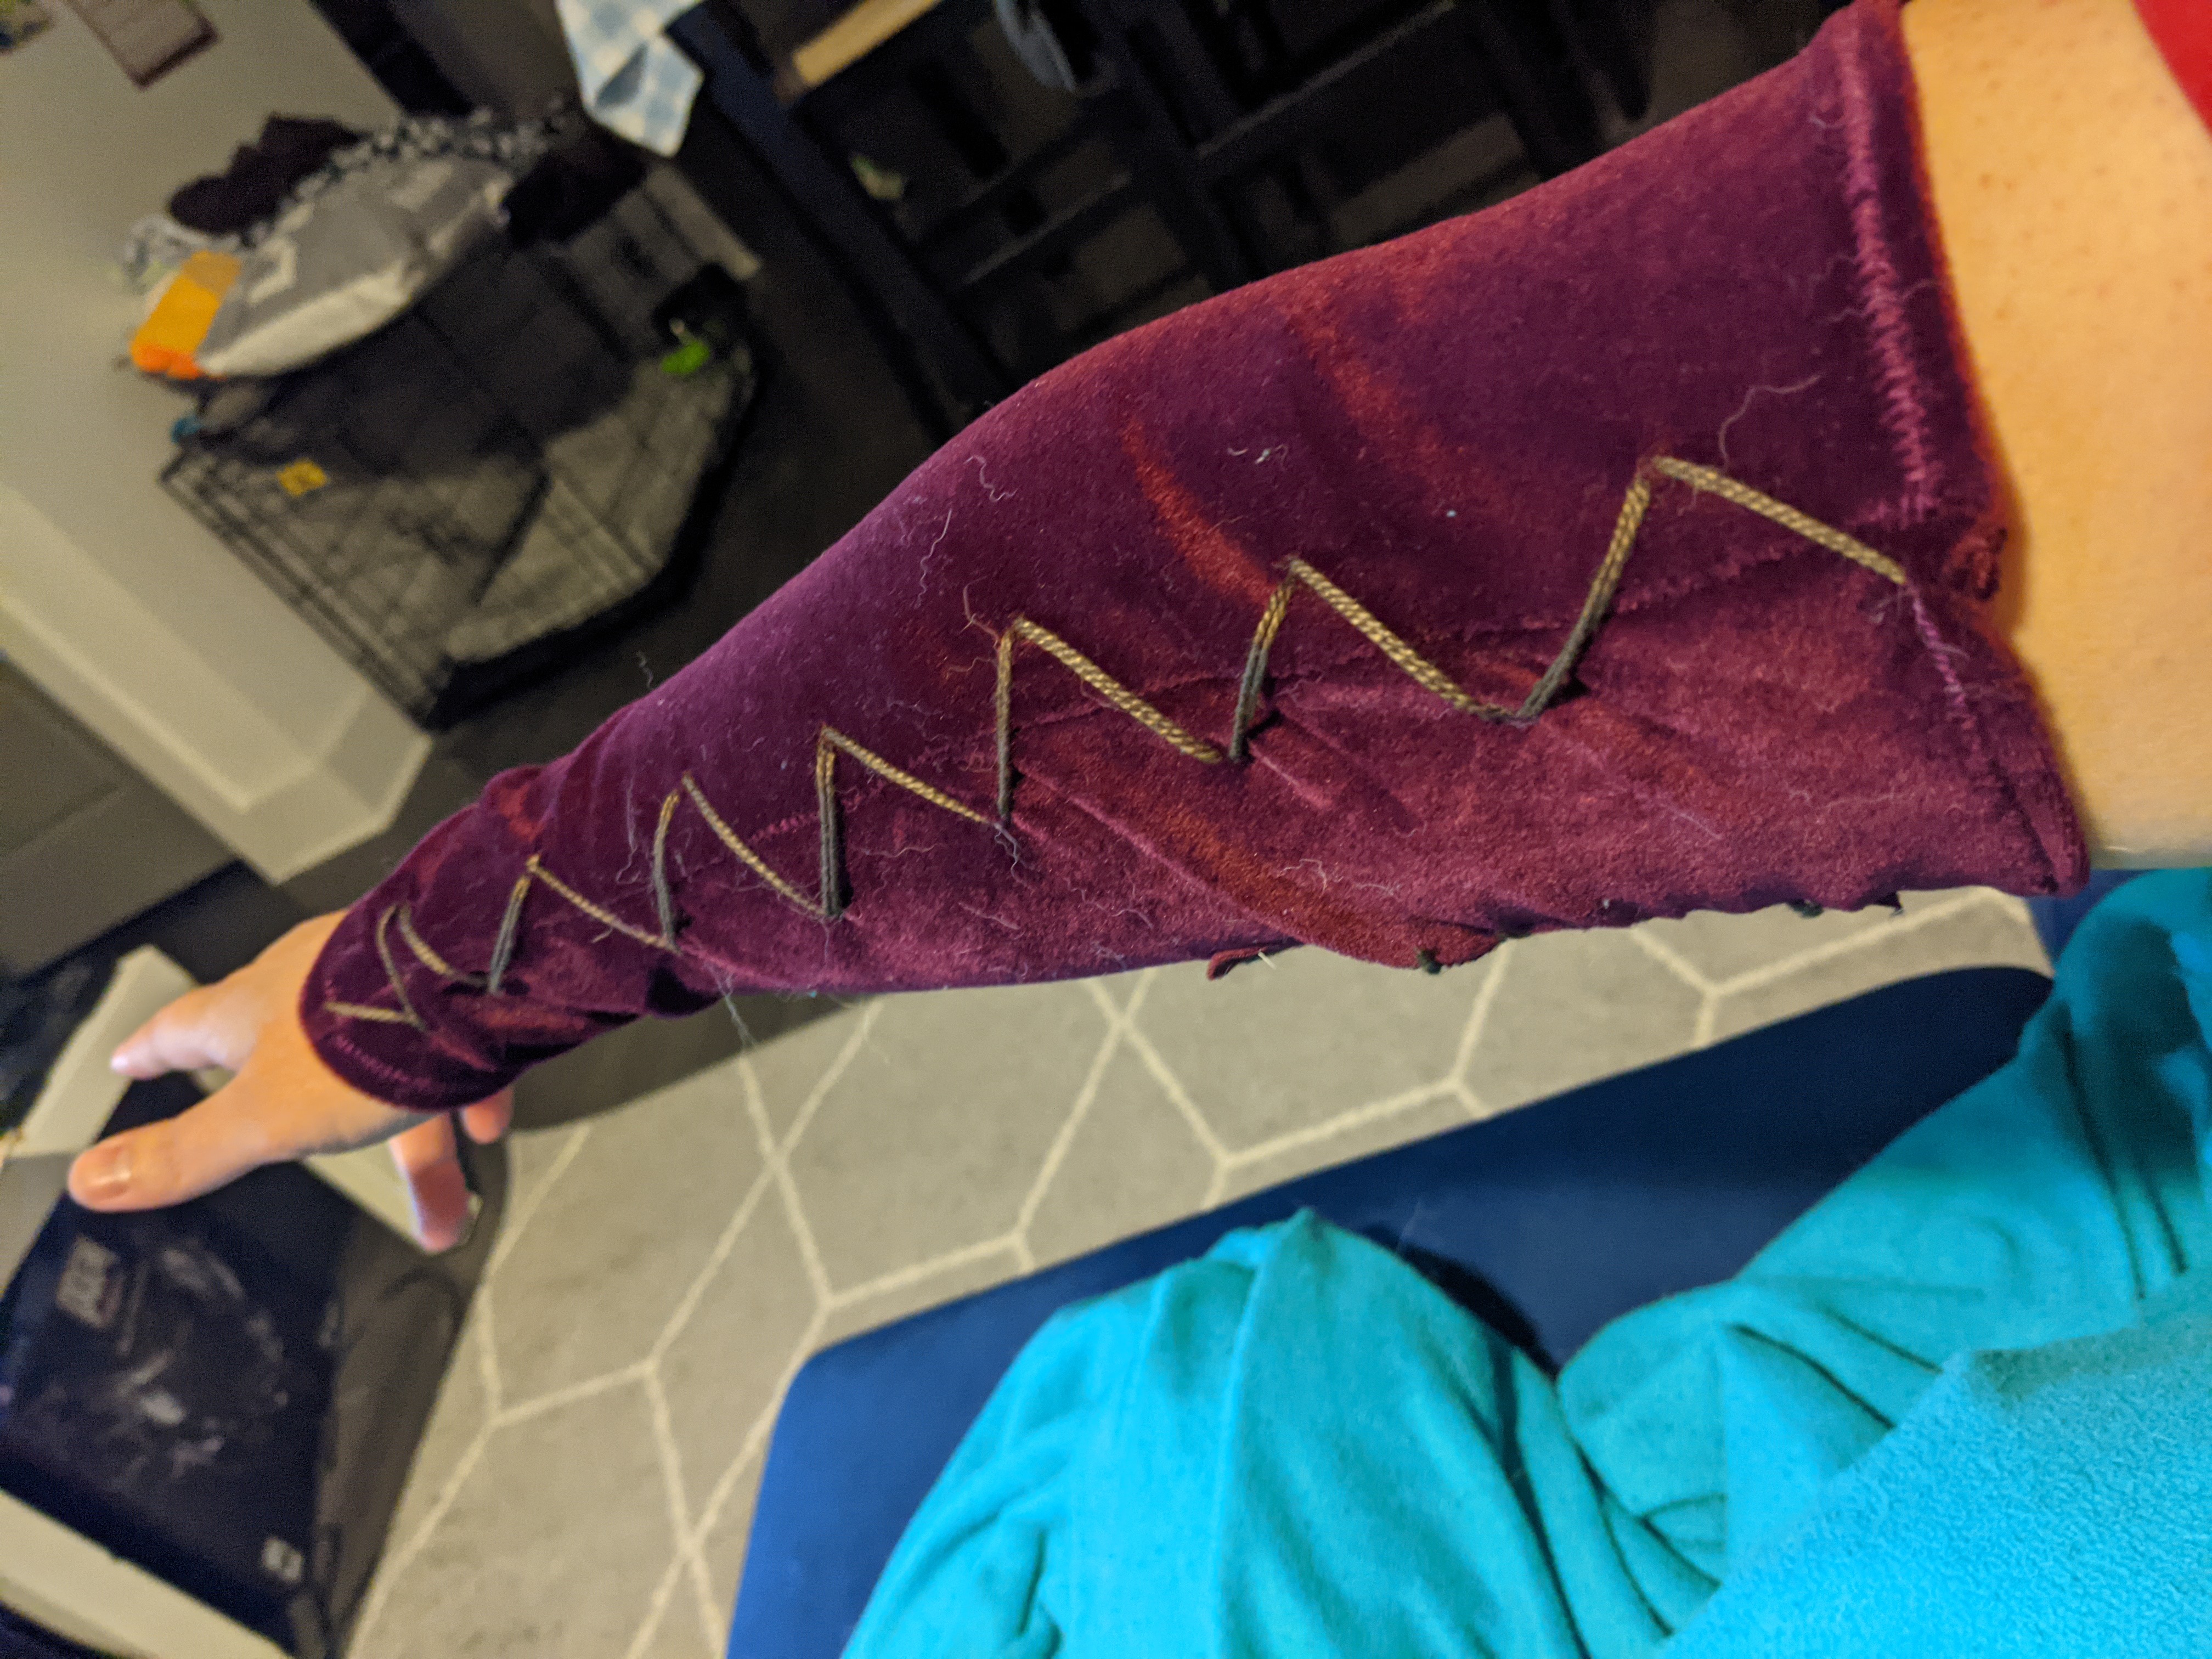
After hemming the edges down, I stitched the patch on with a zigzag stitch. Then, using my trusty embroidery floss stash, I stitched brown details around the edges (embroidery floss doubled-up for thickness). Once that was complete, I sewed the sides together and hemmed the write and upper arm raw edges. After turning it right side out, I added more embroidery floss, this time along the side seam in a zigzag pattern, matching Kena’s armbands in-game.


Pants (2 hrs, 40 mins)
The pants were pretty simple. Some altering and then one knee patch.
And my altering method for these sorts of things is extremely lazy. I don’t seam rip the seams open and then making the adjustments, I just take some pins to it and hope for the best. But first, I had to get the length right.
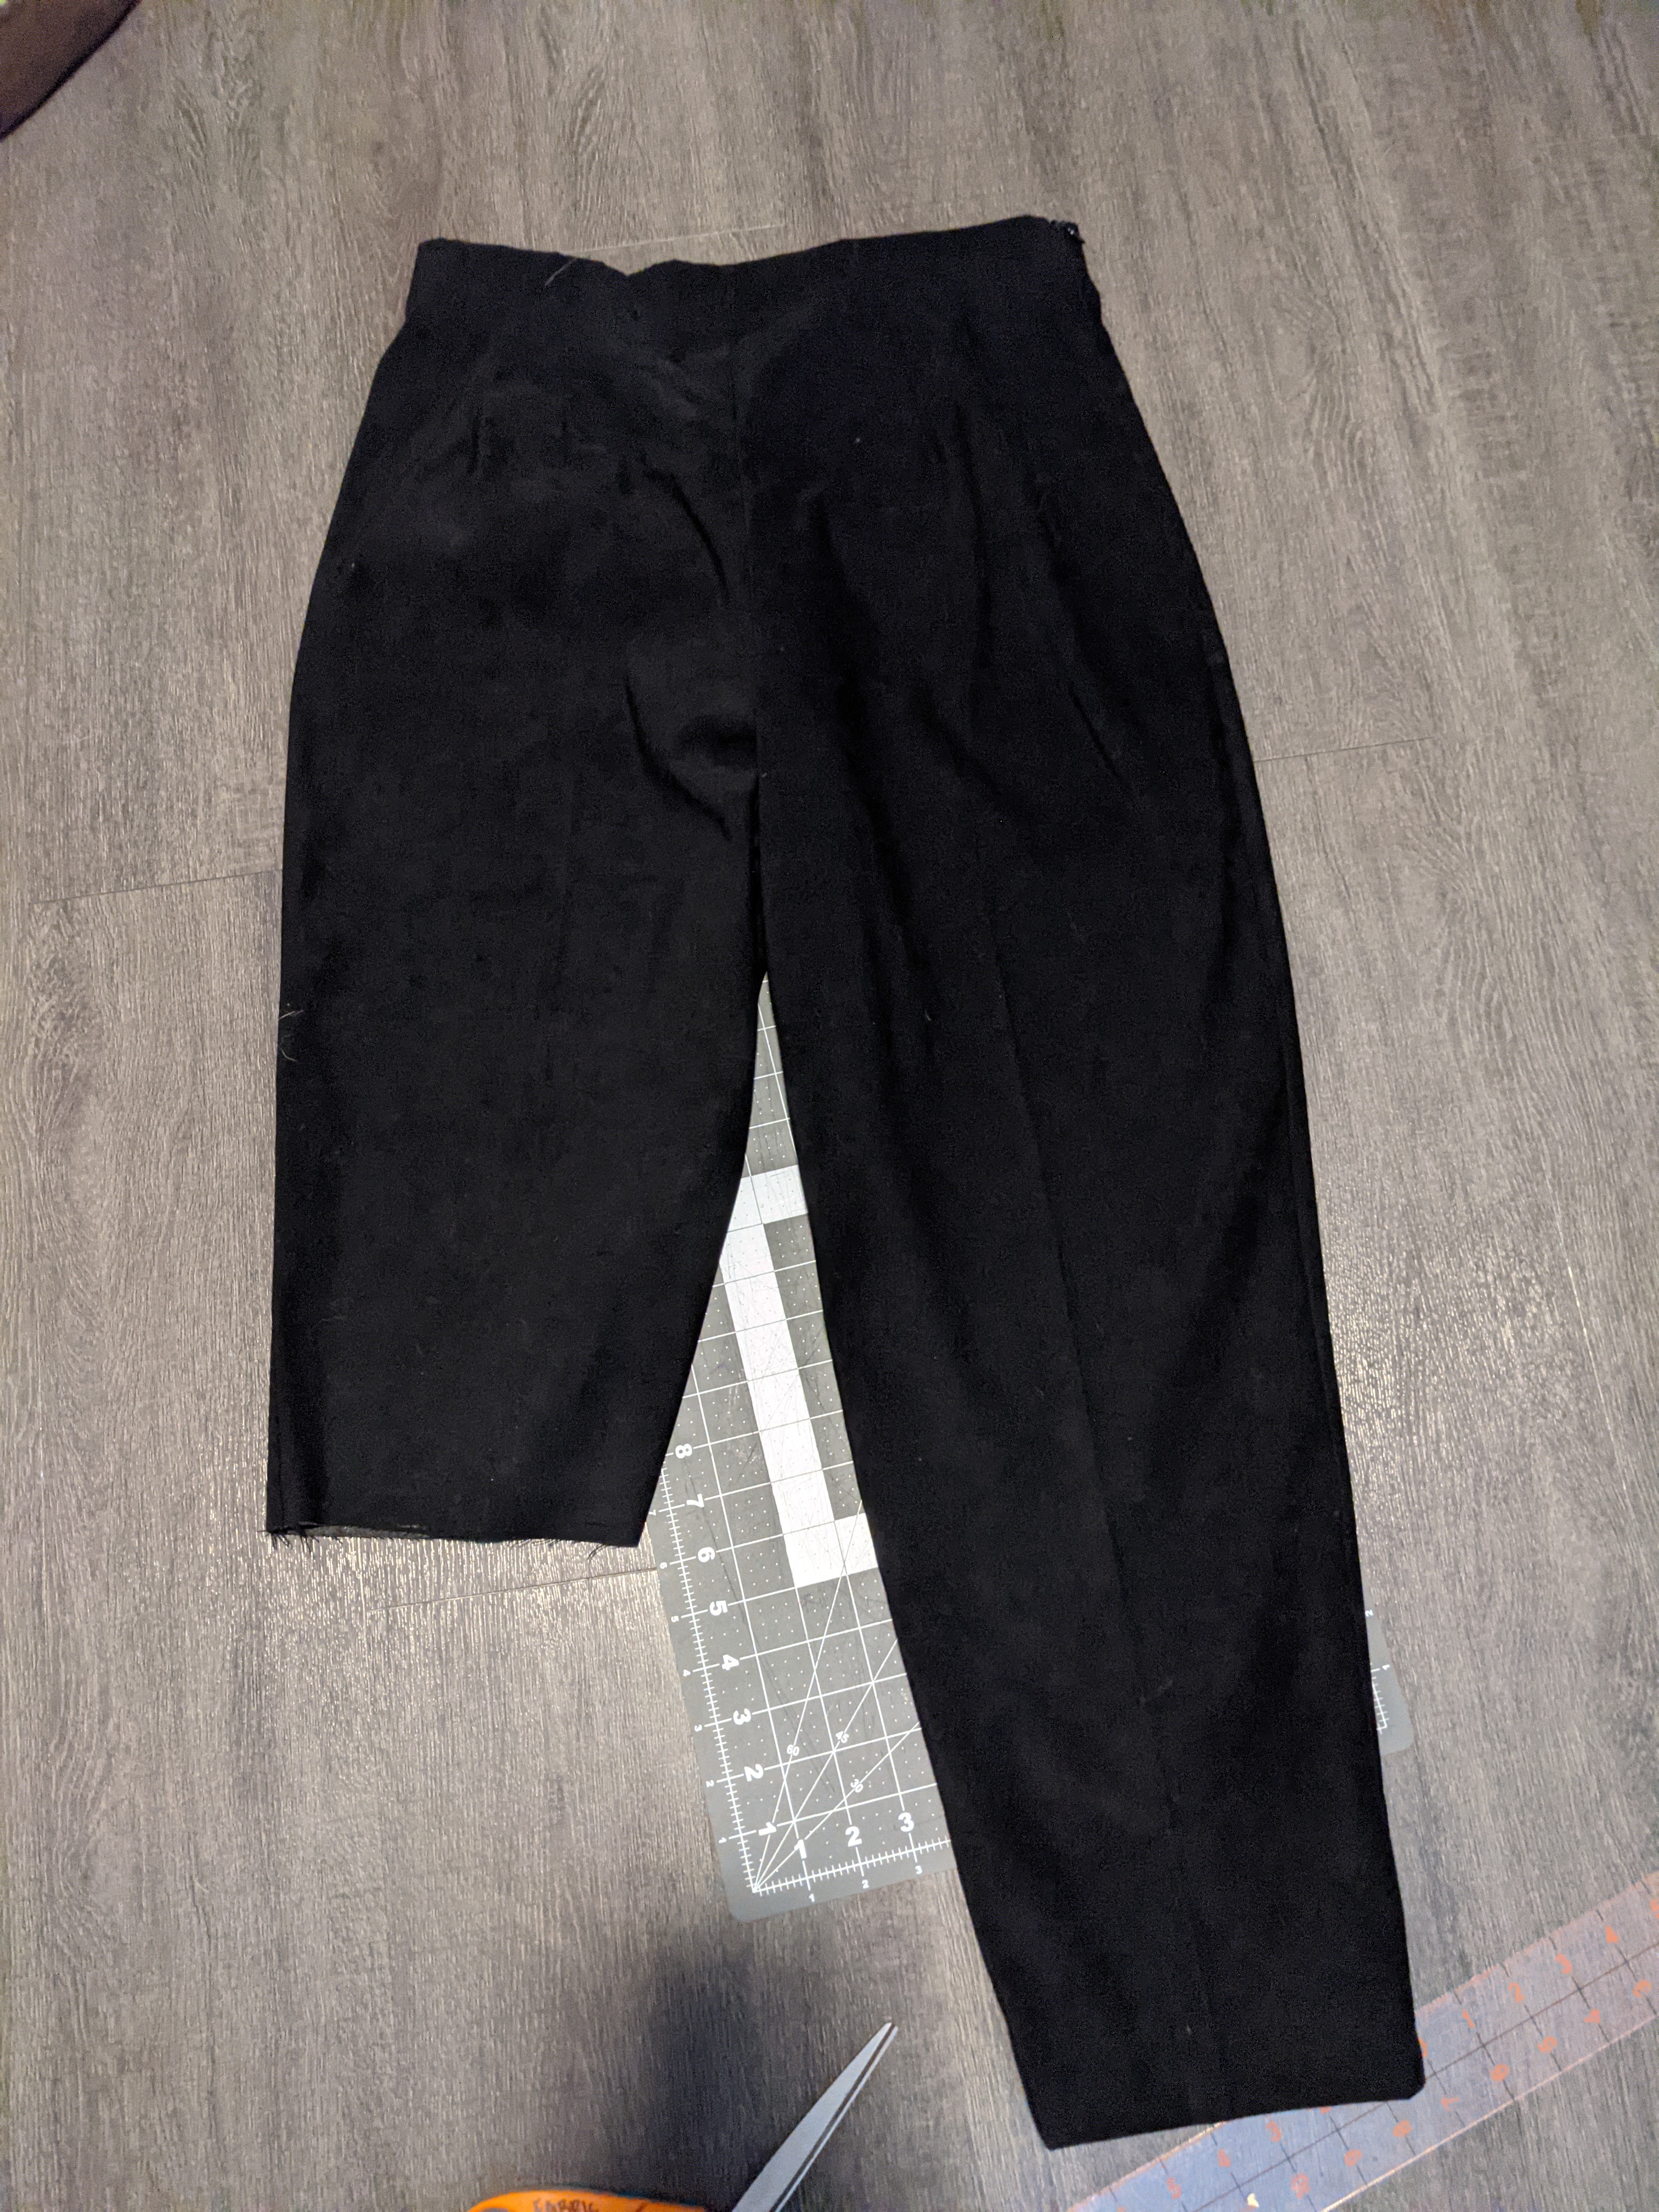
After trying on the pants and marking with pins where I wanted the finished hem to go, I cut the fabric about 2″ past where the hem would be. I did this so that I could fold over the hem once and then fold it over again to hide the raw edges. I did this for both pant legs.
The pant legs were a little loose, so I pinned the side edges just kind of estimating where I thought it would go to tighten them up. I’d try the pants on and make adjustments as necessary. Once happy, I straight-stitched along the line of pins. And that was that for altering! I didn’t even cut off the excess because I didn’t want to deal with fraying / finishing raw edges.

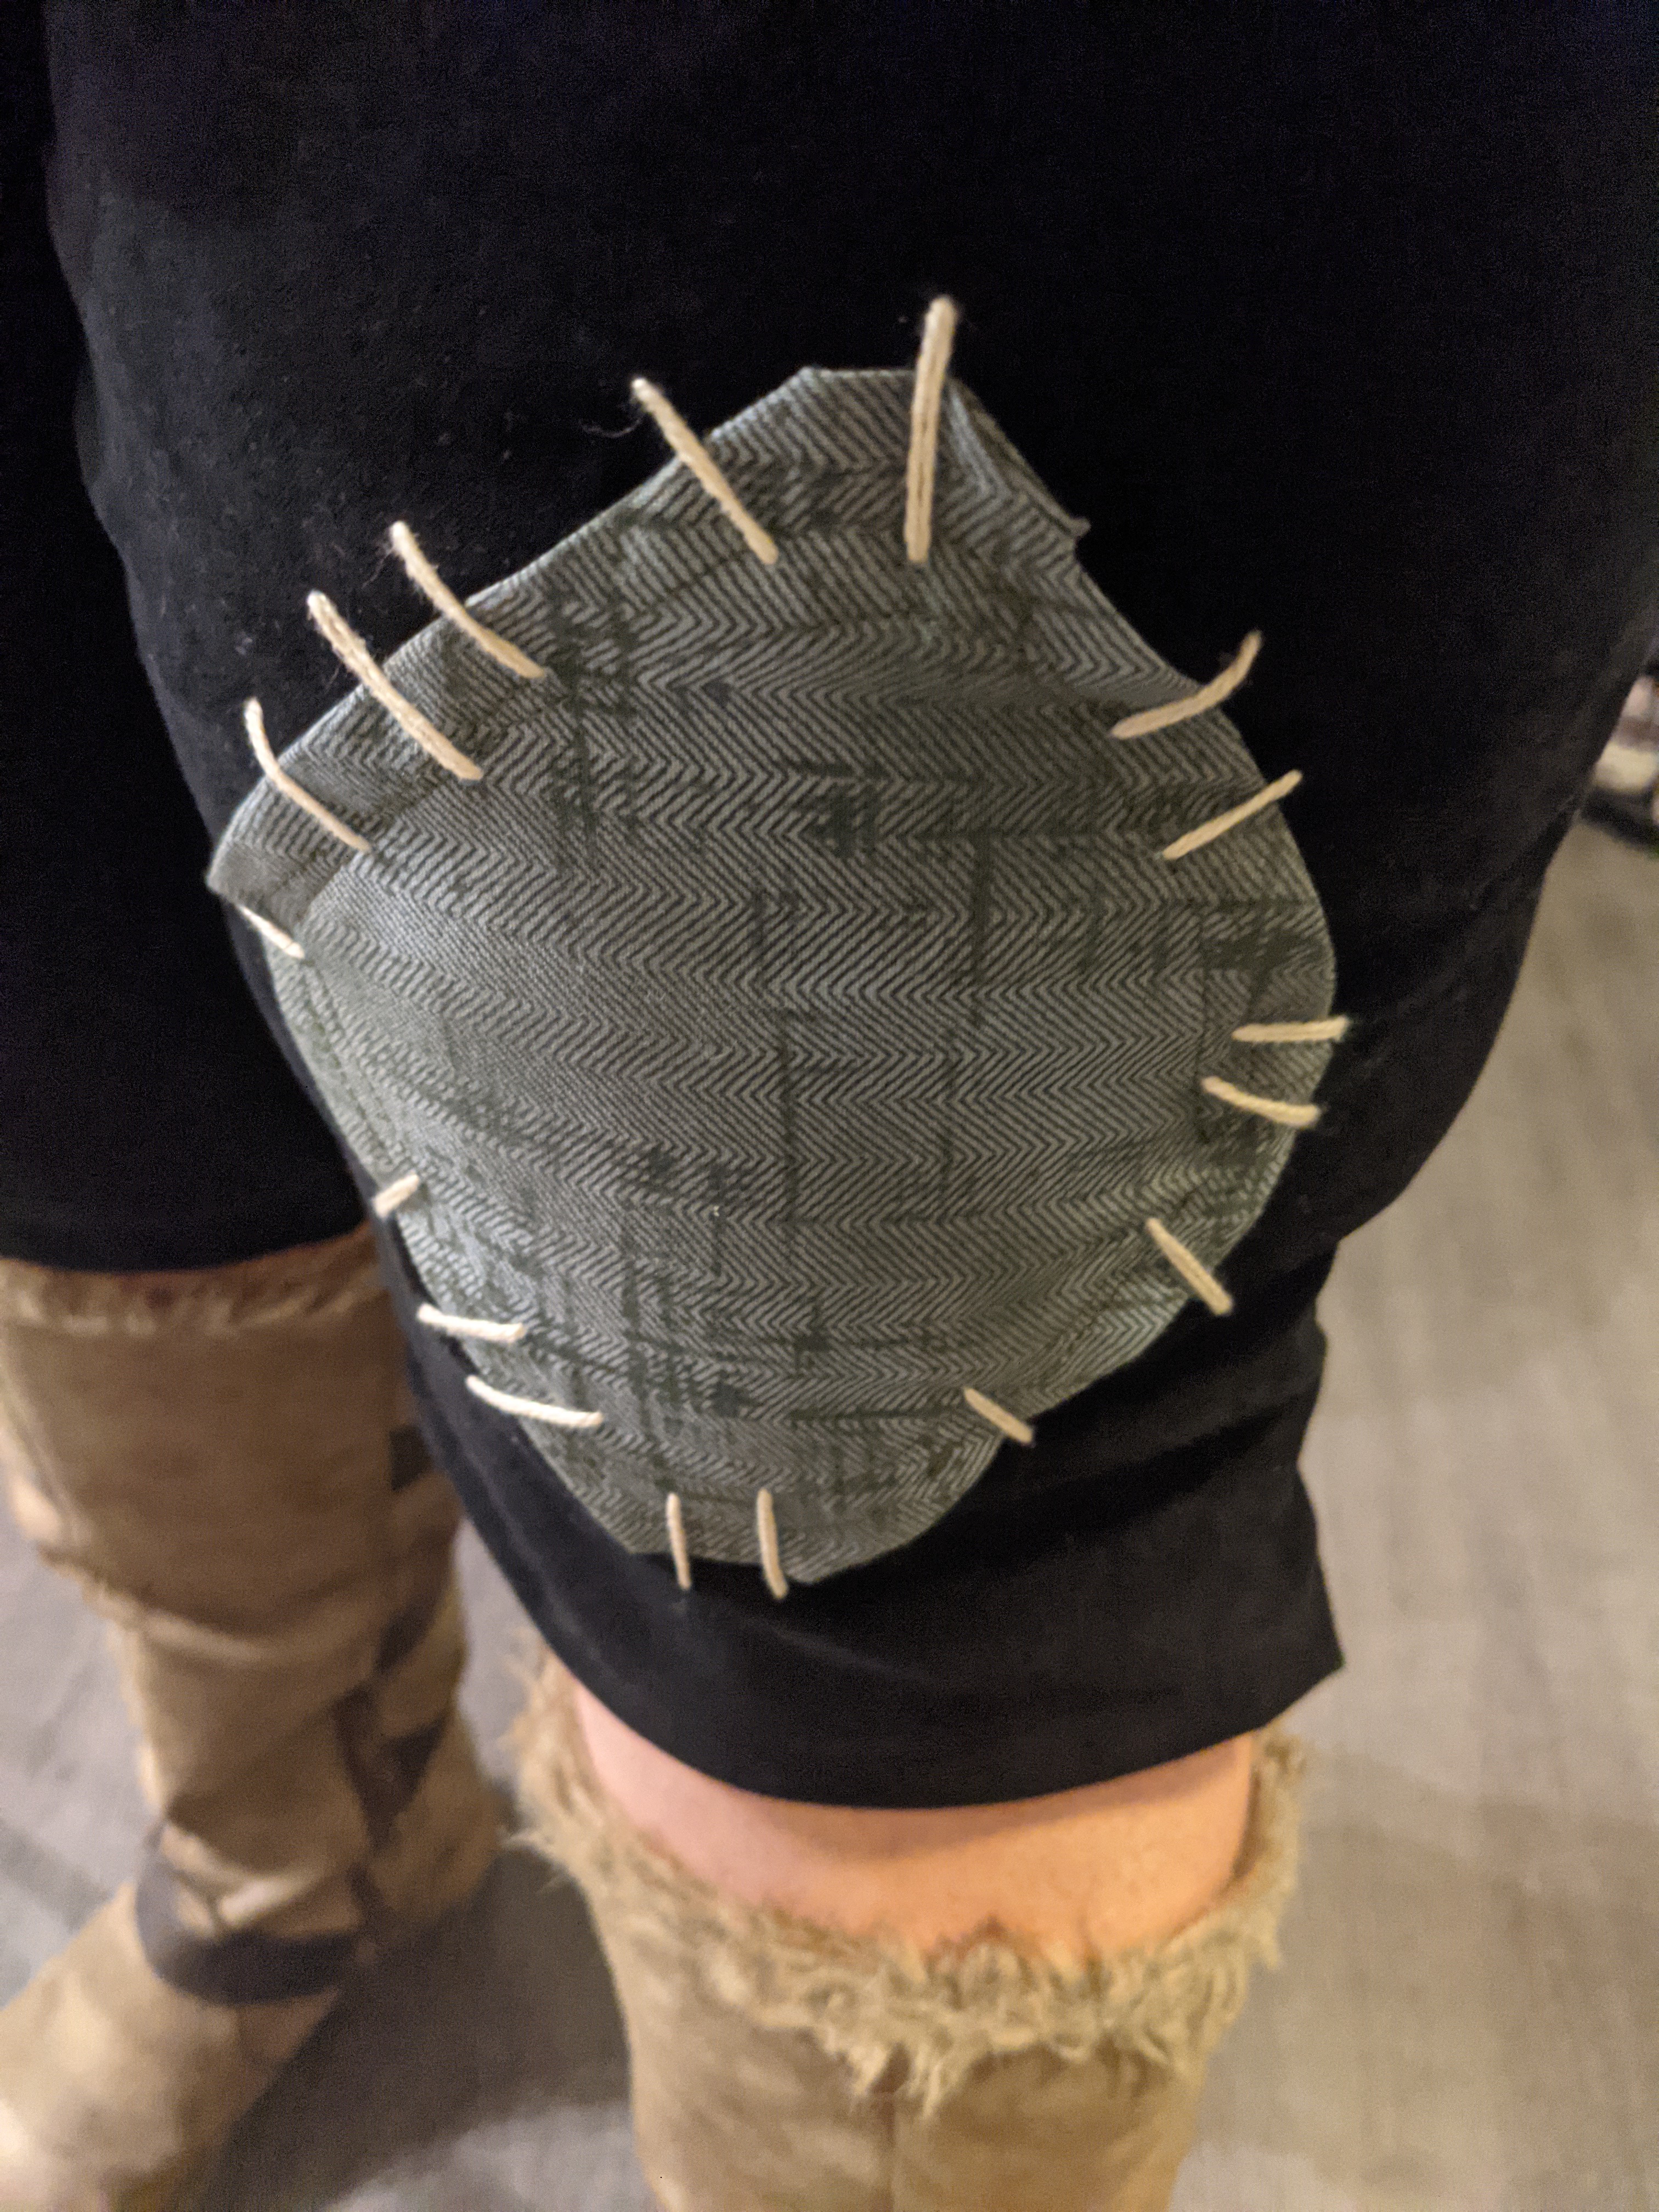
To complete the pants, I needed a knee patch. I went to Joann’s a checked their remnants section and came across this lovely fabric that had a sort of similar pattern as the one in game. The color itself is a little bit lighter than I would’ve wanted, but the price was a steal, so I went for it.
After cutting out a rough rounded diamond shape, I folder the edges over, hemmed it, then pinned it in place. I stitched the patch on with my machine (very carefully because this was with the pants still in tack, so I had to remove the extra arm on my machine to make the pant leg fit under the needle).
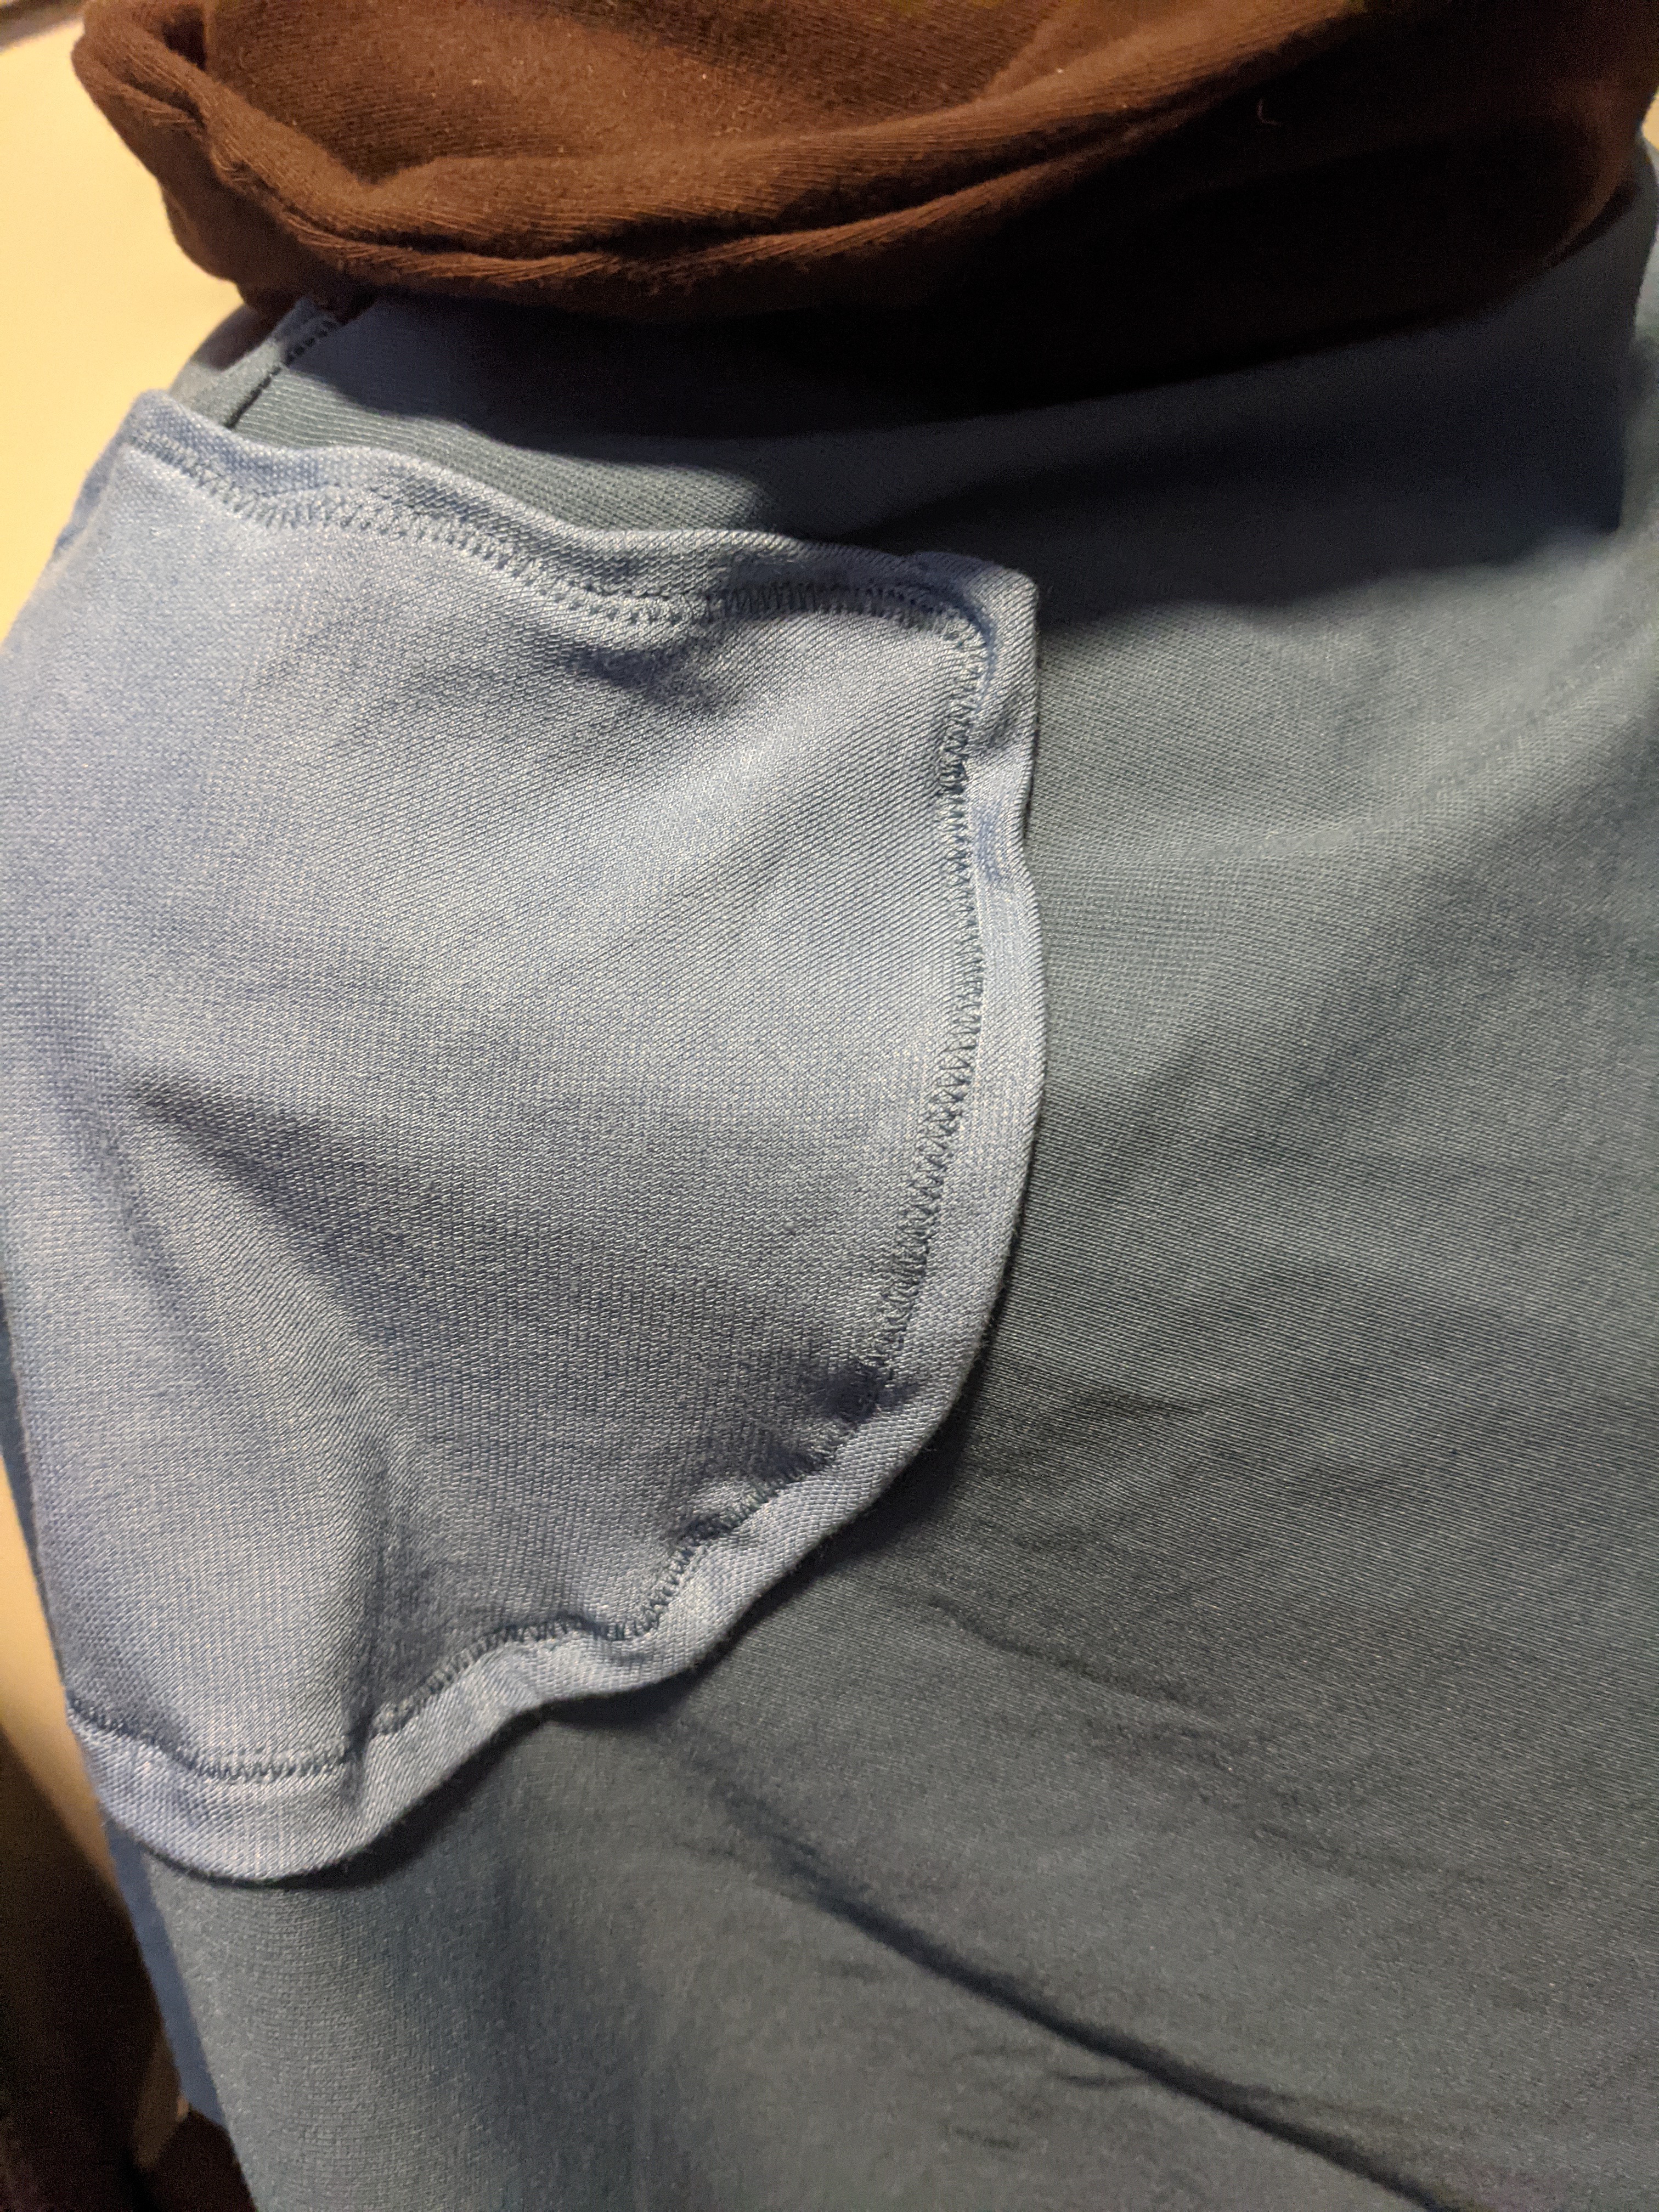
Then, as with most things Kena, I added hand-stitched details using the same cream embroidery floss I had used for the capelet shoulder pad.

Leather bag
I bought this bag from Target. (Apologies for not having a link. I tried finding it on their site but couldn’t find it.) It’s not the perfect color or shape, but it was close enough. I figured if I really wanted to improve it, I could dye the leather to be a bit darker and add the little details to it.
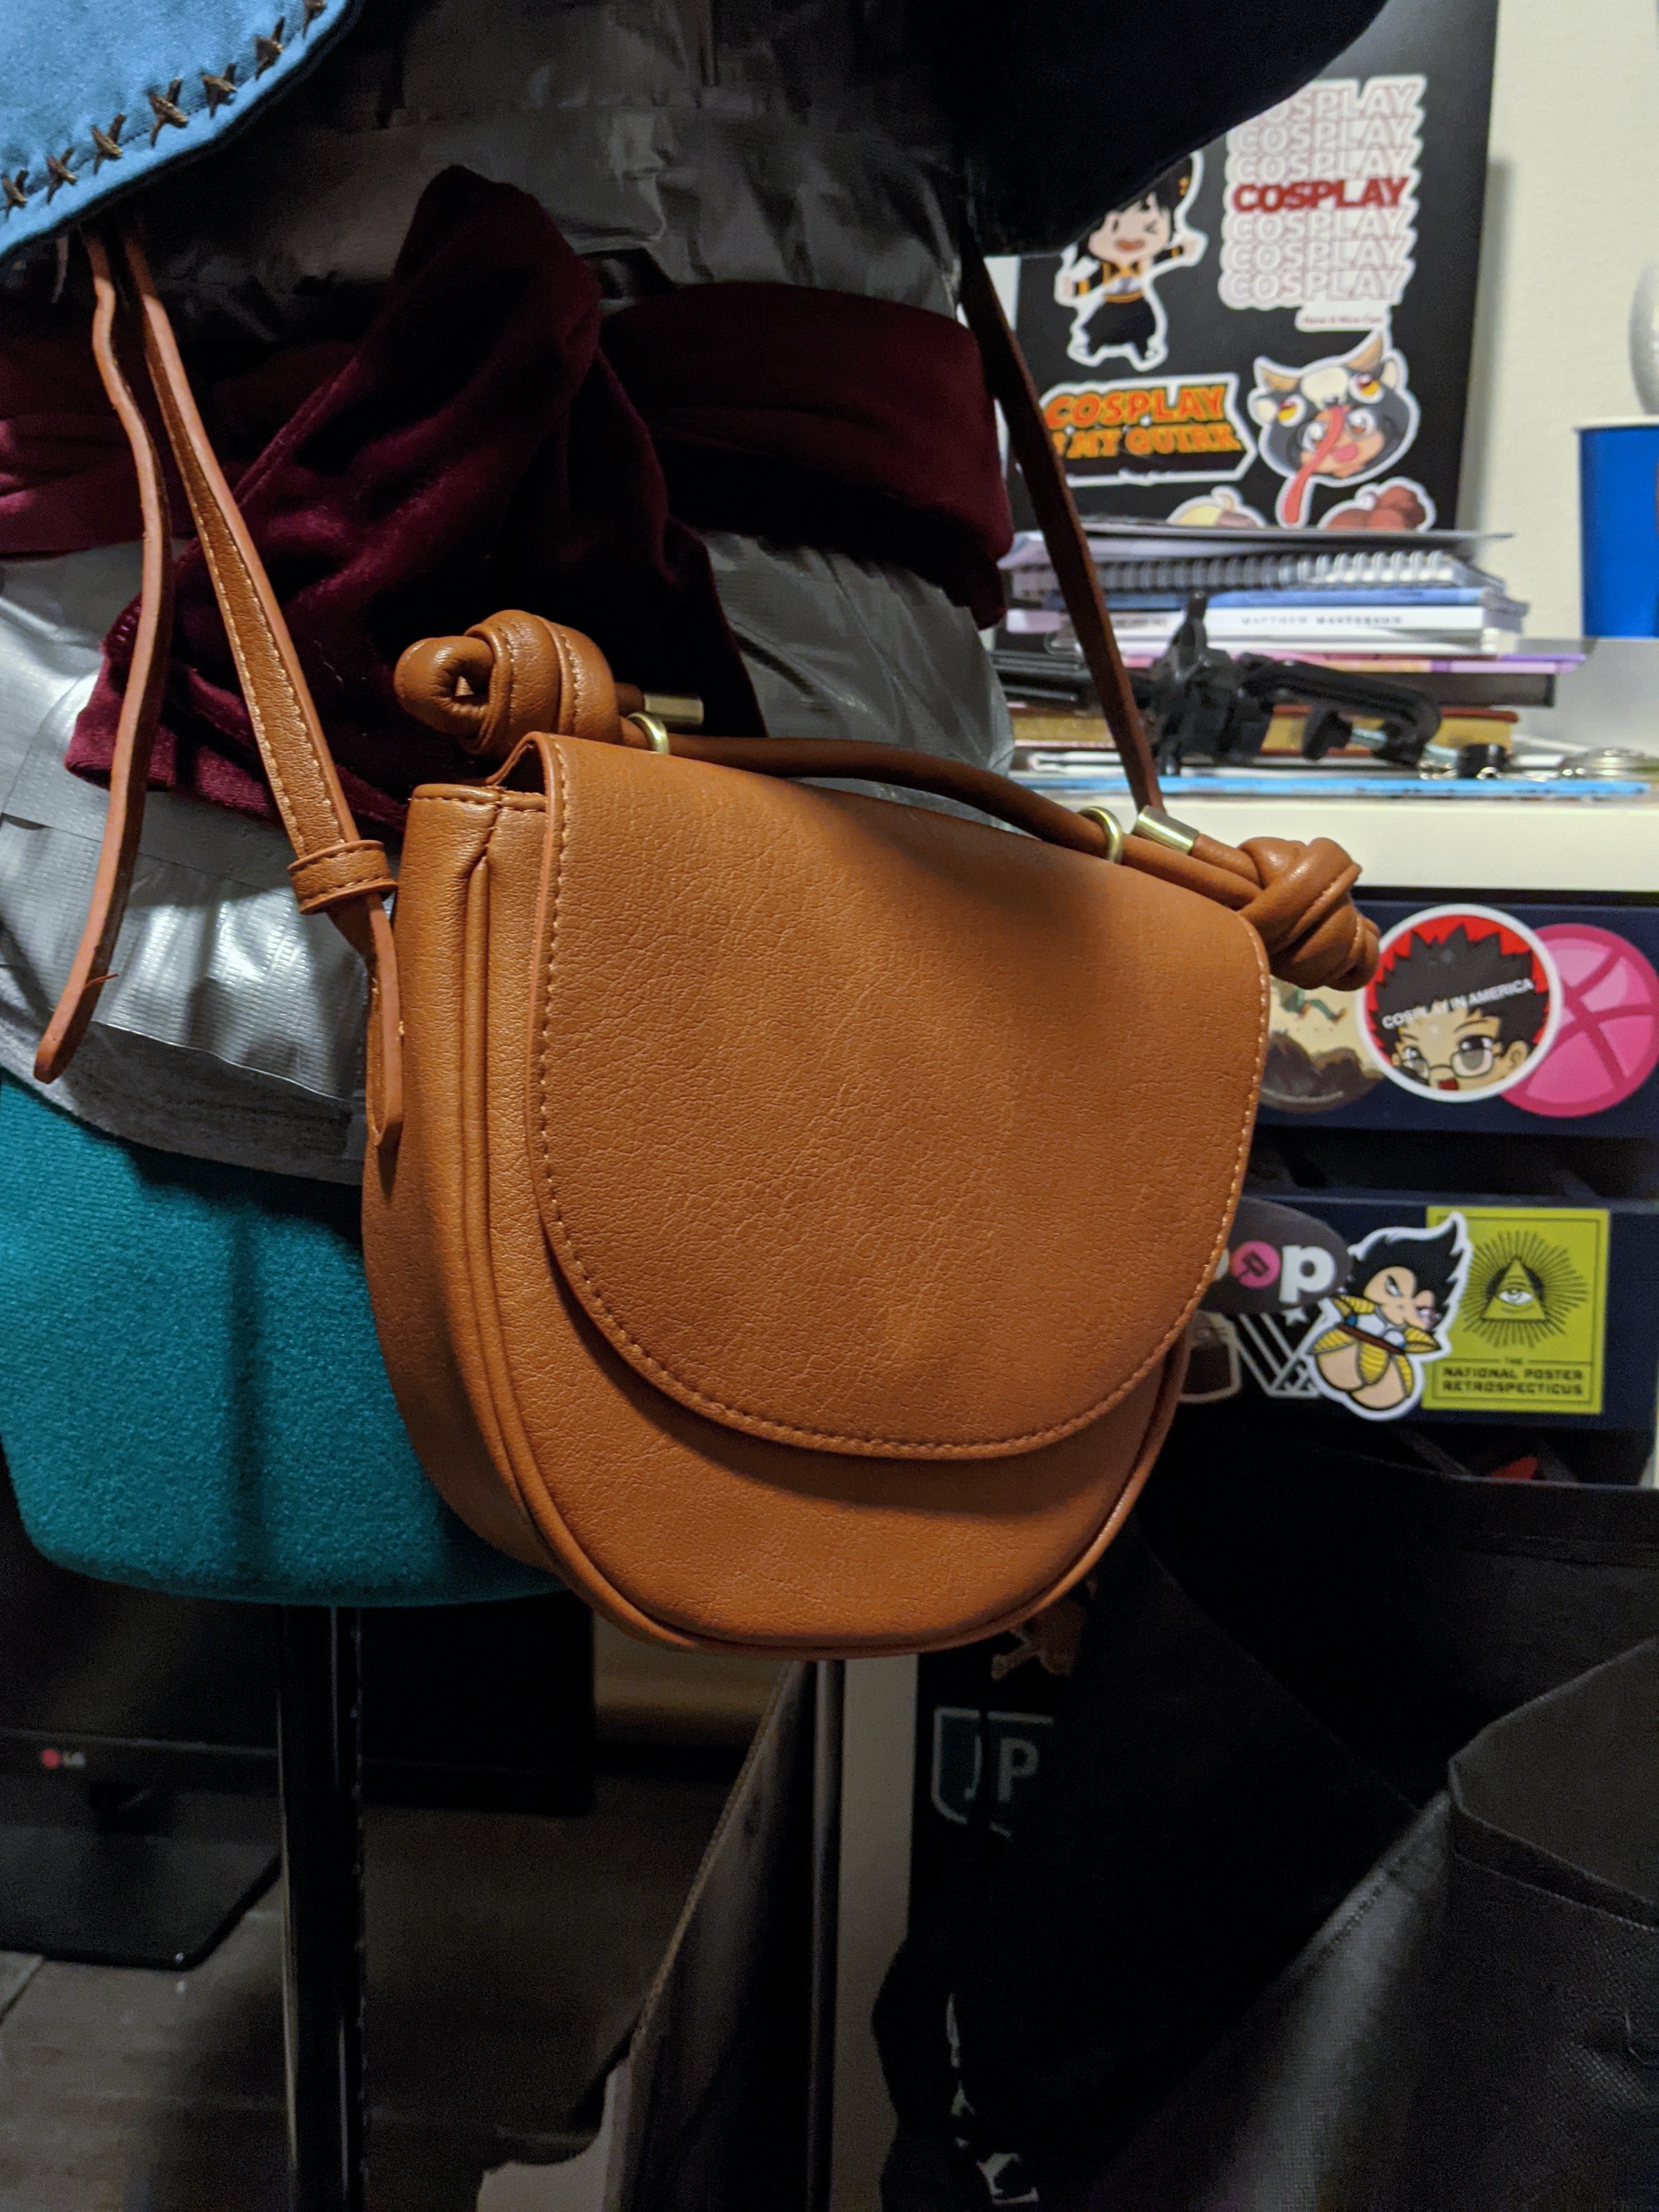
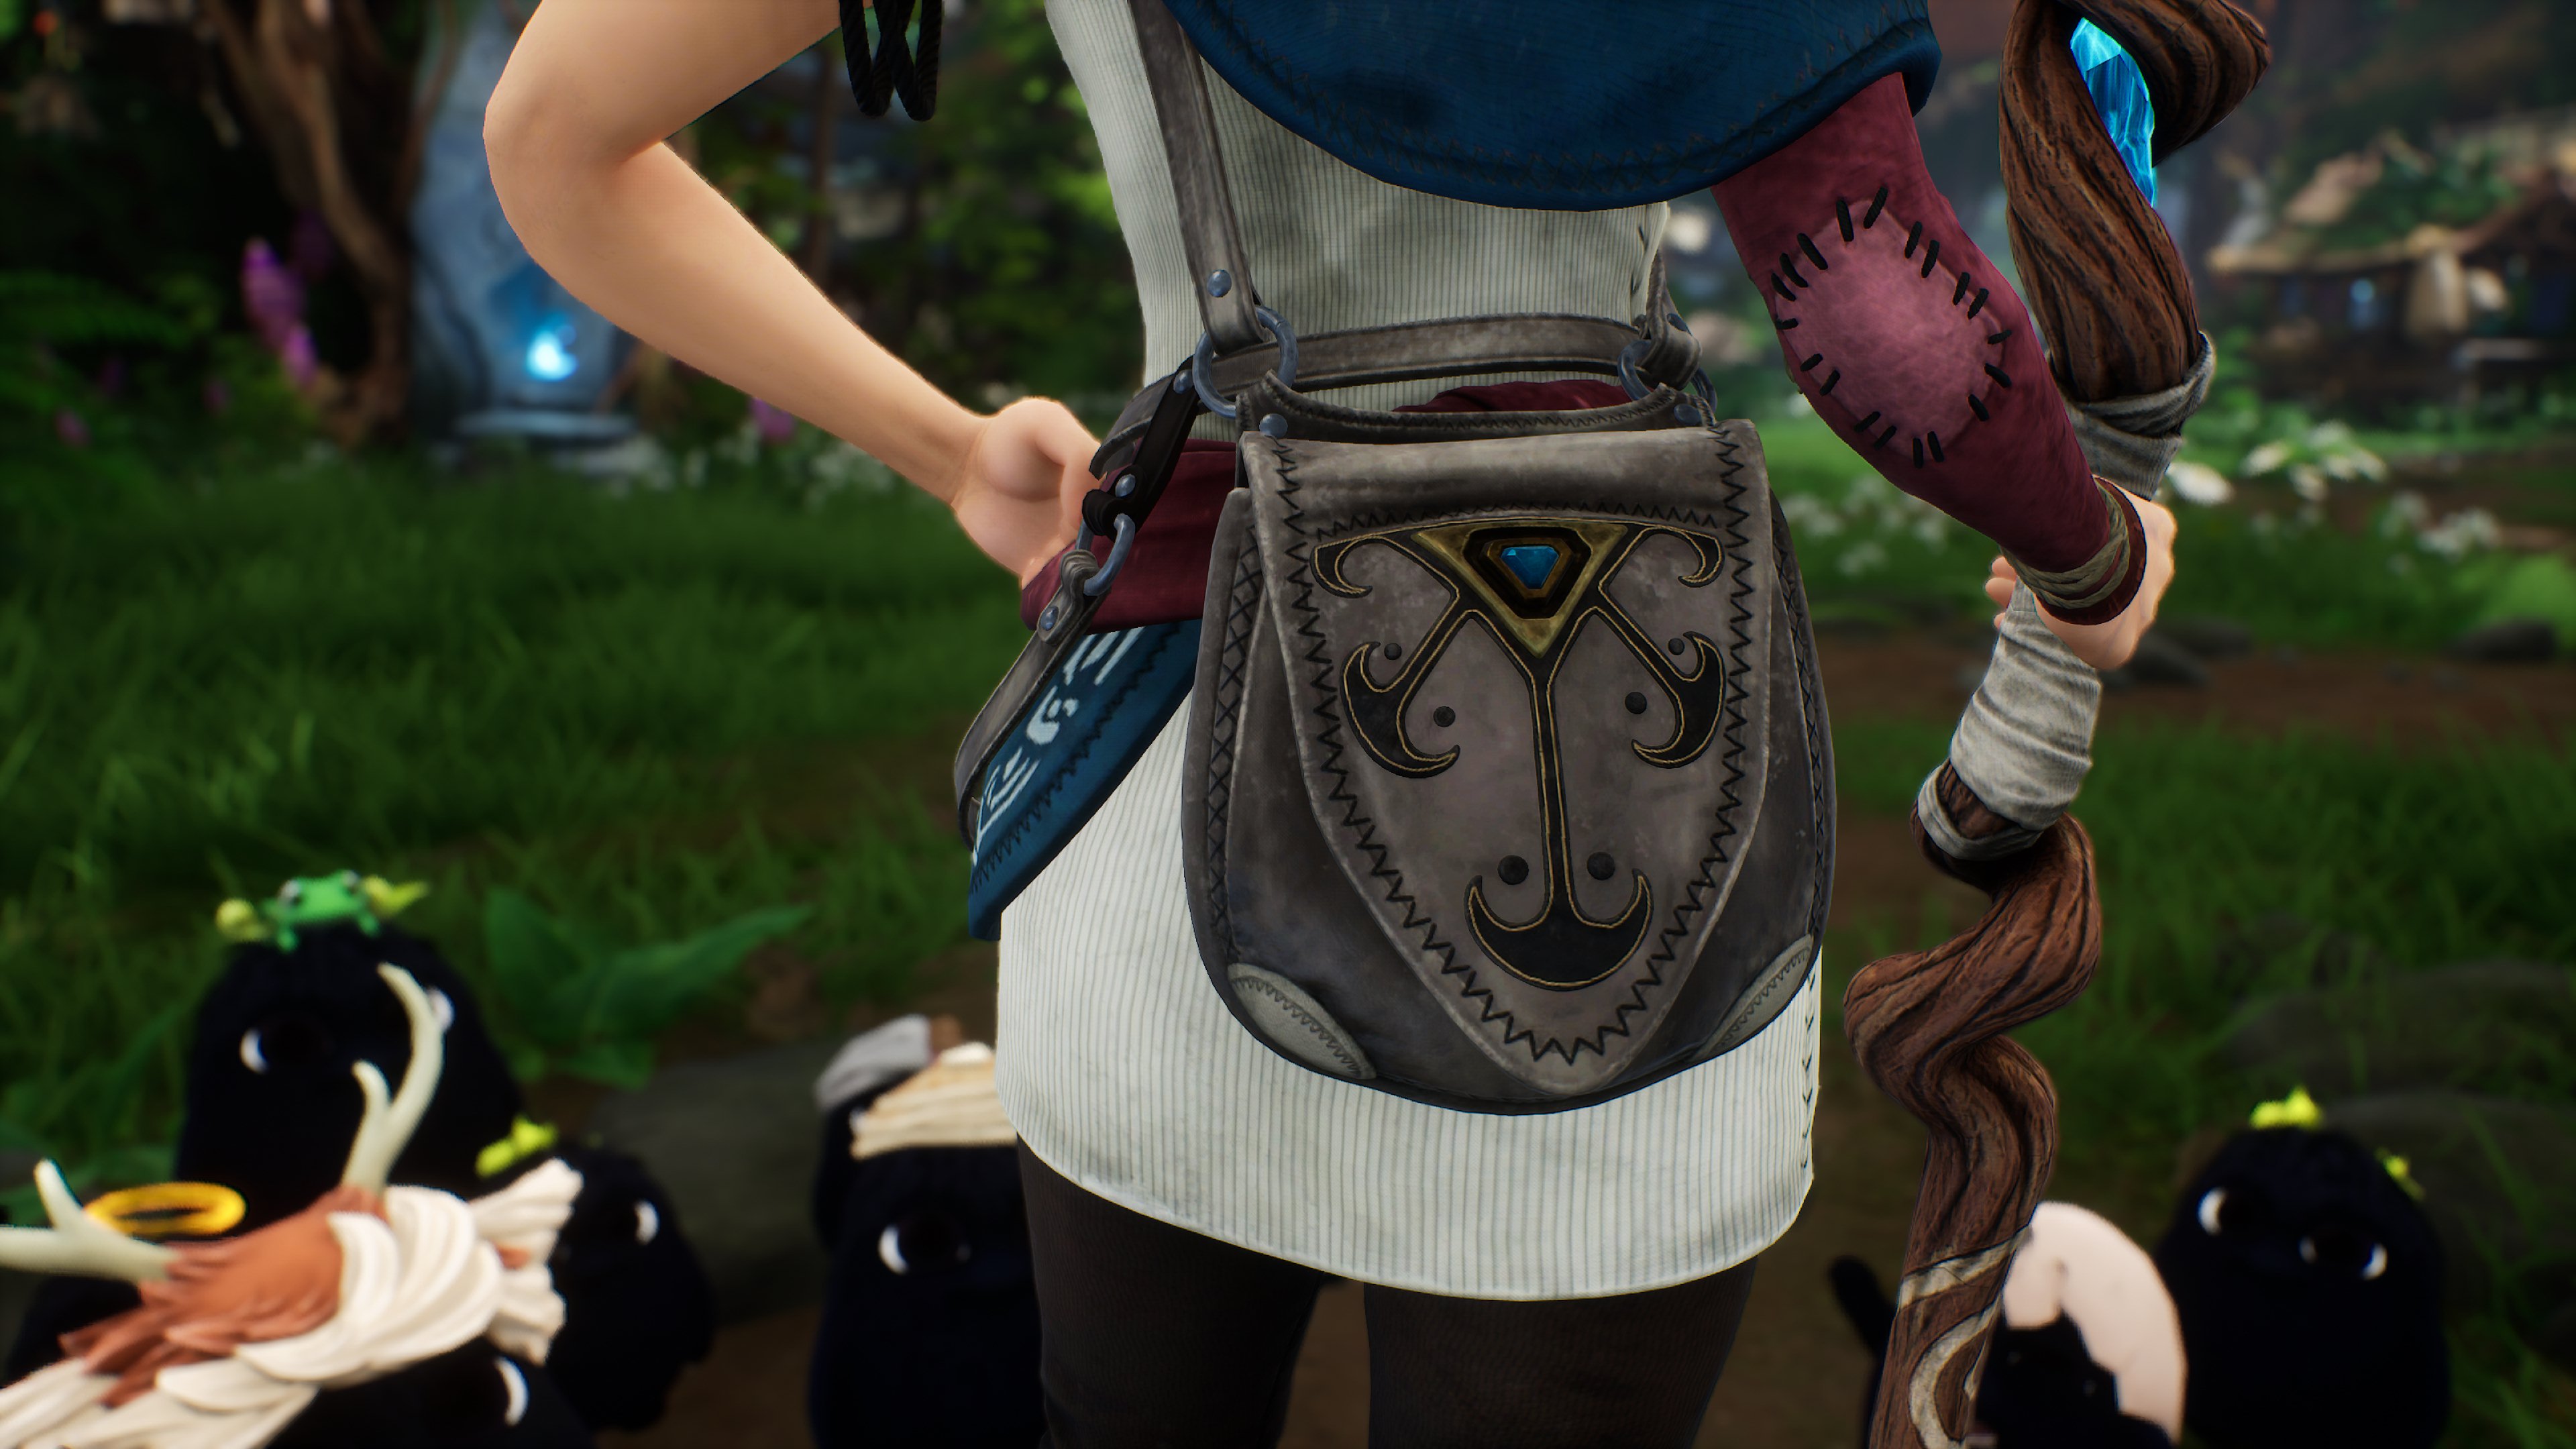
I bought the bag because I just really did not feel like jumping into sewing with leather. Maybe some time in the future, but I didn’t really feel like it for this cosplay. I then realized that I could add the little details on the front flap of the bag with EVA foam, so I set out to patterning it.
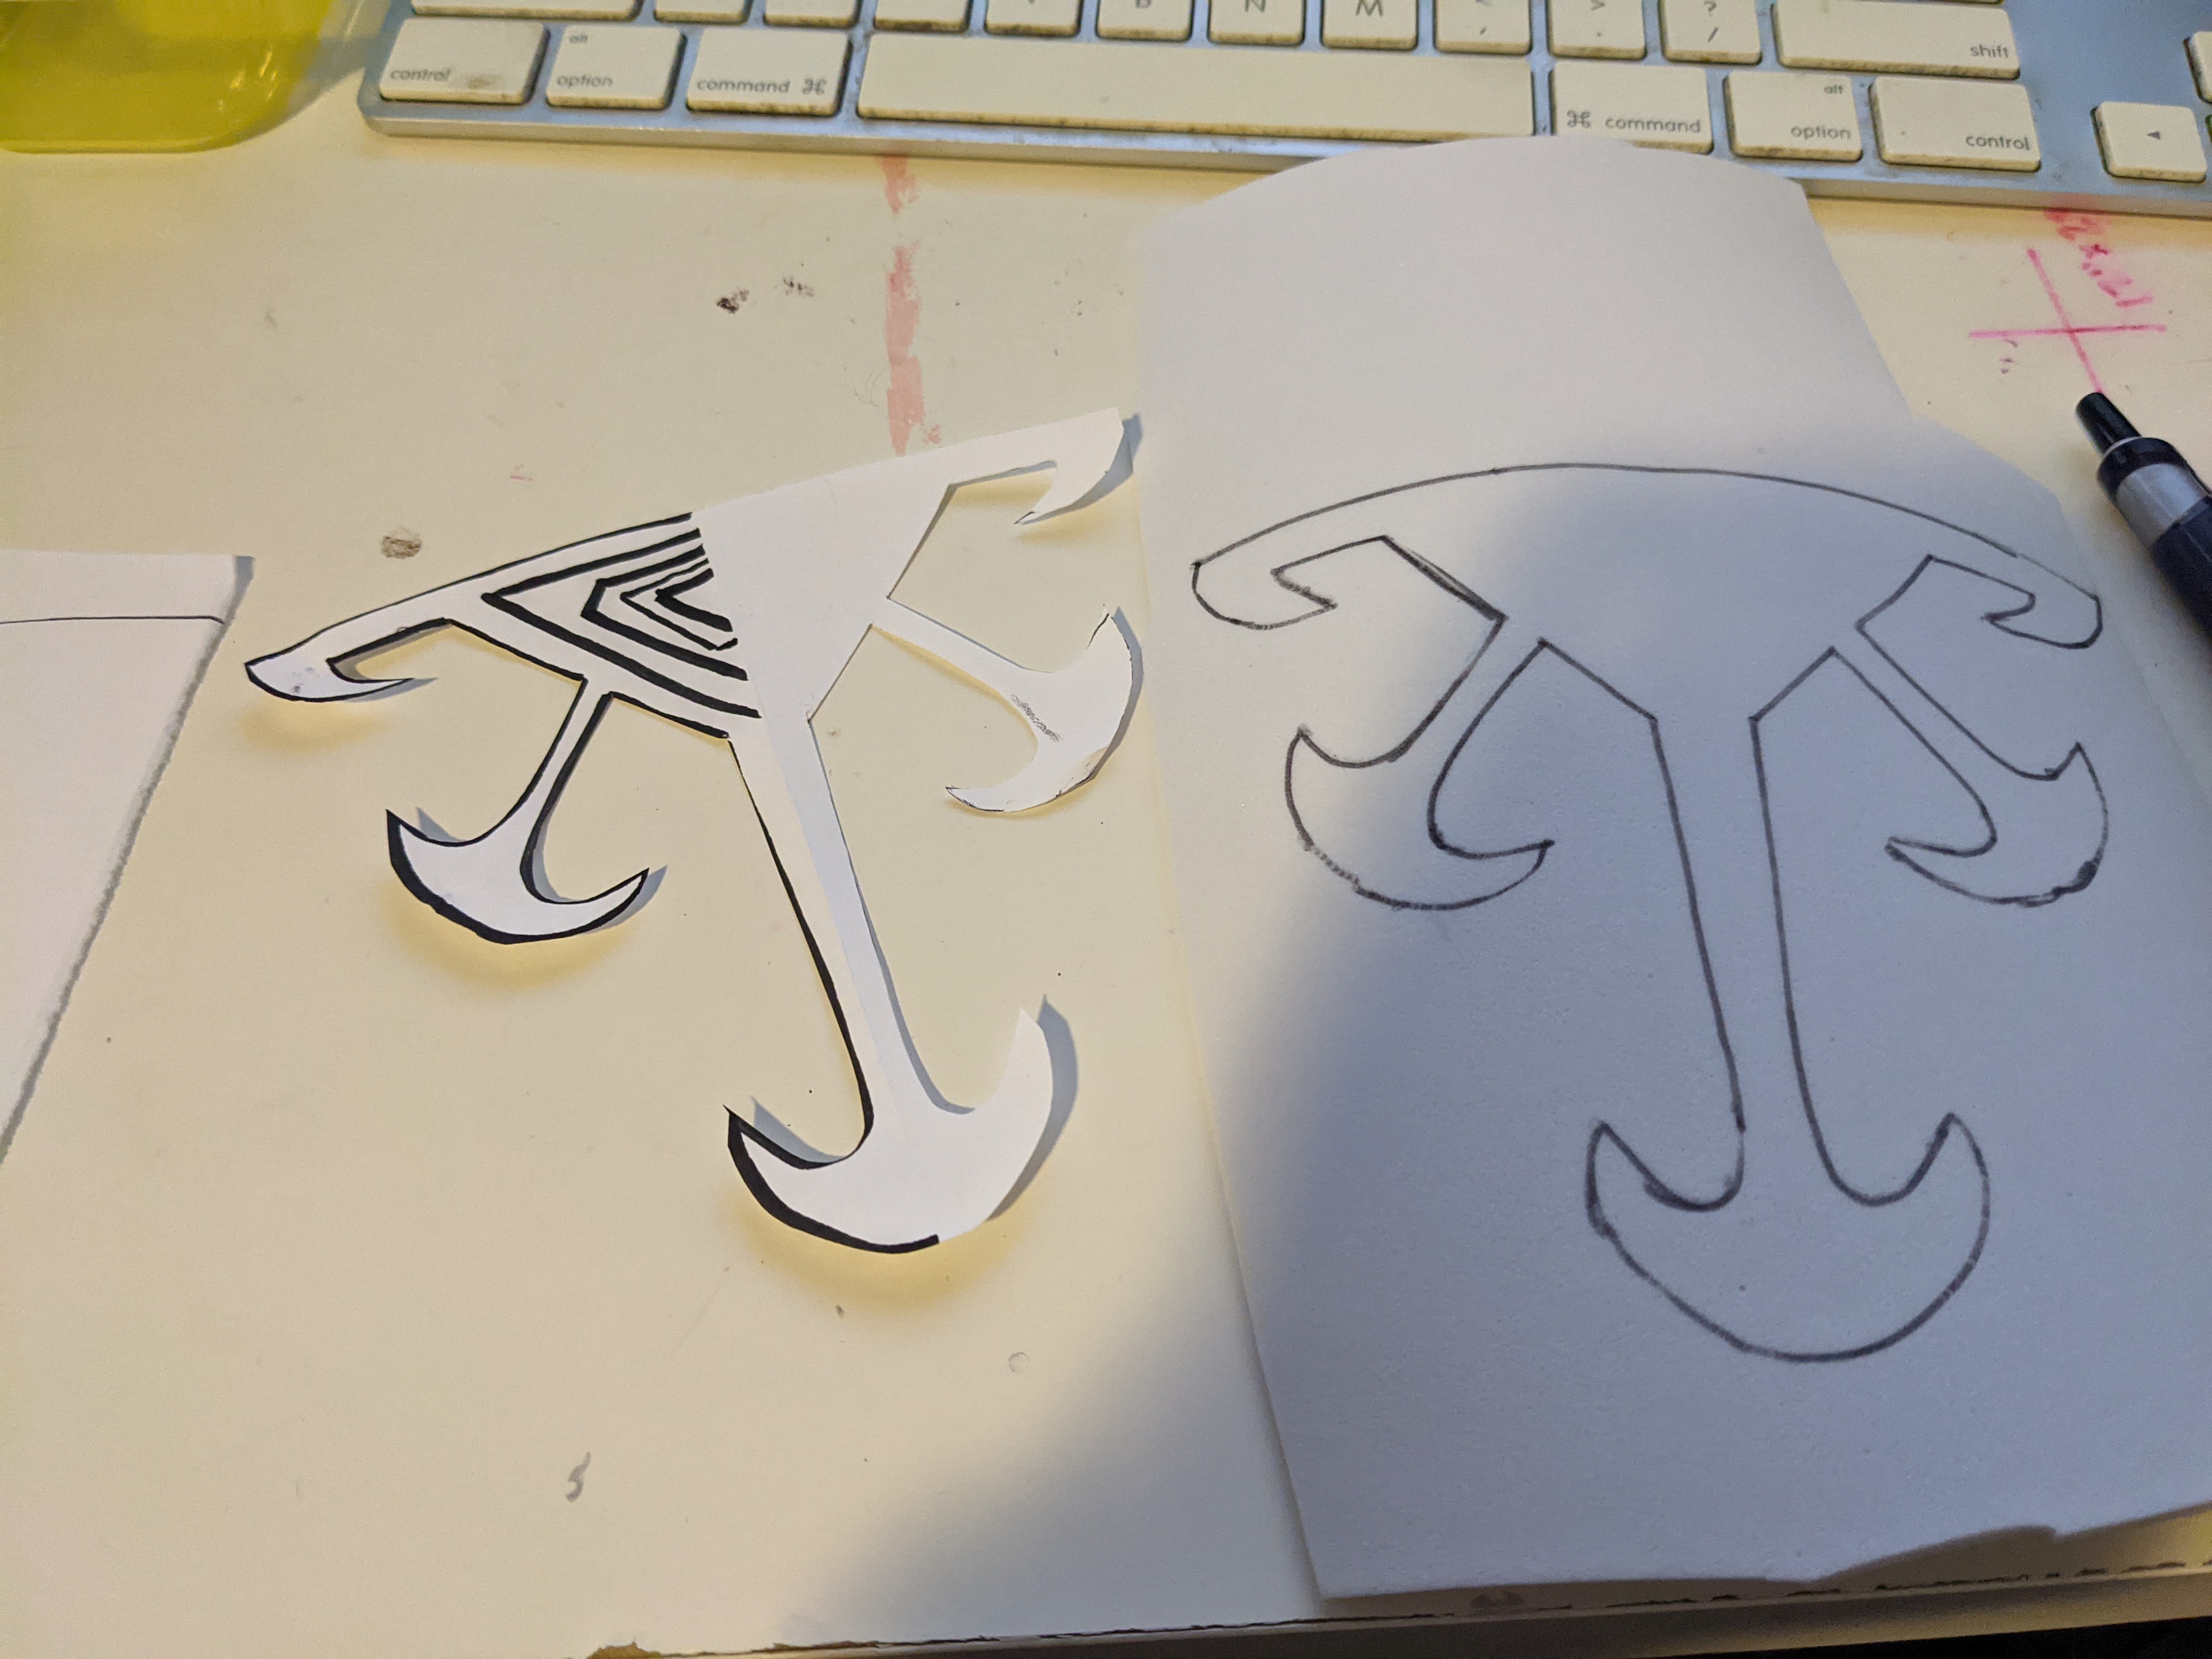
Again with this cosplay, I really didn’t feel like patterning digitally, so I used some printer paper and just traced by hand against my computer screen to it get. I only traced on side and then copied that pattern over to a folded piece of paper for symmetry.
After transferring the pattern to a second piece of paper (so that the original can be kept just in case), I transferred it to 2mm EVA foam (and 4mm EVA foam for one of the middle pieces). I then cut it all out.


Once all the pieces were cut out, I attached them to the cardboard with scotch tape so they wouldn’t shift around during painting. I painted the big piece and the 6 small circle black, the big triangle gold, the medium center piece bronze and the smallest piece blue. All with acrylic paint and paint brushes.
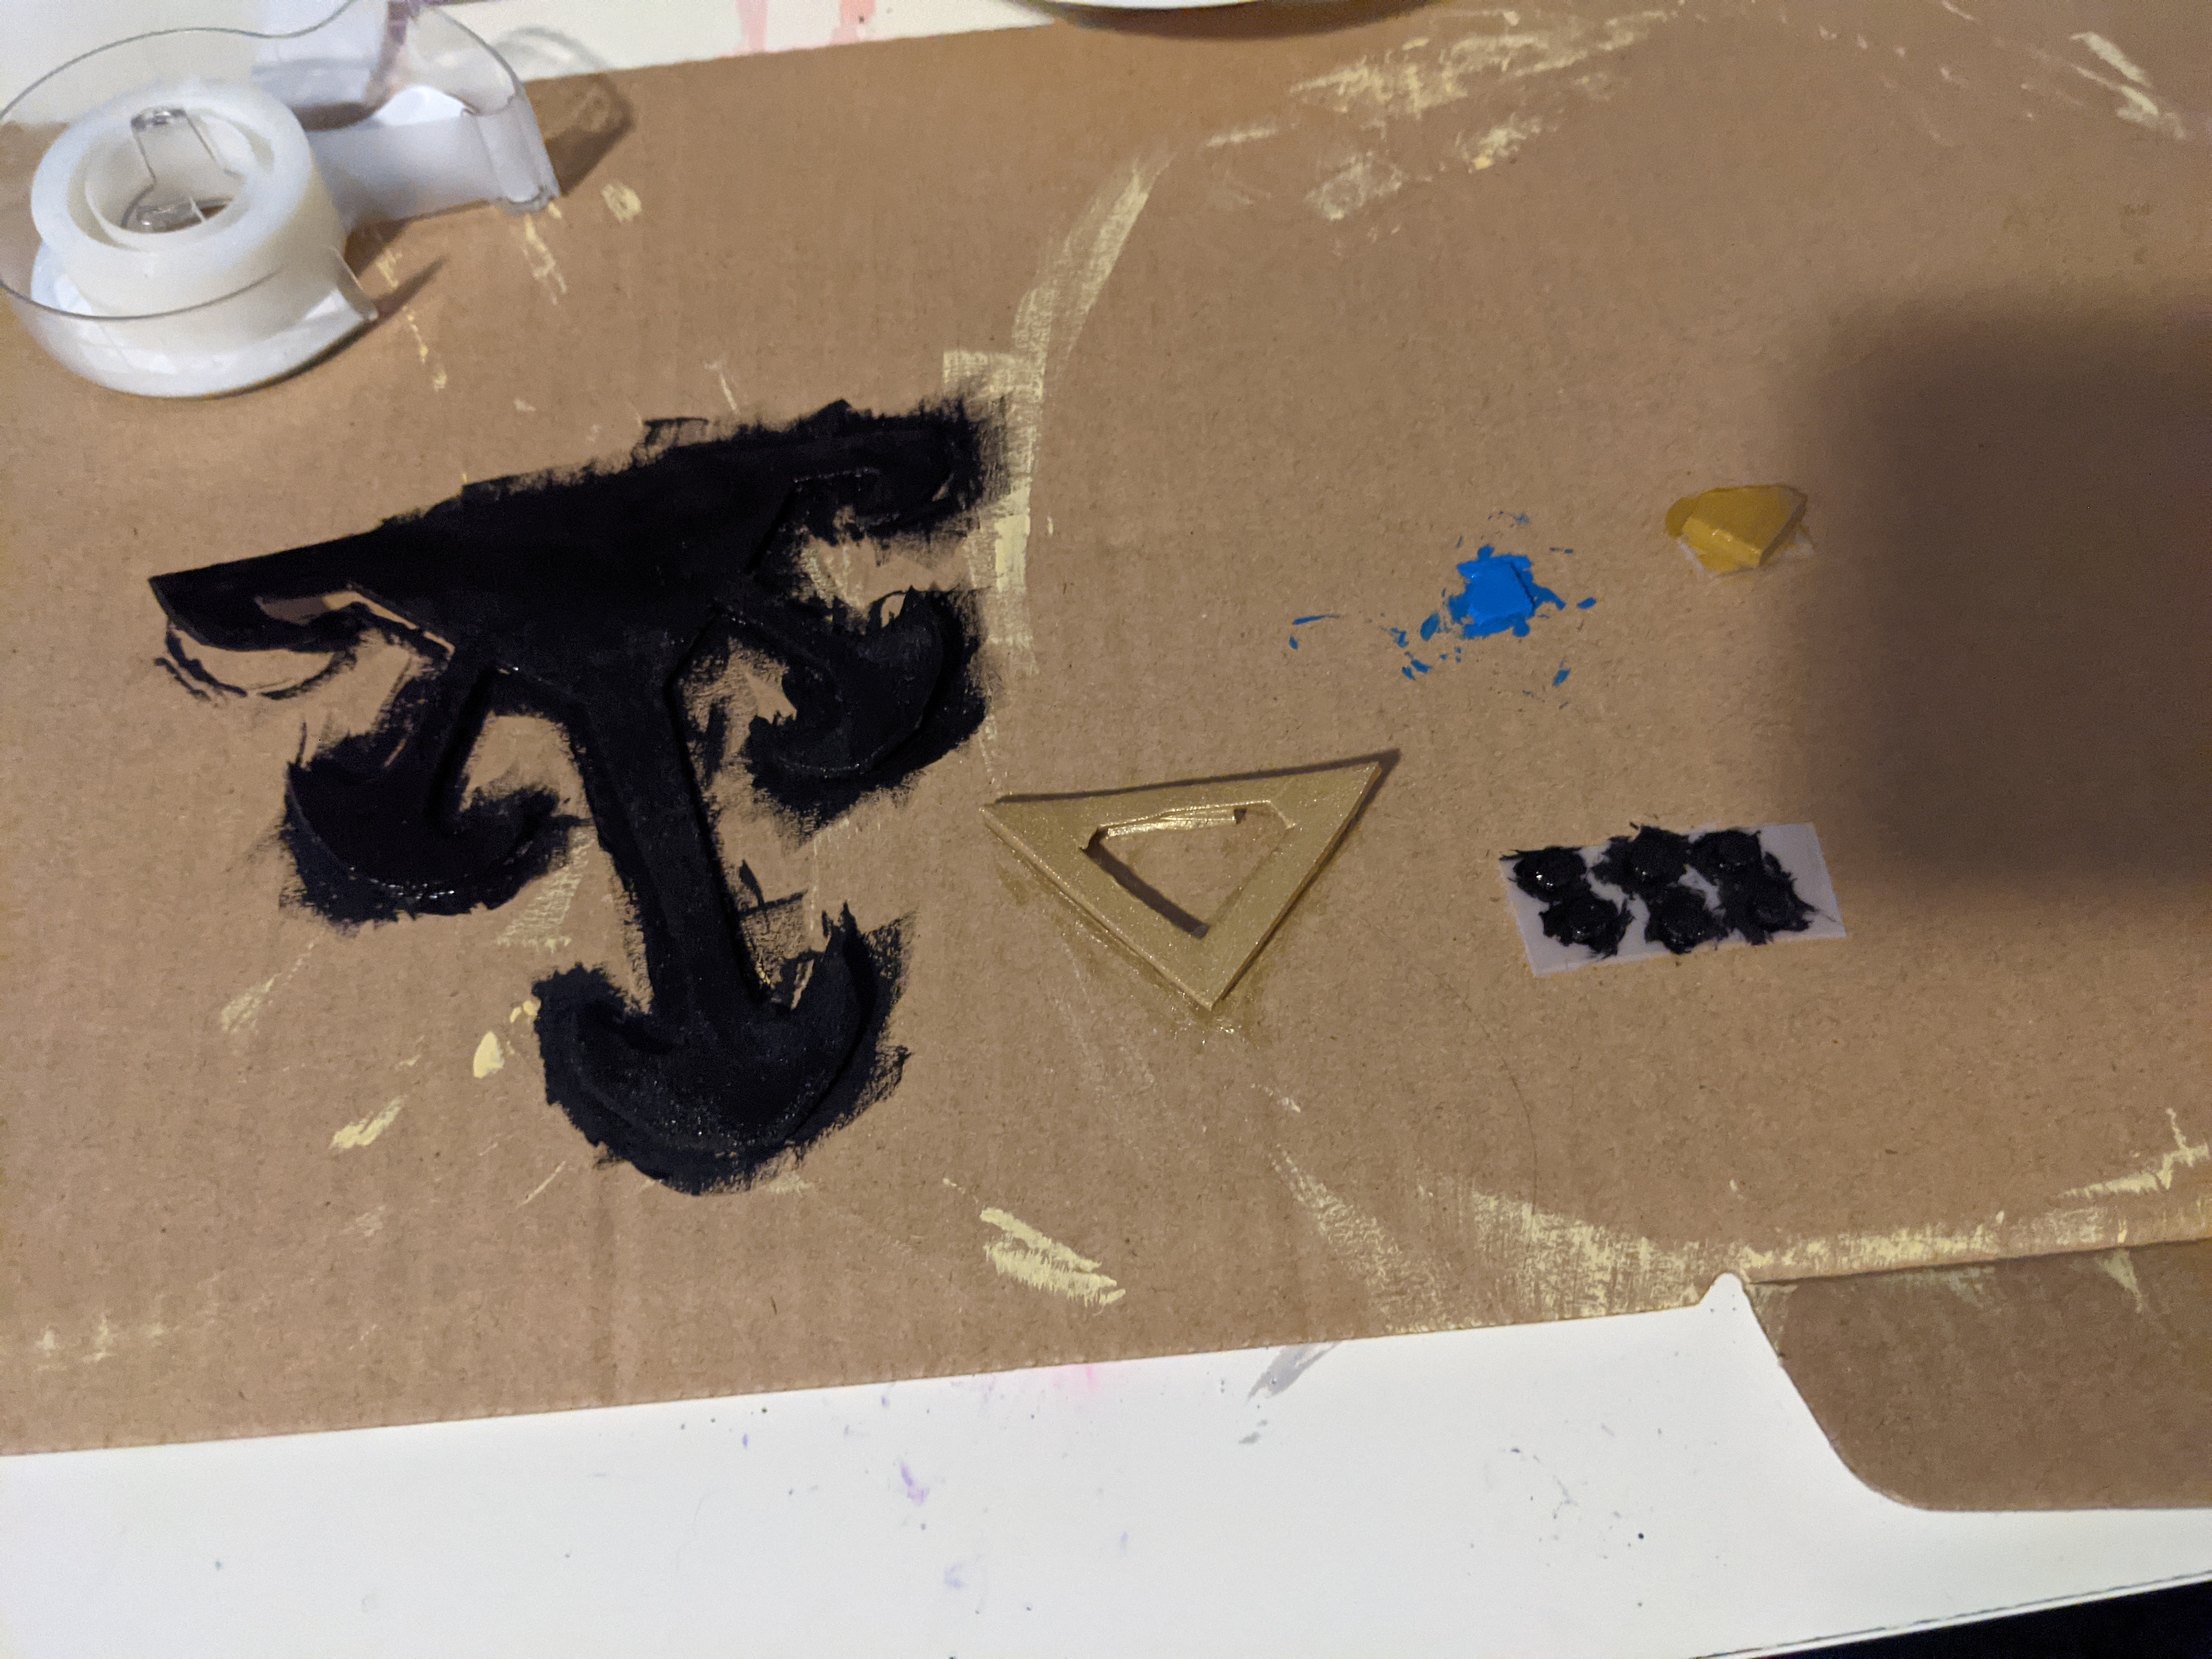
Then, using a gold sharpie paint pen, I drew the outlines on the big black piece. Once all the pieces were dry, I sealed them with a clear gloss spray paint sealer. I then glued the pieces together using contact cement.


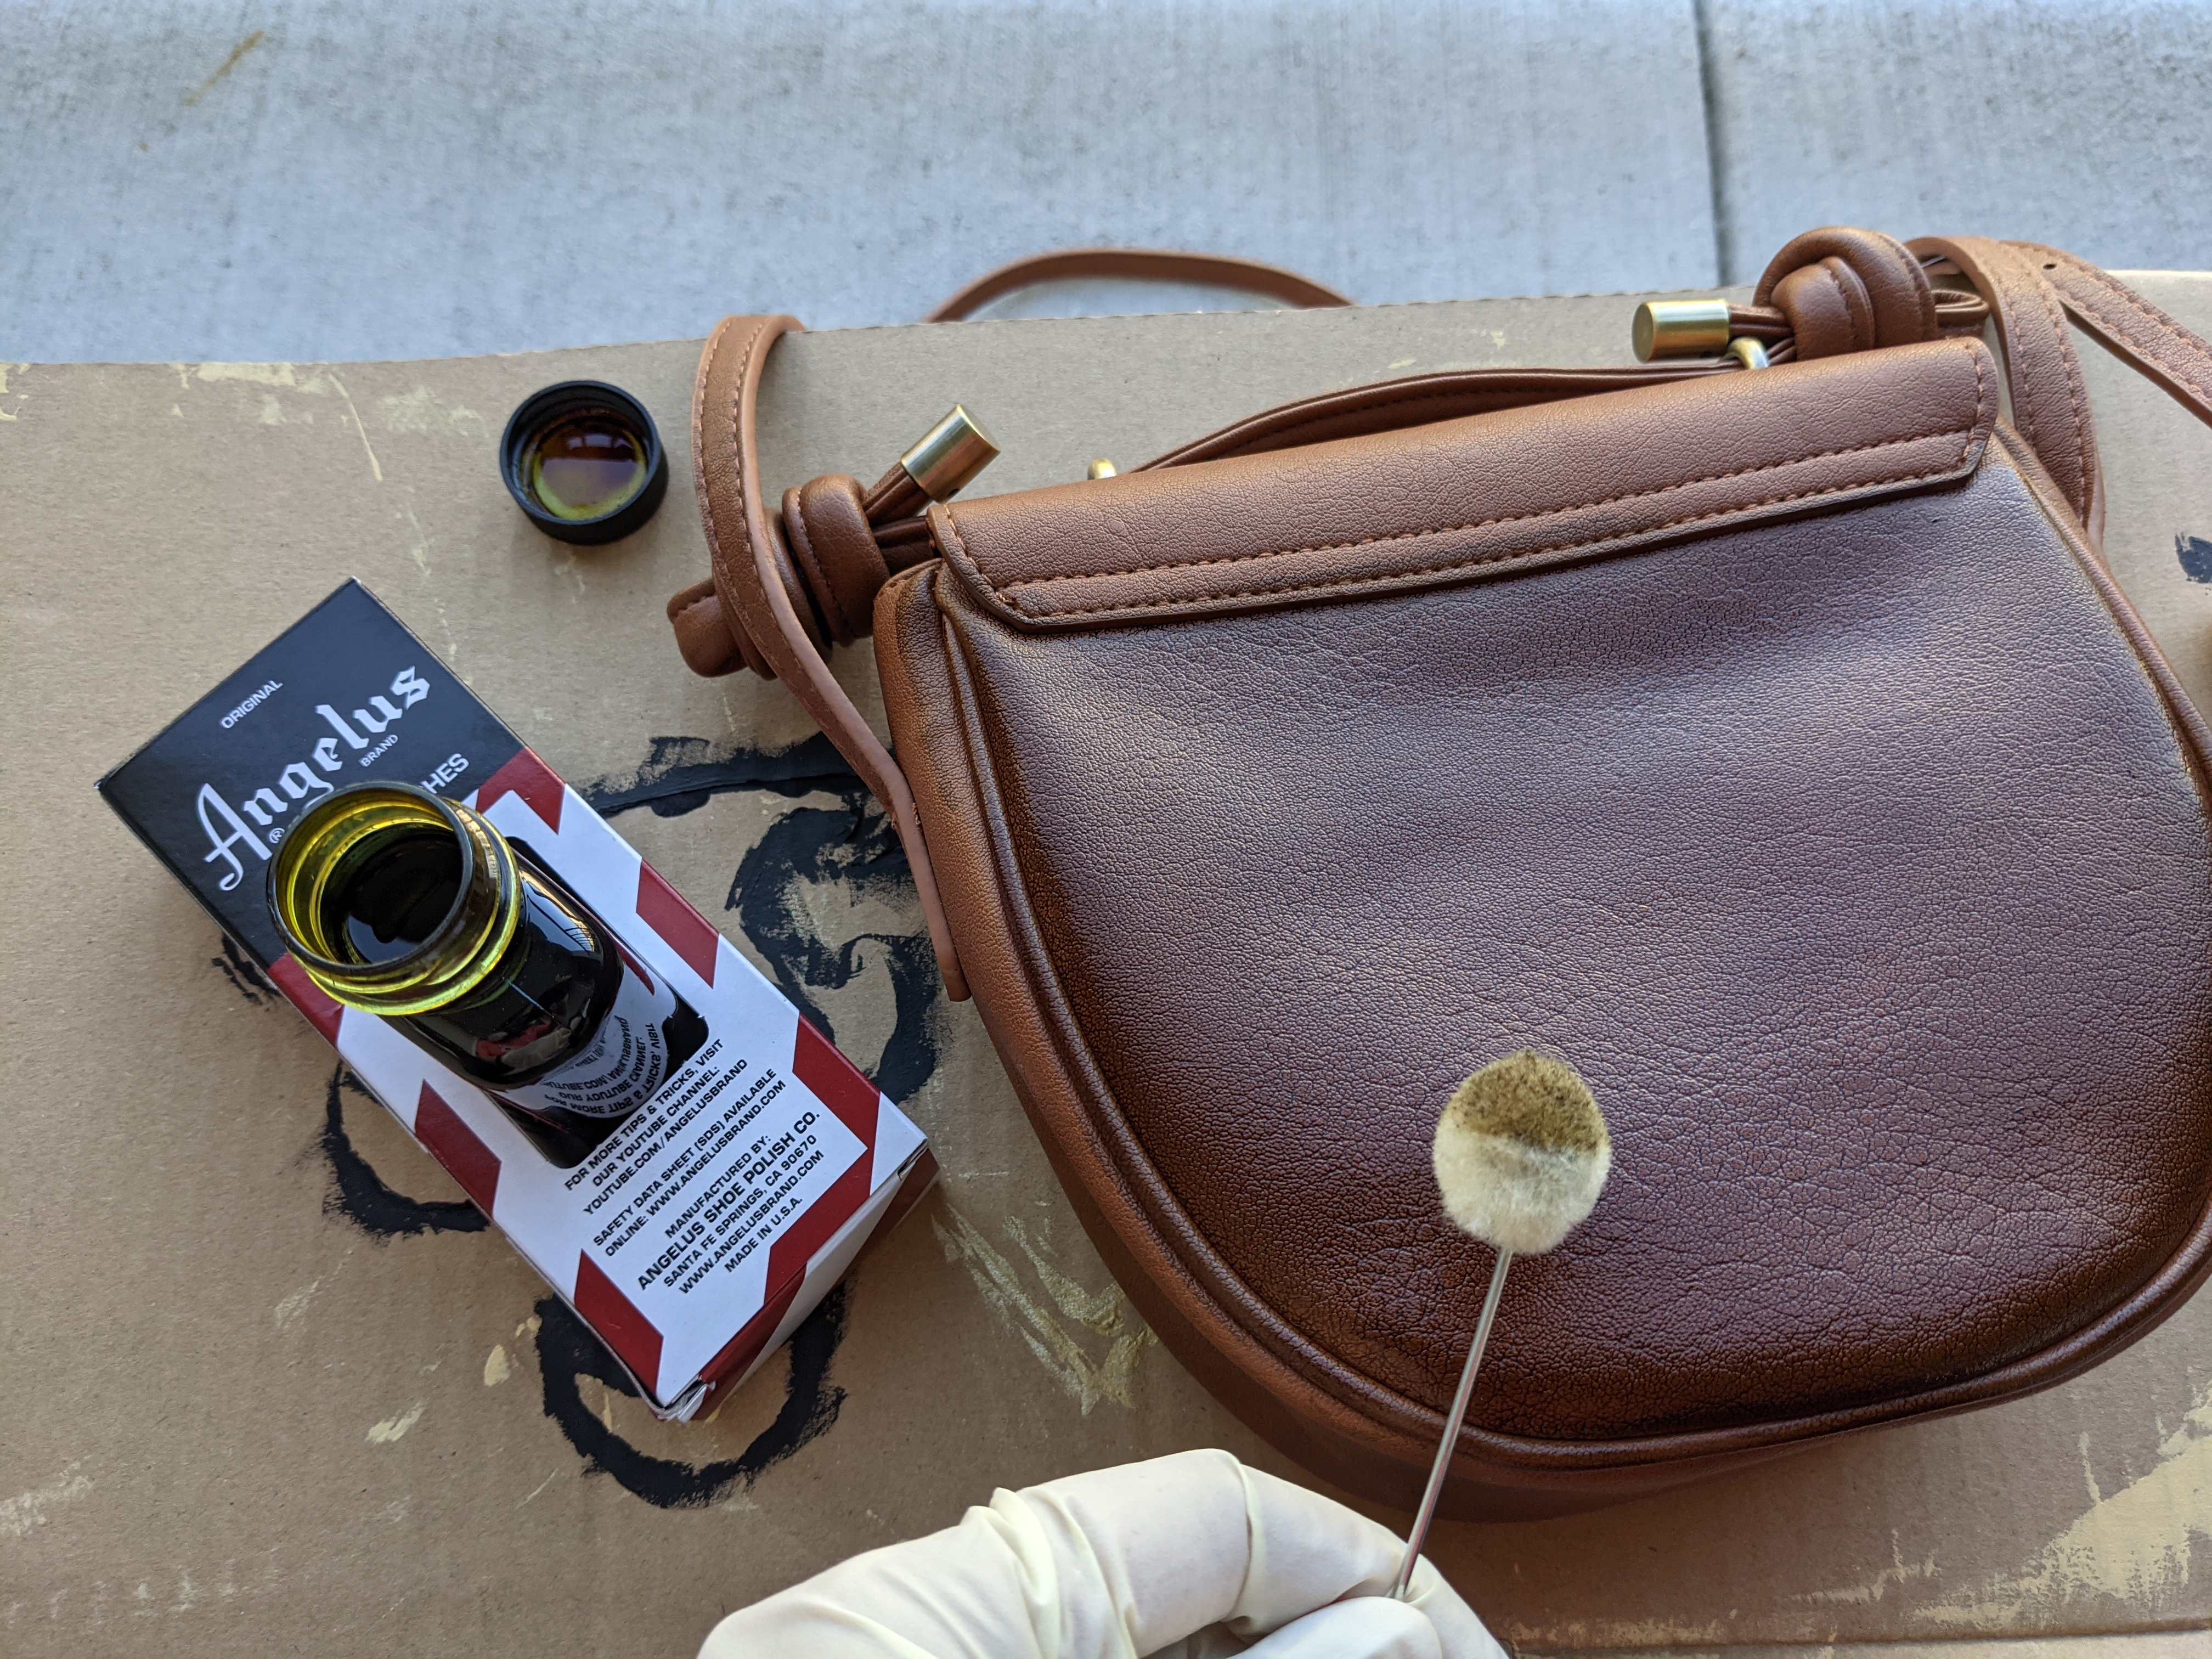
Once I got the leather dye in the mail, I used wool daubers and gloves to dye the entire bag.

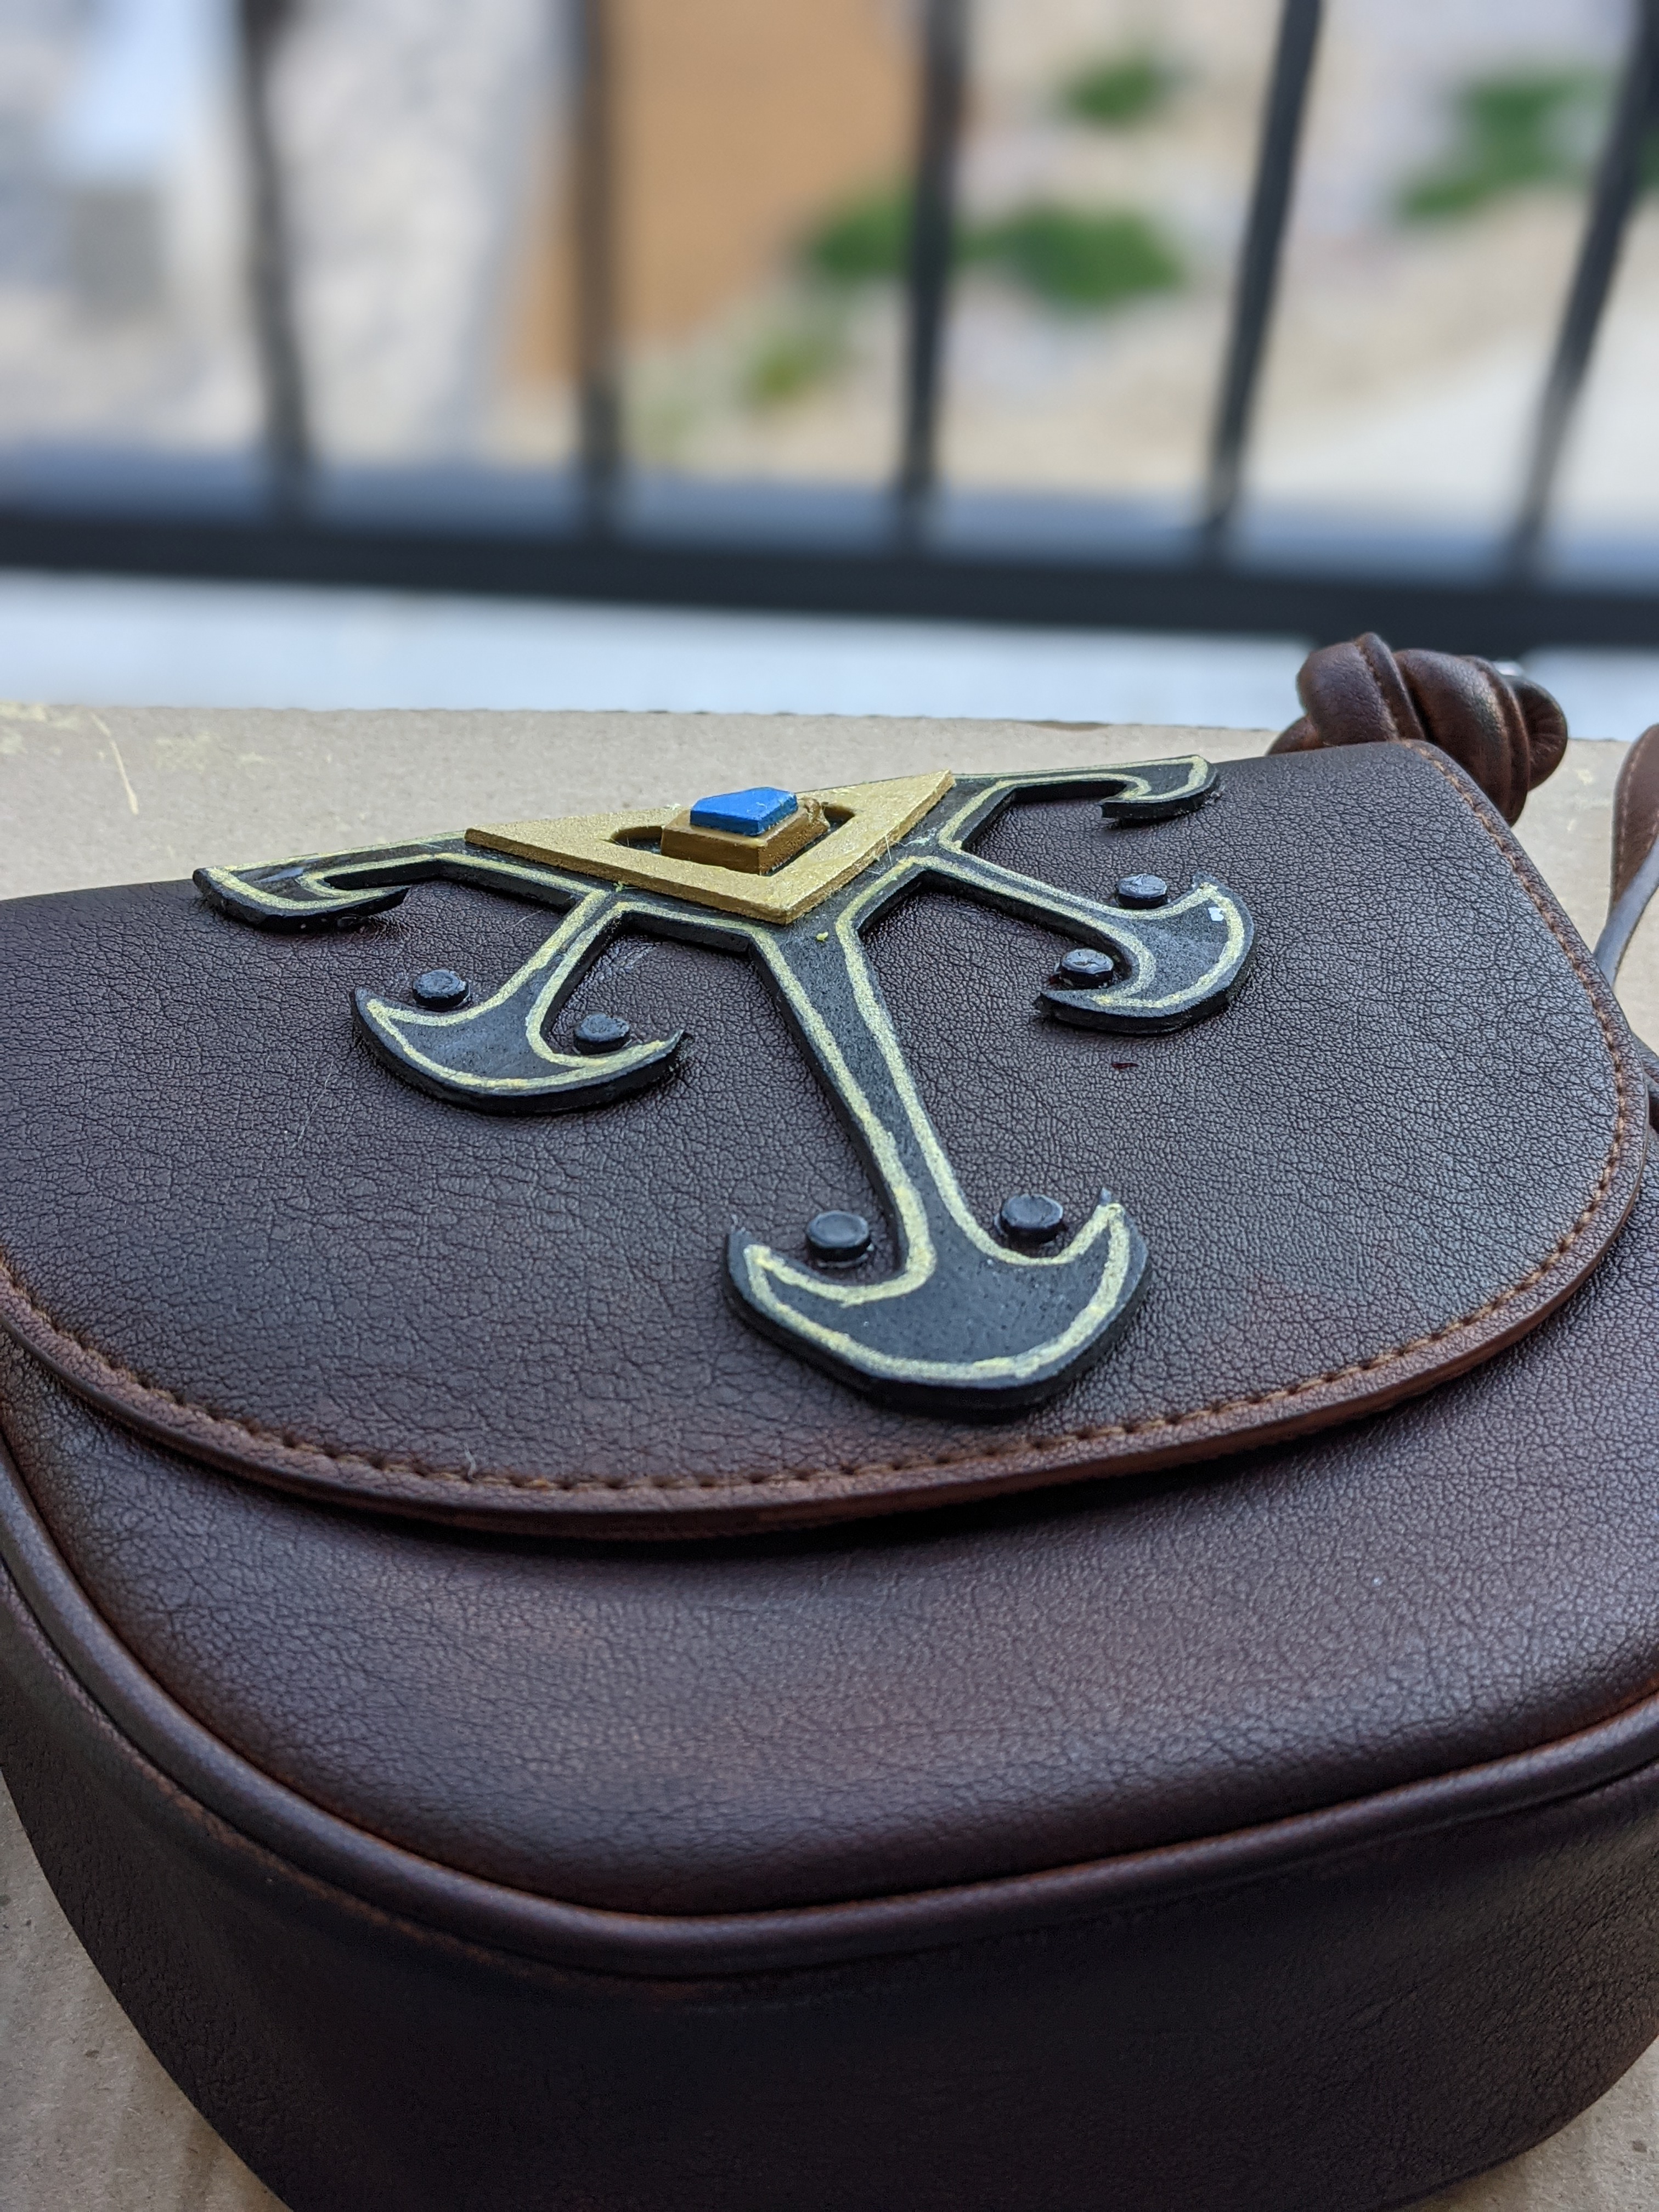
After letting the dye dry overnight, I used contact cement to glue the big foam piece on, using a Q-tip for more accuracy application. Then, using superglue, I put on the 6 little black circles. With that, the bag was done!

Leather Belt & Buckle
Buckle
First, I made the buckle. I opted to go digital with this pattern this time, tracing it in Adobe Illustrator. Then, I printed it out and used the pattern to cut out pieces of 2mm EVA foam.
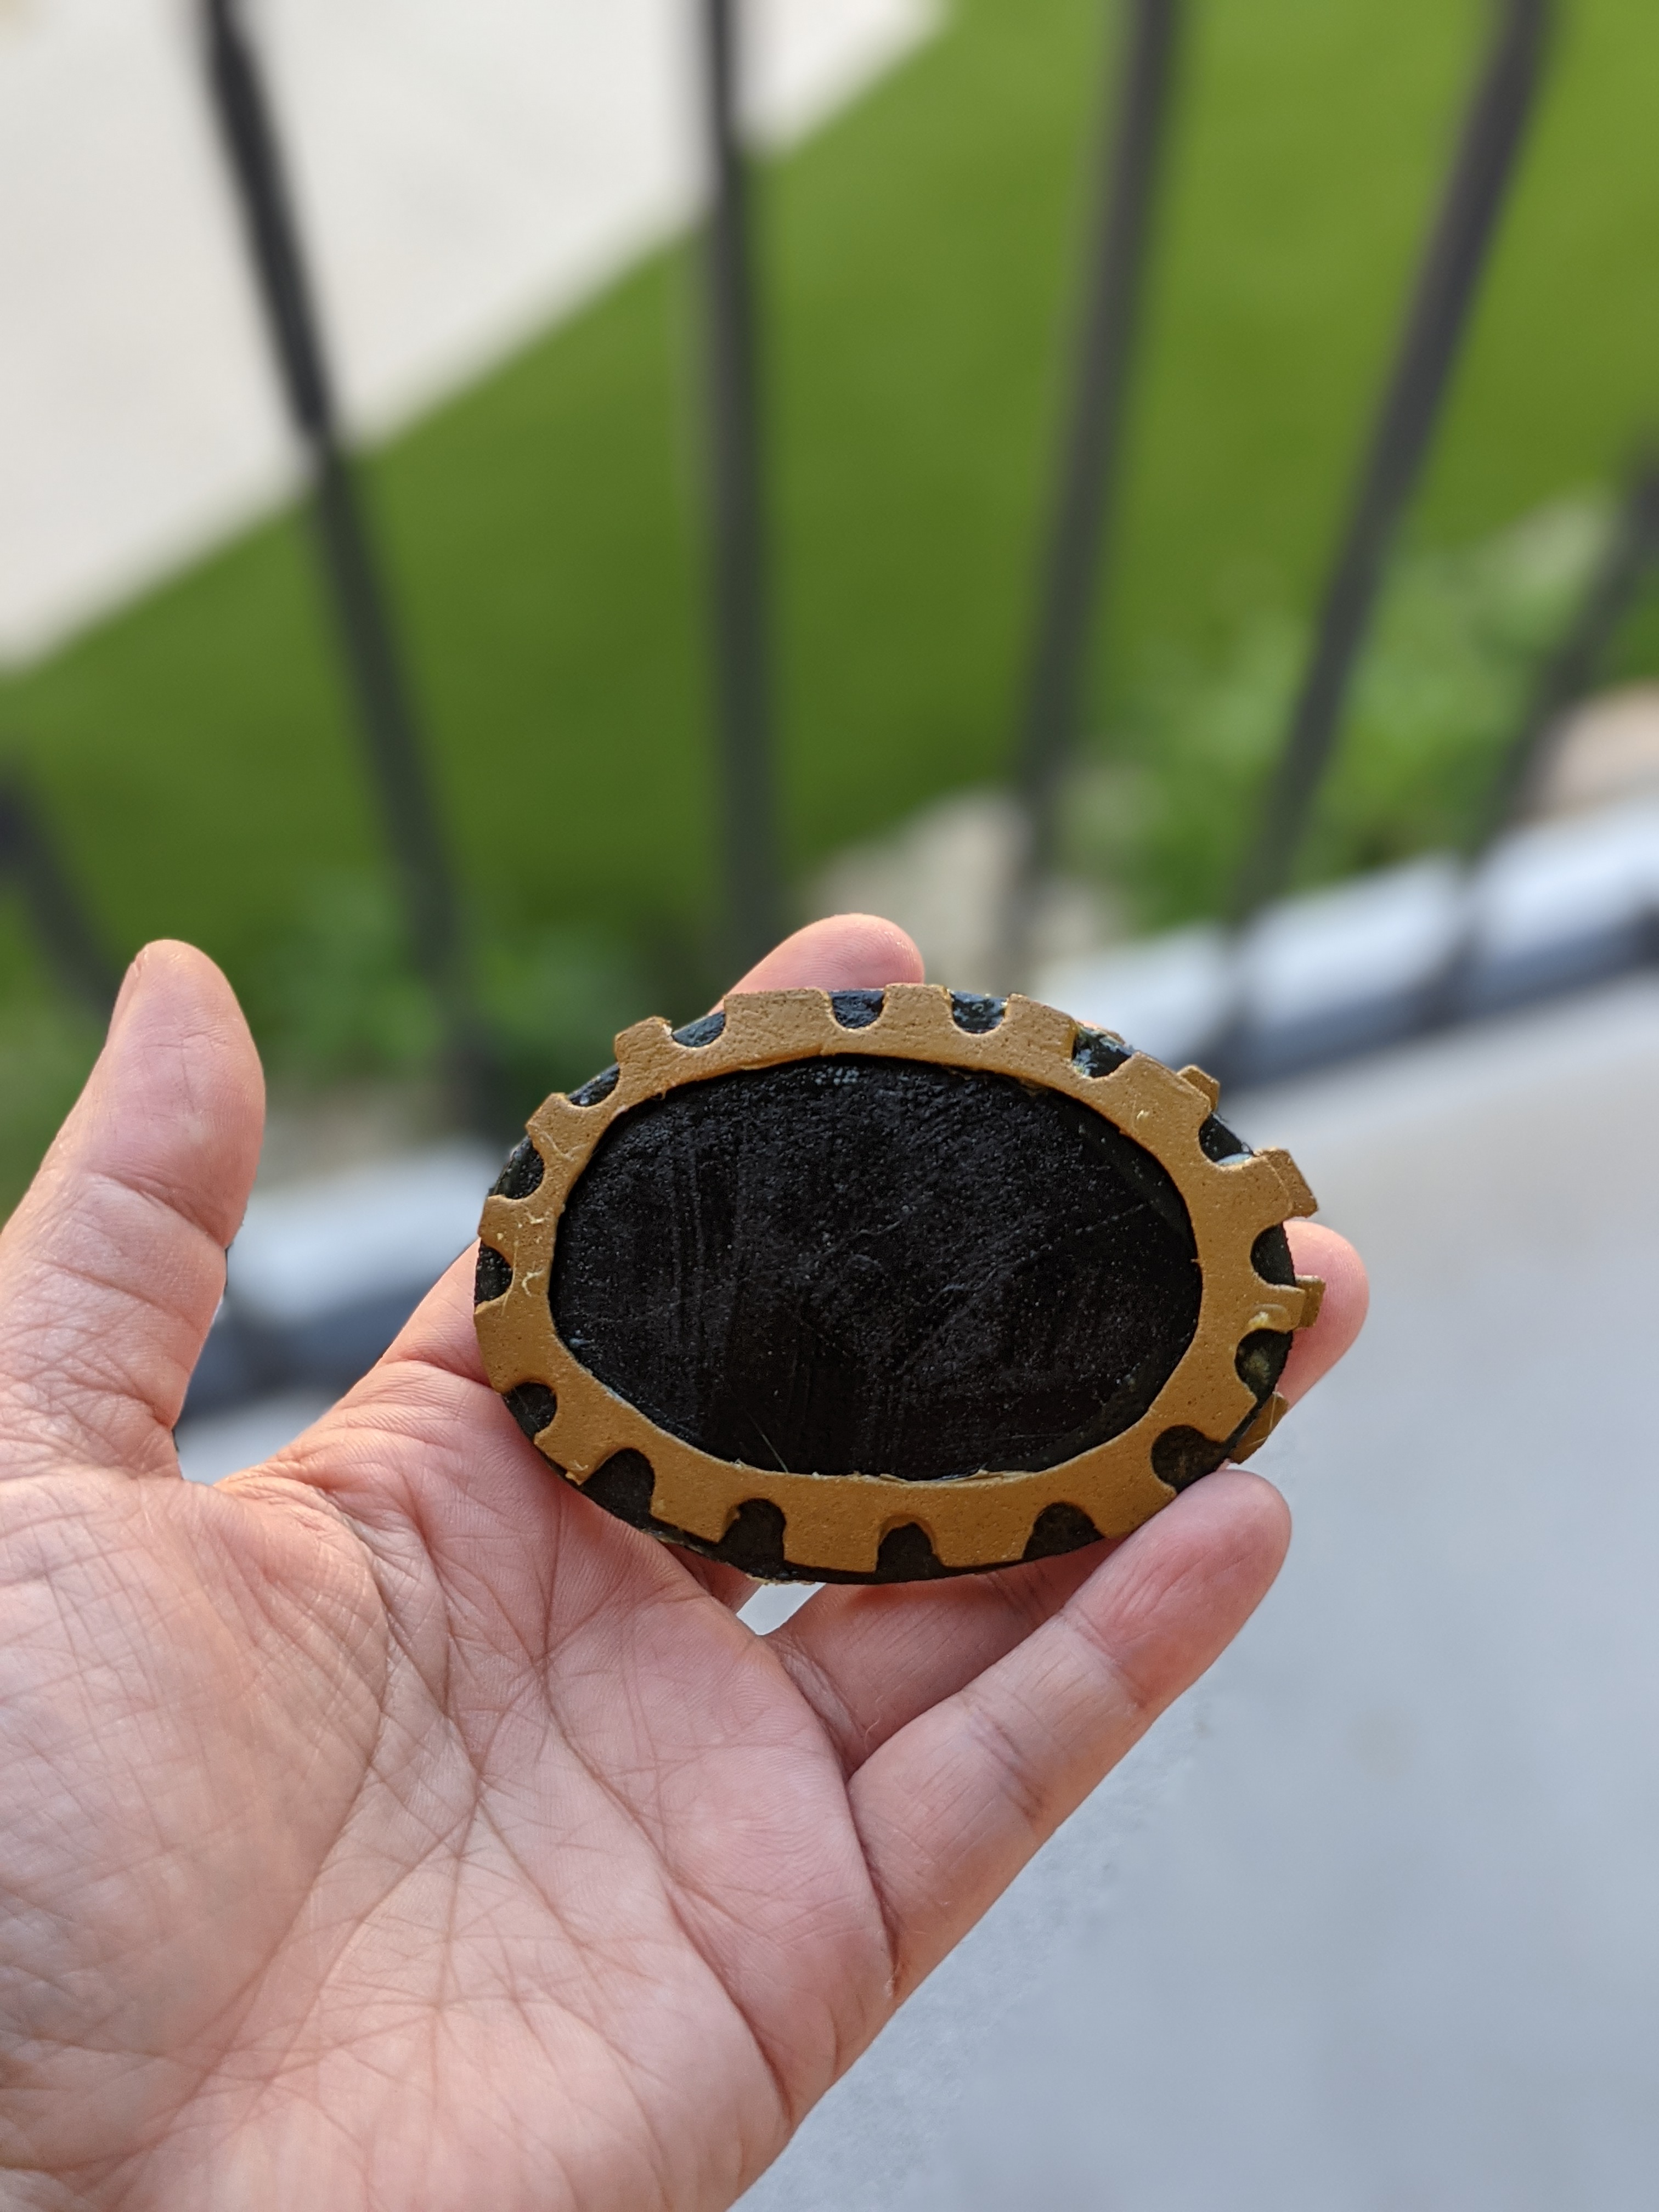
For the gear edges, I actually used a hole puncher to punch round holes around the edge of the piece and then cut the extra ends so that it looked like a gear.


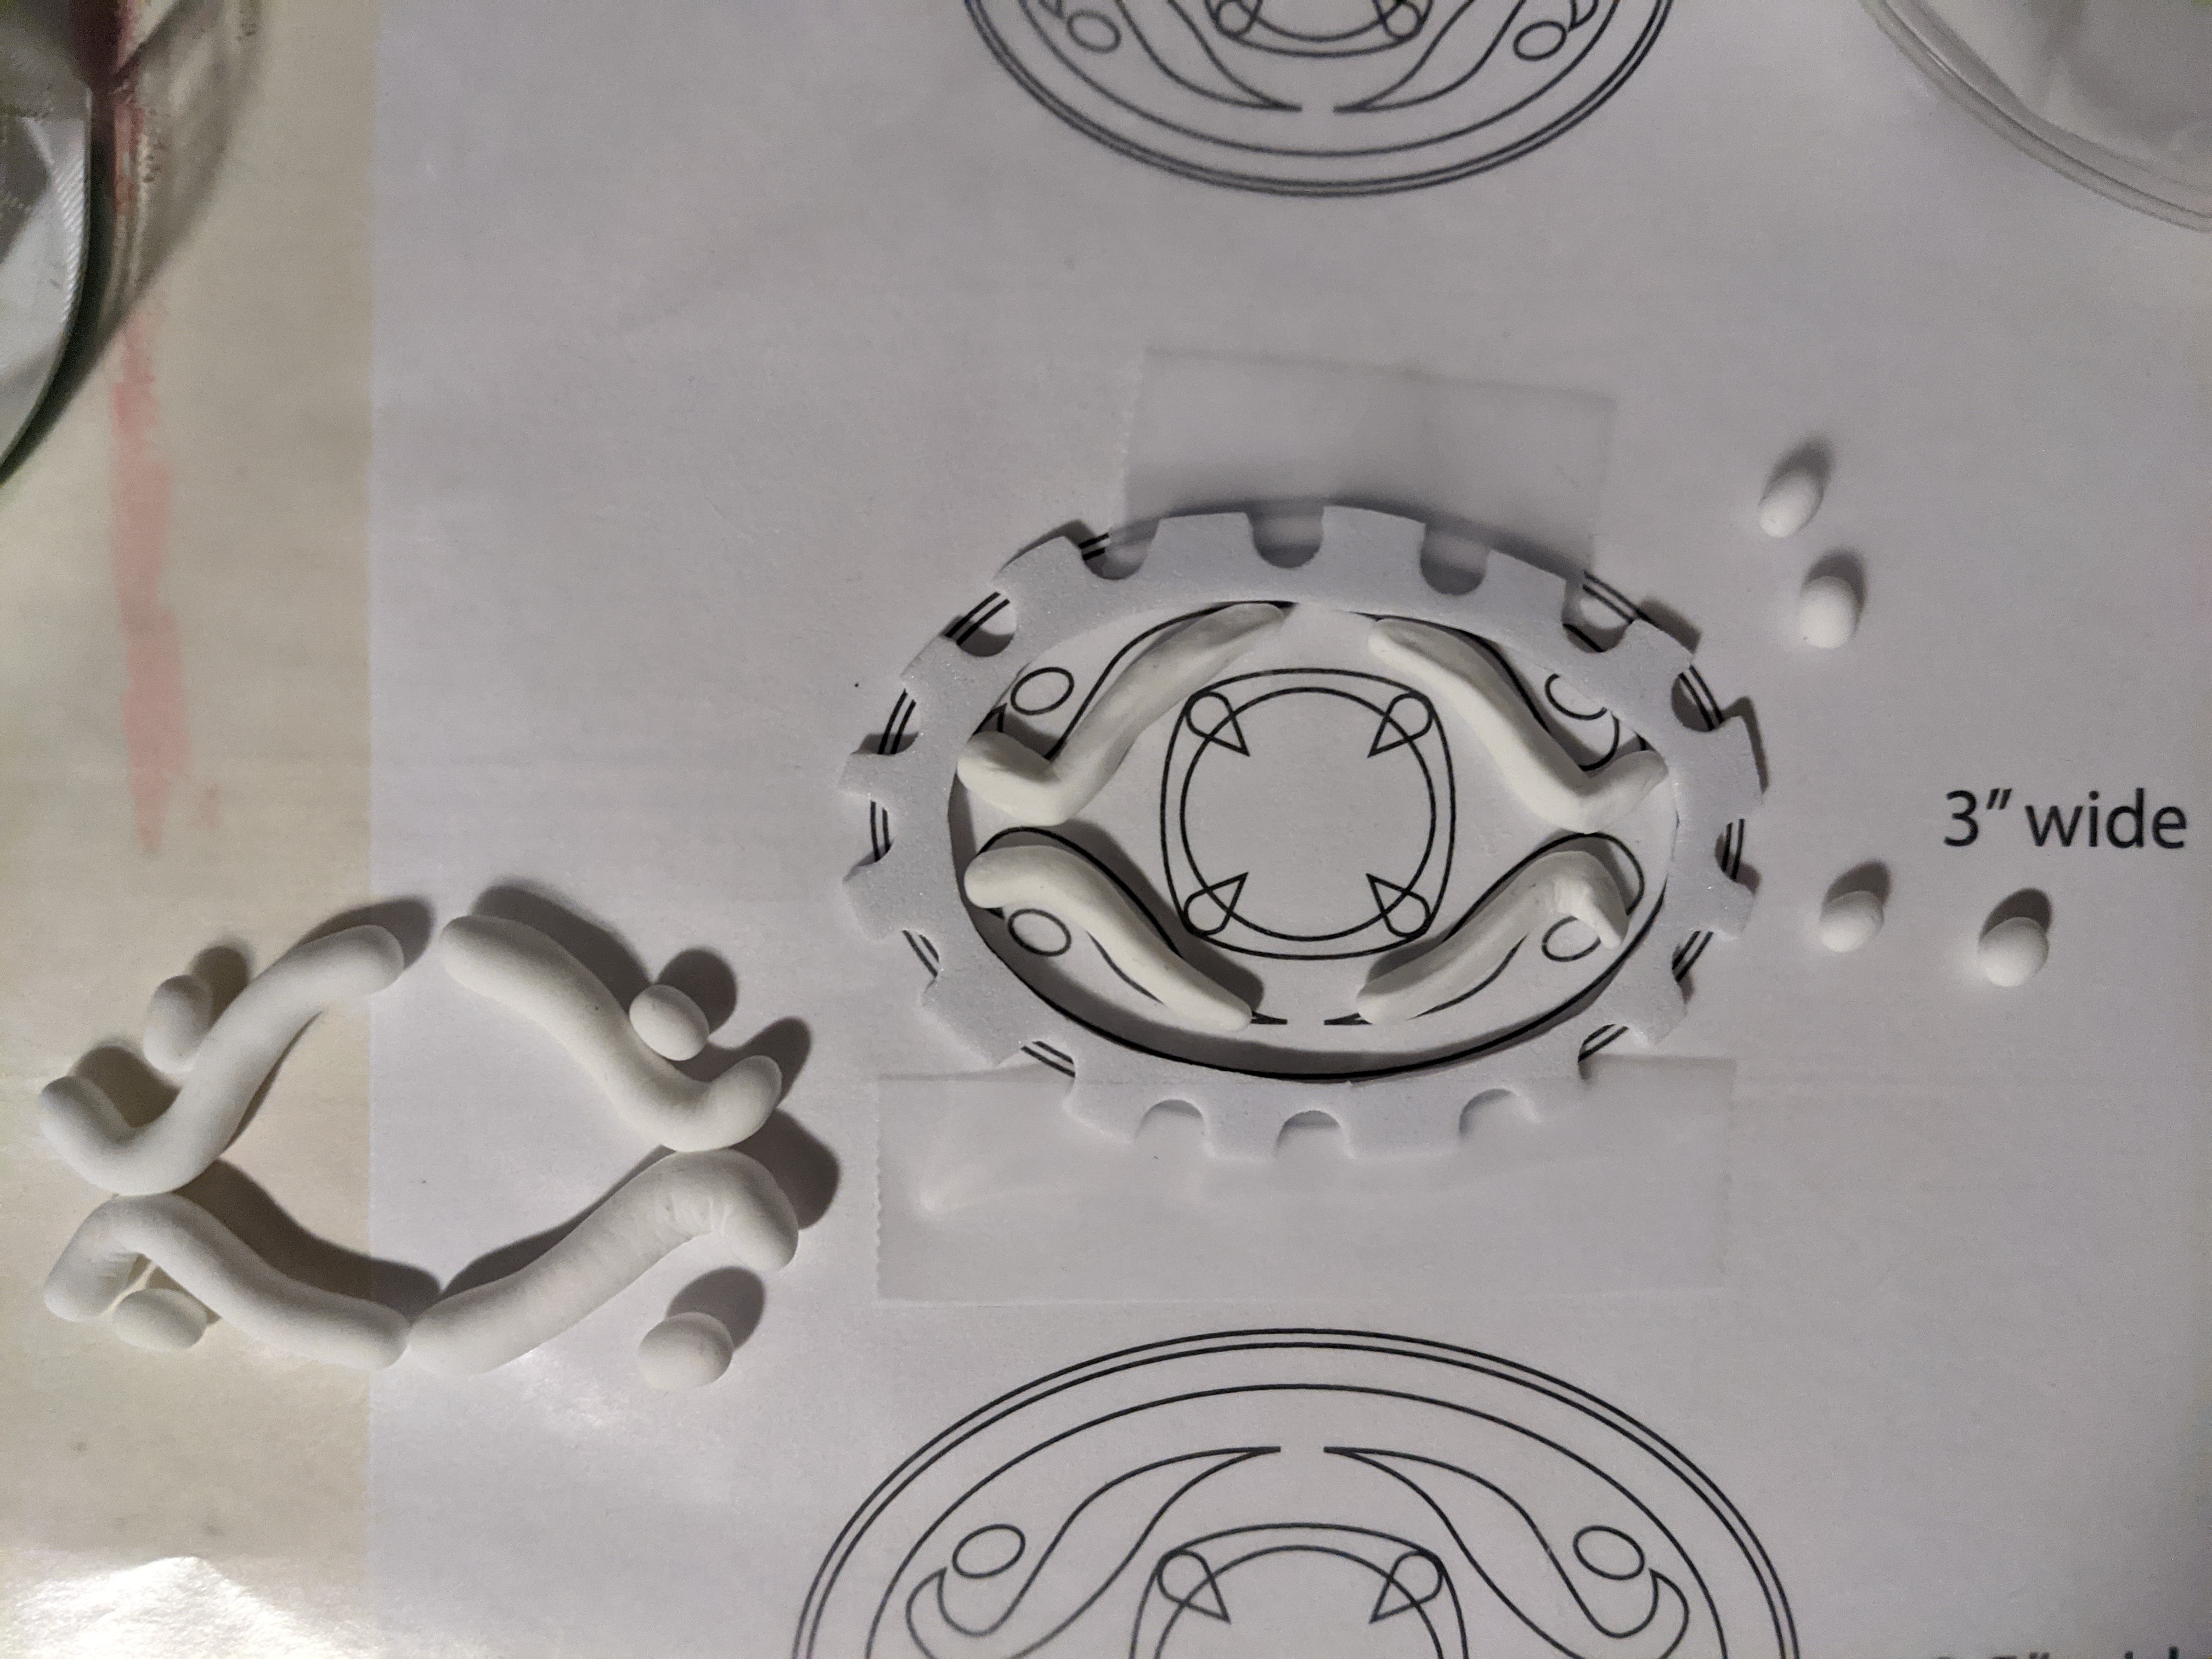
For the smaller inside details, I sculpted foam clay. I did this buy taping my pattern to my table and then putting a sheet of wax paper on top of that. Then, I sculpted over the pattern to get the shapes. I ended up with 4 very tiny oval shapes and 4 curvy shapes. It took two tries because the first one was too big and didn’t fit into the gear piece I had already cut out.
Then, once the foam clay finished curing (which did not take long because they were so small), I painted them. I painted all the pieces bronze with the exception of the one oval-shaped EVA foam, which I painted black.

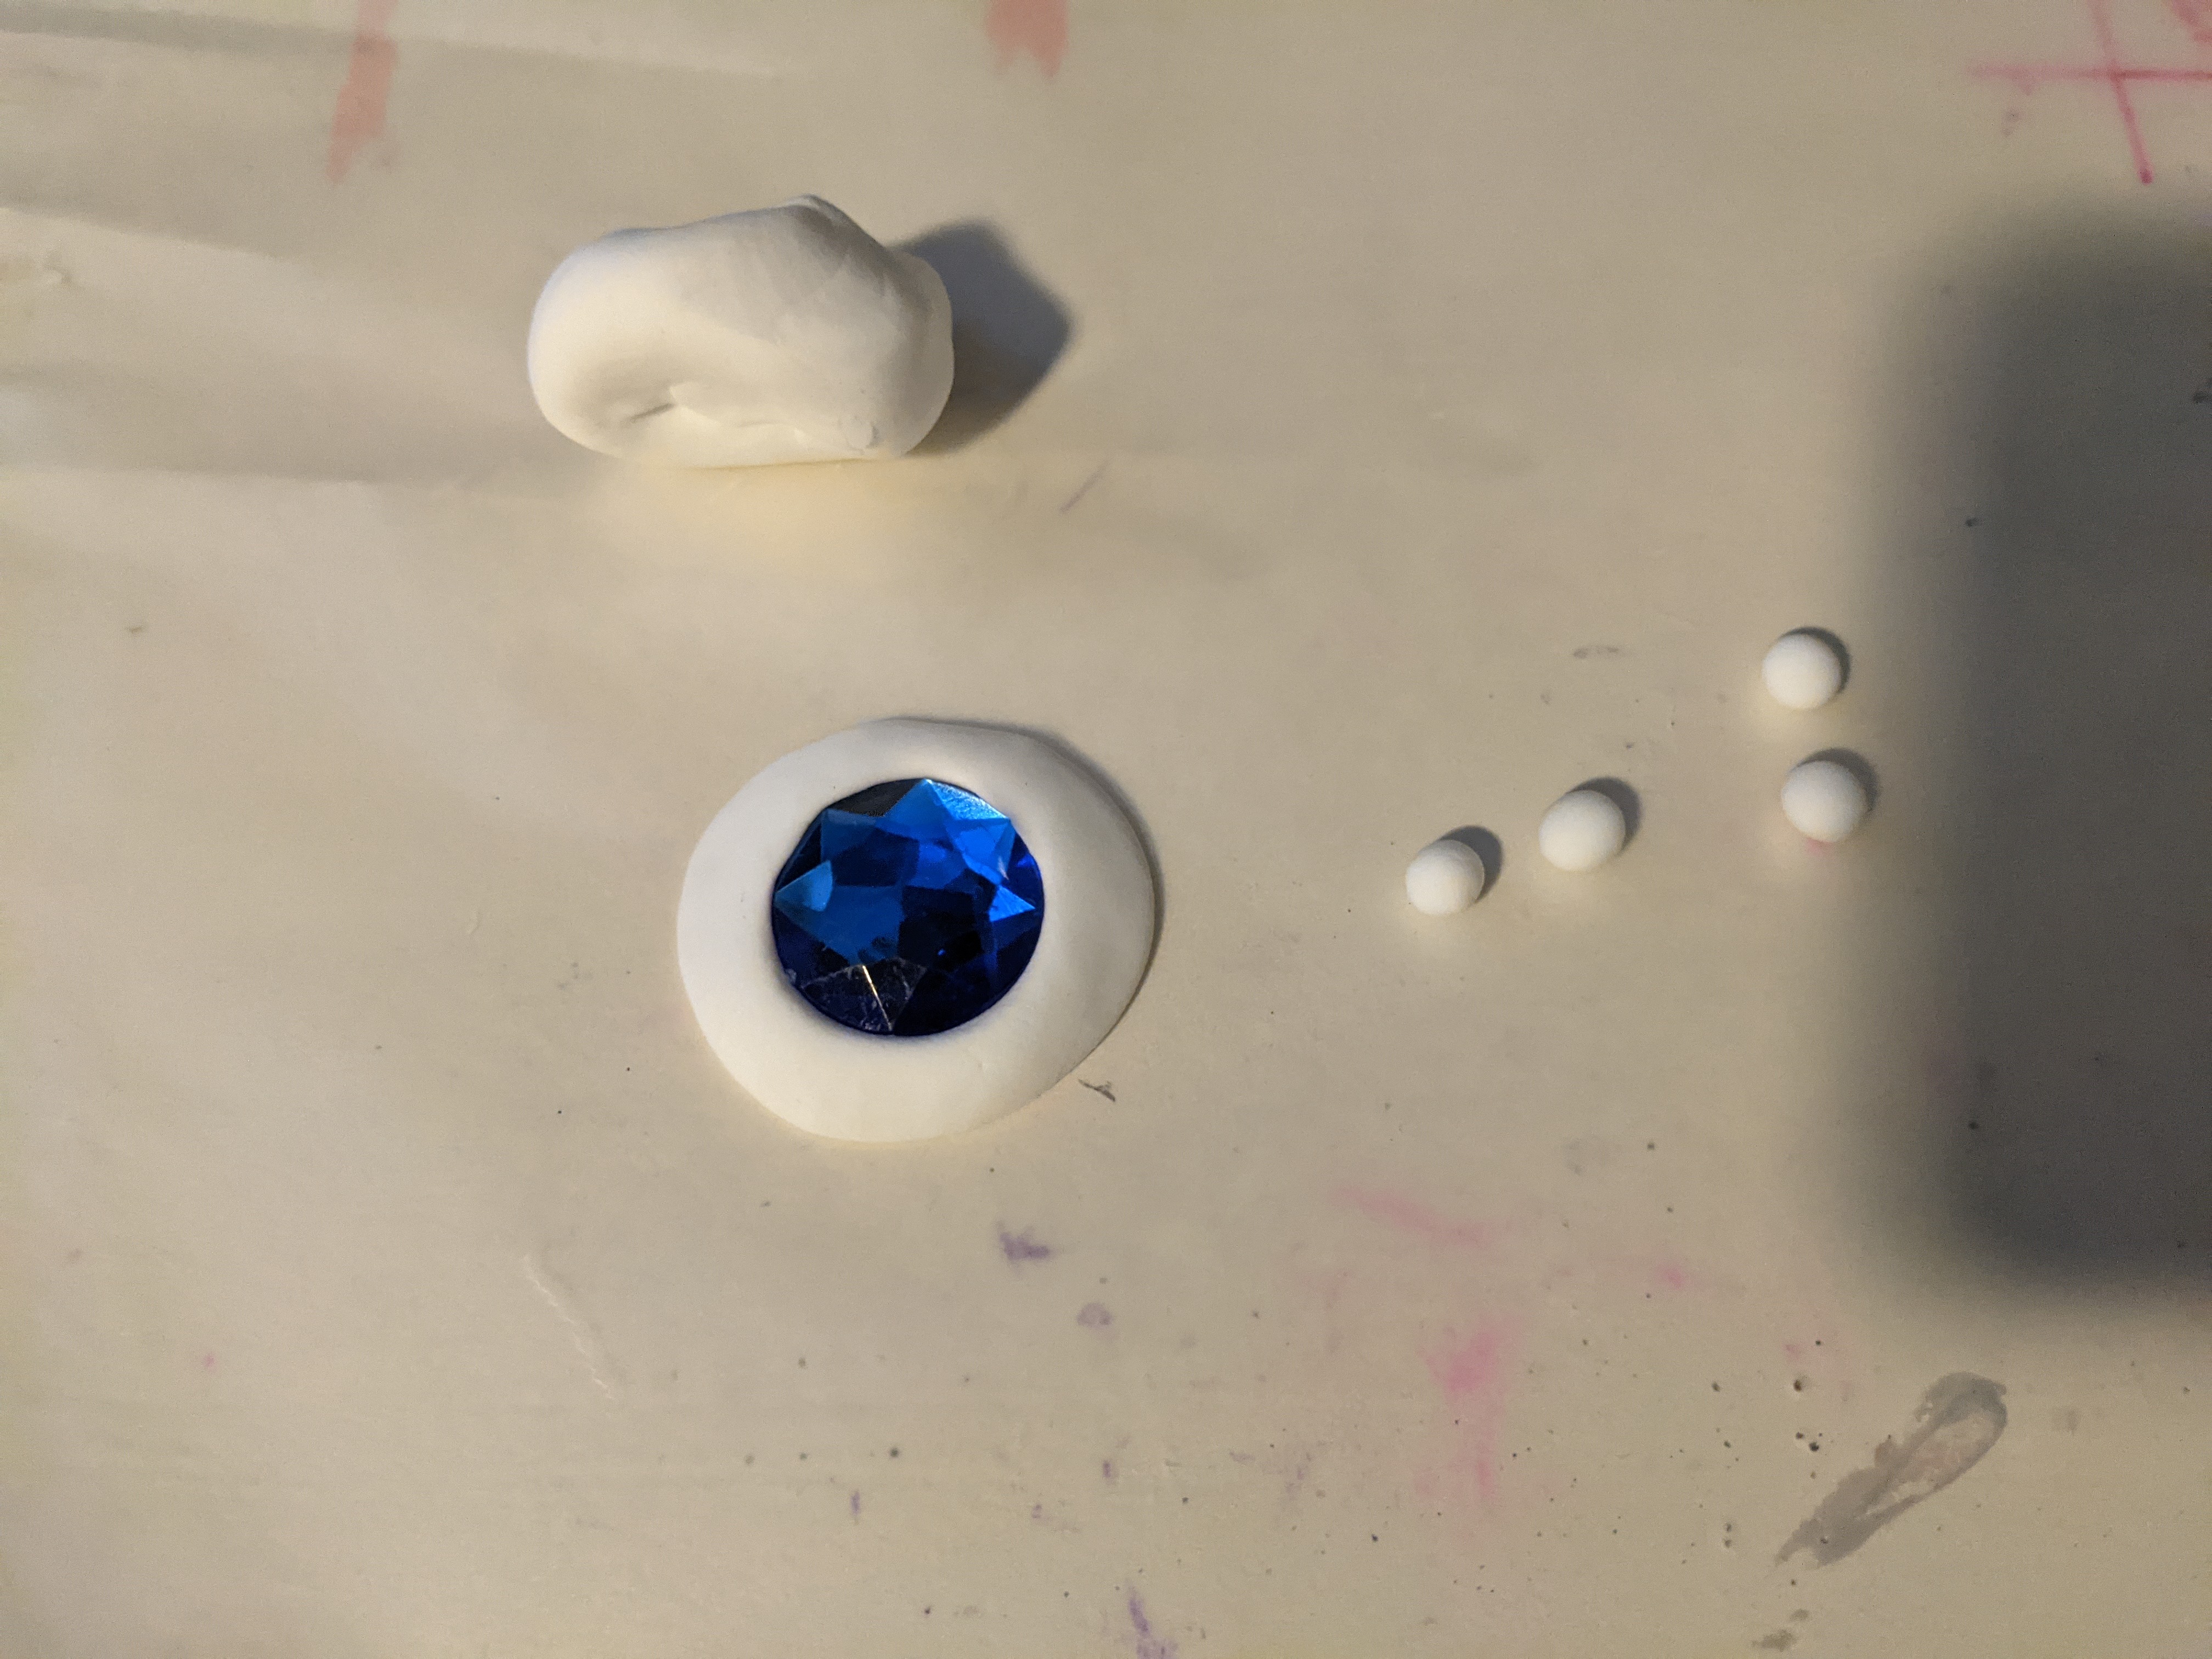
After making a stop by Joann’s for some rhinestones, I sculpted a little holder for the blue rhinestone using foam clay. I made a flat circle then 4 very small, thin cylinders and put them at each of the corners. Then I squeezed them a bit to make them a bit pointed and let all that cure. Once cured, I cut the ends of the circle so that it was more of a rounded square than a circle. I then painted the foam bronze very carefully (using water to wipe off any that ended up on the rhinestone) and let it dry.


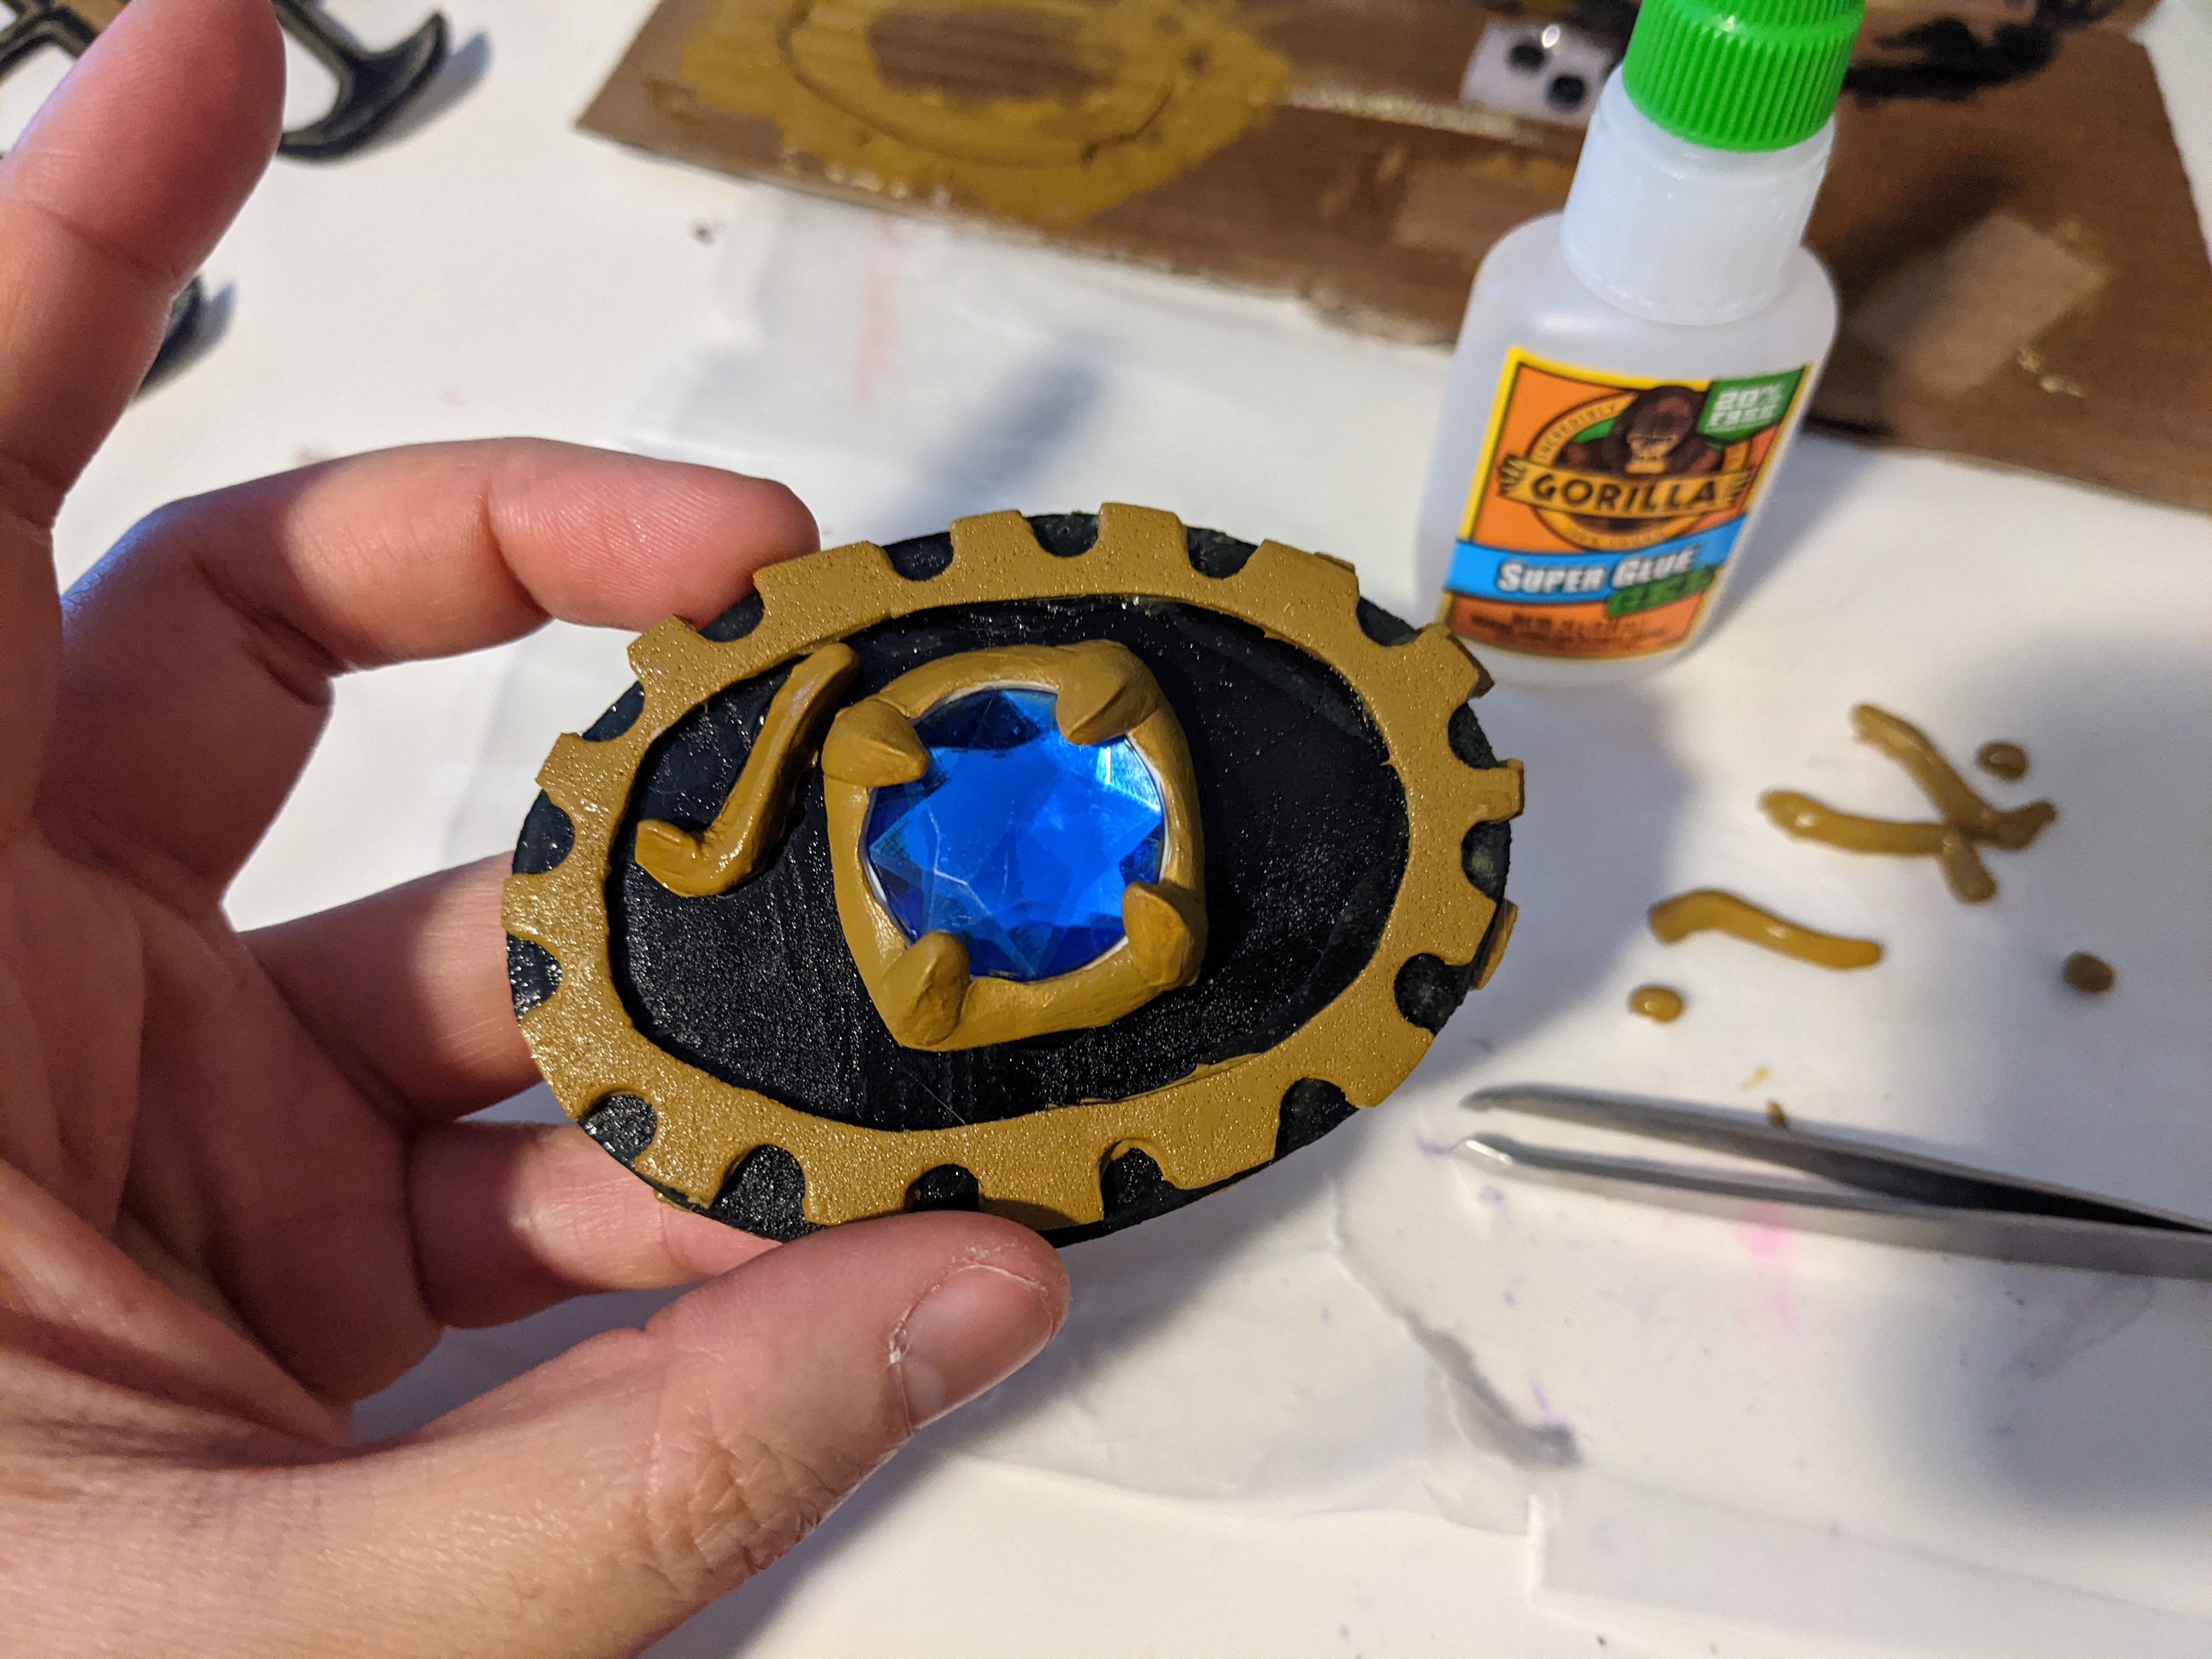
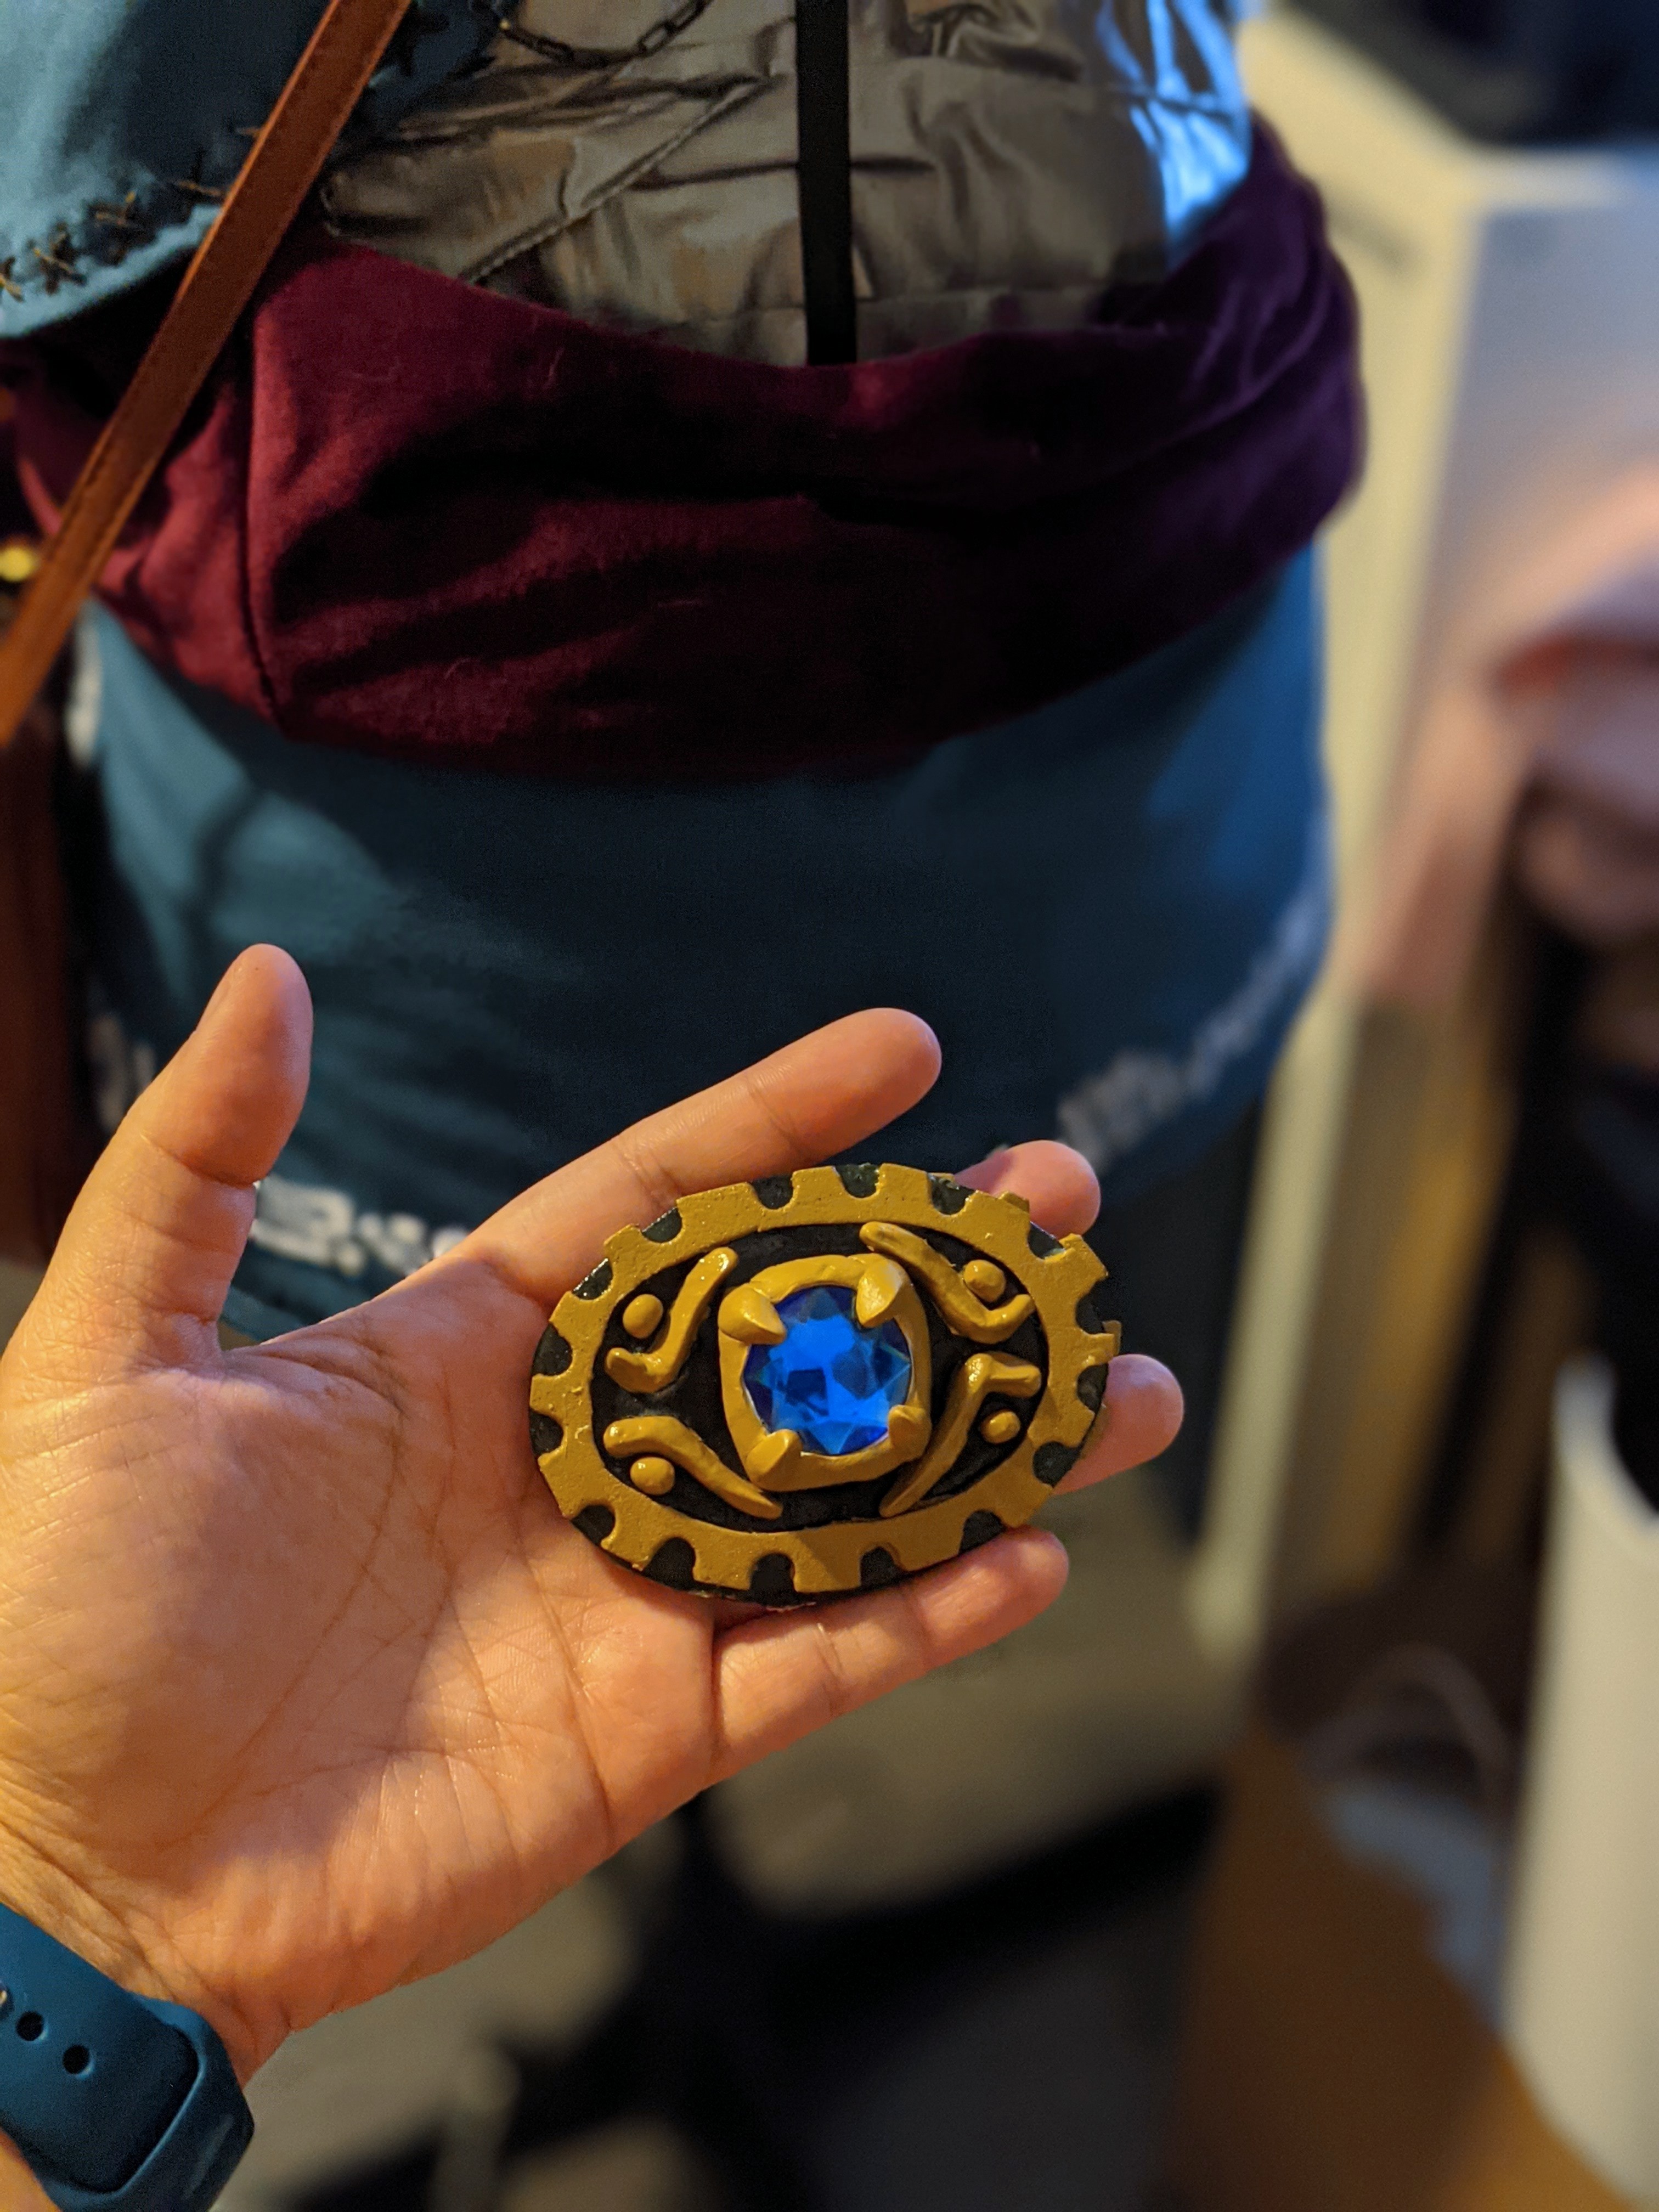
Once everything was dry, I glued the three flat pieces using contact cement. The black piece was sandwiched in between the two bronze gear pieces. Once that dried, I glued on the smaller details using tweezers and super glue. (I have much better accuracy and control with super glue than with contact cement.) I then weathered it, sealed it, and set it aside so I could work on the belt.

Belt
Kena’s belt consists of one main belt that has the buckle and then one strap that just sort of hangs on the side. (I have no idea what the purpose of said strap is lol but it looks cool.)
Apologies in advance as I was working quickly and did not take any progress photos of this part. I’ll do my best to list out the steps as clearly as I can.
To do the main belt, I used leather that I had found in the remnant section of Joann’s. I cut three long 1″ wide strips using my cutting mat, ruler, and rotary cutter. Then, I stitched two of the straps to each other, wrong sides together. I did this just using a simple straight stitch and matching brown thread. The length of the belt was not important just yet.
Next, I attached the (-) end of the center clasp to one end of the belt by looping it through and then stitching the end down. I made a rectangle stitch and then connected the two diagonal points, making an “X” shape for good support. With one clasp end done, it was time to get the belt length correct. I wrapped the belt around my waist and looped the (+) end of the clasp through the open end. I then pulled the belt strap and clasp so that the belt fit where I wanted it to. (I made sure to put on both the finished apron and sash so that the belt would fit over both. Didn’t want to risk it being too small.) After figuring out the right length, I attached the remaining clasp end following the same sewing (rectangle and “X”). I then cut off the excess strap.
The next step was adding the loop that hangs on the side. This piece is much shorter than the main belt, so I was able to just use the third 1″ strip of leather I had made. I cut that in half and then–like the main belt–stitched the two pieces together wrong-sides together. I then immediately stitched it onto the main belt near the clasp. I did this by folding the end over the belt and then wrapping it back around to the back, then stitching it down onto itself to form a loop. You could also stitch this directly to the main belt so it doesn’t slide, but my seemed to be okay.

To finish the other end and have it match Kena’s belt, I added a D-ring to it. After that, I added a brown strap to it and stitched that directly to the back of the belt so it wouldn’t shift around.

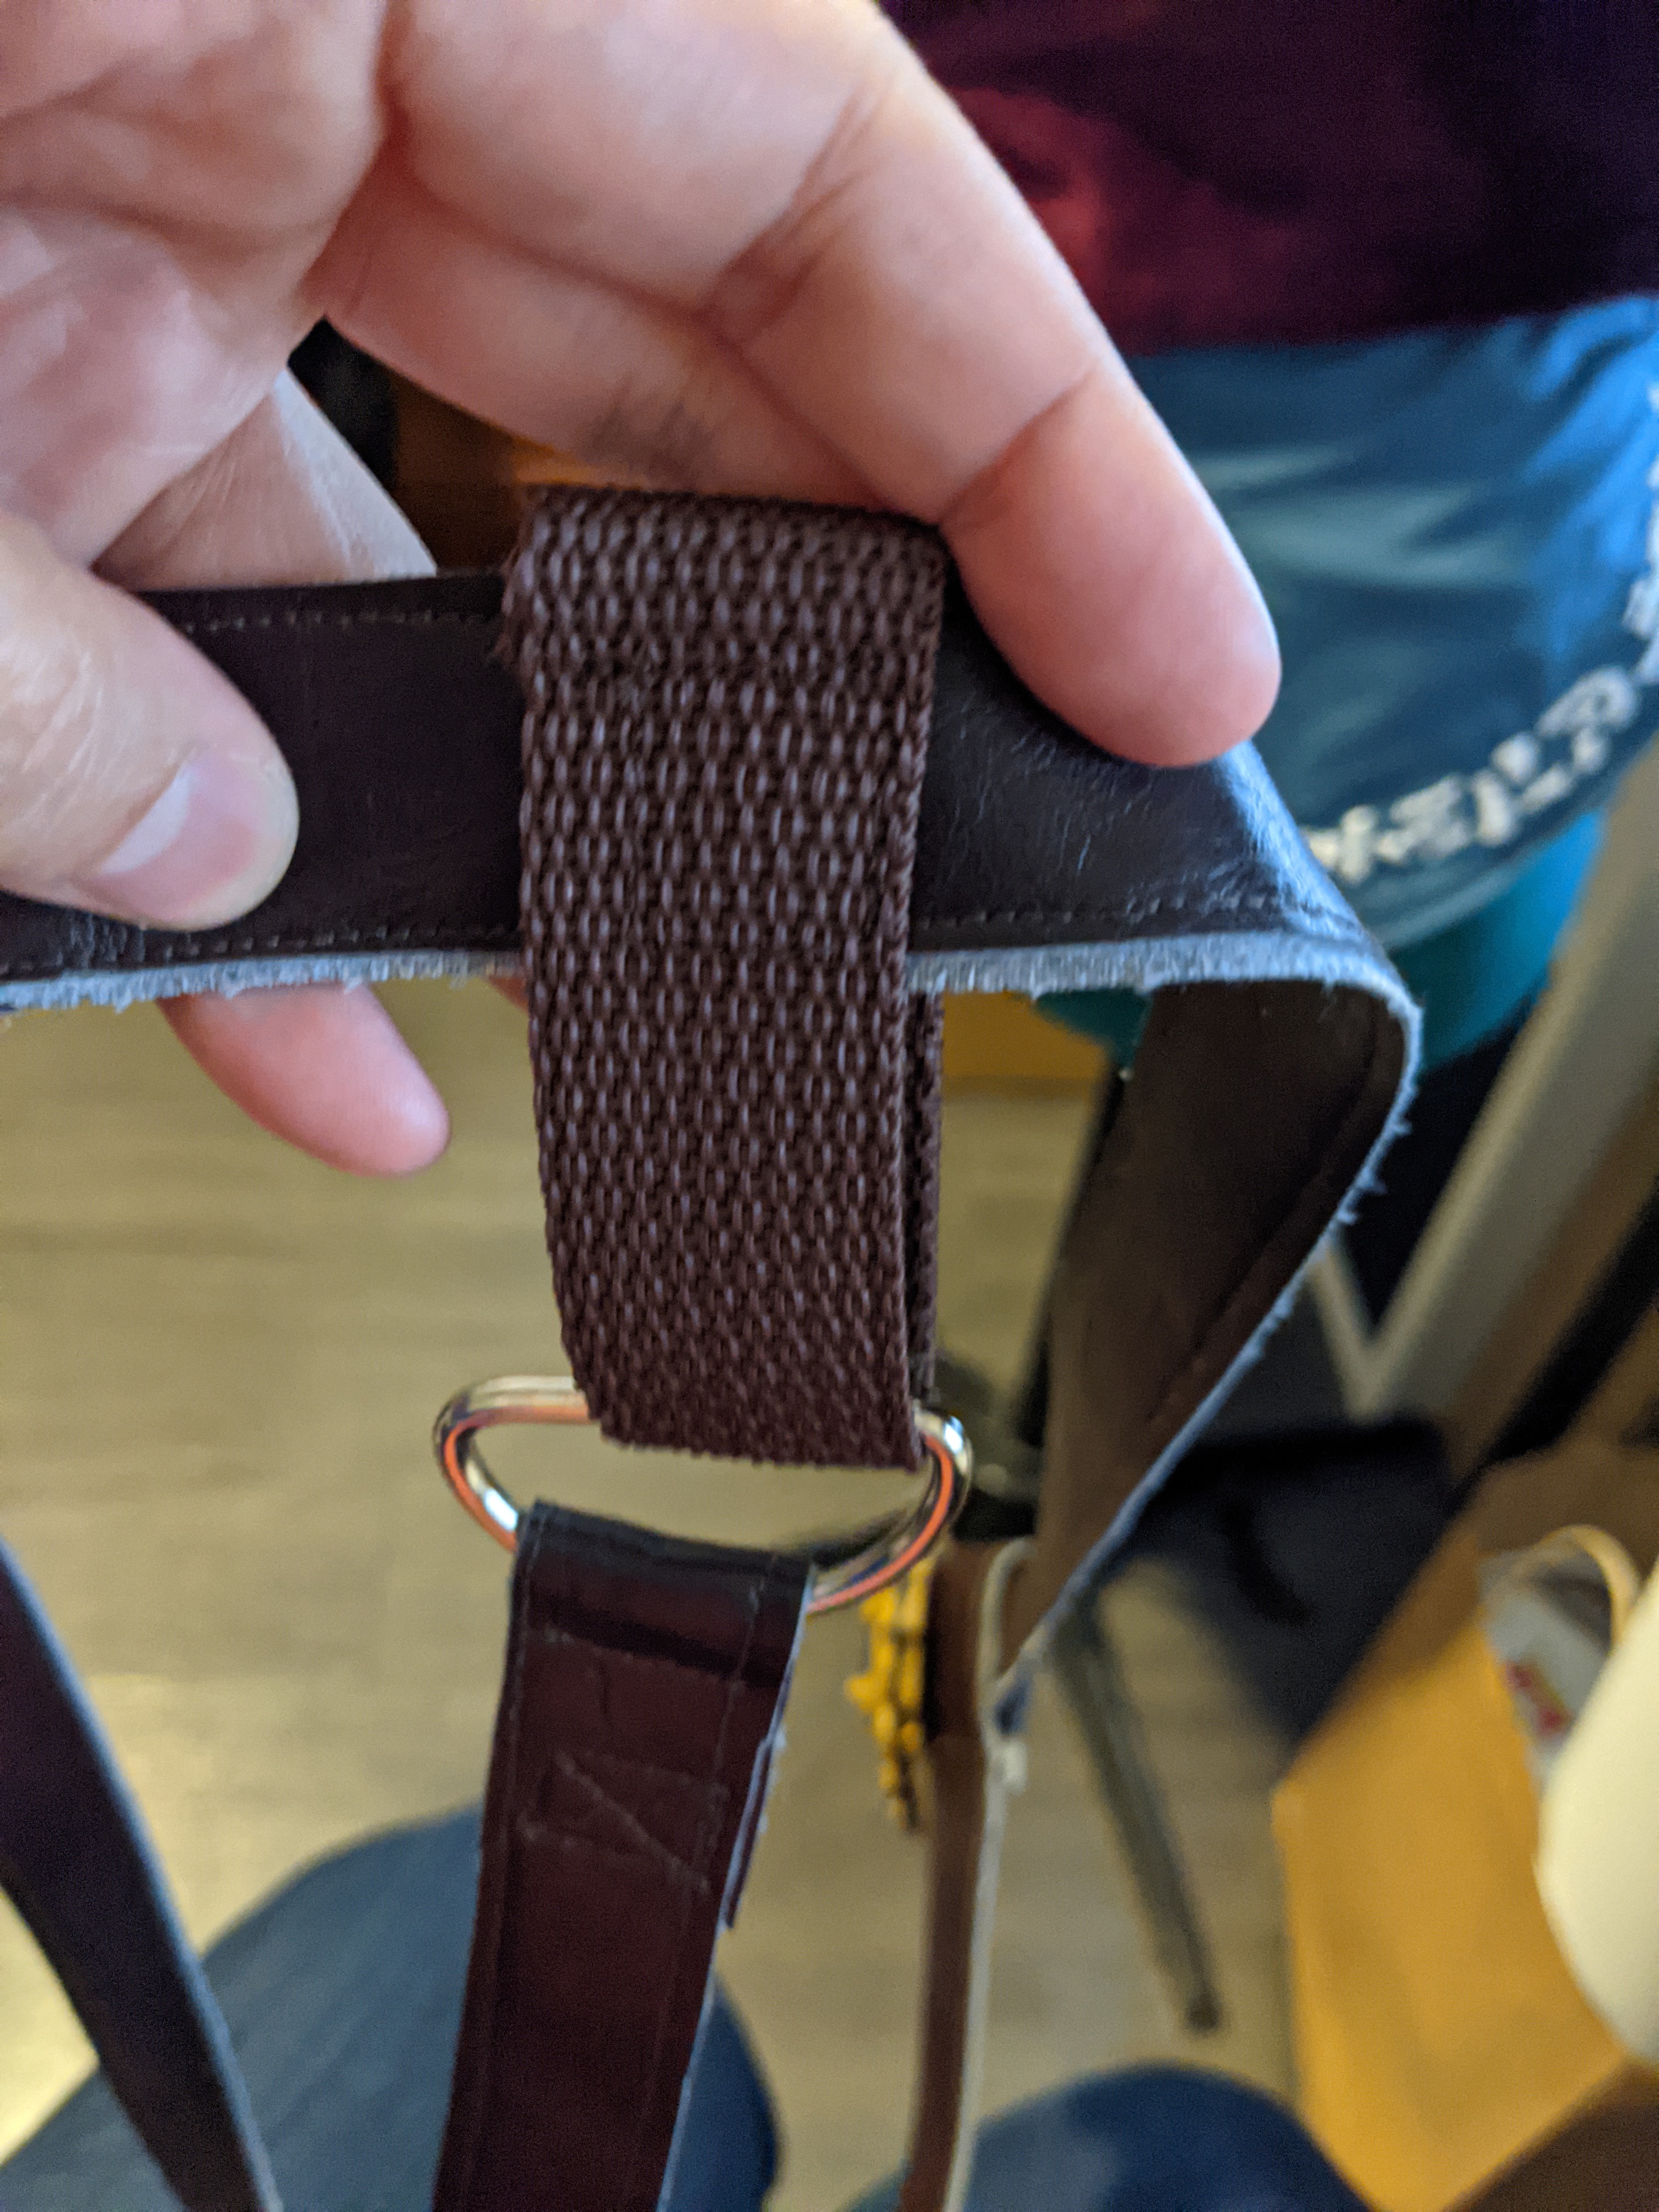


The last step was super gluing the finished buckle to the clasp!


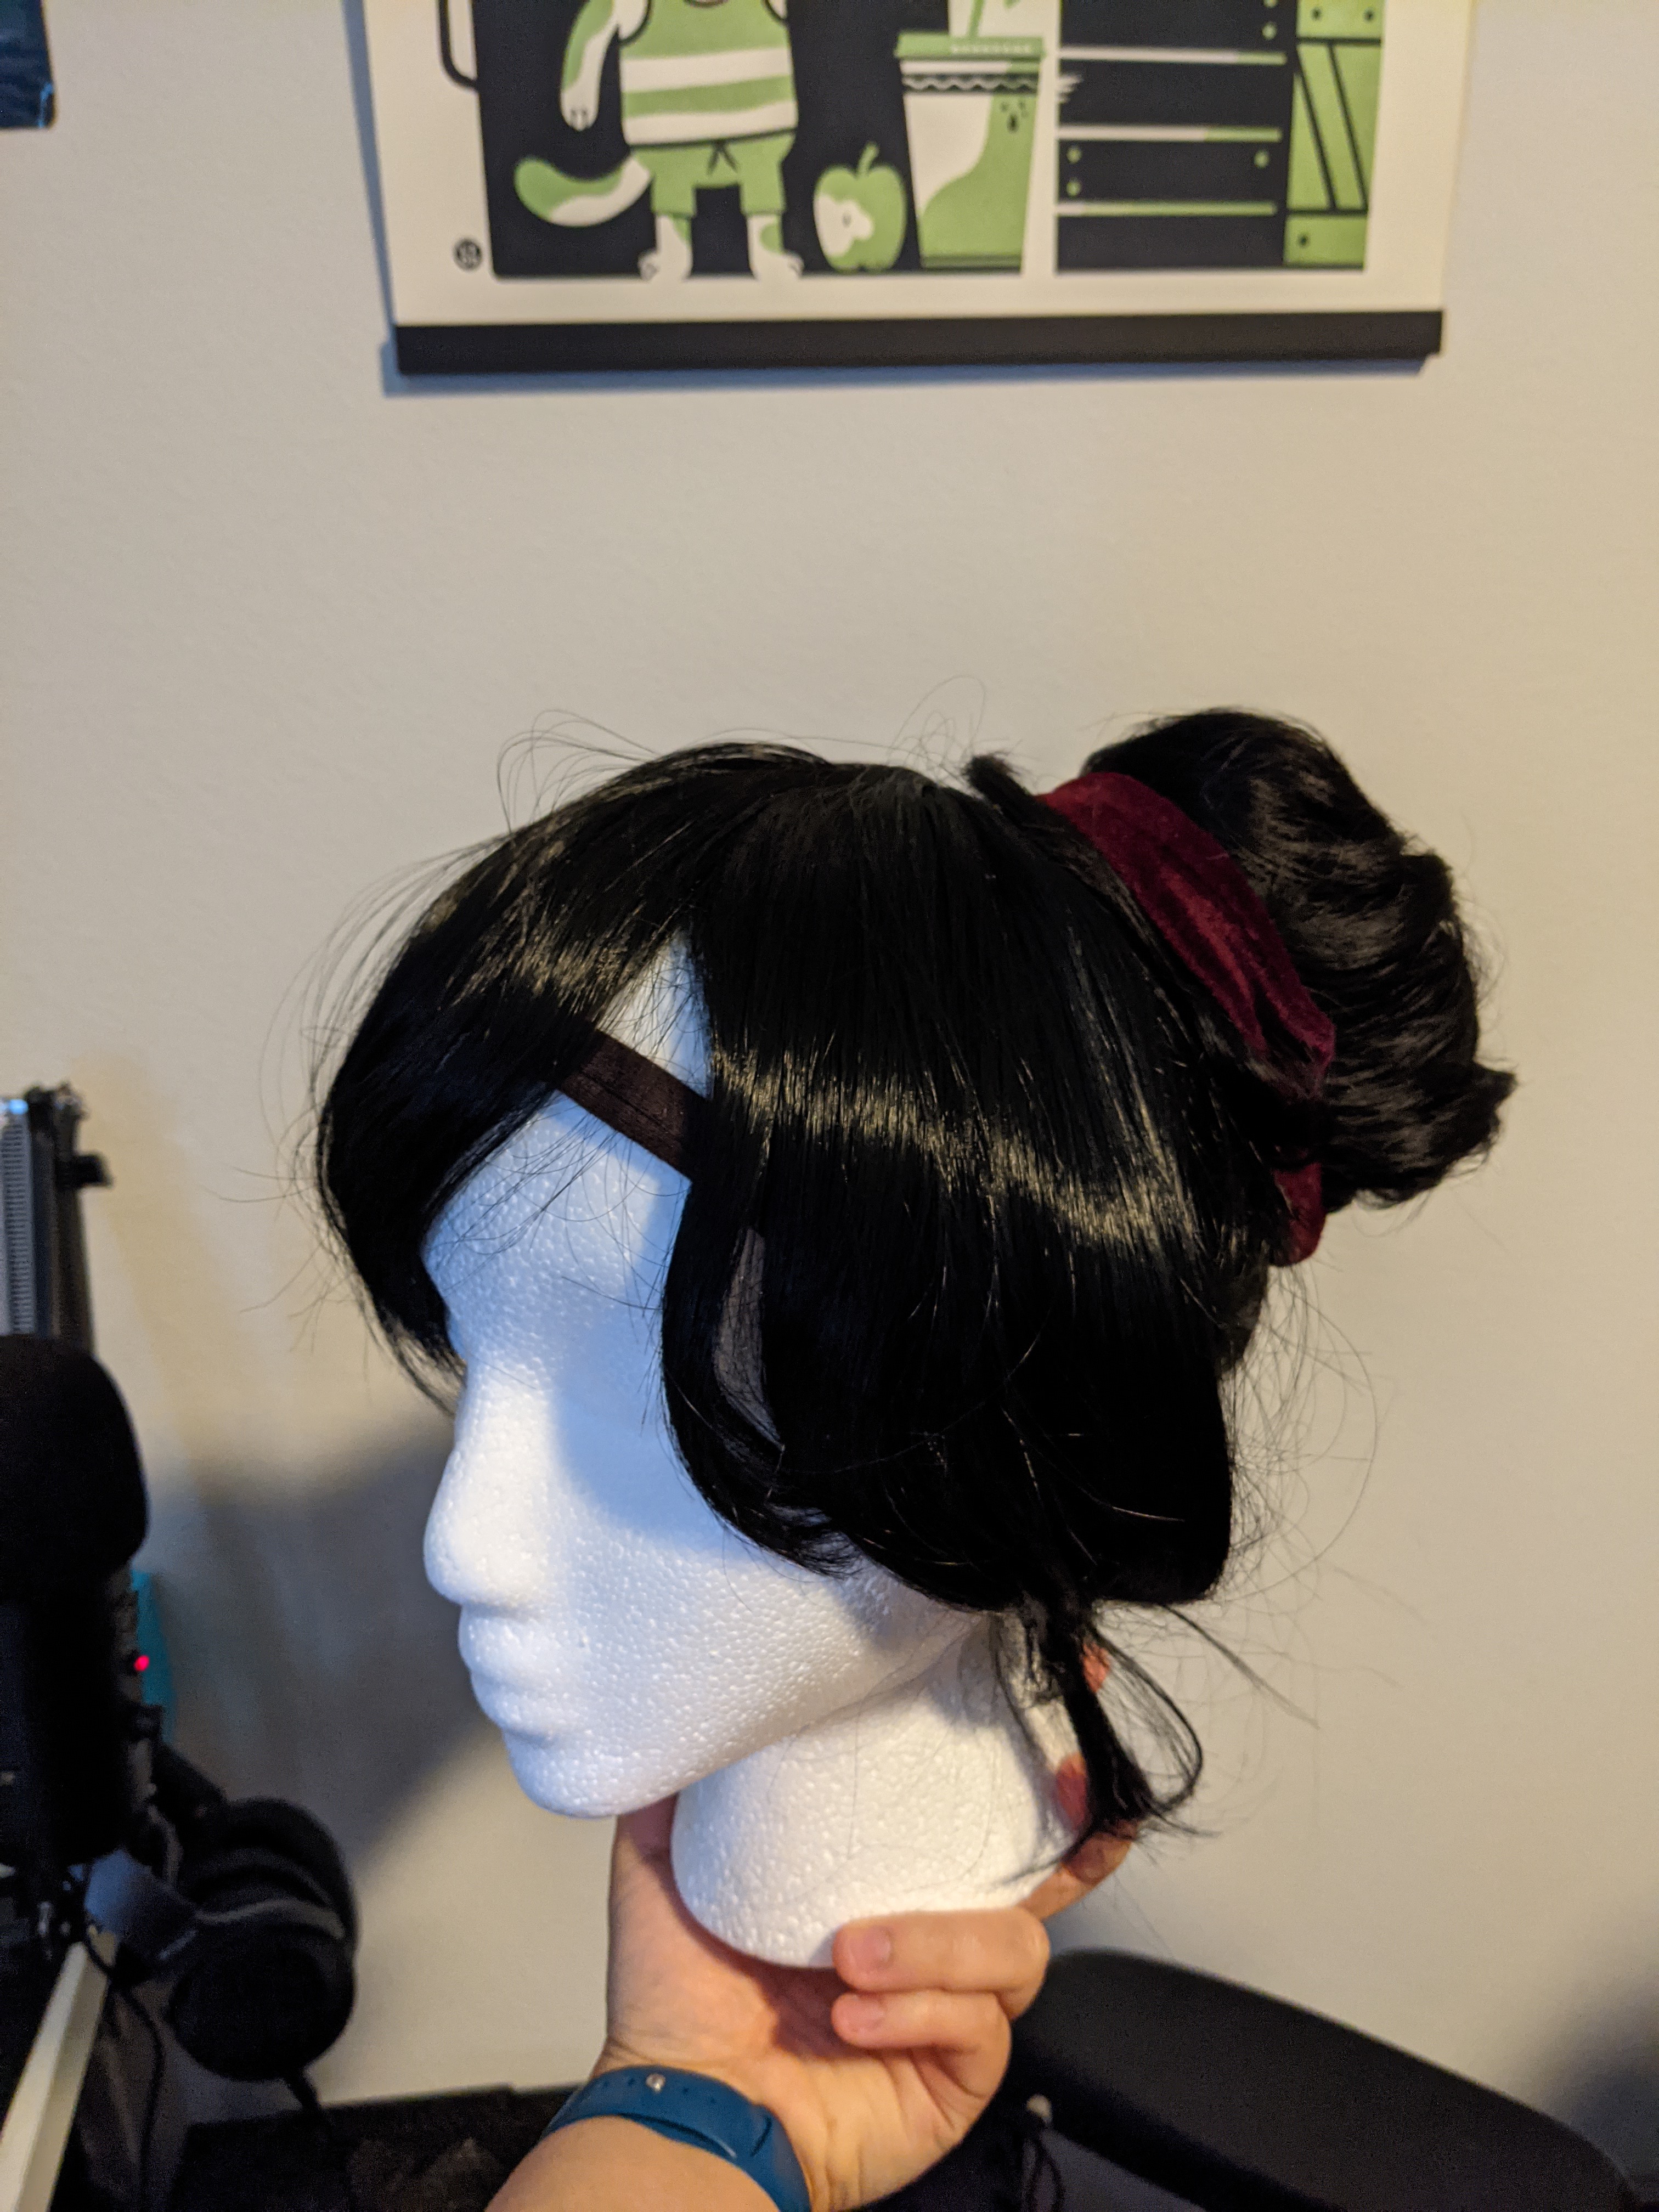
Wig, hairtie, and headband
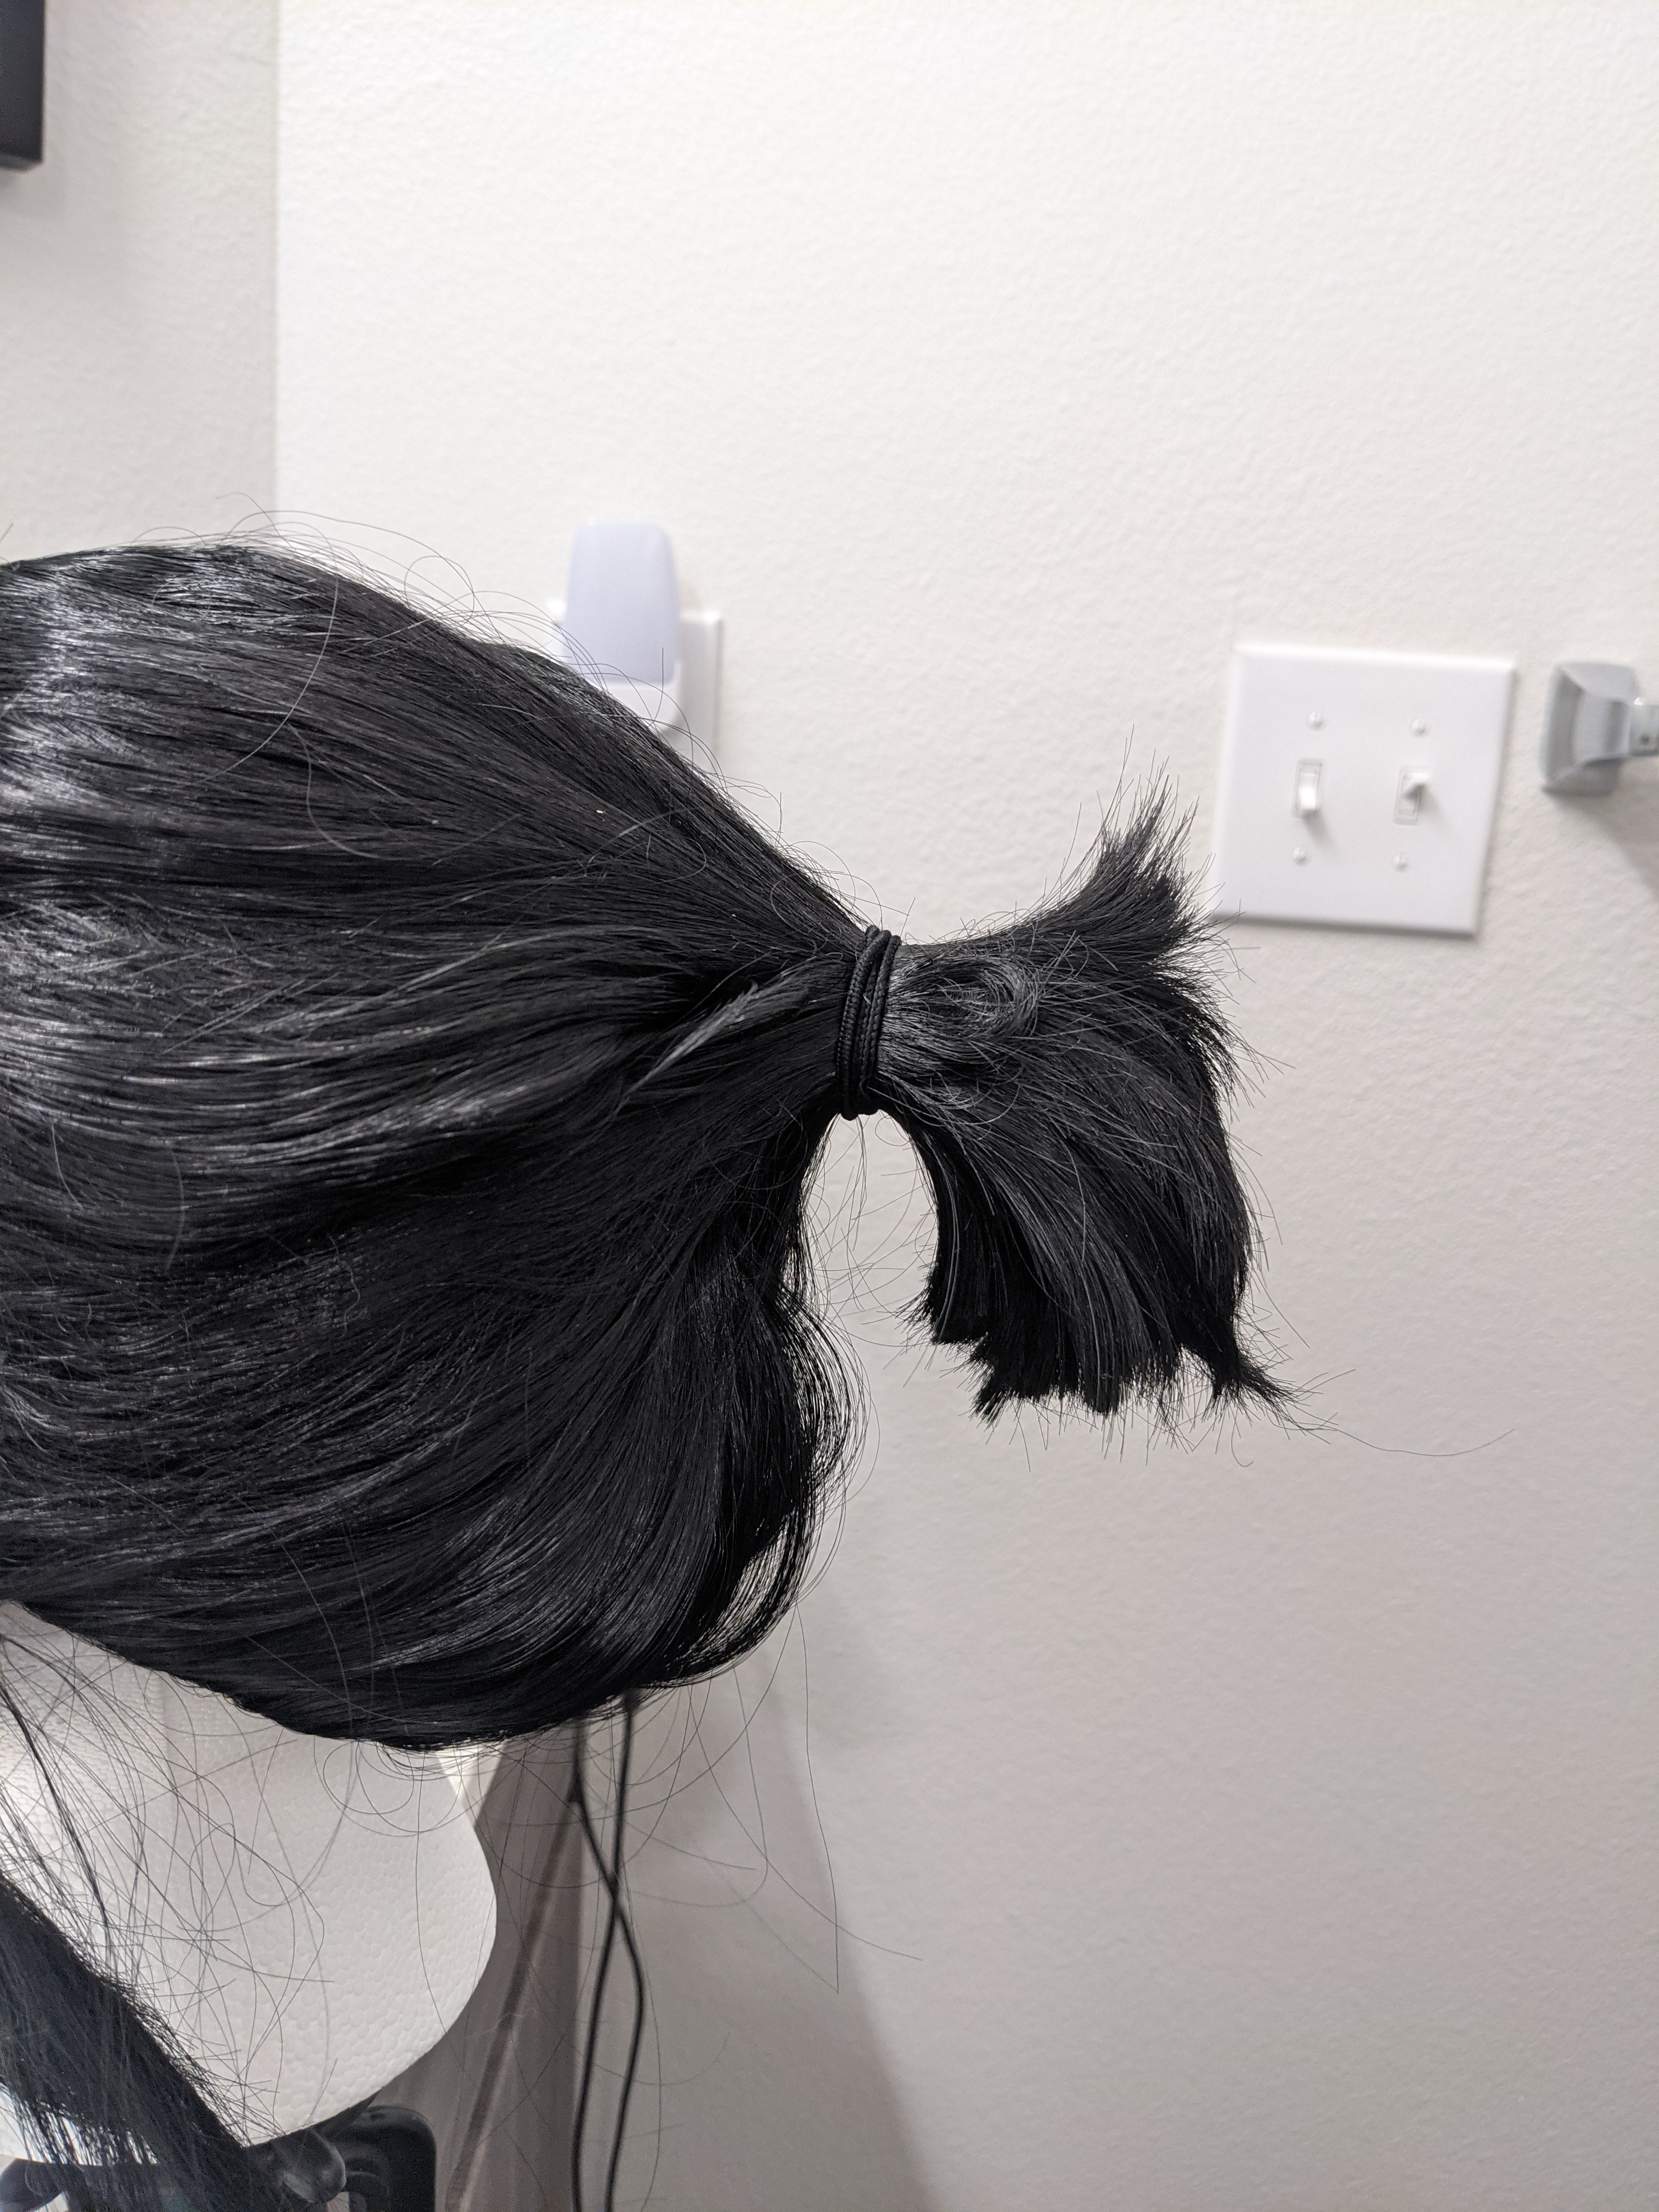
The wig is a combination of a ponytail wig and a bun attachment, both purchased online. The ponytail wig came with a base wig and a ponytail attachment. I put the ponytail attachment aside (could come in handy for a future cosplay!) and just focused on the base wig.
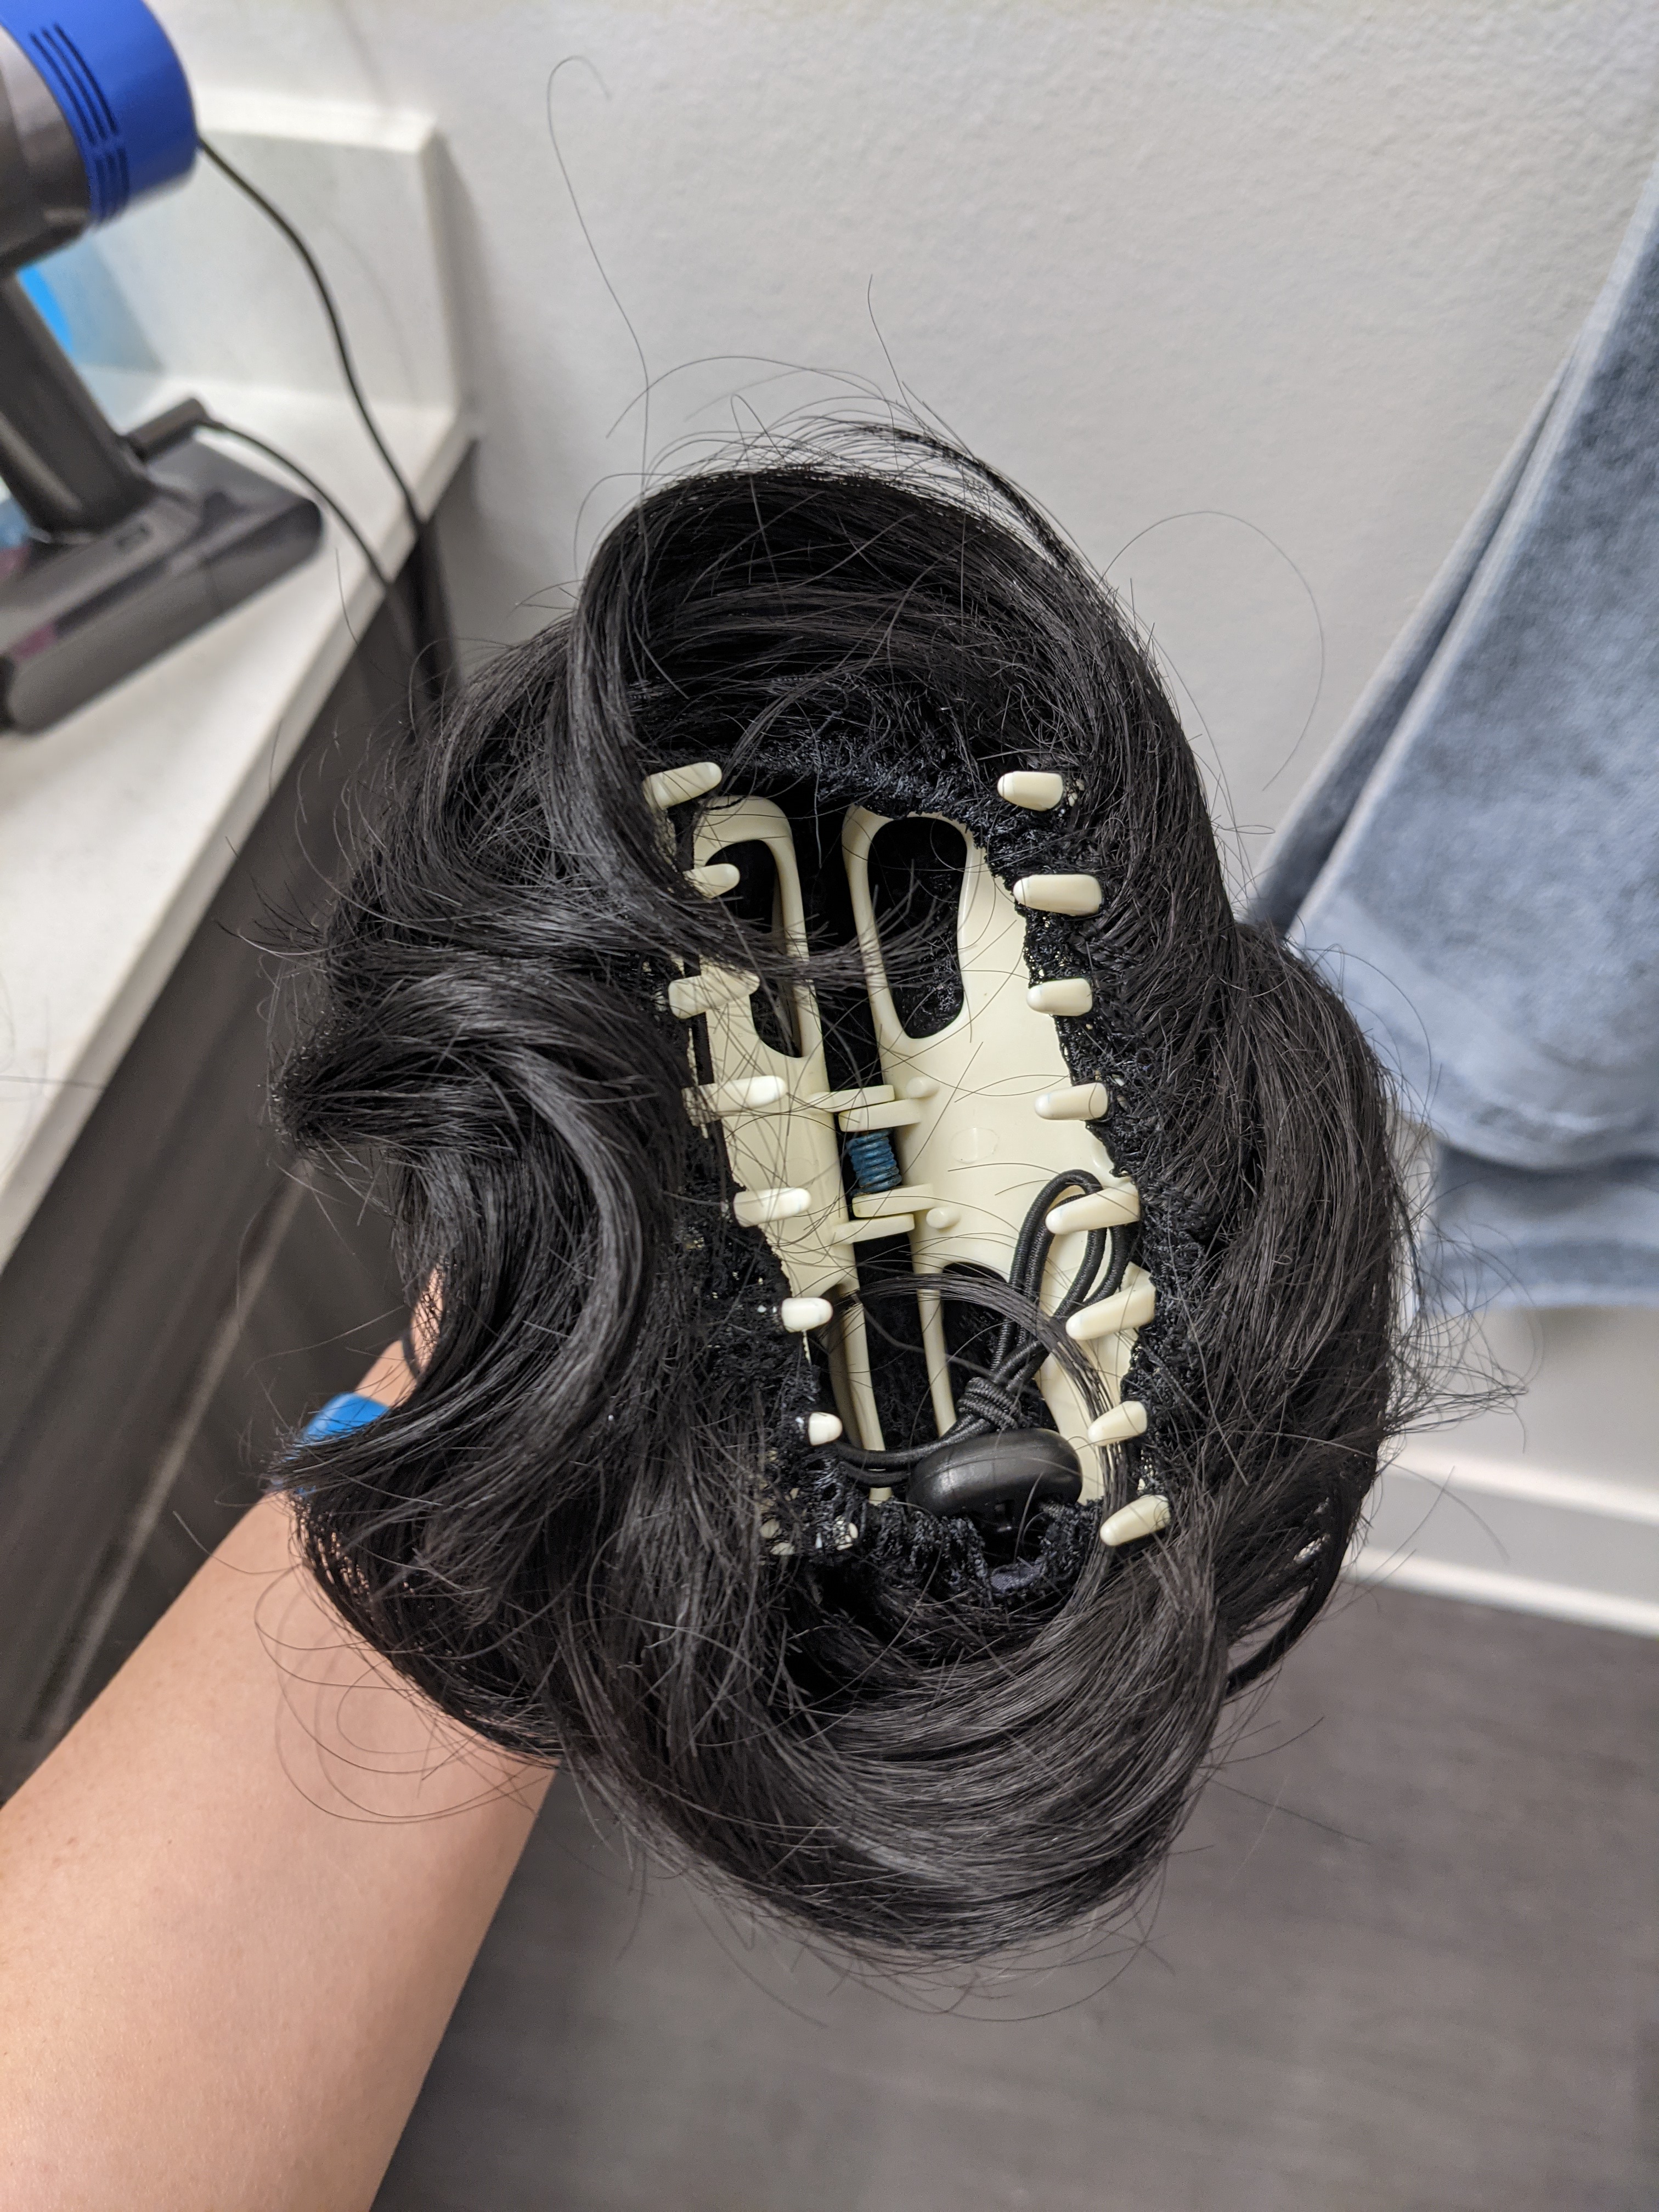
The base wig is long enough to have its own smaller ponytail. I needed to be able to fit that ponytail in the bun, so I ended up trimming it to be shorter. Then, for the wig attachment, I insert a hairclip into it so that it would be easier to put on and take off.
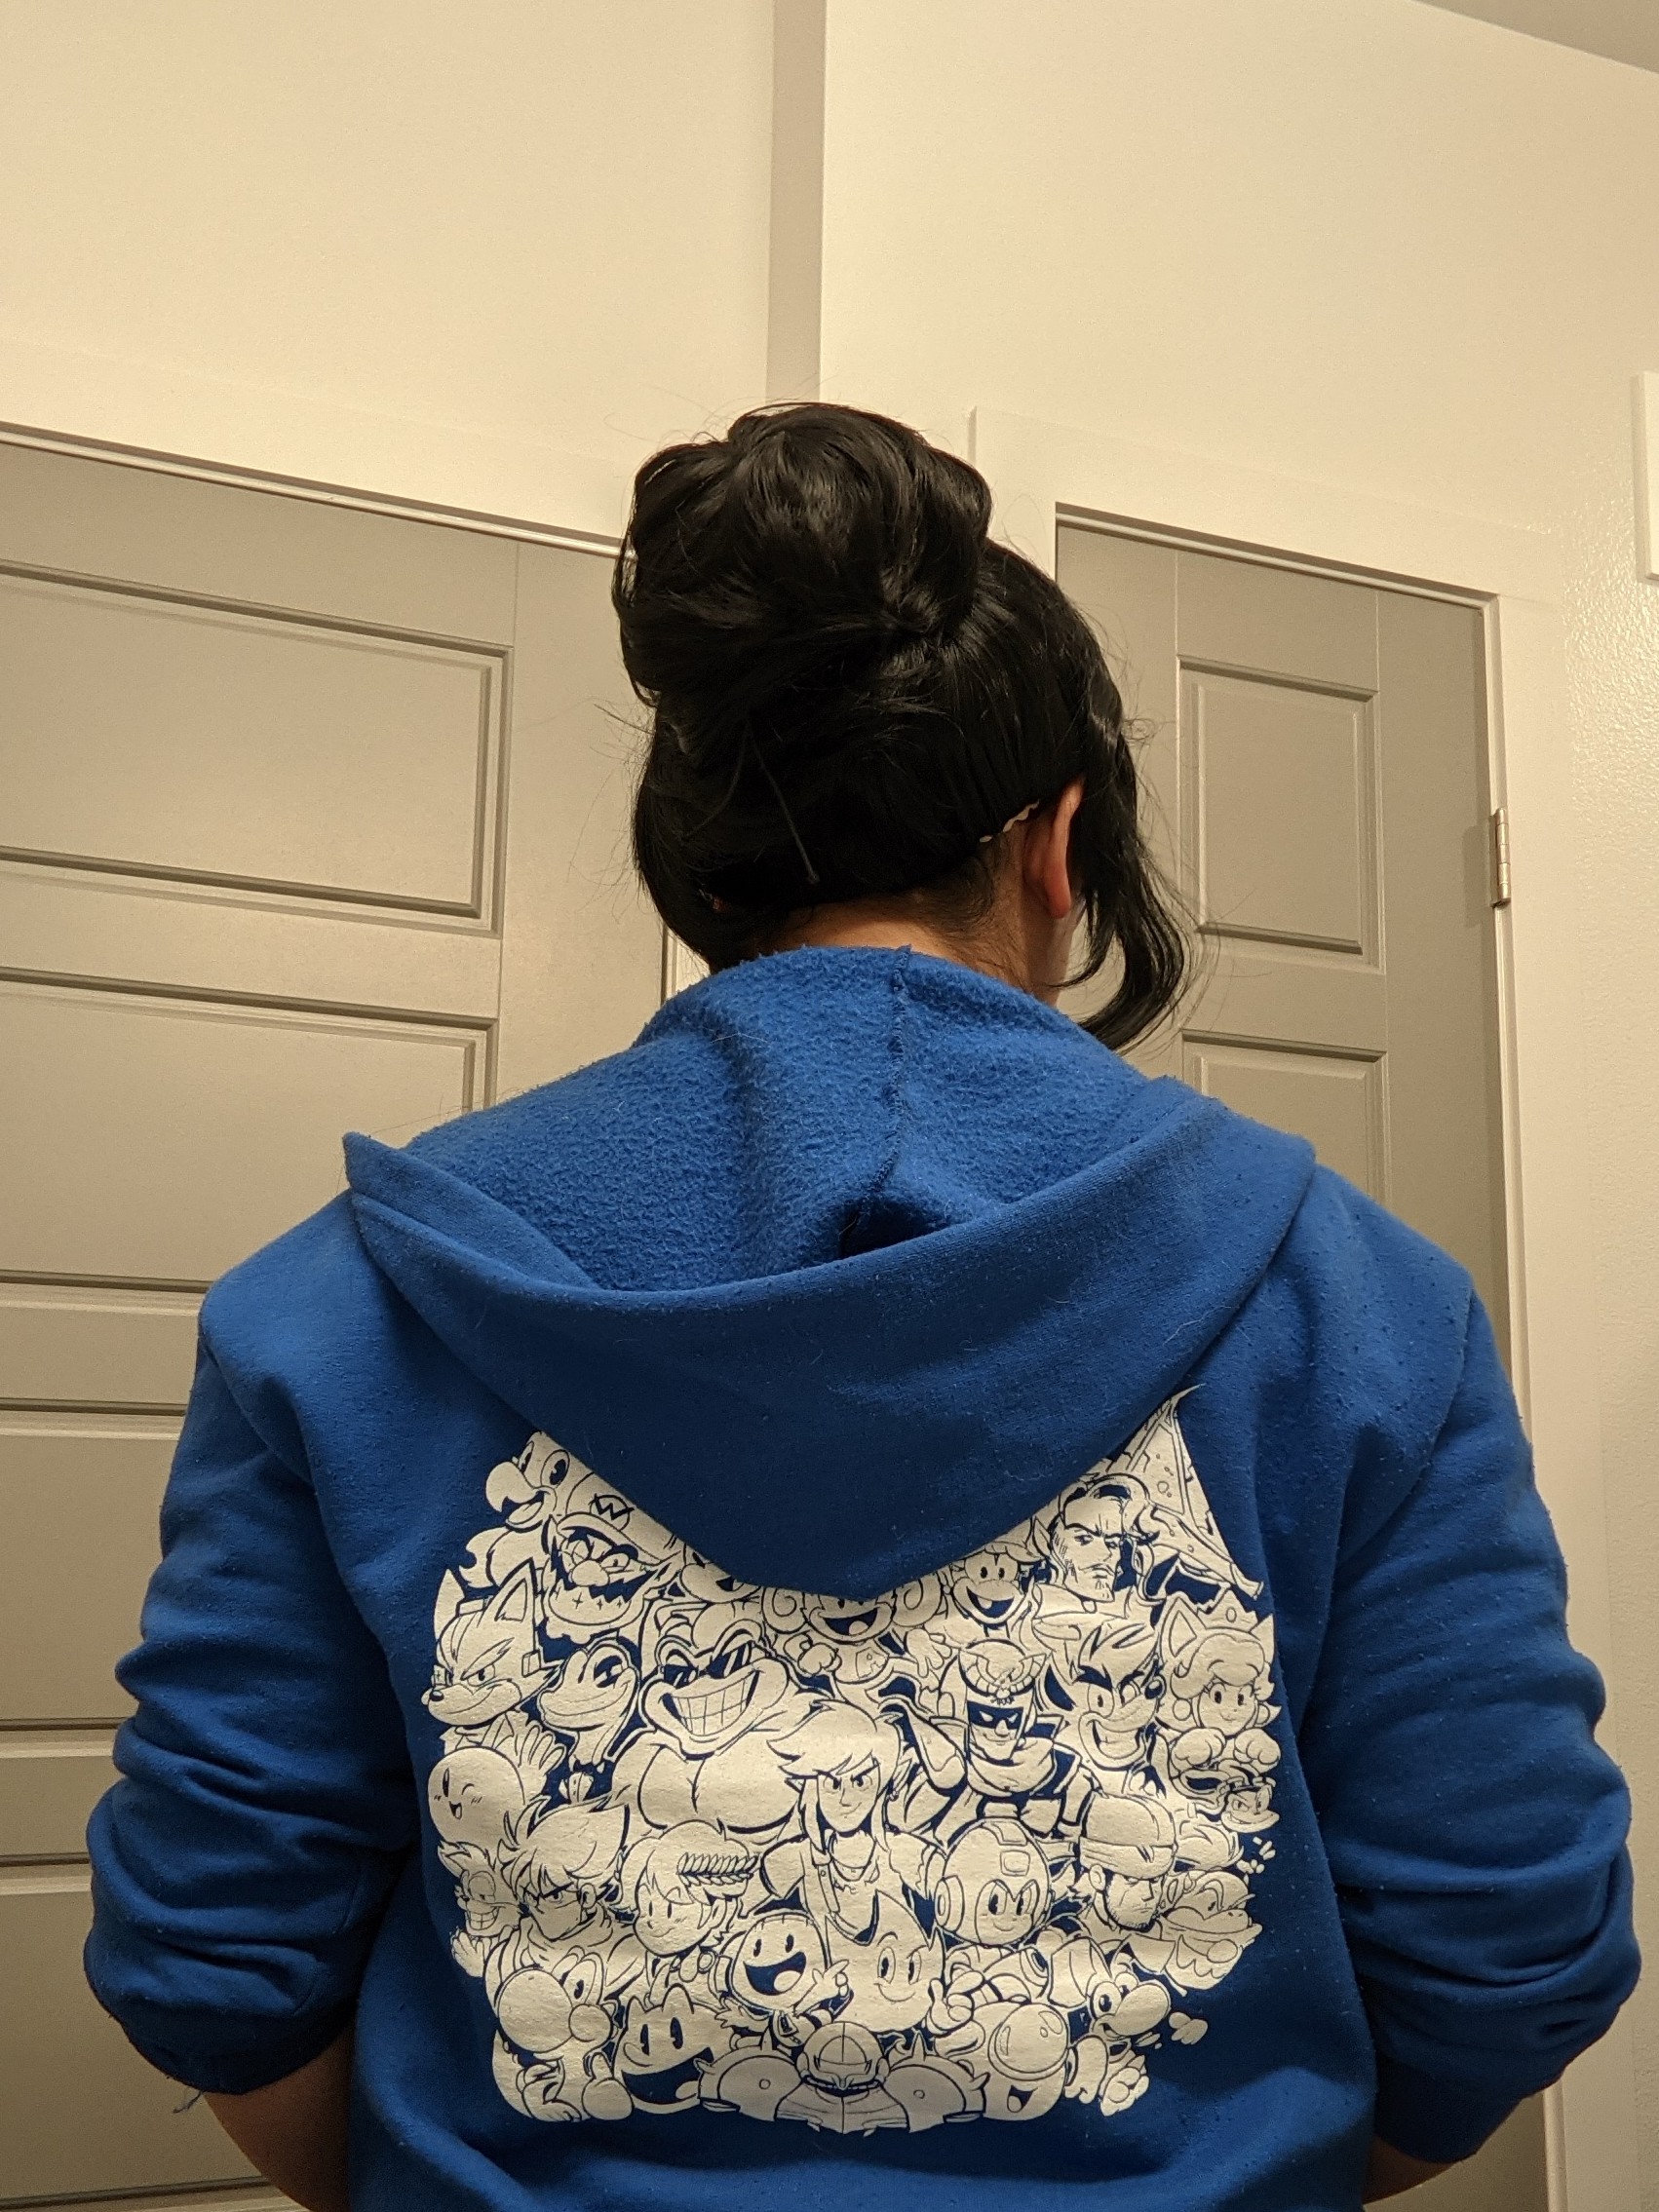

Kena has both a brown headband that goes around her forehead and a red hairtie that goes around her bun. Both are made using the same sewing method.
For the headband, I cut out a piece of brown fabric (the same fabric used for the scarf) that was 3.5″ wide and about 20″ long. After making sure the length was good, I folded the strap over and then sewed along the long side using a small zigzag stitch. Then came the annoying process of turning this now long tube right side out. After finally getting that done, I simply sewed the two ends together! The part where they join would be in the back covered by my wig anyway, so I wasn’t worried about it looking super clean.


For the hairtie, using the same maroon fabric as the sash and armband, I followed the same process: cut out a long strip, fold it over, sew the long end with a zigzag stitch, turn it right side out, close the loop.
I would’ve liked to been able to double up the hairtie, but because of the limited fabric I had, I only had enough length for it to go around the bun once.

Conclusion
Kena was such a fun cosplay to work on. I didn’t want to delay sharing her so that’s why I opted to share this without her necklace and staff. If I had known that I was going to end up splitting this cosplay build into multiple posts, I would’ve just posted it as soon as the last piece of this was done. That would’ve been in October. No worries. It’s not like it’s some race to be the first Kena cosplayer. Especially because I already know I’m not the first!
Kena was absolutely a passion cosplay for a game that I thoroughly enjoyed. I cried multiple times during it because of its beautiful story, visuals, and music! It’s been a while since I’ve fallen in love so hard for a game, so I knew I had to capitalize on this passion while it was at its strongest.
This cosplay also just helped me remember that I have become an “accuracy” kind of cosplayer. The sort of “not 100% accurate, but matches the character’s vibe” approach that I had used in college no longer suits me. I think that’s because, back then, I didn’t have the tools, knowledge, or experience to make what I had in my head a reality. So, I’d do the next best thing and get it “close enough.” But now that I’ve honed my skills (and have more disposable income), I’m now able to get that level of accuracy I want. And now, knowing I can, I really don’t see a point in not making it to the level of polish I want.
Thanks for reading and go play Kena; Bridge of Spirits if you haven’t already!


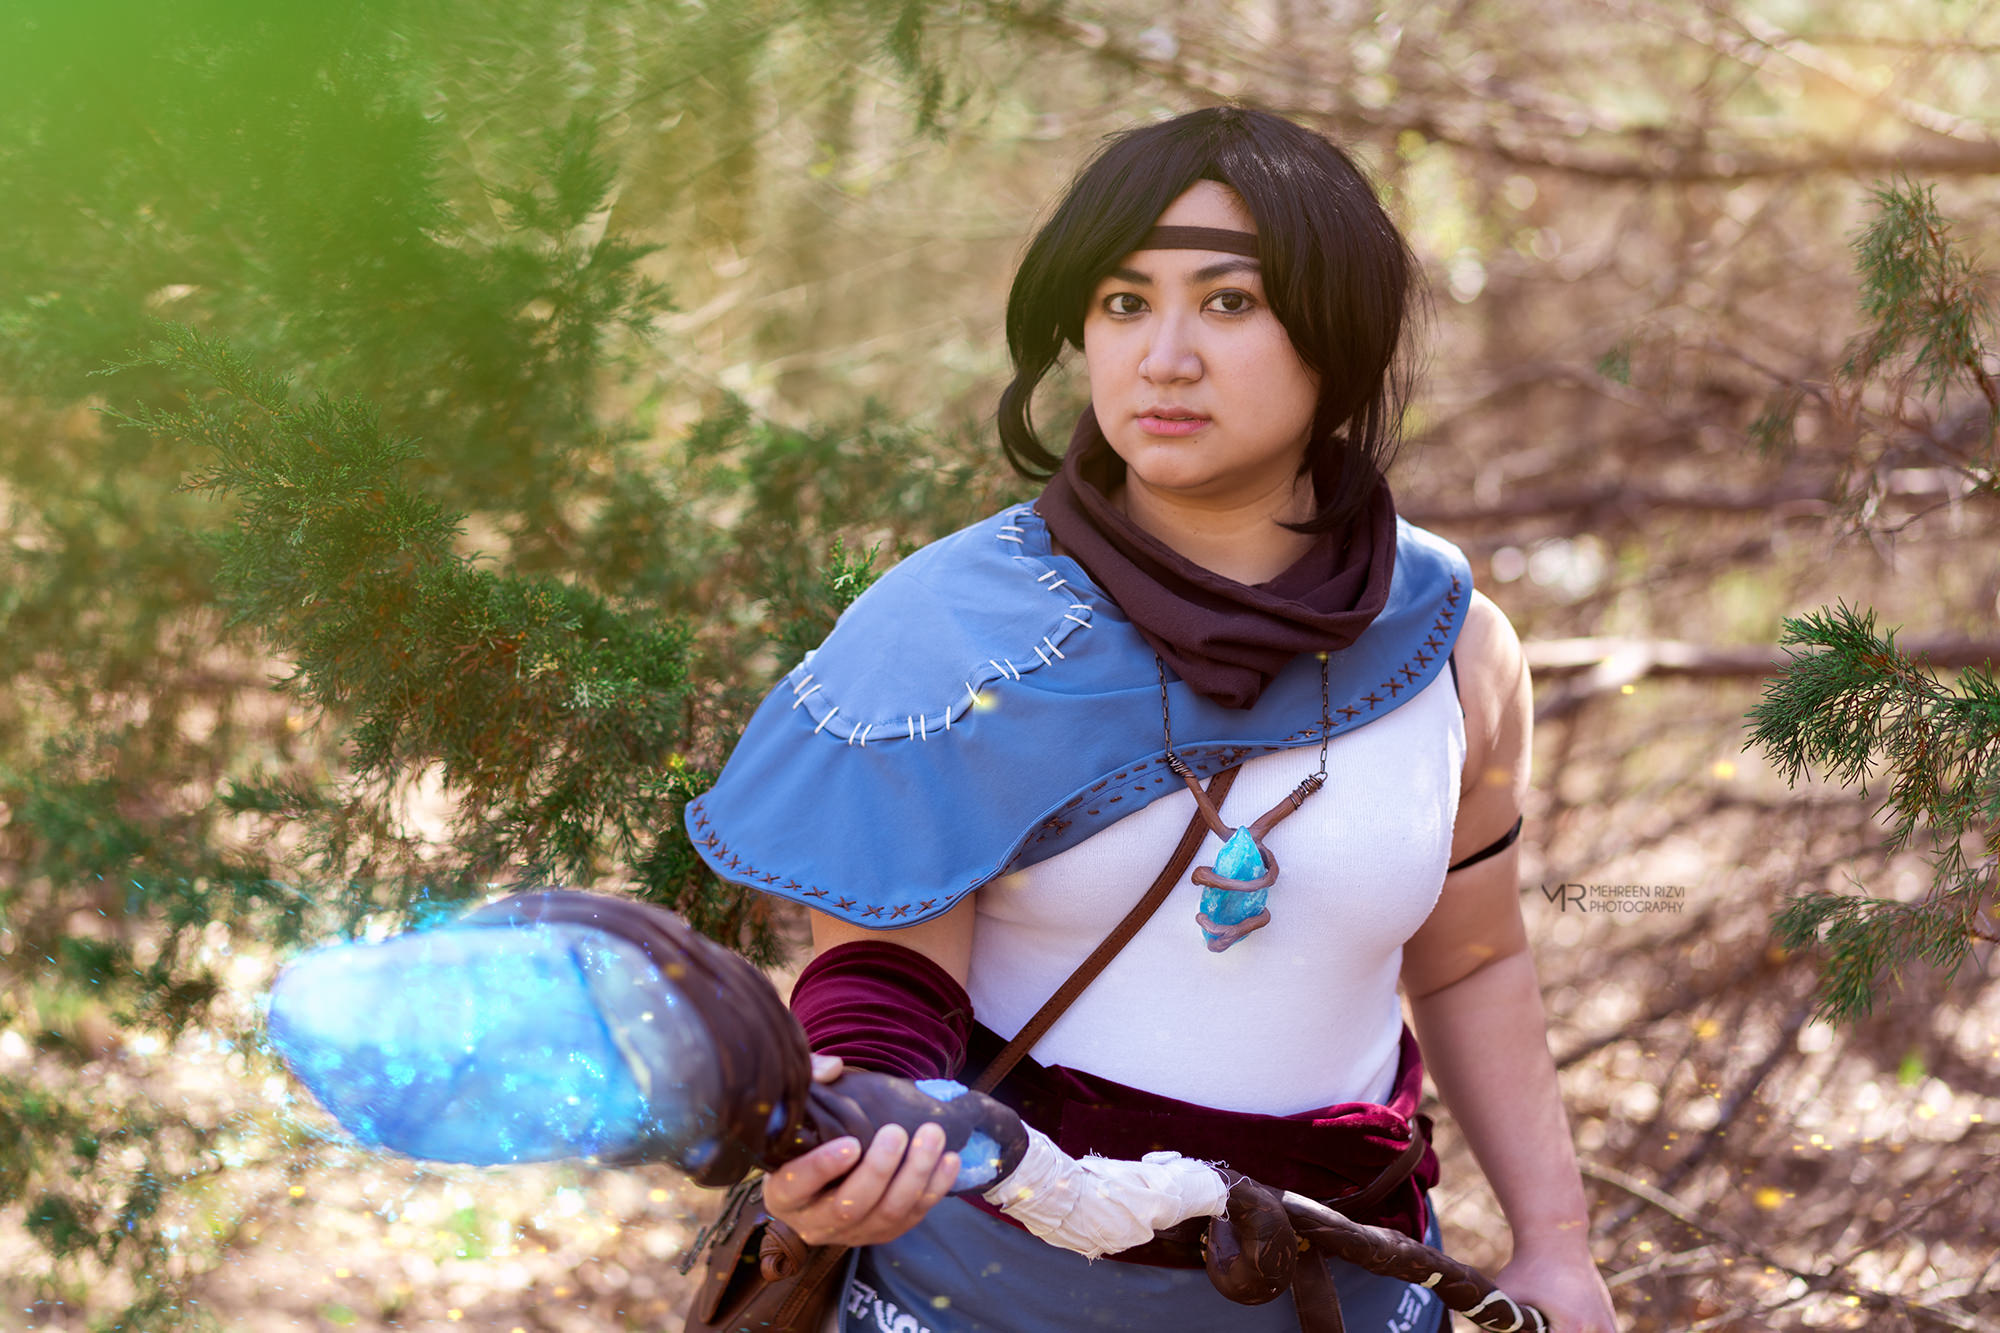
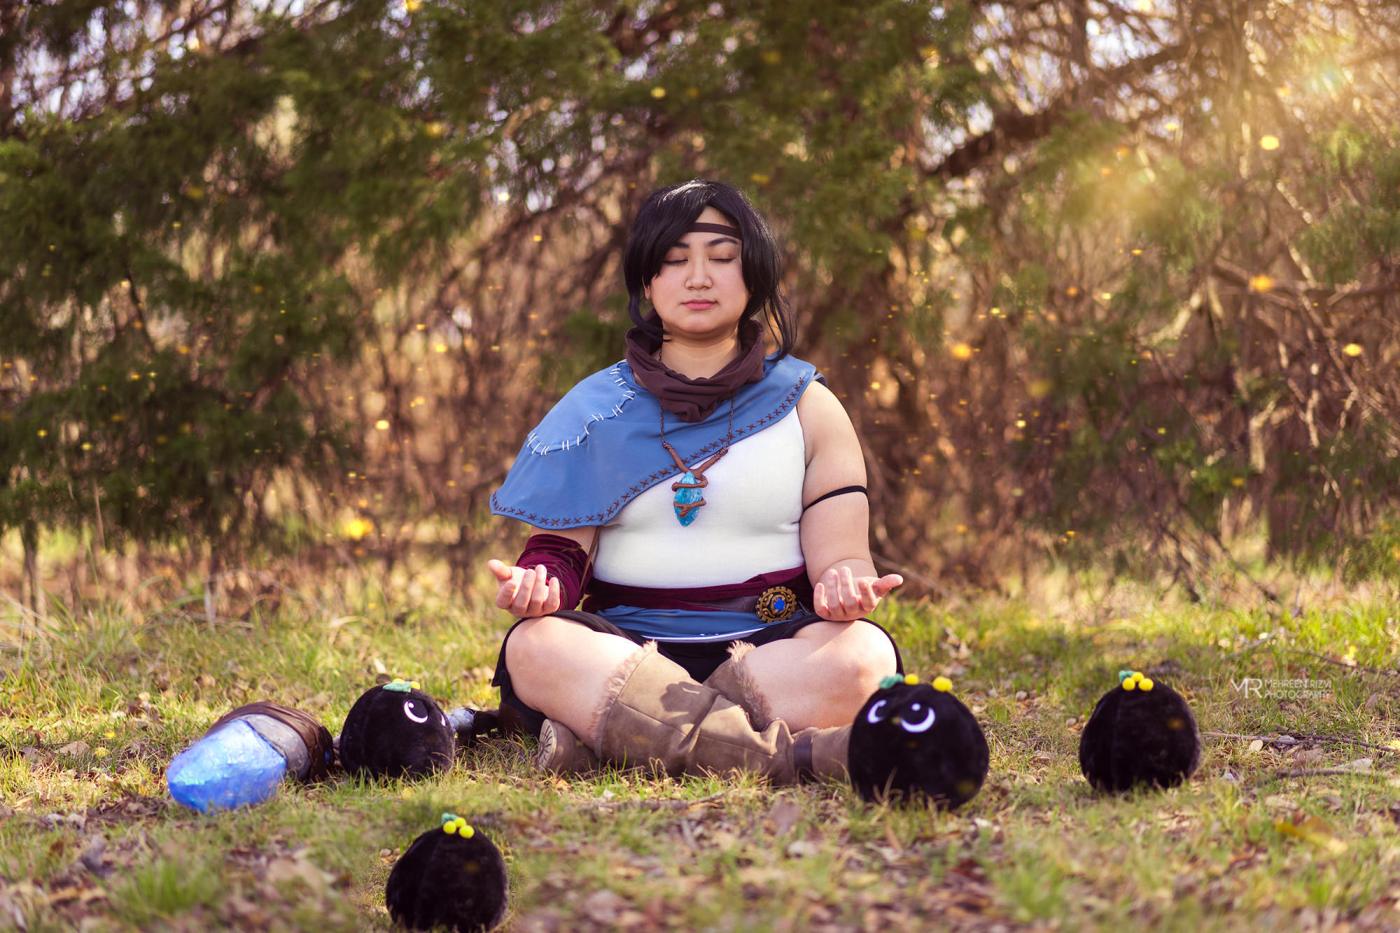
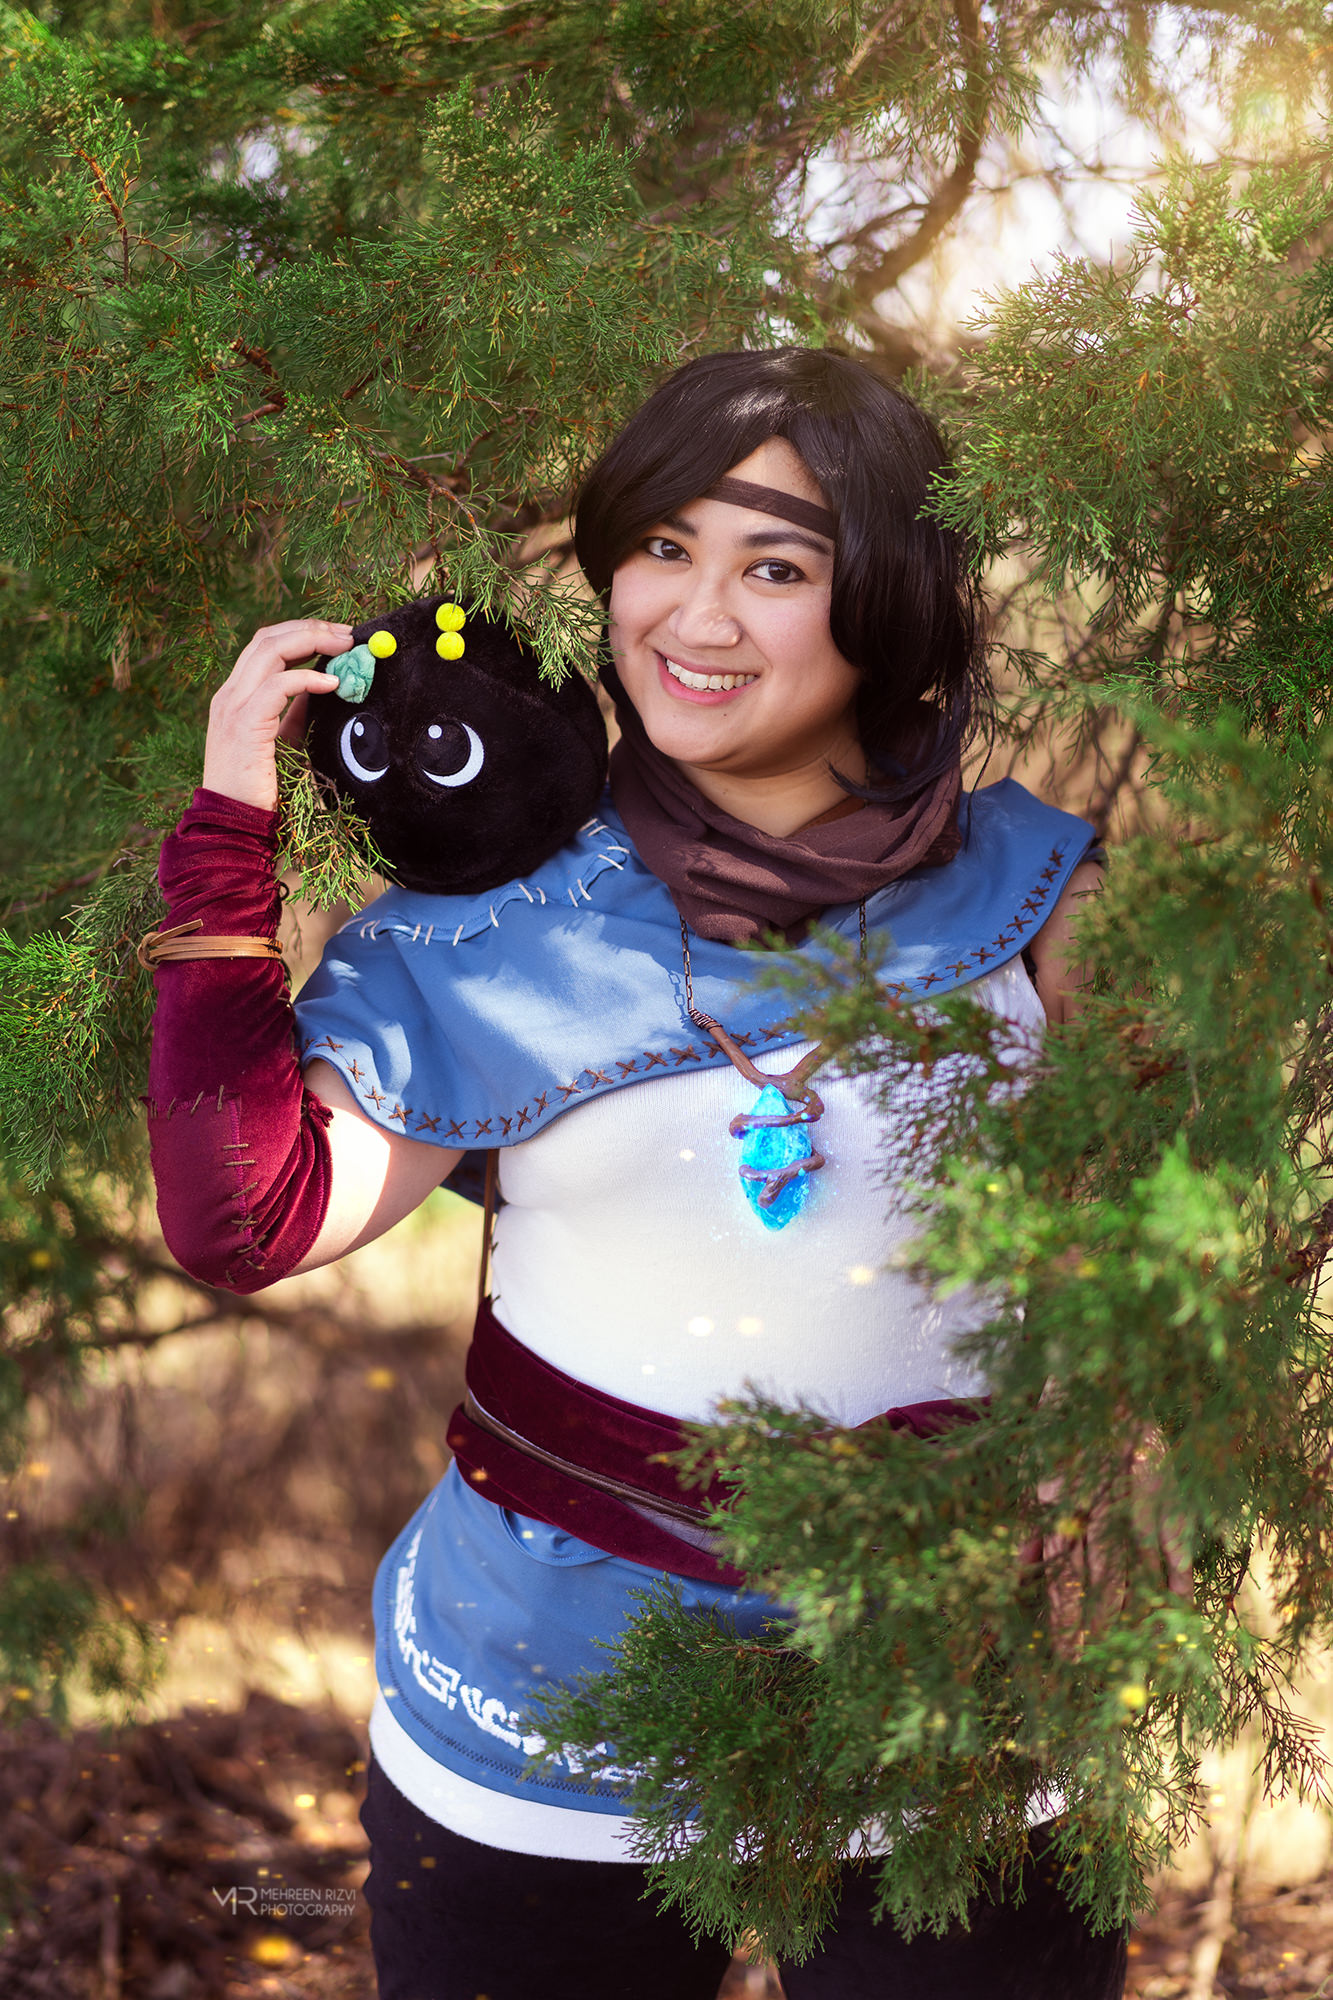
All finished photos by Mehreen Rizvi
Use my build post as inspiration? Let me know!
If you followed along with my build post to help you make your cosplay, I’d love to see it! Leave me a comment or send me an email at ashweezcosplay(at)gmail(dot)com. If you’re comfortable with it, I’d love to showcase your cosplay photo(s) in the blog! I will of course give you credit and link to any socials you may have.
