
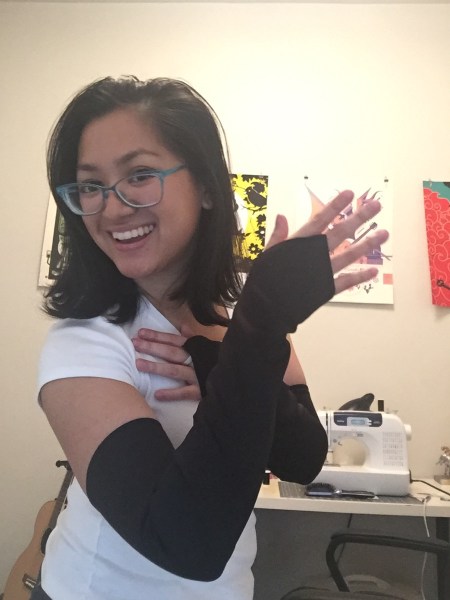
I’ve cosplayed Blake and now I’m cosplaying her momma Kali. She’s a super adorable cat mom so I just HAD to cosplay her! Also, she’s kinda tiny which I think works pretty well for me.


Fan Expo Dallas in Dallas, TX (Apr 2018)

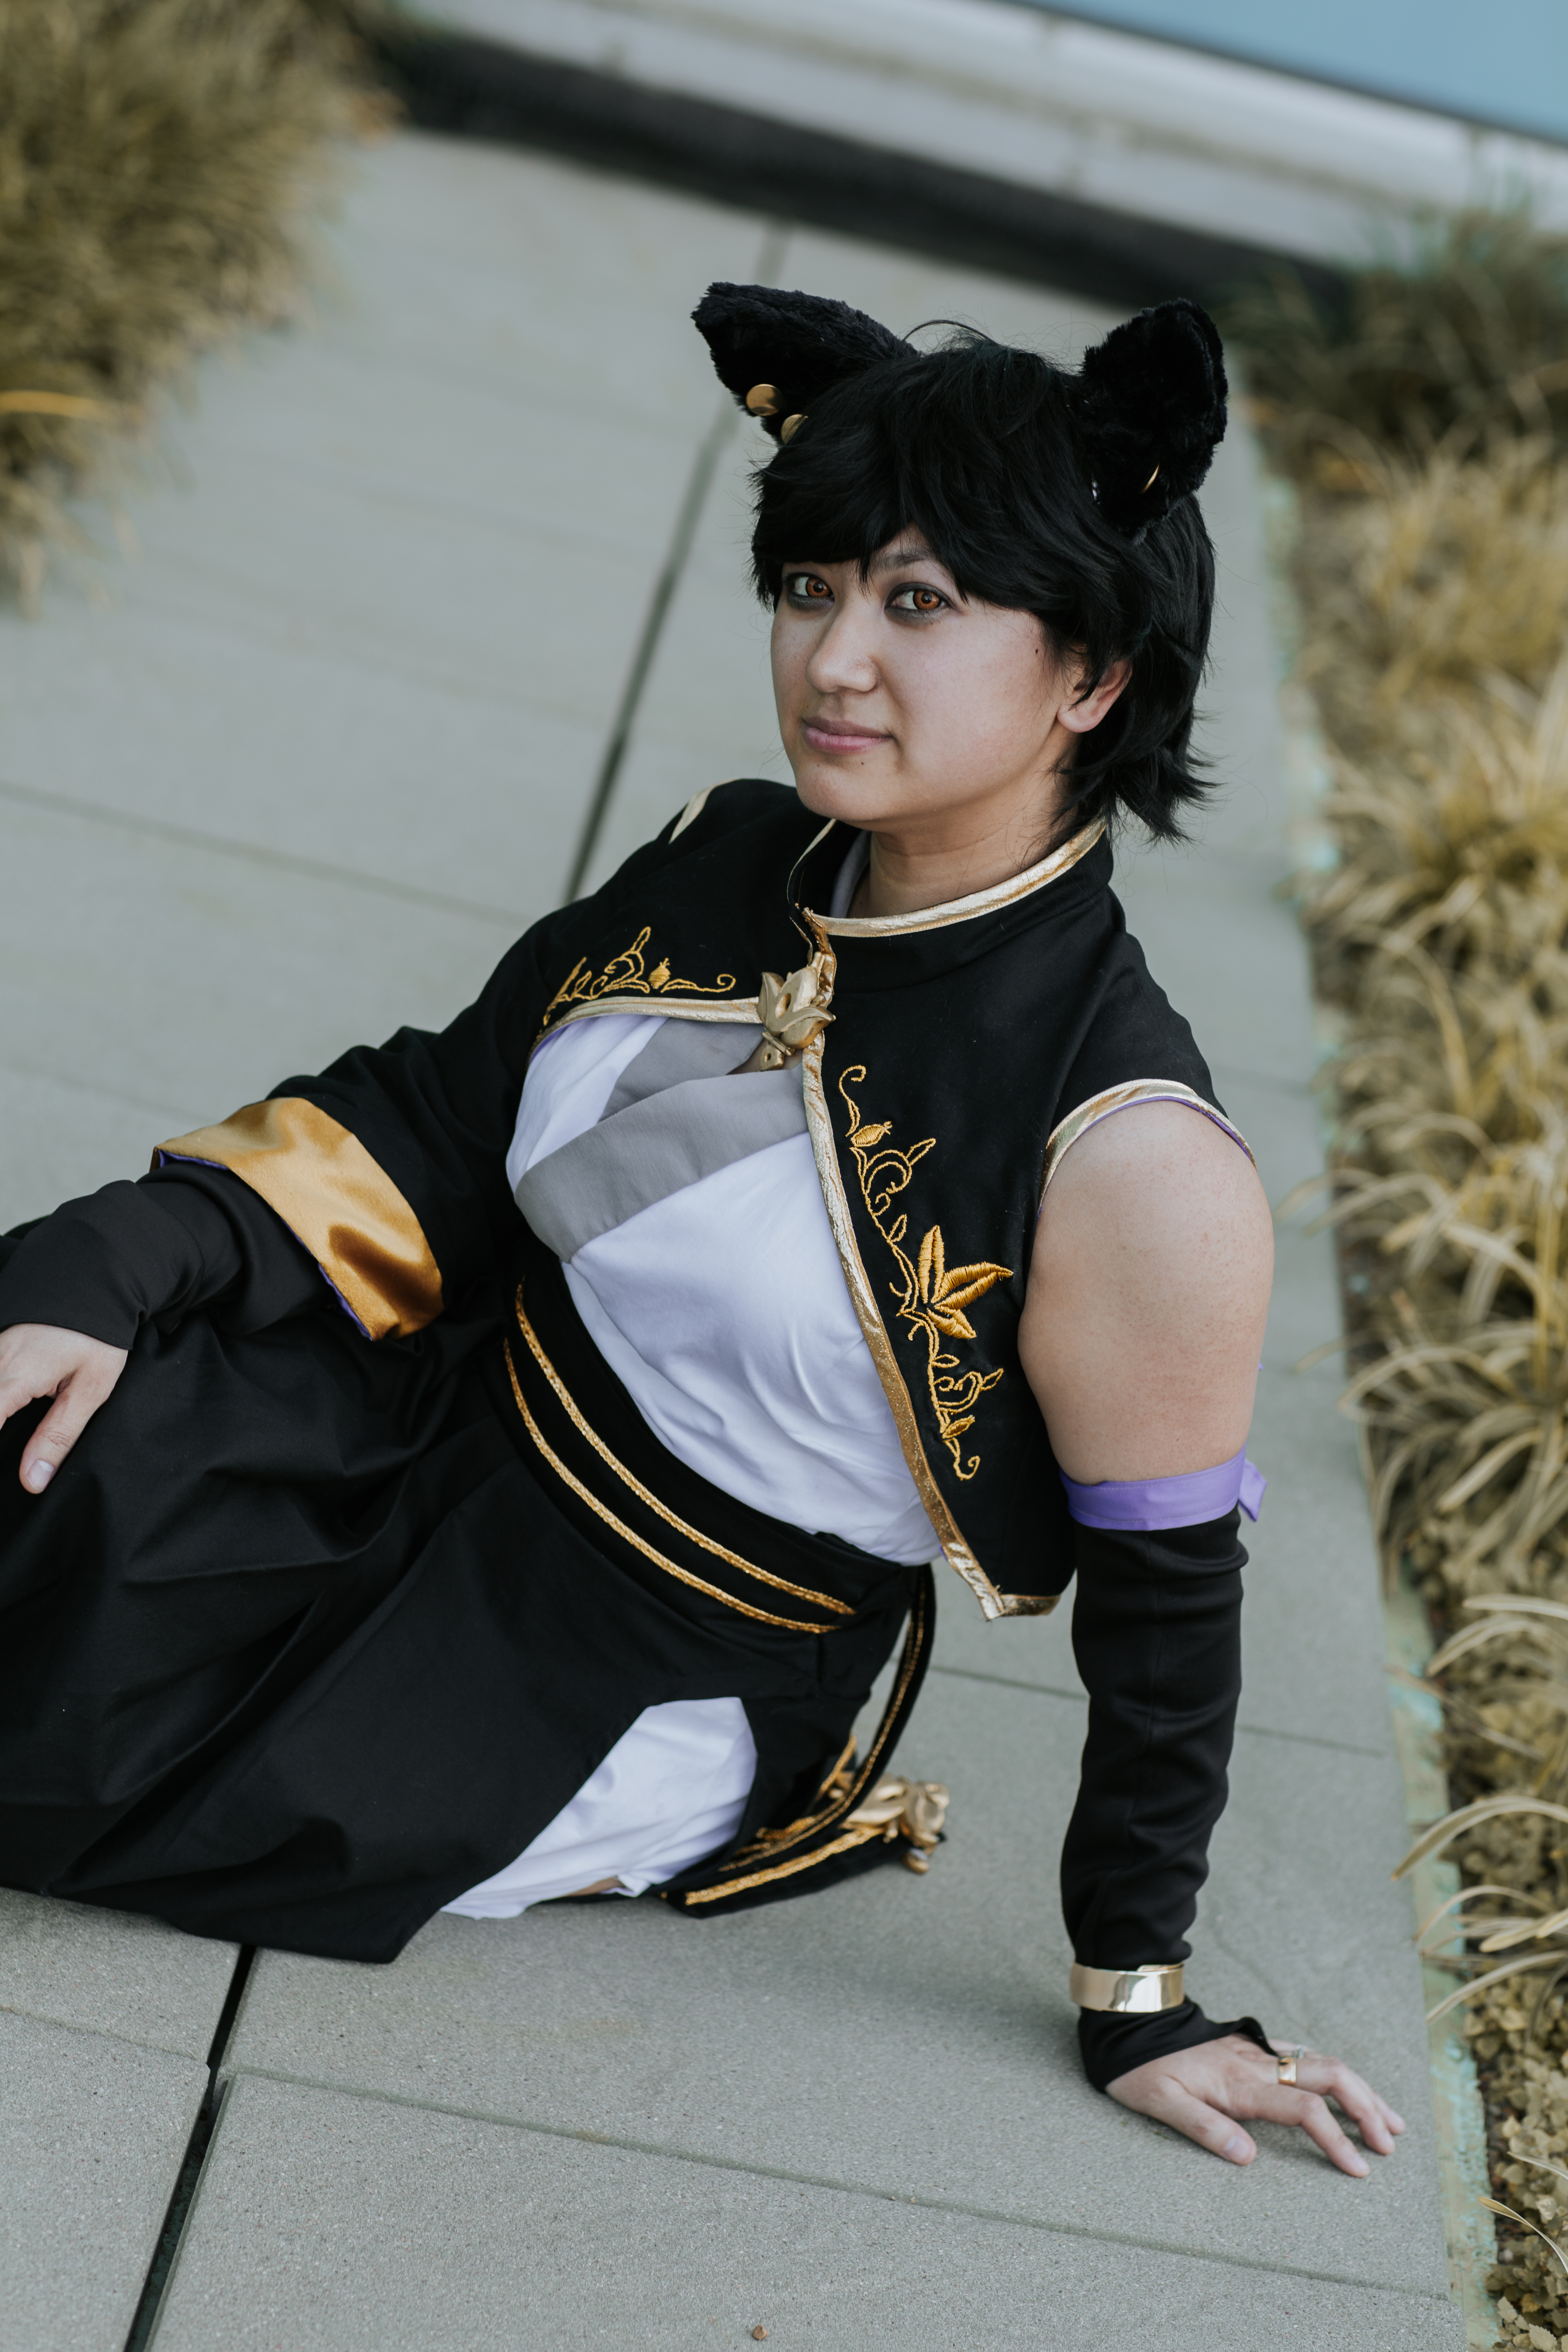


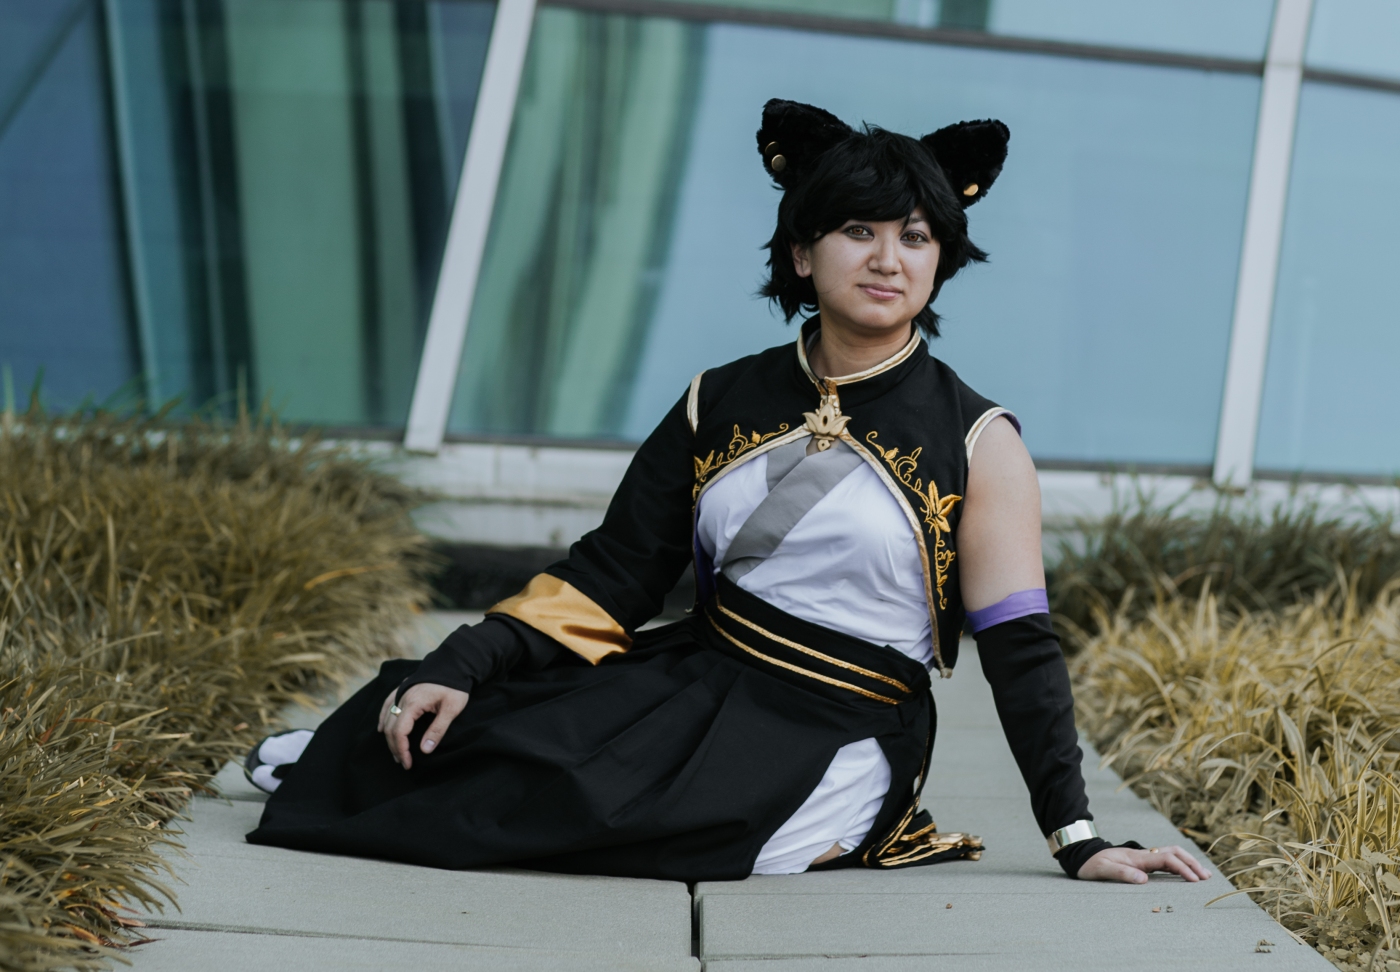
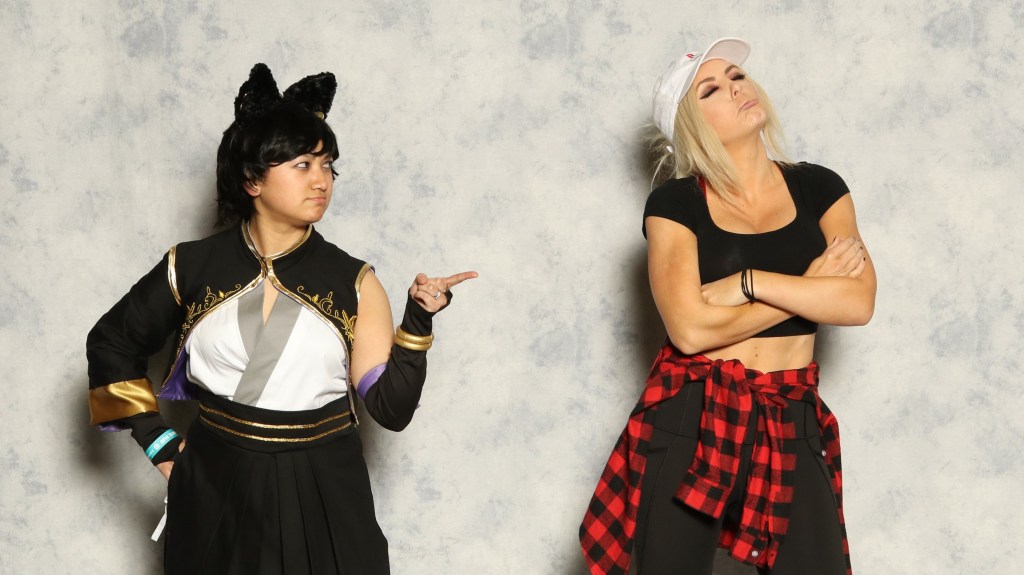
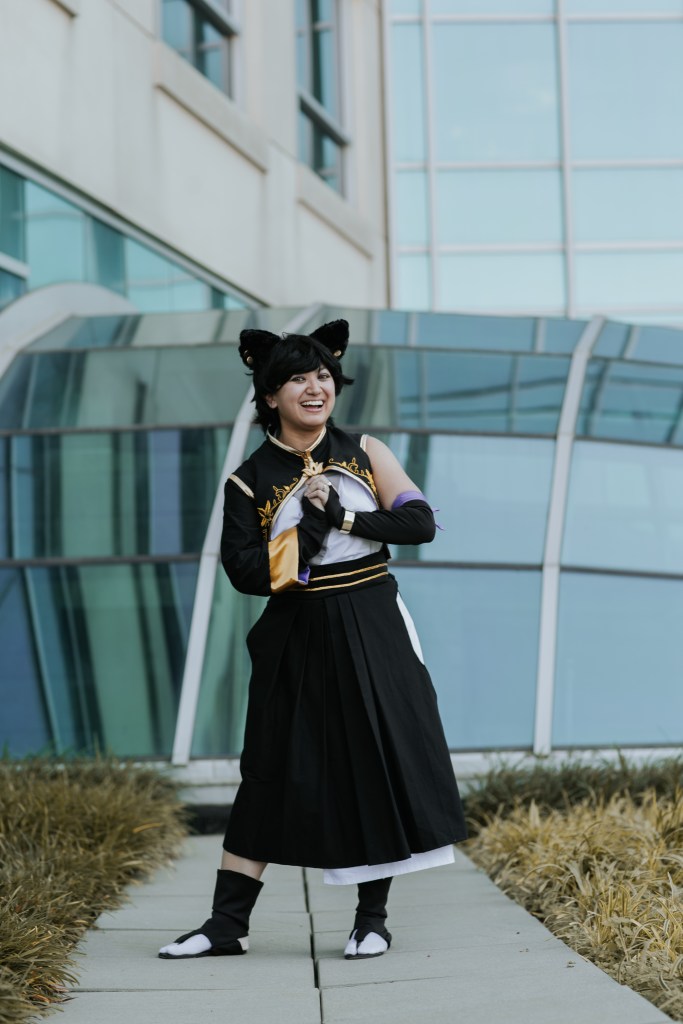
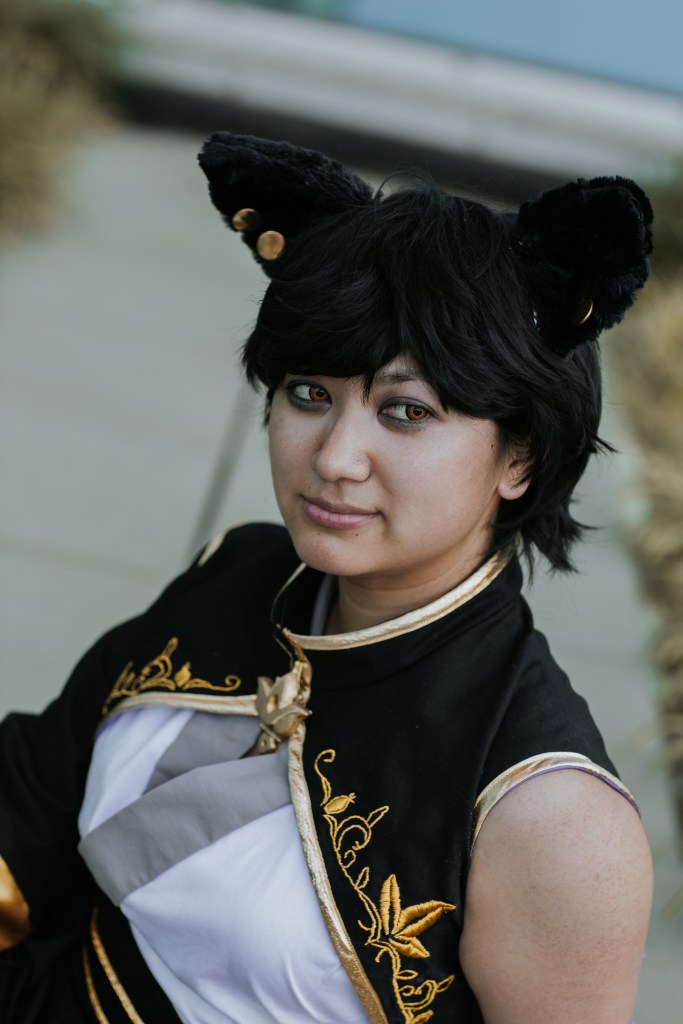
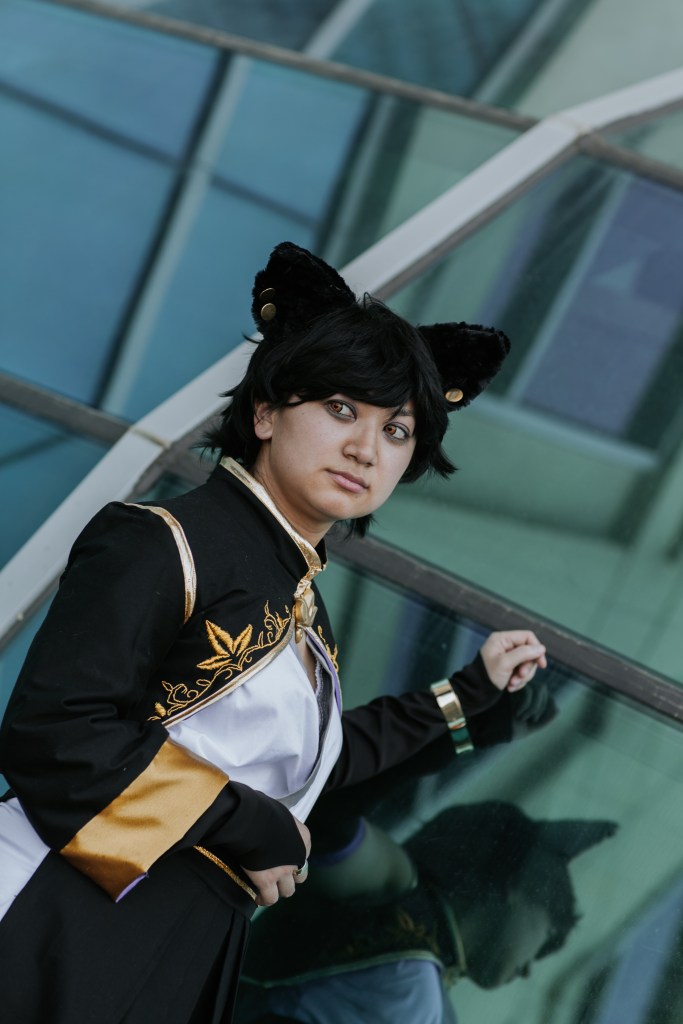
Akon 29 in Fort Worth, TX by Allie Norado Photography (Jun 2018)

I thought her outfit would be a nice step up in difficulty for me sewing-wise. I wanted to pick something that would teach me some new skills (embroidery!) but also not overwhelm me. (Worbla is scary and expensive!) Not only that, but I pretty much wanted to cosplay her ever since I saw her in the RWBY Volume 4 opening credits. I mean, come on, look at her! Isn’t she so cute! *Lures Kali over with catnip*
As per usual, feel free to skip down to the part you’re interested in:
Armbands
For the armbands, I used my Korra armbands as a reference while using leftover fabric from my Blake armbands. I made sure to leave extra fabric on the wrist end, however, since Kali’s armbands extend to her middle finger. After making sure the fabric was the right size for my arm by pinning it in place and very carefully trying it on, I folded it in half and cut a diagonal line for the hand part.
To keep the end in place, I used a strip of swimwear elastic band as a ring. I cut out a little more than the circumference of my middle finger, then sewed the ends together with a little X stitch. Then, after hemming the edges of the armband fabric and stitching the side together to form the armband, I hand-stitched the little stretchy ring to the point of the triangle. I would actually end up removing this elastic band in favor of a more accurate solution: 2 gold rings I bought from Old Navy.

For the purple ribbon, I used the same fabric I used for my shrug lining. I cut a rectangle piece of fabric that was a couple inches longer than the circumference of the armband and about 3 inches wide. I hemmed all four edges and then tried on the armband and pinned in place the purple ribbon. I stitched all of it except the ends to the armband so that it would look clean and flush with the armband edge.
After this, I ended up actually adjusting the shape of the armbands a little bit at the hands to better match Kali’s. Then, using e6000 superglue, I carefully attached gold rings I had bought at Old Navy to the end of the middle finger part.
Kimono
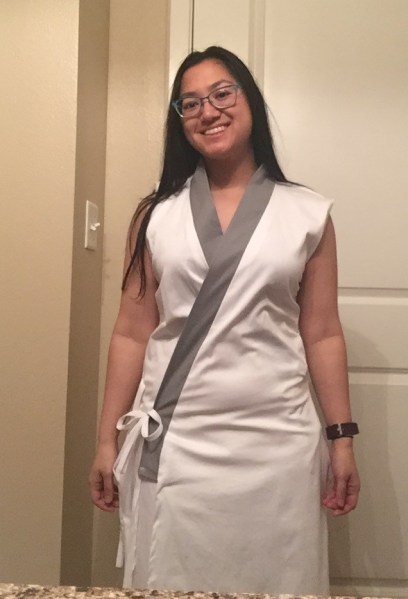
I found a great pattern that works great for both the kimono and hakama: Simplicity #8318. I used the pattern for part A (size S) for the kimono and left off the sleeves since they wouldn’t be necessary for Kali. I needed to use the full length kimono because the white part of Kali’s “dress” shows up underneath her skirt.
I followed the pattern pretty much exactly with the exception of the length (I am very short lol). I actually followed it too closely at one point because I stitched all the way down the side seams when, in reality, Kali has a long slit going up the sides. So I had to take seam ripper to those seams… twice.
Overall, the pattern worked almost perfectly. I only made a small number of alterations, including not using interfacing for the collar and taking in the side seams a bit. I probably could have used the size XS of the pattern rather than S. I also adjusted the placement of the bias tape I used as ribbons so that it fit me better.
Hakama Skirt
Using the same Simplicity pattern, I started the hakama. This one I had to make significant modifications to, but the base was a really good starting point.
Instead of following the pattern perfectly for the front and back pieces (which called for four pieces total), I folded my fabric in half first before cutting so that I’d have just one continuous piece for the front and one for the back. Also, because Kali’s hakama is a skirt and not pants, I didn’t have to cut out the inner leg or facing pieces.
Pleats

At first, I followed the pattern’s pleats exactly. While they looked nice and were good practice, they weren’t what I needed. I realized that the pleats were too wide; there wouldn’t be enough room to the sides of them to do that hole that Kali has that reveals the slit in her kimono. So, after undoing my basting stitches and ironing out the original pleats, I made my own.
I did it by doing a series of 4-inch pleats that, once folded, come out to around 2 inches wide. I made the pleats half an inch from each other so that there’d be a little bit of overlap but not too much space between them. This worked out perfectly. When I did the pleats, I marked with chalk the pleats on both the top and bottom hem of the fabric, then folded the whole thing and pinned both sides. This way, I could get one smooth fold for each pleat instead of it ending somewhere in the middle. Once everything was pinned, I ironed down the pleats then basted them at the top.
Side holes
This part was weird. I don’t have a video of me doing it cause it was awkward and also involved me wearing nothing but the kimono so there were panty shots galore. (Sorry folks lol) This is a case where having a dress form would have been so much easier.
I did it by putting on the kimono, pinning on the hakama where I thought the side seams of the skirt would be, then very slowly putting the makeshift skirt on over the kimono. I hiked it up to my waist and then fiddled with it to find out where the side hole would need to be in relation to both my hips and the kimono slit. It was at this point that I realized the slit wasn’t high enough, hence the aforementioned seam ripping. After adjusting the kimono, I had to do the whole song and dance again of trying to put the pinned skirt on.
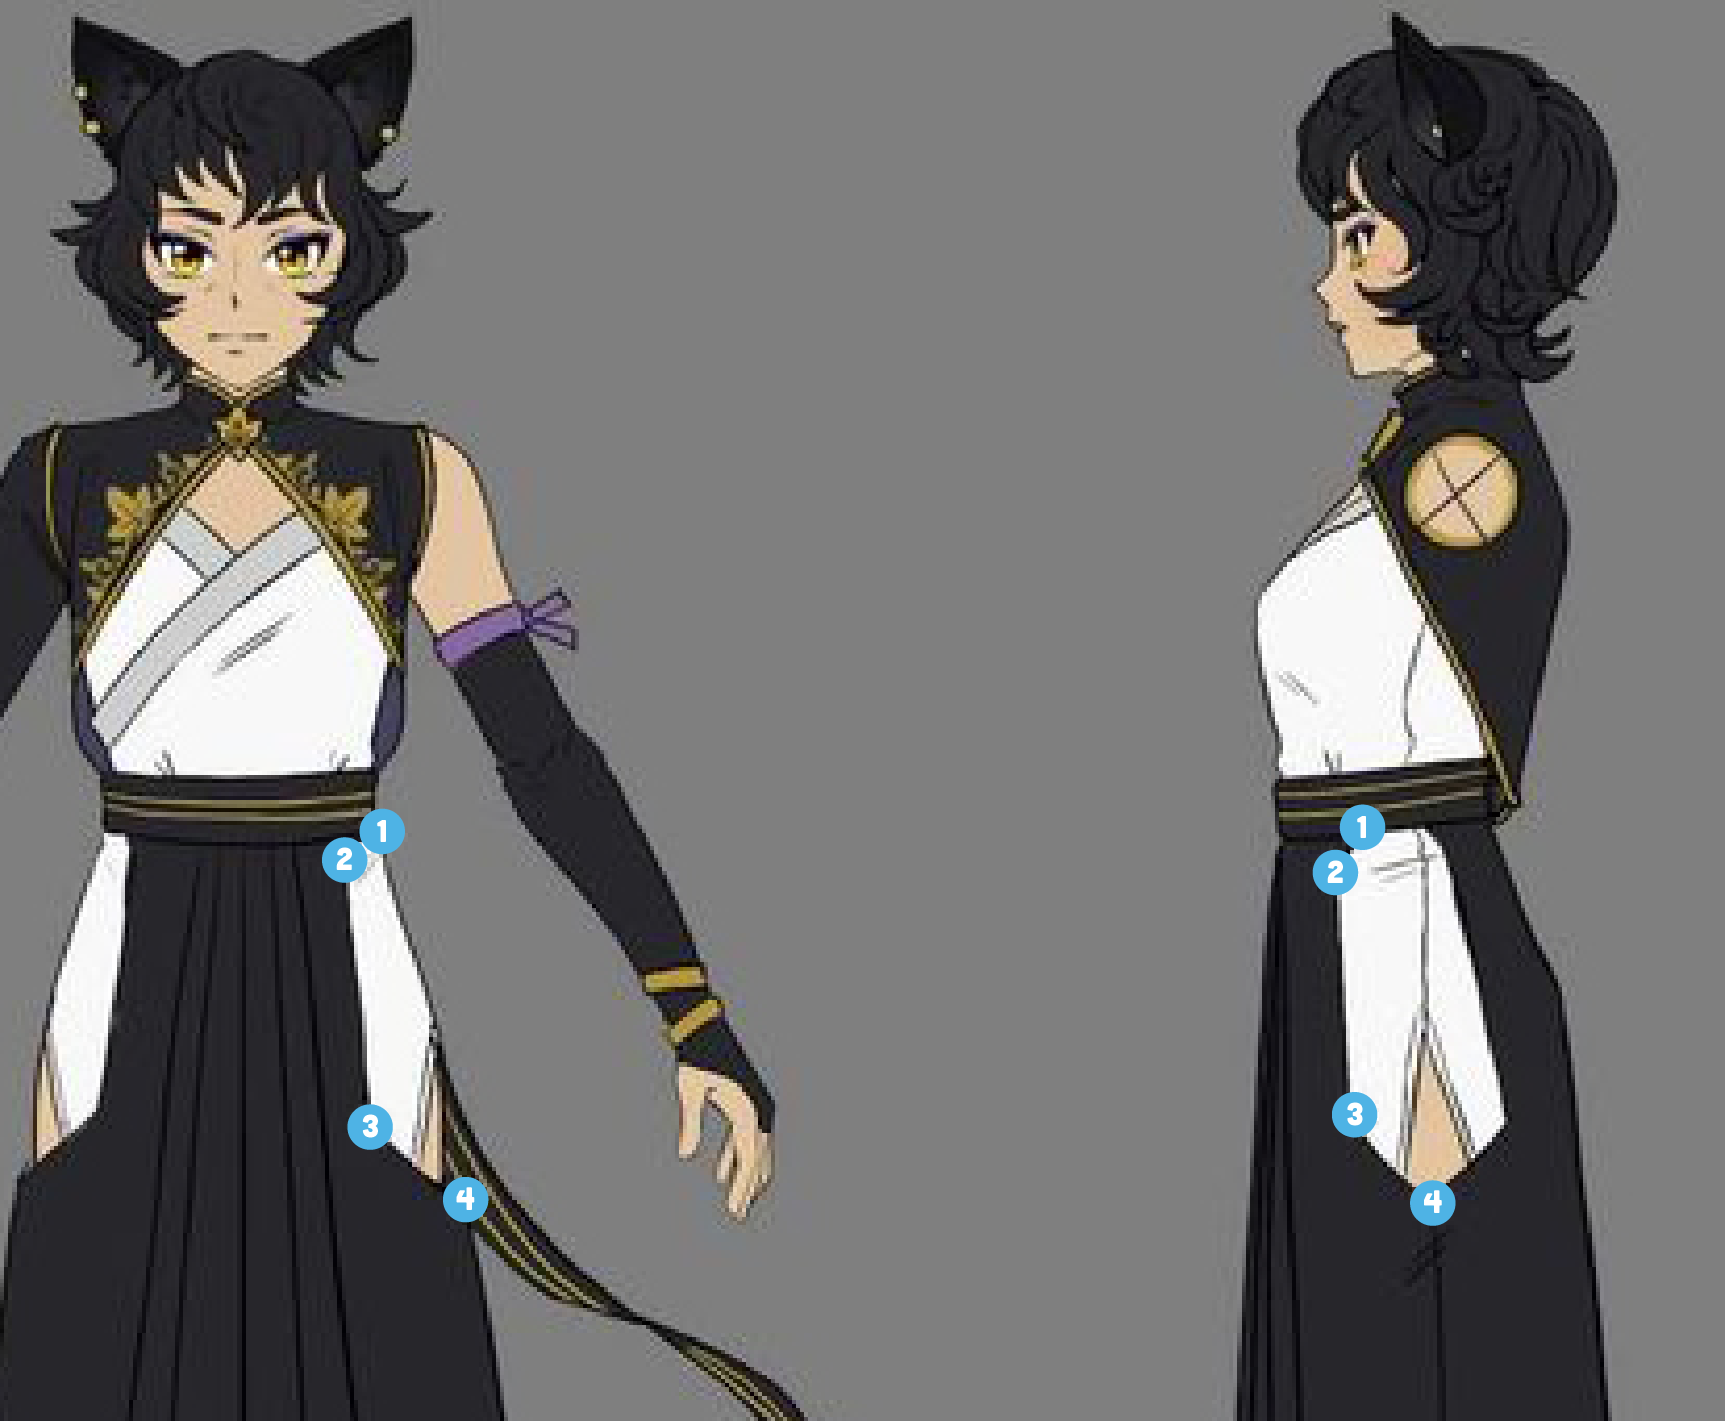
I marked four points on my skirt with pins, which I’ve marked on the picture below. These four dots would be where I draw the lines to cut the hole. After taking the skirt off, I measured out where the pins were so I had an accurate record of it. I also adjusted the pins a little bit since points 2 and 3 weren’t perfectly in line vertically. Once I was happy with how the dots looked, I used chalk to connect the dots together with a yardstick. I then repeated that three more times for the other sides. Finally, I cut out the holes and finished the raw edges with black single fold bias tape. The bias tape rounded the corners a little bit, but the shape itself is pretty close to the concept art, if a bit less angular.

Waistband and belt
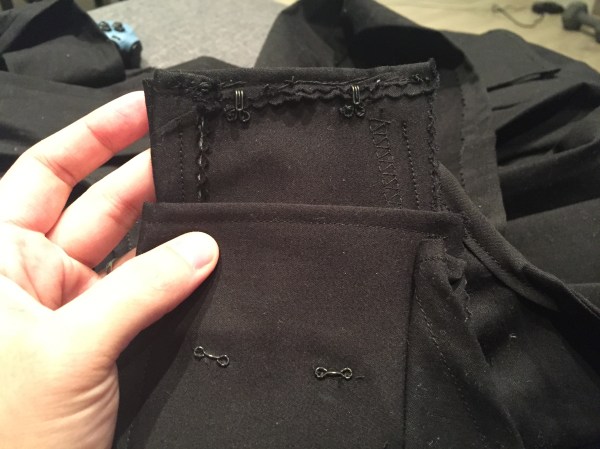
Next up was the waistband. I used lightweight interfacing (the same kind used for shirt collars) for both the front and back pieces of the waistband. I ironed on the interfacing to the black fabric then stitched them to the skirt. After that, to ensure that everything stays in place, I hand-stitched on four pairs of black hoops and eyes, two pairs per side.
The concept art shows the straps of the hakama belt being of different lengths: one ending halfway down her skirt and the other near the bottom. To achieve this, I pinned two long strips of black fabric that I had hemmed to the sides of the front waistband piece, purposefully making them longer than intended so I could cut them to the right size. Then, I tried on the entire outfit and marked with pins where each fabric strand should end. Once satisfied with the length, I removed the skirt and shortened/hemmed the strands and stitched them onto the skirt.
With the belt now a continuous piece, I handstitched two strands of gold trim to the belt. I would’ve liked to have done it with the sewing machine, but given the weaving of the belt, it proved difficult. I had to resort to handstitching it in place which took about 3 episodes of Netflix’s “The Crown” and a few hours of watching Jason play through Deus Ex: Mankind Divided. I regret not actually timing it to see how long it took me precisely.
Once I did one side, I realized I’d need to do the other because sometimes the belt would twist in such a way that it showed the back and you could see the stitching. So, I went and bought more of the same trim and stitched it the back. Now, I don’t have to worry about how the belts fall because both sides will look fine!
Belt buckles

Kali has these little gold buckles at the end of her belt straps. (She also has a matching one for a bolero that’s a smaller size.) I attempted to make these using foam to disappointing results. Then, I found Skim Milk Cosplay on instagram who was also making a Kali cosplay! She made these amazing buckles out of resin. I messaged her on there asking about how she did it since I’ve never molded or resin cast anything before. She gave me tips and offered to send me some “raw” buckles for a great price! All I would have to do is sand and paint them! After a few months of toying with the idea of trying resin casting myself, I finally decided that it was too much upfront cost (there were lots of supplies I’d have to buy) and I would rather just pay another cosplayer who already has a great mold. I bought them from her and received them really quickly! They looked absolutely gorgeous.
Once I received them in the mail, I painted them on my apartment balcony using primer, then gold spray paint, and finally sealant. Afterwards, I followed Kamui Cosplay’s handy painting tutorial to weather them.


To attach the buckles to the belt ends, I used e6000.
Pro-tip! Either glue outside or in a very well ventilated room. I did this in my craft room with a ceiling fan and box fan on and it still smelt like glue for a couple days.
Cat Ears
I followed an amazing Youtube tutorial by Annette Celia Rosemary for the cat ears.

I followed her instructions pretty much exactly, save for using foam instead of cardboard for the base, since I already had foam leftover from the buckles. Seriously. Just follow that video. It’s perfect. After following the tutorial, I added 3 earrings (one on the left, two on the right) by using three flat, gold buttons. Attaching them to my head was as simple as bobby pinning them into place.
After a couple test runs, I noticed that the white foam on the bottom of the ears (the part that lays flat against my head) would sometimes show through. It looks really obvious since the ears are black and the wig is also black. So I used some black felt and hot glued them on so that it’s less obvious.
Shrug
For the shrug, I used Simplicity pattern #1138 (size 12, option C). I had to make quite a few adjustments to it, but it still worked nicely as a base.
Prototype 1.0

I cut out the pieces for the option C shrug, which included a front piece, back piece and sleeve. I didn’t bother with the collar until I got to the final stage just because I already had some collar experience from Korra and was pretty confident I could draft one once the rest of the shrug was done.
To match Kali’s shrug, I extended the bottom hems of the front piece and also made the sleeve rectangle rather than coming to a point. I didn’t make any adjustments to the back piece (until the very end). I made notes of what changes I made, cut the pieces out on scrap fabric, and stitched everything together. I kept the sleeve very long intentionally so that I could trim it later.
Once it was on me, I realized two things:
- The front pieces could stand to be longer.
- I really messed up sewing the sleeve to the shoulder seam.
Keeping this in mind, I drafted a pattern for the next prototype.
Prototype 1.1

This time, rather than tracing the Simplicity pattern onto fabric and then making adjustments, I traced it onto paper. I made notes of the adjustments I had made for 1.0 and then from there incorporated the changes I had noted. As for fixing the sleeve, it was a matter of rereading the instructions and realizing I had stitched the pieces on wrong.
I cut out my new paper pattern, transferred it to scrap fabric, and yet again stitched everything together. This time everything was pretty much perfect, so I was able to draft the pattern for the back piece that connects to the front piece. (See below.)
After trying it on, I marked two lines on the sleeve: one for where the black fabric needed to end and one where the gold trim fabric needed to end. I trimmed the sleeve at both lines.
Once again, I had to make sure my pattern was up to date since I would be using the final pattern twice (once for the purple lining and again for the black fabric). The only adjustment I had really made was the addition of the back piece and trimming the sleeves. So I used a seam ripper to remove the sleeve from the prototype and also undo it so that it was flat. I put it on top of my pattern and trimmed it where necessary.
Lining

The lining was as simple as using my latest paper pattern on my satin purple fabric. The only tricky part was making sure I got the sleeve on the correct side. Because it’s a lining, it’s effectively the exact same pattern but turned inside out so that the seams are hidden underneath. That made perfect sense when it was just the front and back pieces stitched together since they’re already symmetrical, but I had to do lots of talking to myself to make sure I got the sleeve right. What helped me the most was to follow the Simplicity pattern instructions but to consider what would normally be the wrong side to now be the right side and vice versa. It took some mental gymnastics but I got it in the end.
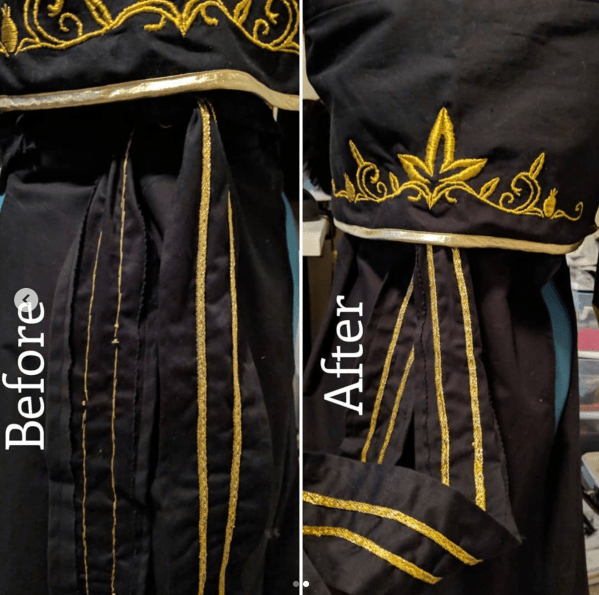
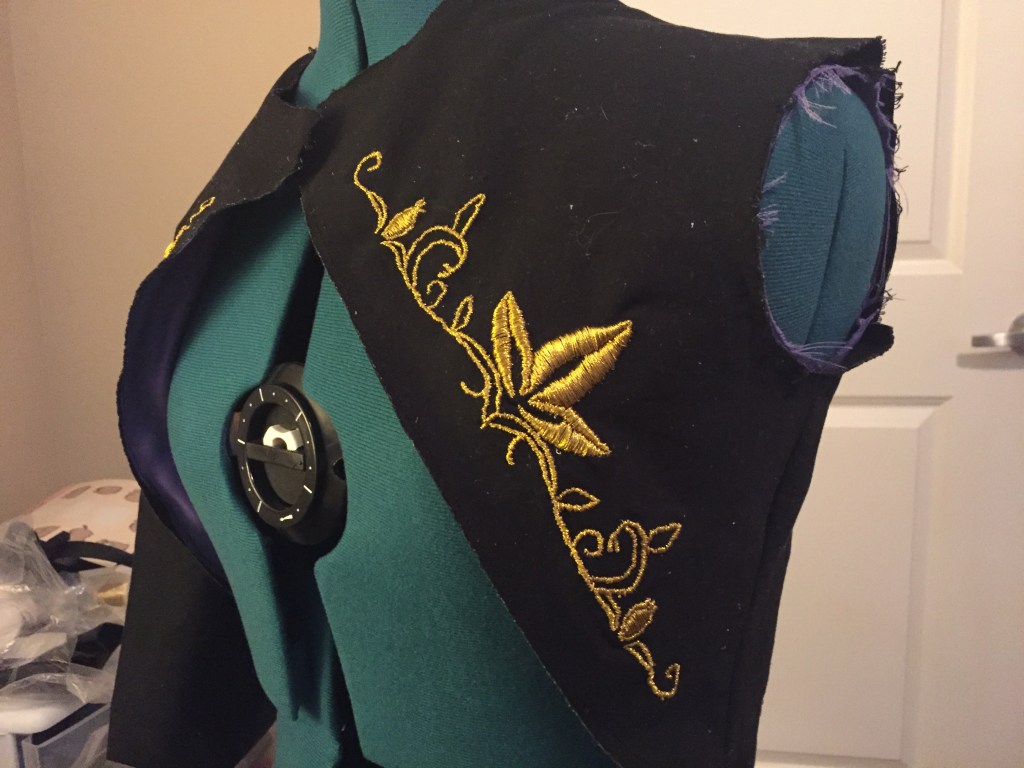
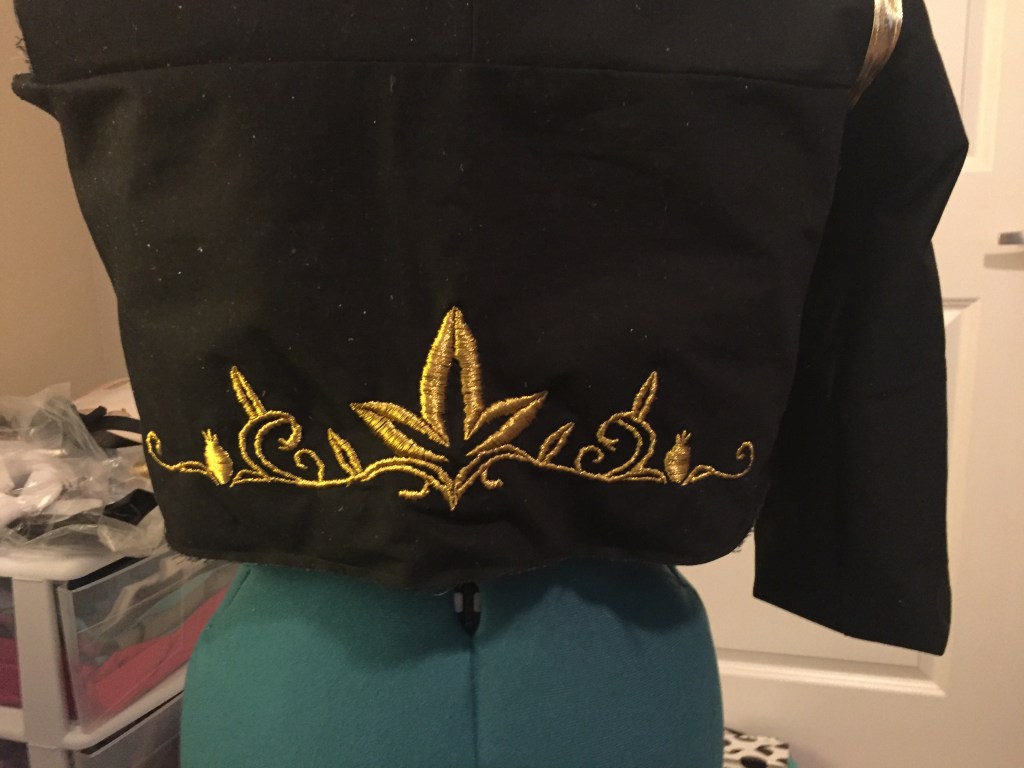
Embroidery
This was my first time trying out embroidery. Remember Skim Milk Cosplay? Well, she’s the one who inspired me to do embroidery for Kali! I had seen some Kali cosplayers on instagram using fabric paint and appliques. I was thinking of using appliques myself until I saw Skim Milk’s embroidery and thought “Damn! That looks amazin! I gotta try that!”
It seemed like embroidery would be a good fit for me since I already find needlework meditative. (It also gives me nice quality time with Jason on the couch.) So I went to Joann’s to stock up on supplies:
- Embroidery needles
- Metallic gold embroidery floss
- Embroidery hoop
- Embroidery interfacing
- Carbon transfer paper
Being an embroidery noob, I of course took to the internet for sage advice. Here are some pages I found very helpful:
- Flamingo Toes: “Embroidery Tips”
- Instructables: “Embroidery 101: How to Embroider”
- Sublime Stitching: “How-to: Dark Fabrics Part 1 – White Patterns on Dark Fabric”
First, using the carbon transfer paper, I transferred my paper pattern onto the black fabric. I used my old Wacom tablet stylus to trace out the shapes, but you can use any ball point pen really. After pinning some embroidery interfacing to the back for some stability, I used back stitches to do the outline.
I started filling in the middle flower piece with satin stitching and quickly realized that I had picked out the toughest embroidery floss for a beginner. Metallic floss, while pretty, is an unruly beast of a thread. It comes apart very quickly and it can be difficult to pull through the fabric. The ends fray and the thread is so thin, so I had to use a lot of it to cover a small amount of surface area. I had to keep going back to Joann’s to buy more of it! It was, however, completely worth it. I love how shiny and pretty it all looks together!
At one point in the process, I went ahead and stitched the shrug pieces (sans sleeve) together just so I wouldn’t lose track of all the fabric.
Putting it all together!
Once the embroidery was finally done (79 hours and 40 minutes later!), it was time to put the entire shrug together. I started by trimming off any of the extra embroidery interfacing and then basting the sleeveless lining to the sleeveless shrug. I finished the left sleeve with single-fold gold bias tape. I then attached both the lining and fashion fabric sleeve to the shrug and stitched more gold bias tape around the right shoulder seam. I also added the little bit of gold fabric to the cuff of the sleeve. At this point, I finally measured out the collar (using a dress form I finally had!) and attached that to the shrug. Now, all the shrug pieces account for, I finished the rest of the raw edges with the same shiny gold bias tape.

The final touch on the shrug was to attach the resin pendant brooch. To do this, I hand-stitched two snaps onto the shrug. Then, yet again using e6000, I glued the other sides of the snaps to the back of the pendant. It worked really nicely!

Socks & Shoes
Tabi socks
Kali wears a pair of white tabi socks, which are those Japanese socks that have a little seam for the big toe so that it can be worn was sandals/flip flops. You can find them easily on Amazon, but I managed to swing by our little “cool Japanese stuff” speciality store Wabi Sabi in downtown Bend and found a pair! So that was handy. No need to wait for shipping when you buy it in a store! I did, however, end up buying more socks off Amazon because, due to me not painting my shoes properly for FanExpo, my first pair of tabi socks were ruined by lots of black paint.
Shoes
Kali has a very interesting set of shoes. They’re sandels with a thong and short heels. The back leaves the heel of her foot exposed, showing her socks. And on top of this, the shoe goes up even higher and covers her ankles.
These shoes don’t exist. It’s just not a thing. So finding a pair of shoes that I could modify was very difficult. It took a really long time to find them and they’re still not exactly what I wanted. The closest I got was this pair of tan sandals off Amazon with thongs, no heels, and elastic around the ankles. (That link has since changed to one’s that don’t have thongs. I don’t know why.) The top shape is kind of close to what I want, and I figured I could just cover it to look like Kali’s shoes.
To make this, I used the duct tape method of shoe cover making. It’s literally covering up your legs with duct tape, drawing the shape of the shoes on the tape, then removing the duct tape and cutting along the lines to form your new shoe pattern. It was incredibly awkward and required getting into some weird positions to draw all around my leg.


Once I made my pattern, I transferred it onto scrap fabric for a test. I realized that I didn’t have a way of really attaching the shoe cover to the shoe, so I added a rectangle of fabric to the bottom that the sandals would slip through. I made some minor adjustments (making the shoe cover around the ankles a bit tighter) then moved onto the actual shoe covers. Using the same black elastic-type fabric used for the armbands, I made the covers. I had just enough fabric for both shoes. Score!

With the shoe covers done, it was apparent that I would need to paint the sandals if I wanted them look accurate. The black fabric with the tan leather of the shoes just didn’t look right. At first, I simply painted them black using black acrylic paint and a sponge brush. I did this two days before FanExpo Dallas. As I mentioned earlier, this ended up ruining the socks. After walking around all day in these shoes, the paint rubbed off onto my socks and became quite the mess. So after FanExpo, I decided to repaint the shoes, properly this time. I covered the straps with painters tape and then used black primer to both prime and paint the shoes, then used clear sealant to seal in the paint. Fingers crossed it doesn’t smear off on my socks this time!
Accessories
Wig
For Kali’s hair, I used Arda Wig’s Hansel Classic in Black. It was pretty much perfect right out of the package, so I didn’t make any adjustments to it. Literally that easy.

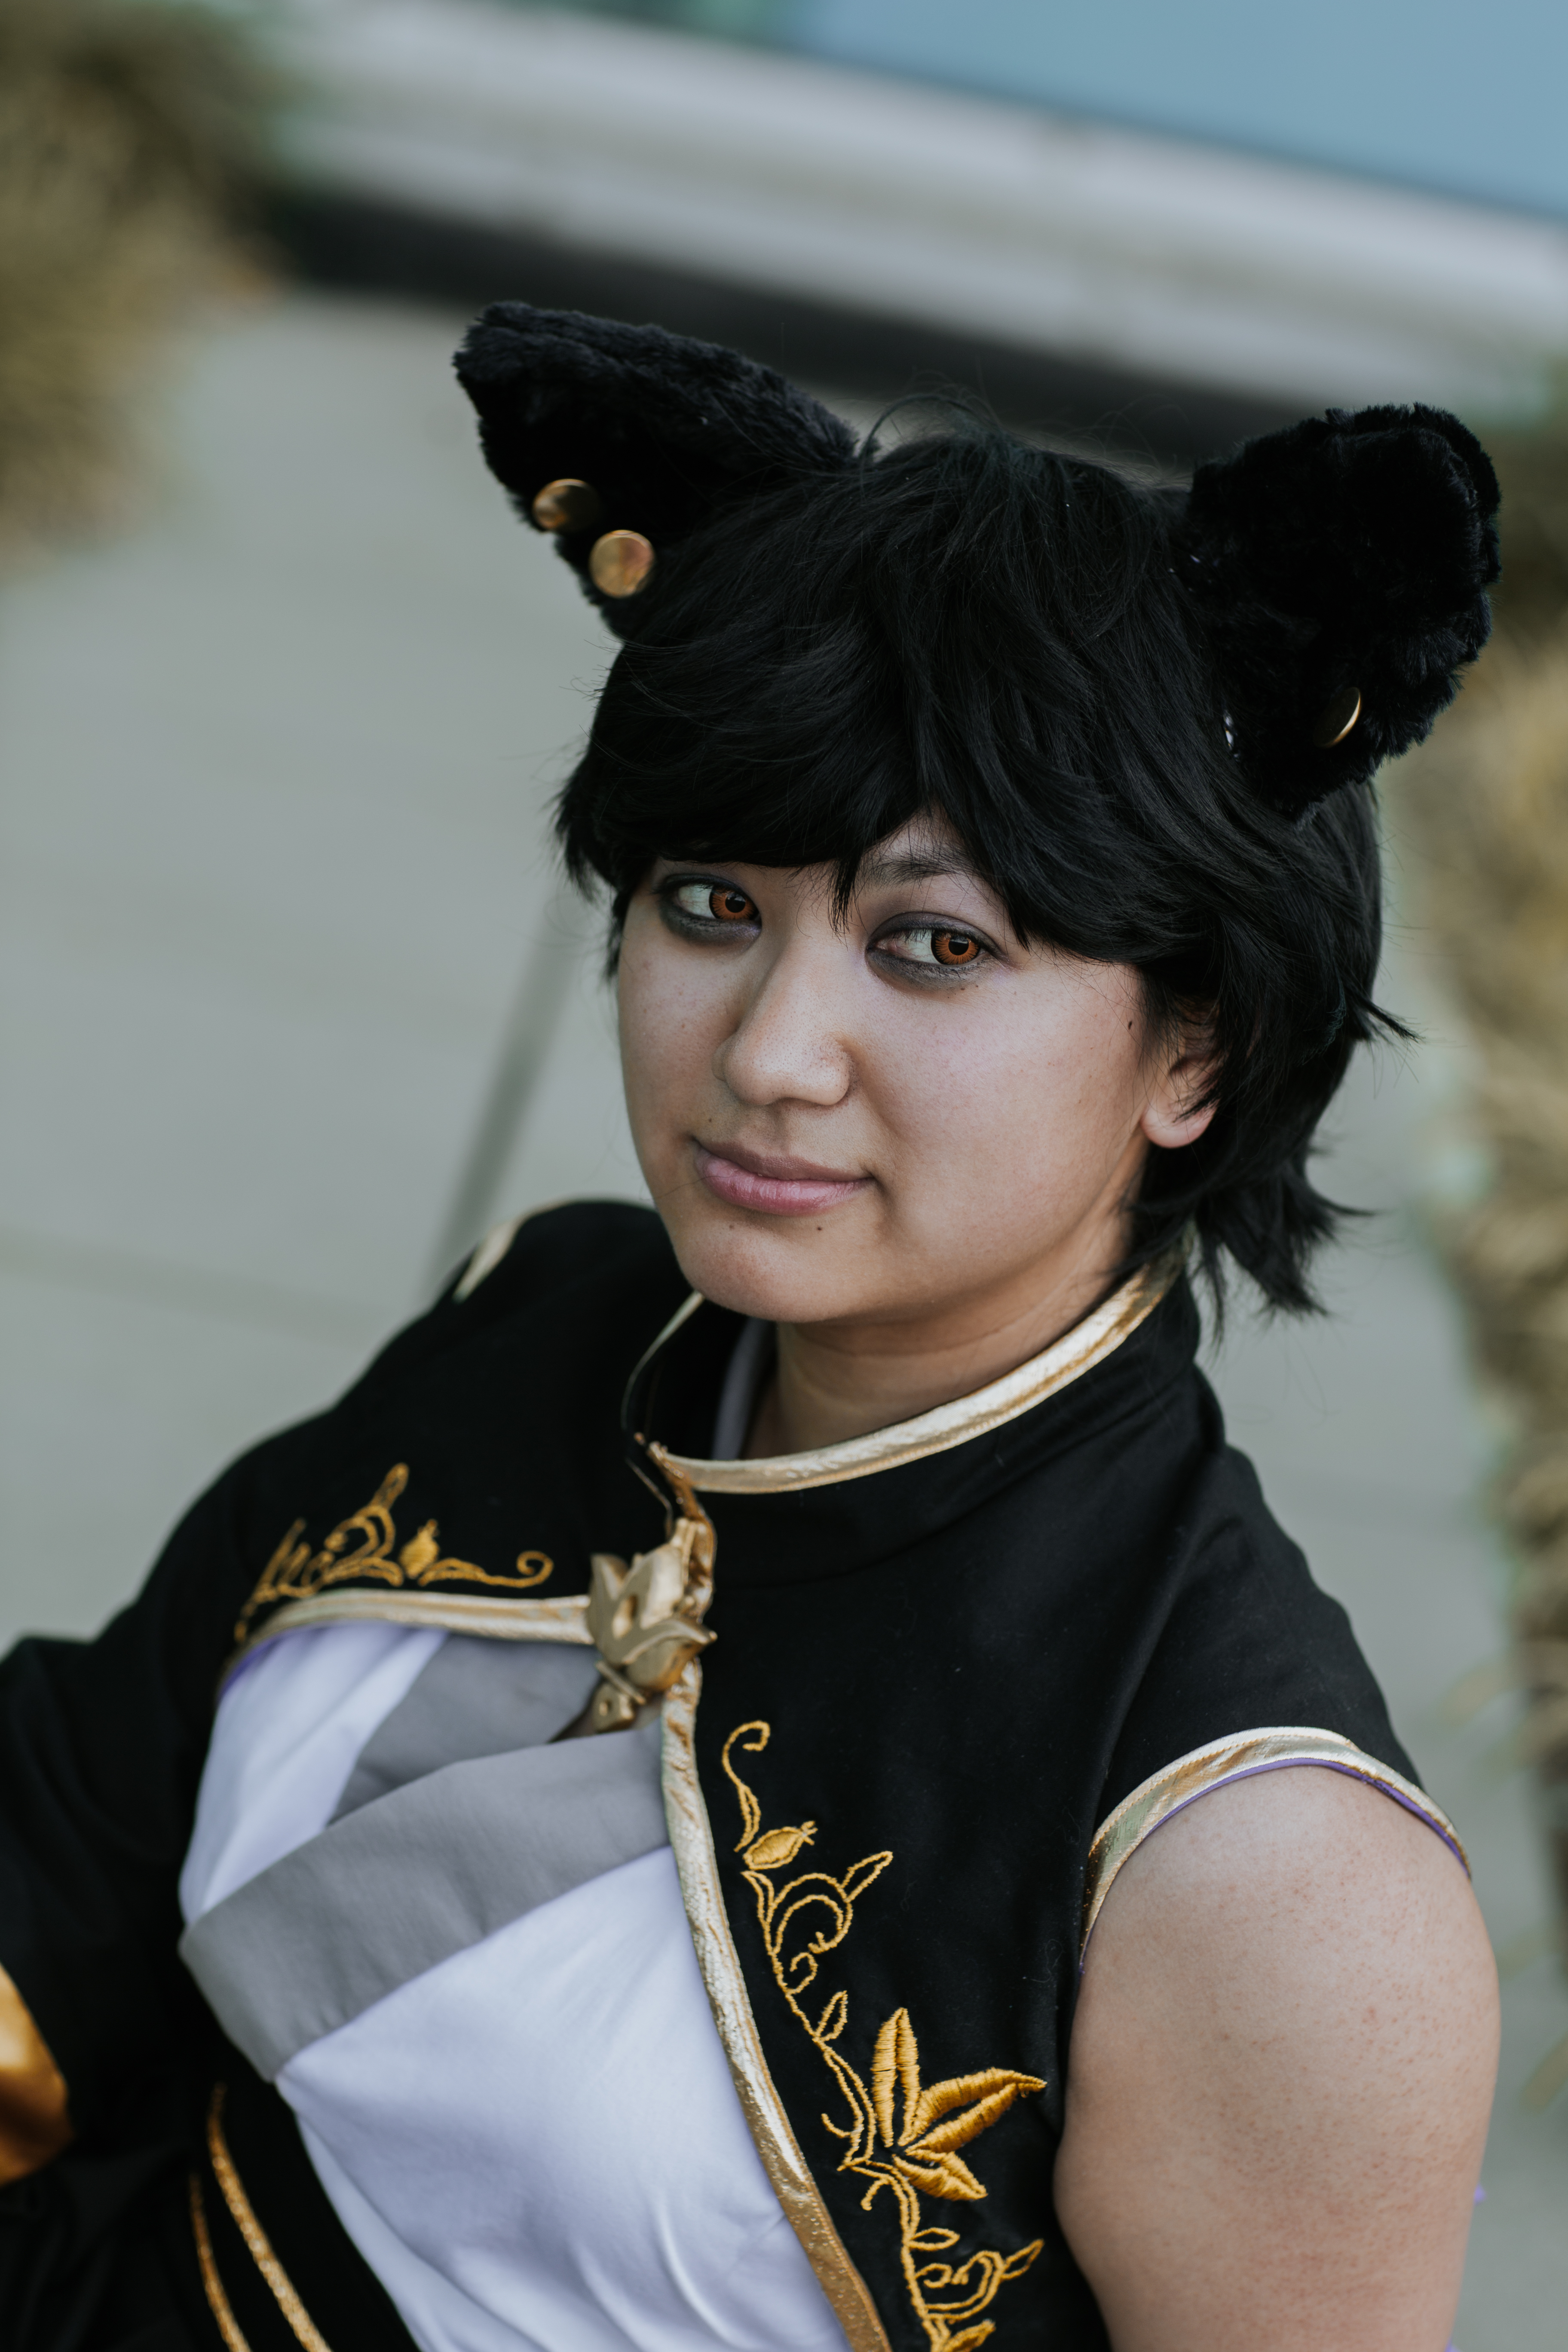
Contacts
I bought a pair of contacts for HoneyColor. I got the “New Moon Twilight Crazy Lens.” I’ve used HoneyColor before for my Korra cosplay contacts and liked them, so I gave them a shot again for Kali. They looked great and really pop in the pictures I got back from photographers. I will say that it was hard to see with them because I have astigmatism in both eyes and they don’t account for those in their prescription color contacts. So there was lots of squinting to be had at A-kon.
Bangles
I bought bangles on Etsy after using a different pair that I had found at Target. The ones I bought at Target were originally silver and I haphazardly painted them gold during con crunch for FanExpo. While they worked fine, they weren’t shiny or particularly good looking. So I bought these bangles off Etsy and I’m very happy with them! They’re lightweight and very shiny.

Conclusion: Lessons Learned & General Tips
I learned that it’s so much easier to use a pattern and modify it than to make one from scratch. Those two patterns I bought were immensely helpful and saved me so much time during the brainstorming portion of the project.
I also learned that as much as you try, you’ll never grab everything you need from the store at once. You’ll always forget something or realize you need something else. So be friendly with the craft store employees cause you’ll be seeing them a lot. And also because you should be friendly to them regardless.
Important things to remember while sewing
- The type of needle you use matters. Be sure you’re using the right size dependent on what fabric you’re using.
- The amount of thread tension also matters. This time around, I used a square piece of test fabric to try out different thread tension settings to find out which one worked best with the fabric and thread I had. I did this every time I used a new type of fabric, and made a mental note of it.
- Clean your sewing machine! I got my sewing machine in 2010. It’s now 2018. This project was the first time I had cleaned my machine since receiving it as a gift. It was disgusting in the bobbin area. There was so much dust and loose thread from all my previous sewing projects. Cleaning the machine and switching out the needle at the beginning for my armbands took it from constantly jamming to running super smoothly.
- The type of thread you use matters. That metallic embroidery floss… my god. What a pain in the butt to use. It’s very beautiful but it took me a very long time to use. In the end it was worth it. I do, however, look forward to using a cotton thread in the future.
- It’s okay to take a break. This cosplay has been months in the making. I went through periods of intense constant work to none at all. Normal life gets in the way and that’s okay. (And sometimes you decide that you should get married and make your own wedding dress, so that also gets in the way.) Whenever you feel yourself getting burnt out on a cosplay or project, allow yourself a break. You won’t be very productive if you’re working while frustrated, so give yourself some space from it. Coming back to it refreshed and with a clearer mind means you’ll be much better off moving forward.
- Ask for help! I’m so thankful that I reached out to Skim Milk Cosplay for help with the buckles. If I hadn’t asked her about how she made hers, she never would’ve offered to make some for me!
Pictures!
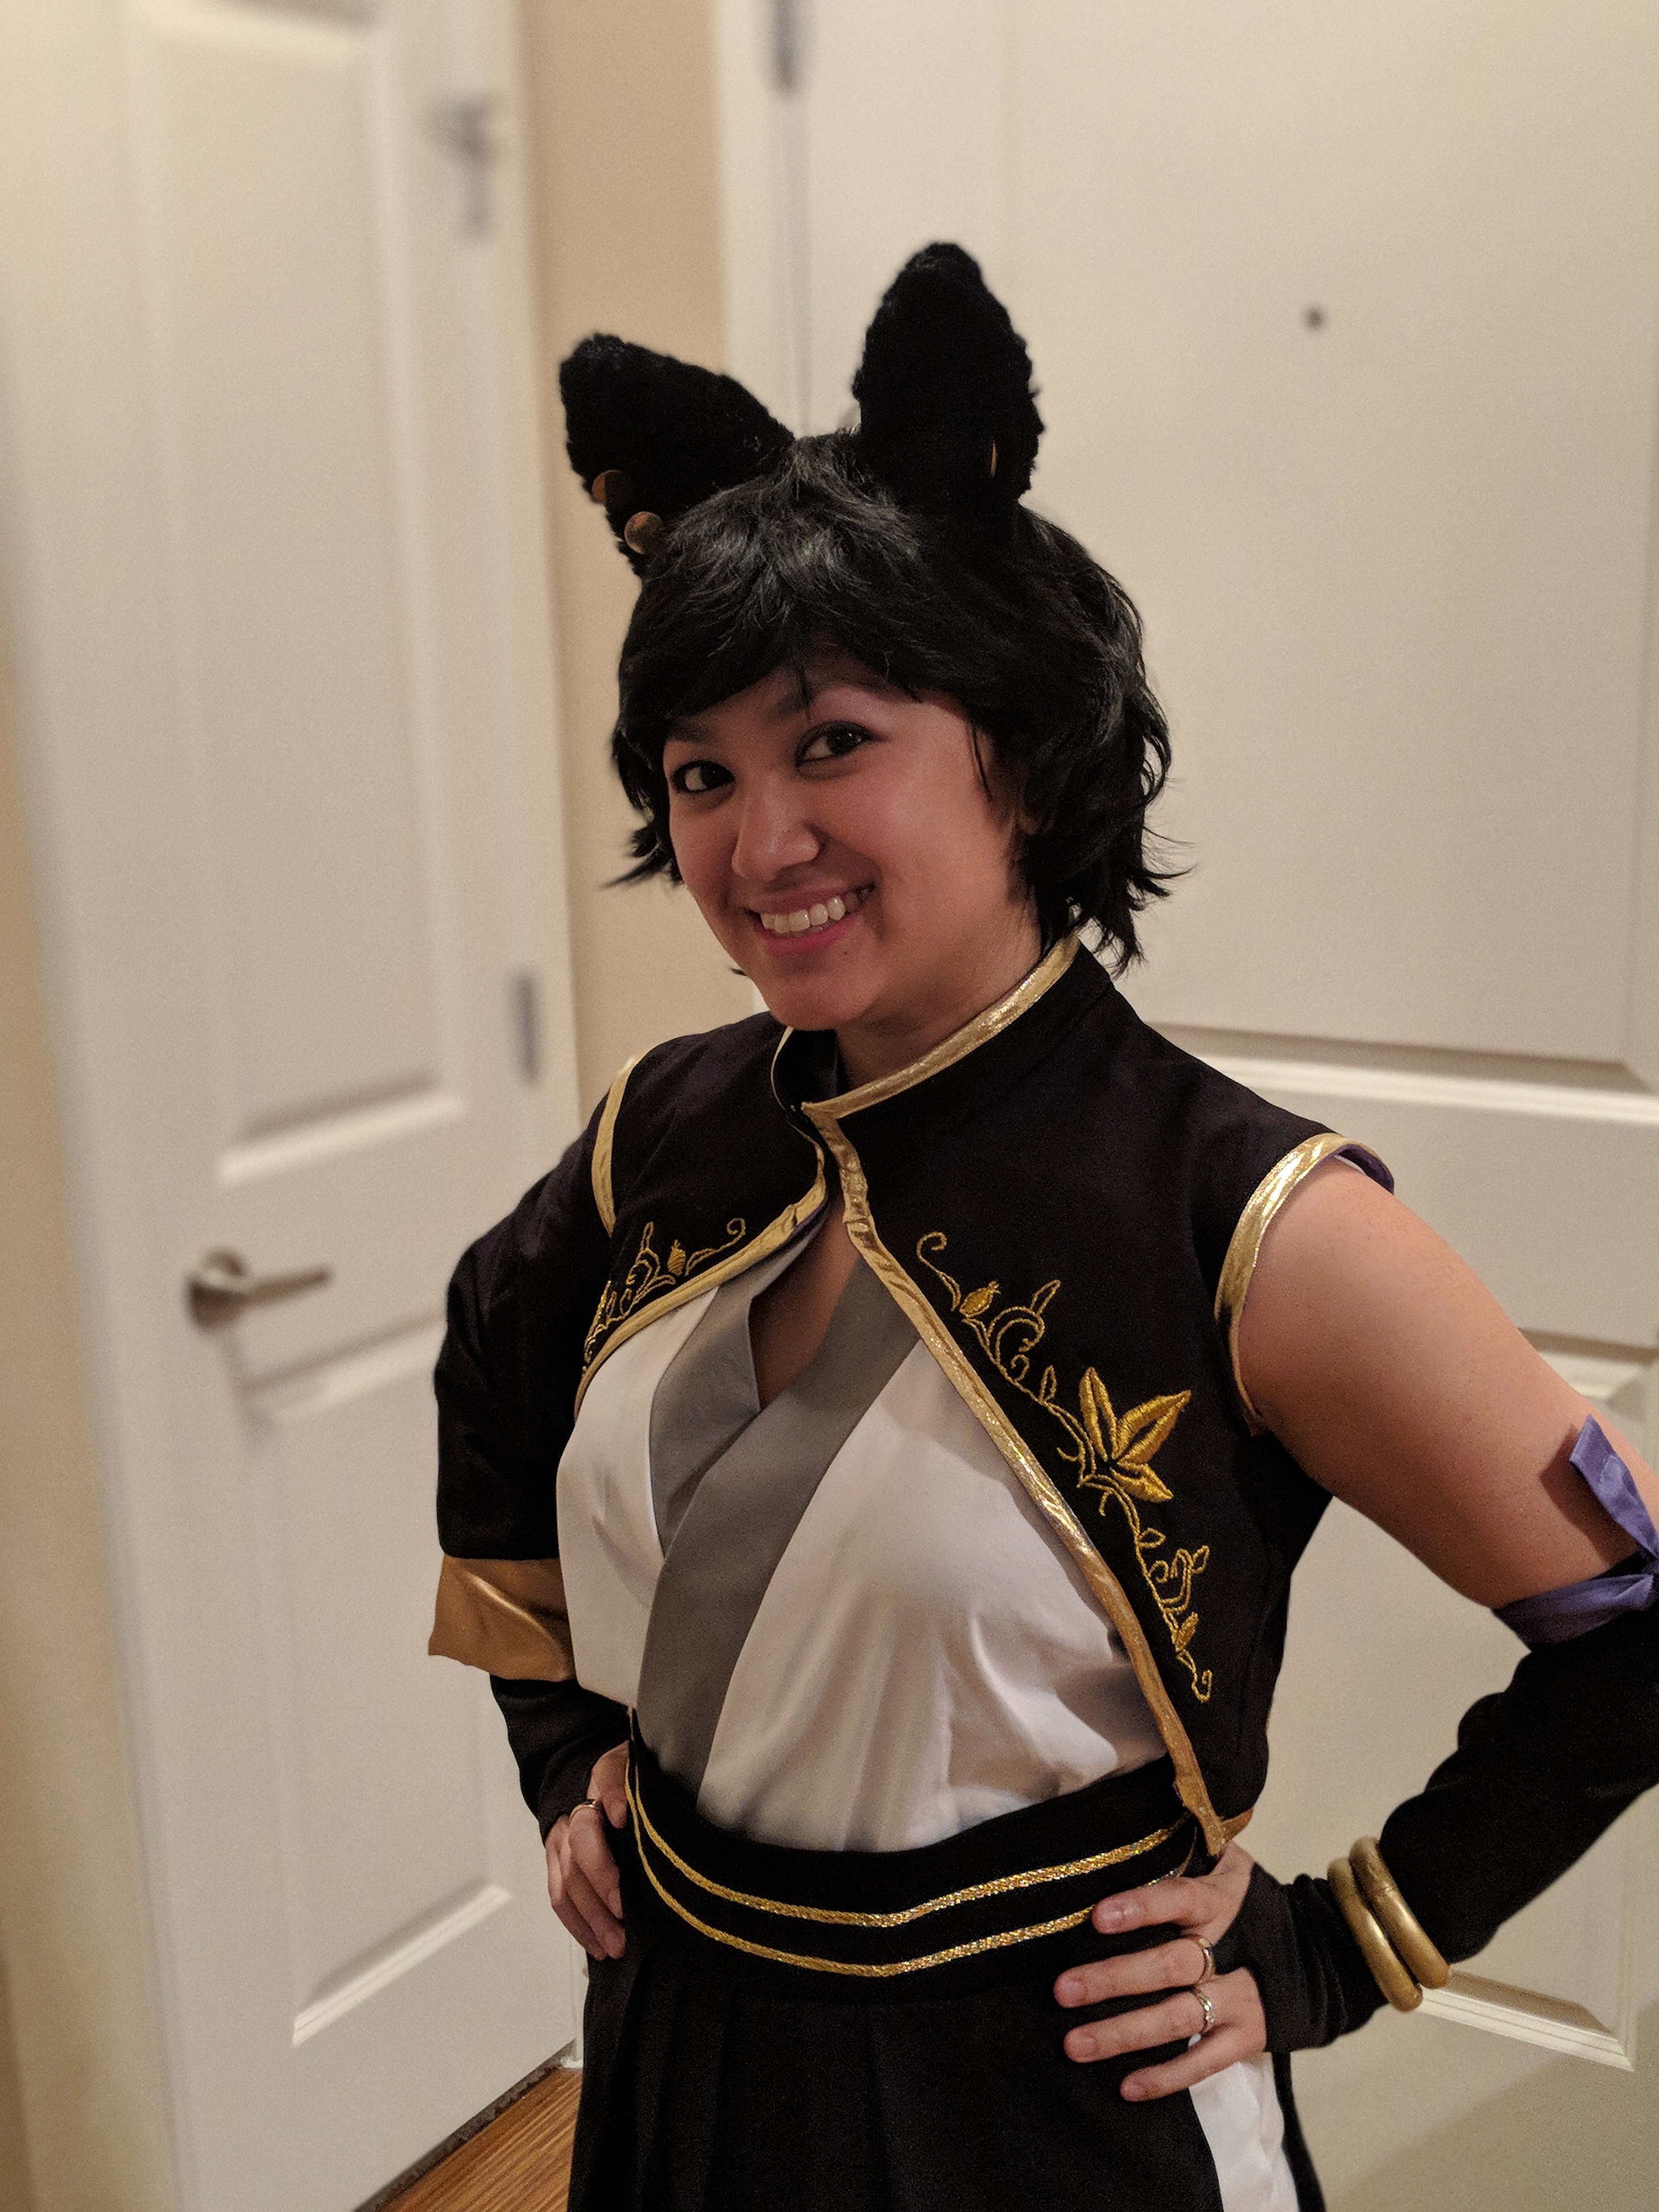
Fan Expo Dallas, April 2018


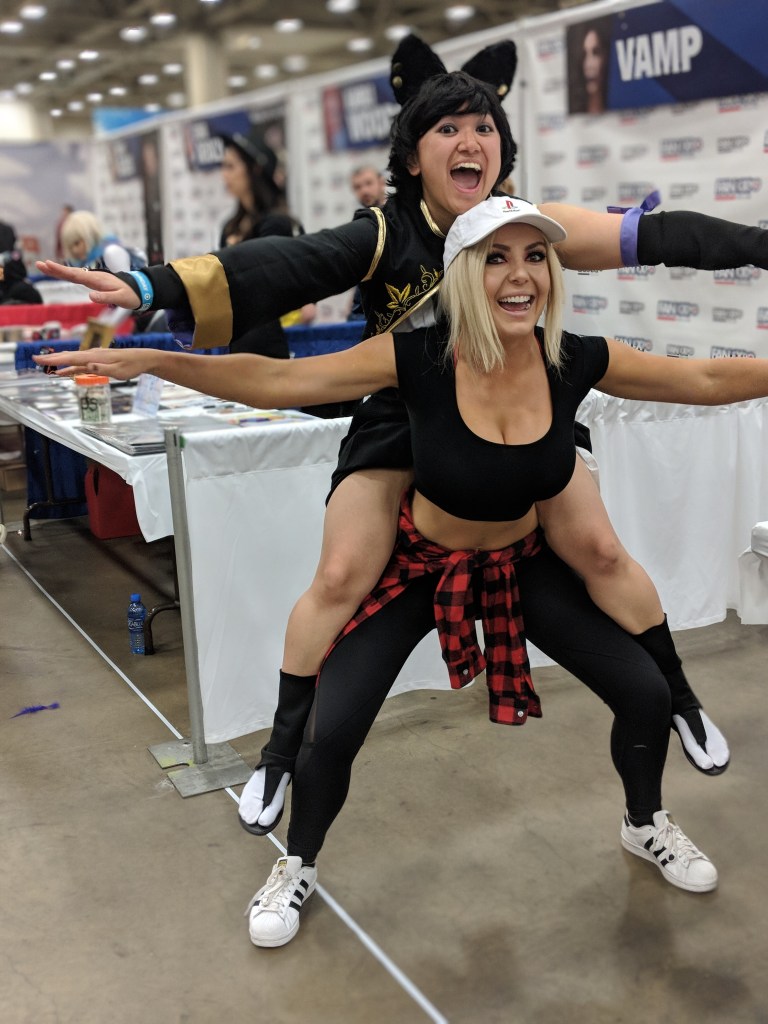
These were taken before and during FanExpo, so some things like the buckles and updated bangles aren’t included.
Akon 29, June 2018
These were taken by Allie Norado Photography at the Omni hotel, with the 100% completed Kali!


Use my build post as inspiration? Let me know!
If you followed along with my build post to help you make your cosplay, I’d love to see it! Leave me a comment or send me an email at ashweezcosplay(at)gmail(dot)com. If you’re comfortable with it, I’d love to showcase your cosplay photo(s) in the blog! I will of course give you credit and link to any socials you may have.
