

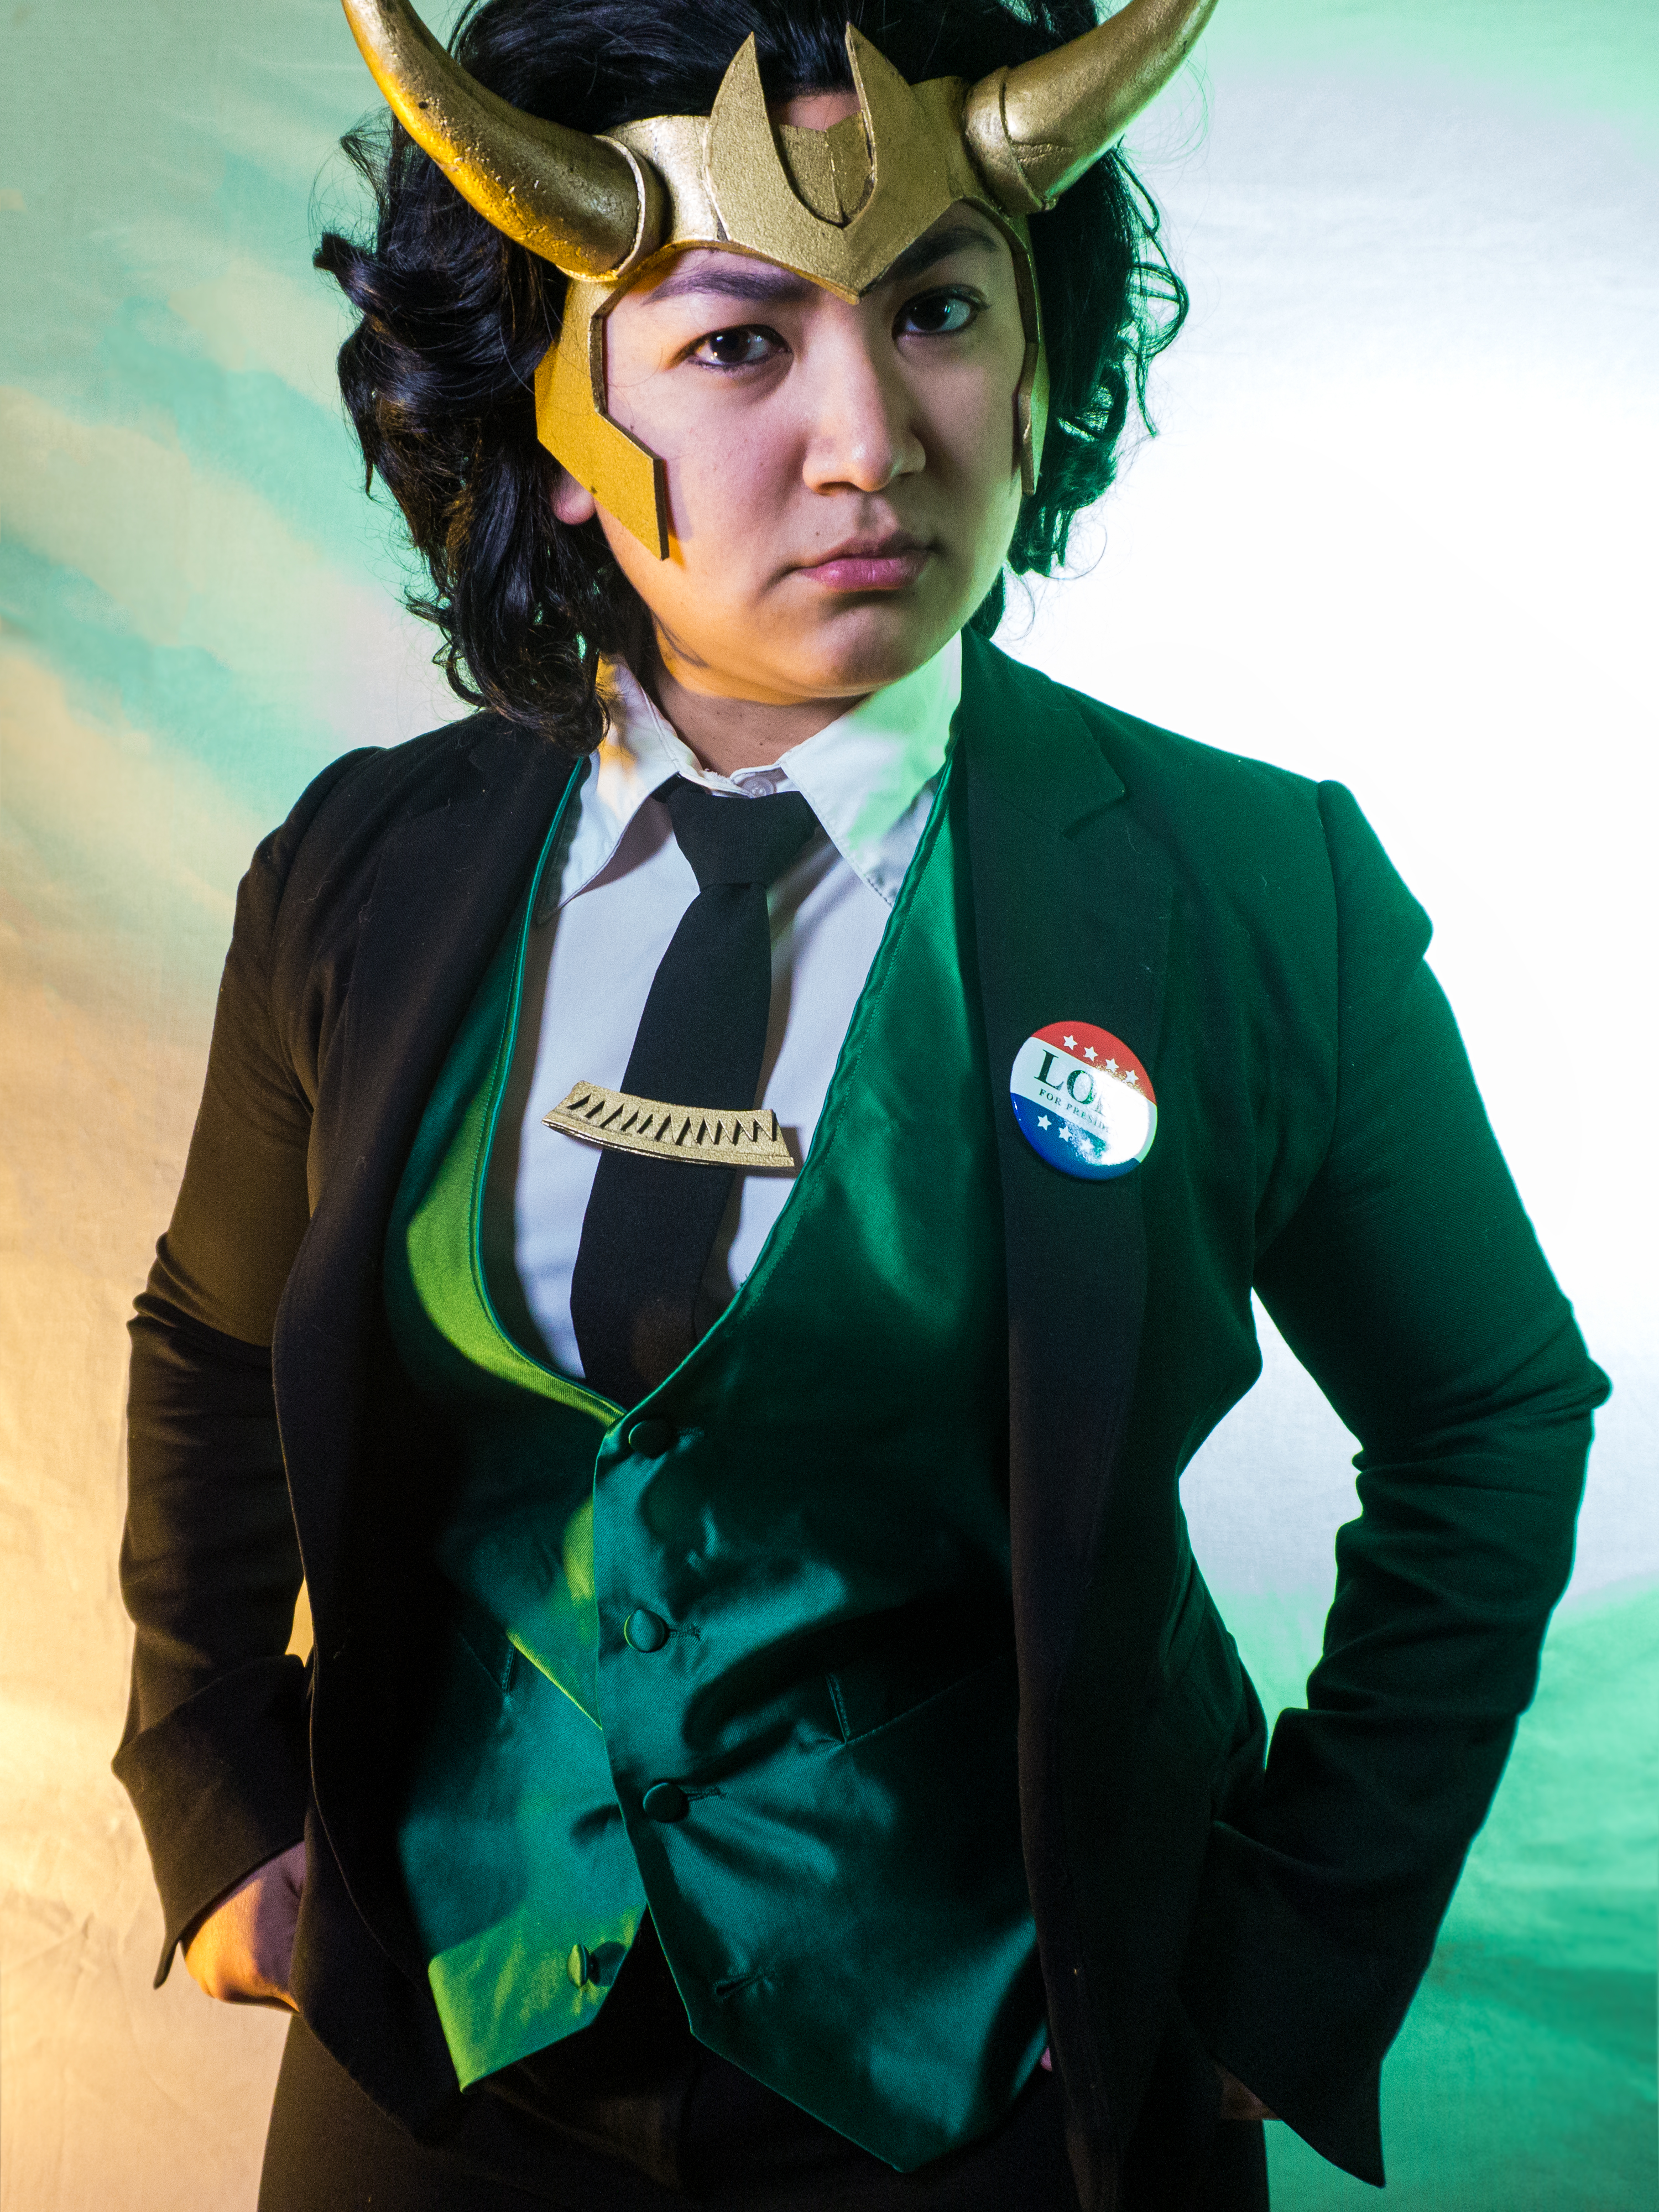
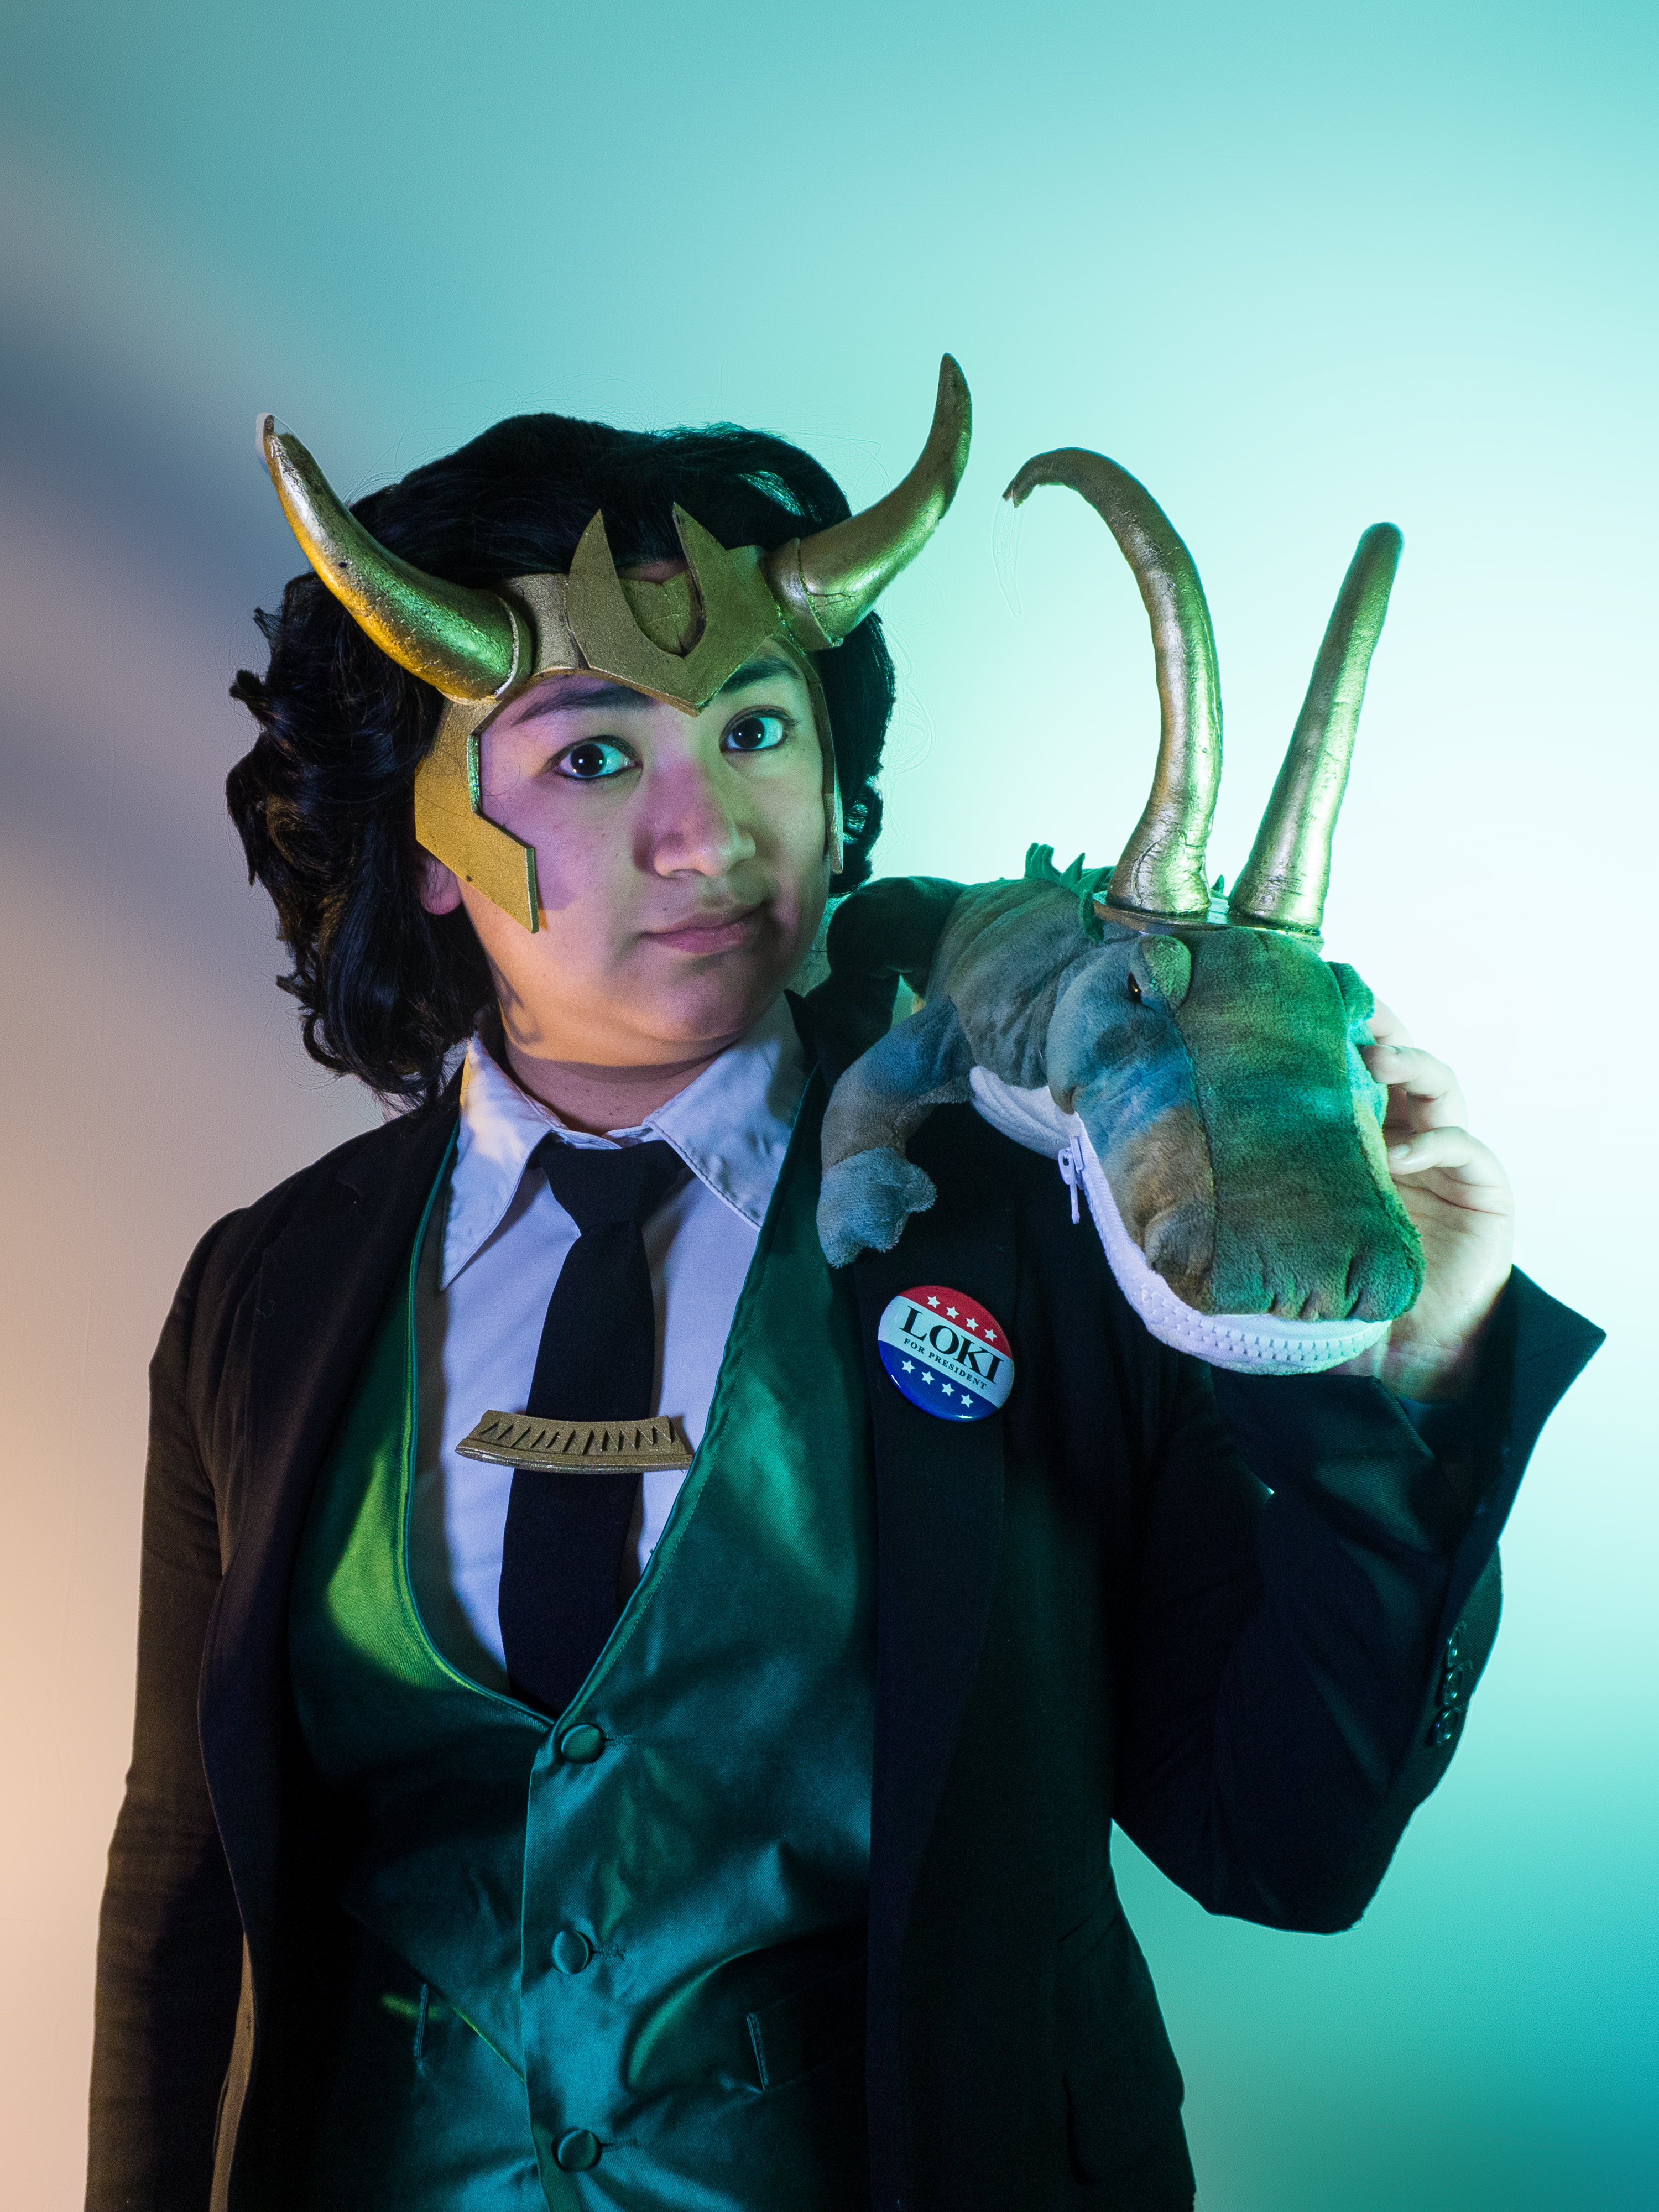
As a non-binary, bisexual cosplayer, it is a mystery how I haven’t cosplayed the God of Mischief Loki until now. While I didn’t immediately fall in love with Loki’s character at the very beginning of the MCU, I did slowly grow very fond of him and Tom Hiddelston’s portrayal of him. With each new appearance, I began to love him more and more. The Disney+ show “Loki” solidified that.
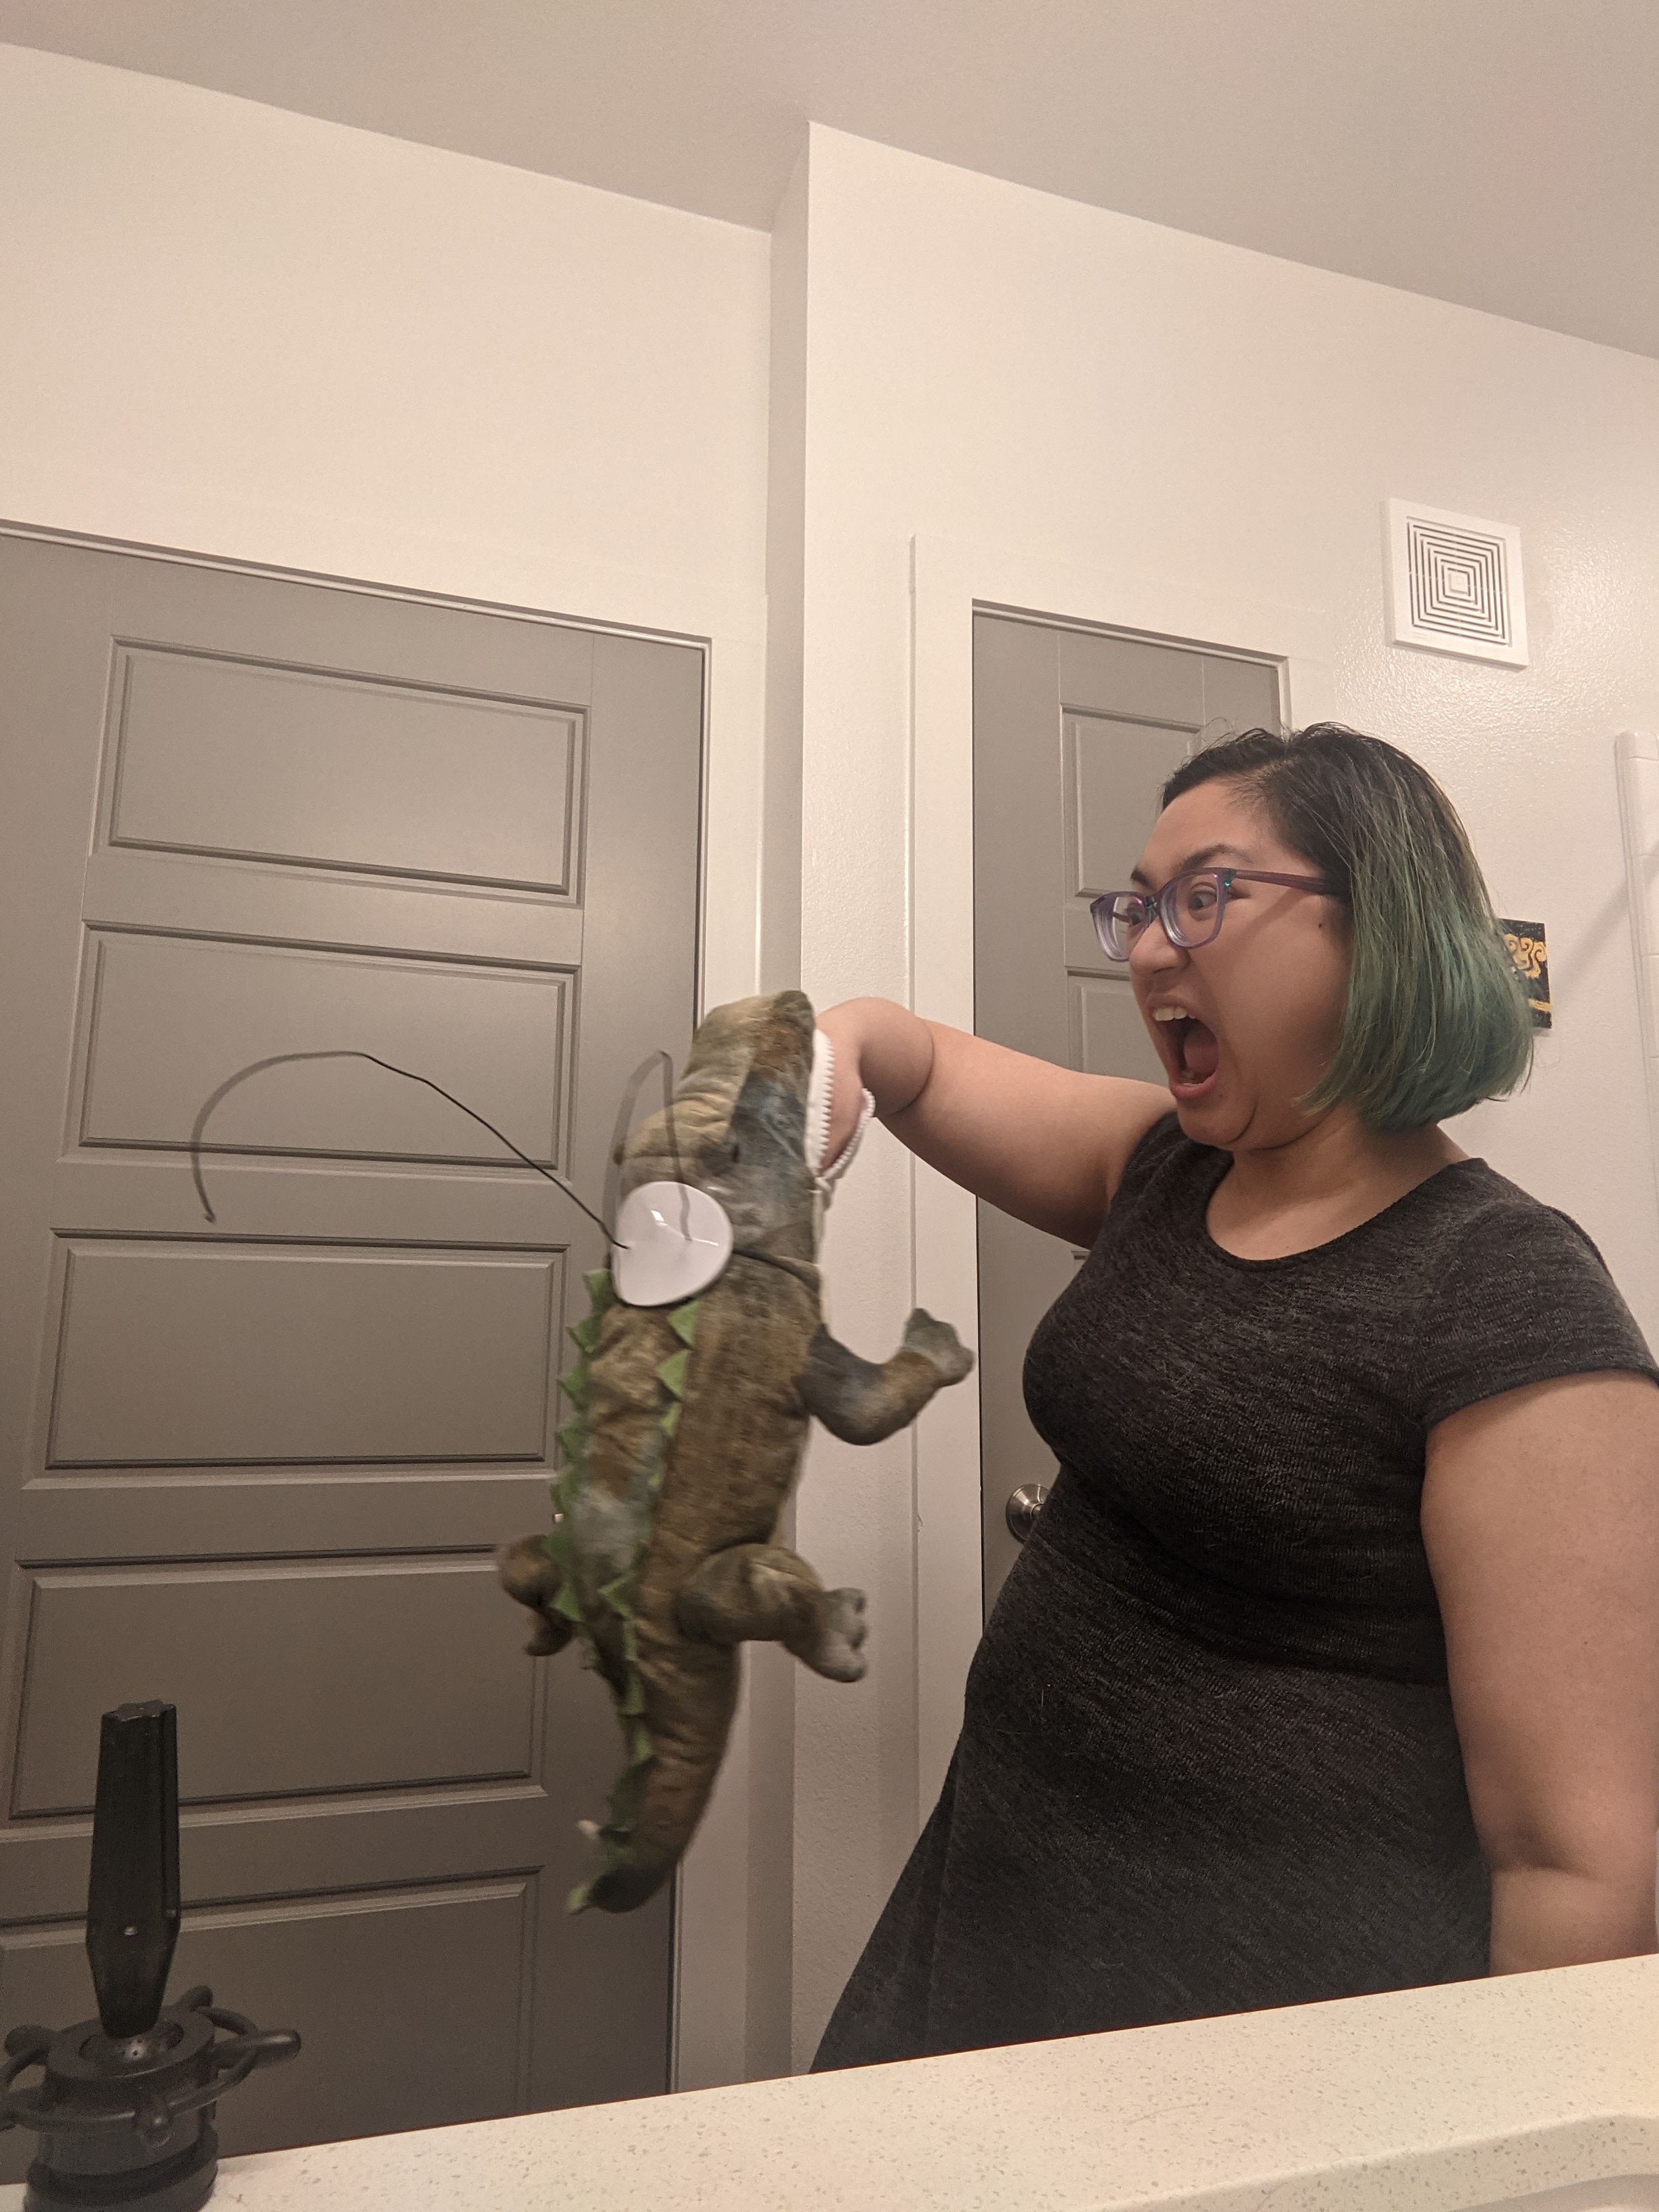
The morning after “Journey into Mystery”—the fifth episode of the Disney+ show “Loki”—aired, I was brainstorming up cosplays. There were so many Loki variants in the episode to choose from. I realized that it wouldn’t take a whole lot of work to put together a President Loki cosplay. Not only that, but I could have a prop as well in the form of my very own Alligator Loki.


Items I Already Had
- White shirt
- Black tie
- Black blazer
- Black slacks
- EVA foam
- Foam clay
- Wire
Items I Bought
- Alligator plush
- President Loki button
- Green waistcoat
- Contact cement
- Elastic straps
- Tie bar set
- Black wig
Items Made & Modified
Click an item to jump to its build section:
President Loki Helm
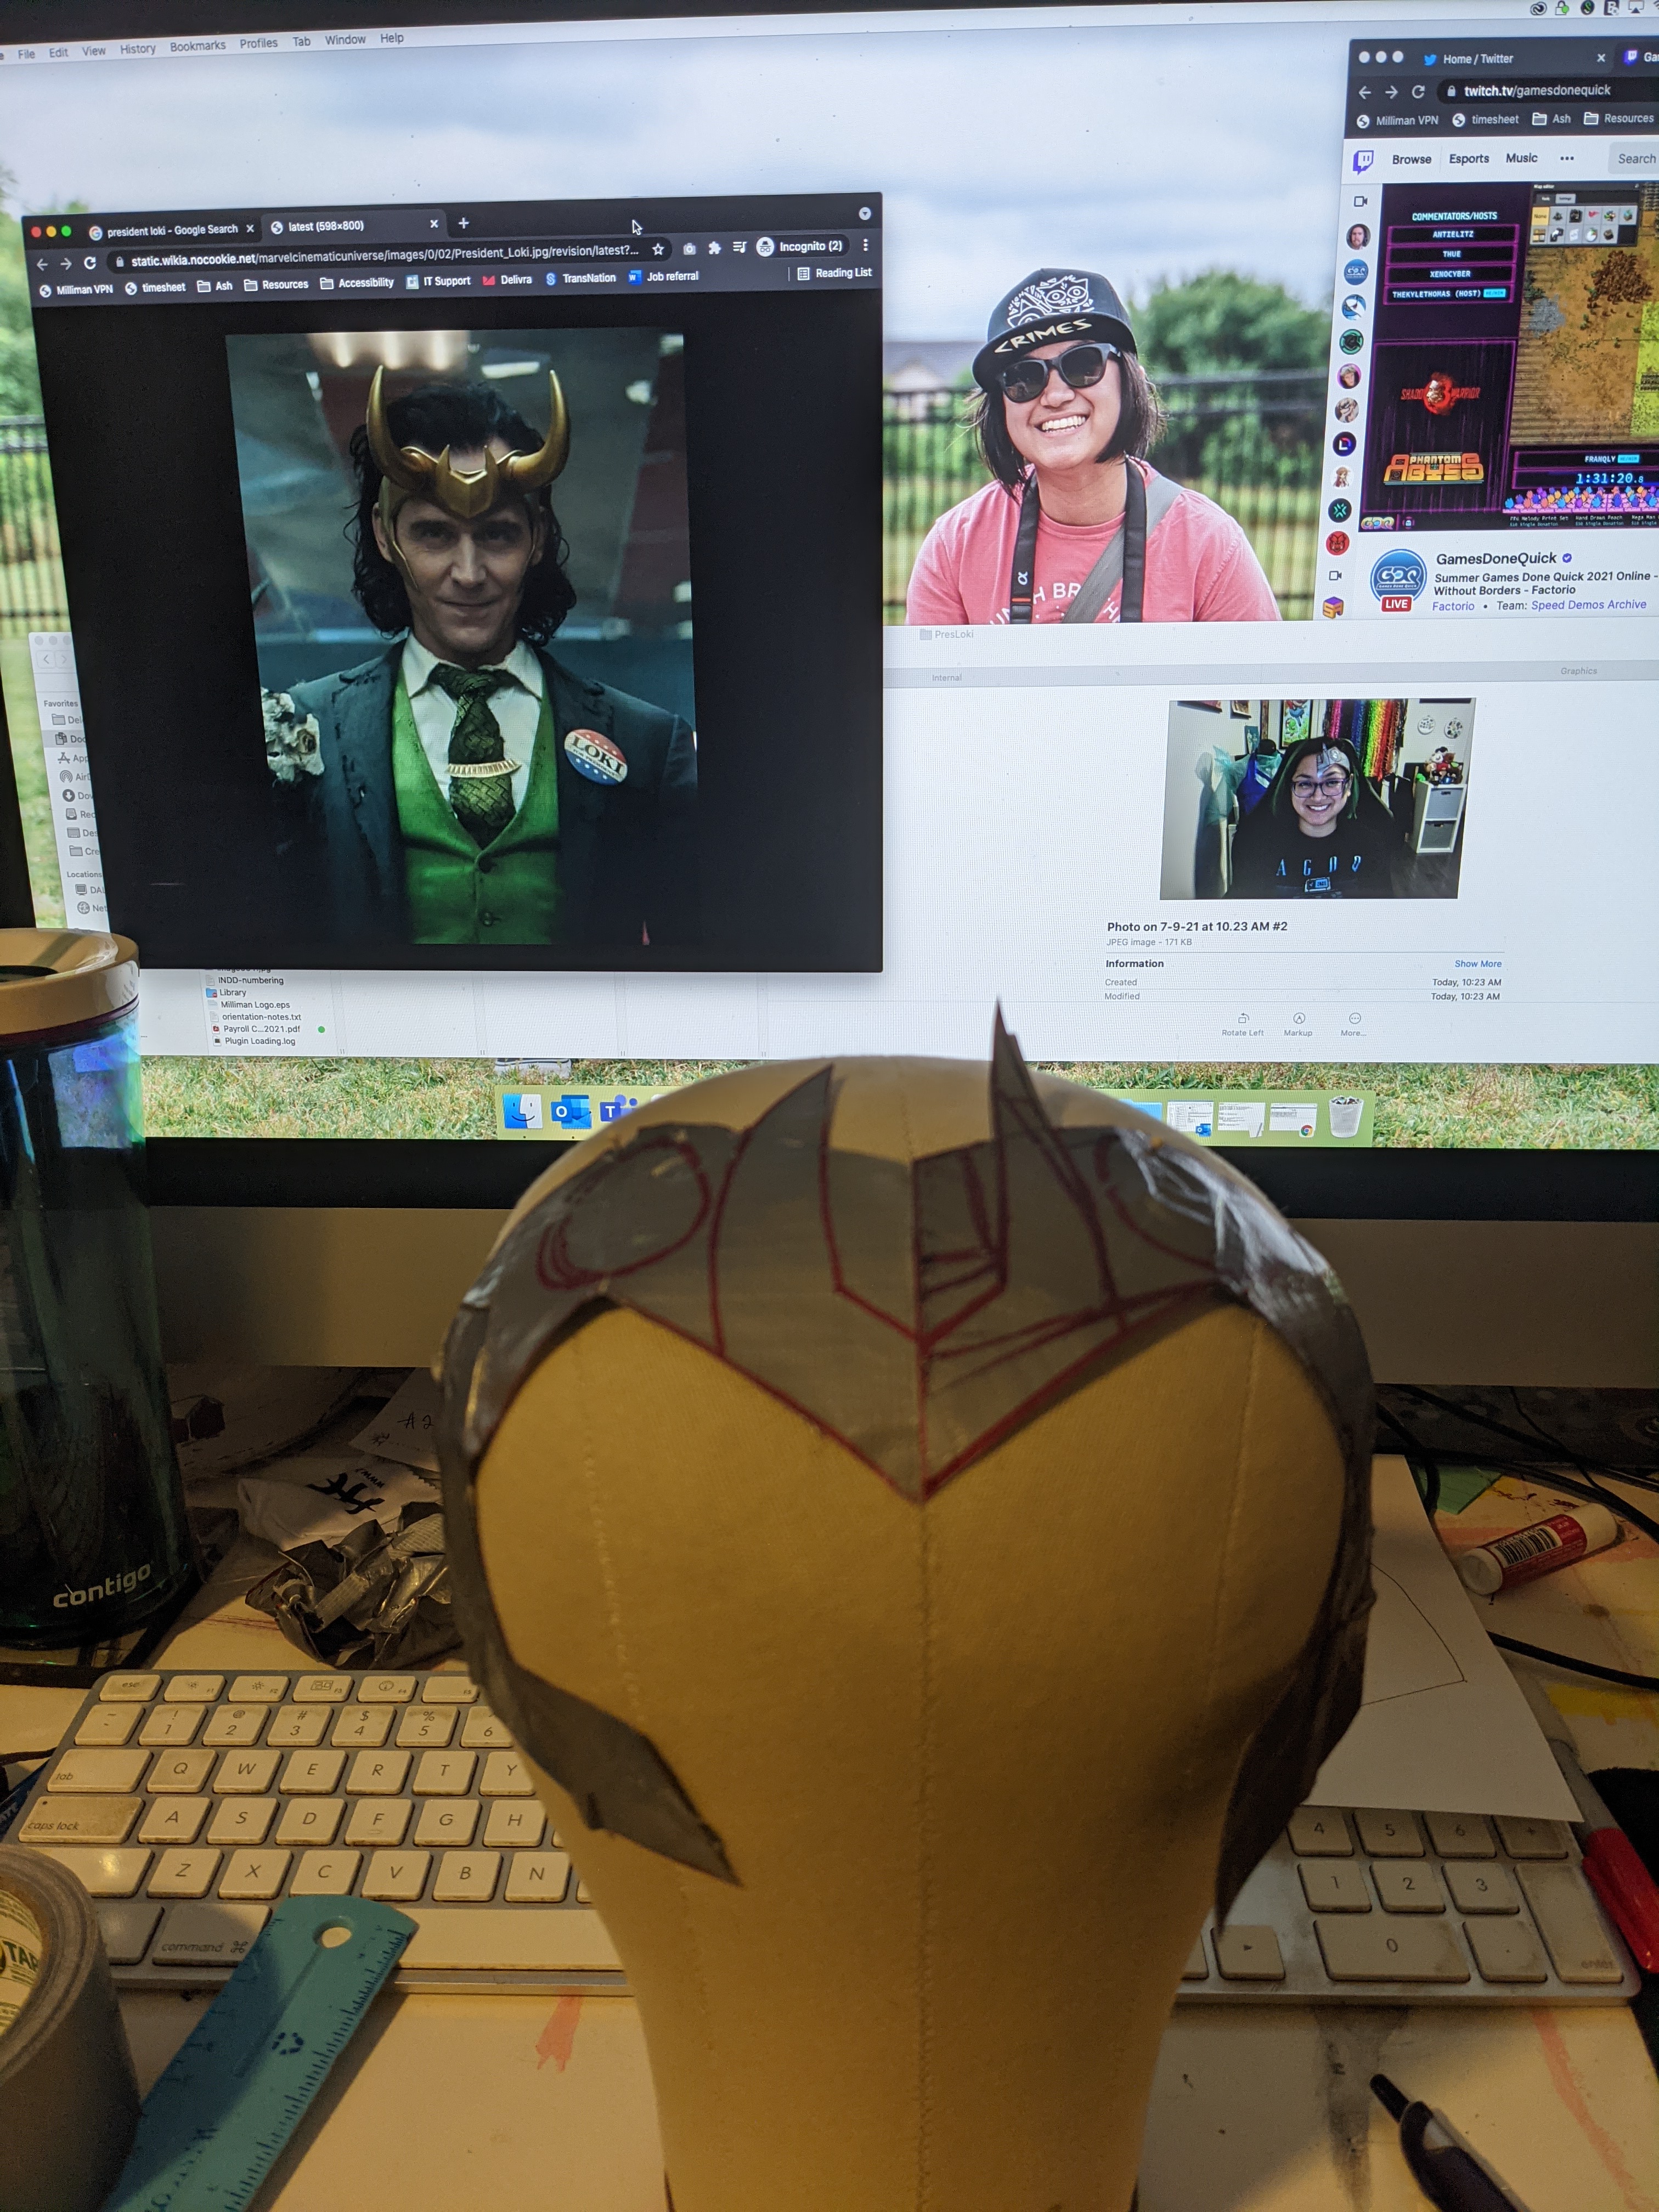
No President Loki is complete without his signature horned helm, a shorter but still unmistakably “Loki” helm. There are many patterns available for free online, but I opted to design my own for a couple reasons: 1) I wanted to make sure it was custom fit for my face/head. 2) I didn’t feel like having to credit the pattern makers in the captions of my posts lol I’m stubborn in weird ways sometimes.
Duct Tape to Paper Pattern
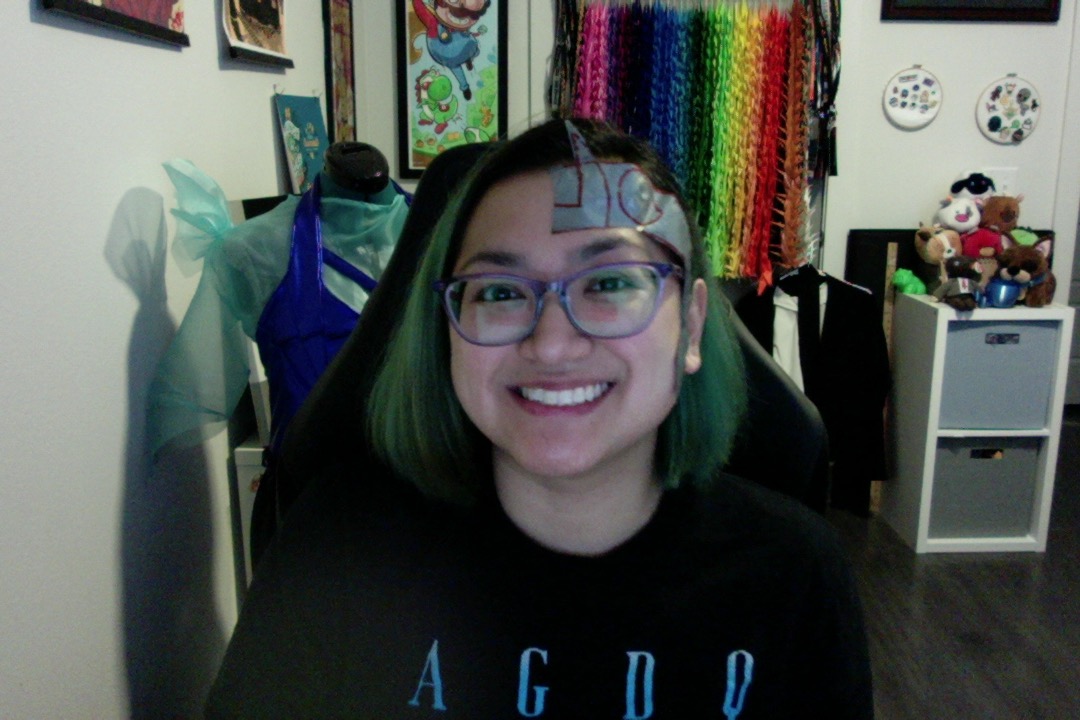
To pattern the base, there was lots of duct tape involved. Initially, I covered the right half of my wig head with duct tape and then drew out a pattern with red sharpie on it. After cutting it out and trying it on, it was clear that this would not work very well. Because my wig head has no face on it, it made it very hard for me to visualize where the helm needed to sit in relation to my eyebrows, ears, and cheeks. So, I went straight to the source and slapped the very first duct-tape pattern onto my own face.

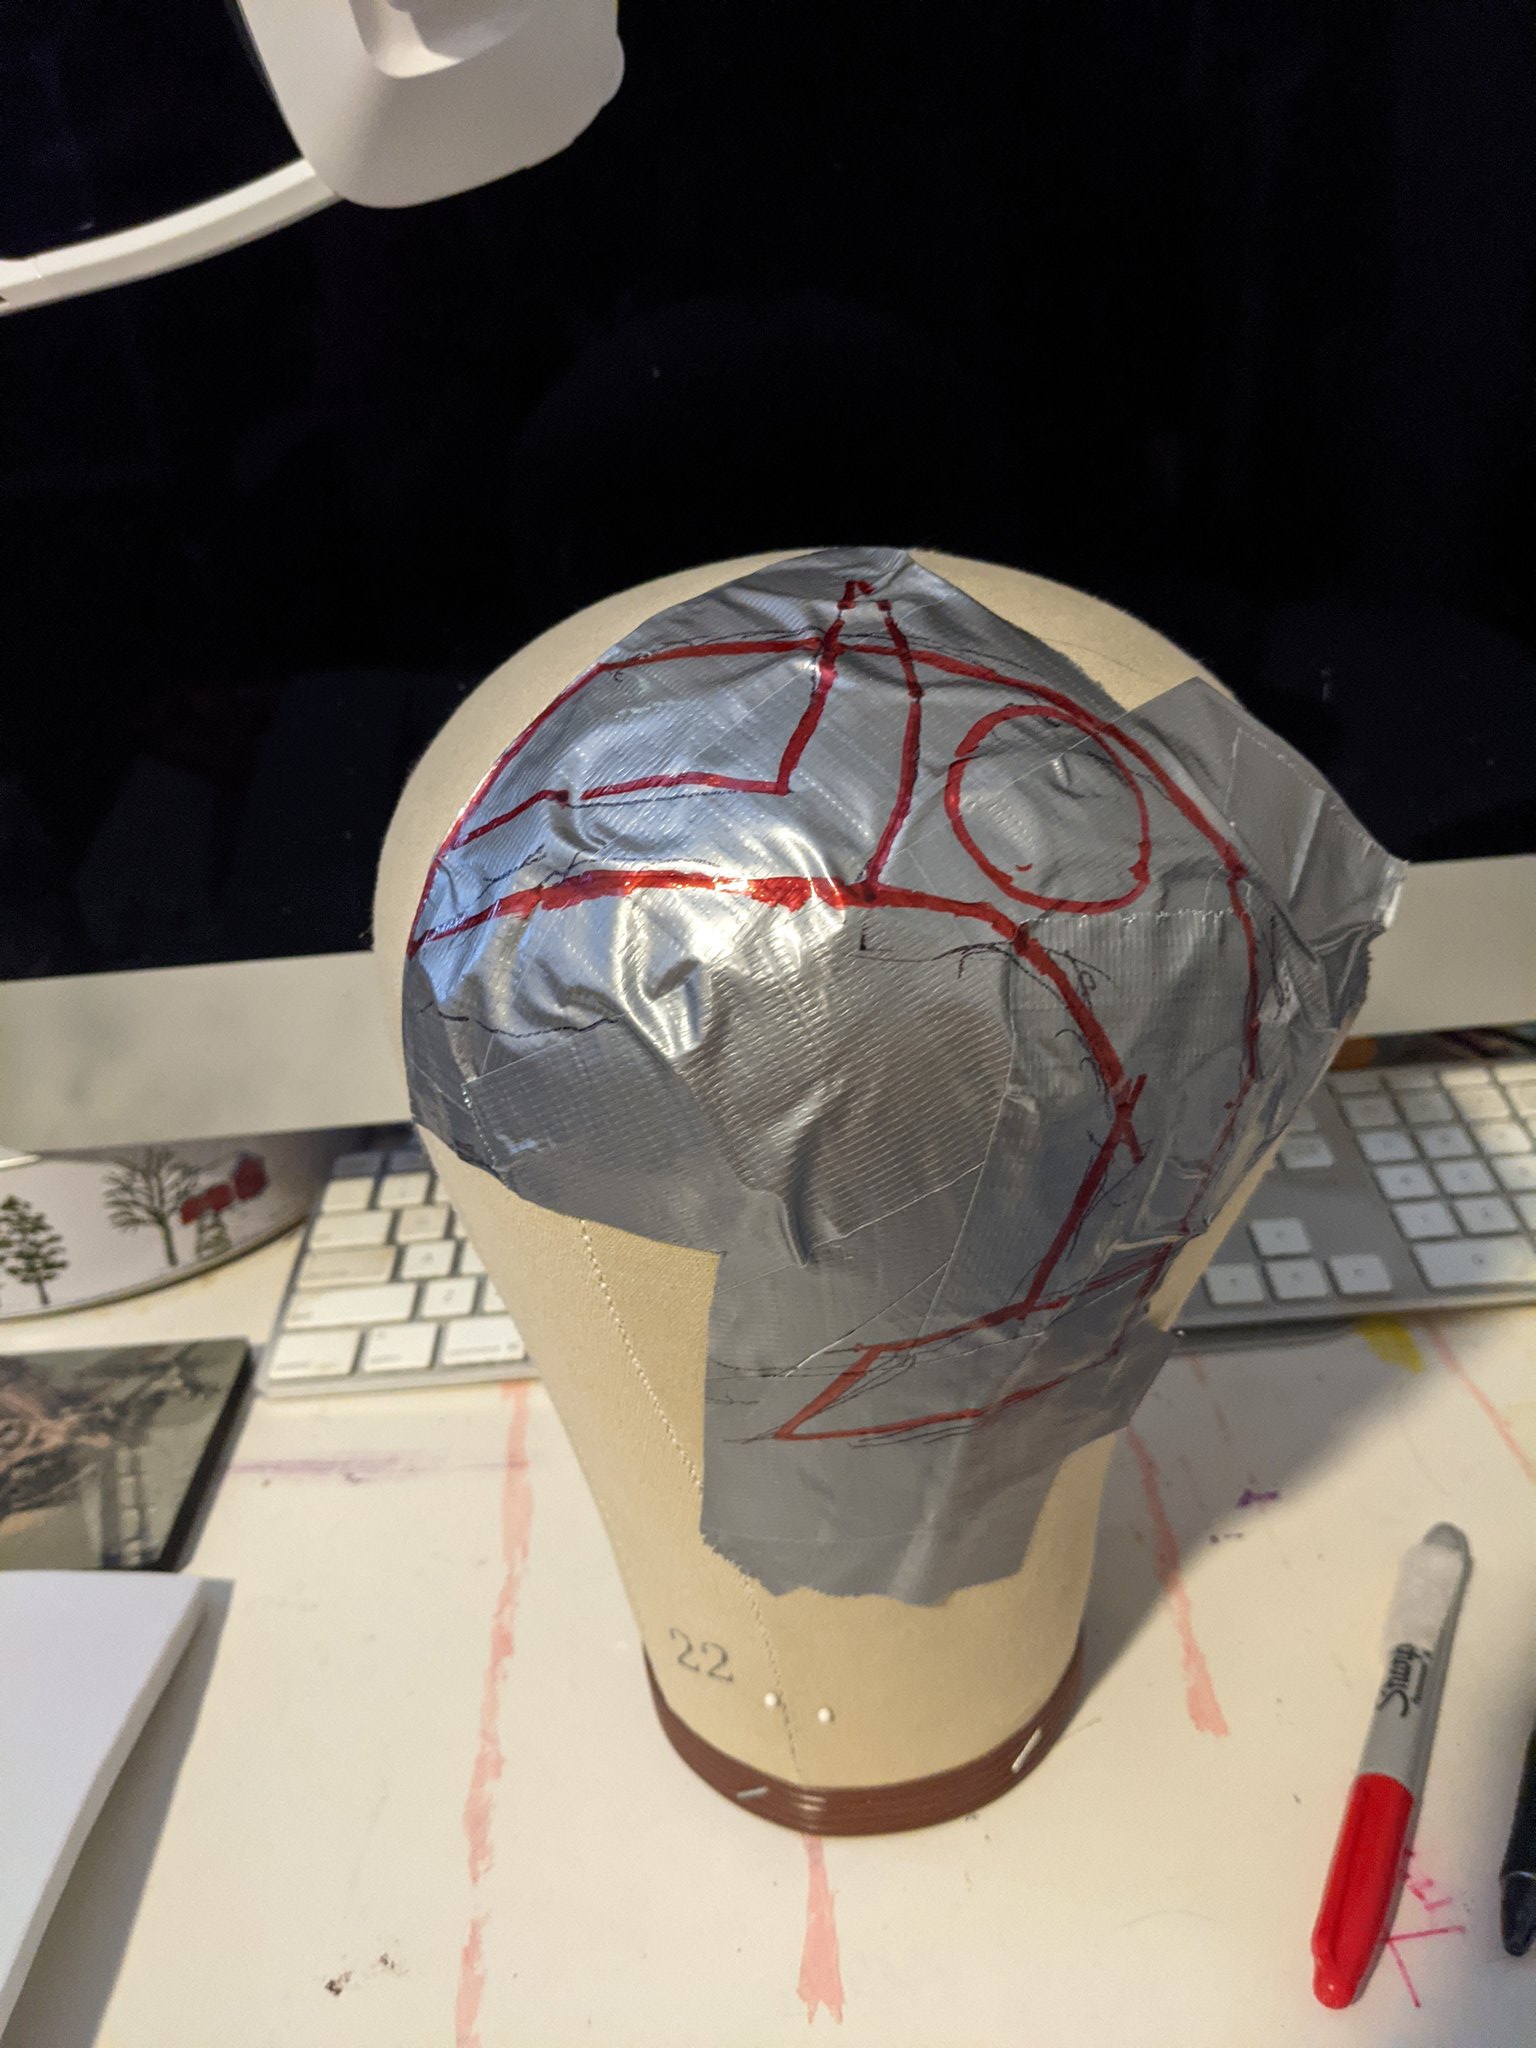
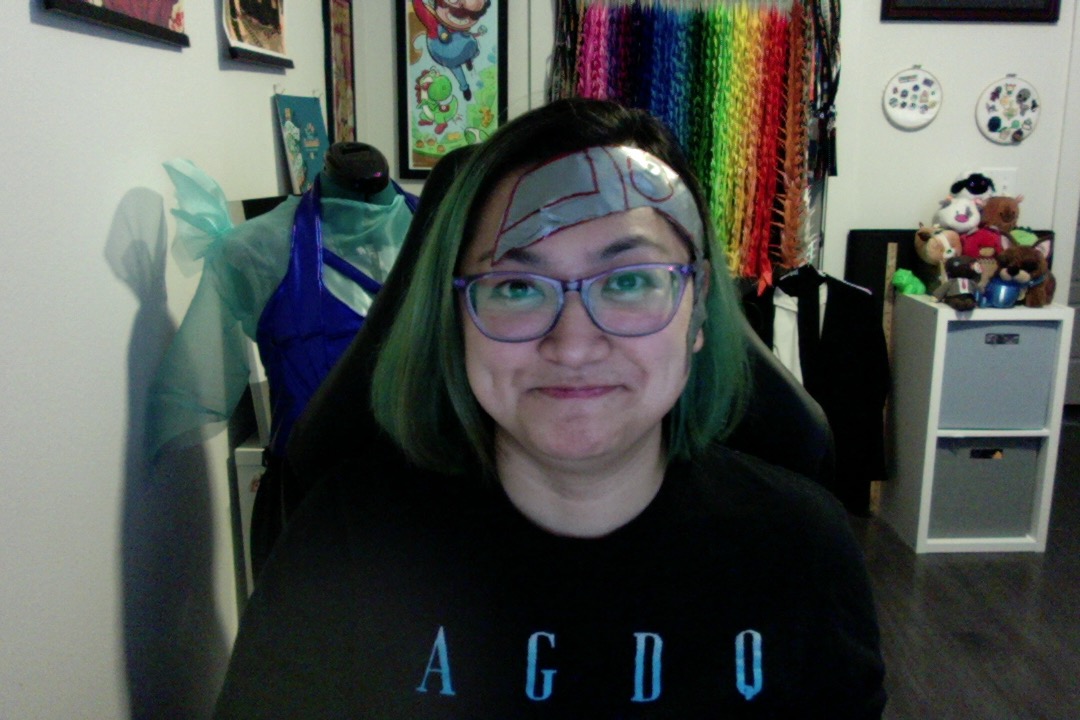
What transpired afterwards was lots and lots of sticking duct tape onto my face, checking myself in my webcam (it was easier to do this sitting at my desk and using my computer’s webcam than to try in front of the bathroom mirror). I’d make mental notes of what adjustments need to be made, then added more duct tape to the duct tape pattern. Then, I’d draw the fixes onto the pattern, cut the new pattern out, and start the whole process over. Occasionally, I would take a picture with the webcam and then put it side by side with a President Loki screenshot to compare. It made it easy to note where it fell on his face versus where it was falling on mine. The entire patterning process took about 2.5 hours alone. Once I was finally happy with the pattern, I traced it onto printer paper and cut it out.


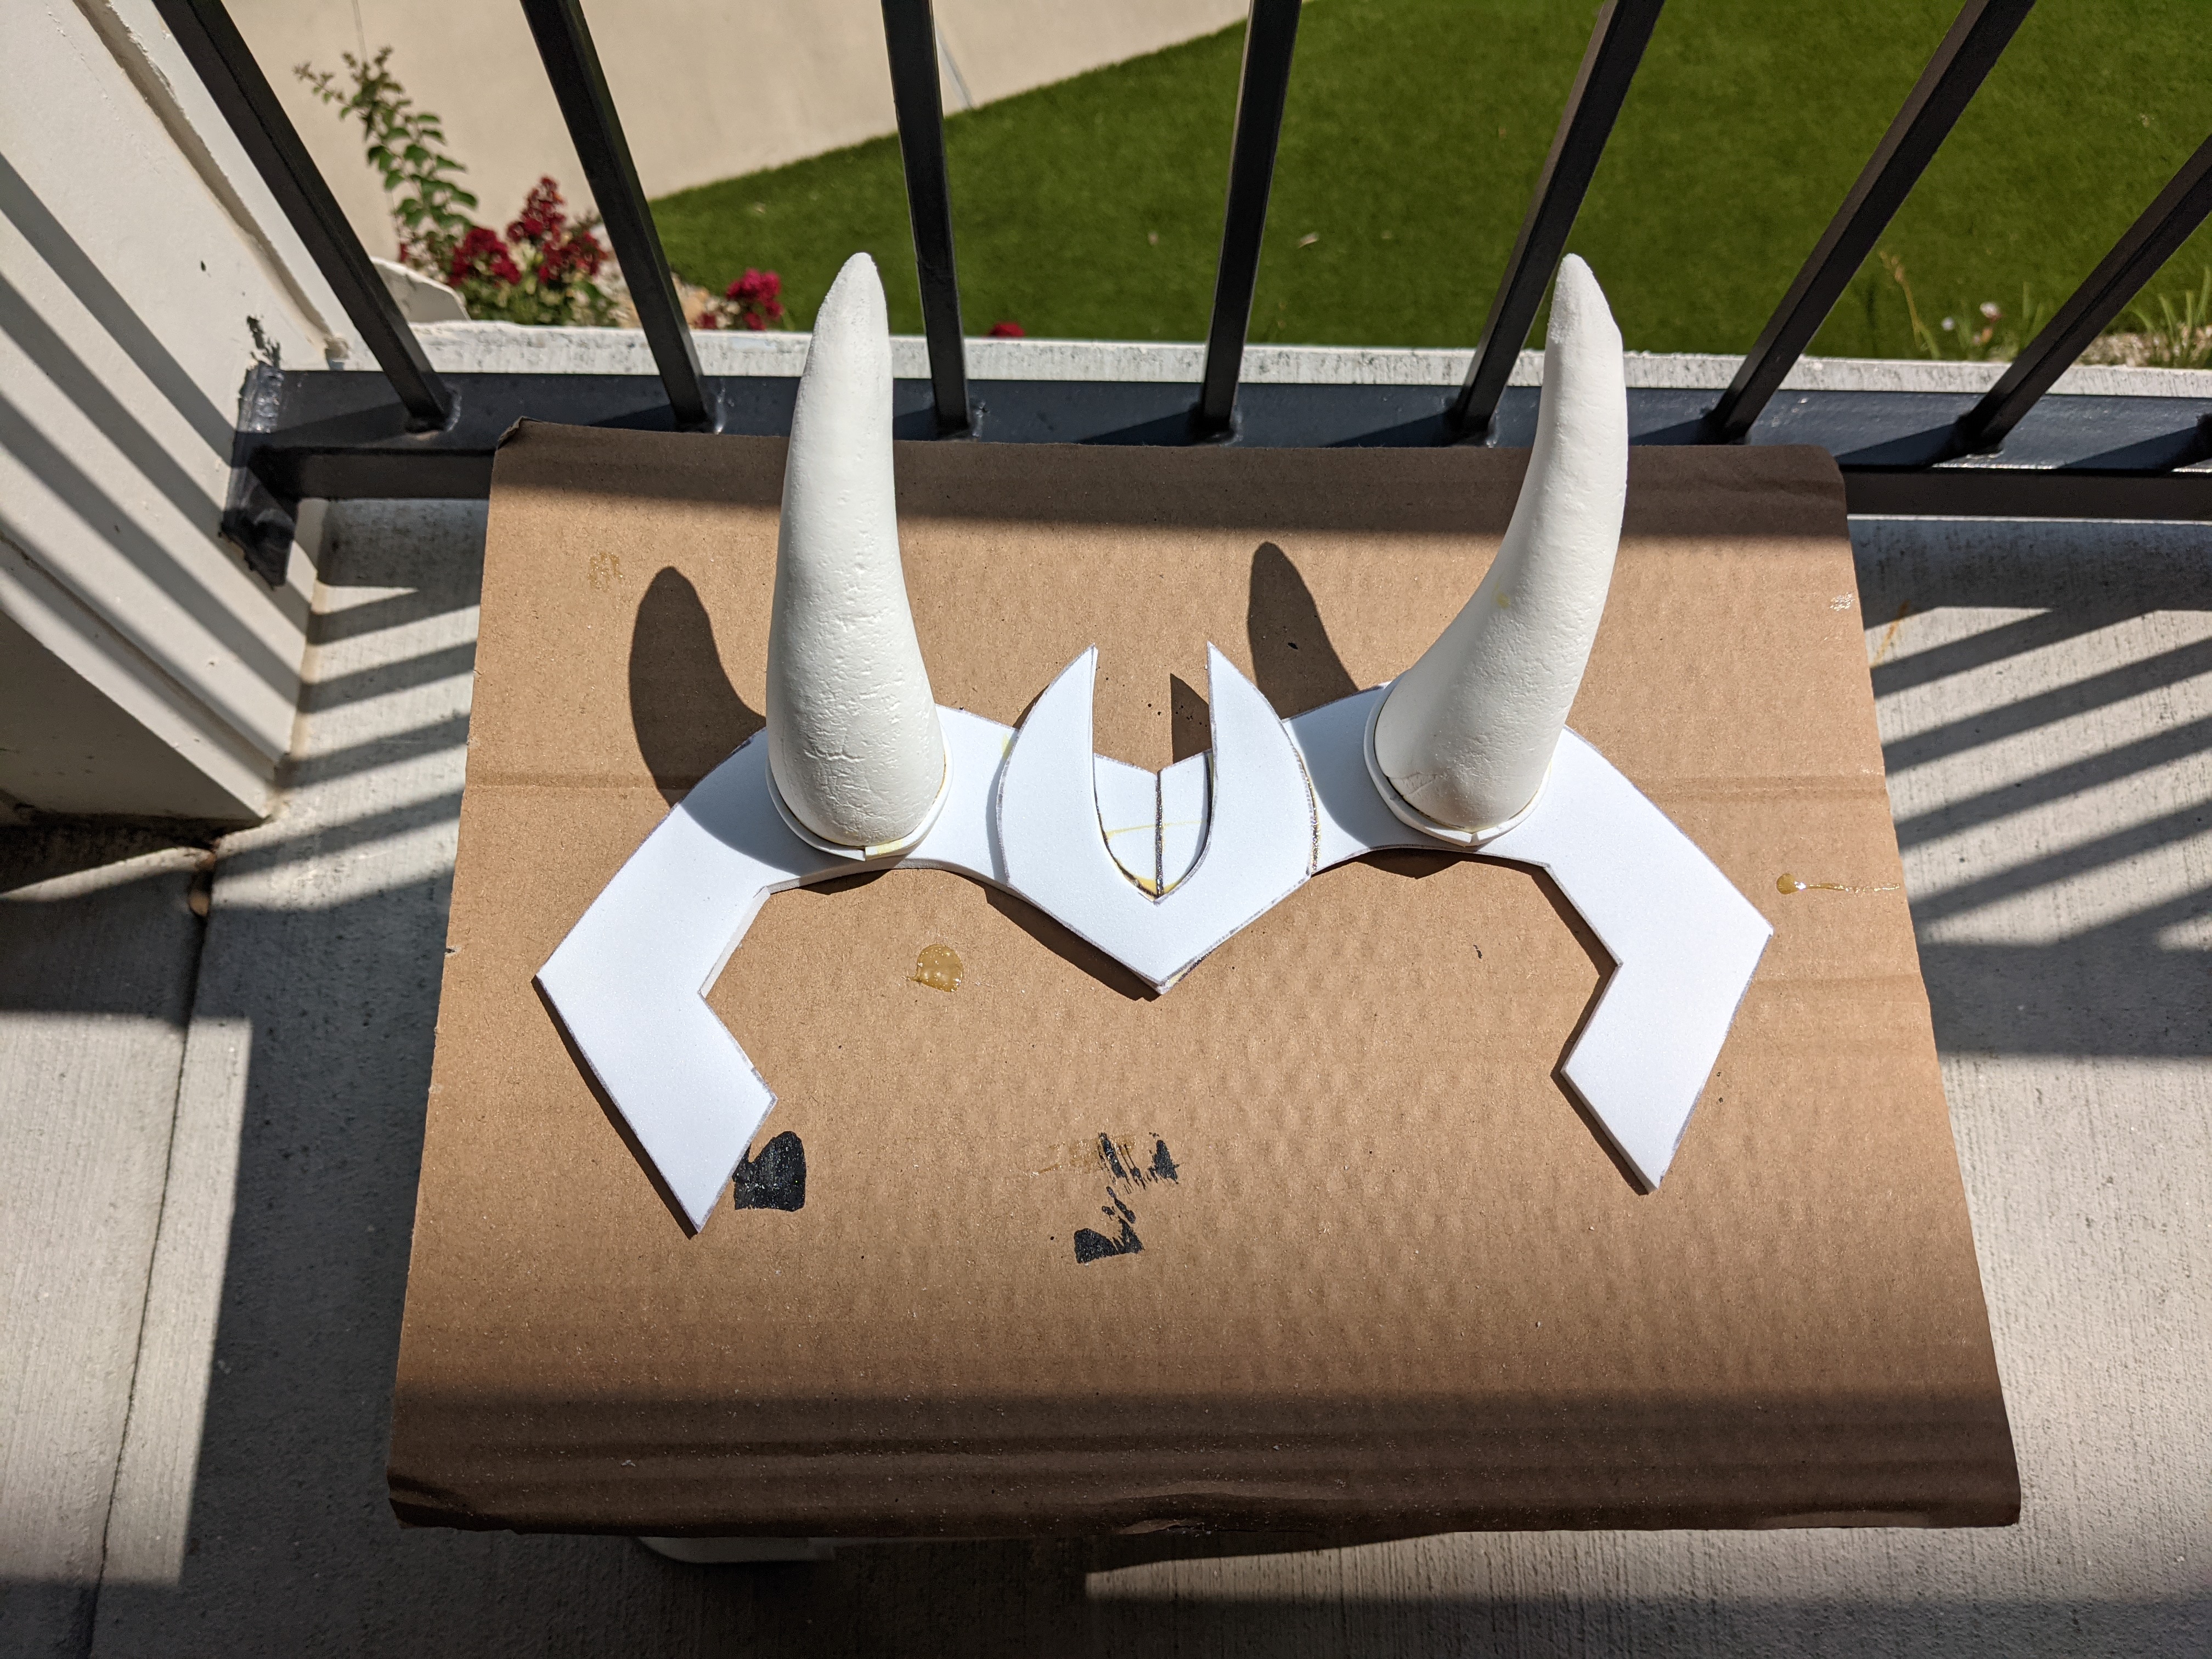
EVA Foam Helm Base
Using the paper pattern, I traced out the pattern onto pieces of 4mm EVA foam. Initially, I cut them out with an xacto knife. However, the cuts ended up jagged and I wasn’t happy with them. So, I cut them out again, this time just with a pair of scissors. I’m more precise with scissors and the cuts were cleaner, so I wouldn’t need to sand down the edges. To costest, I would just attach it all with scotch tape (including taping it to my face lol).


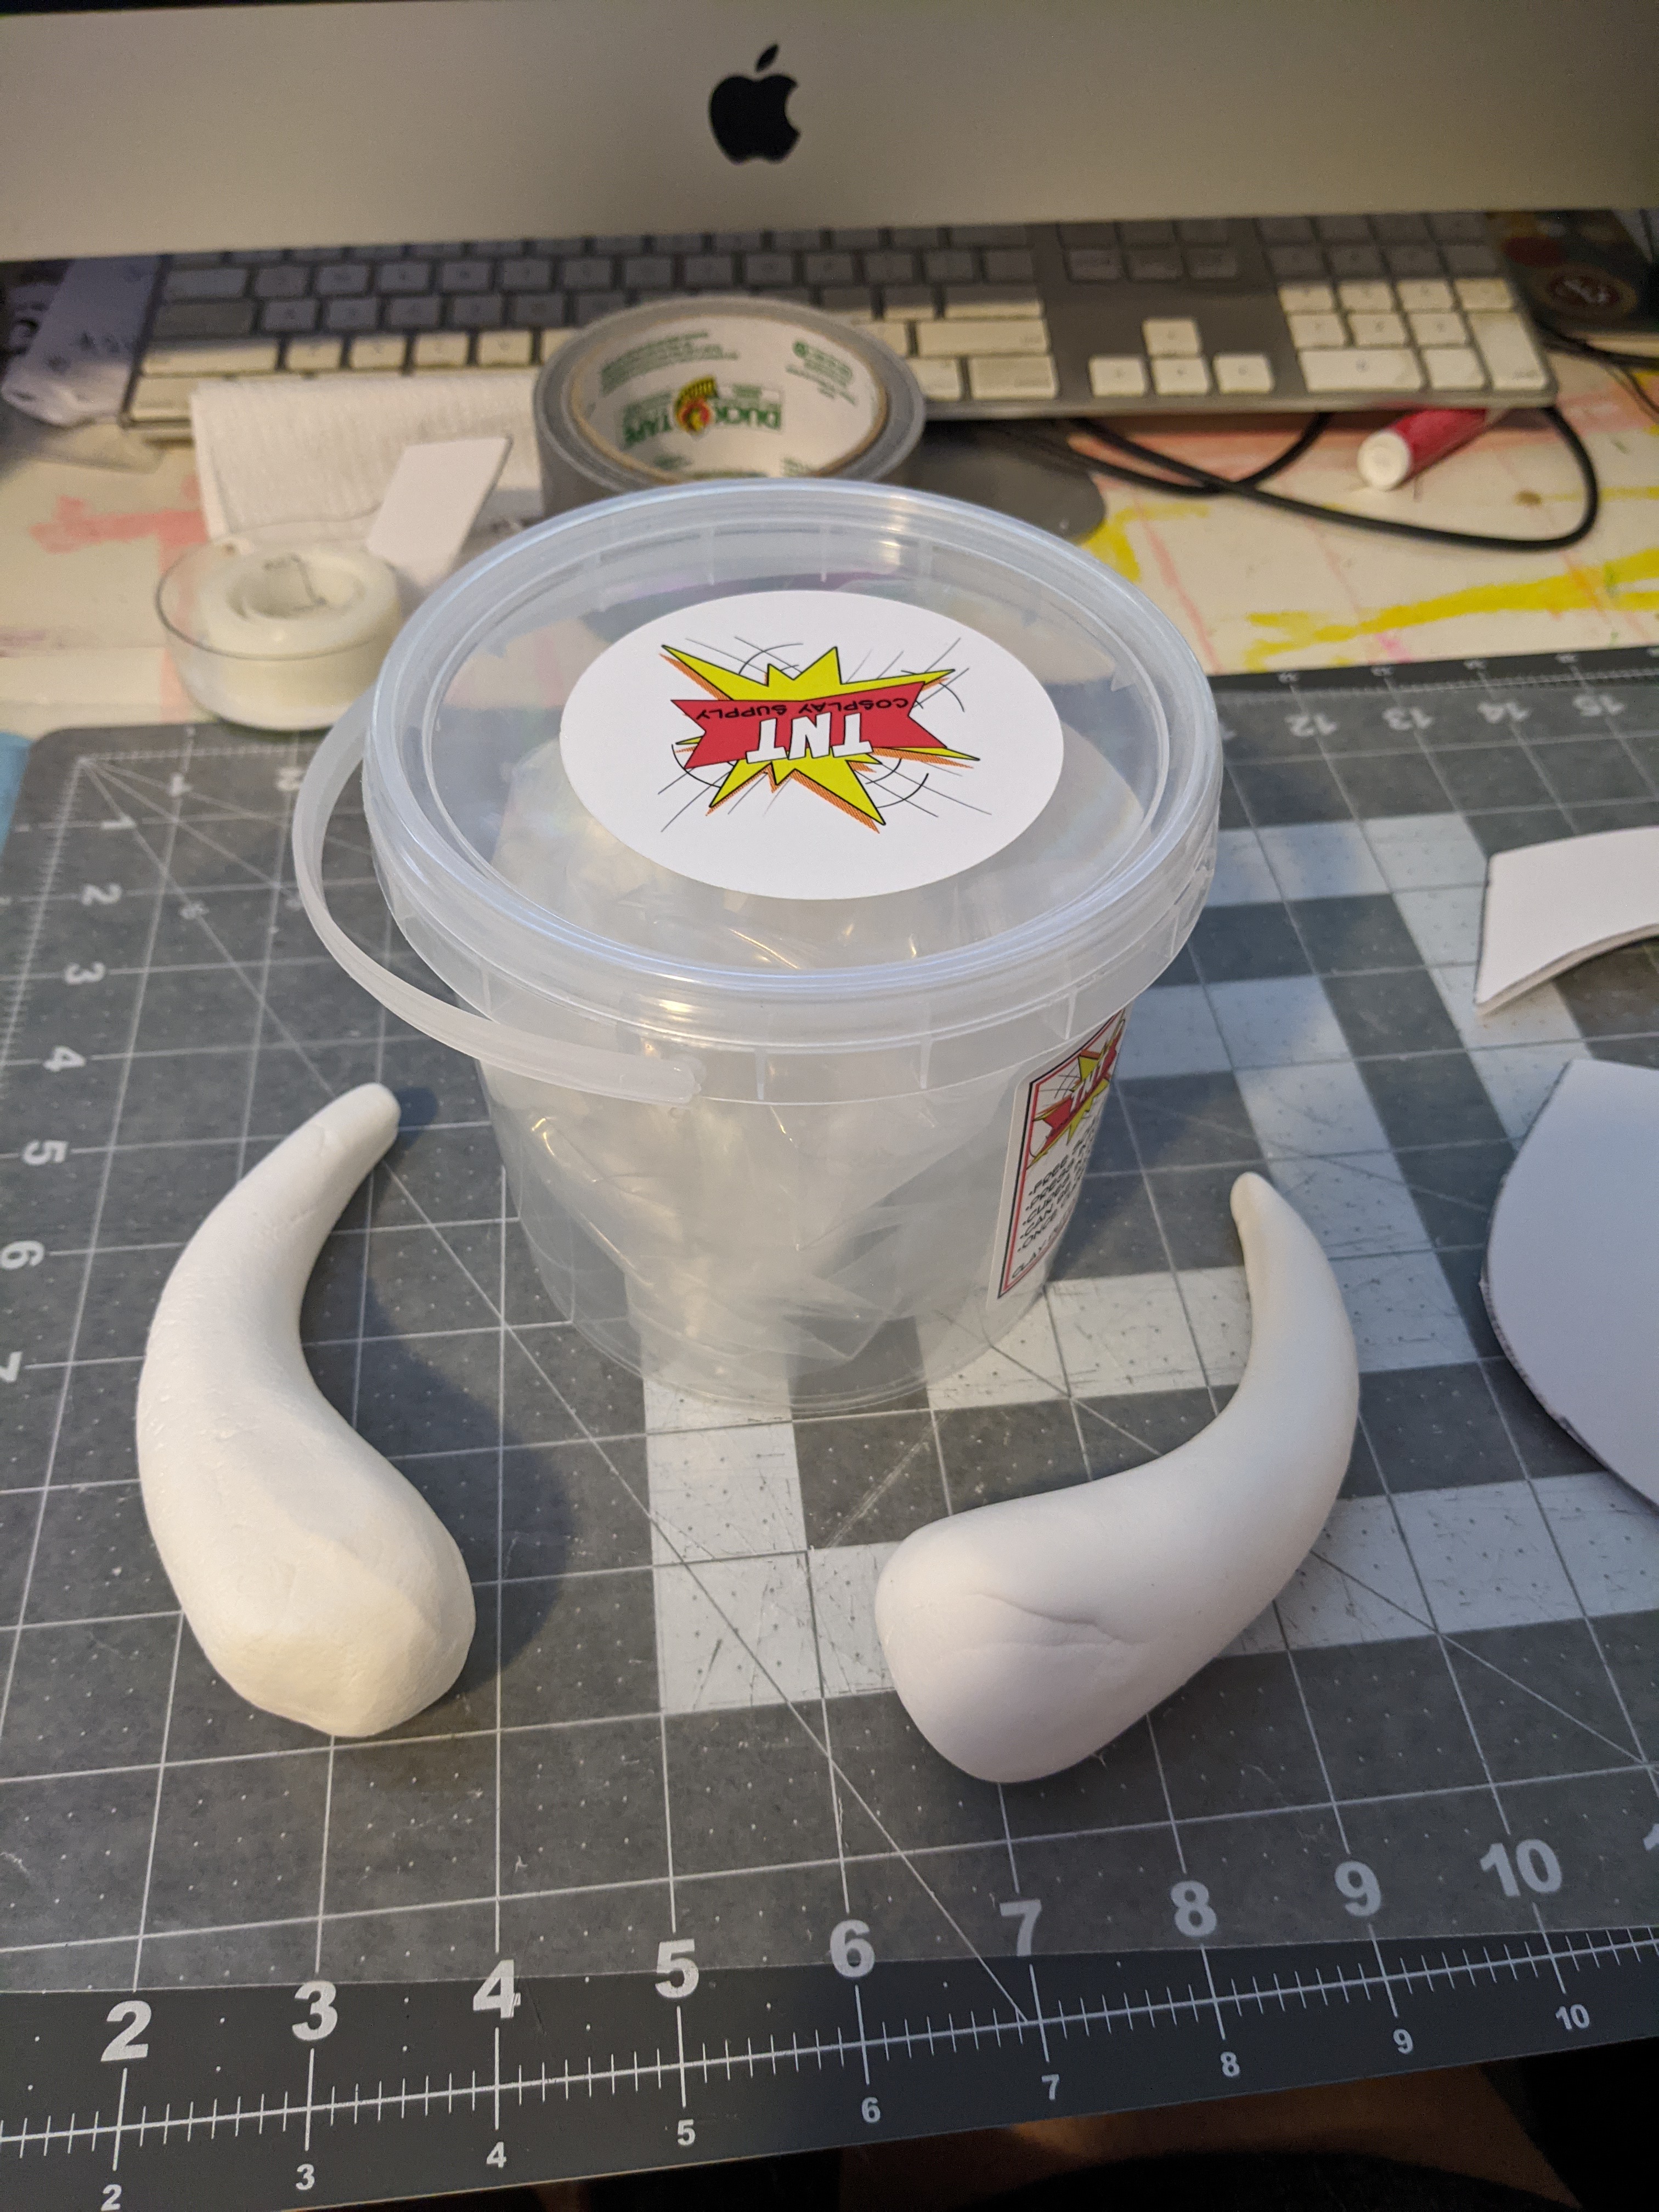
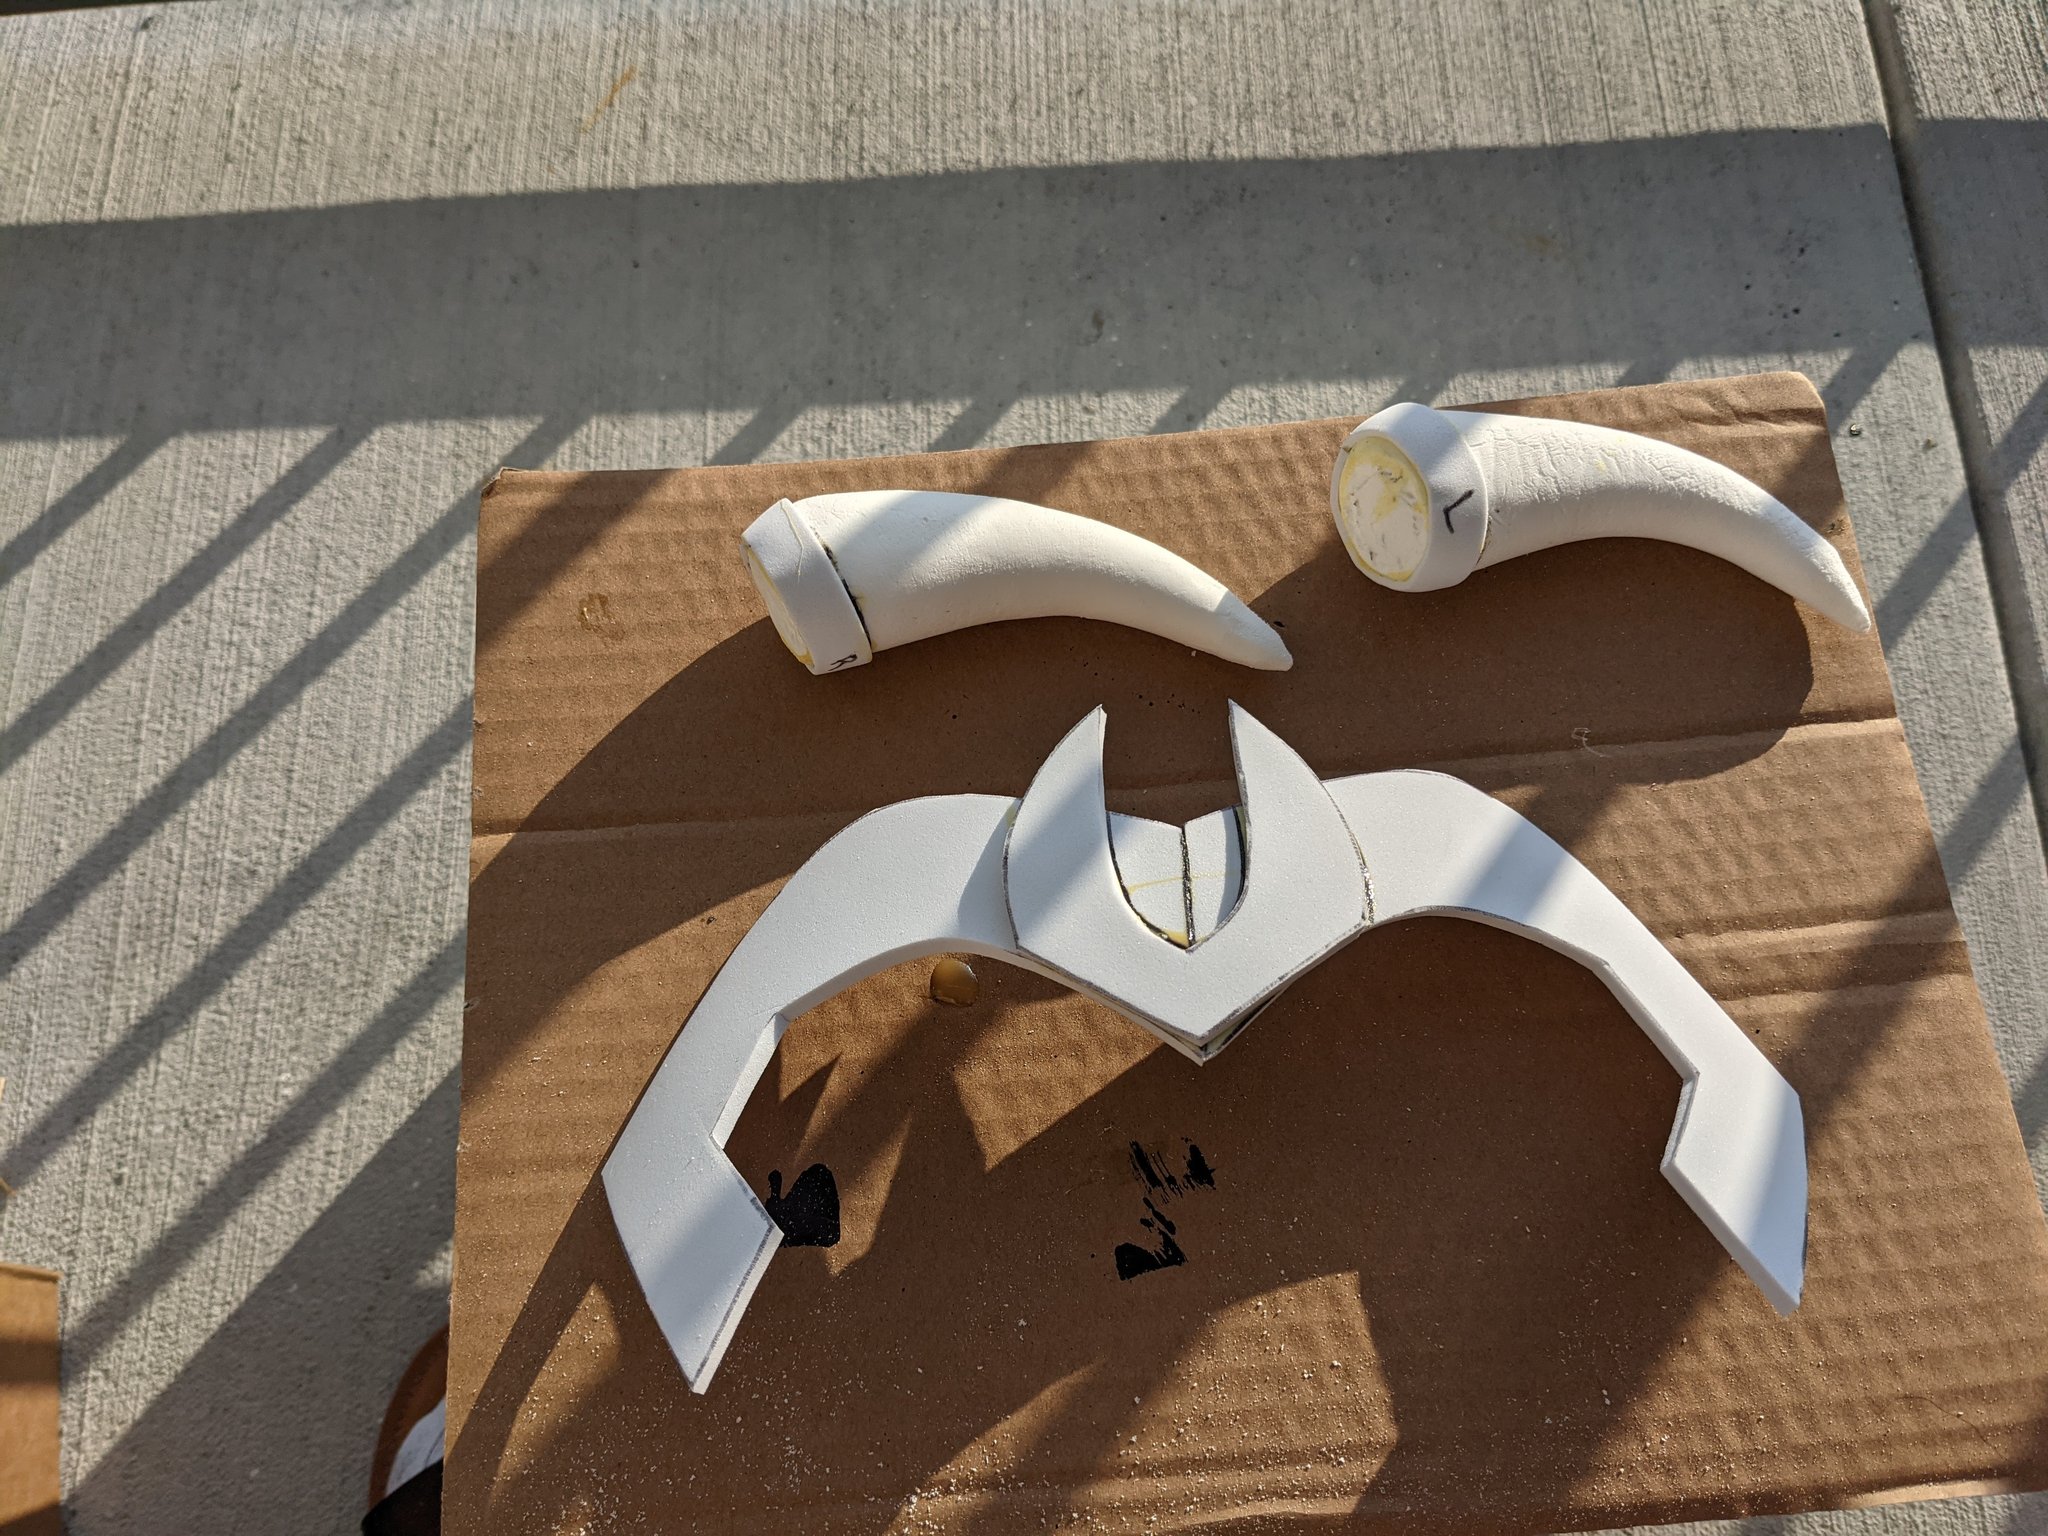
Horns
For the horns, I used foam clay. I did this by rolling a handful of foam clay on the table back and forth, but rather than keep both hands level, I would keep my hands at a slight angle. This helped to make the clay form into a pointed piece rather than an even cylinder. Once I was happy with the length, width, and angle of the cone-shape, I gently pressed it up against the outside of the jar the foam clay came in. This would give both cones the curved shape, making them more horns than spikes.


Once they finished curing, I cut a small circular hole into a piece of 2mm EVA foam. I used this to mark the base of both horns so I knew where to cut. I needed to do this to make sure that the bases of the horns were level for easy gluing to the helm. I used an Xacto knife to cut along the circle I had marked, then later used a dremel to sand them down.

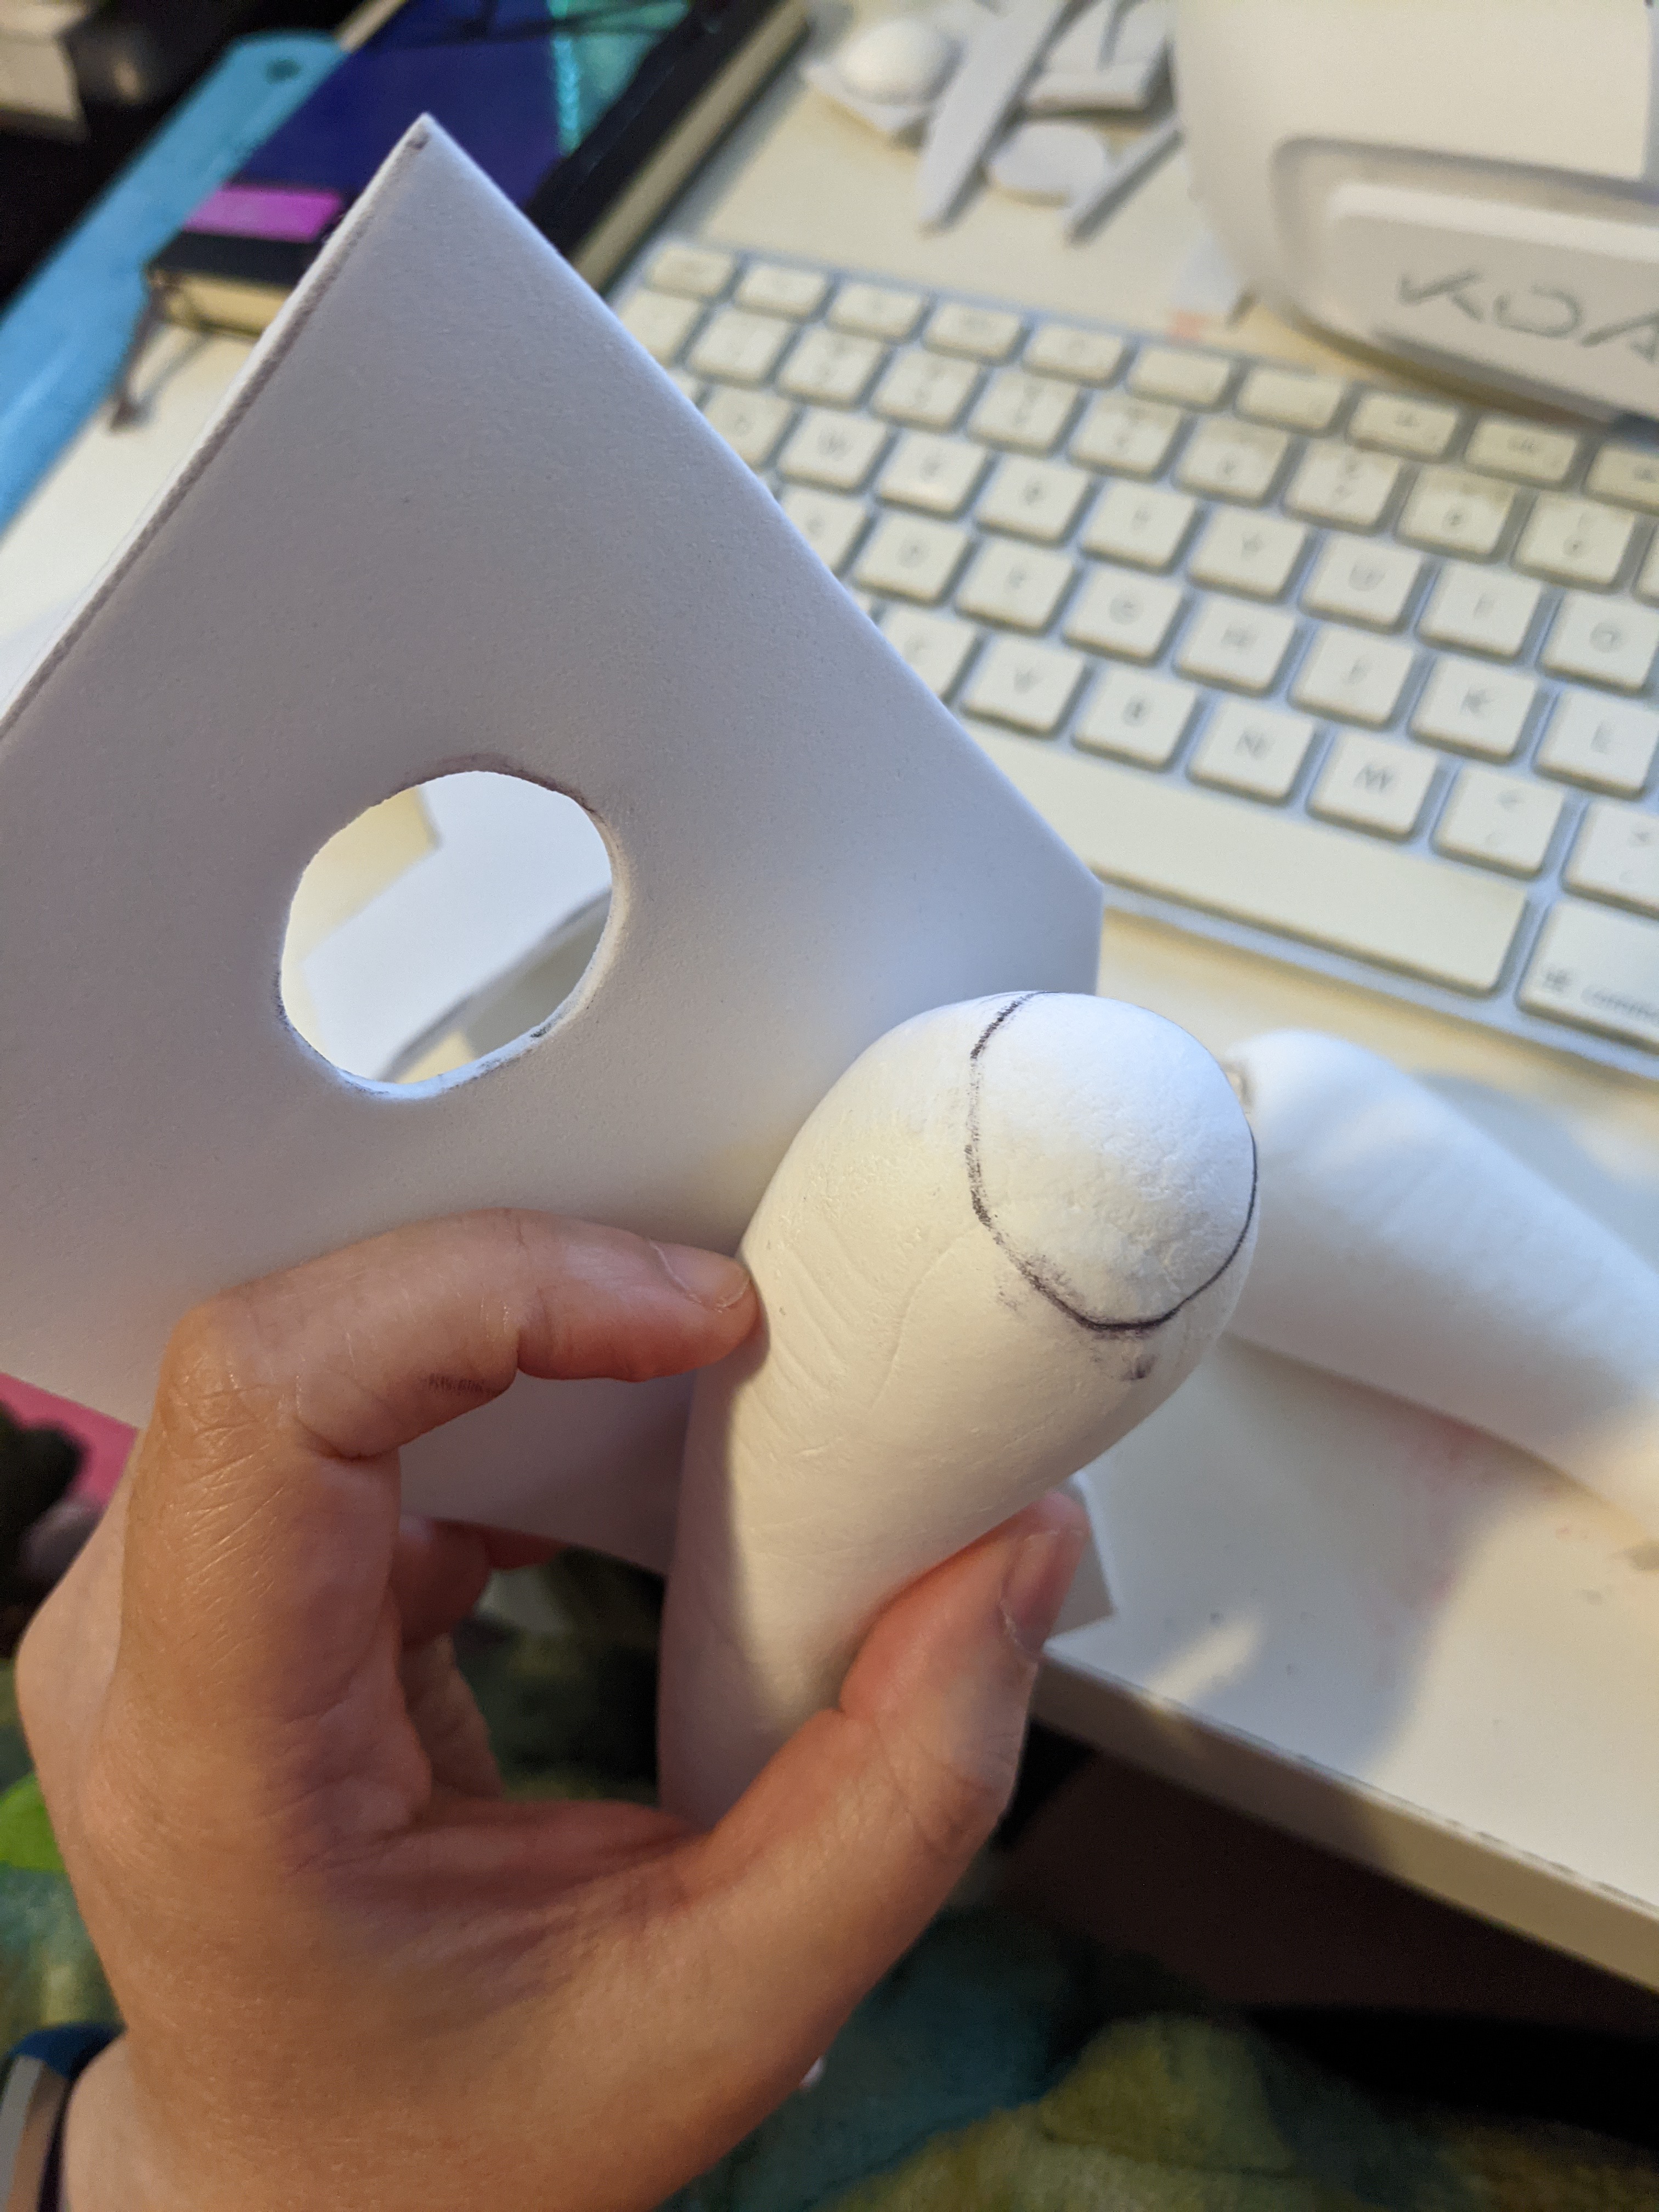

The last part for the horns were the small trim on the bottom at the base. For this, I cut out two pieces of 2mm EVA foam about 1cm wide and 15cm long. With the horn base flat on the table, I’d wrap the strip of EVA foam around the base, mark it, and cut to the correct length. I also marked the horn and the foam strip either “L” or “R” so I could match the pieces together. (Because the horns are hand-sculpted, they’re not perfectly symmetrical, so the foam strip lengths may differ slightly, hence the labeling.)
Putting It All Together
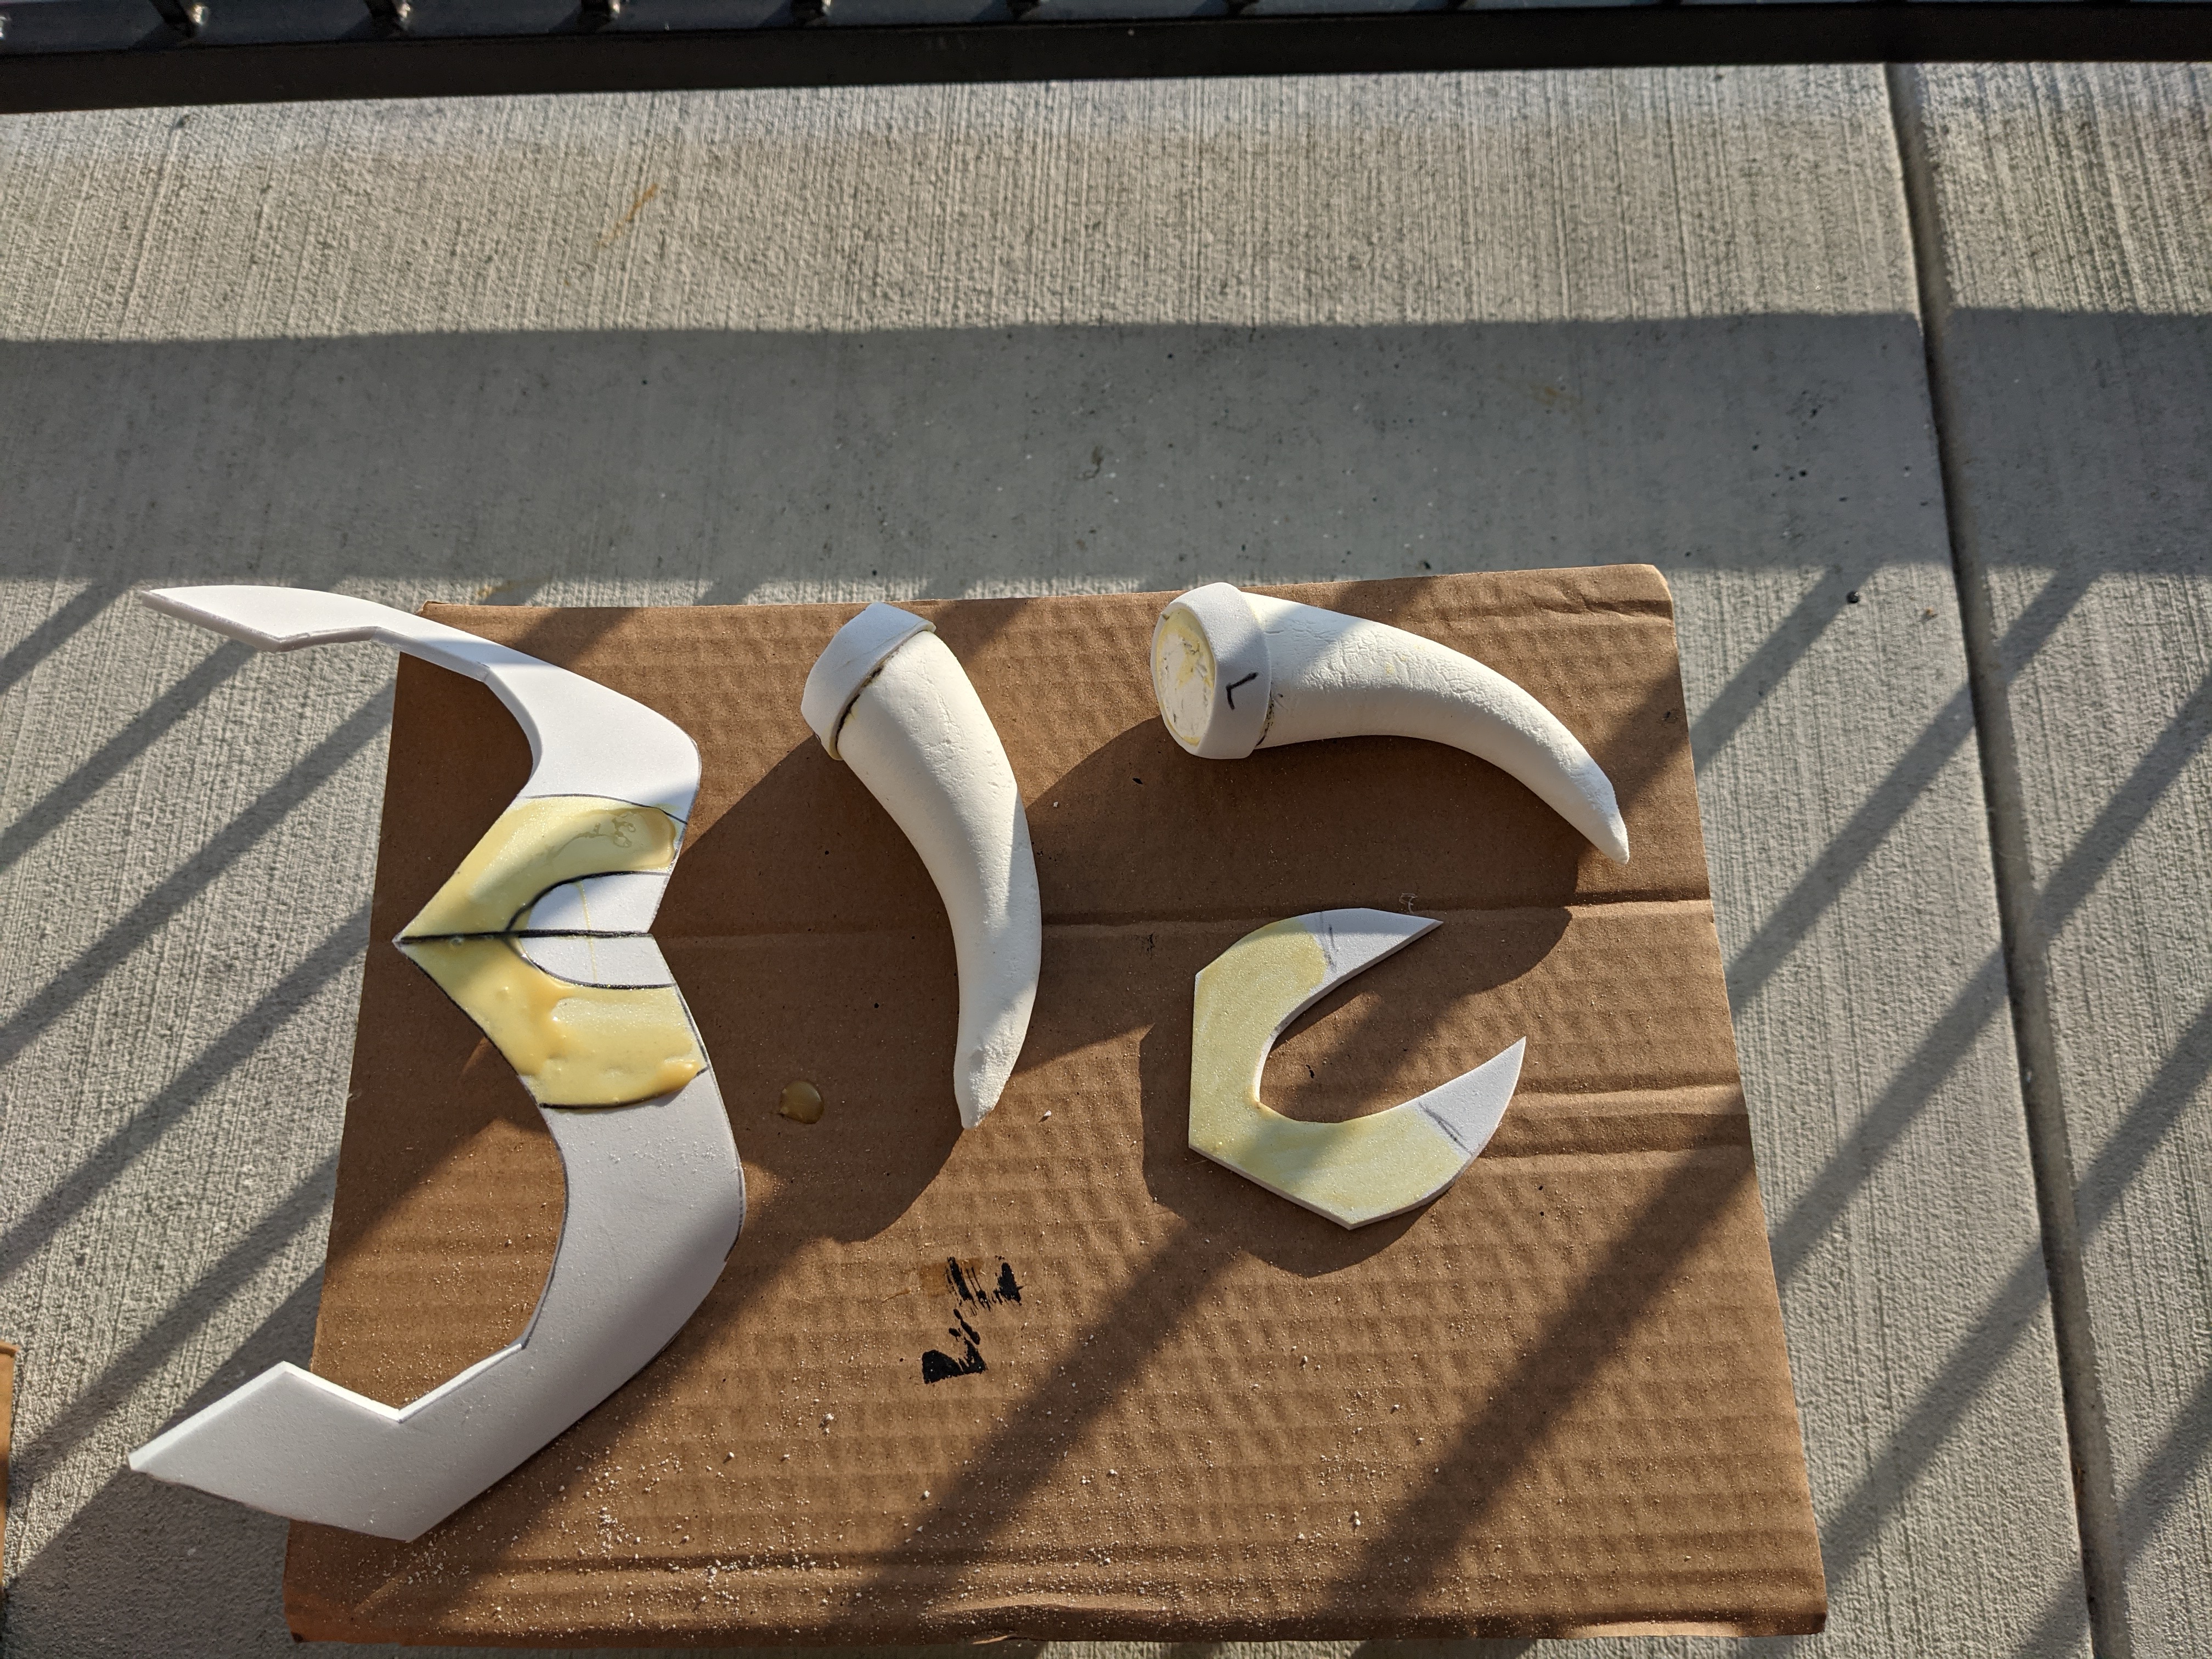
Once all the pieces were ready, I marked with pen where all the pieces would join together so I knew where I would need to apply contact cement.
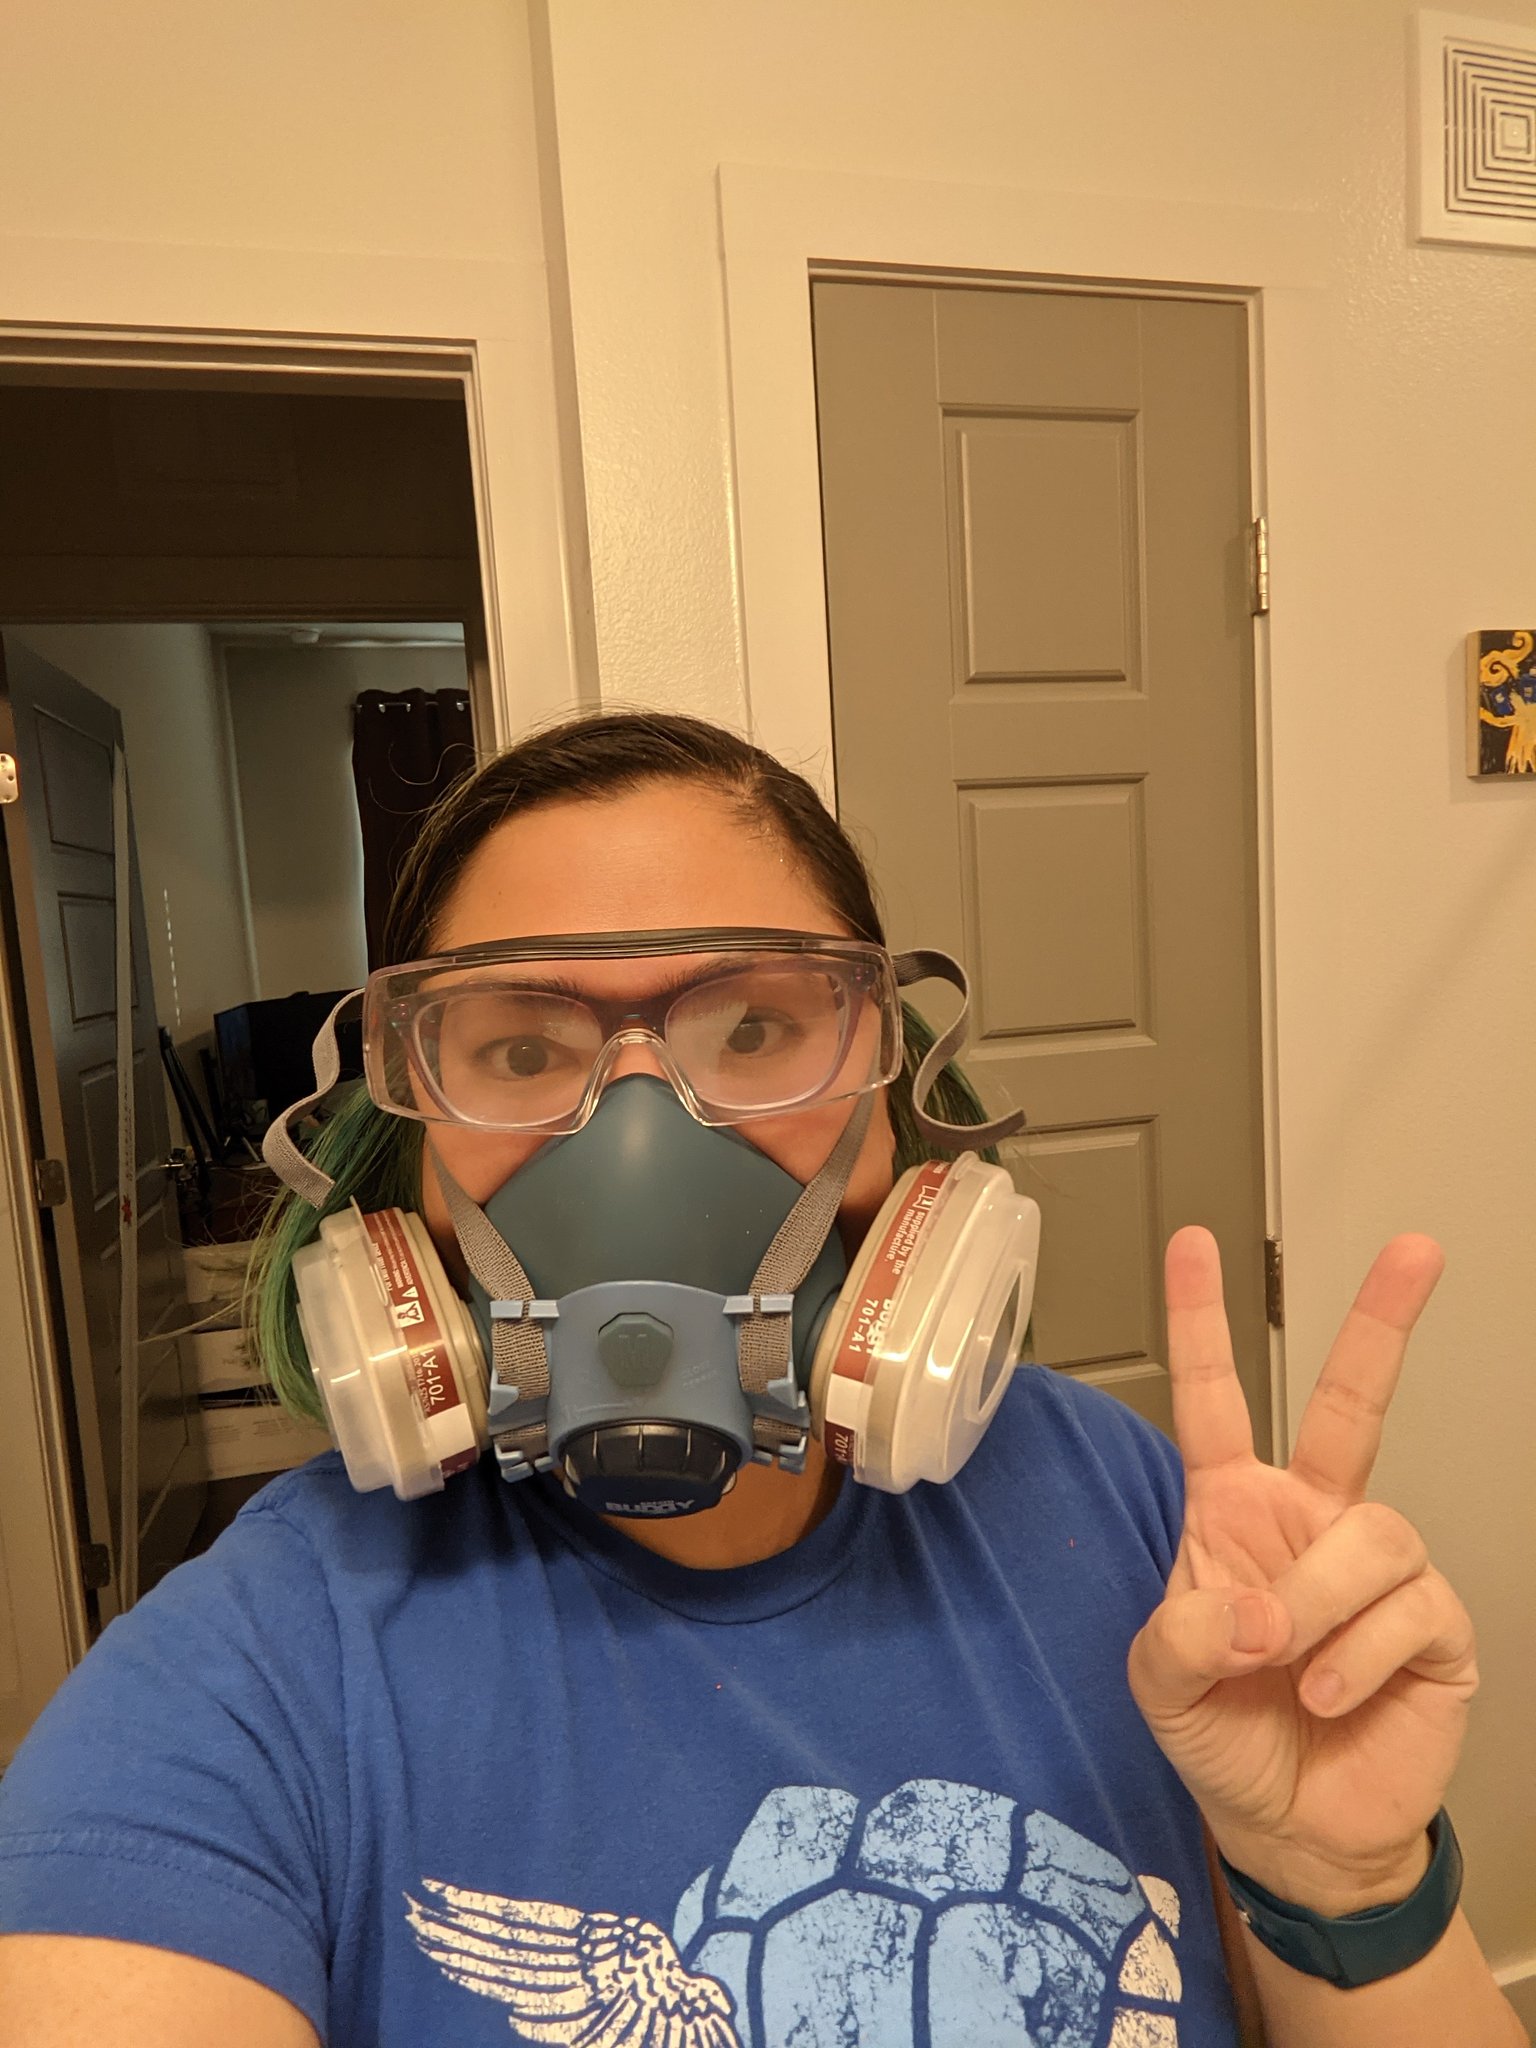
As always, practice proper safety when working with contact cement. I had on a respirator, gloves, goggles (for when I was sanding), and worked outside on my apartment balcony for good air ventilation.
To use contact cement, you apply the cement to both pieces that are going to be joined, letting it become tacky, then pressing the pieces together. It can be a long process depending on how much cement you use and how long it takes to dry/become sticky, but the results are worth the wait time for a very solid hold. I glued the two helm base pieces together, the front helm detail to the base, and the trim to the horns.
After letting them sit for a bit, I did the same process of applying contact cement to attach the horns to the helm base.
Prep, Paint, and Weather
To prep, I used a paintbrush to coat the whole thing with modpodge. After letting that dry, I went over to a Kaseydidwhat’s house to paint in her yard. She had a nice giant TV box to paint on and some sticky tack to put on not just the helm but all the foam props so they didn’t blow away.
After priming all the props with 2-in-1 primer paint and letting it dry, I did 2 layers of gold spraypaint. Once all that dried, I sealed it with a gloss sealant. Be sure to wear a respirator when spray painting! And make sure the filters in them are changed out reguarly!


To weather the helm, I did what I always do when weathering and refer to Kamui Cosplay’s “Painting with Acrylics” video. (I’ve now done it enough that I don’t really need to refer to it anymore.) To summarize, it involves mixing black acrylic paint with a little bit of water, coating pieces of the props in this mixture, then using a towel to wipe off the excess. By doing this, the black paint gets left behind in little crevices and cracks in the prop, giving it dimension and making it look worn and lived-in, rather than pristine. It’s honestly one of my favorite things to do for props because it really gives it character!
After weathering, I gave it another spray of sealant to seal the whole thing.

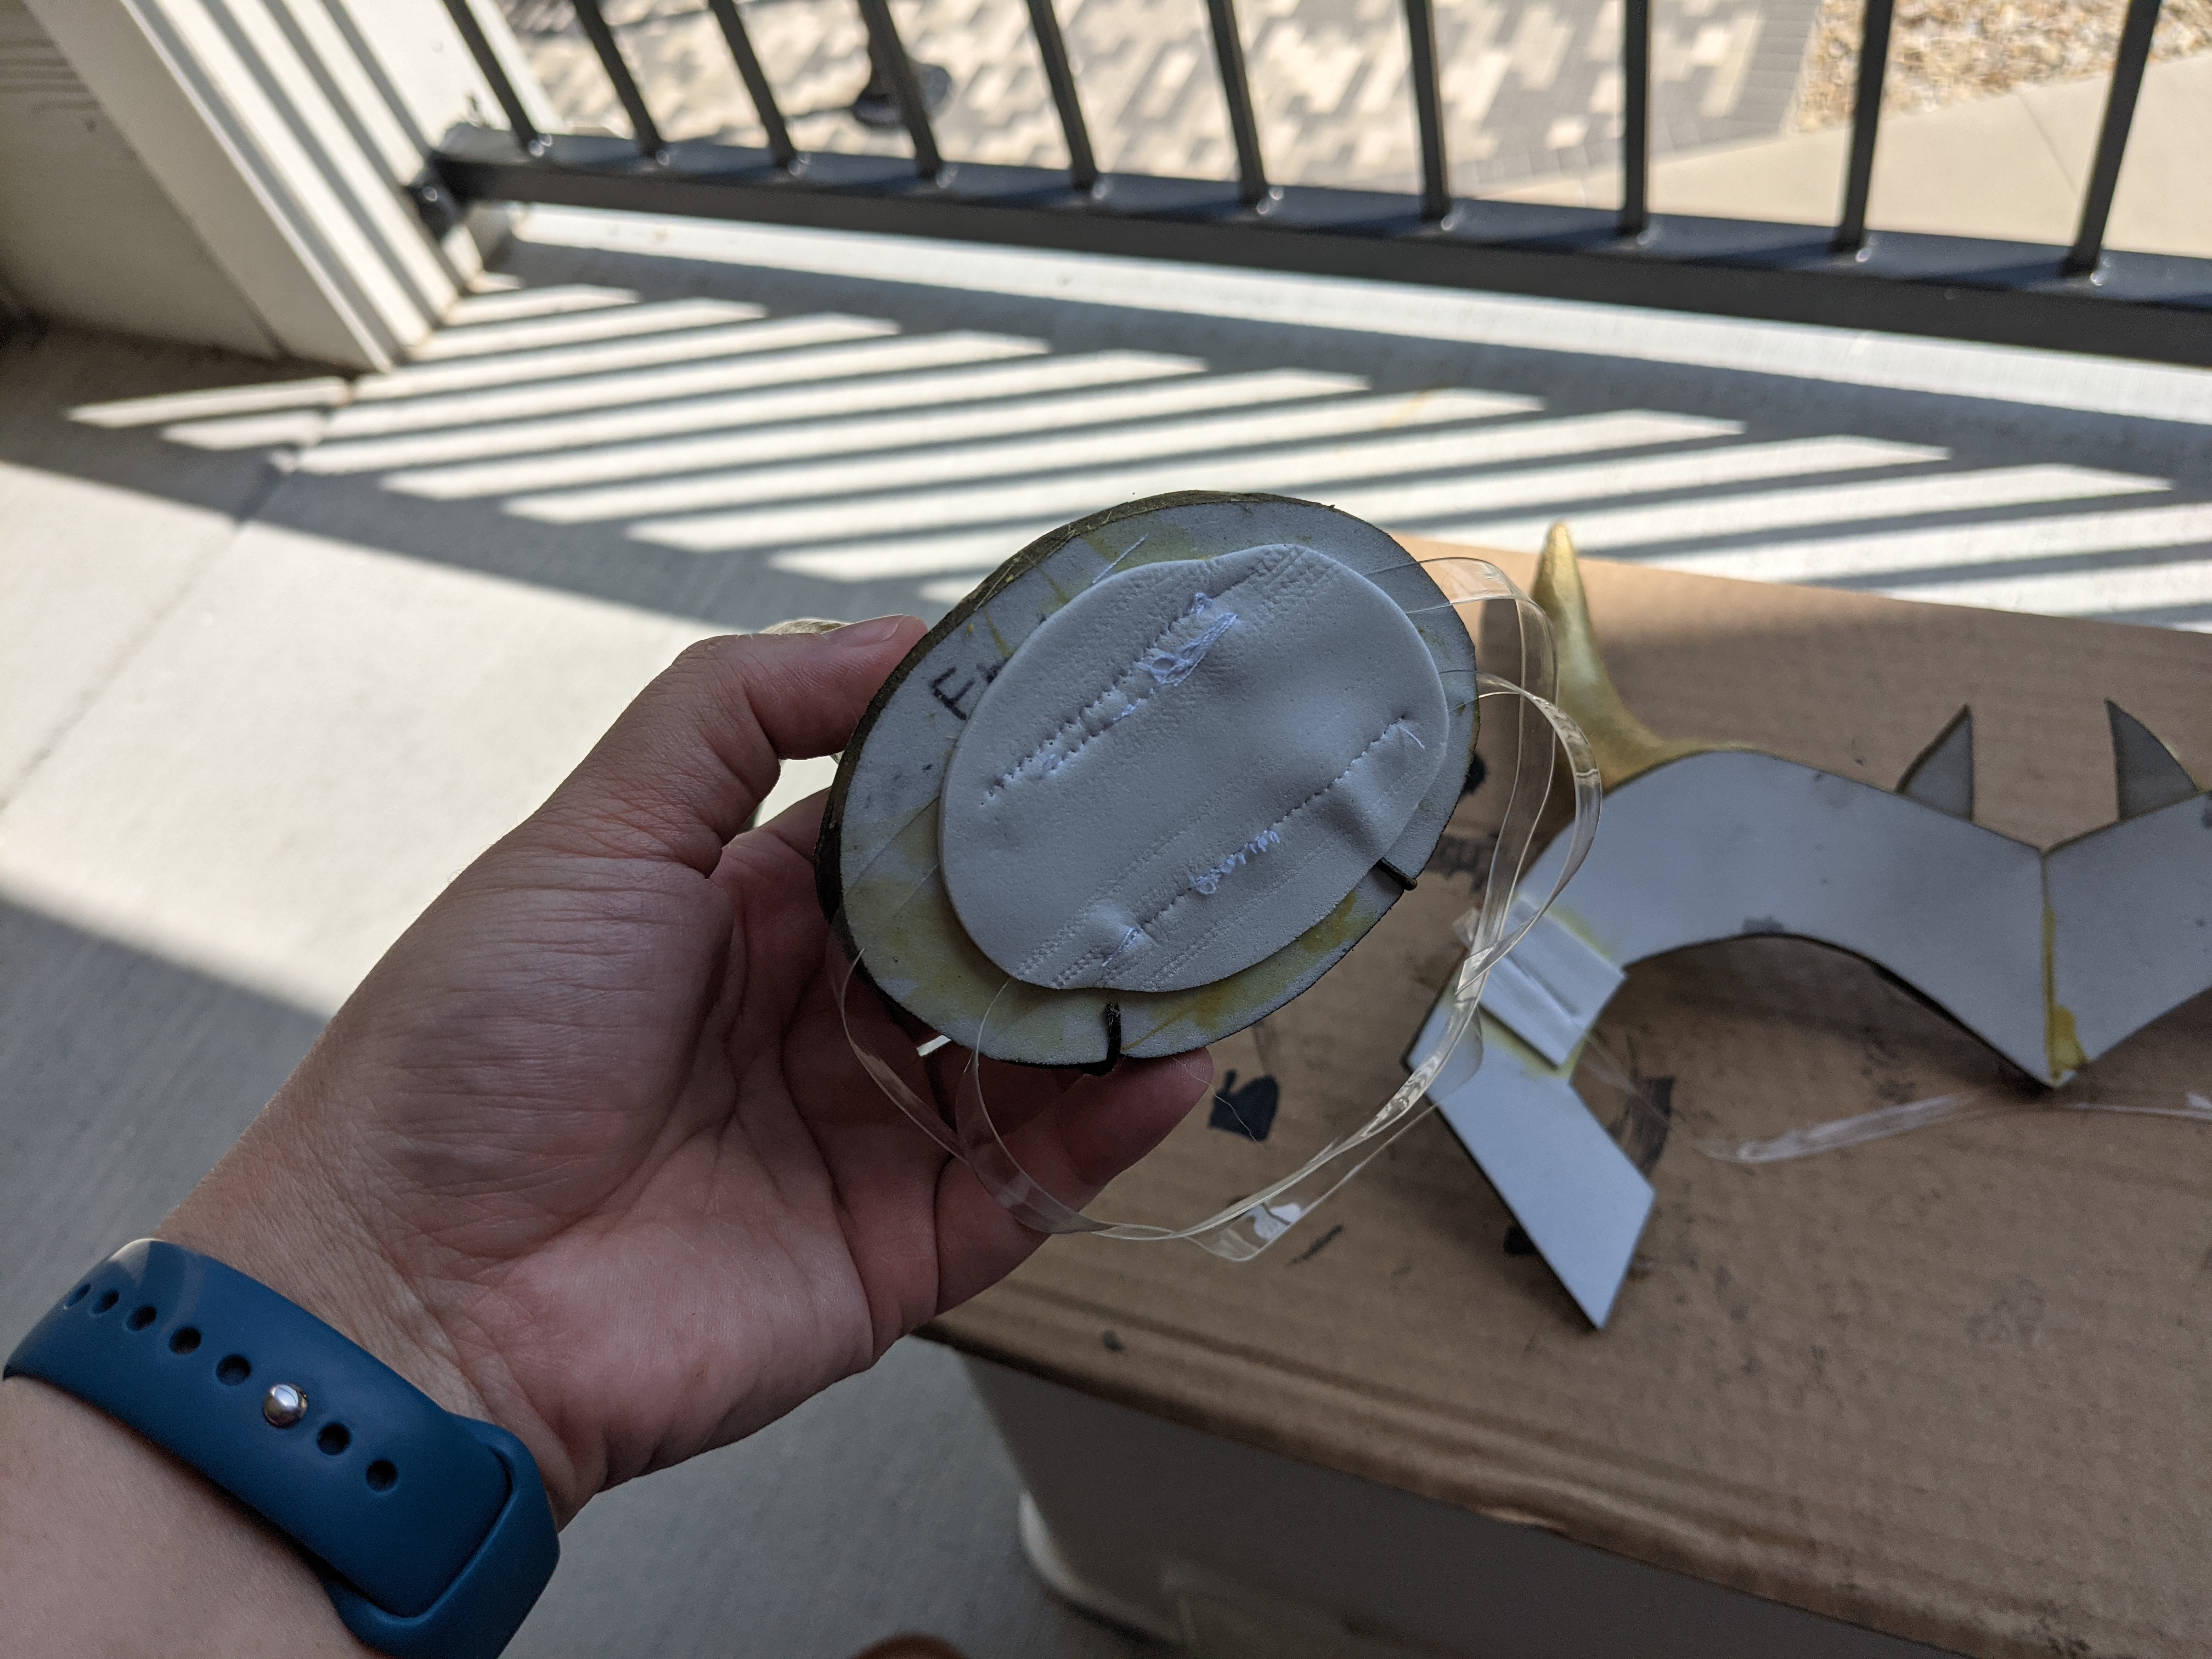
Attachments: Elastic strap
This next part of the process is a bit messy and doesn’t translate well to a tutorial. I knew that I wanted to add an elastic strap to the helm to help it stay on my head, so I bought clear elastic straps online. To get the length right, I wrapped the elastic around the back of my head and made a mental note of where the ended near my temples. I purposefully cut longer than that so that I could make adjustments to it. (It’s much easier to make something smaller than it is to extend it if you make it too short!) Alternatively, I could’ve just as easily measured with a measuring tape and then transferred that to the elastic strip, but I figured I’d cut out the middle man of the process and go straight to the elastic.
At the suggestion of some Twitter mutuals, I decided that I would attach these straps by first sewing them to small pieces of EVA foam then use contact cement to glue the foam parts to the underside of the helm. So, in order to do that, I cut some small squares of 2mm EVA foam that would fit under the helm at the temples. Then, to get the length and placement right, I used masking tape to tape all the pieces together so I could try it on. I did this a few times to get it tight but not too tight. The elastic has some stretch to it, but not a lot. Once happy with placement, I very carefully removed the masking tape without moving the elastic and then clipped it in place onto the foam. Then I trimmed off the excess elastic.


Next was sewing the strap on. I not only learned that you could sew EVA, but that you probably shouldn’t attempt a zigzag stitch for it. I tried that at first thinking I should because of the elastic, but the elastic barely has any stretch so it wasn’t necessary, and the EVA foam just could not handle a zigzag stitch, I’d come away with giant rats nests on the underside. Once stitched on, I glued the pieces together, easy peasy!


Green waistcoat alterations
I ordered a men’s XS green waistcoat of amazon. Why men’s? Well I liked the style of it better and I had a feeling I would have an easier time finding one that fit than if I had tried women’s. While this somewhat turned out to be true, I still had to make some alterations.
This waistcoat came with five buttons, President Loki’s only had four. This worked out nicely considering this waistcoat was just a little too high (didn’t show enough of the tie underneath) so I could hit two birds with one stone by both removing the top button and lowering the neckline a little bit. I also made sure to tighten the strap that was on the back of the waistcoat to make it tighter.
To do this, I put everything on, buttoned buttons 2-4, and then folded the top over and pinned it in place.
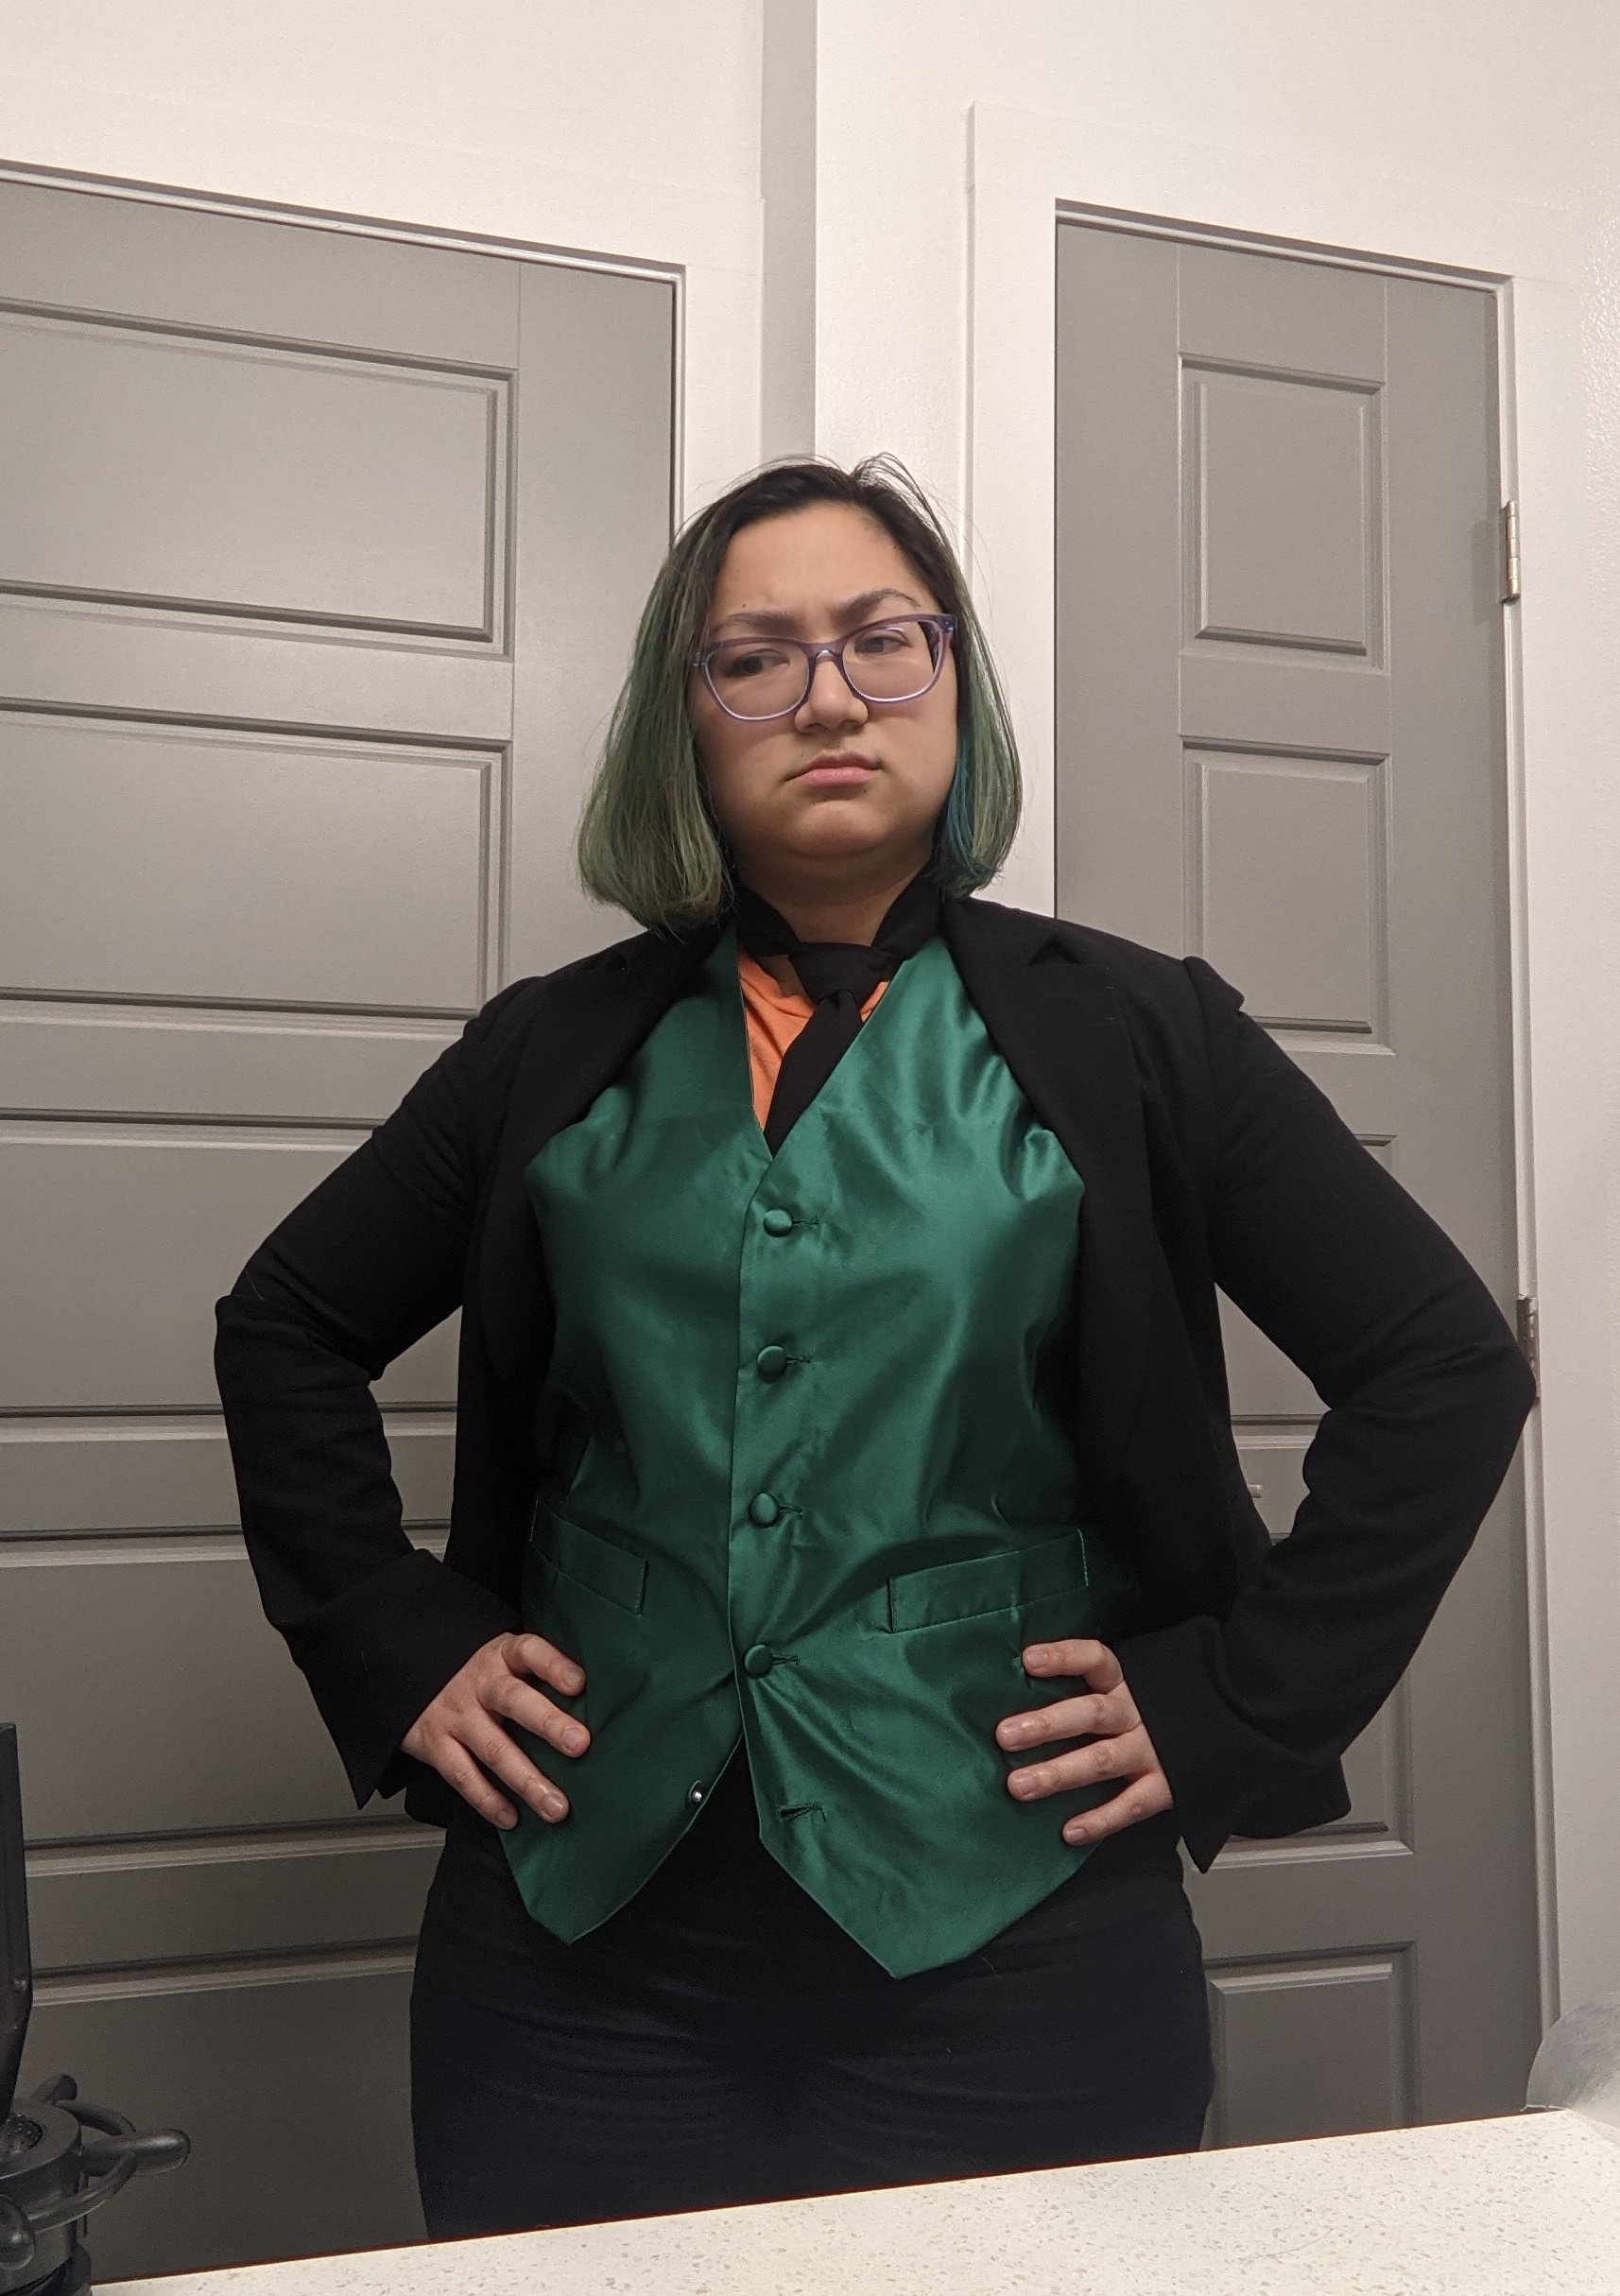

After basting the folds in place and deciding it looked fine, I took the waistcoat to the sewing machine and stitched it down. Then, I removed the basted stitches. Could I have properly altered the waistcoat by seamripping the lining from the fashion fabric, cutting it to size, and then stitching it shut? Sure. Did I want to do all that? Not really. So opting for this easy and effective method worked just fine for me.


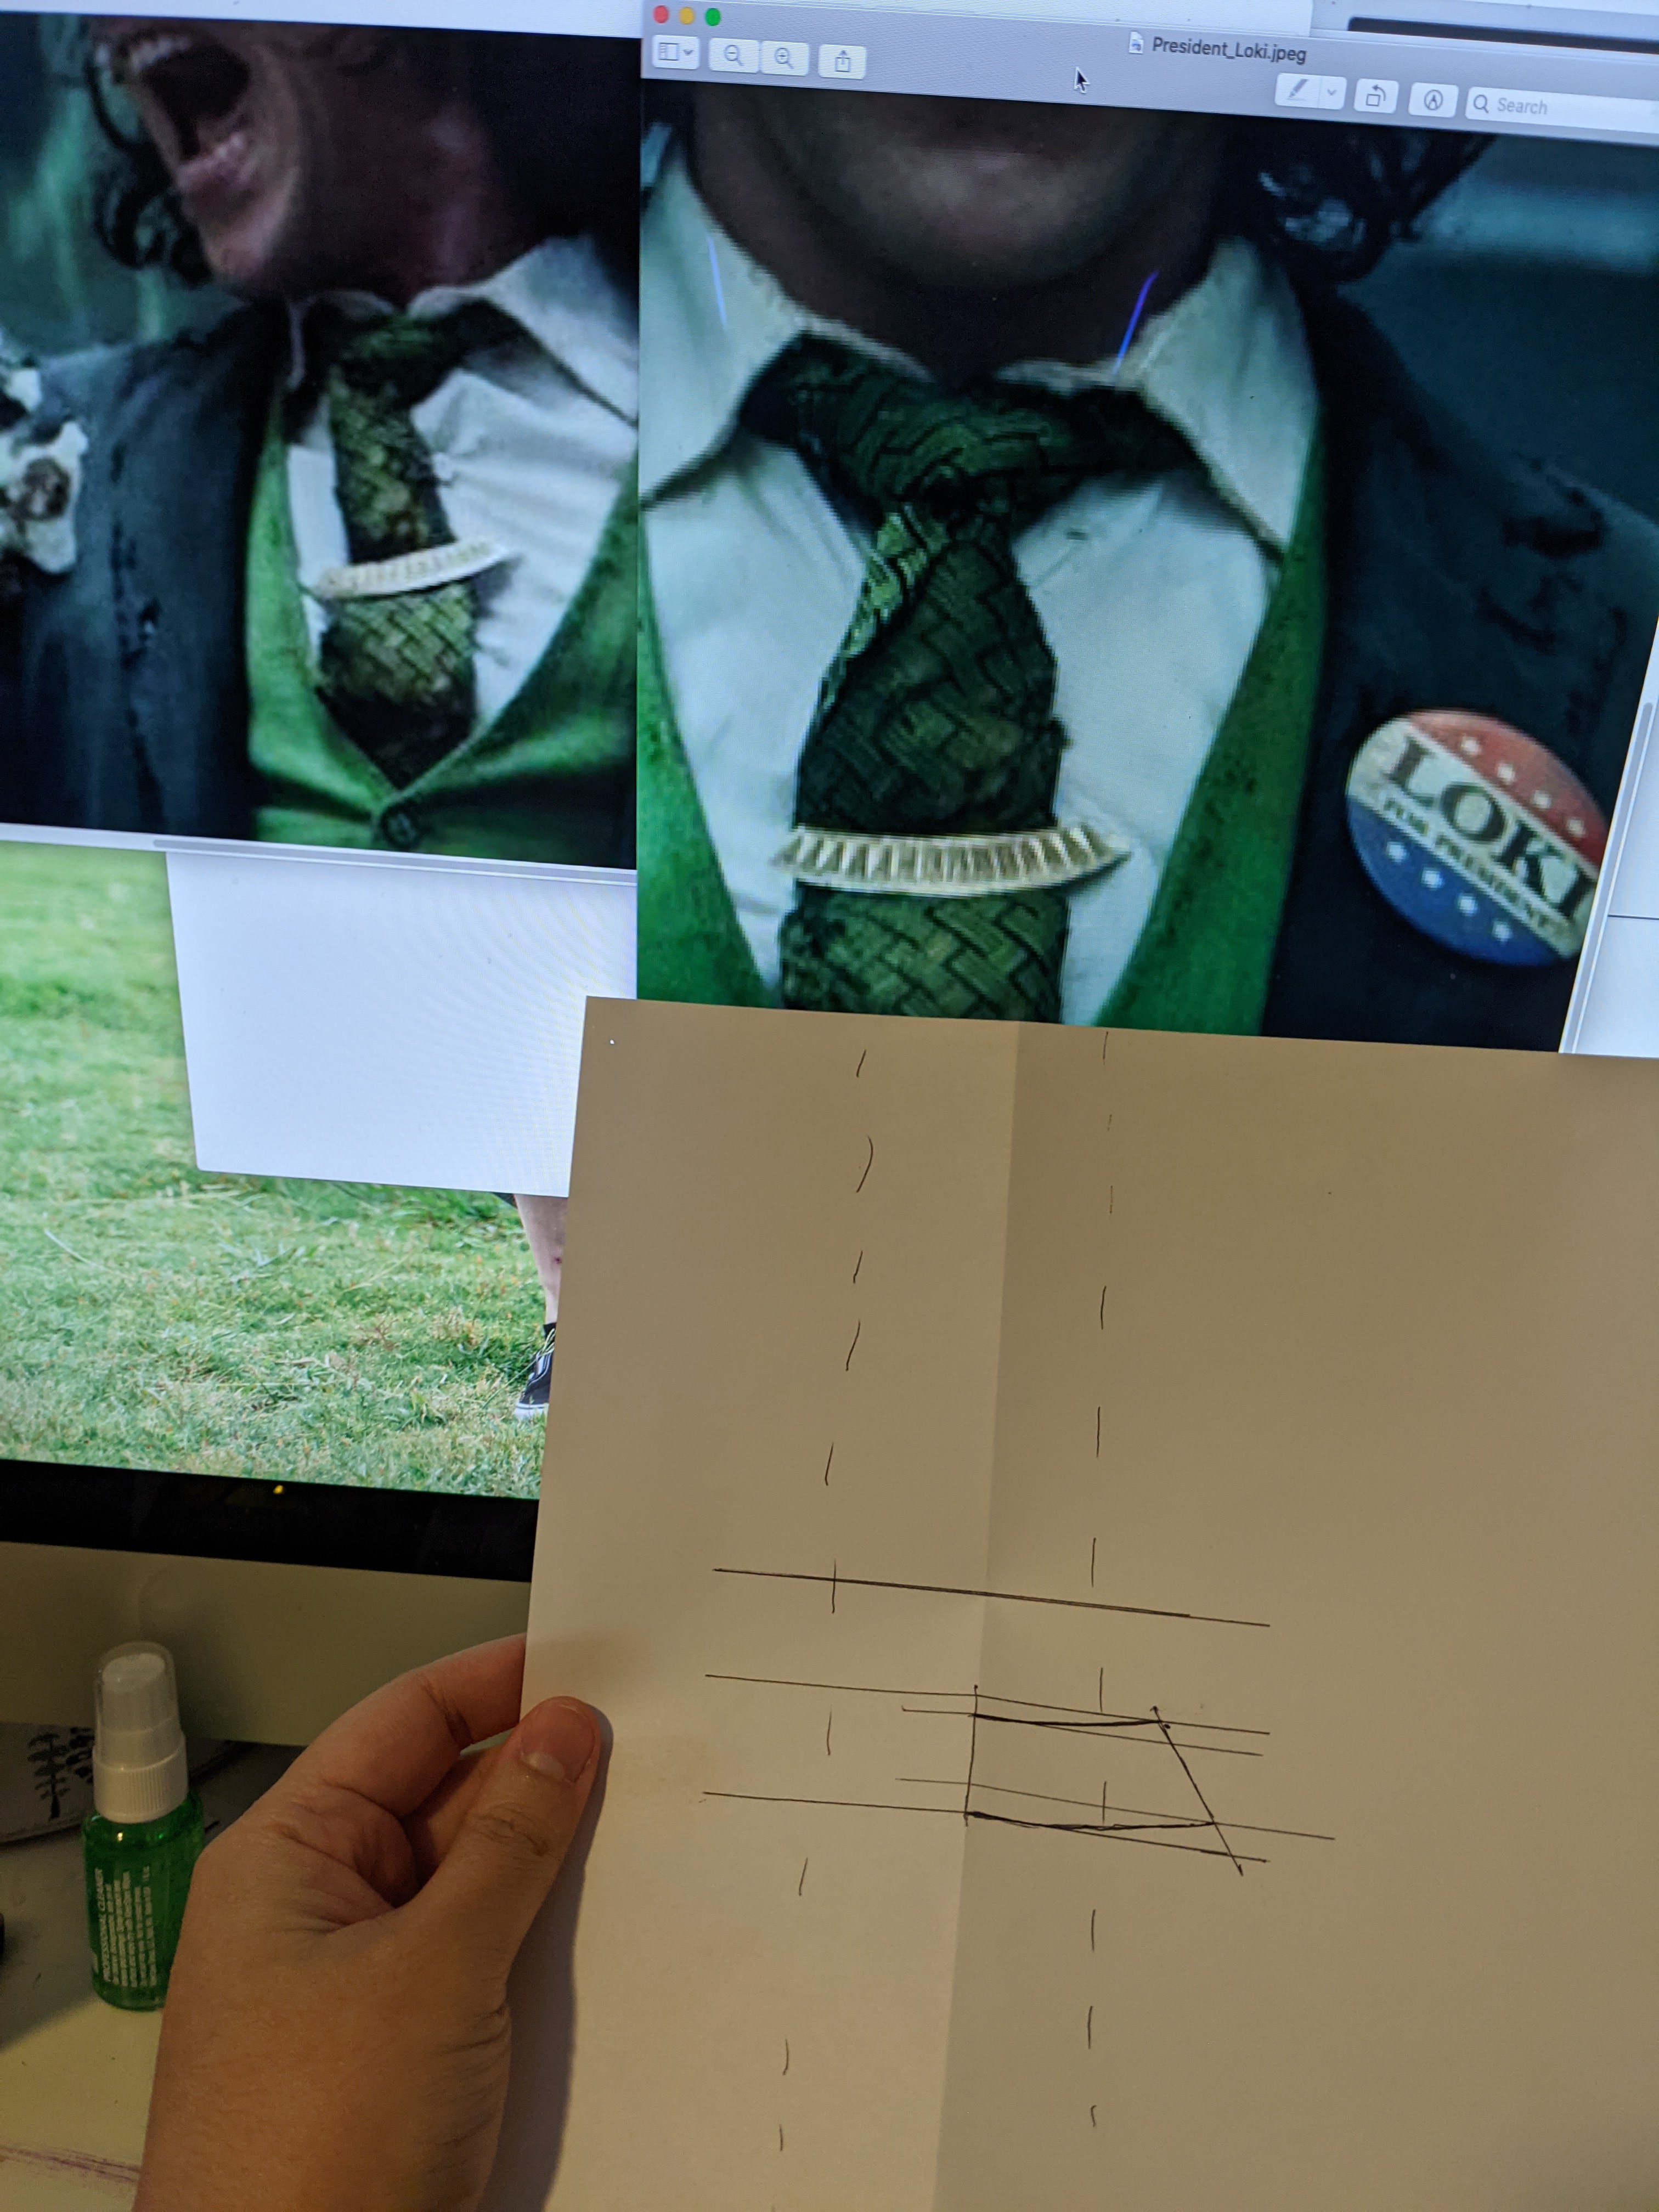
Gold tie bar
Initially I was thinking of just using my husband’s tie clip. But then I realized that it’s silver and all of Loki’s aesthetic is gold, so that wouldn’t work. Not to mention the shape and design of Loki’s was very unique. So I opted to make one.
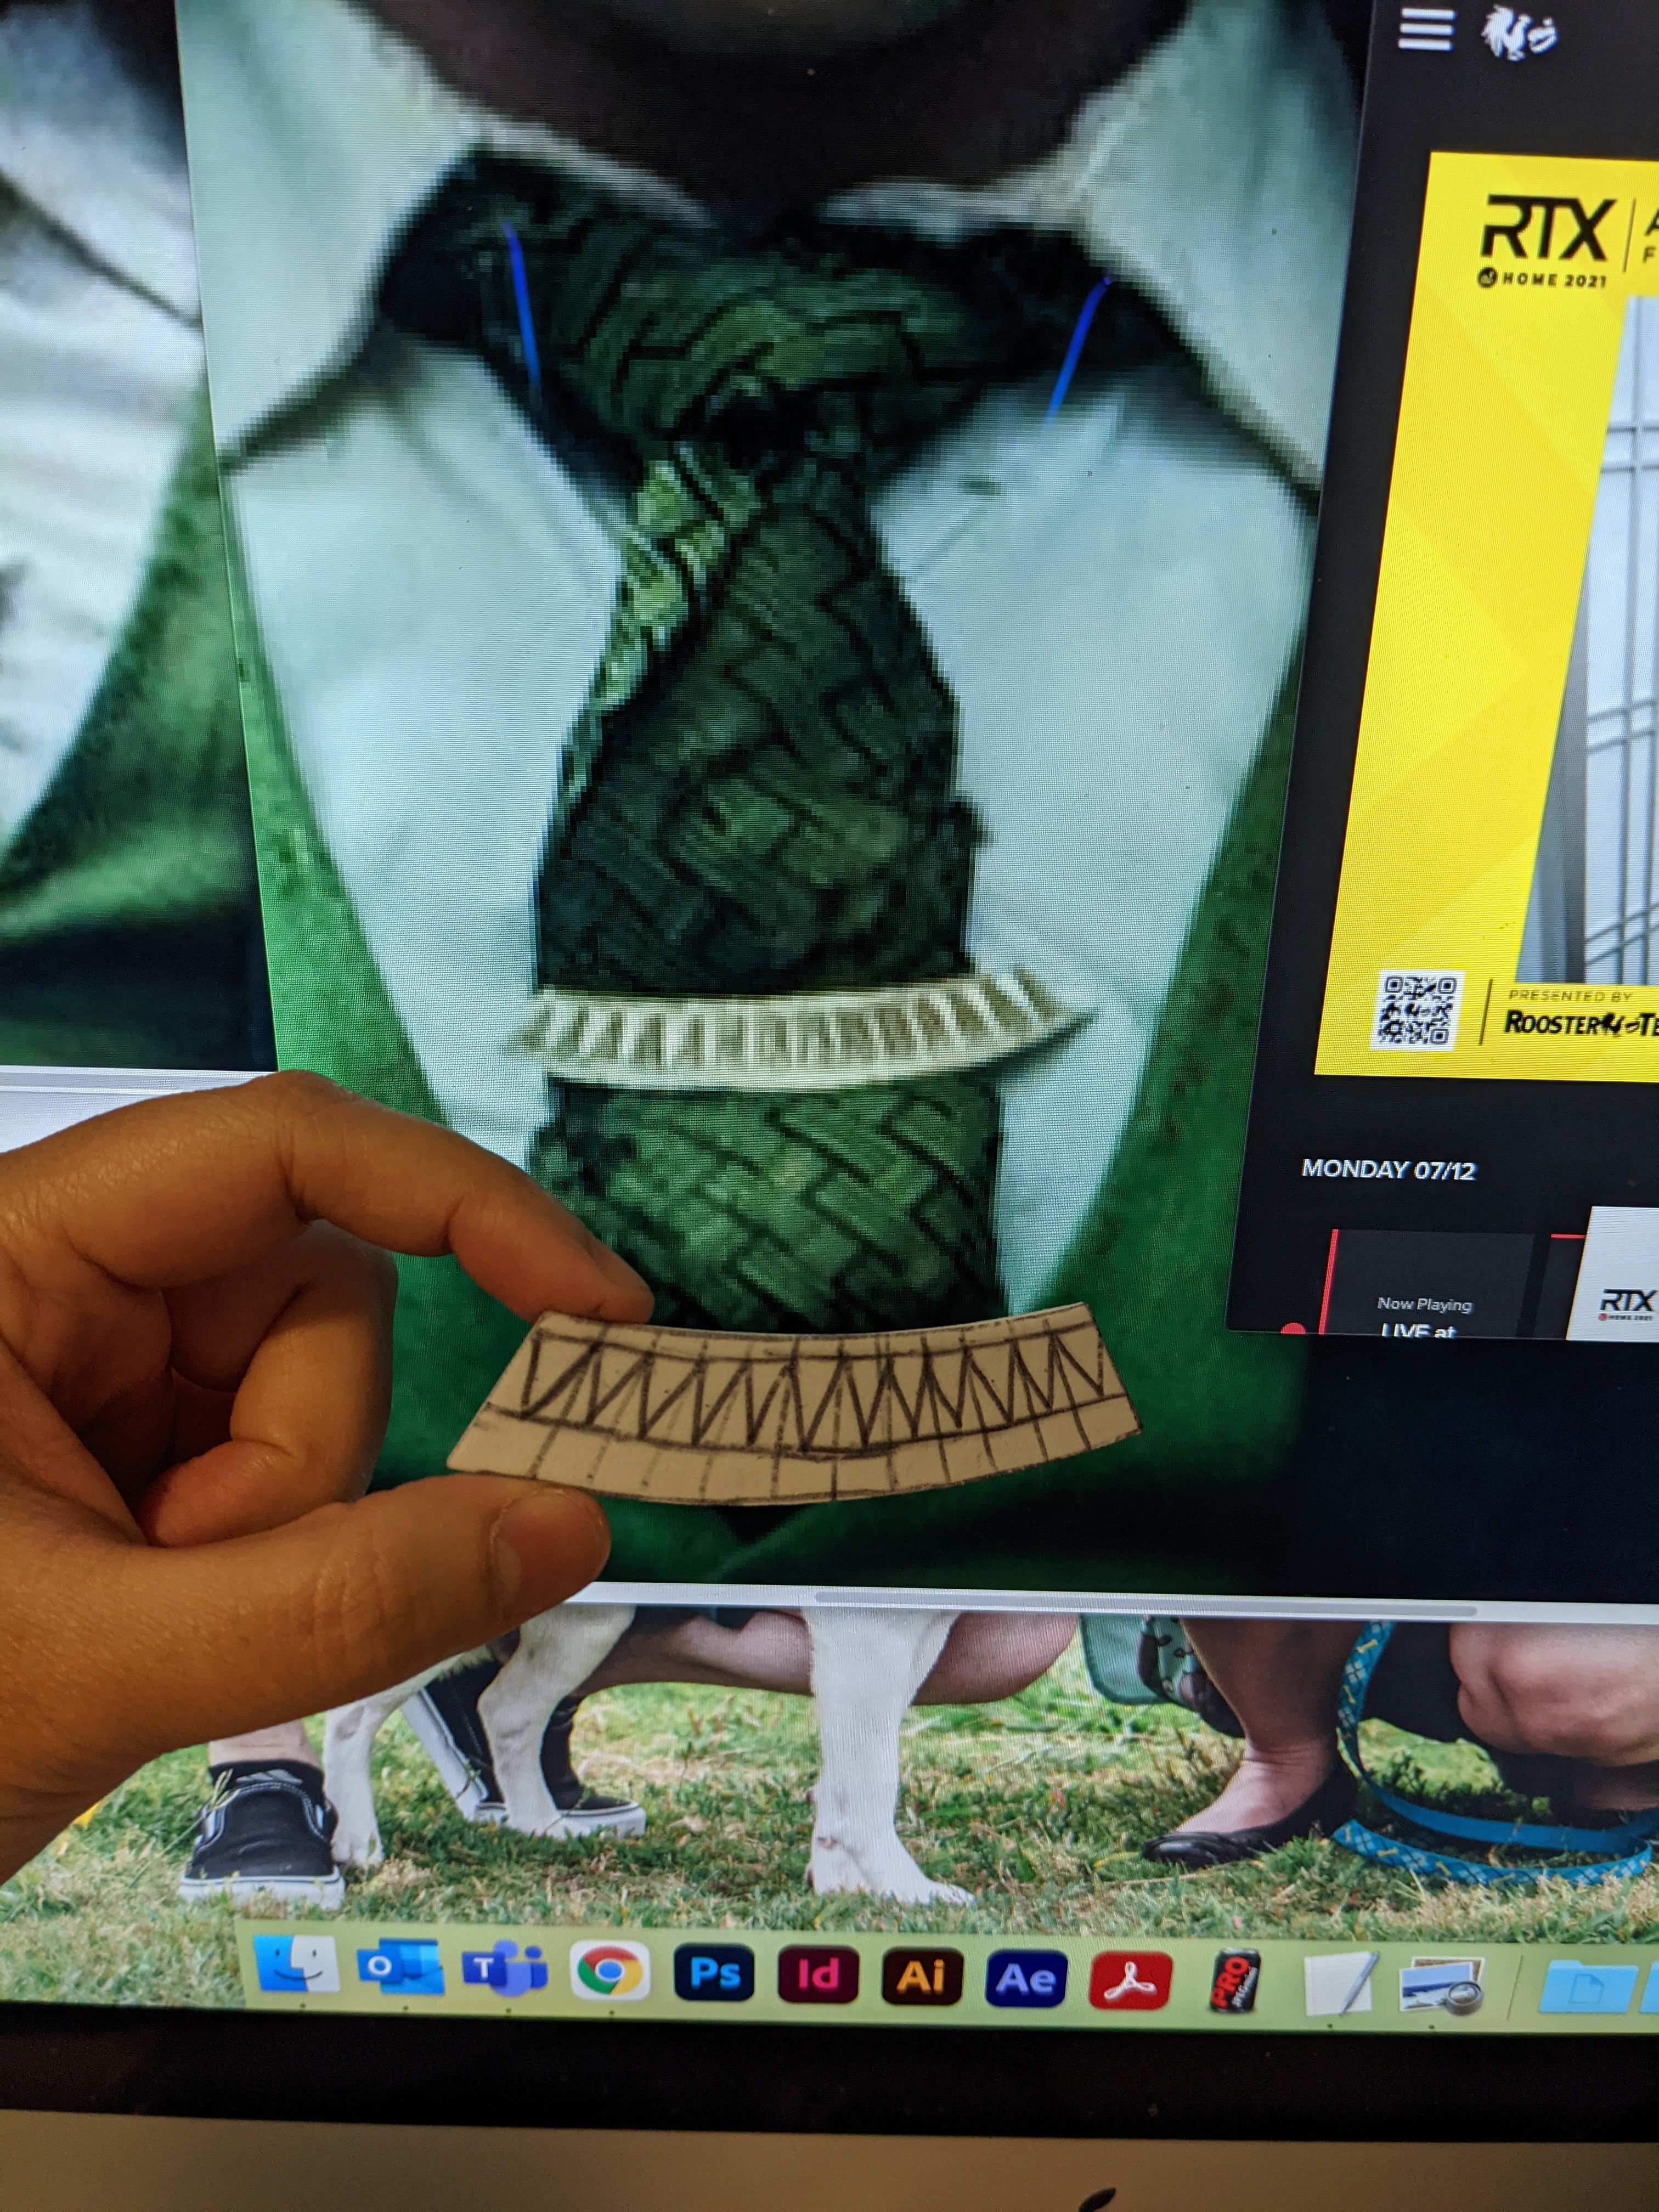
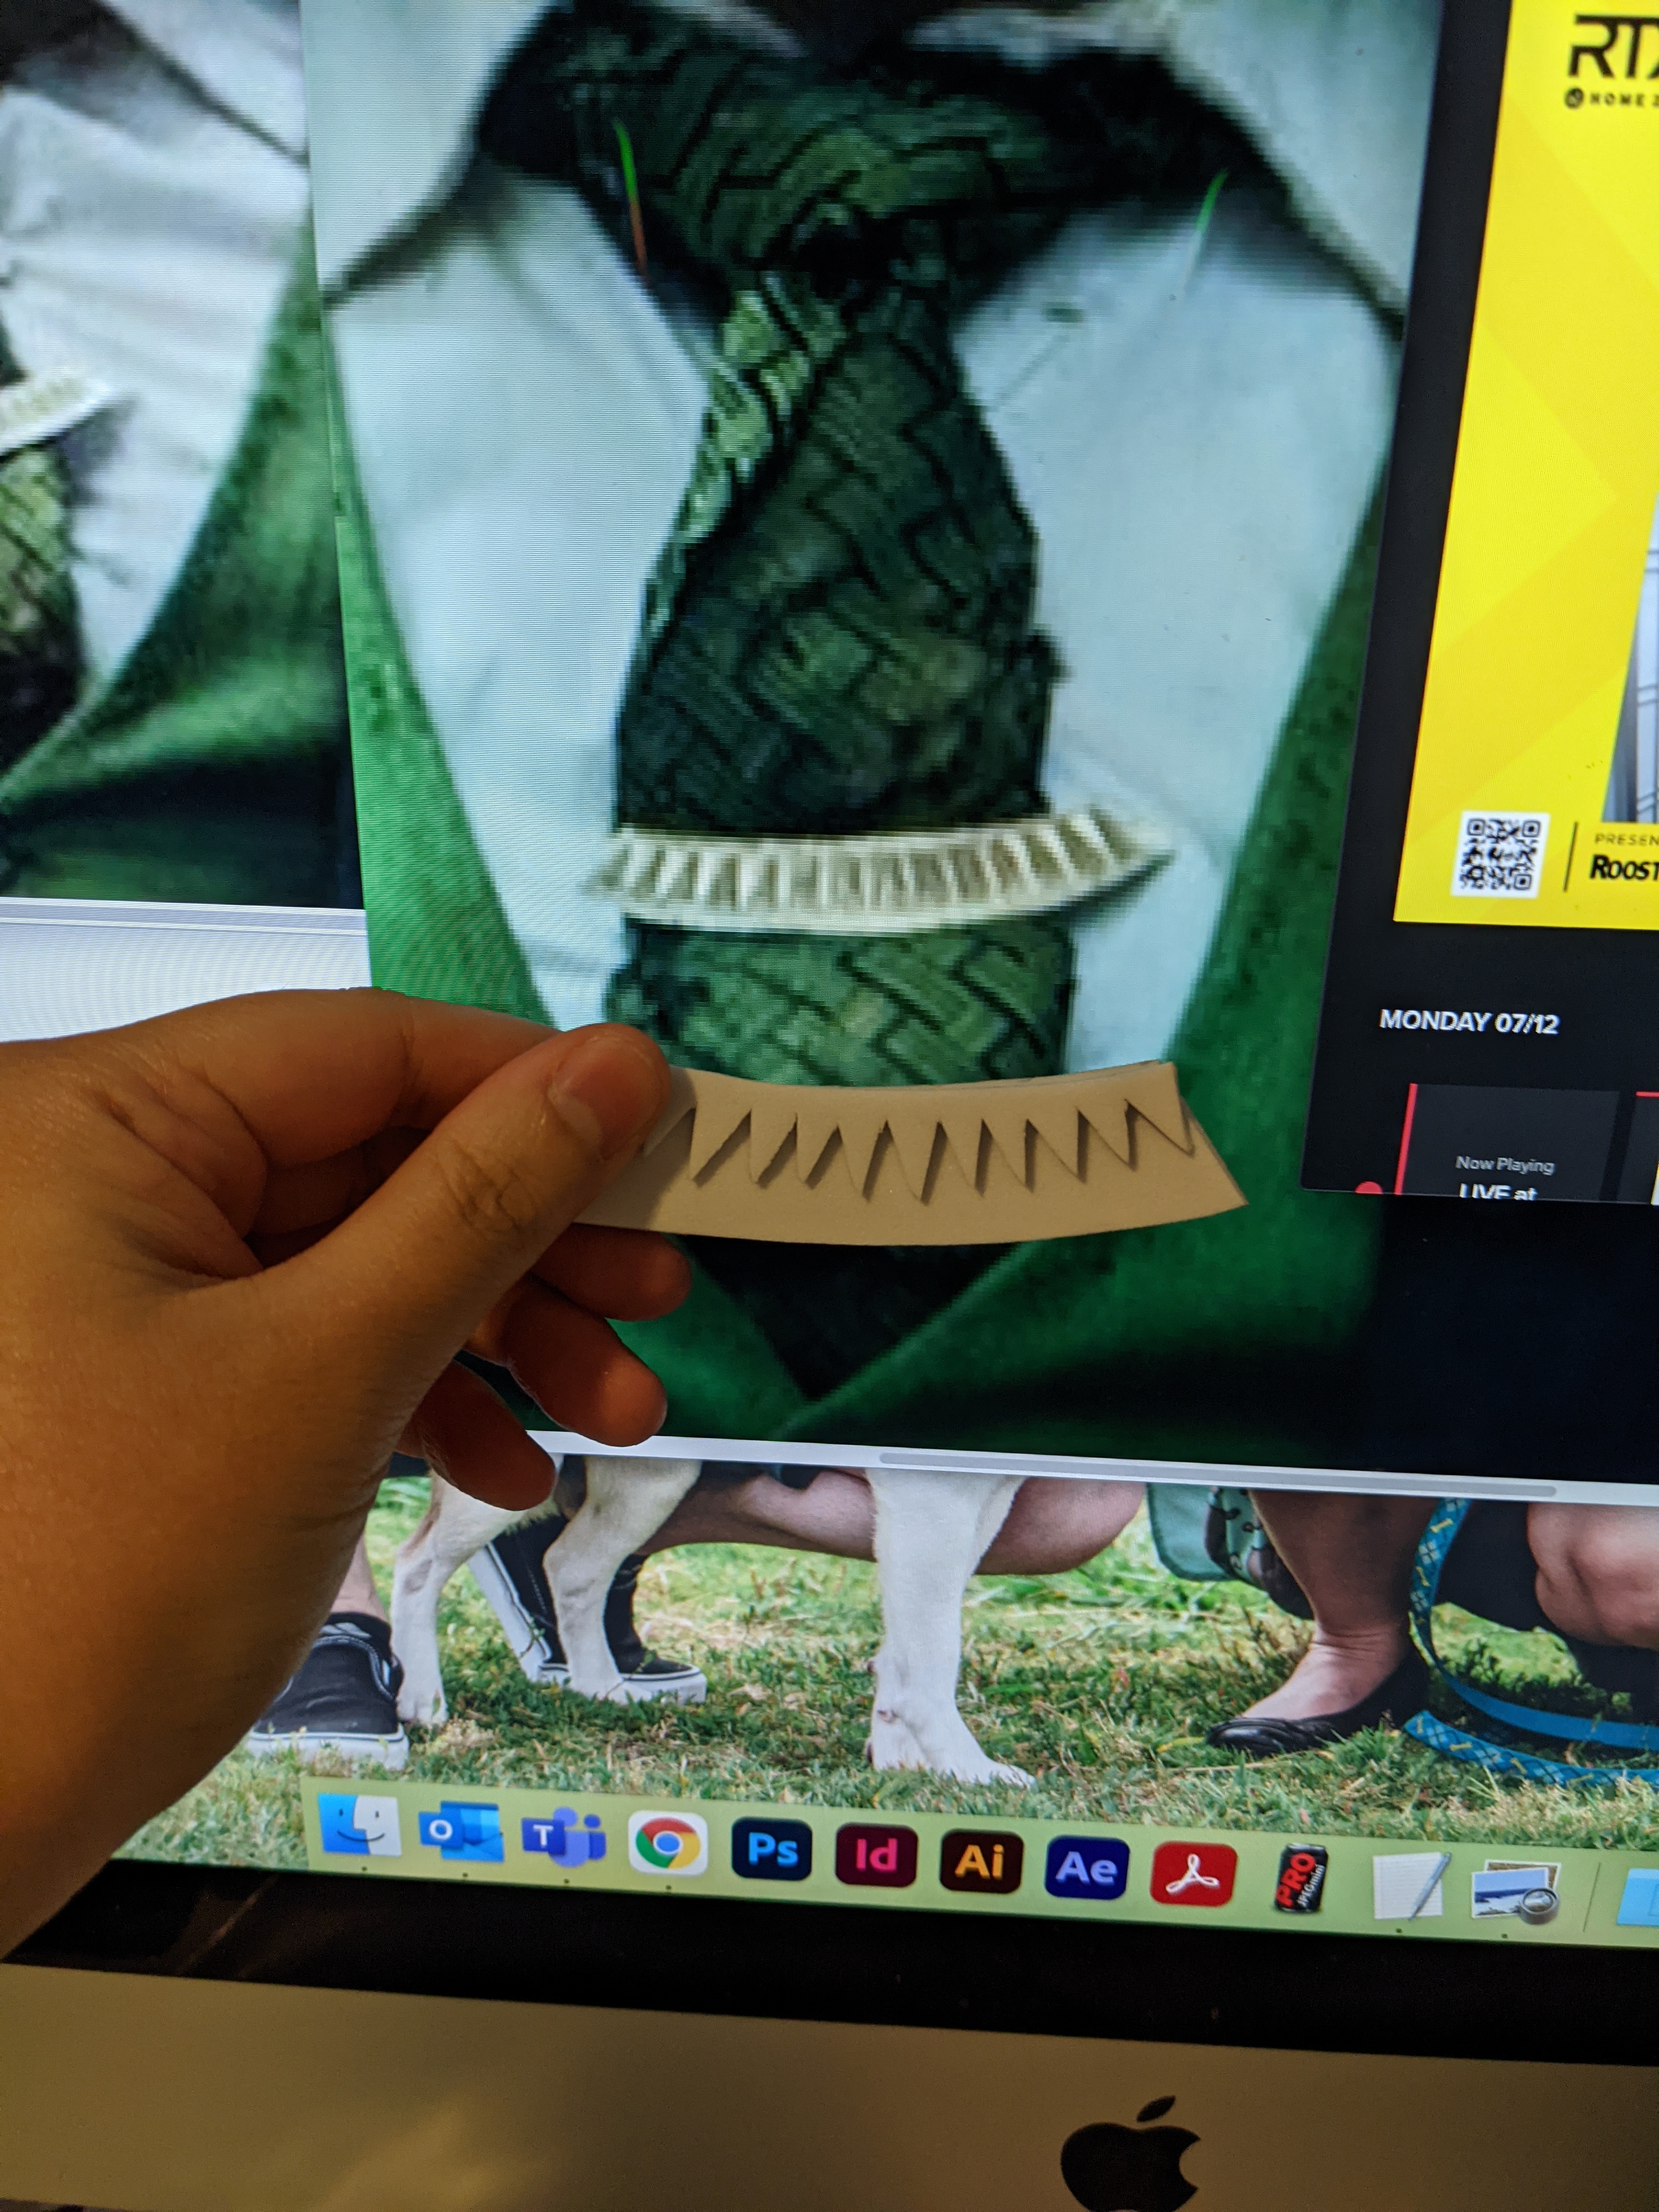
First, I drew out on a piece of paper the width of my tie. I folded that in half so that when I drew my pattern, I would only have to draw one side. After some careful drawing, constantly consulting reference screenshots, I had a paper pattern. With the paper folded in half, I cut out that one side and now had a full pattern for EVA foam. I traced that onto 4mm EVA foam and cut it out with scissors.
For the details, I traced the same pattern but onto 2mm EVA foam. I cut it out. Then, I marked parallel lines to the top and bottom of the clip. This would help me ensure I had even lengths for the little triangles. Then, I marked the horizontal’s lengths halfway mark. From that center line, I marked other lines going outwards, about 1cm apart. These would be my triangle guides. I drew out the triangles, then cut them with an xacto knife.
For the bottom part, I once again traced my paper pattern onto 2mm EVA foam, and then simply cut a small trim of the bottom.

Gluing, Painting, Weathering
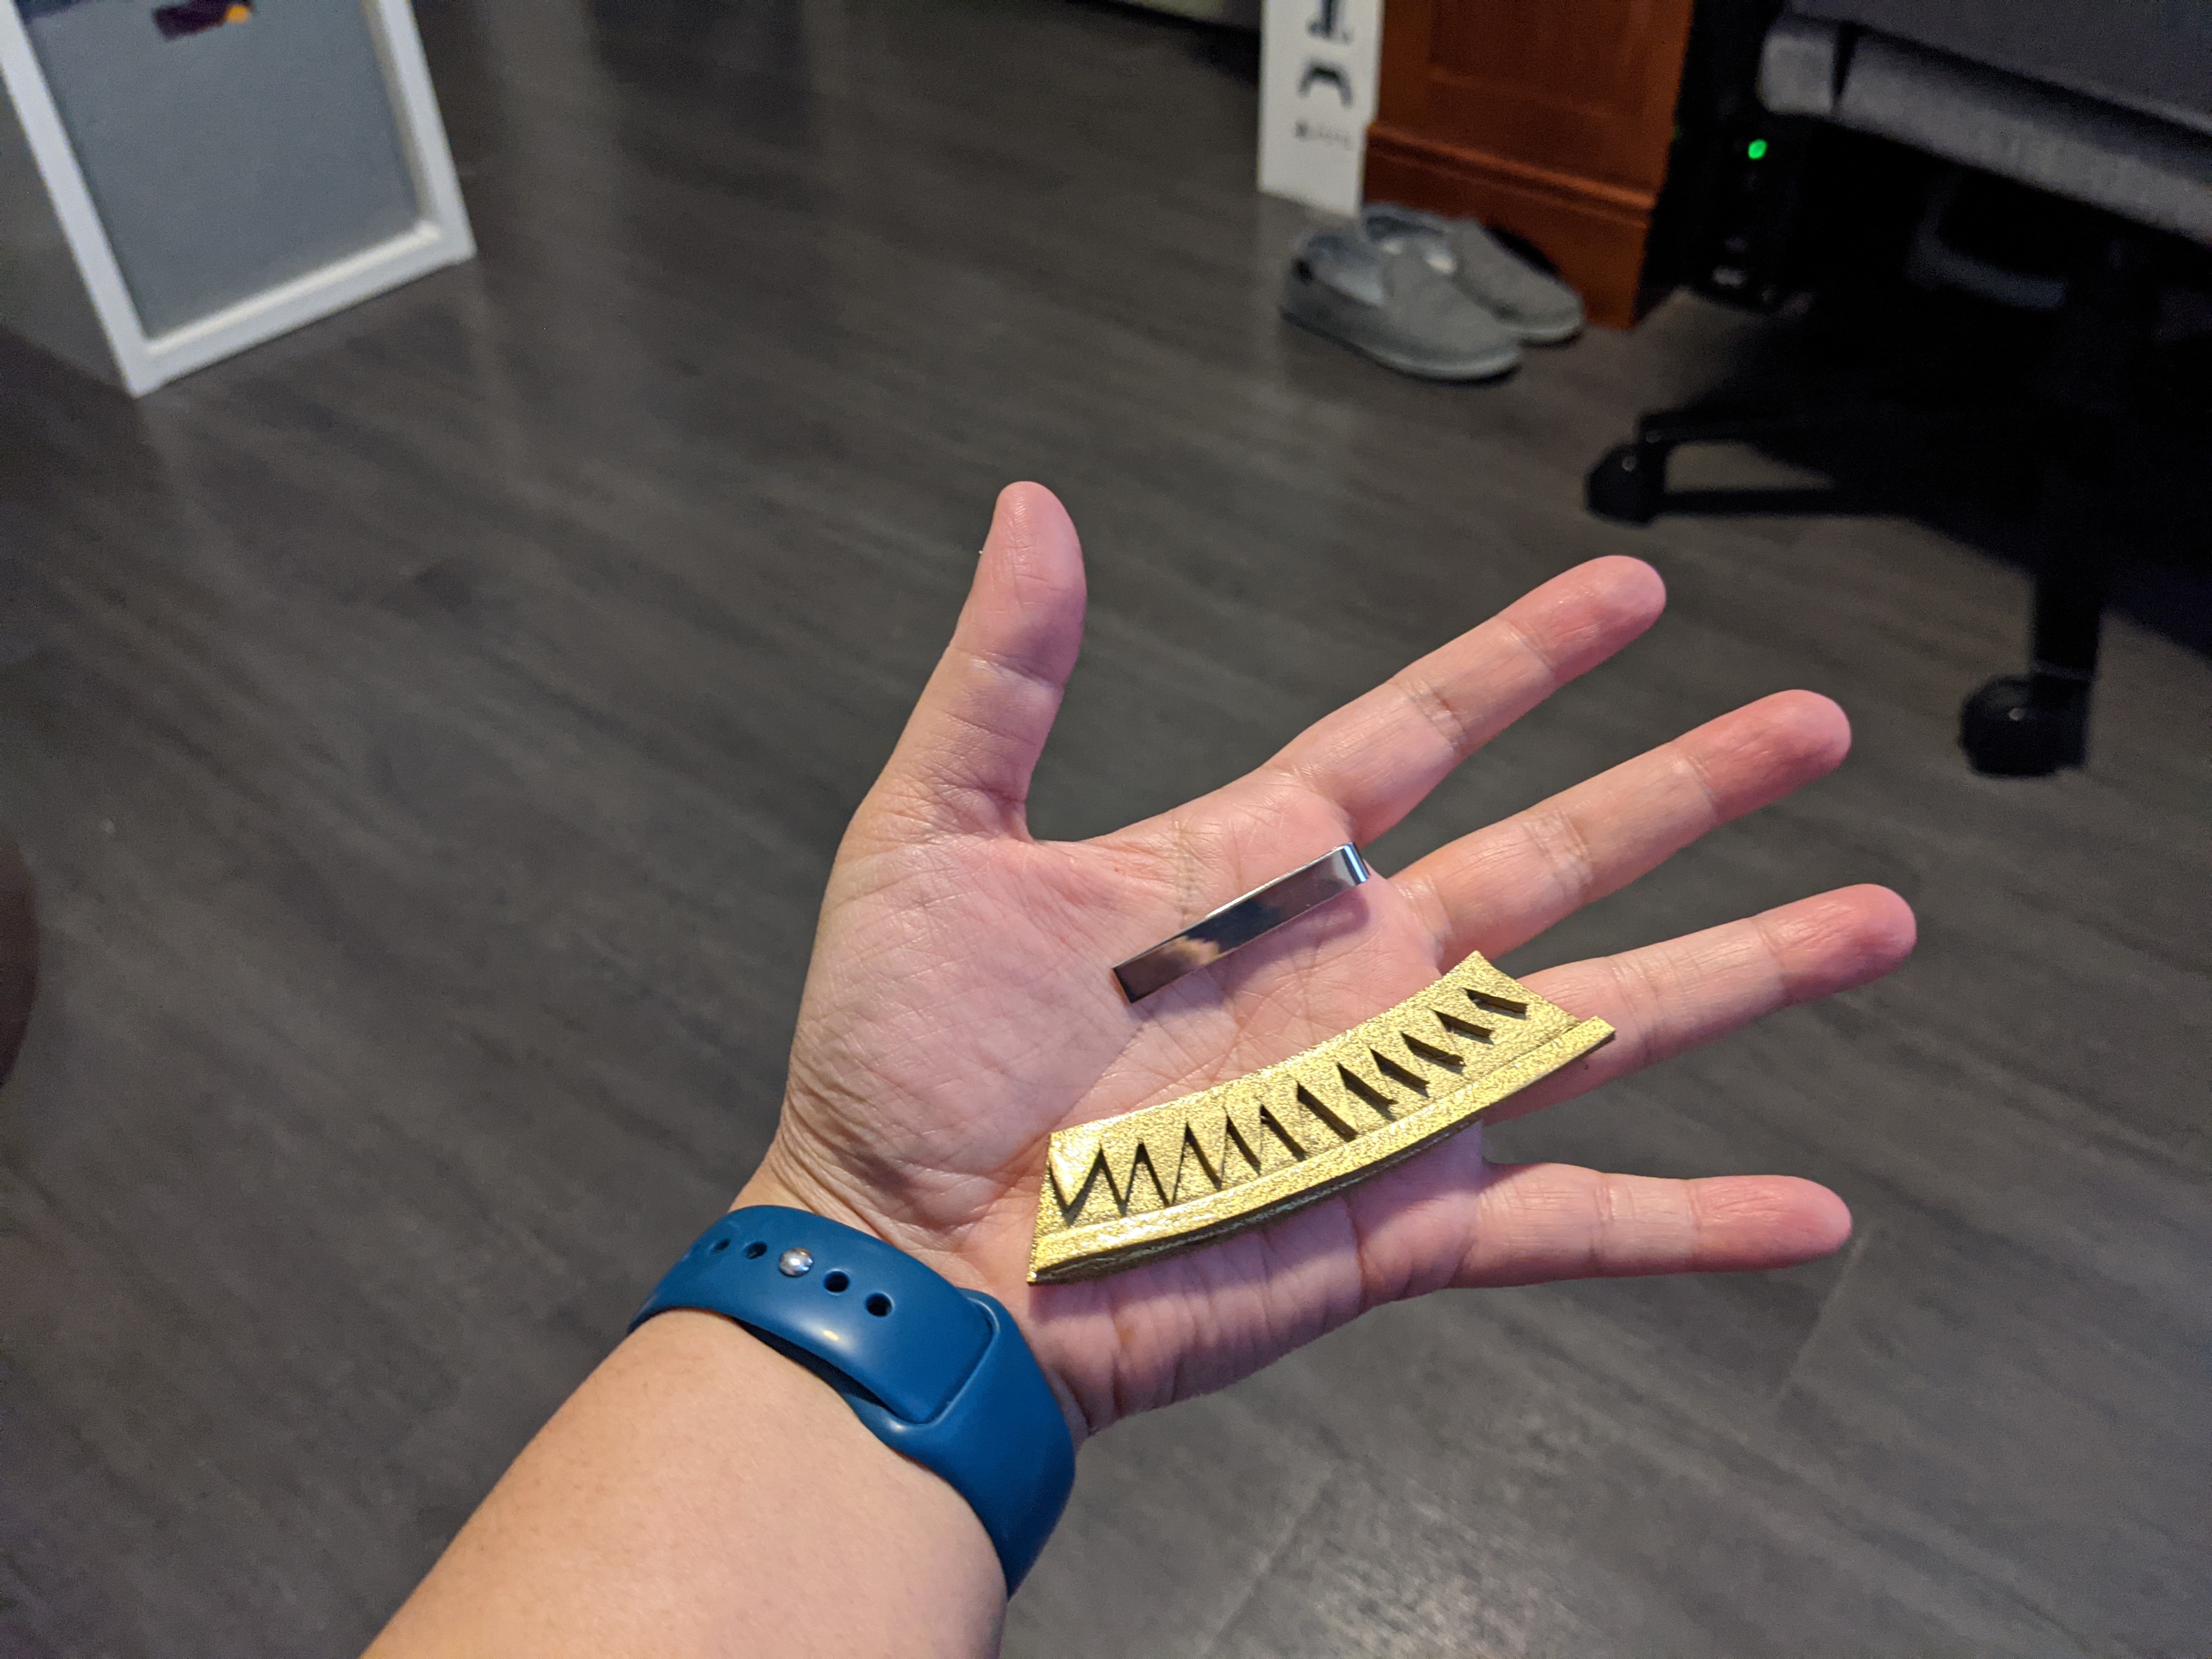
The process for gluing and painting the tie bar was the same as President Loki’s helm: contact cement, 2-in-1 primer paint, gold spraypaint, and black acrylic paint + water mix. Then follow it all up with a final coat of glossy sealant.


Attachment: an actual tie bar
To make this a functional tie bar, I actually purchased a set of tie bars off Amazon. (I specifically got one for skinny ties because I wanted to be able to the remaining two in the set for myself.) To mark where it needed to go, I put on my skinny tie, put the metal tie bar on, and then put the gold tie bar on top of it, centering it to the tie and not the tie bar. (Tie bars, when worn properly, do not go over the whole width of the tie. But since Loki’s was symmetrical, I needed to make sure I was making the gold tie bar centered to the tie.) So you’ll notice that the marking is a little off center.
To attach, I used contact cement again, but this time with a much smaller brush than the one that comes with the jar for more precision.


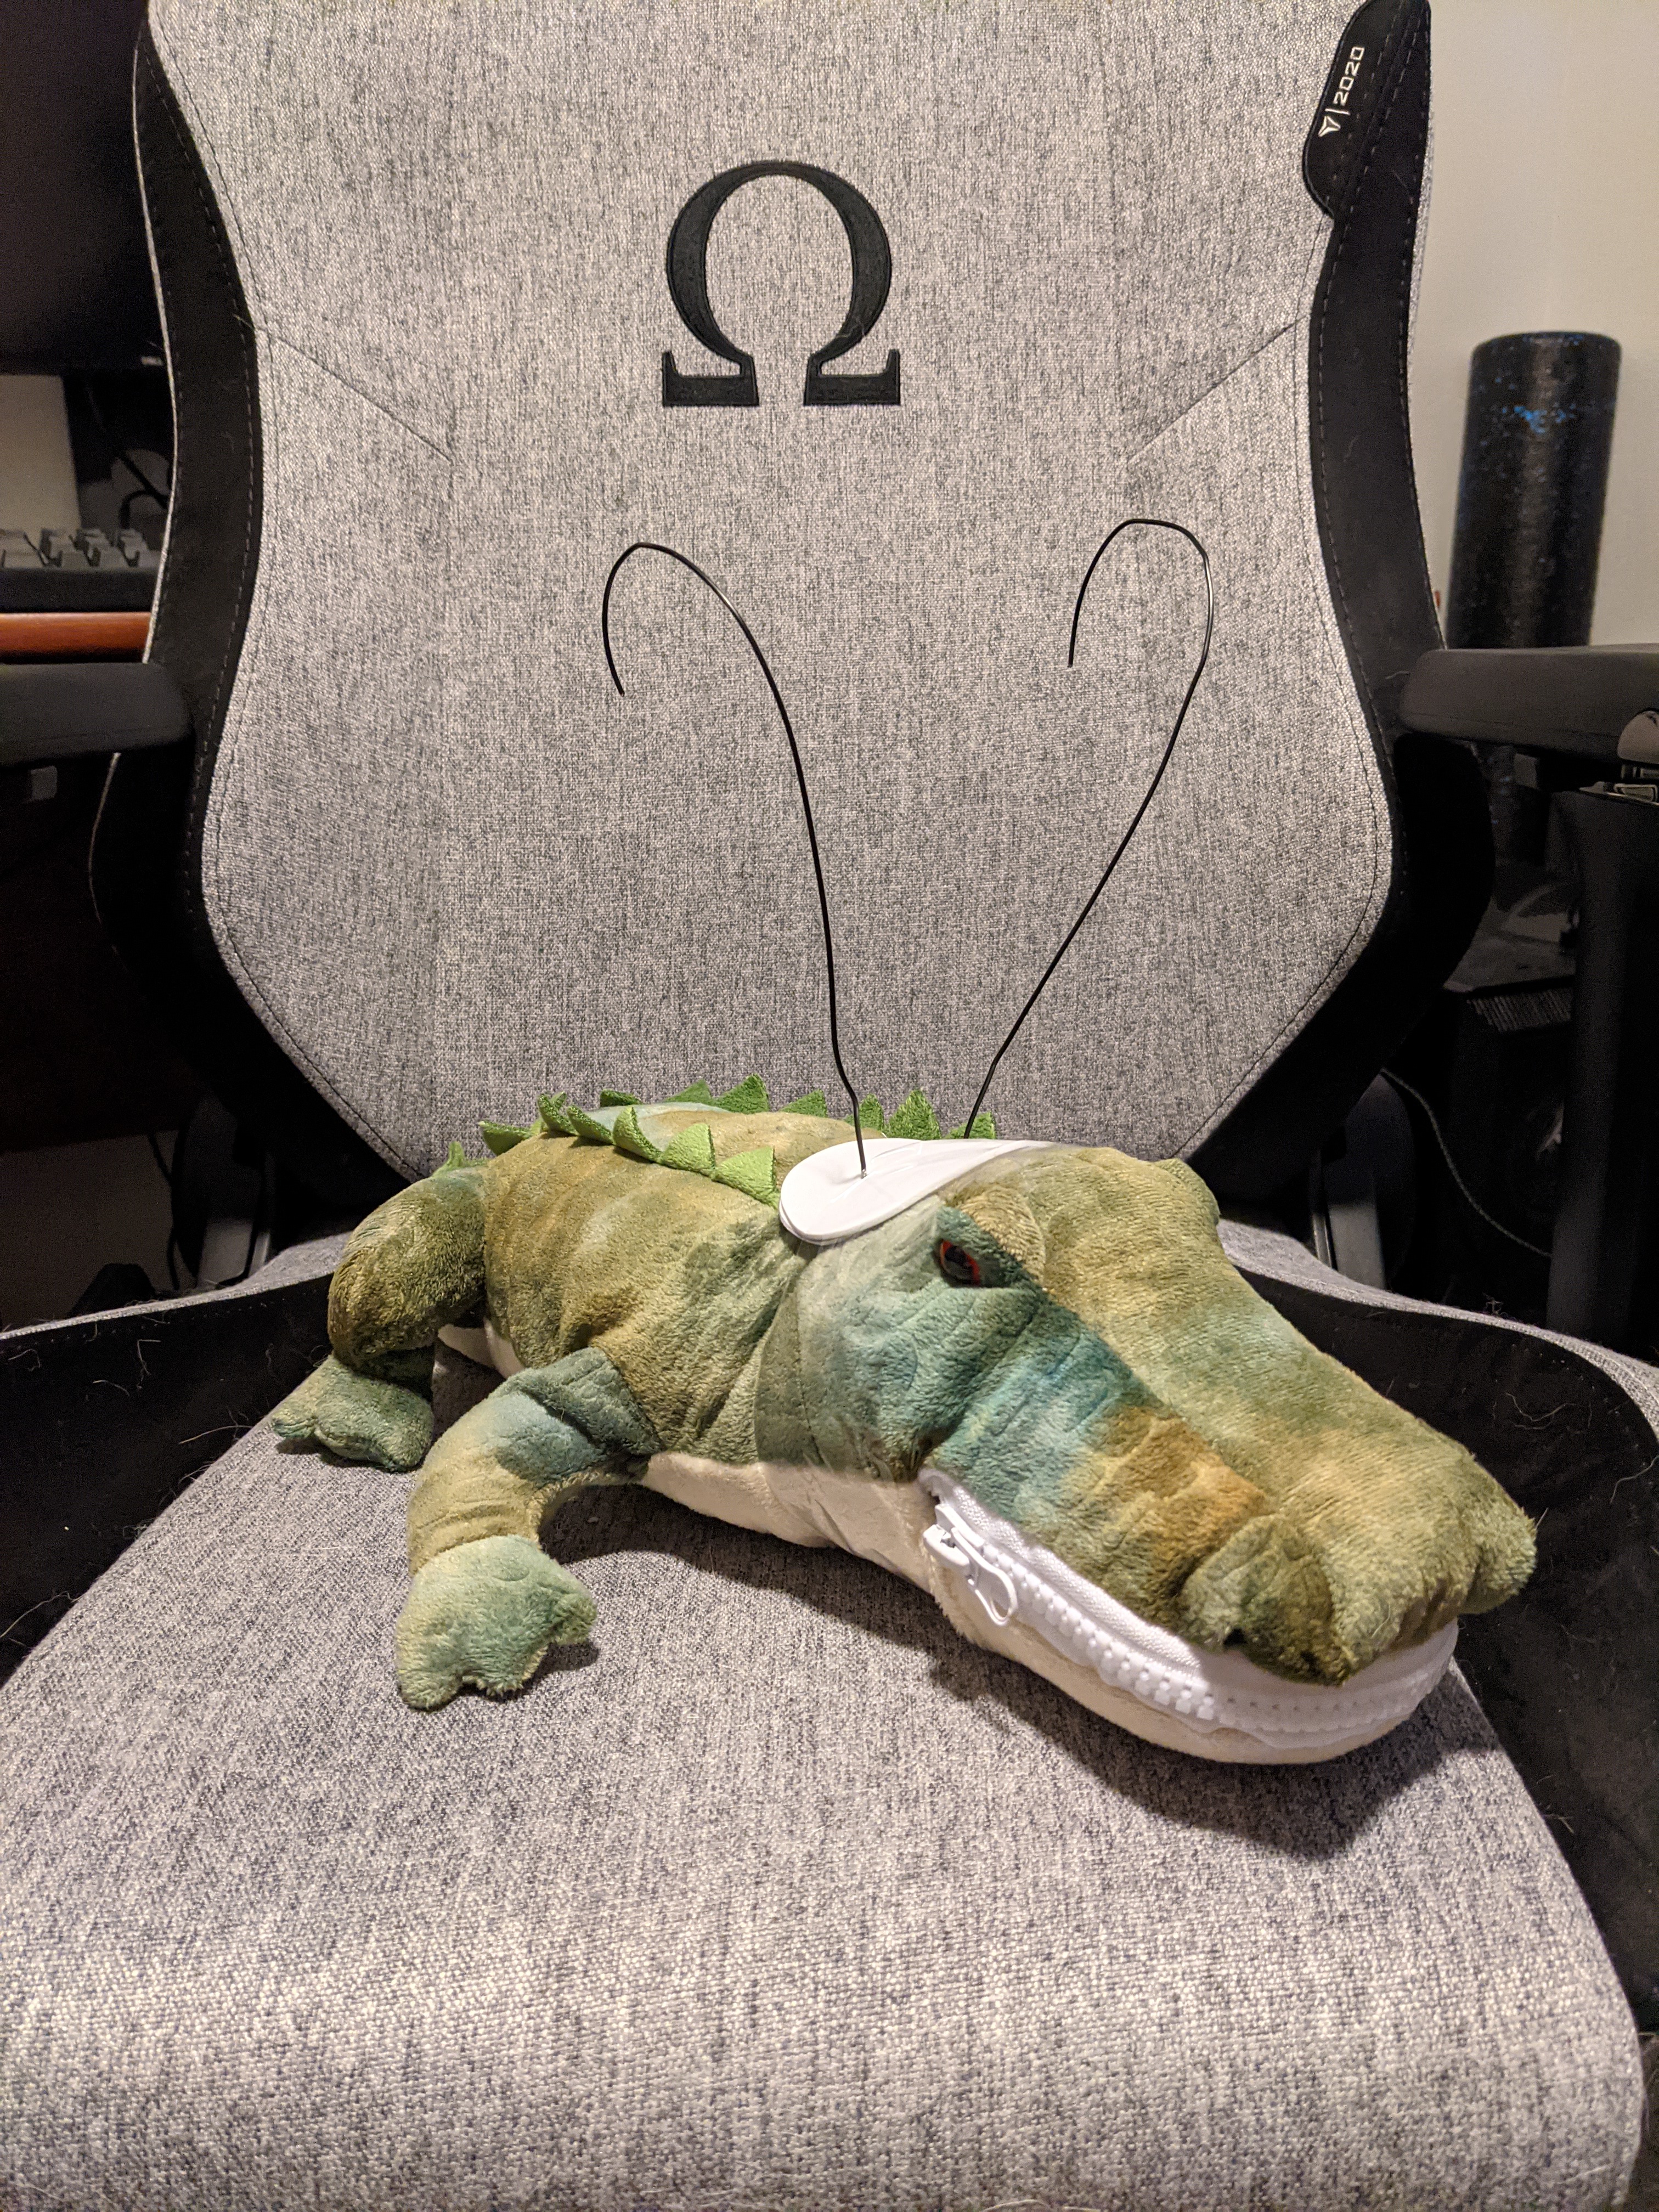
Alligator Loki horns
The horns for Alligator Loki follow a similar process as President Loki in that you end up rolling a lot of foam clay into the basic shape. The difference is that I had a piece of wire running through each of the horns.
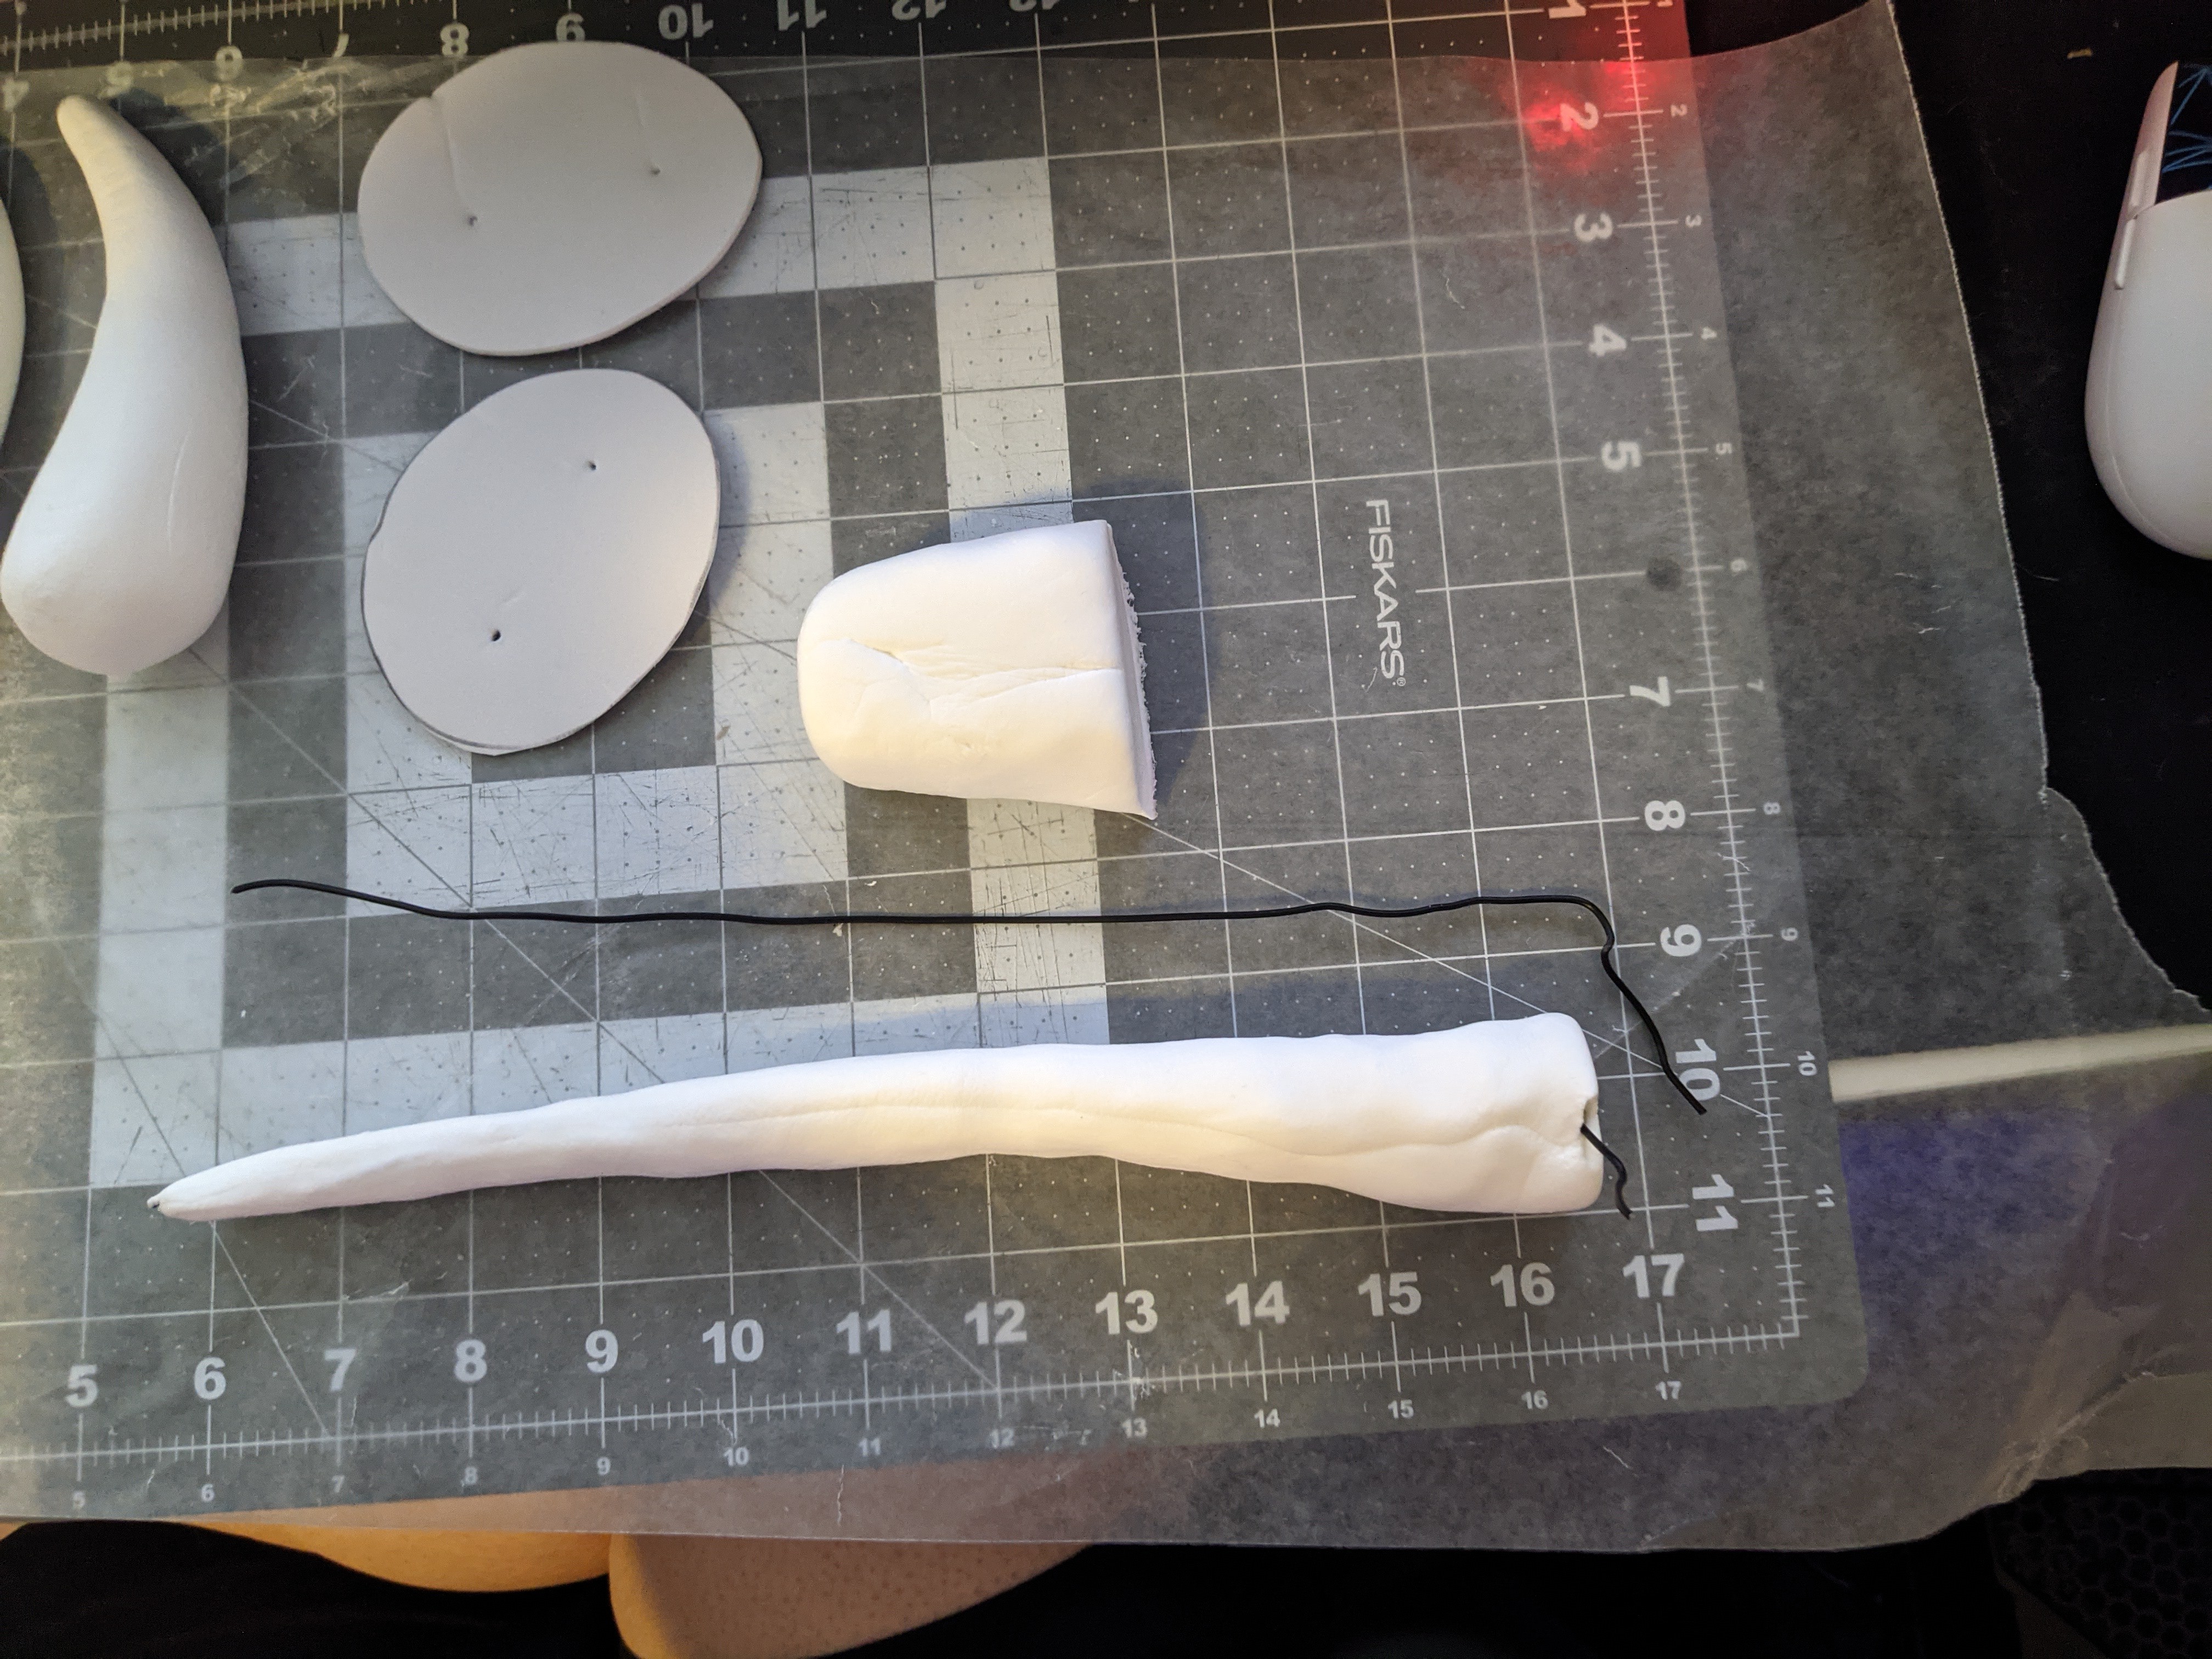
For the base, I cut out a few pieces of EVA foam (2mm and 4mm) in an oval that fit over my alligator plush’s head. I then punctured two holes for wire to come through. For the wire, I put them through the two holes and then played around with the length and curve to see how closely I could match the reference.

To do this, I first rolled the foam clay into a cylinder, about the size of the base of the horn. The length was about half of the final horn length. More on that later. Then, I pressed the wire into the cylinder, letting the foam clay sandwich and envelope it. I pressed around to make the ends meet and completely cover the wire. I don’t have pictures of that part, but picture a corndog that’s been half eaten – corn dog in the middle with the stick sticking out of both ends.
To get the horn/cone shape, I pushed and pulled the foam clay towards one end of the wire that would be the horn tip. I covered the wire completely with the foam and then rolled the clay the same way I had done Pres. Loki’s: hands at an angle so that it rolled into a cone shape. I left about 3 inches of wire exposed out of the base of the horns. Once I did one horn, I did the same process for the second, letting the first sit and cure a little bit in the meantime.


After both were done, I carefully bent the wire and foam clay to form the curve. There was no accurate or precise process for this, just lots of eyeballing. I did it for both horns and made sure to hold them side by side and compare them to the reference photos so they could be as symmetrical as I could get them.
Sanding
I didn’t actually sand the Croki horns that much. I tried to sand the bottom of the bases a little bit so that they’d be flat, but they were already pretty flat. I did, however, make sure to sand the horn tips a bit to make them a bit sharper. (But not too much or else the wire would start poking out.) I unfortunately forgot to take pictures at this part.
Gluing and Painting
Again, same gluing and painting process as the other parts before. (Refer to the President Loki helm section if you jumped to this section.) Weathering for this was a lot of fun because I hadn’t bothered sanding down the parts of the horns that were a bit of a “seam”, so it ended up looking like a really cool crack. Once all done, top it off with some sealant.


Attachment
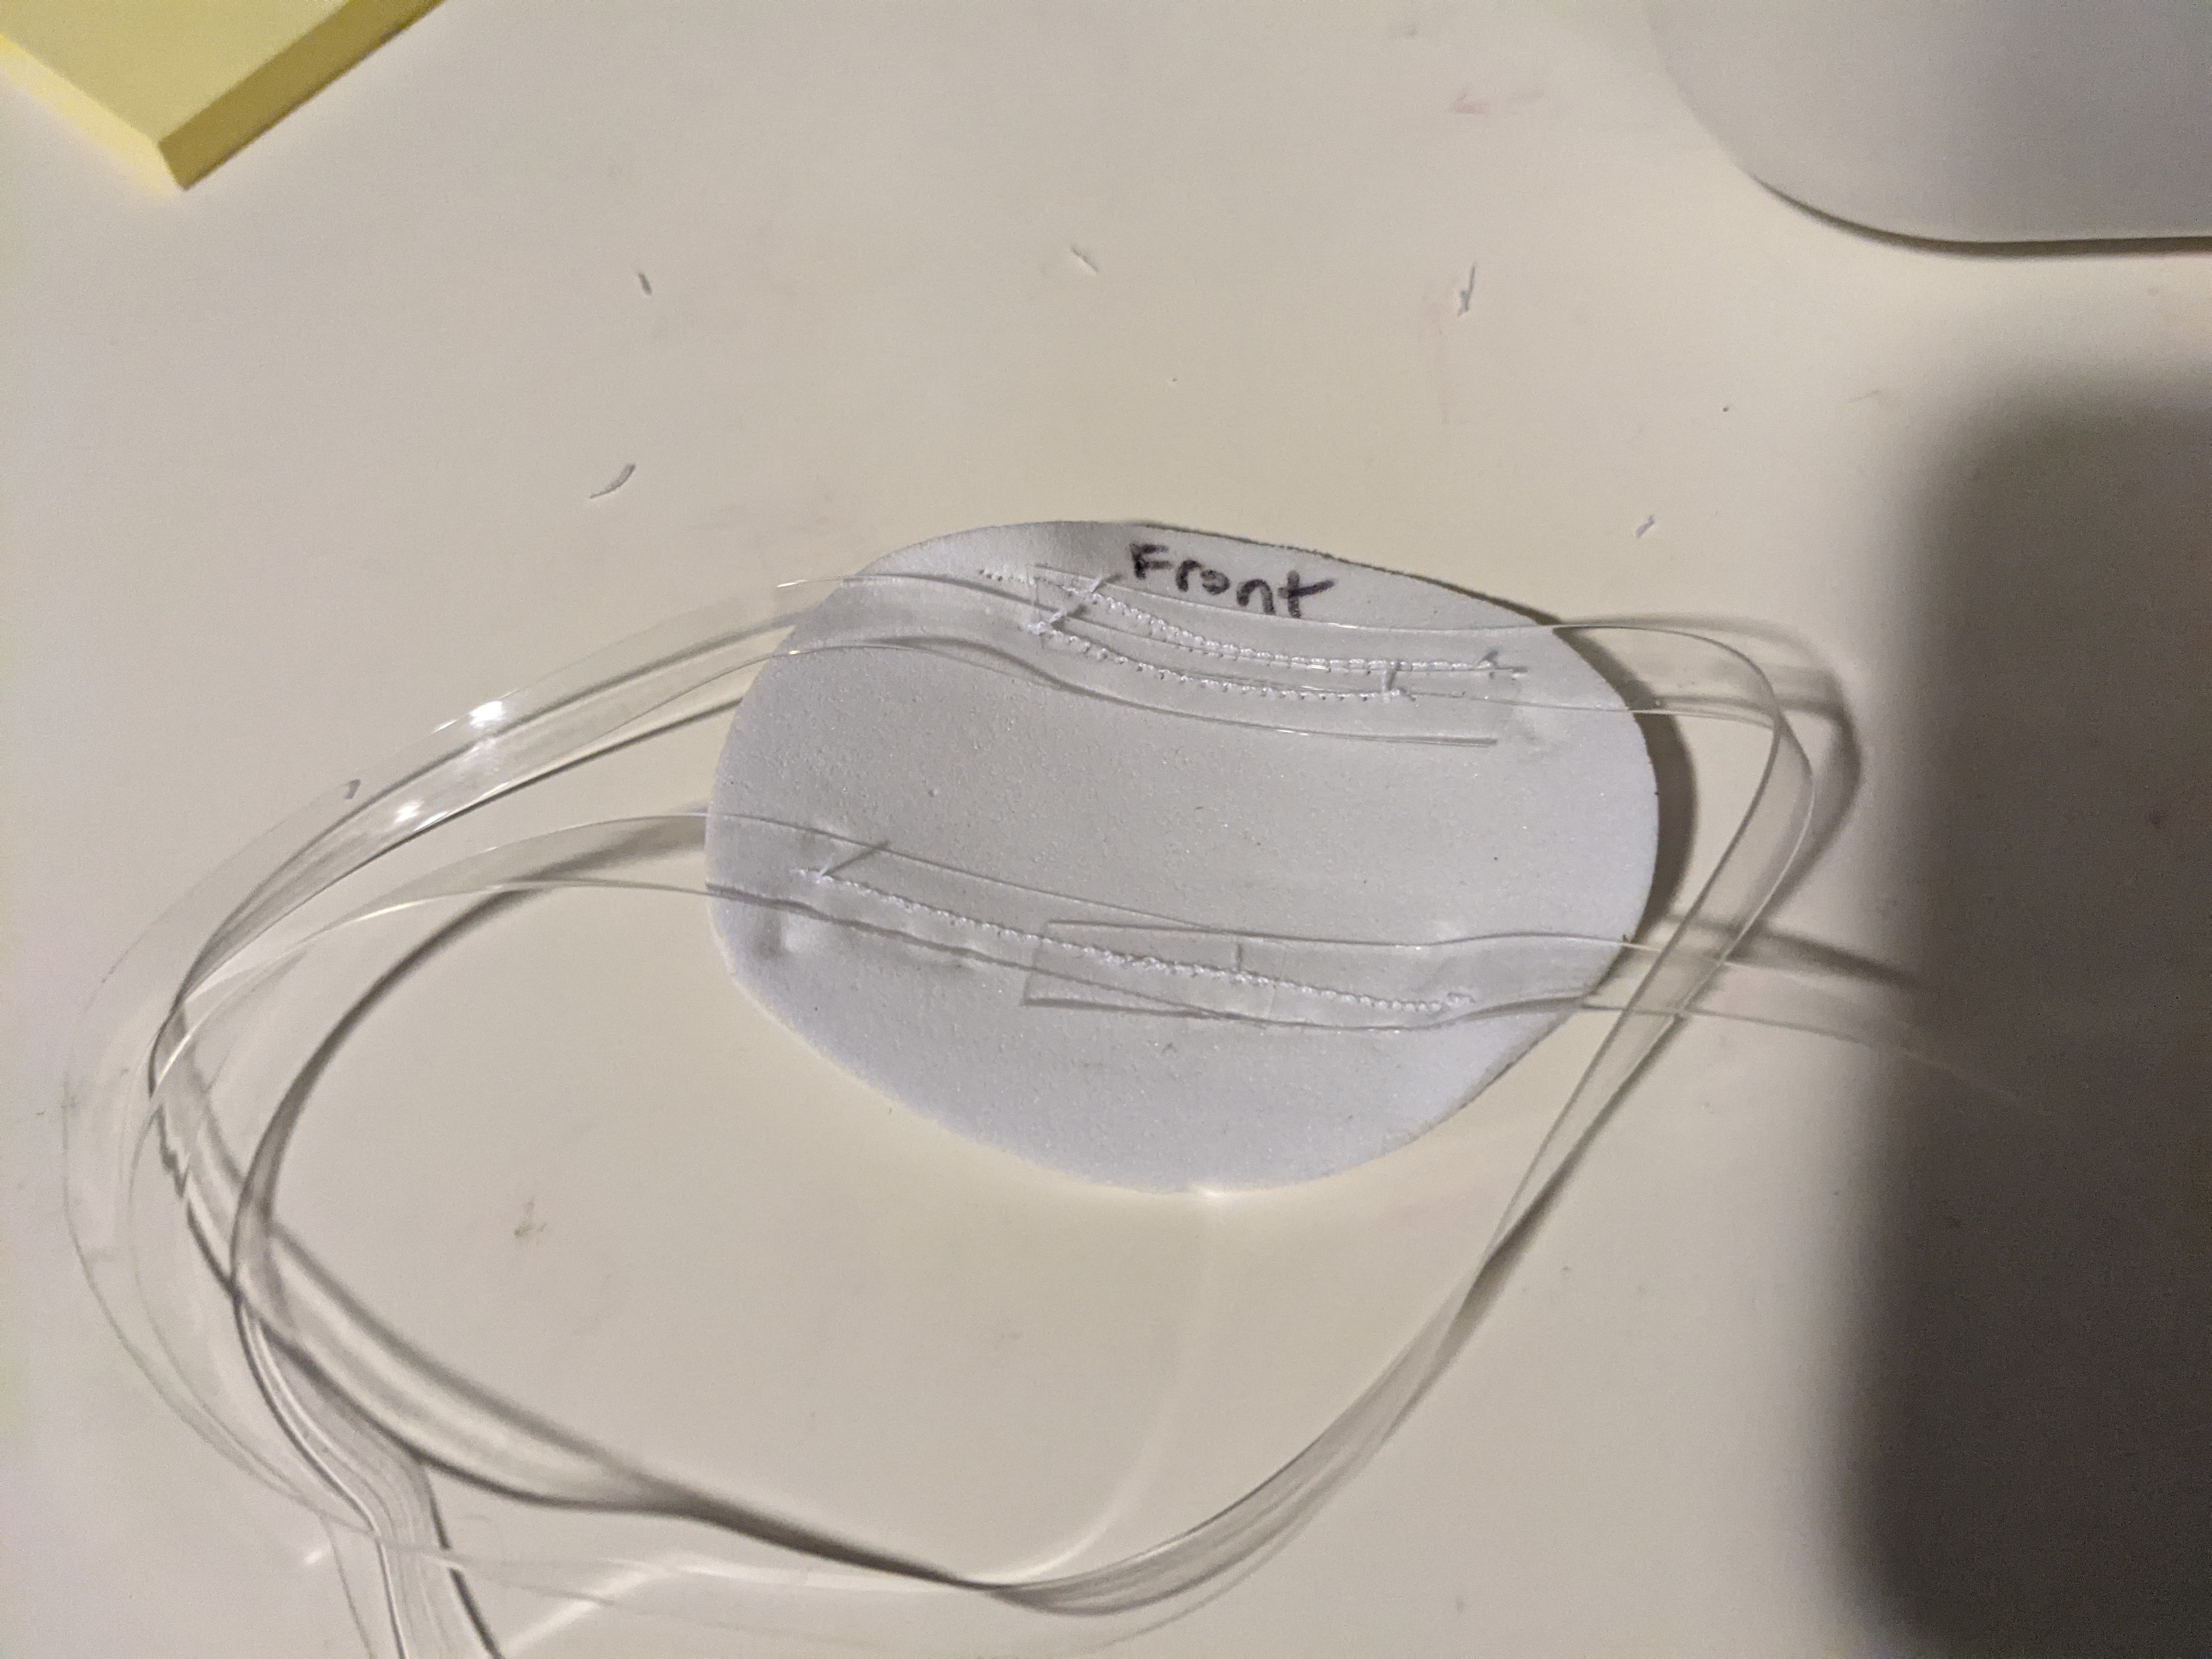
Similar to President Loki’s helm, I added elastic straps to Croki’s horns. To find out the length, I wrapped the elastic around the plush’s neck where the helm would sit, then I cut more than that length so there’d be some overlap. I ended up going with two straps instead of just one so that the helm would lay flush wish his head (otherwise, it had a tendency to wobble).
For the foam, using the paper pattern I had made for the helm base, I cut out another oval of 2mm EVA foam, but this time I trimmed the sides so that it was an oval just a little bit smaller than the base. This was mostly so it wouldn’t show because I just really didn’t feel like painting again. To test, I combined the elastic straps and foam with tape and put it on Croki to try it on.

Once happy with the fit, I did the same thing as before: stitched the elastic to the foam with my sewing machine and glued in place with barge cement.

Conclusion
This was a very fun low-key (sorry, couldn’t resist) cosplay to do that required some crafting but didn’t involve making everything. It was a nice project where I wasn’t glued to my sewing machine the entire time like I had been for Seraphine. I got to do some interesting EVA foam and foam clay work, which I hadn’t done since Maria. (I very briefly used EVA foam for Nana but that was very simple and the pattern process was very easy.)
Overall, this was a fun short project to work on and took less than 3 weeks to do! (That sounds like a long time, but when you’re used to cosplays taking months, less than 1 month feels speedy!)


Use my build post as inspiration? Let me know!
If you followed along with my build post to help you make your cosplay, I’d love to see it! Leave me a comment or send me an email at ashweezcosplay(at)gmail(dot)com. If you’re comfortable with it, I’d love to showcase your cosplay photo(s) in the blog! I will of course give you credit and link to any socials you may have.
