

I’ve never done a mashup cosplay before, at least not one of my own design. (Sylveon Bard was a mashup of Pokemon and D&D groups, so I guess that was technically my first mashup cosplay.) And I don’t know how the idea for Jollibee Inn Girl even got into my head. I think the FF7 remake had come out and the Honeybee Inn Girls just looked so cute and I must’ve seen or thought of Jollibee when I merged the two thoughts together. Either way, I had the idea and I couldn’t get it out of my head. So I decided to do it.


Items I Already Had
- Dance tights
- Fishnet stockings
- Foam clay
- EVA foam
- PETG
- Interfacing
- Muslin fabric
- Acrylic paint in cream, black, red, and yellow
Items I Bought
- Bunnysuit set (bodysuit, bunny ears, wrist cuffs)
- Yellow heels
- Red wig
- Bodysuit (commissioned from Fairchild Cosplay)
- Aluminum bar
- PVC sheet
- Chicago screws
- Silicone brushes
- 8 gauge aluminum wire
Items I Made & Modified
Click an item to jump to its build section:
Stinger (using pattern from Monicaofthelion)
Stinger harness (using tutorial from Kinpatsu Cosplay)
Antenna
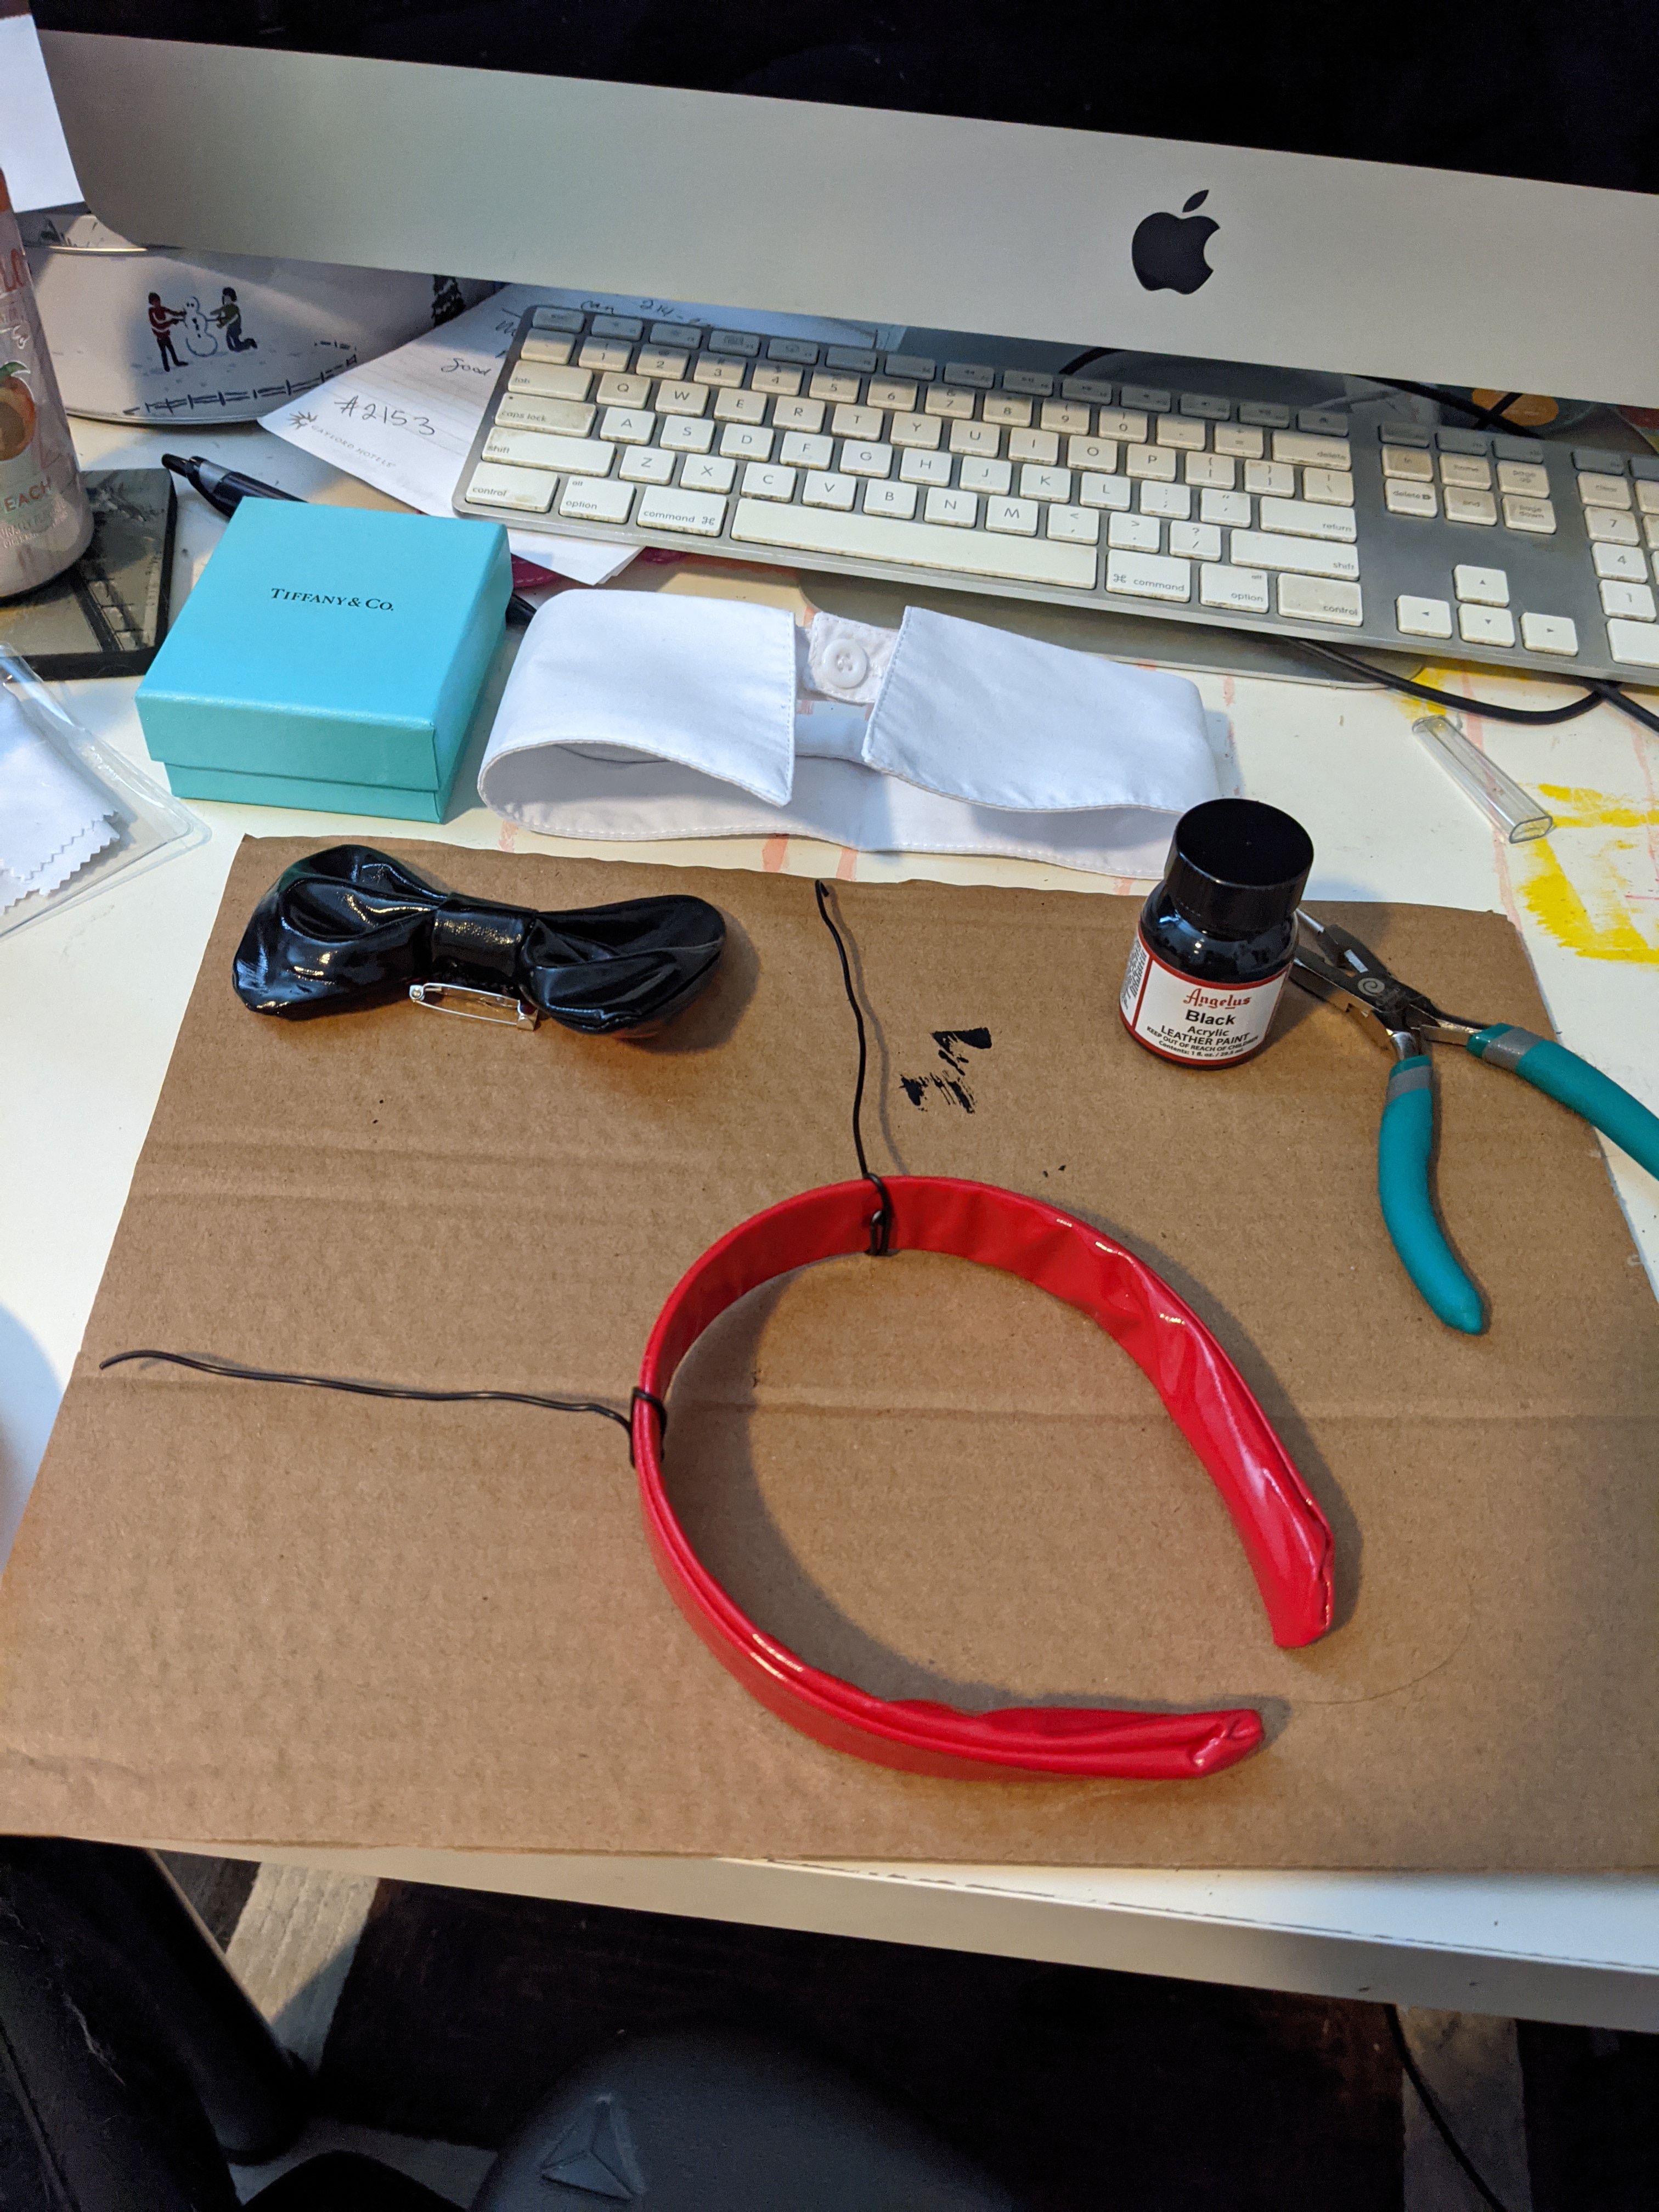
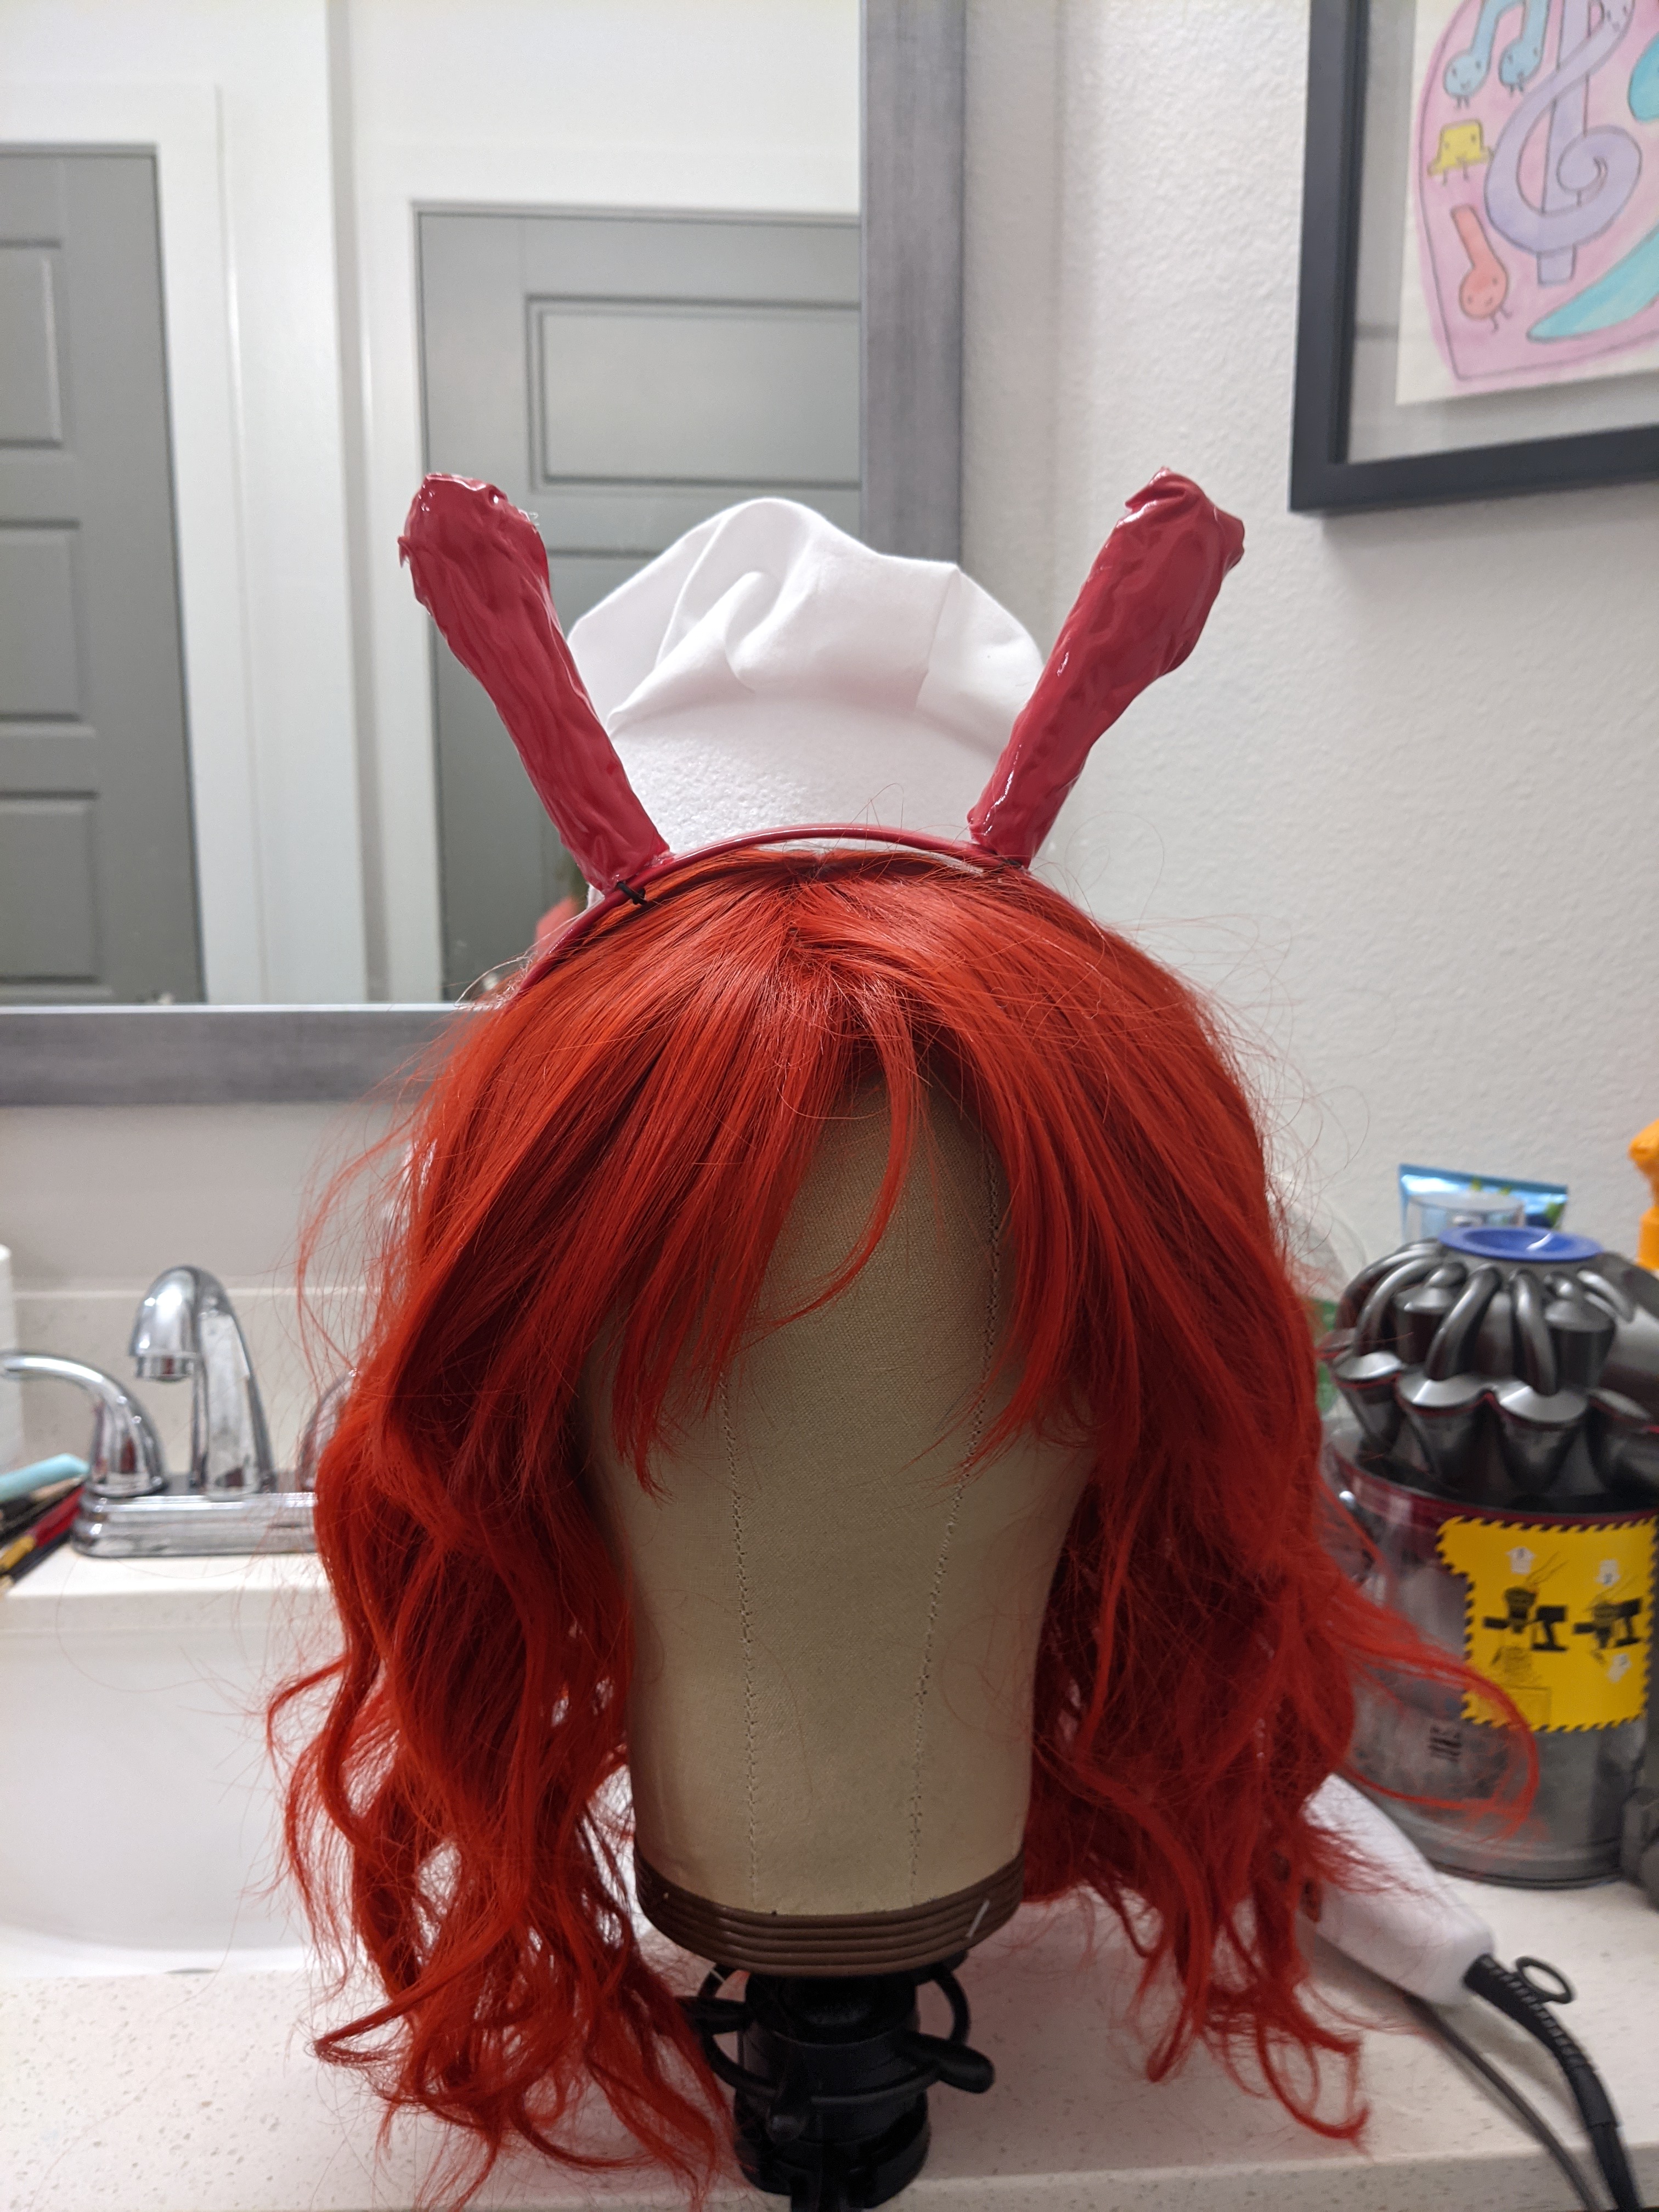
To make the antenna, I started with the bunny ears that came with the bunnysuit set. The ears consisted of one red headband and two detachable ears. The ears themselves were each made of buckram, pink vinyl, red spandex, and two pieces of wire. I used a seam ripper to get at all the raw materials of each of the ears so that I could use the red spandex fabric and wire to make my antenna.

The ears being twice as long as the antenna needed to be, I cut two of the wire pieces in half to make them shorter. I then wrapped the ends around the headband to get an idea of placement. Once happy, I slid them off the headband so I could cover them with foam clay.
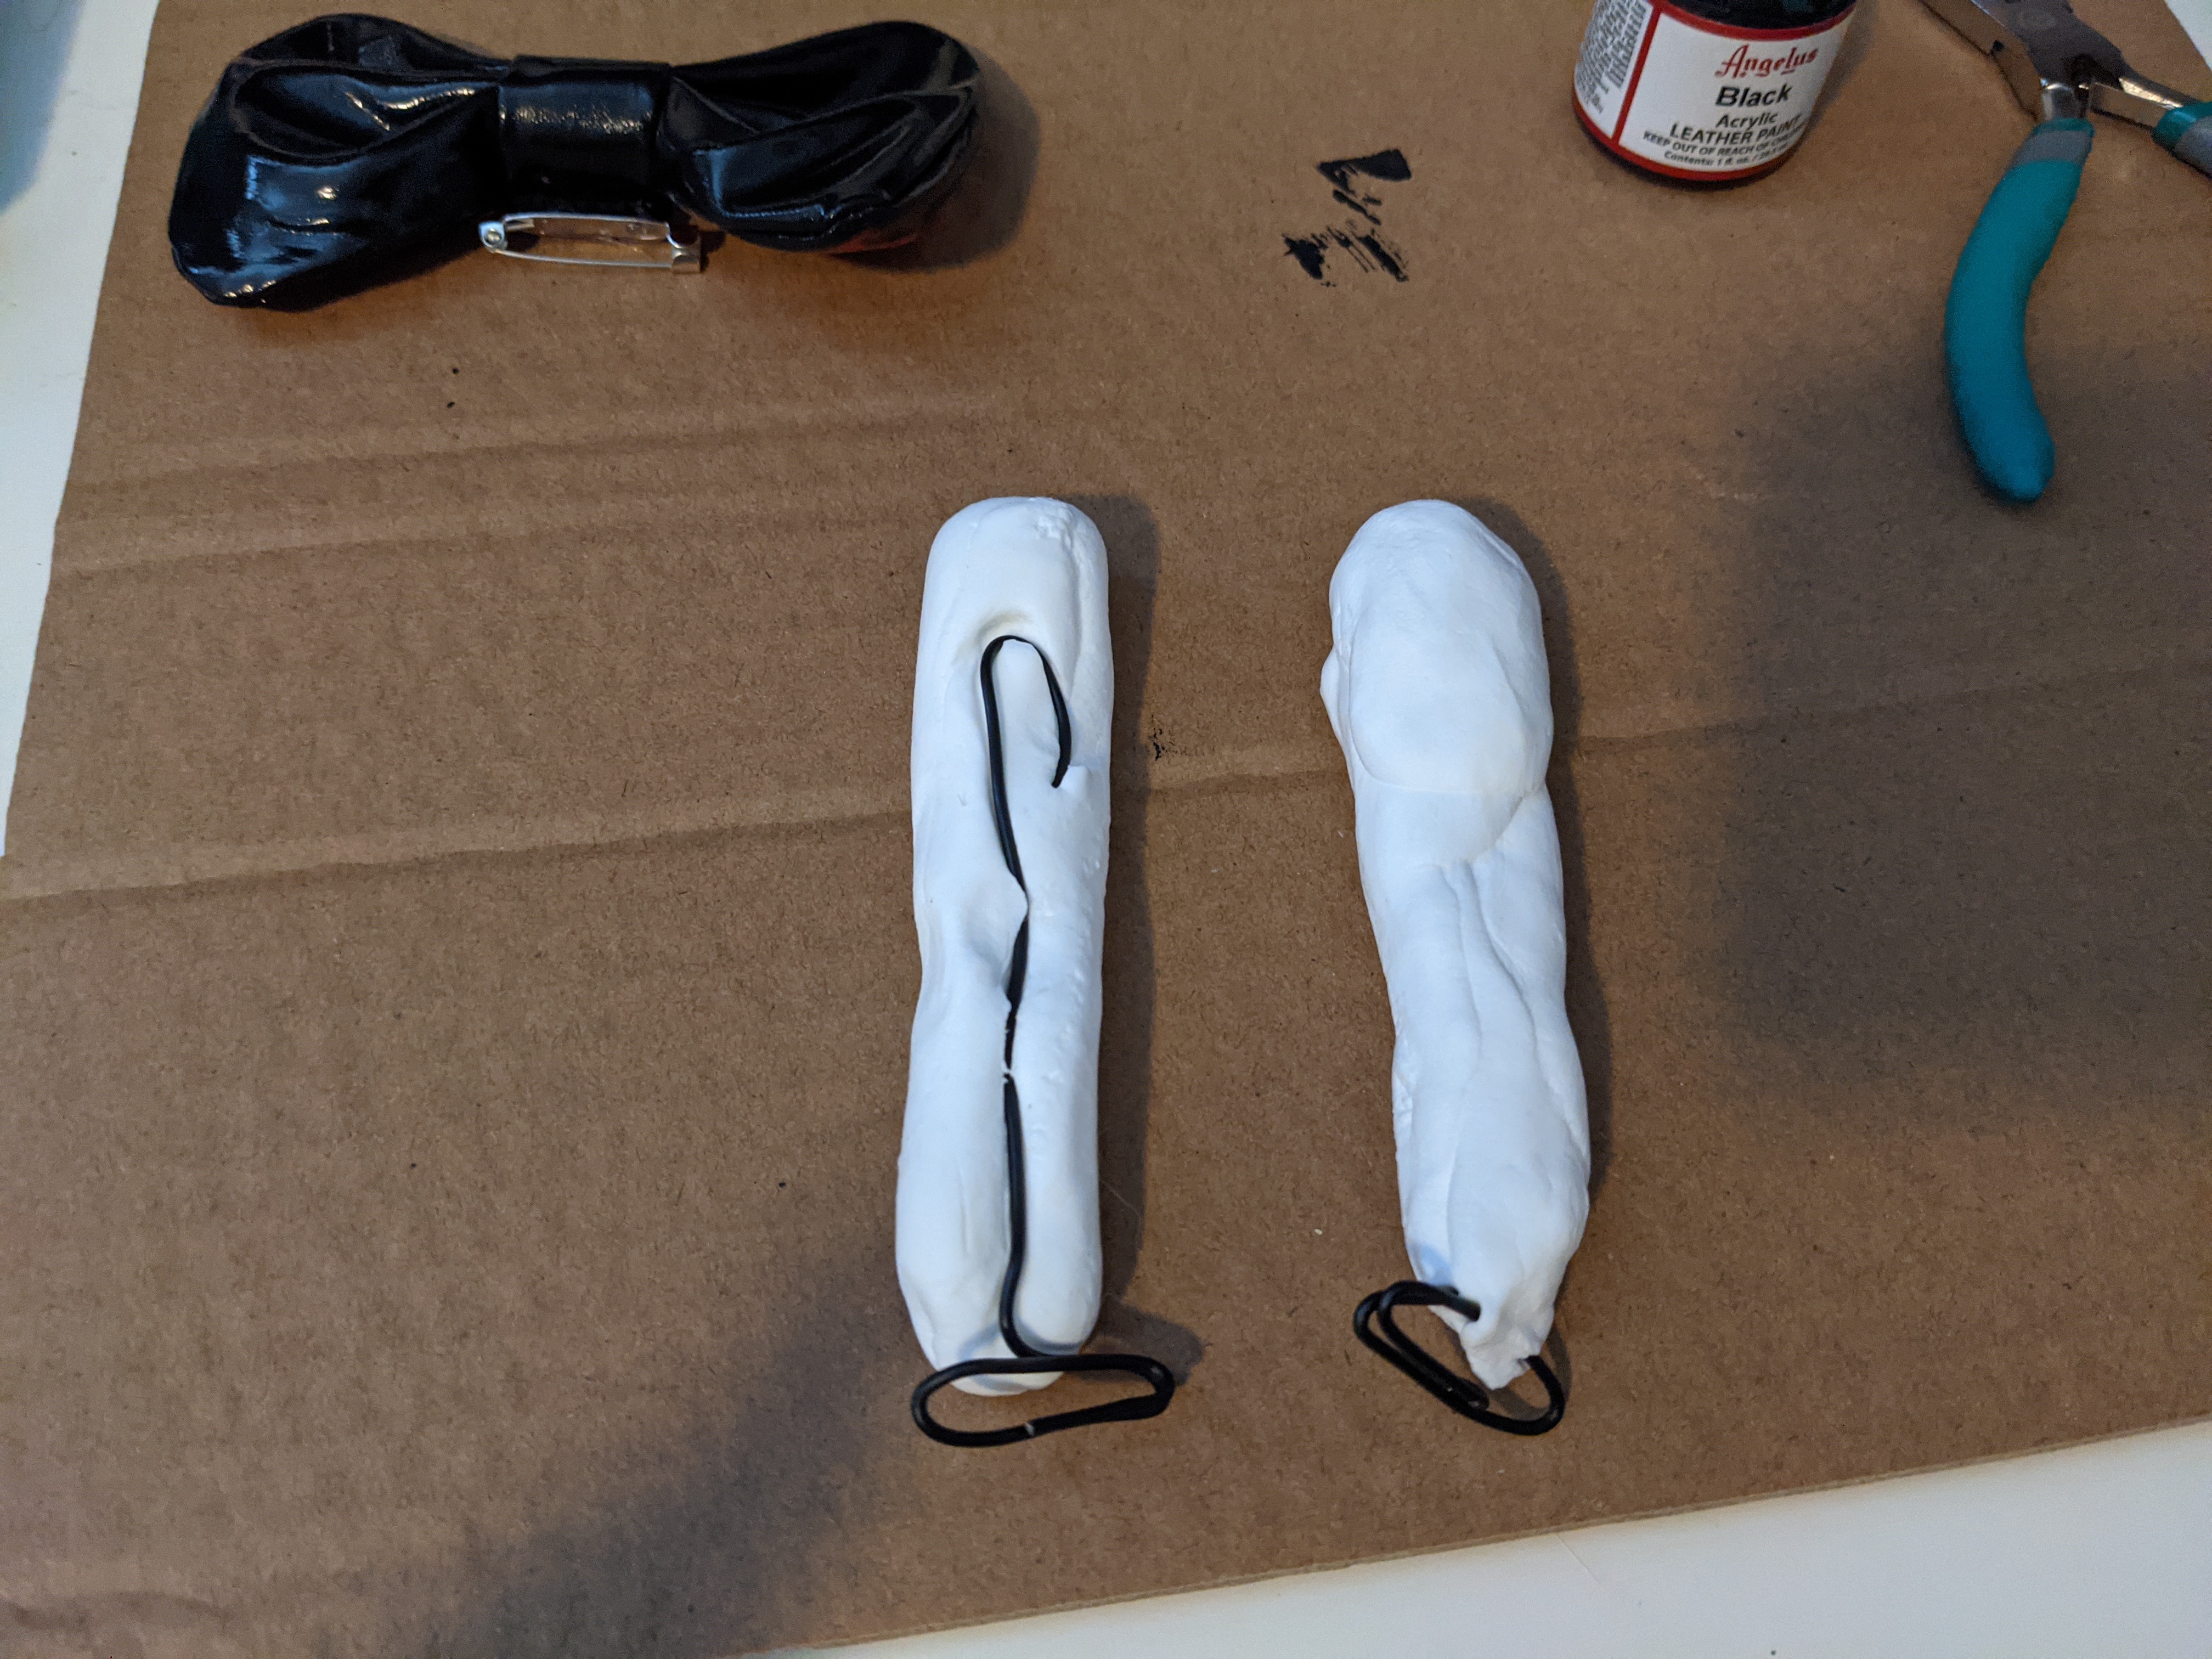
Using foam clay from my stash, I rolled them into little cylinders by rolling them against my table. Once happy with the size and shape of them, I pressed the wire into the foam clay and smoothed out the “seam.” I then let it air dry.

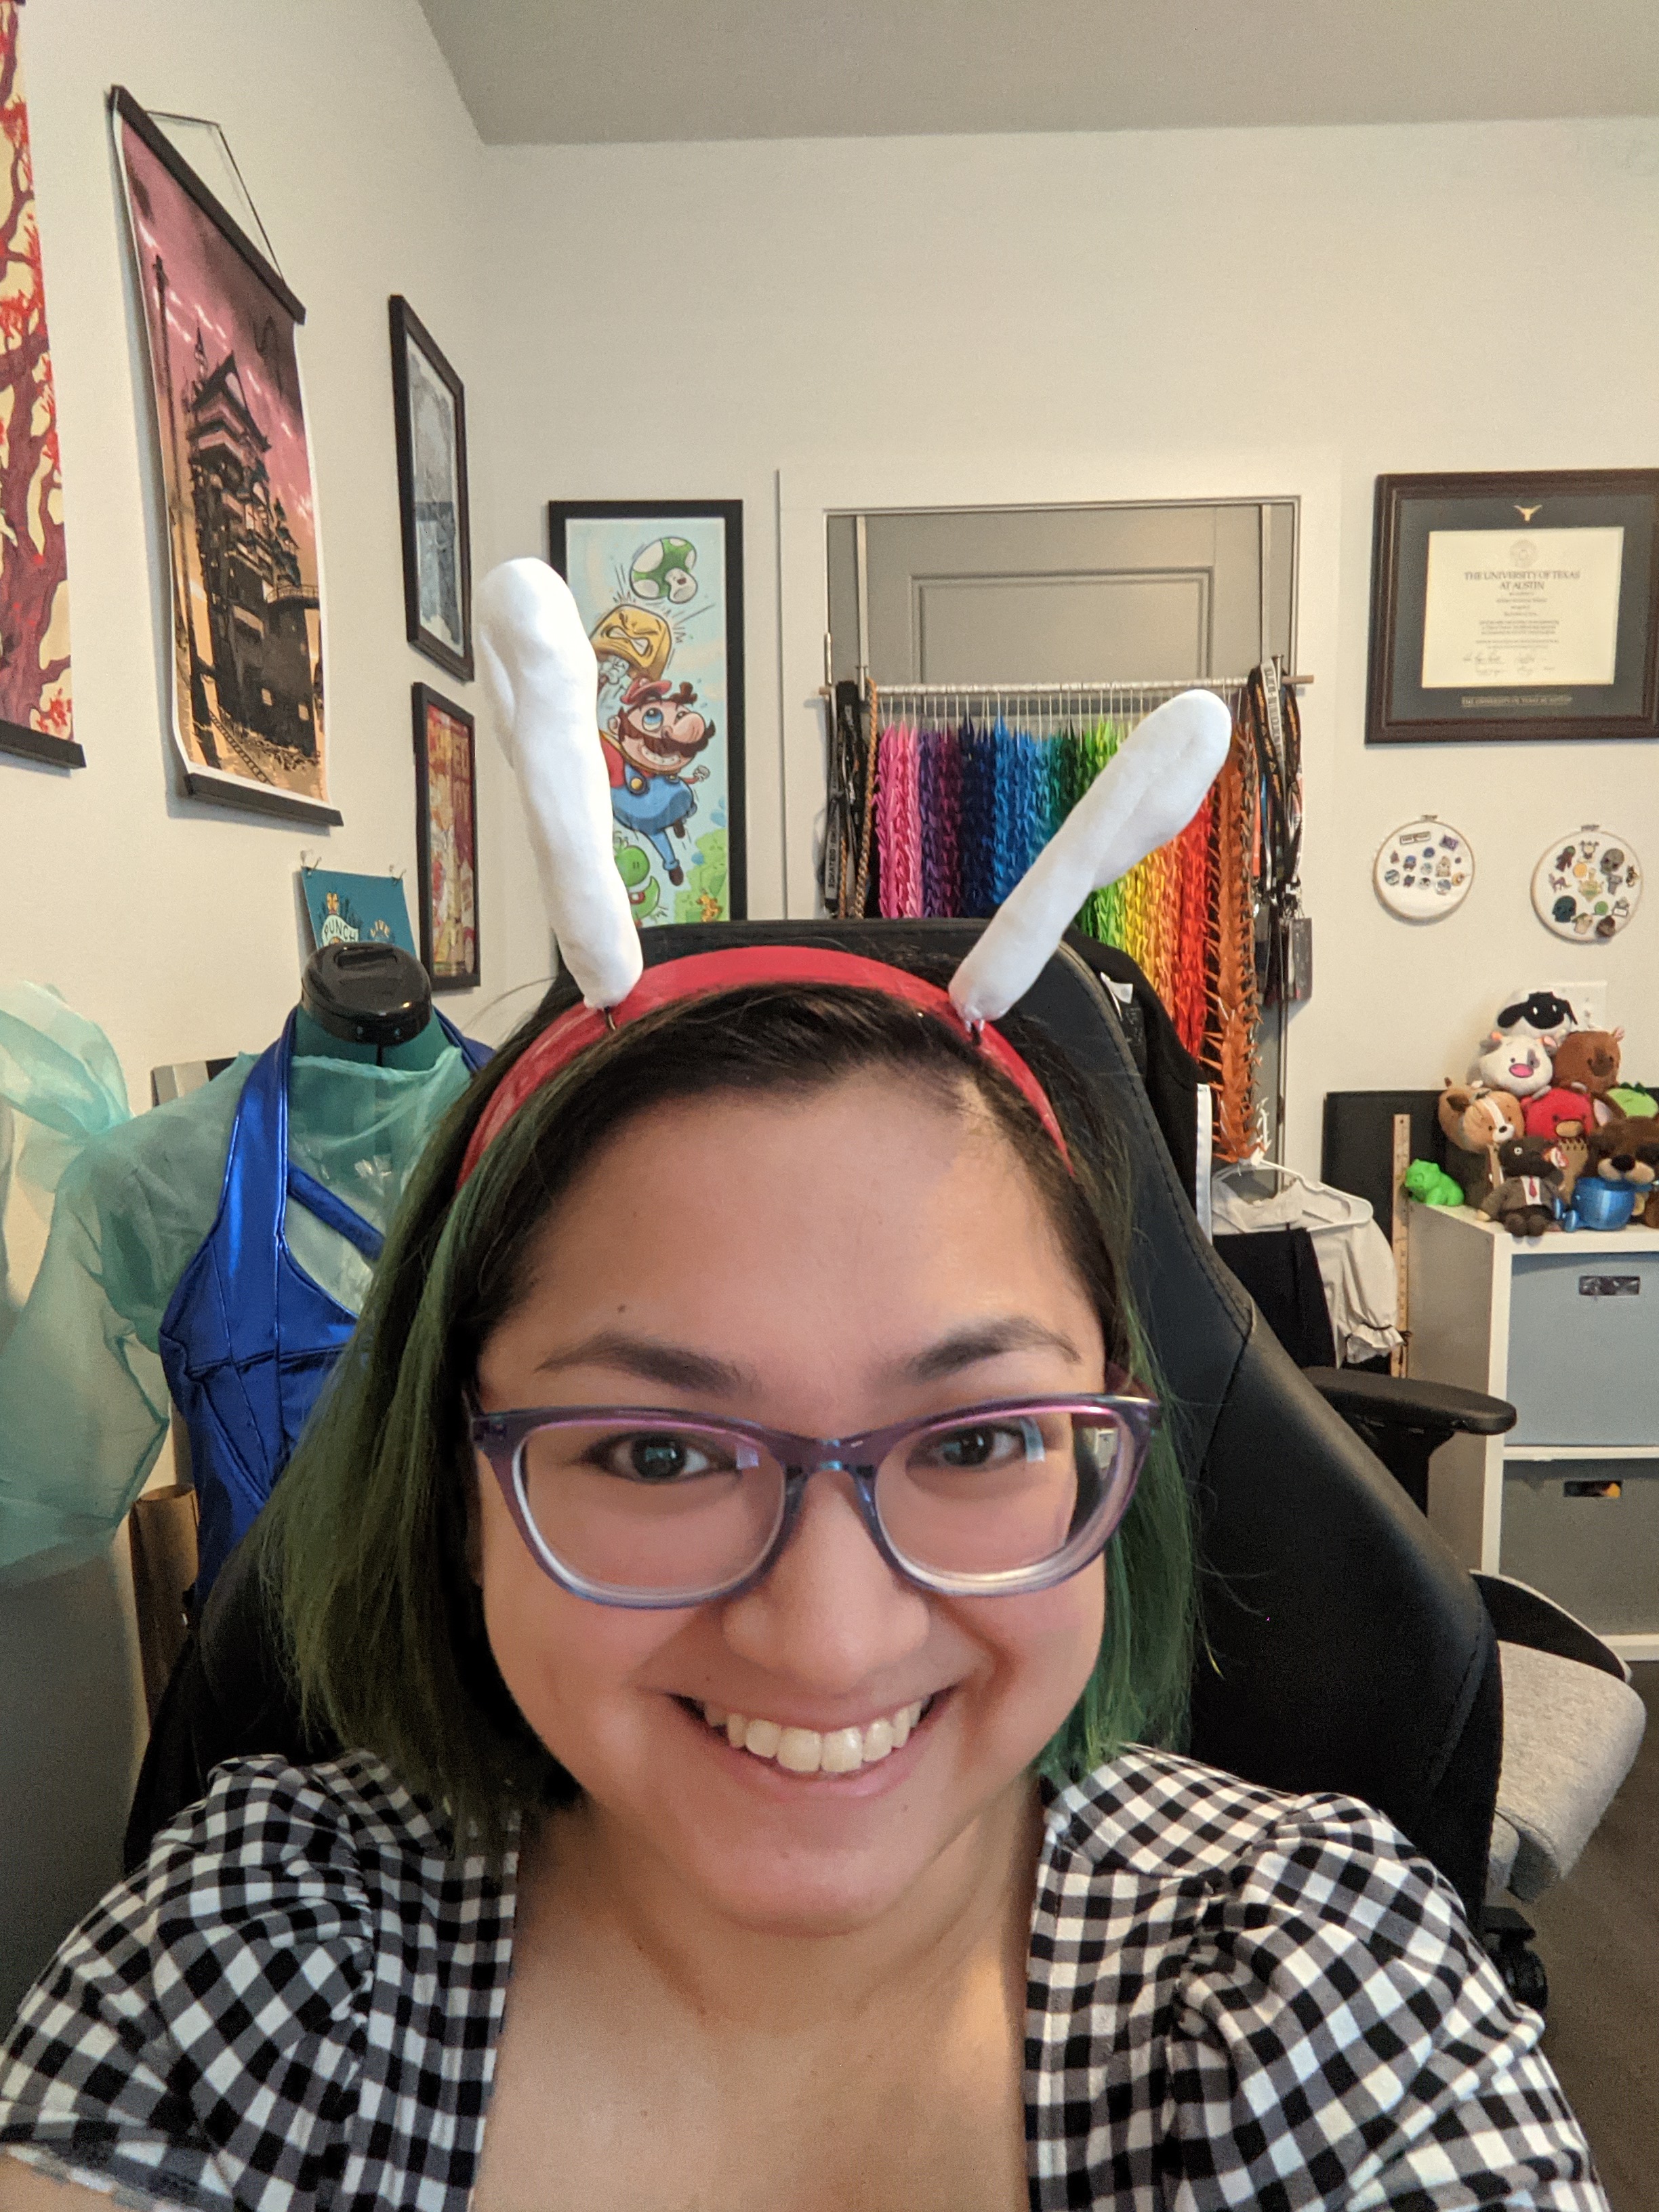
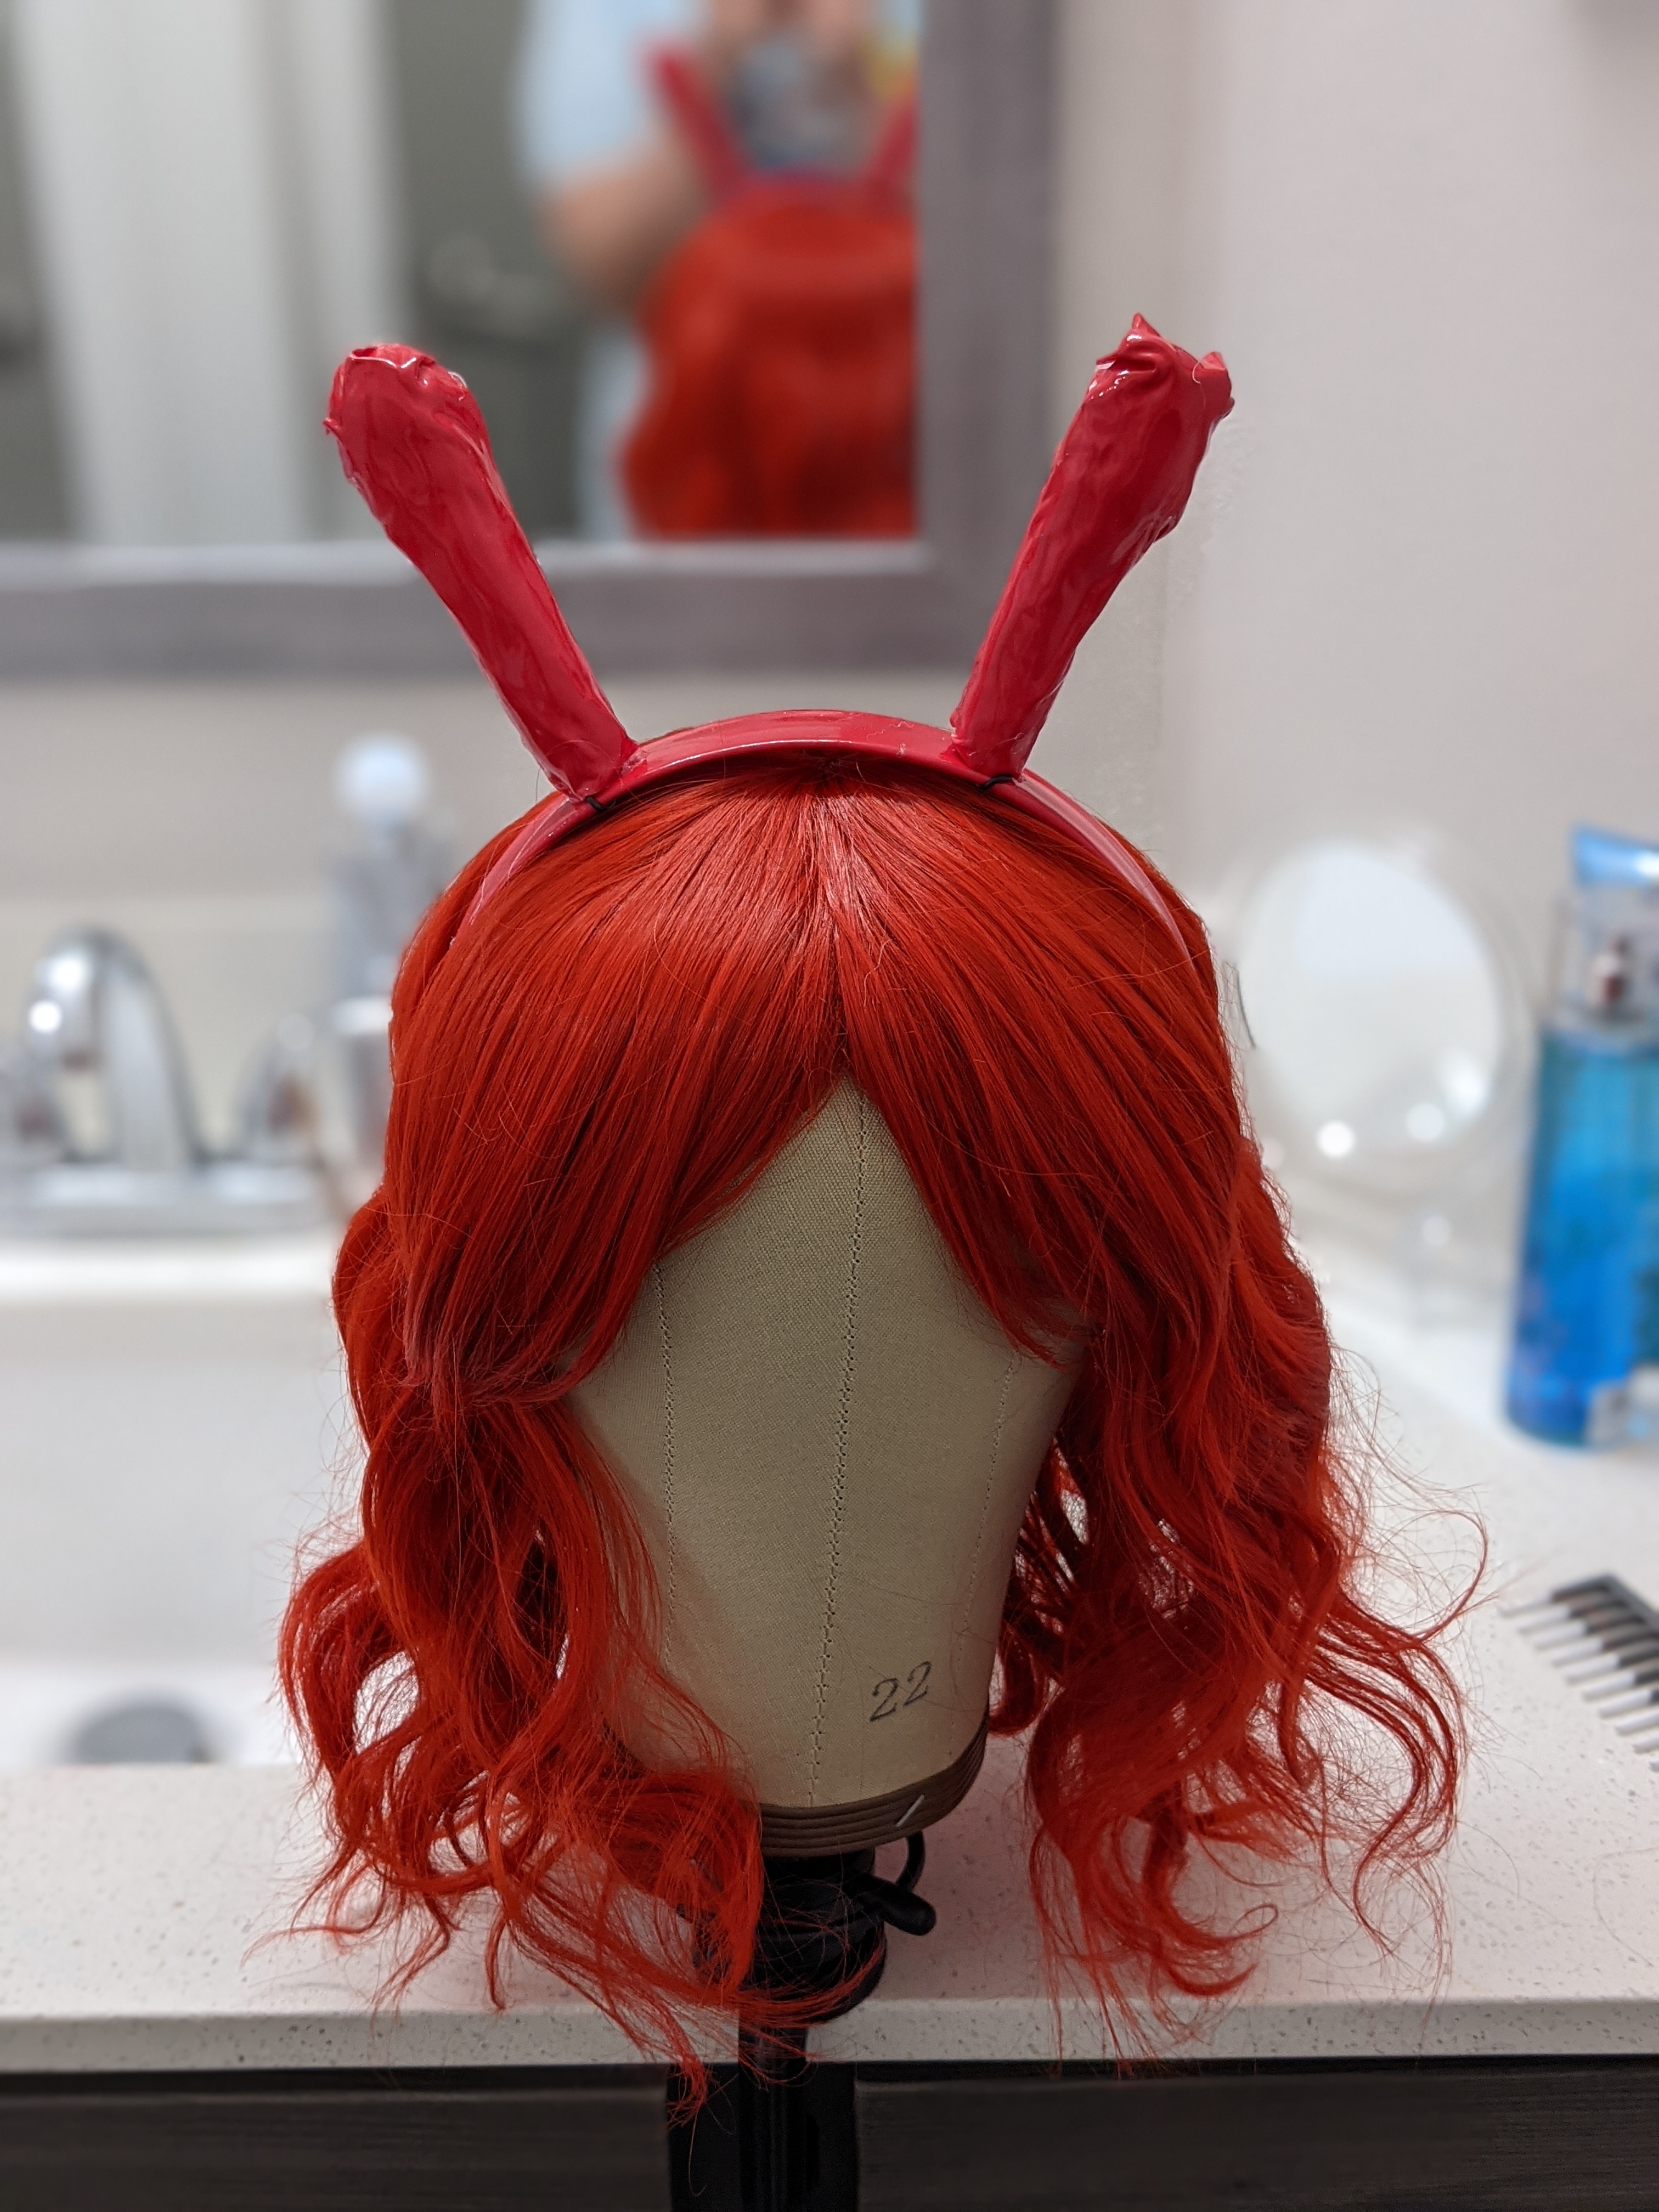
From there, I covered the foam clay with the red spandex. Could I have properly made a pattern out of duct tape and sewn the fabric together? Sure! Did I feel up to doing that? Absolutely not! So what transpired was me taking the pieces of red spandex, eyeballing width and length, and then hot gluing it on. First the back, then the front. I would cut little darts around the tip to follow the curve, but it did end up pretty messy. I got better with the second one. It would do just fine for what I needed (Everybody stay 6ft away!) and looked good from the front, which is really all I cared about.

Wings
For the wings, I improvised. Could I have looked up wing tutorials online? Why yes, of course. Did I? Nope. (Are you sensing a theme here? The YOLO theme of my chaotic “process” for this cosplay?) I wanted to try to use materials I had at my disposal. And what did I have a lot of? EVA foam and PETG. I decided PETG would be used for the wings and my EVA foam for the stinger.
Jollibee’s wings are a different shape from the Honeybee Inn girls’ wings. I decided to go with Jollibee’s wings’ shape to really drive home that half of the mashup. Honeybee would do all the heavy lifting with the bodysuit, collar, and wrist cuffs; I needed to make sure I incorporated enough Jollibee to make it balanced.
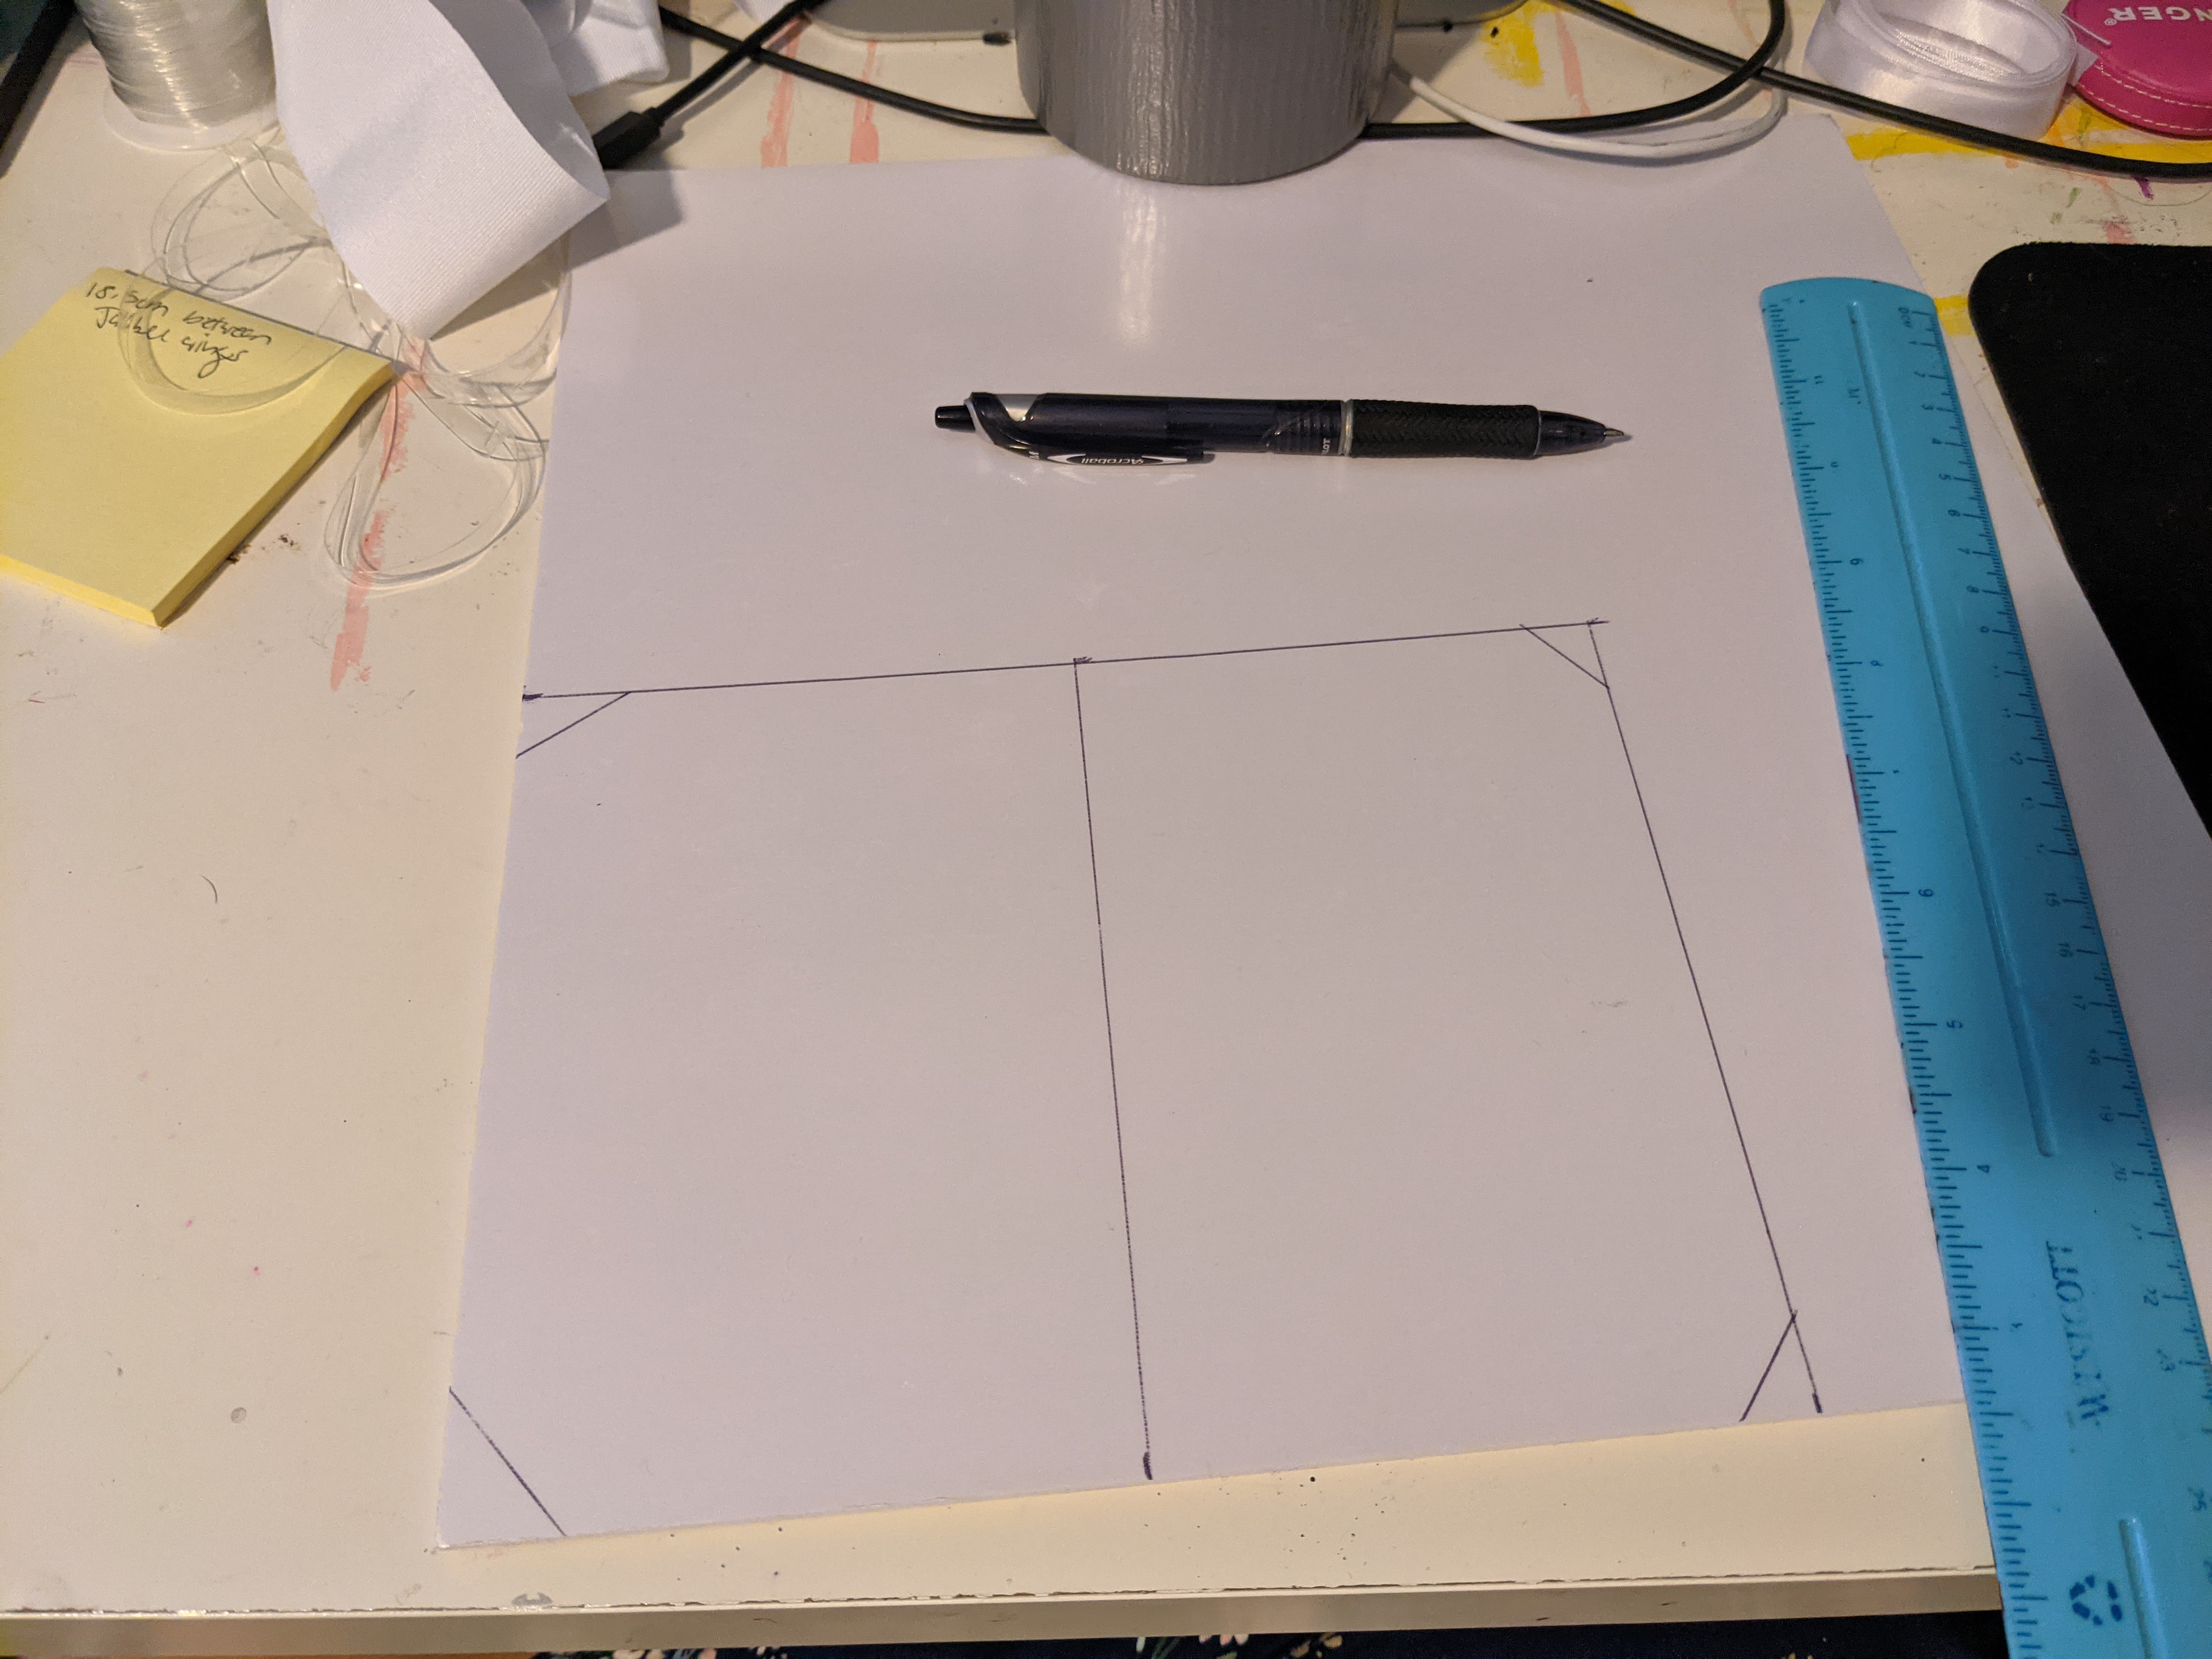
To start, looking at Jollibee mascot photos for reference, I drew out on a sheet of printer paper a circular shape with one flat edge. So, effectively, the capital letter “D” but with a very short line. I cut that out and held it up to my back in front of the mirror to get a feel for the proportions. Once happy with that, I used the paper pattern to trace onto the protective film of the PETG. Then, using scissors, I cut out the two wings and removed the protective film.

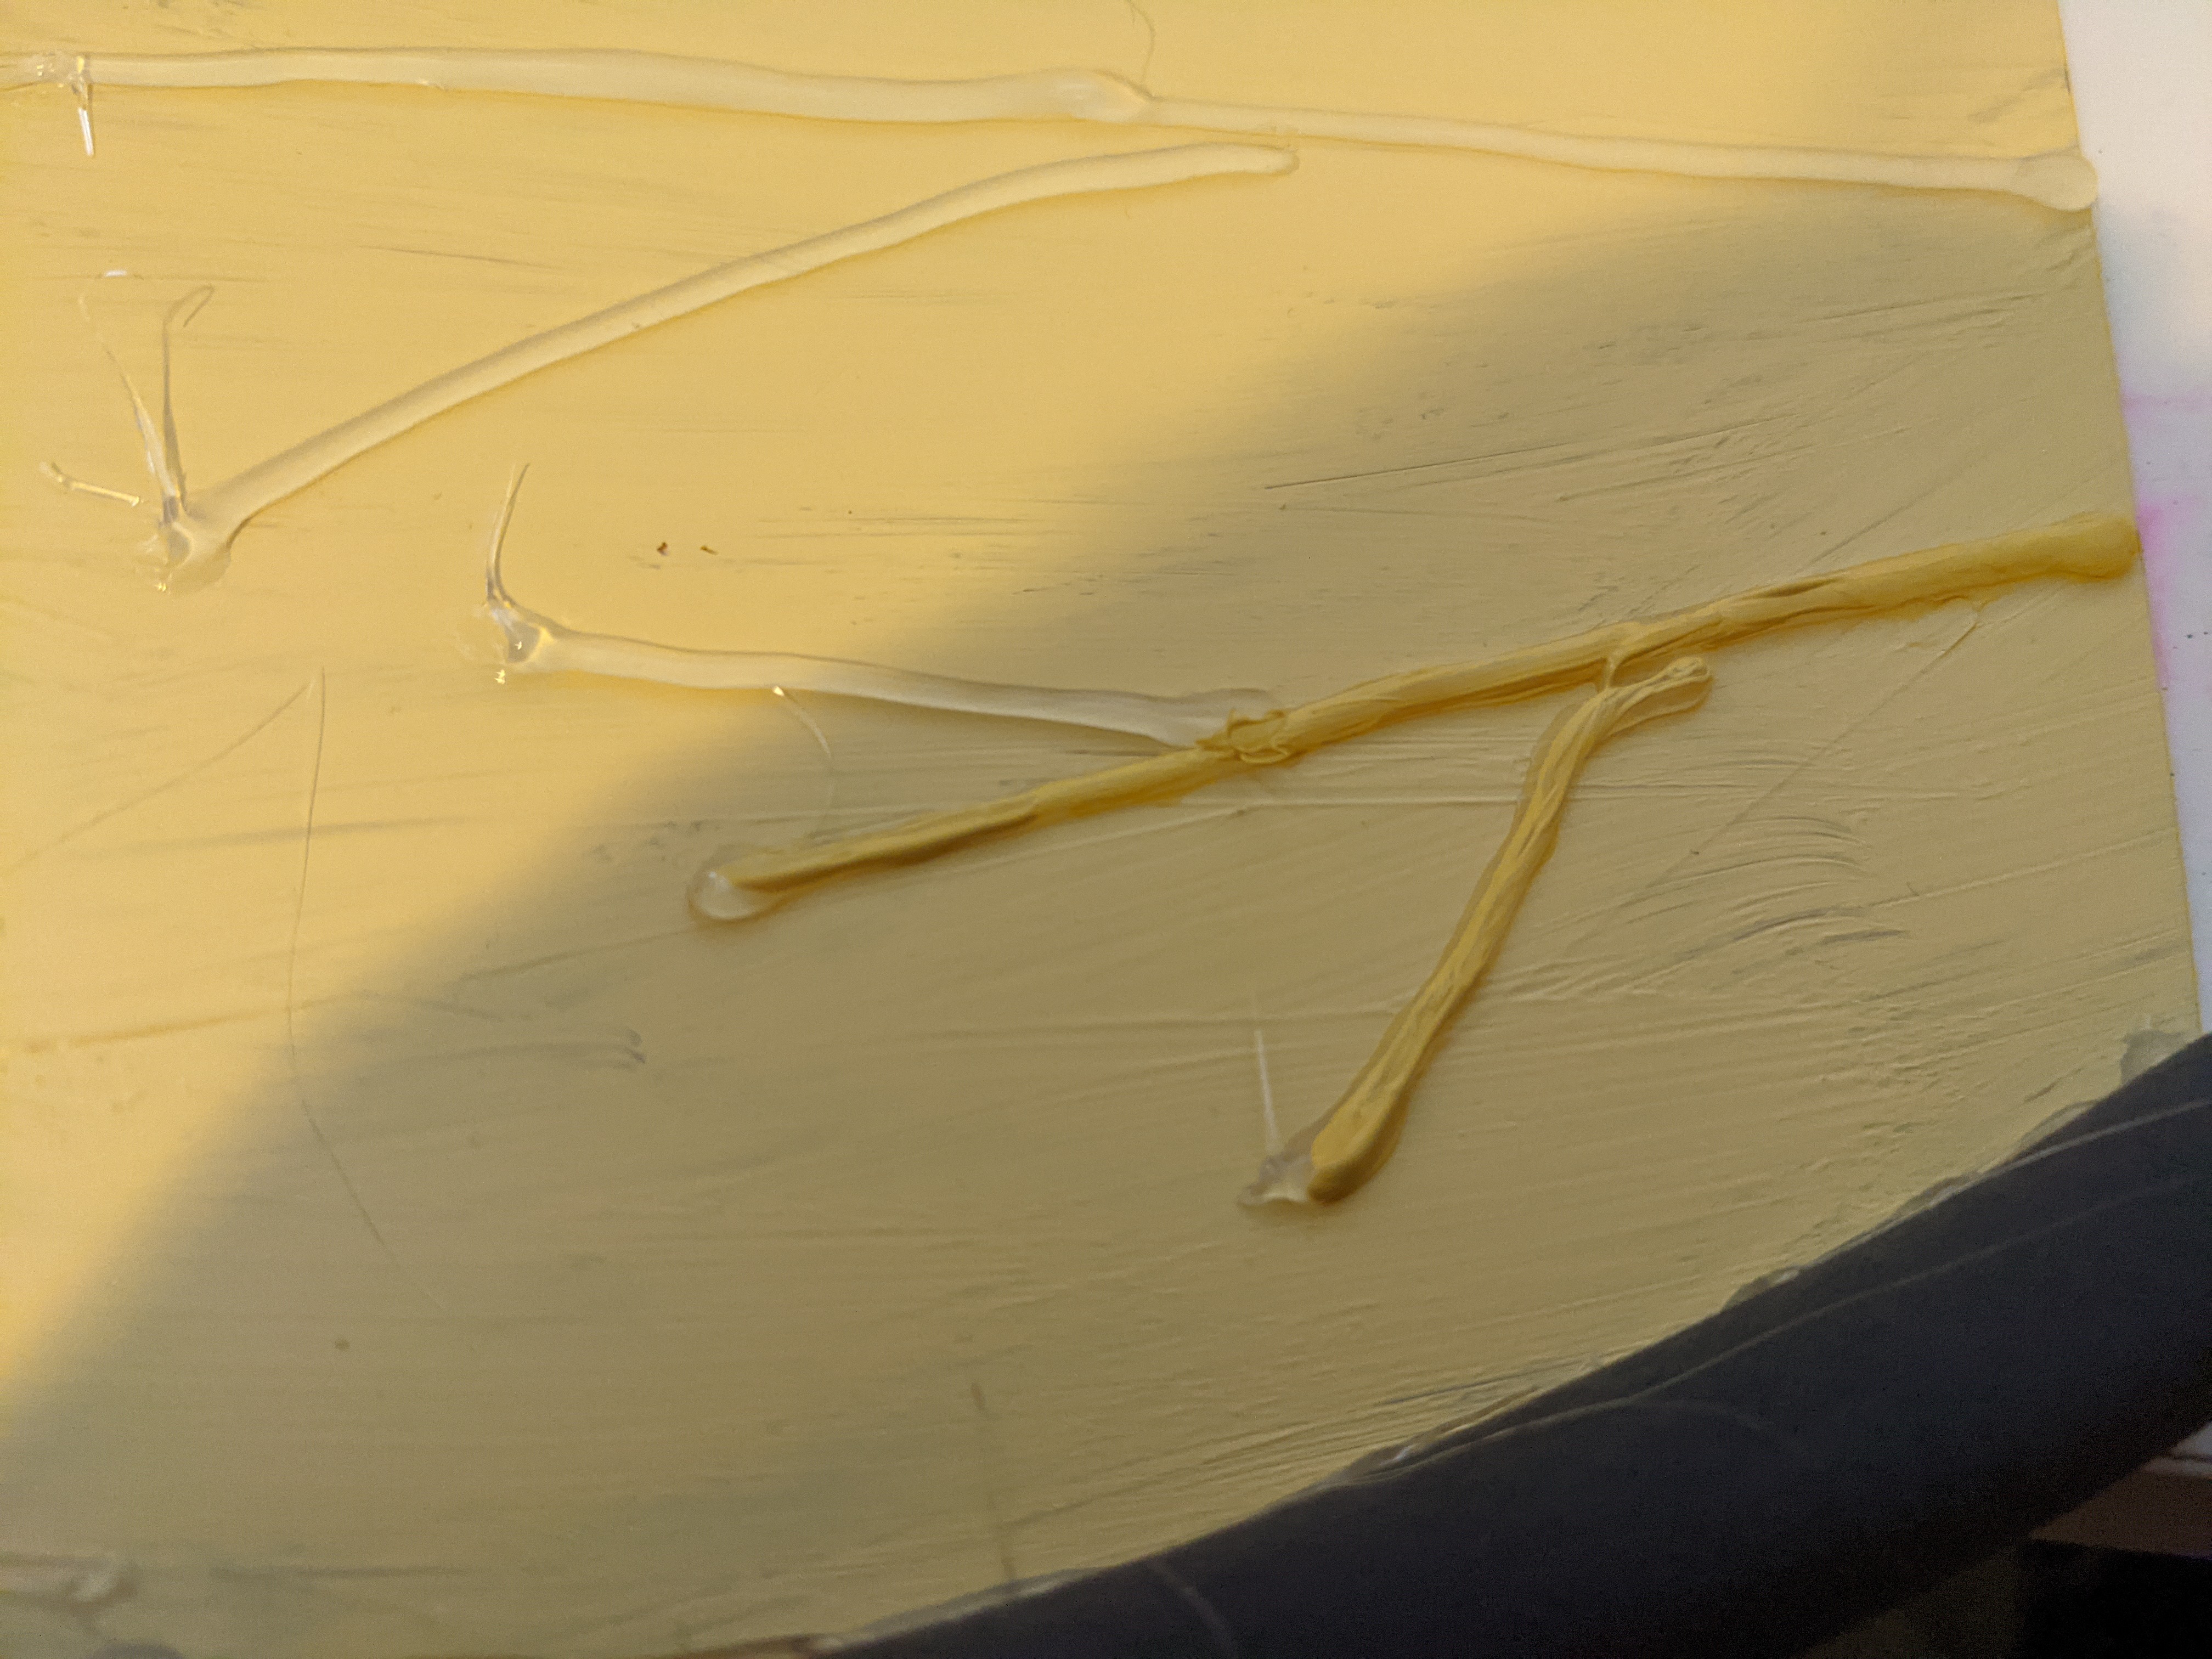
Once removing the film, I realized that the PETG was so clear to the point that it’d be hard to see from a distance. So, I need to paint it. I painted it using some cream acrylic paint I already had on hand. Then, do to the black edges of the wings, I used black EVA foam and rolled them into long strips the circumference of the wings (not included the flat part). I had to make them pretty thick, otherwise, they start stretching and becoming very uneven.
To do this, I lay the (now dry) wings onto my table and then place a sheet of wax paper on top of them. This helped me not muck up my table but also see exactly how long the strips would need to be to fit around the wings. After rolling them out, I place them on top of the wings and let them dry and set in that curved shape.


After hot gluing the now cured foam to the edges of the wings, I cut the edges of the foam to be flat. Then, I decided I wasn’t done using my hot glue gun and added some details to the wings with it. I free handed some hot glue lines on the wings and then, once dry, I painted over the lines.


It was at this point that I learned that hot glue is not actually a strong enough glue for PETG. The black foam edges came off very easily and the hot glue peeled right off. The hot glue details stayed on fine though, as long as I don’t sit there and pick at it. So, I went outside on my balcony and glued the foam pieces back on, this time with contact cement.
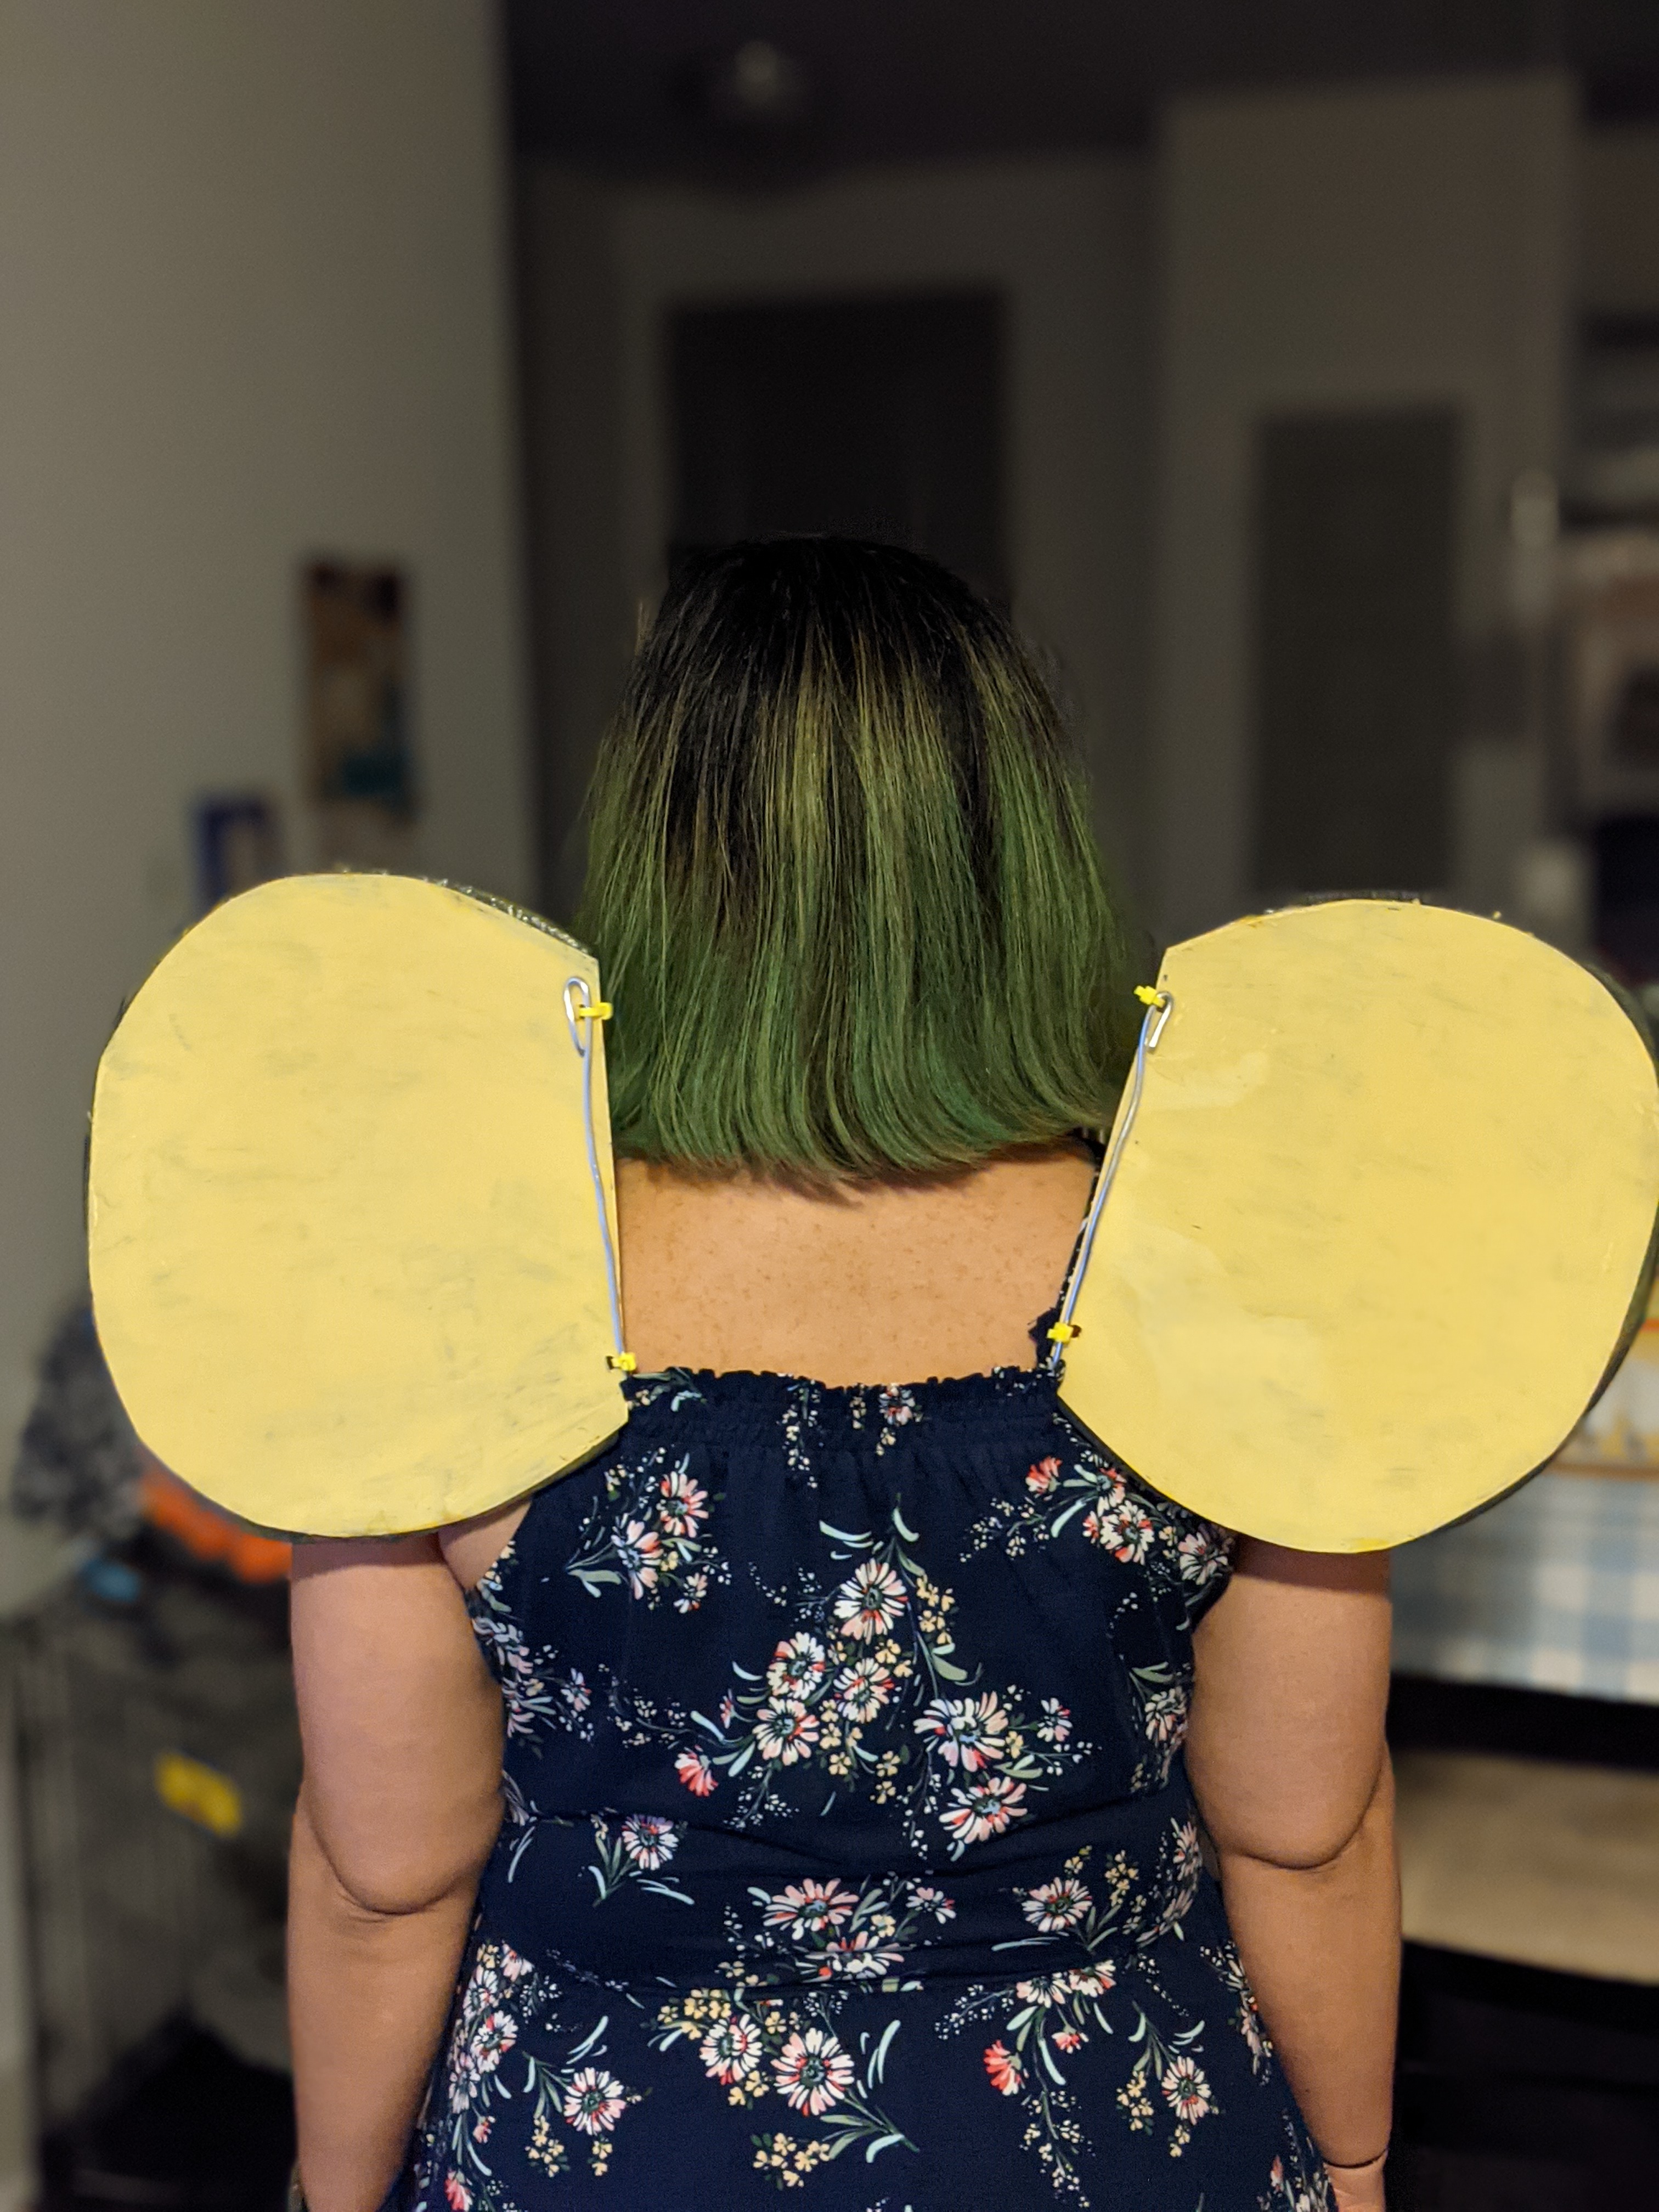
Once the edges were done (for real this time!) I set out to rig the wings to be wearable. At first, i attempted to use clear elastic straps. Even just testing with tape, it was obvious that this method wouldn’t work. Then, at the suggestion of Kaseydidwhat, I modeled my rig after the ones commonly used for fairy wings you may see at ren faires. This involved getting 8 gauge aluminum wire and bending it into a U-shaped. This part of the wire would tuck into my bodysuit in the back.
To attach the wire to the wings, knowing I couldn’t reliably use glue, I opted for making two holes into each wing with a hole puncher and then looping a ziptie through the hole before wrapping it around the wire and securing it tight. I then cut the extra ends off the zipties and sanded them down so they wouldn’t poke me.


If I really wanted to, I could make the same designs (hot glue details and black edges) to the back of the wings so it’d look good from either side, but considering I was running low on time before my shoot, I opted to leave that for a future con/shoot.
Stinger
I owe the biggest shout-out to Monicaofthelion for gifting me the pattern for the stinger. Her Honeybee Inn Tifa cosplay is to die for and when I asked her what materials she used to make them, she offered without prompting to send me her pattern for free. So thank you again Monica so much for sharing your pattern with me!
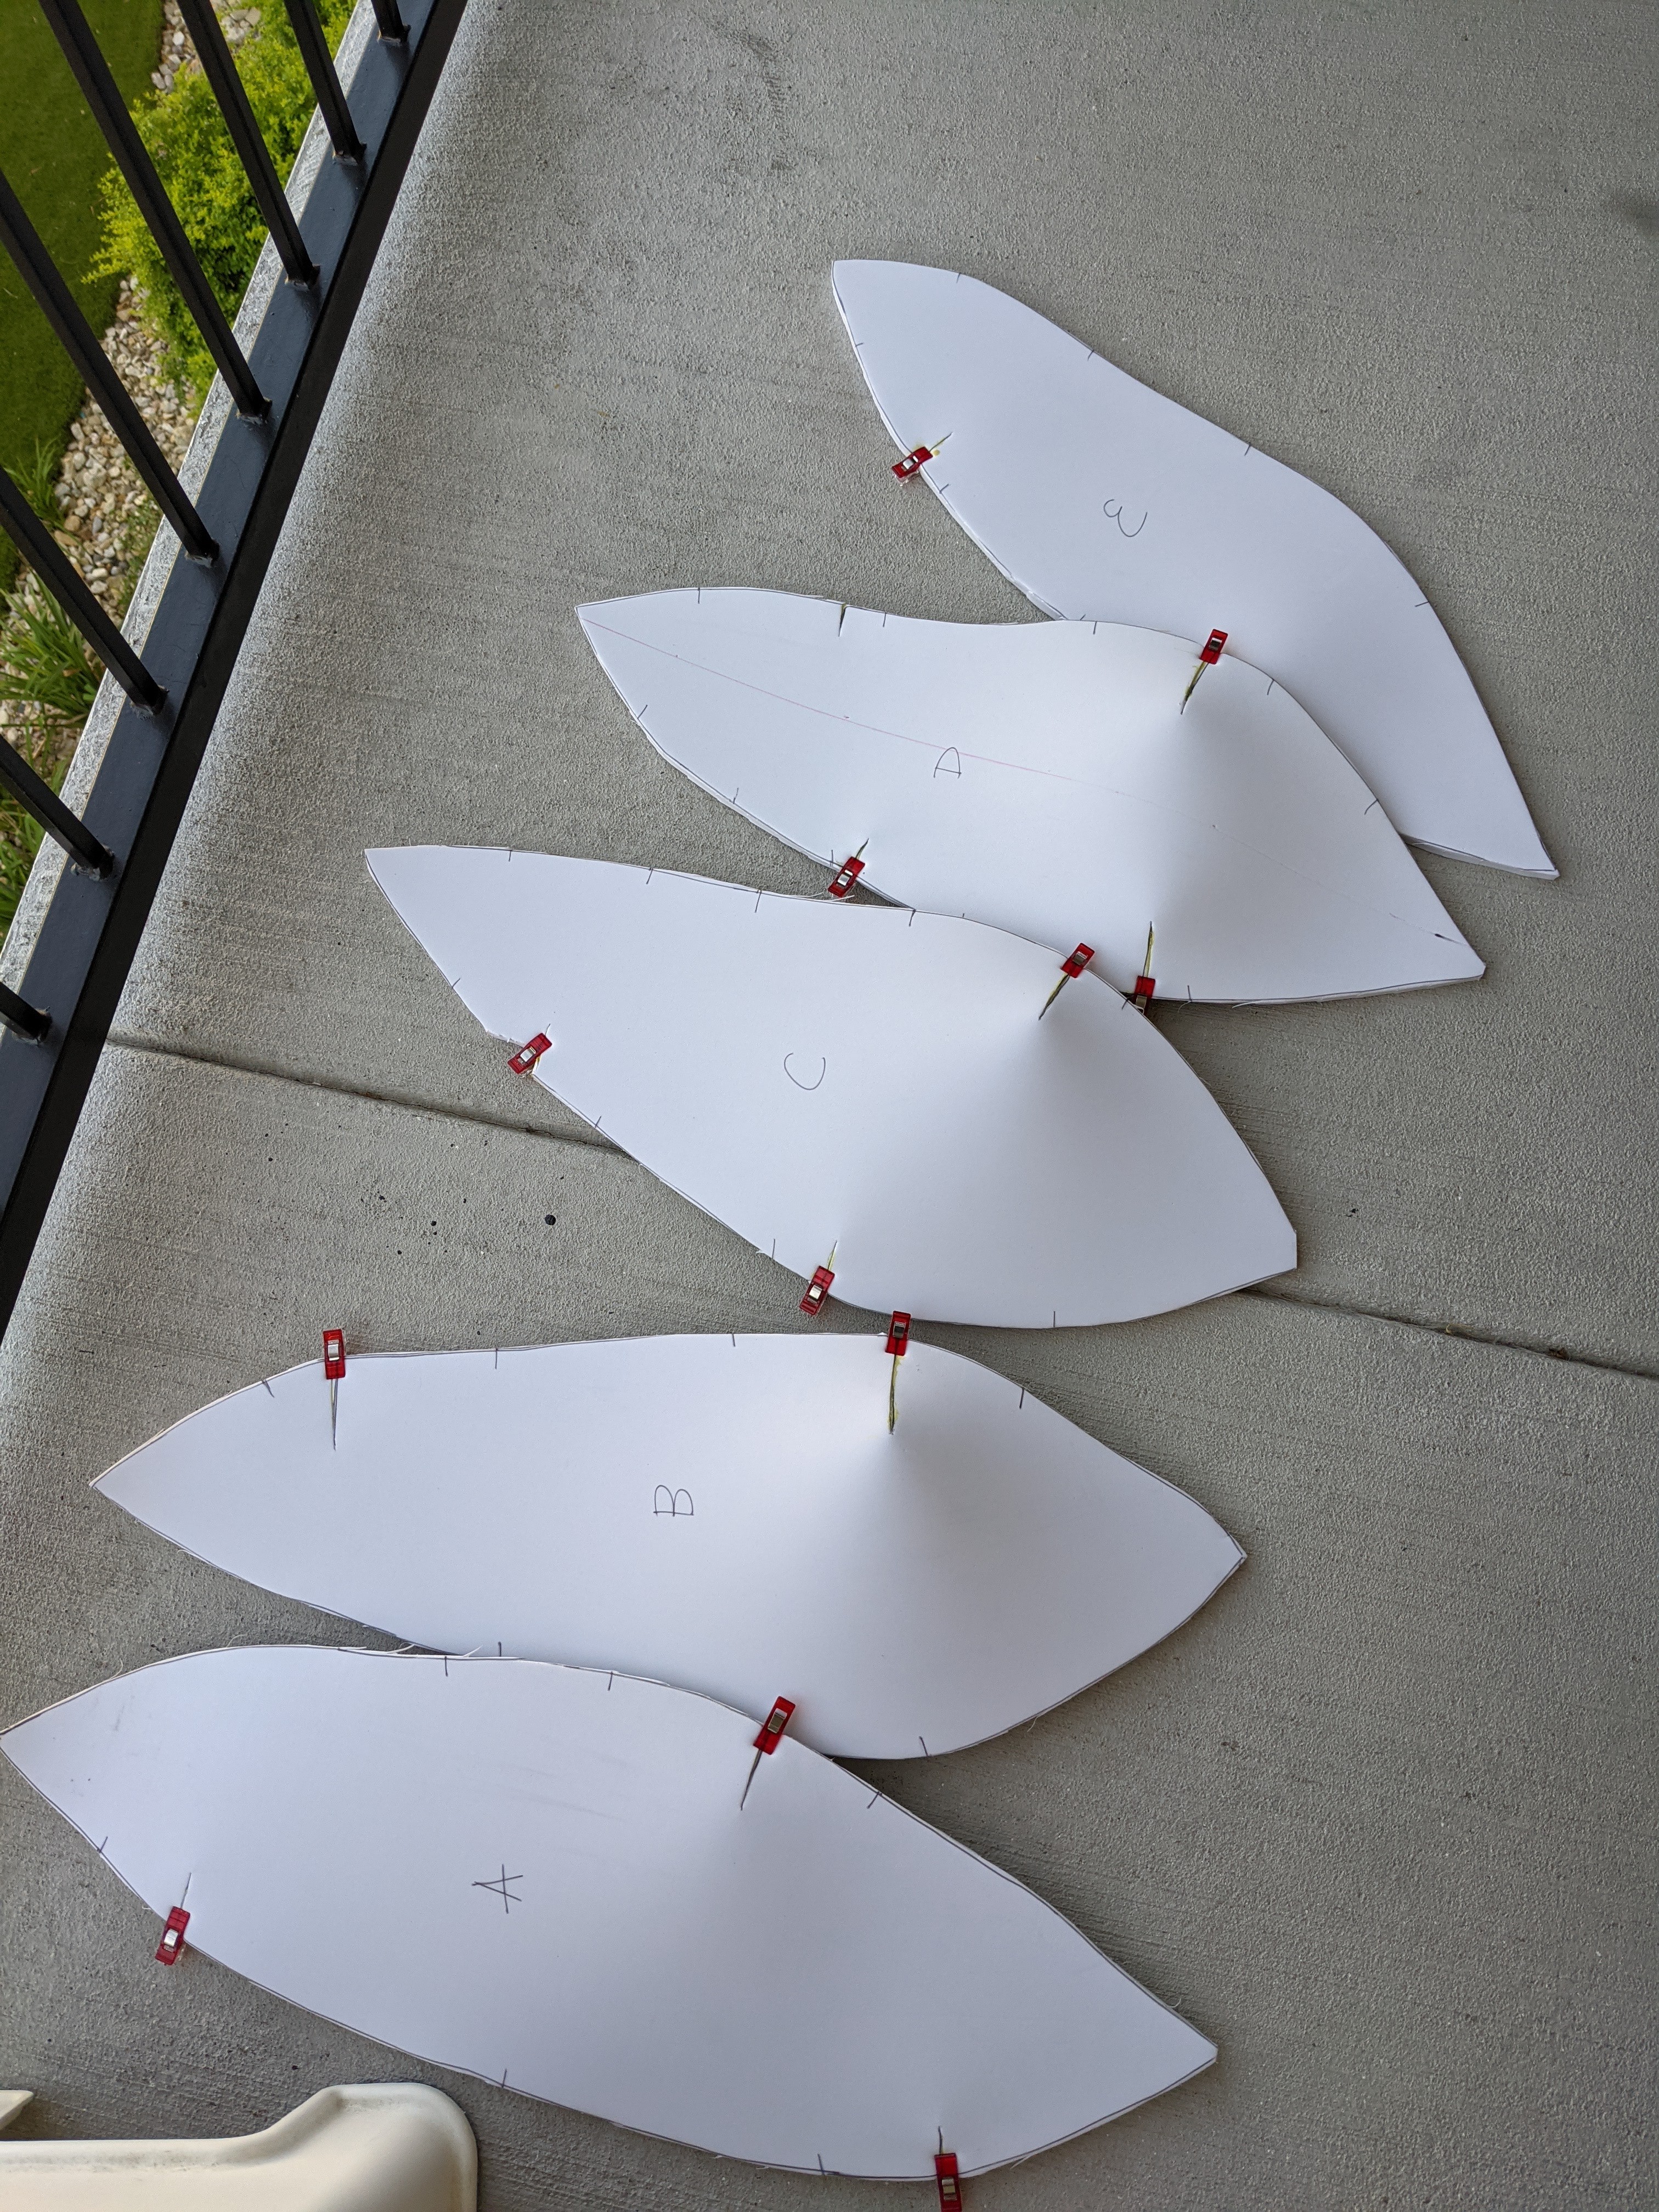
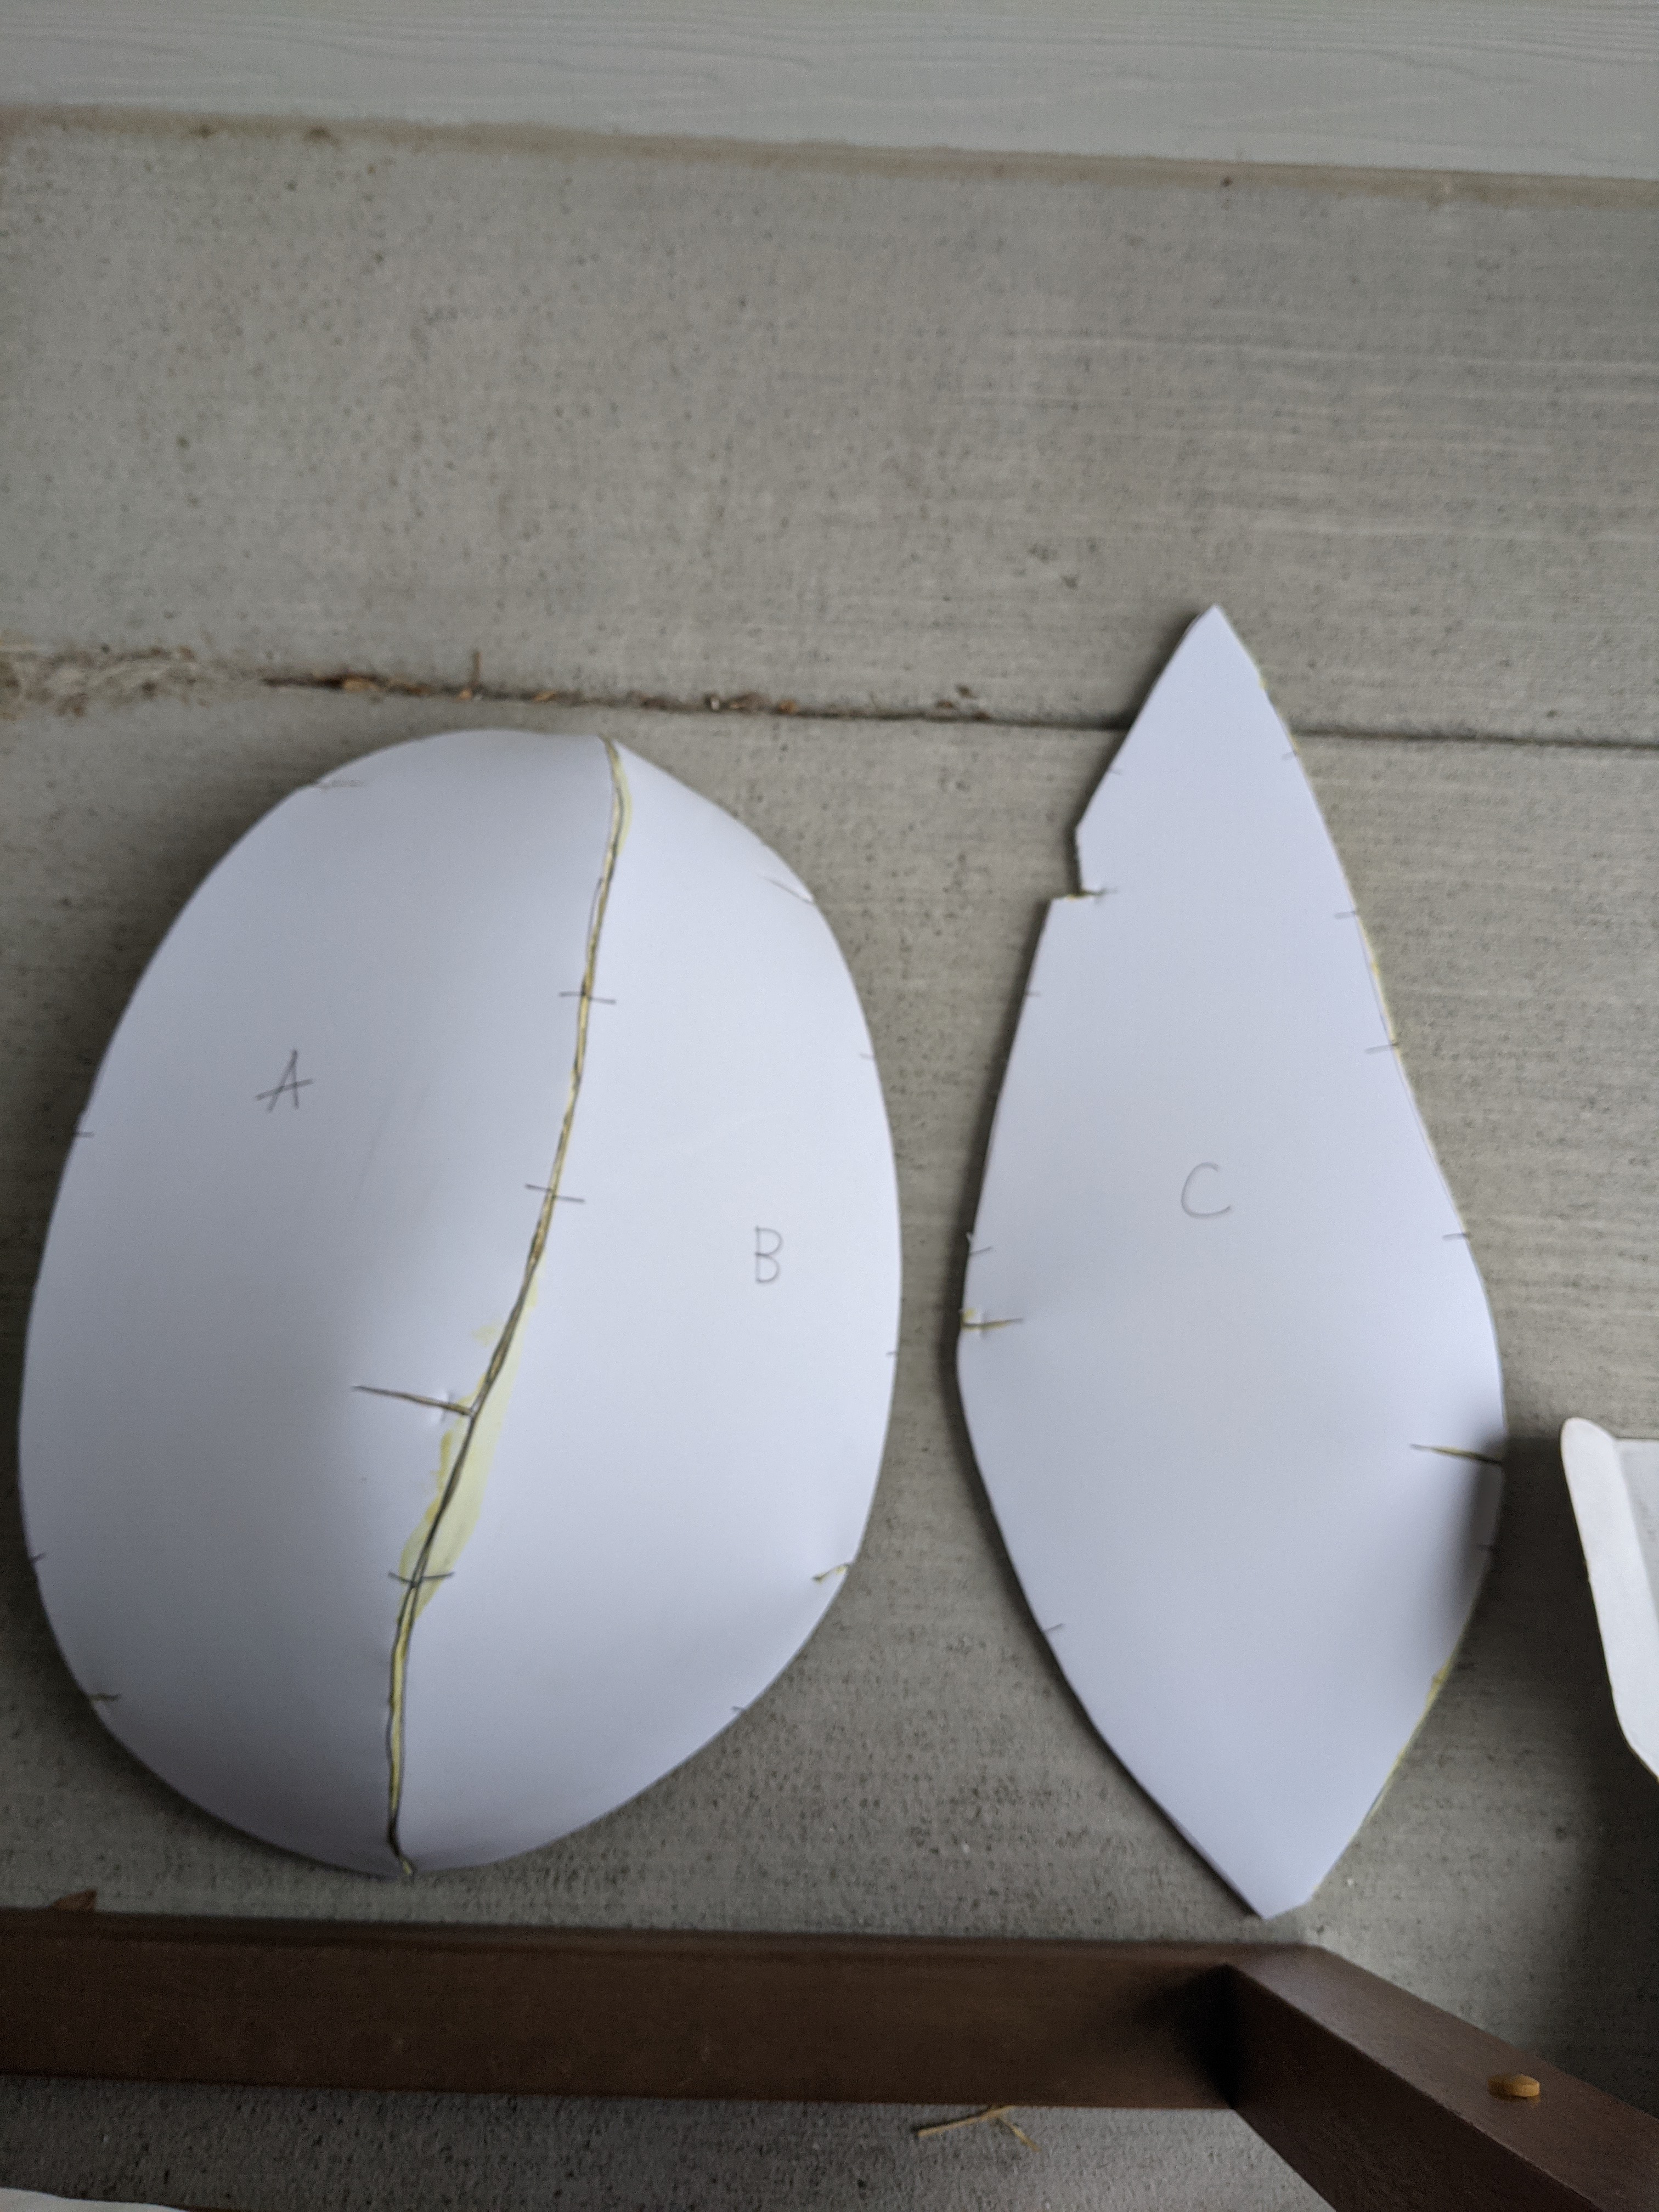
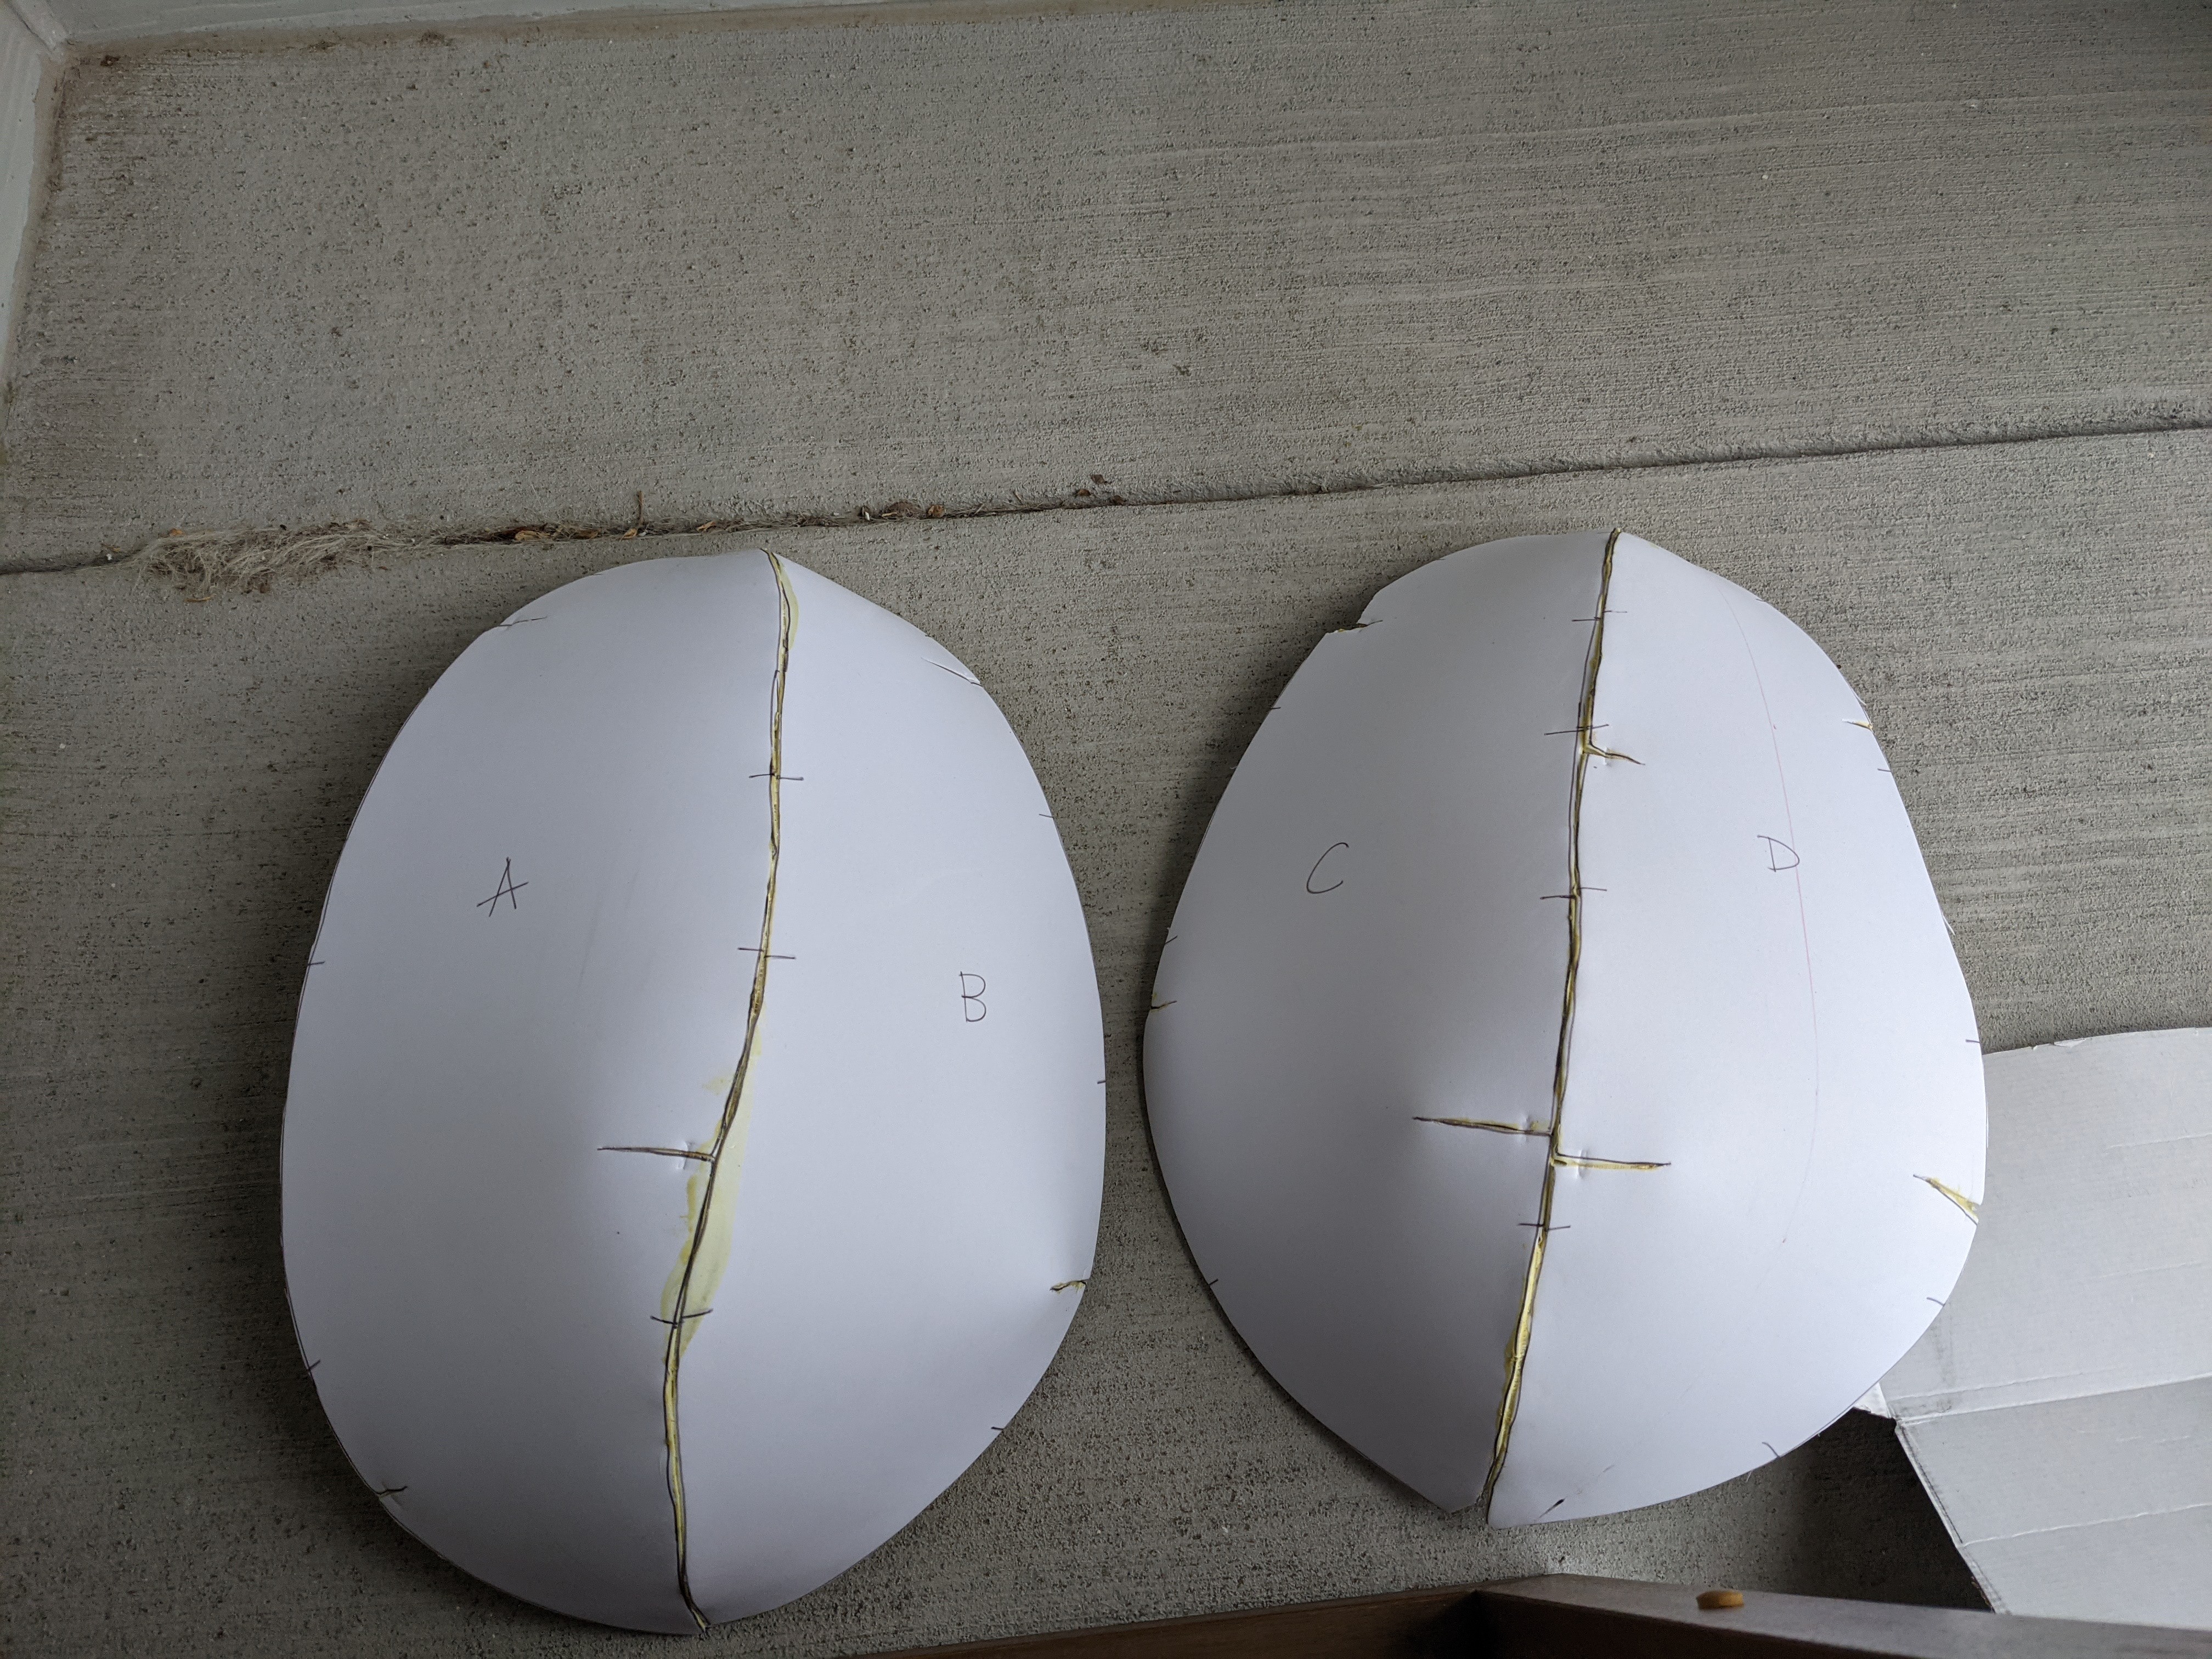
Once I got Monica’s pattern in the mail, I used them to trace out pieces of 8mm EVA foam (the thickest I had available at home). I then cut them out with scissors and an Xacto knife.

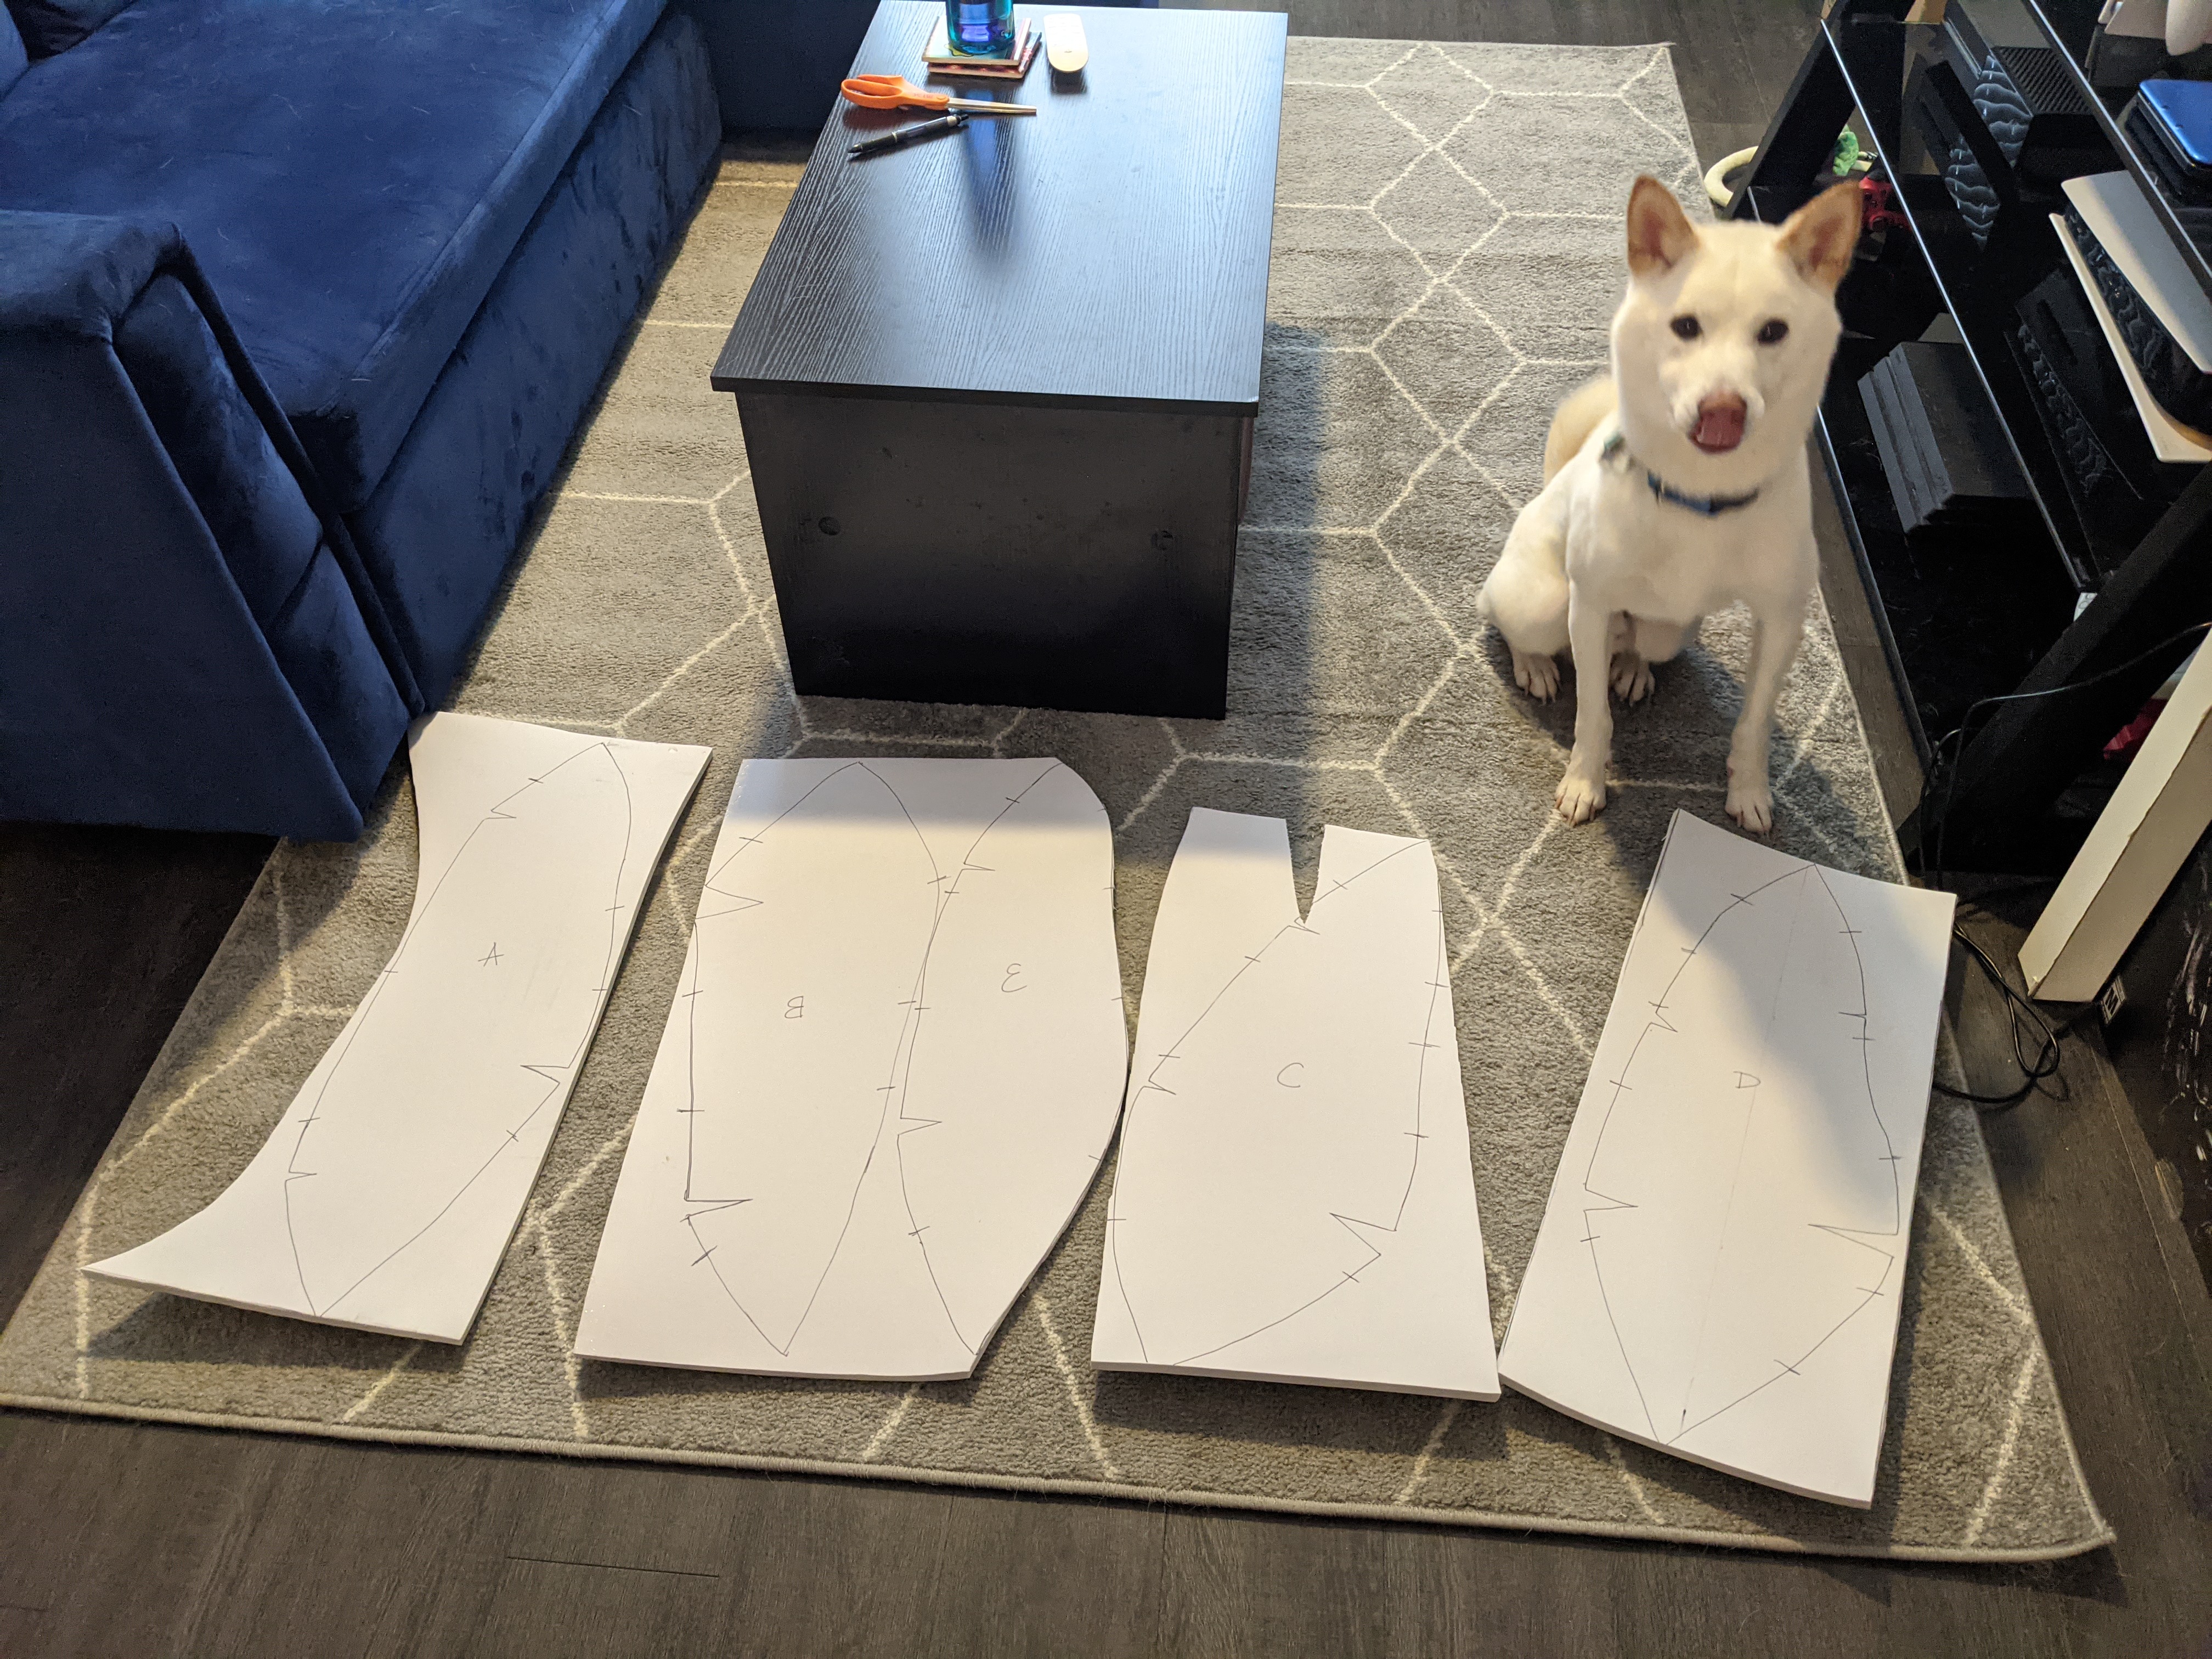

The next step was gluing. First, I glued the darts together using contact cement. While I let them dry, I clipped them using my red sewing clips. This helped for all but one of the darts, which was easily fixed with just another bit of contact cement. After gluing the darts, I meticulously glued the panels to each other. First, A to B. Then, C to D. After letting those set overnight, I came back and glued D to E and E to A, forming one big foam stinger!


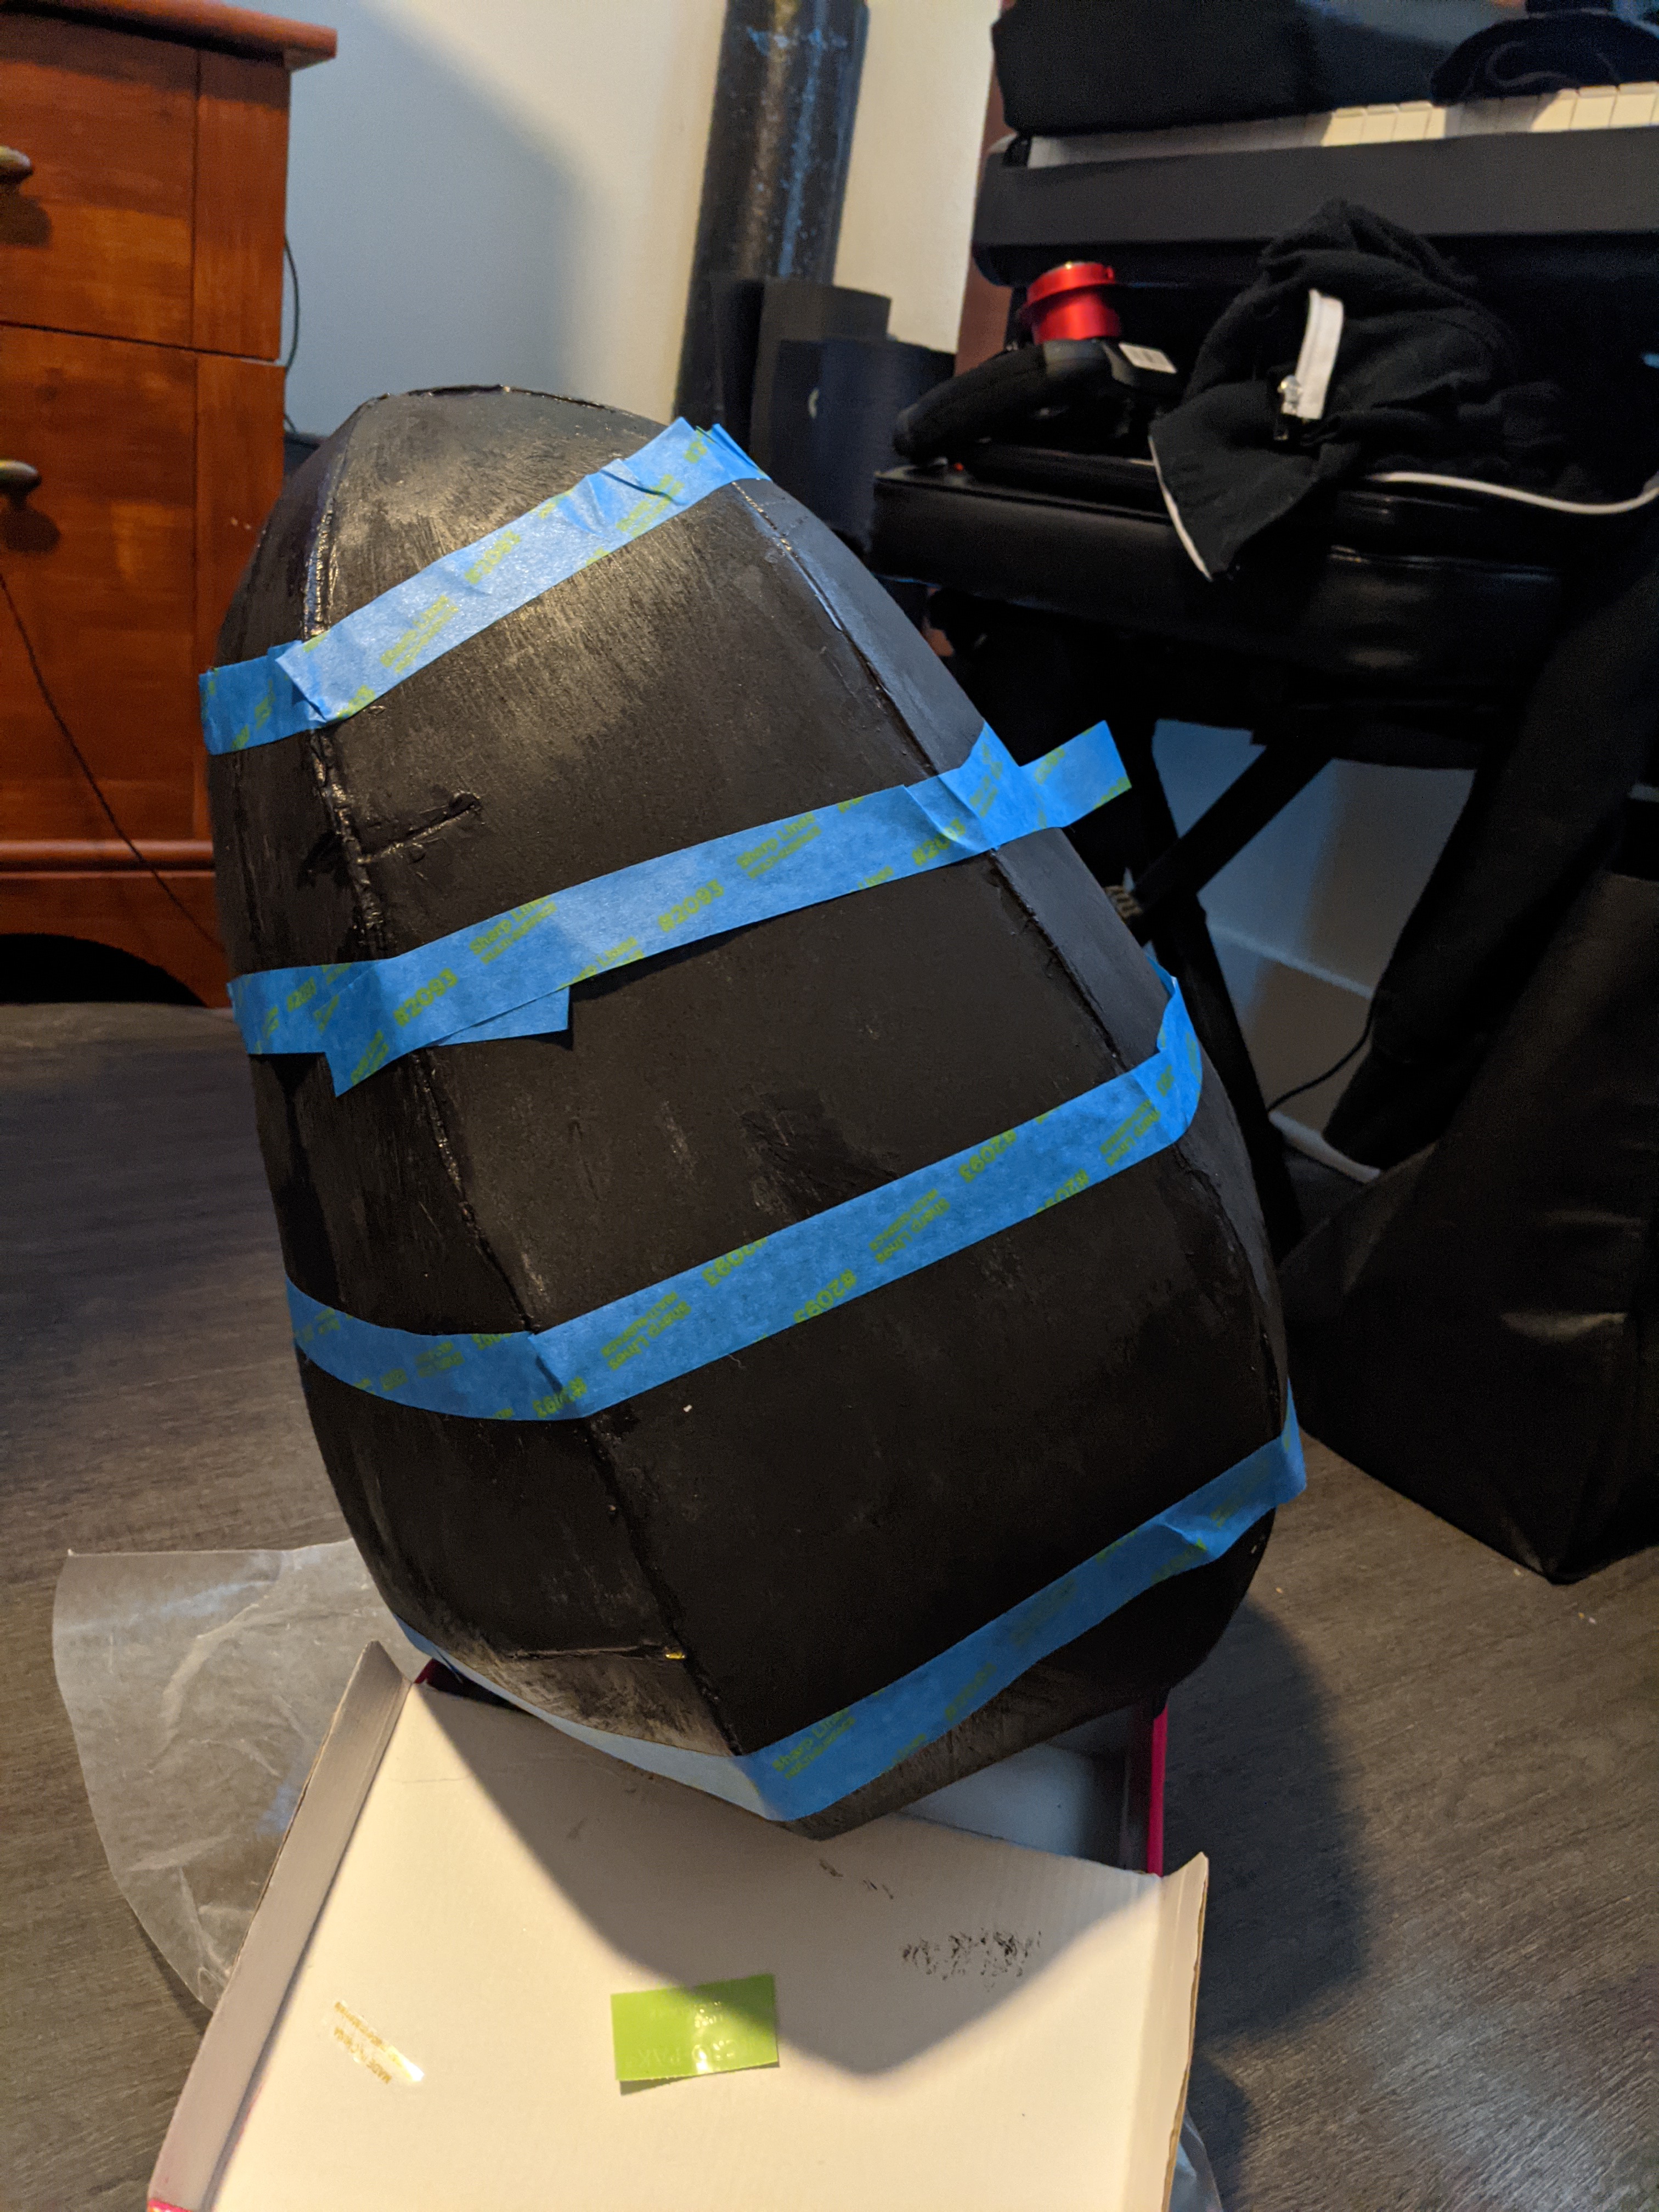
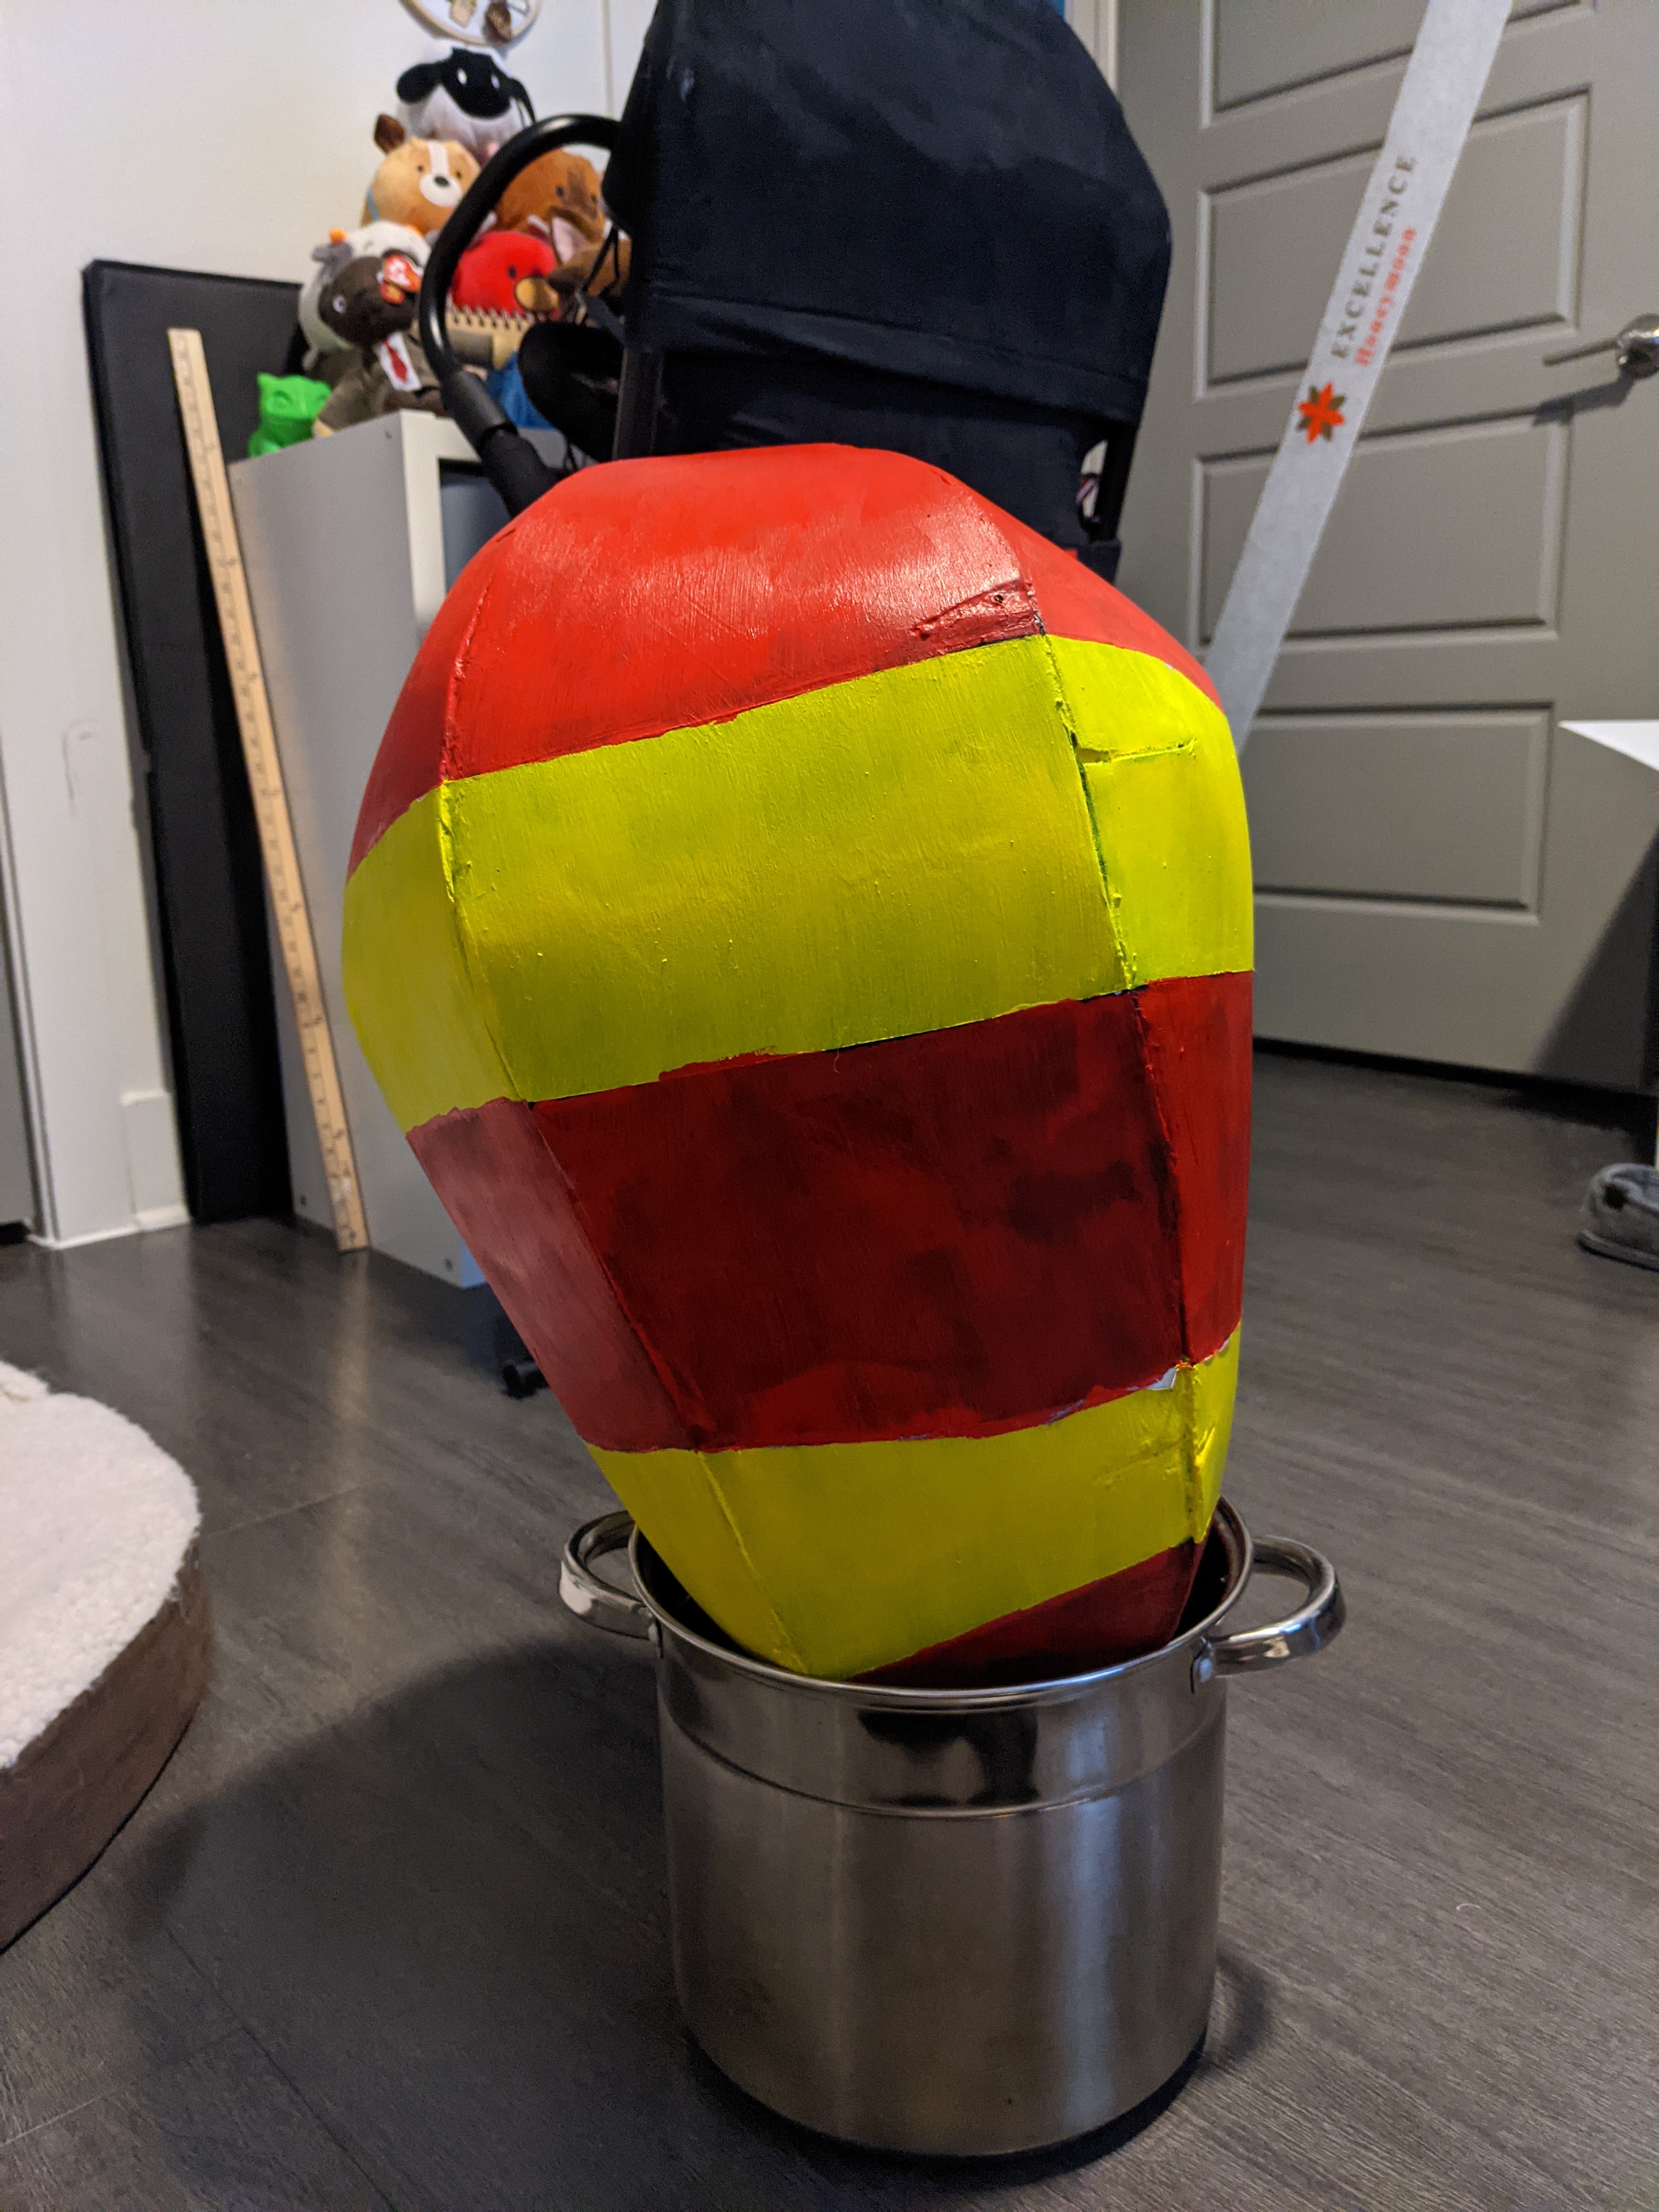
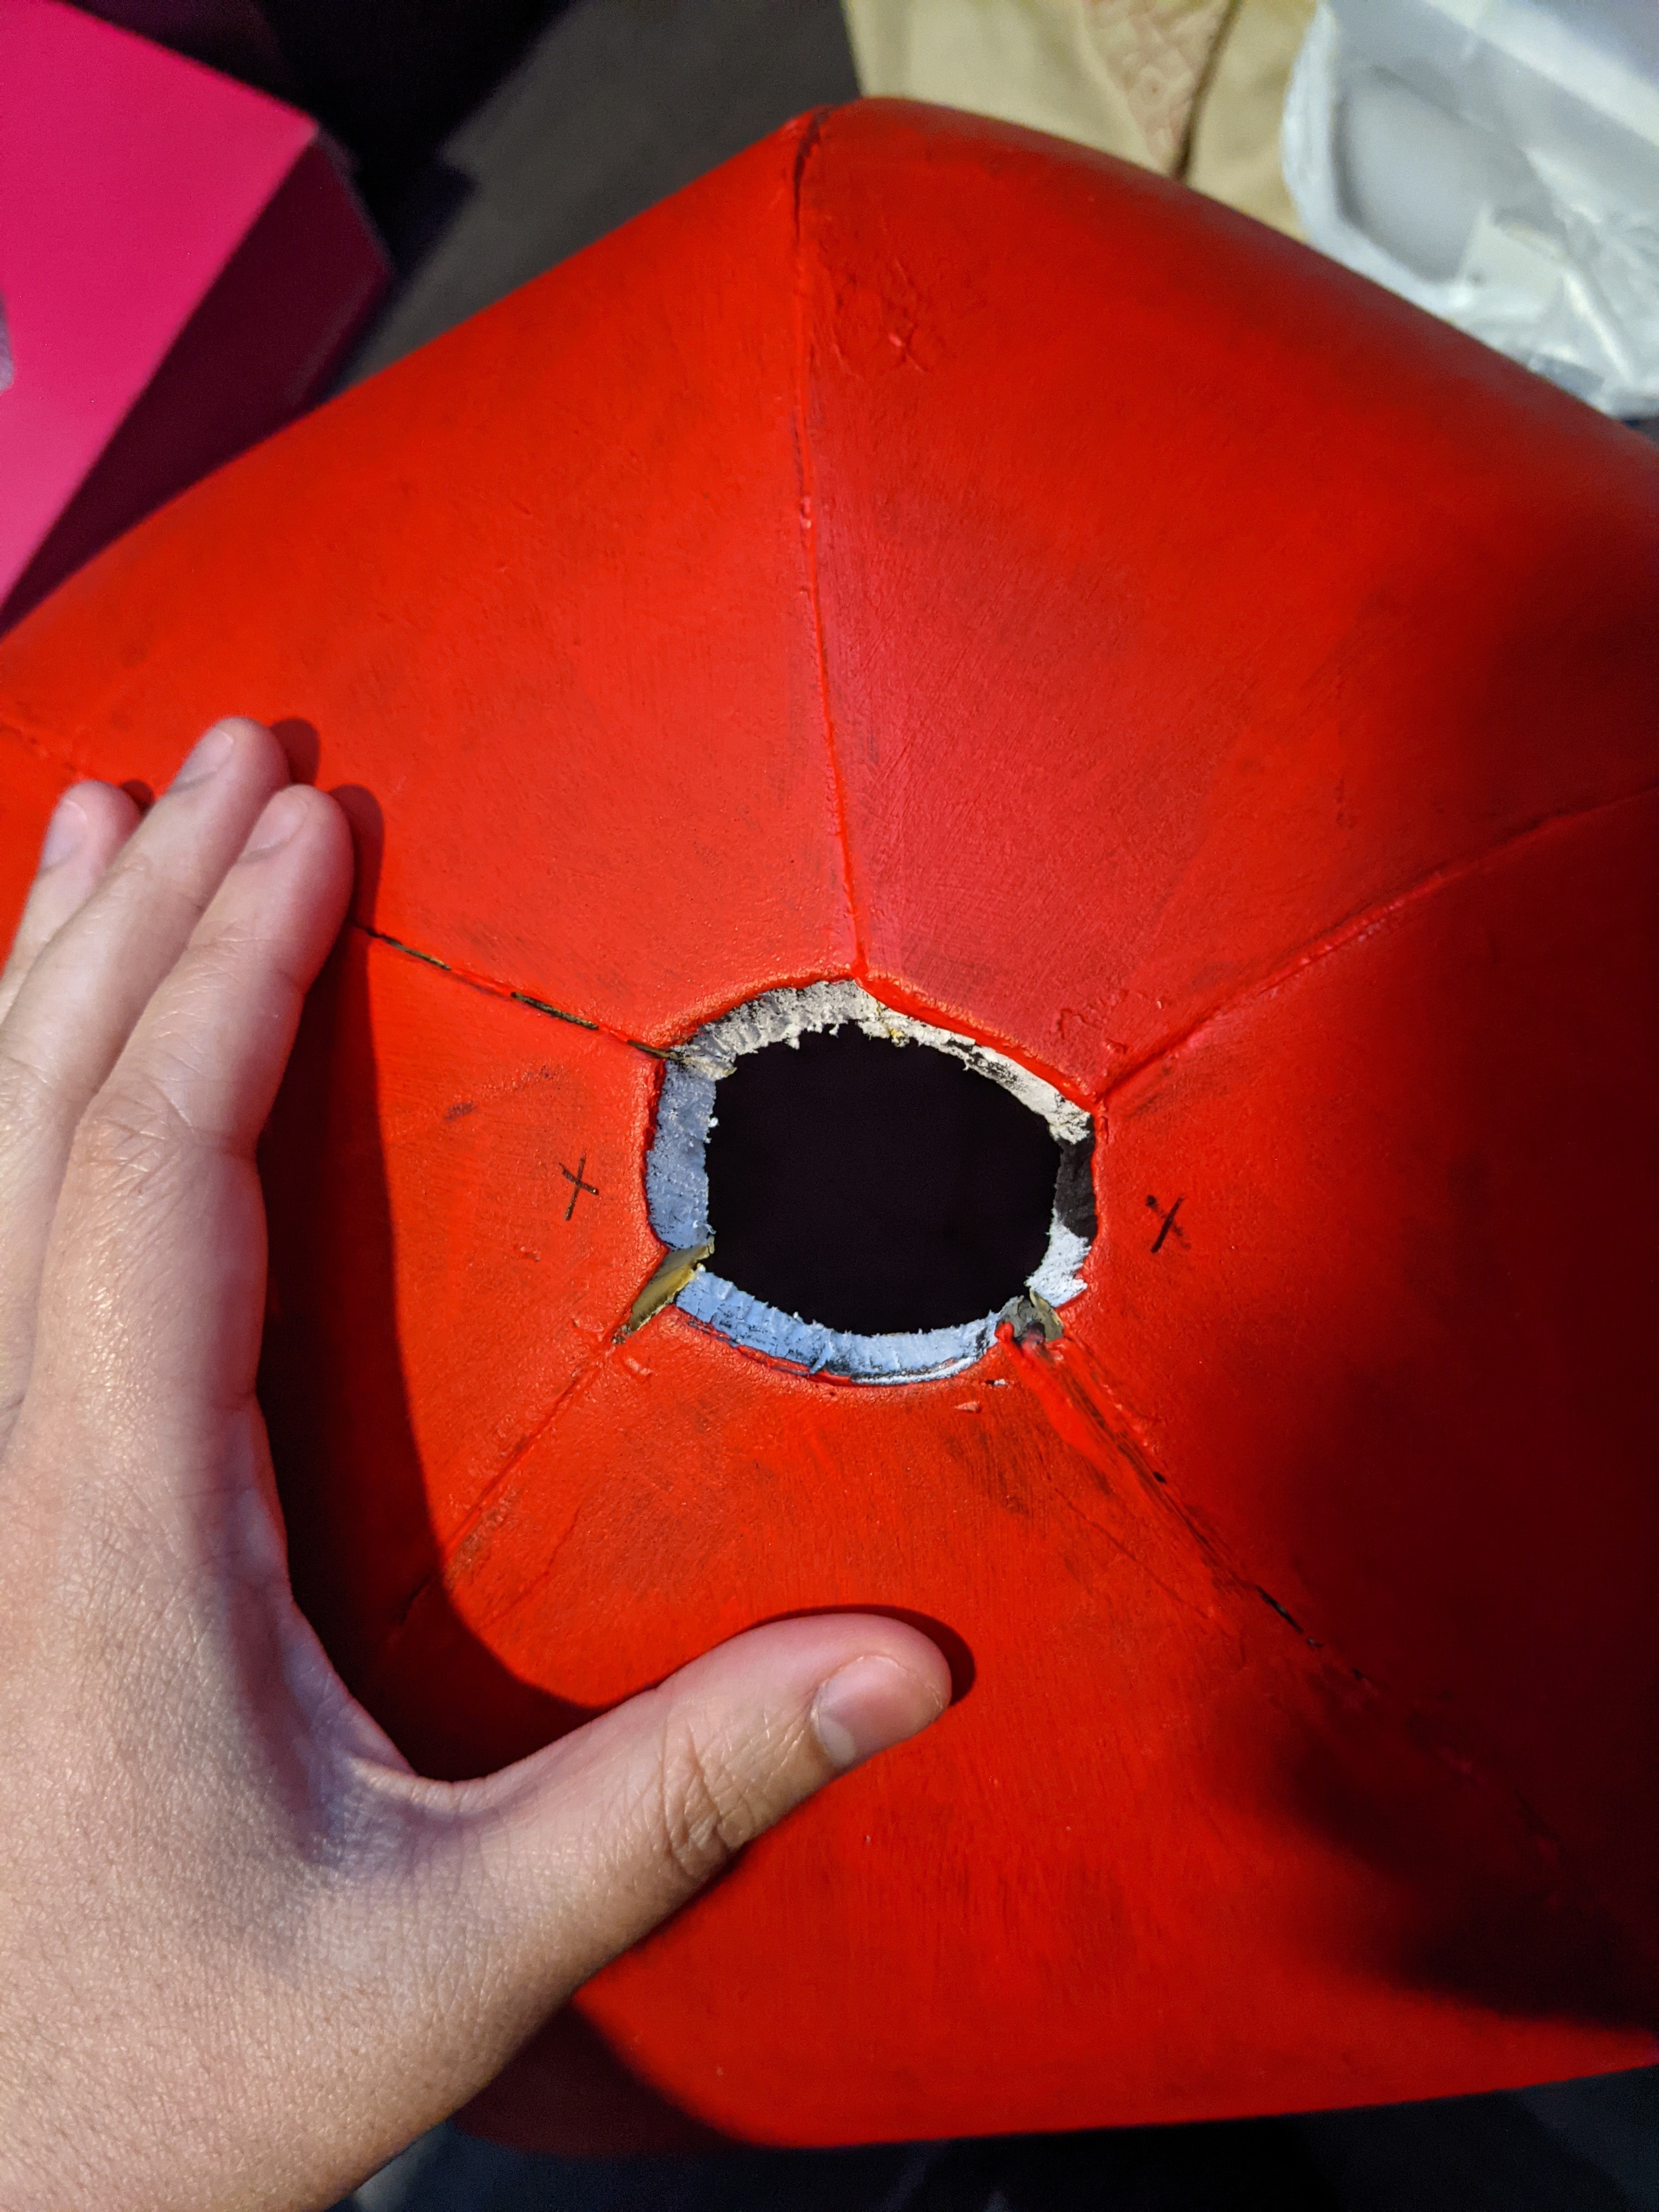
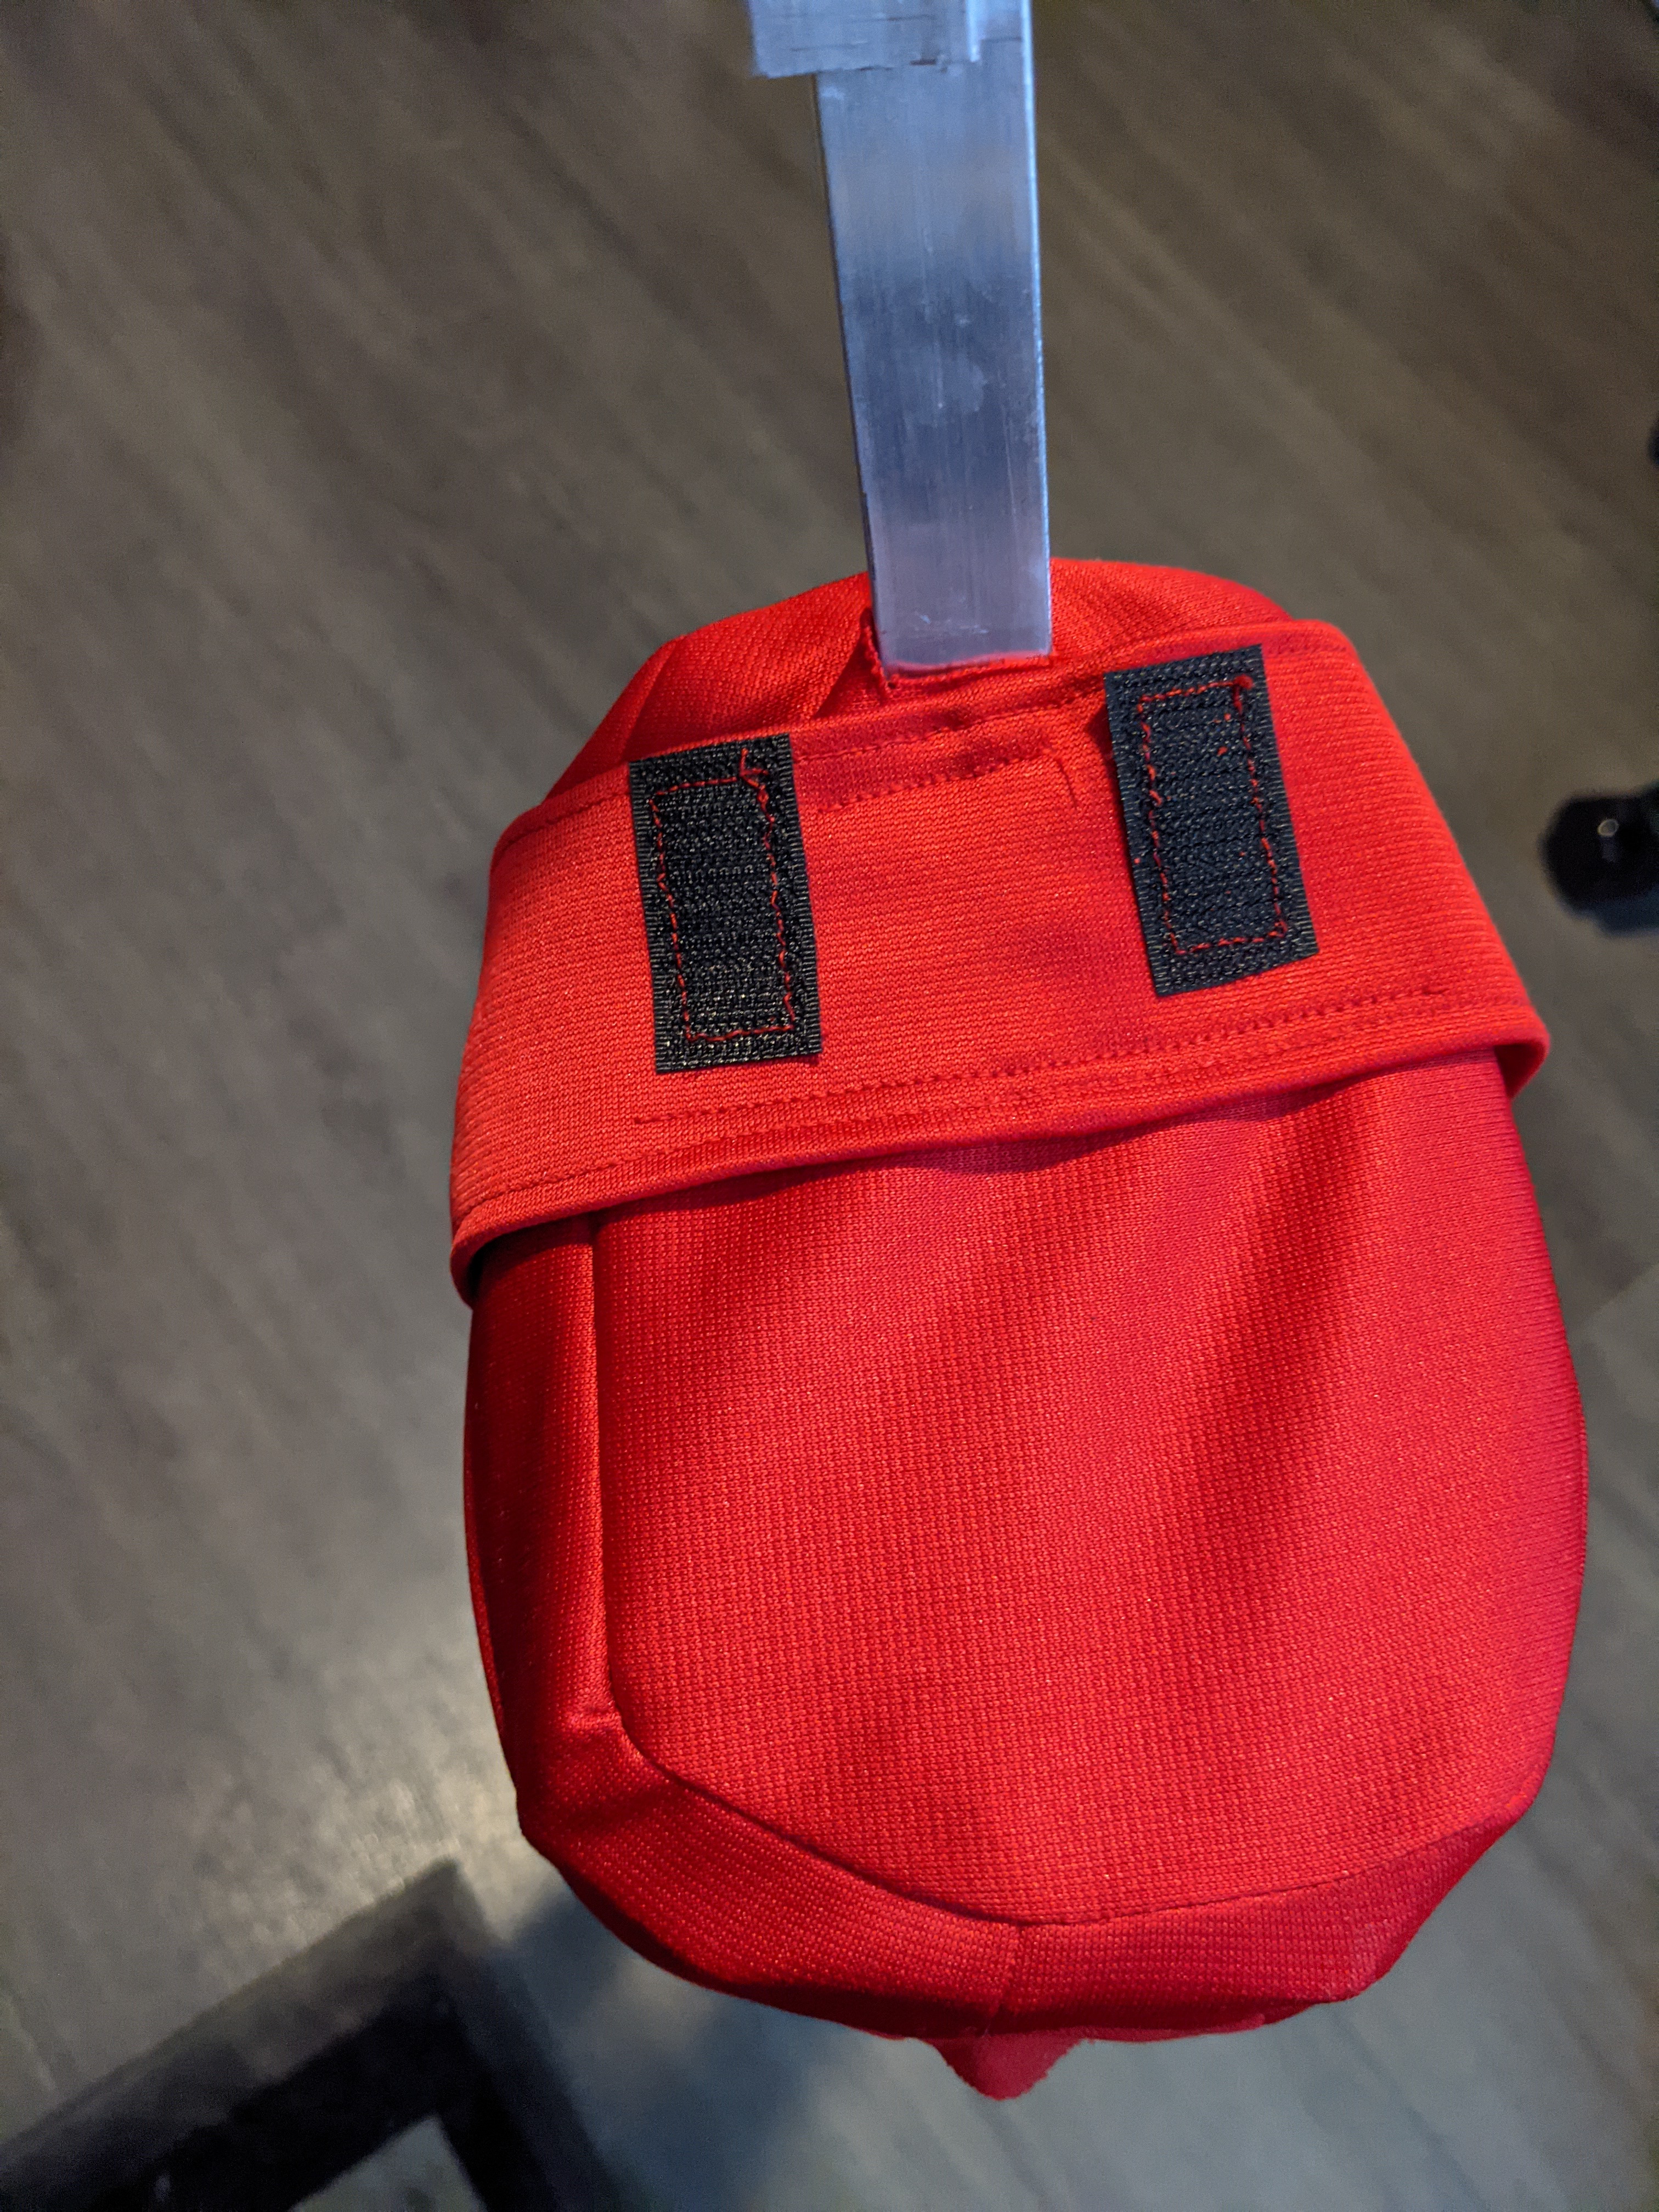
After cutting a small hole at the bottom for where the aluminum bar of the harness would go, I set out to painting the stinger. At first, I attempted to cover the pen marks with white paint. This proved fruitless. So, I painted the entire stinger in black paint. You can see in the image that it was the only way to make it so the pen marks didn’t show up through the paint.
I ended up having to use a shoebox and later a pot to prop up the stinger for painting. Seemed to work out just fine!


Once the black layer was done, I used painters tape to make 4 lines, which would divide the stinger into 5 stripes: 2 yellow and 3 red. I started with yellow paint and using a sponge brush, applied 5 coats of yellow paint. After removing the painters tape, I did the same thing with the red paint, being very careful to follow the yellow line edges. (I didn’t want to use painters tape because it had managed to peel a little bit of black paint, so I was worried it would peel some of the yellow paint.) The red only took about 3 coats of paint.


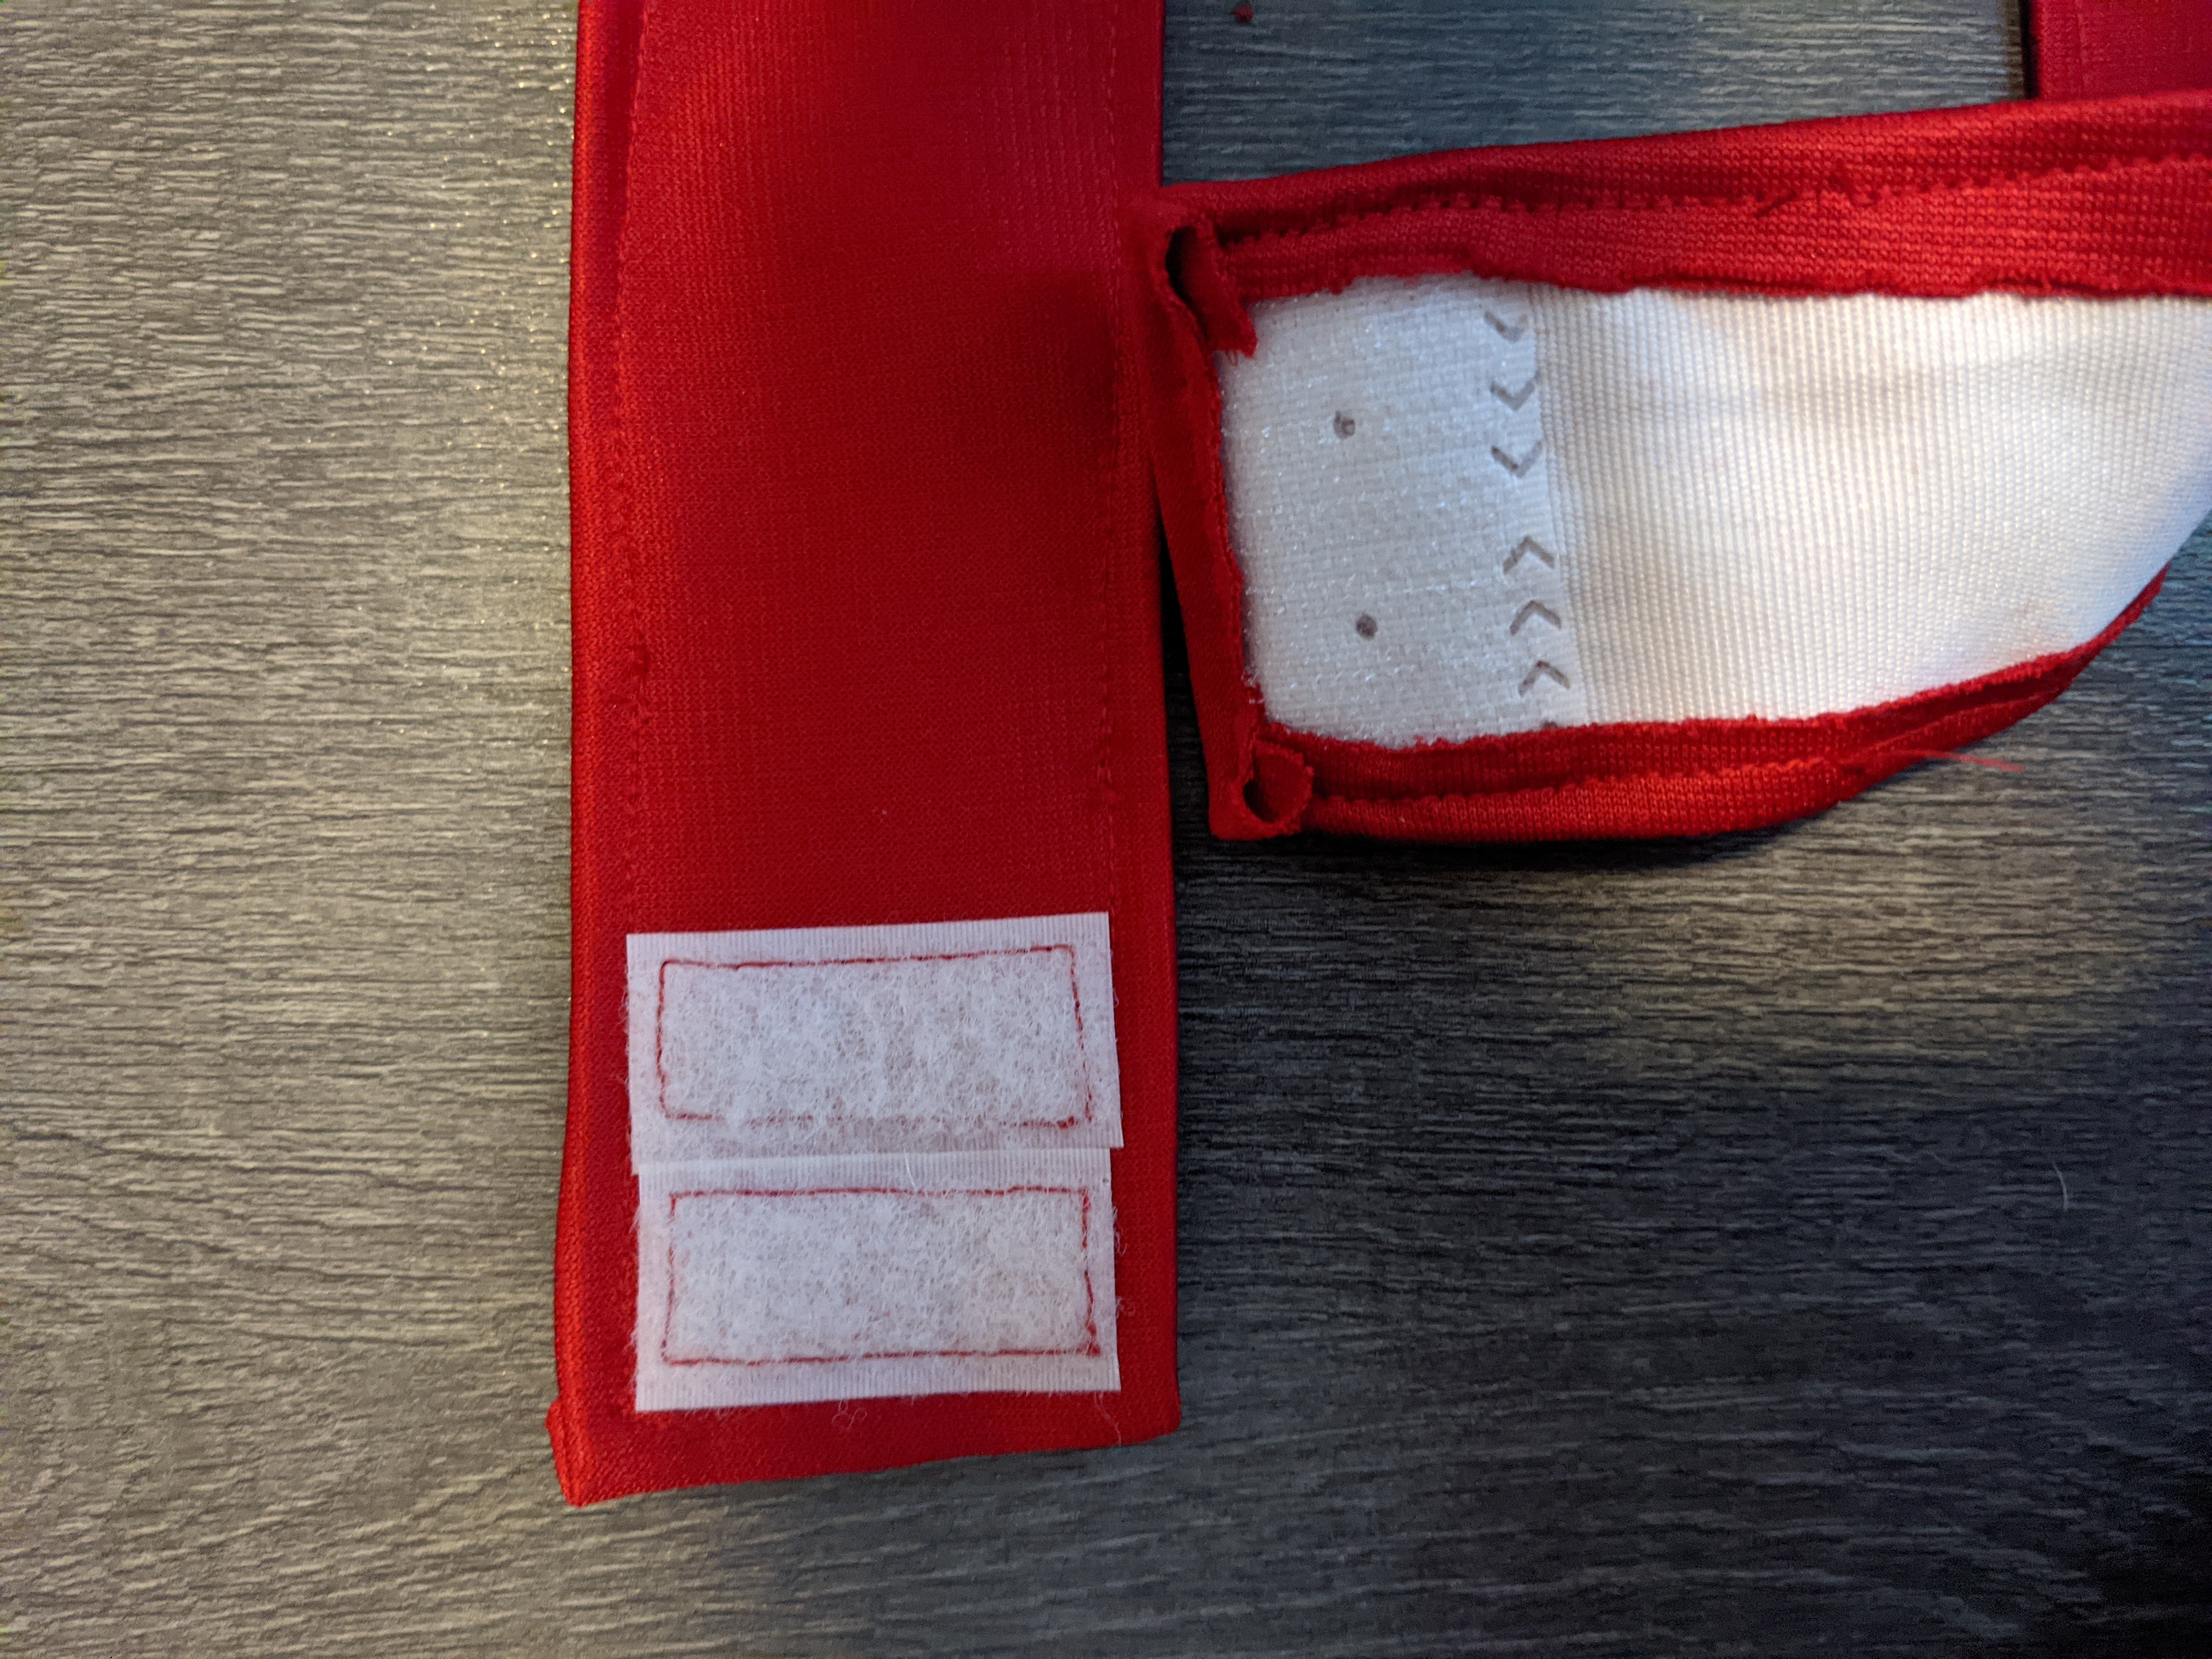
The very last step for the stinger was to glue velcro to the base of it. This would attach to the harness. I marked where I wanted them to go and simply hot glued the velcro pieces on. I made sure to keep the matching velcro pieces in a safe spot so I wouldn’t lost them, as I would need to glue them to the harness later.


Stinger Harness
At the suggestion of Monica (who had provided the pattern), I used Kinpatsu Cosplay’s tail harness tutorial for the harness. I bought the same supplies she had linked in the video description. I followed the tutorial pretty closely but made some modifications to suit my needs.
First step was making the PVC board base. I didn’t make any modifications here. Like Kinpatsu said, I cut two pieces of PVC board about 10cm x 15cm, cutting off the corners. Then I glued them together with super glue and sanded the edges.


The next part required some help. Kasey was gracious enough to drill the holes into both the aluminum bar and PVC board. It took a few attempts to get the holes just right to fit the chicago screws. Once the chicago screws were in, Kasey bent the bar to the correct angle for the stinger and then also bent the excess bar length down since we didn’t really have an easy way to cut it to the right length. I taped it down with the duct tape so it wouldn’t wobble.


After that, I hot glued the upholstery foam I had cut to size to the underside of the harness base. I had to cut 2″ foam in half because I didn’t have any 1″ foam available and didn’t feel like bothering to buy some when I had perfectly good 2″ foam on me!
This is where my harness starts to differ from Kinpatsu’s. Her tutorial calls for cutting a hole in your cosplay so that the harness could be tucked underneath it, hiding it. I did not want to ruin the beautiful bodysuit that Fairchild had made me (and it would’ve required messing up the zipper), so I opted for covering the harness in matching fabric instead. Thankfully Fairchild had given me all the scrap fabric that was leftover from making the bodysuit, so I could match it exactly. But first, I’d need to make sure I had enough red fabric for the strap.
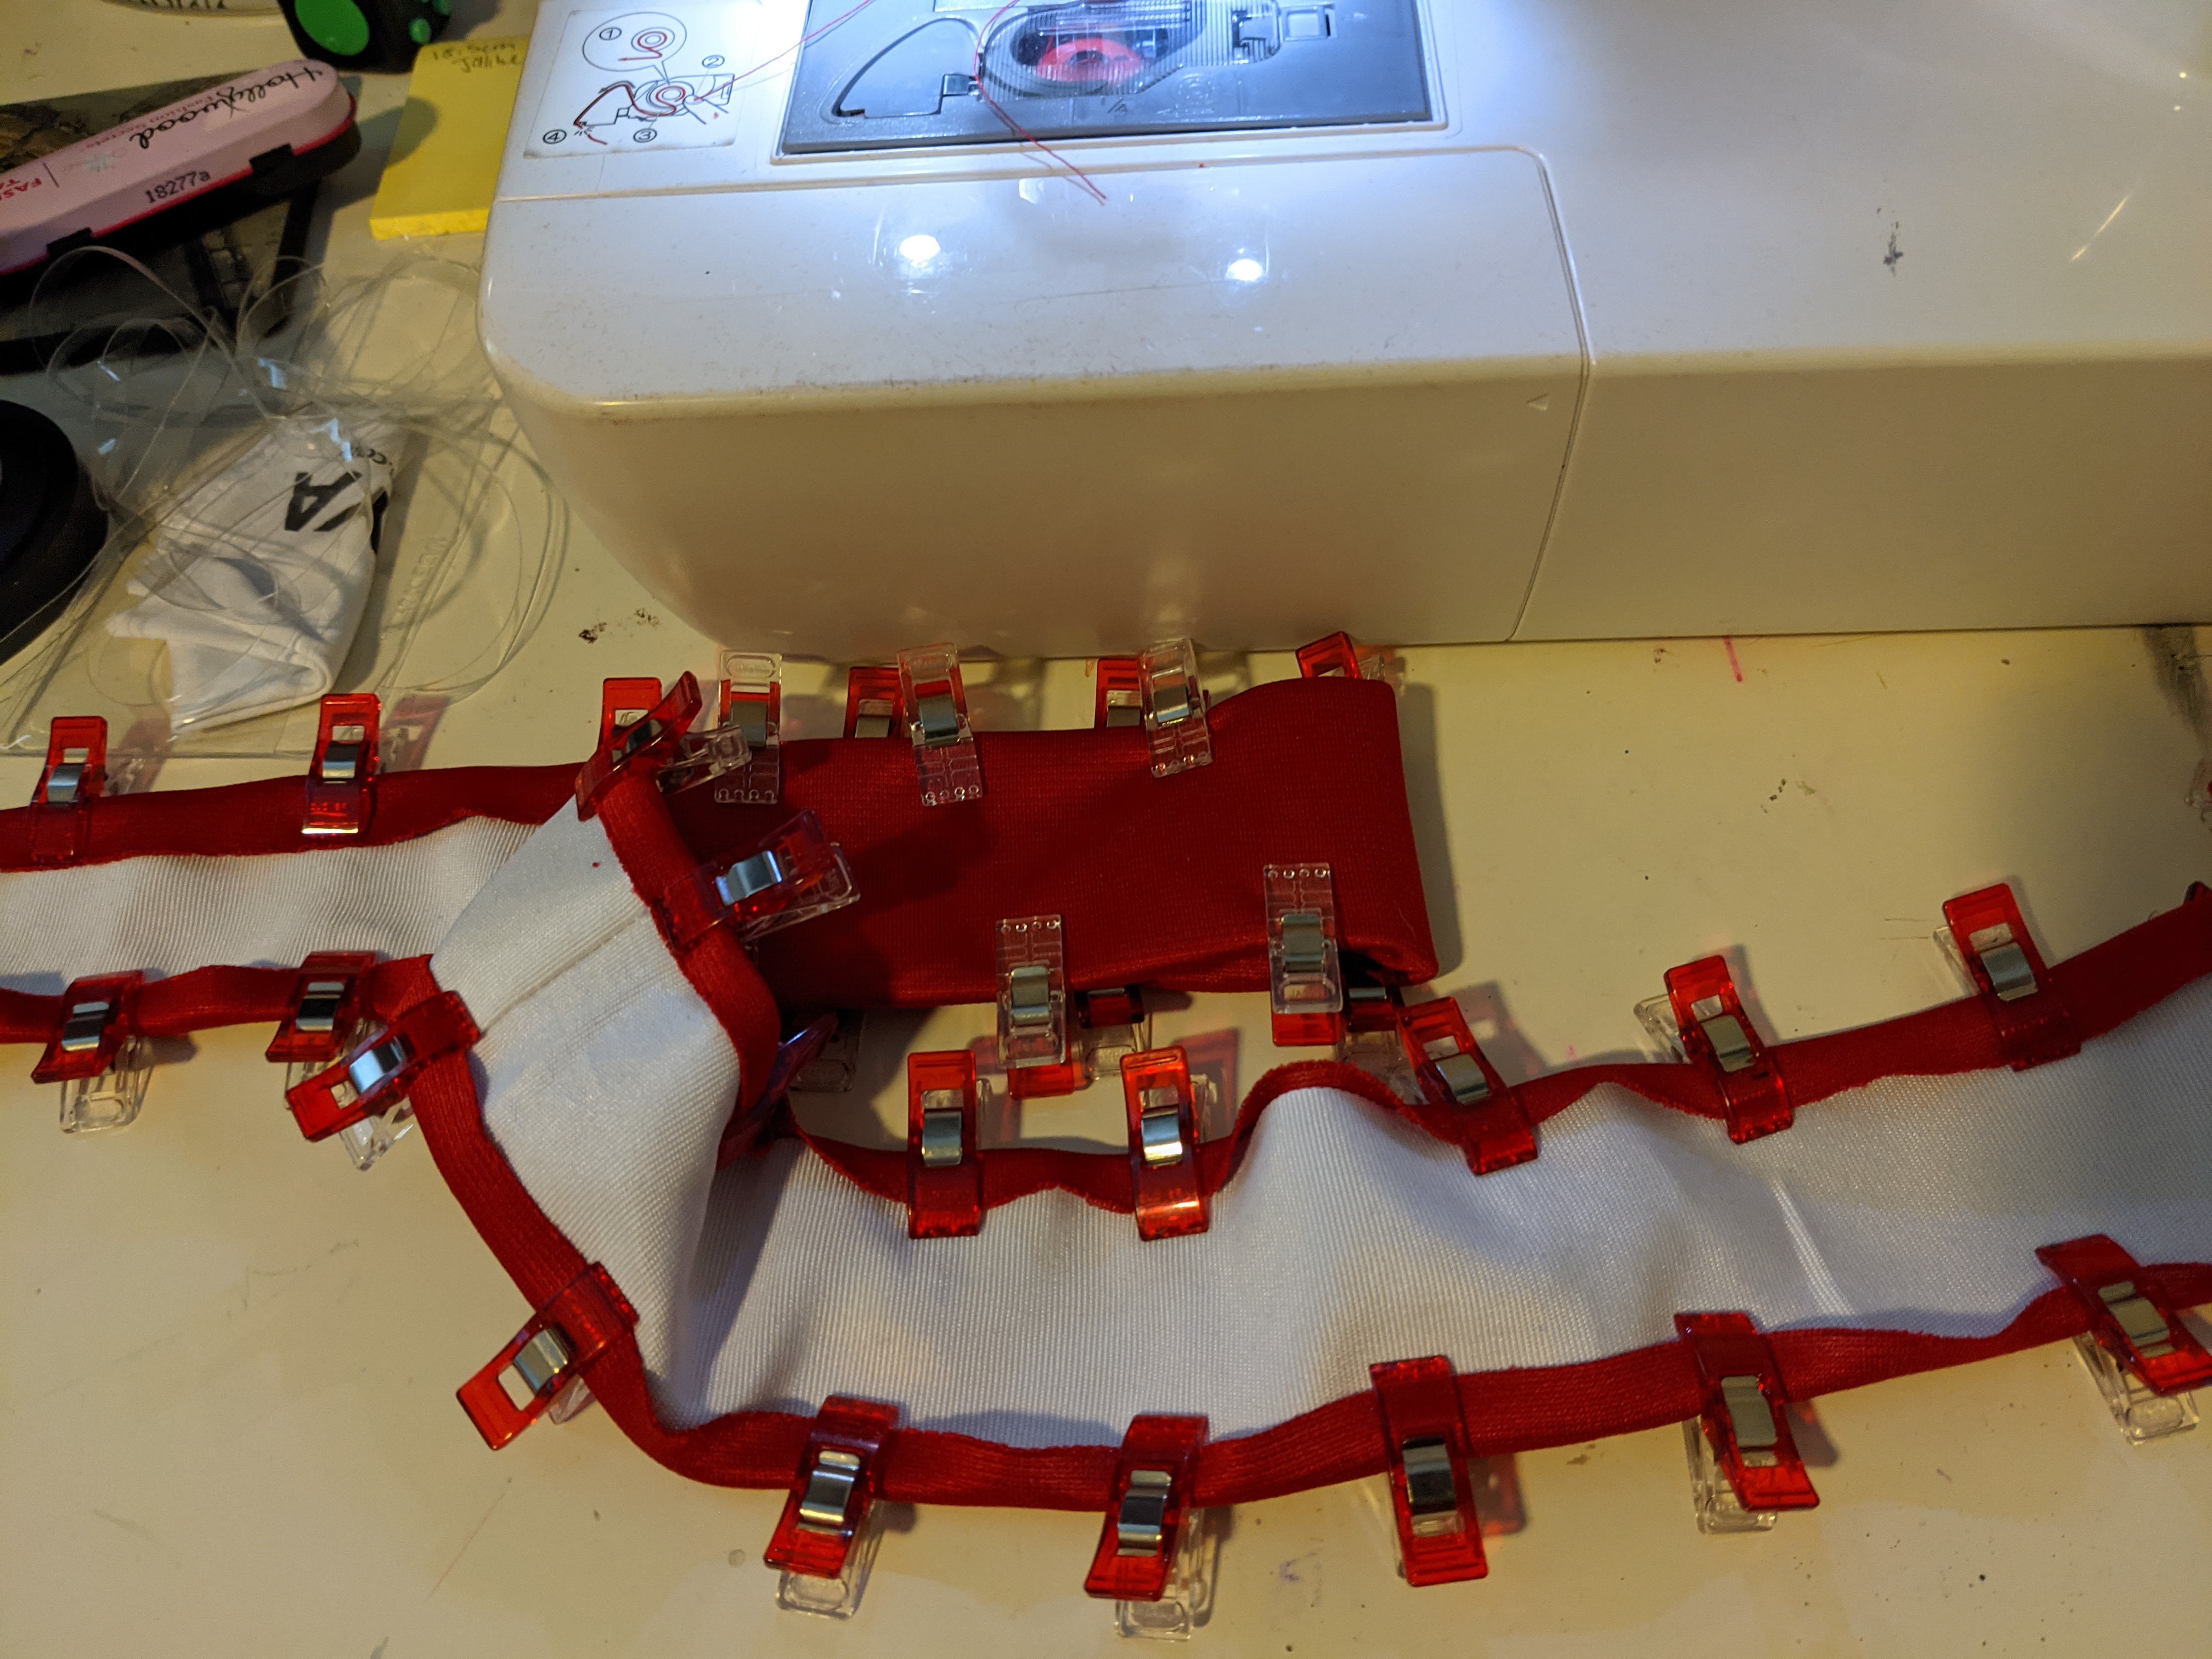
I ended up covering 2″ ribbon I already had in the red fabric for the strap because, after multiple tests, I learned that the red fabric alone was too stretchy to sufficiently hold the harness to my back. The ribbon was sturdier, so I used that as a base. I clipped the edges down and then stitched in place. Once that was done, I added velcro to the ends.
One minor detail I also added was I cut a small length of fabric along the bias to make a matching ribbon. I used this to tie a little bow in the front of the strap, just because I thought it’d look cute!
Next was covering the harness, a process that was very imprecise since I was just using what scrap fabric I had leftover from the harness strap and the leg ribbon. I unfortunately didn’t get many pictures of this process.
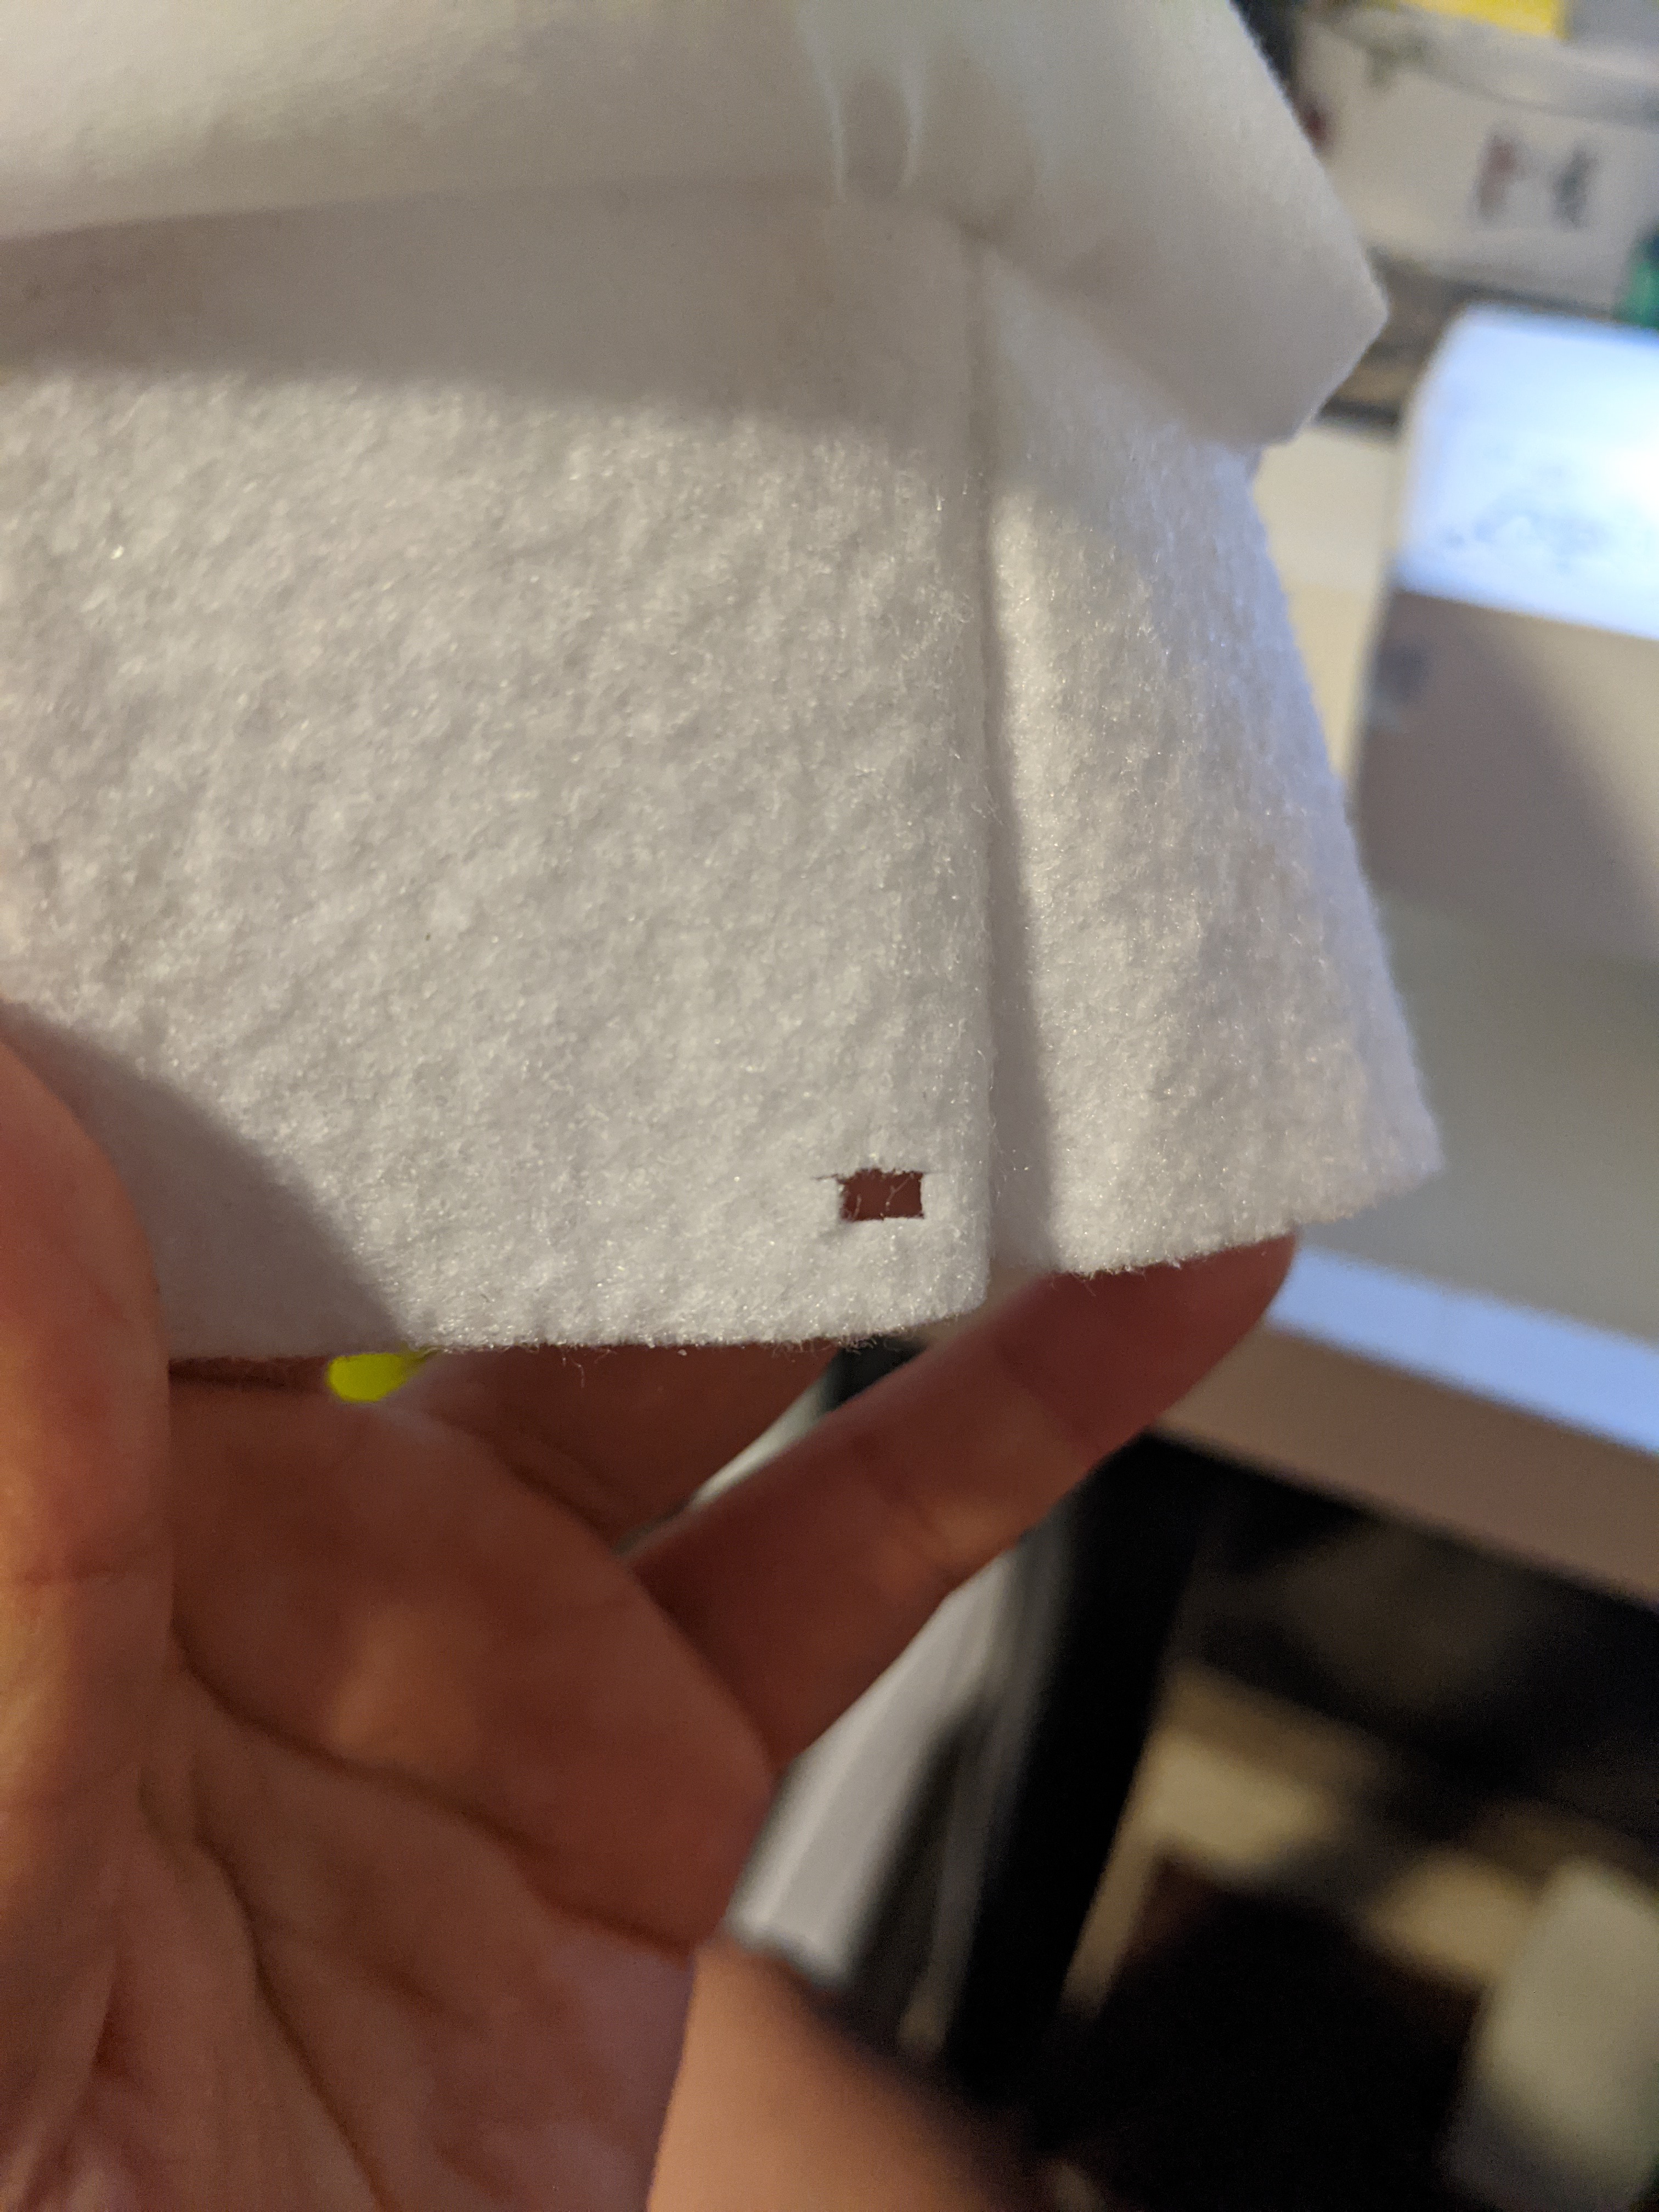
First, I cut out a piece of fabric that was the same shape as the PVC board but wider by 1cm all around for seam allowance. I then cut out a small rectangle at the top center of it, to be the hole for the aluminum bar. Then, I cut fabric strips about 1″ wide and the length of the circumference of the other piece. This required stitching together a few strips because of the dimensions of the leftover fabric. After clipping and then sewing the pieces together, I ended up with this:

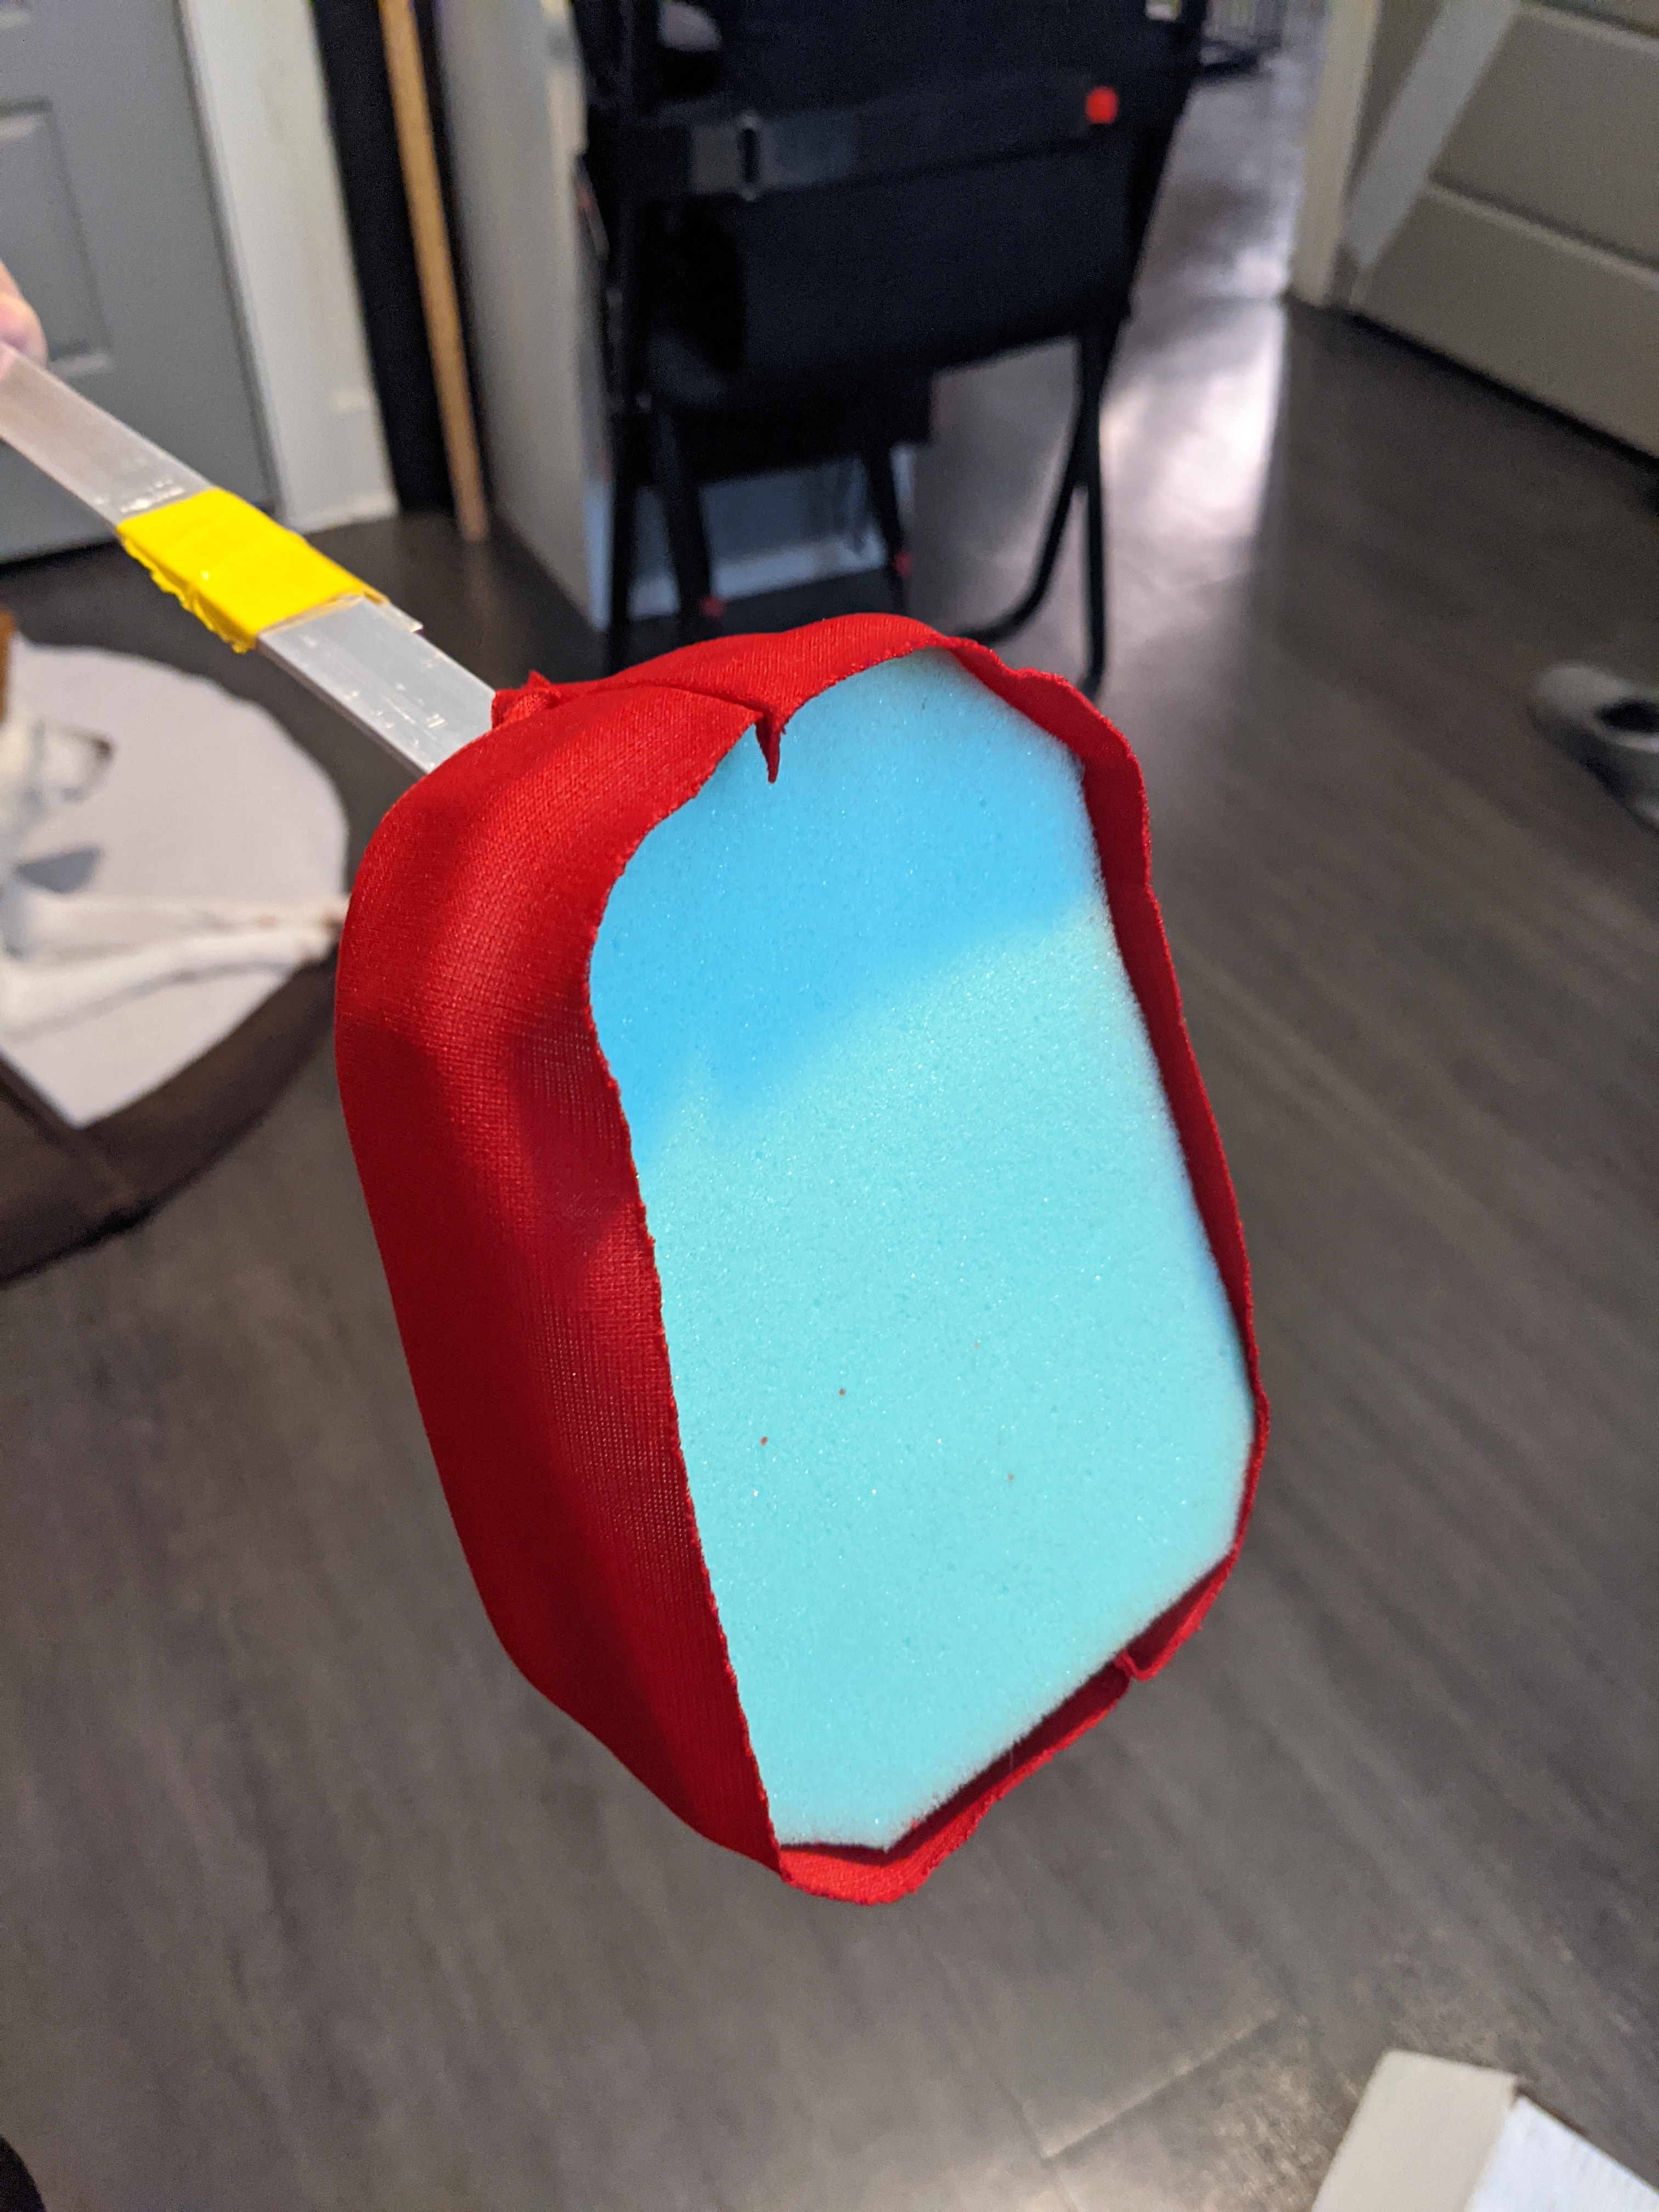
After doing a test, I realized that it still wasn’t quite enough, sometimes the cover would shift and expose the upholstery foam. So, again, I cut out 1″ strips of fabric, stitched them together so they’d be long enough, and added that to the cover. I wouldn’t have enough to cover the back entirely, but at least enough to cover the edges.
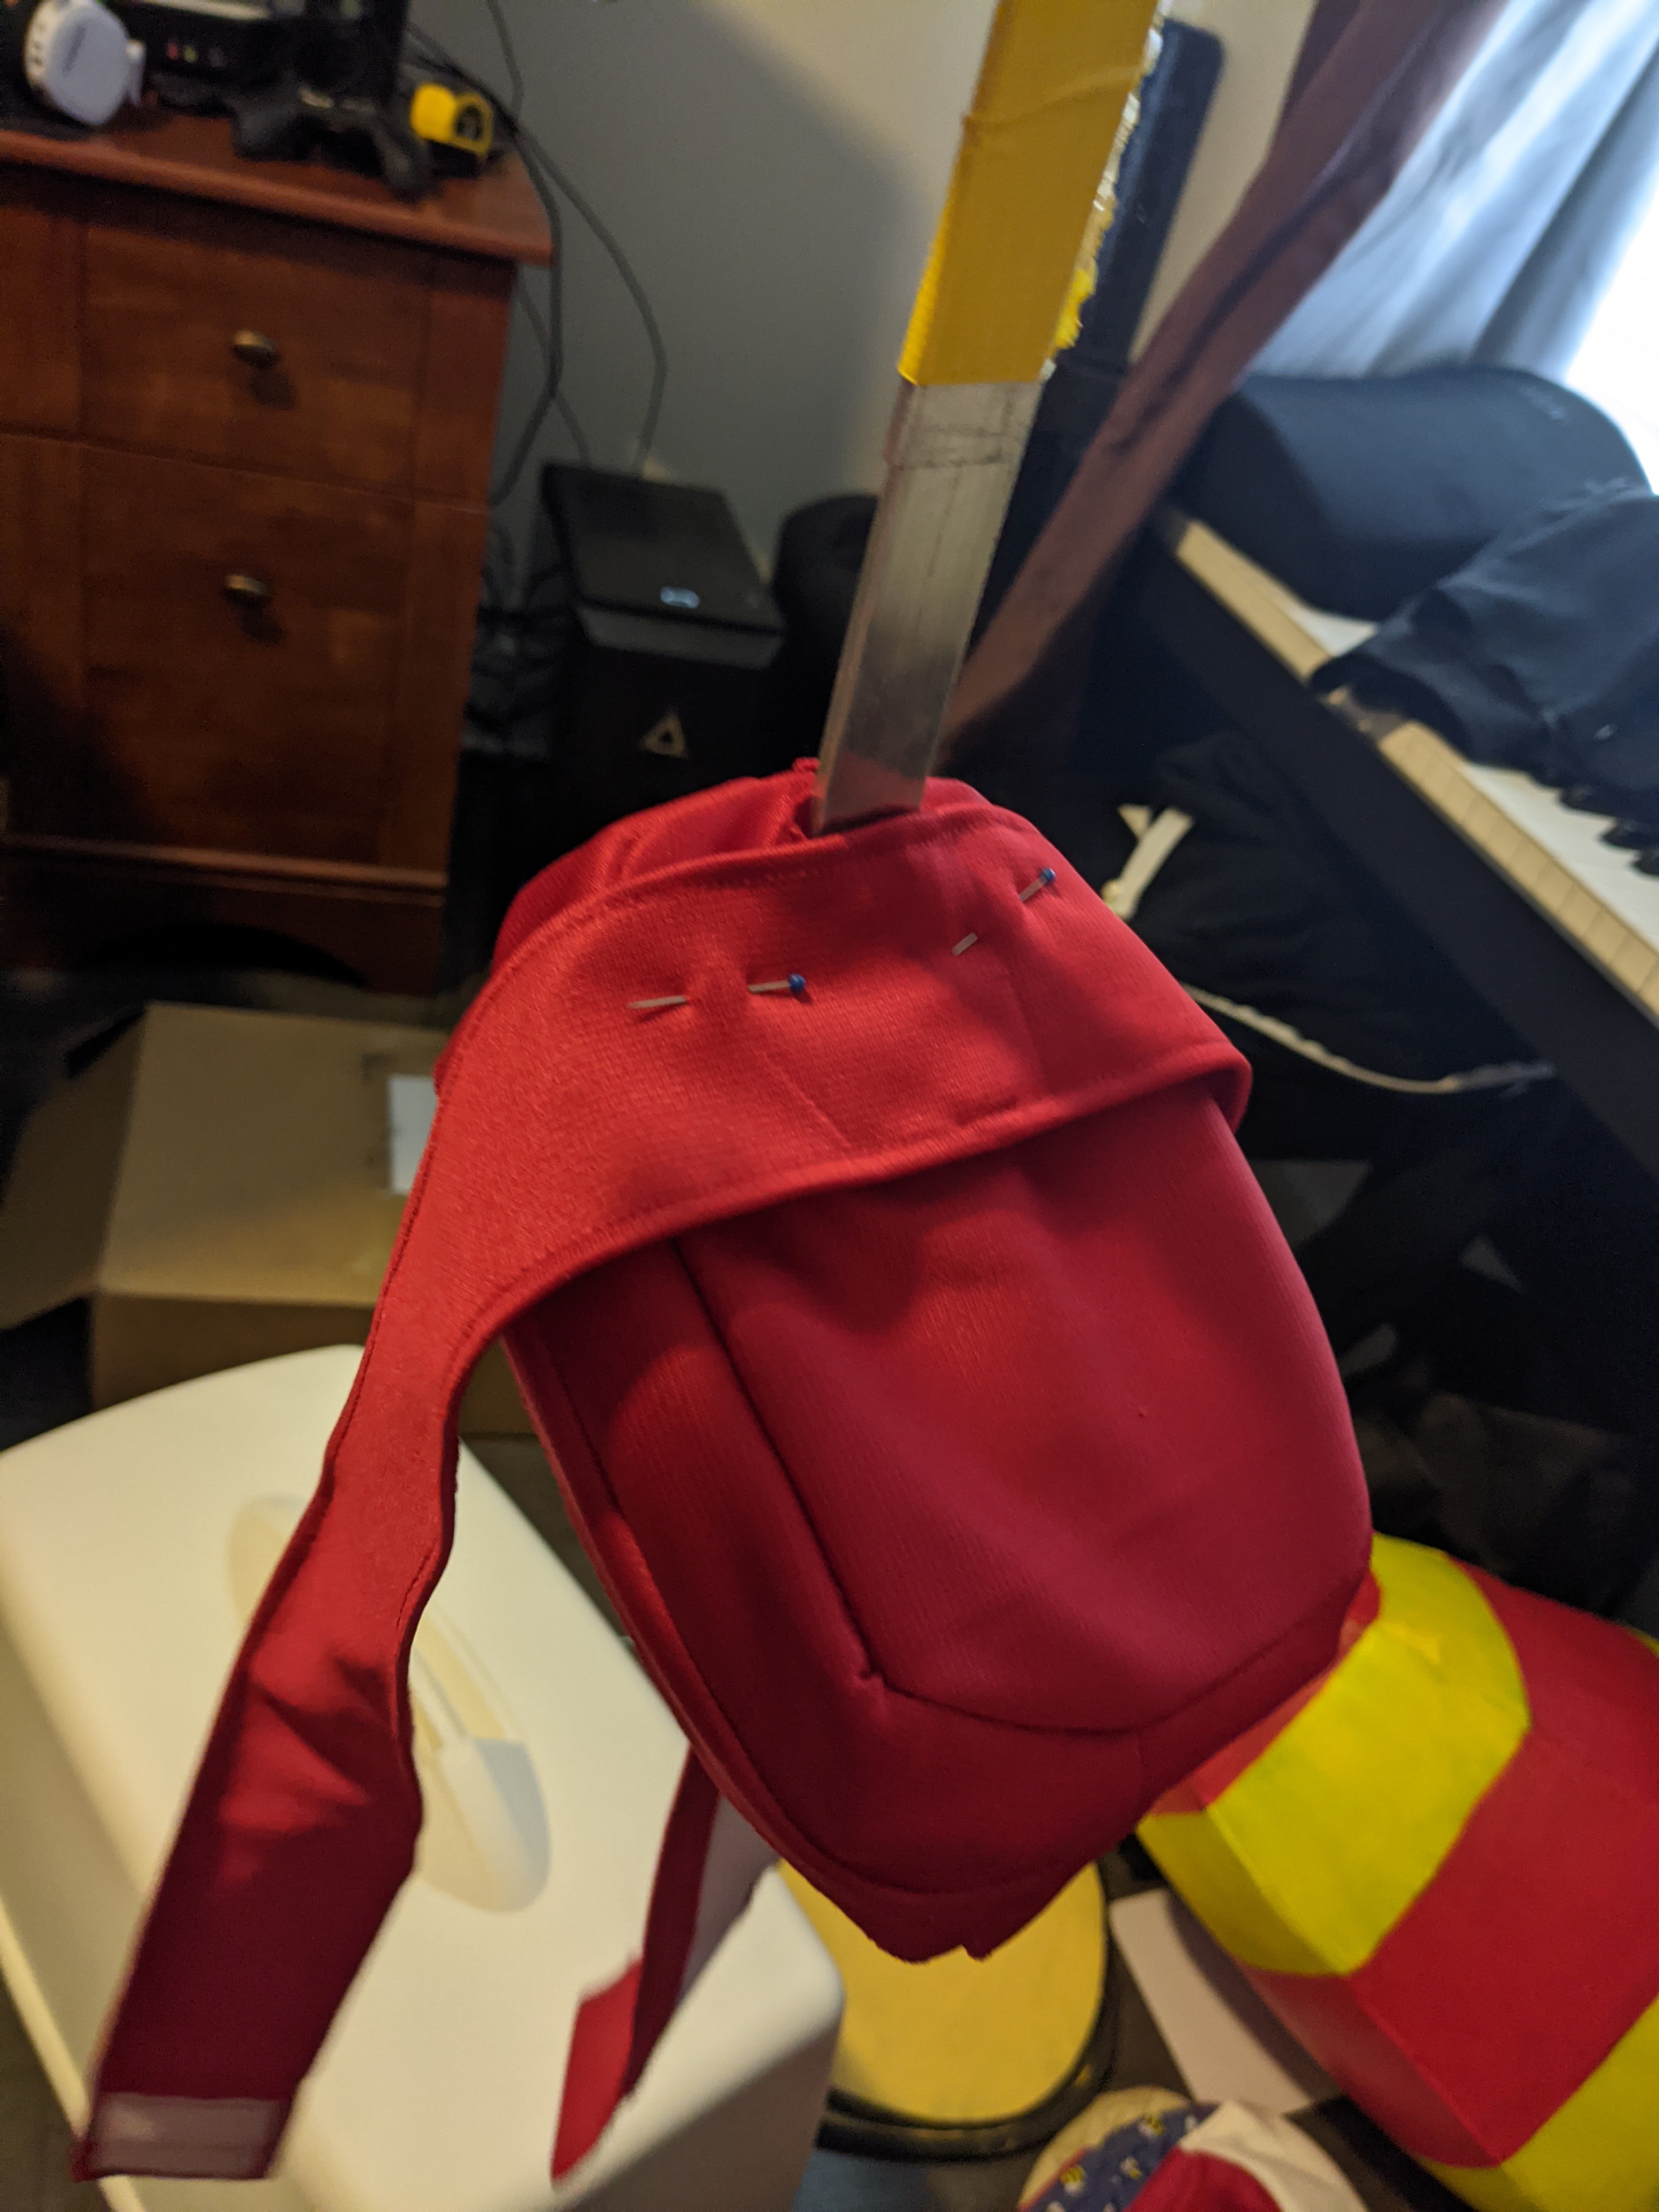
Once happy with that, I pinned and then stitched the matching velcro pieces that go with the stinger to the harness strap. I then stitched the strap itself to the harness cover. (Kinpatsu’s tutorial says to glue, but since that was ribbon to PVC board, it was fine, but mine is fabric-to-fabric, so sewing was required.) After that, the harness was complete!
Mini chef hat
Making the chef hat was very simple and only took me an hour! I used scrap interfacing and muslin I already had in my fabric stash.
First, I used interfacing to make the band. I used two pieces that I clipped together and placed on my head to test the size. Once happy with the dimensions, I stitched the sides together and turned it right side out.


Then, I cut out a circle of muslin fabric with my pinking shears. I kinda just fudged the dimensions and made an approximate size that I thought would be big enough. I happened to get it right on the first try, so that was nice! To test that it was the right shape and size, I clipped the circle to the band. To ensure even distribution, I started with the cardinal directions (N, S, E, W) and then did the ones in between those (NE, SE, SW, and NW). Finally, I added clips in between all the existing clips and made sure I folded all in the same direction. Once I turned it right side out, I knew I had a winning size! Always test it out before stitching it down!


Once clipped, I stitched the pieces together and turned it right side out. The final step was cutting holes on each side of the facing so that I could use bobbypins to attach it to my wig.


Accessories
Wrist cuffs
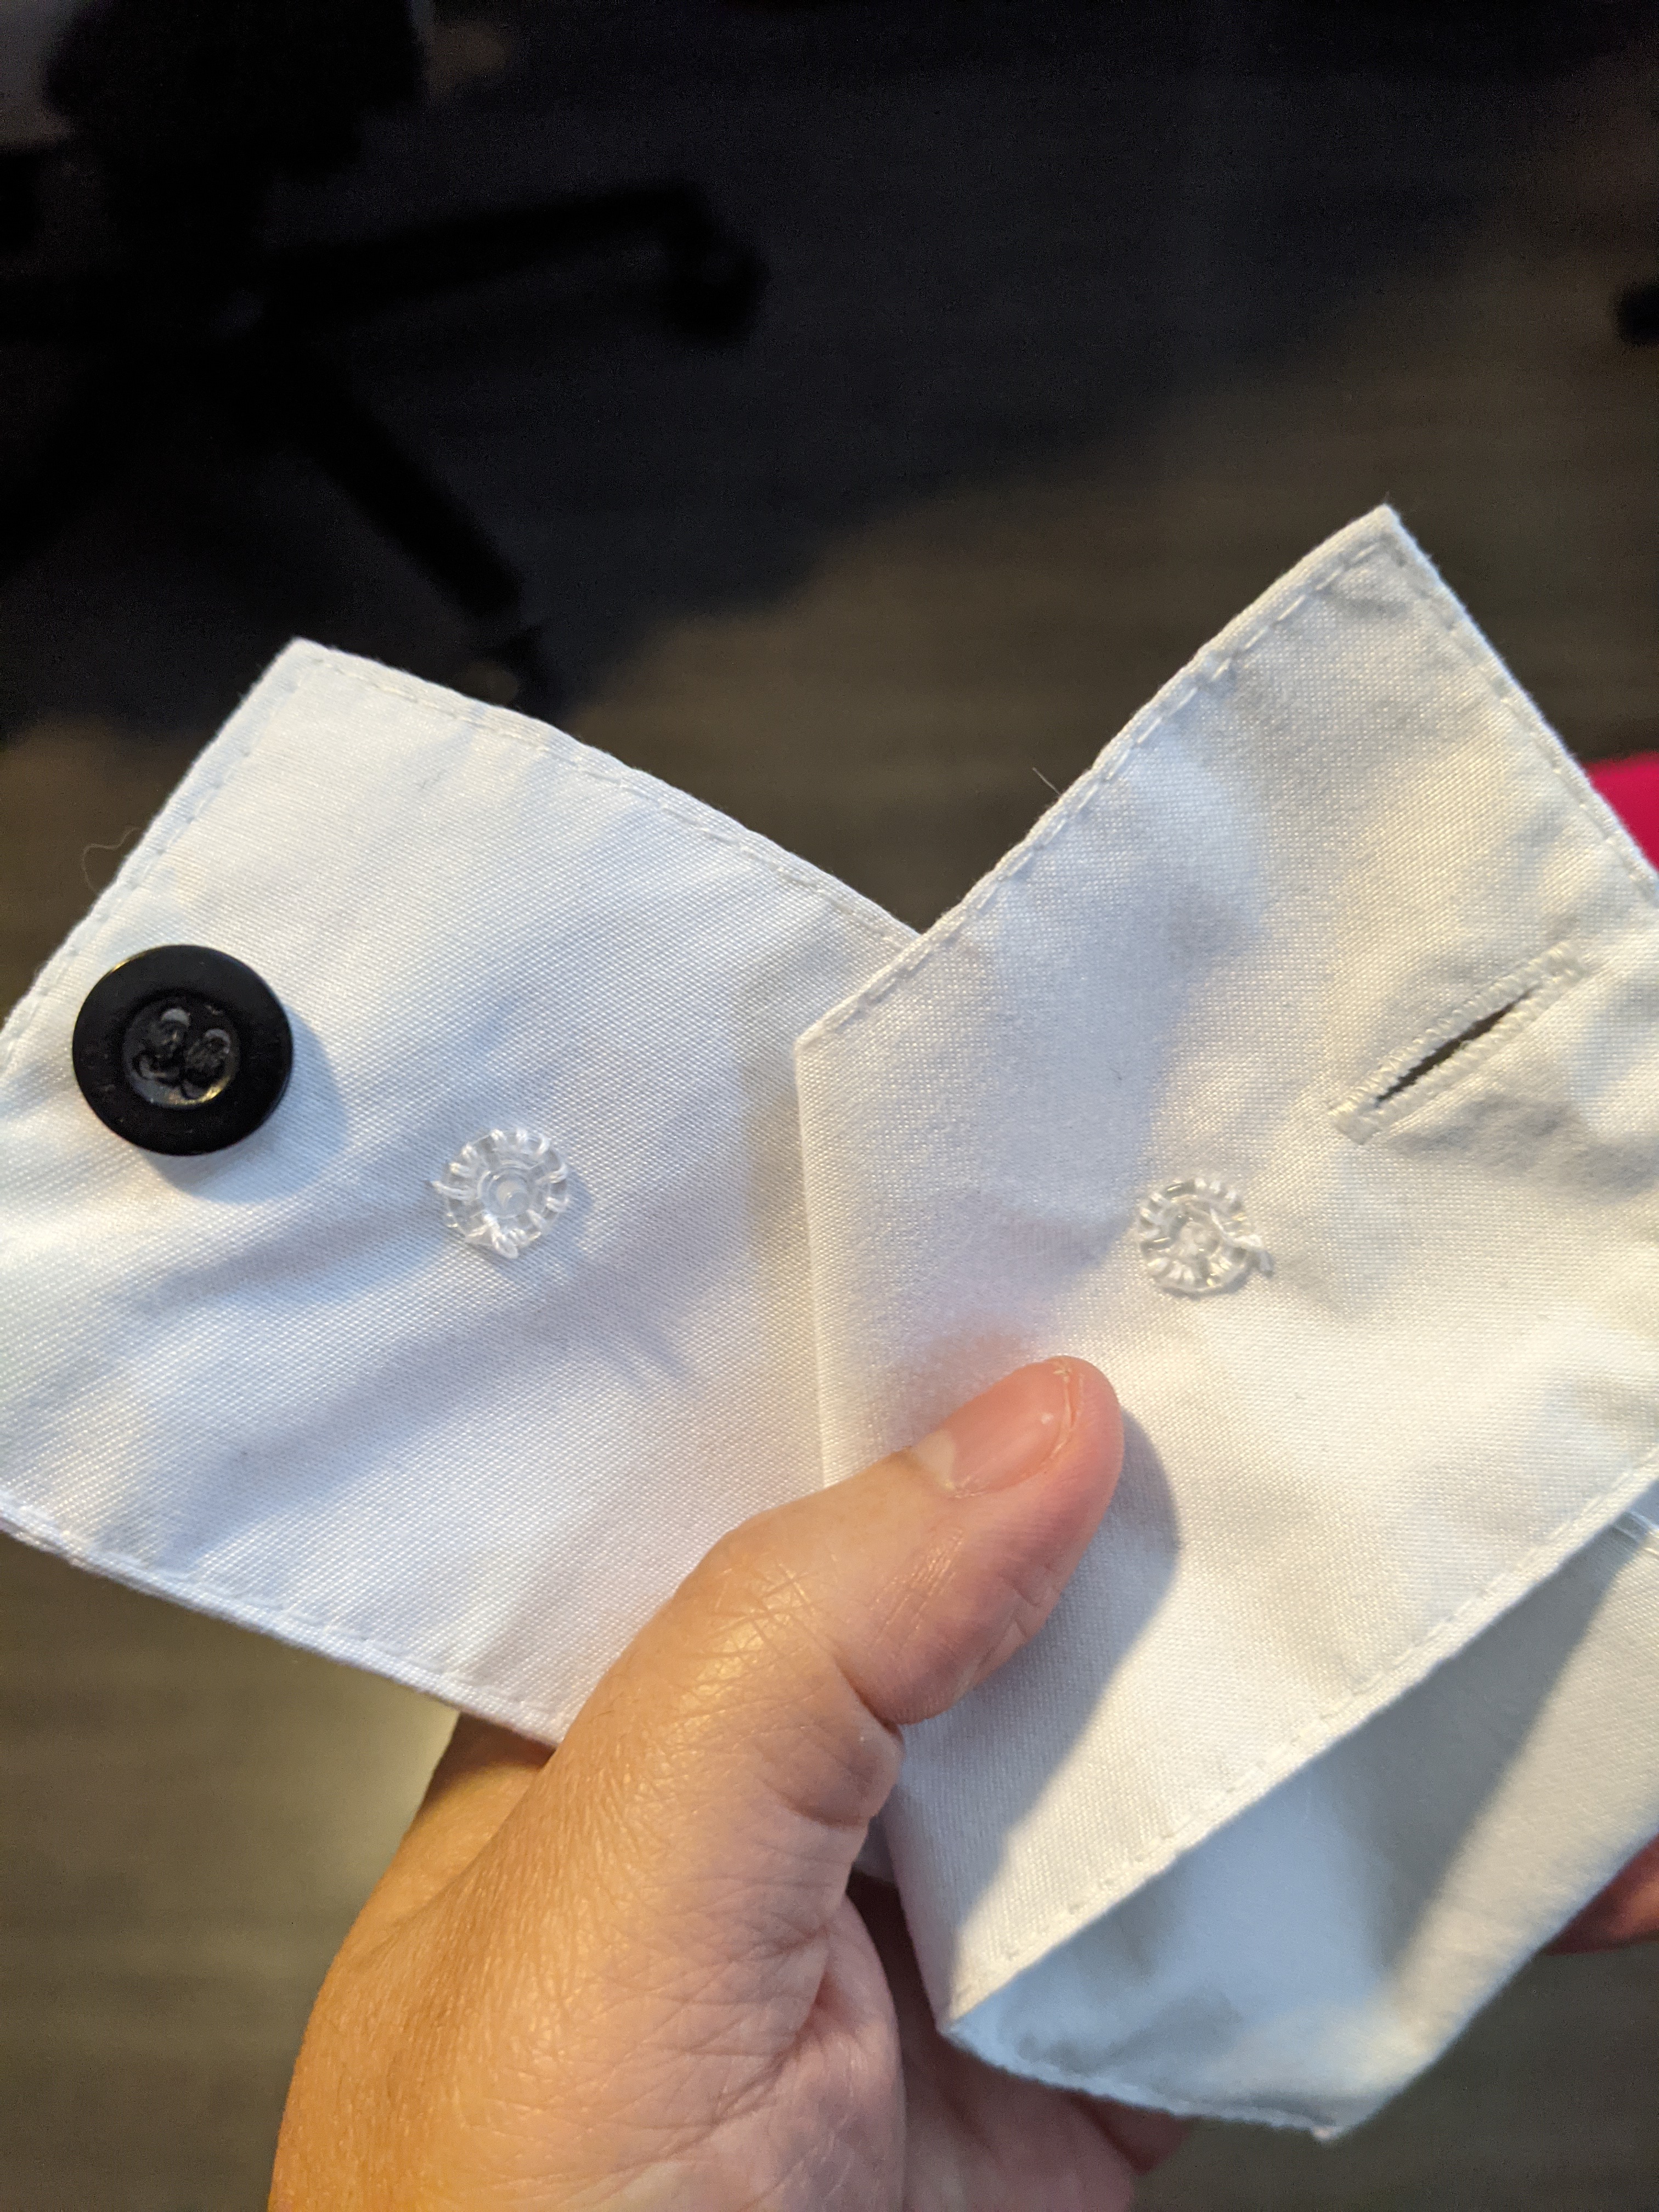
The wrist cuffs that came with the Amazon bunnysuit set, while cute, didn’t fit my wrists very well. They were very loose and prone to spinning. I didn’t have any interest in messing with the button/buttonhole, so I opted to just add snaps to make them tighter. To do this, I put on one wrist cuff, but inside out. I squeezed it so that it was tighter around my wrist, then marked with a fabric pen where the snap needed to go. (This is why I did it inside-out, so that the marking was on the inside rather than outside.) After adding both sides of the snaps. I did the same thing on the other wrist cuff. Easy peasy!

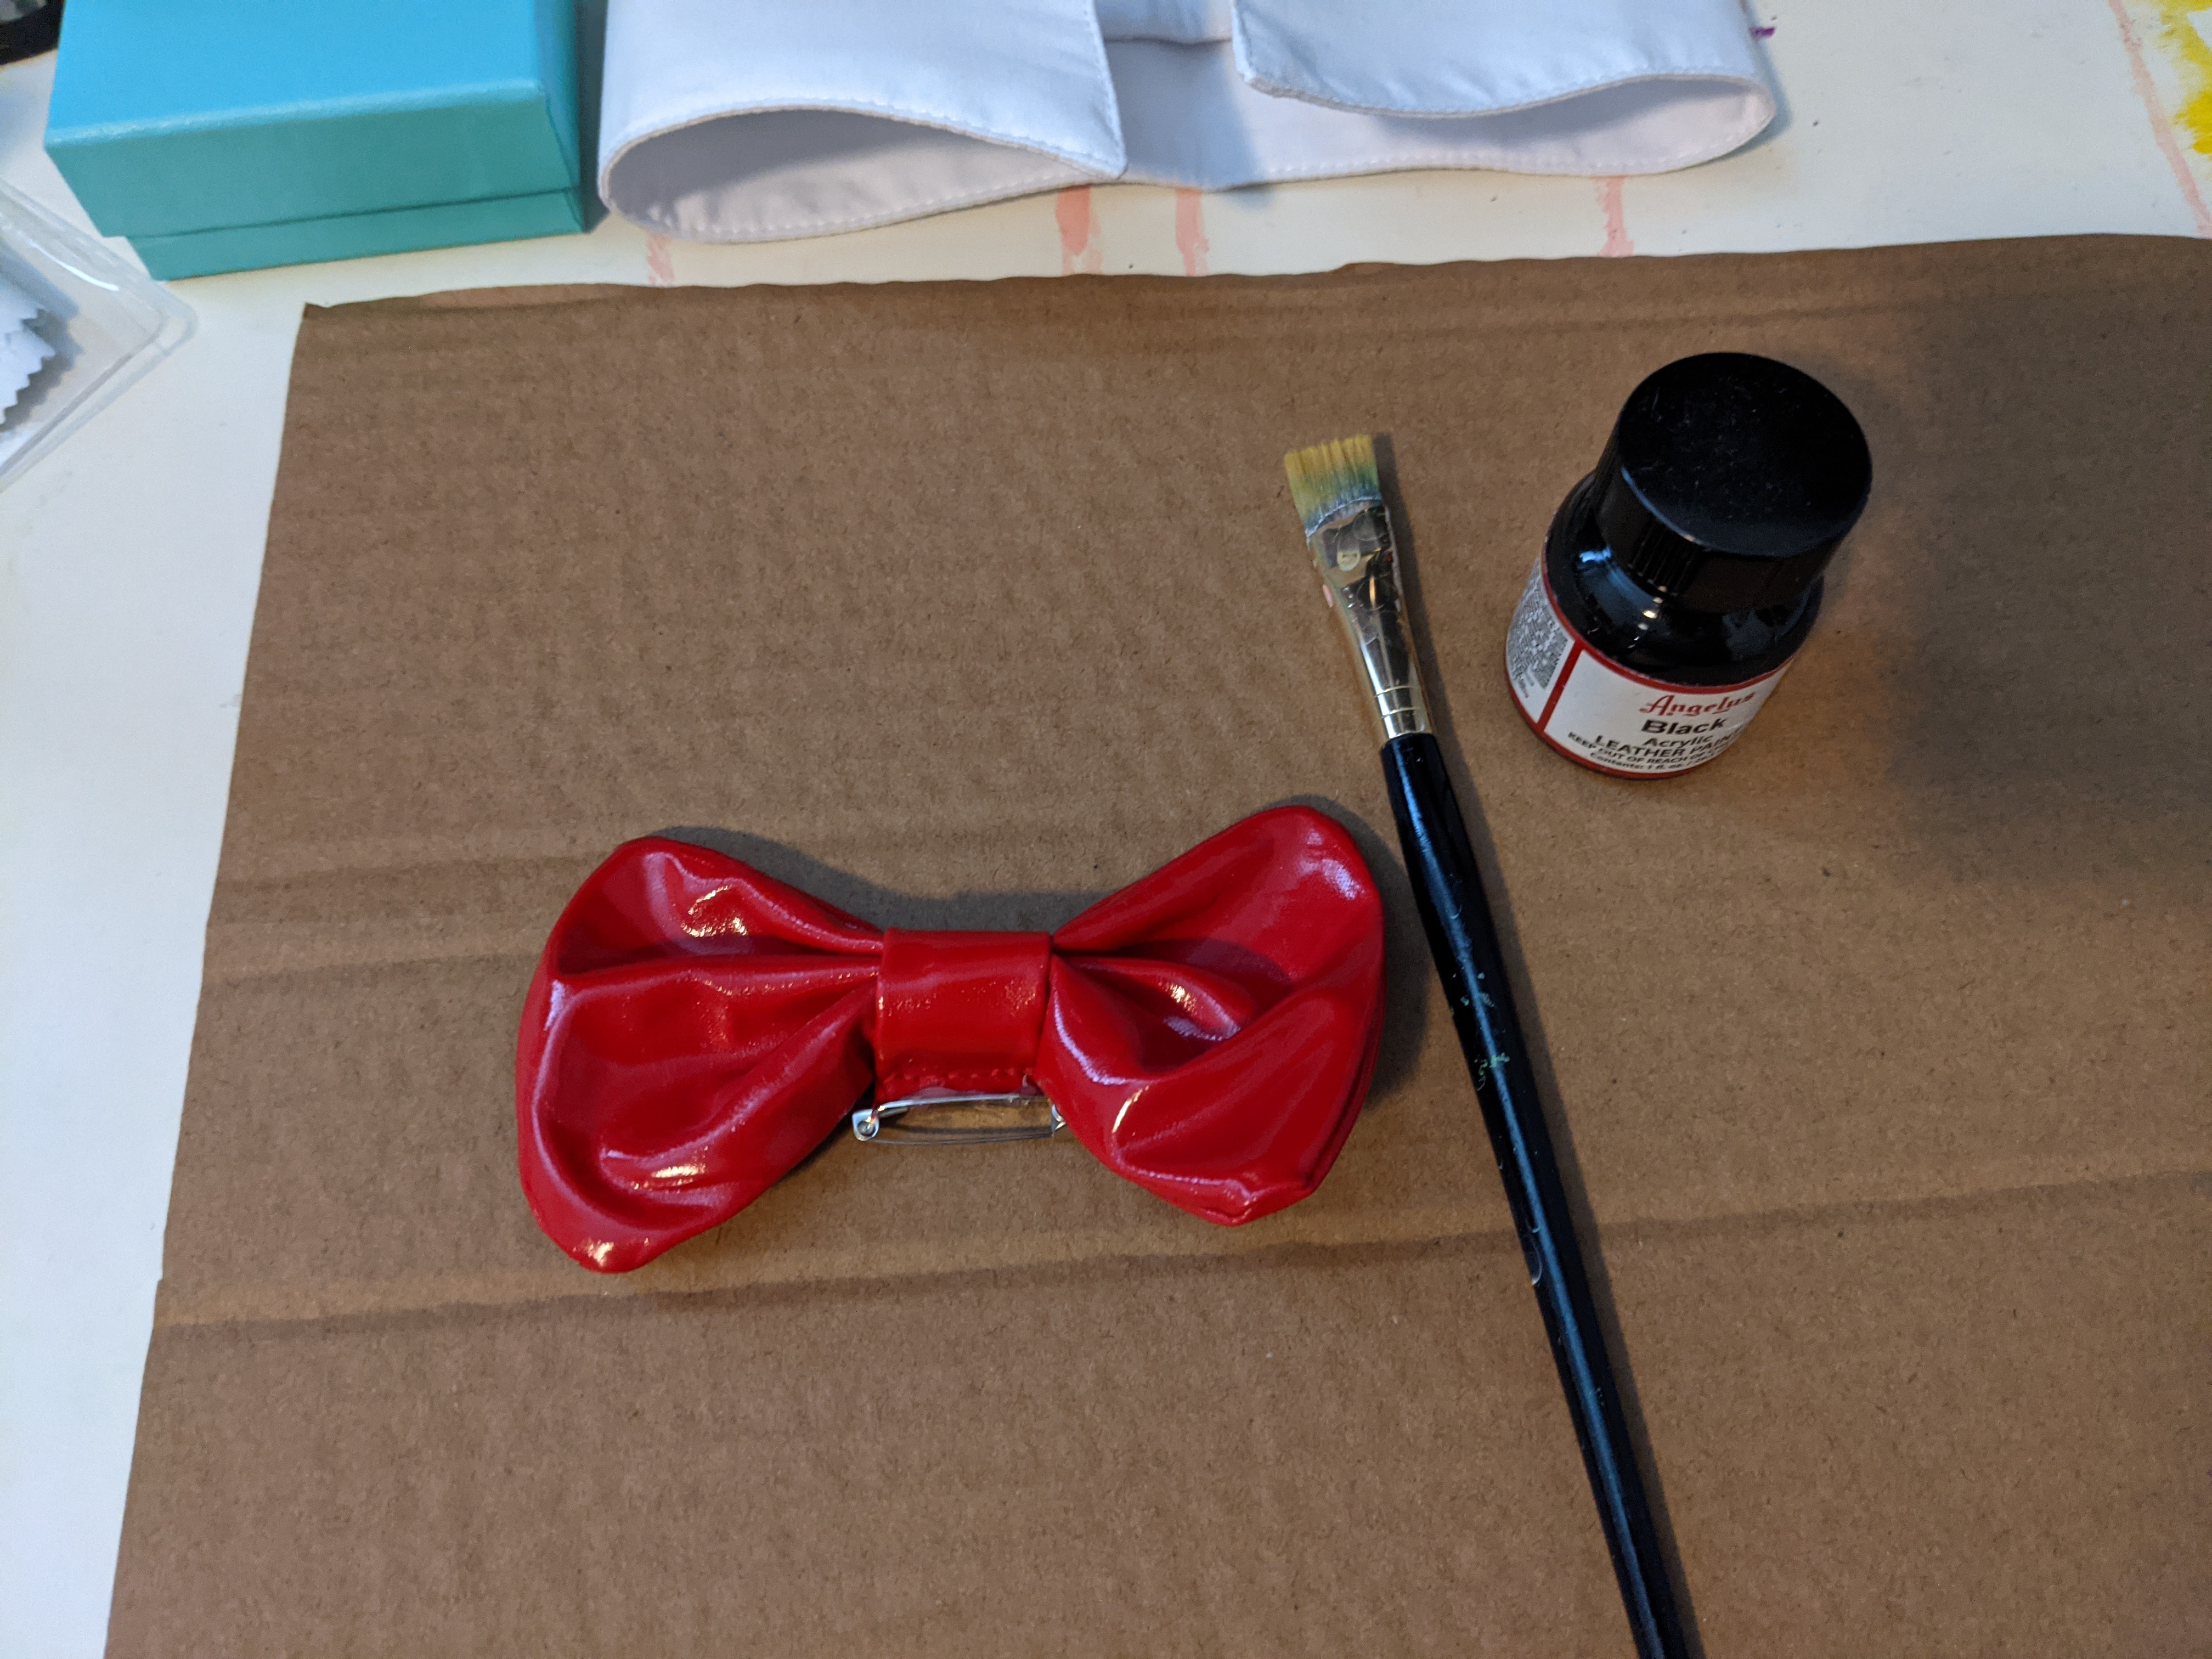
Bowtie
The bunnysuit bowtie was red, Jollibee’s is black. Good thing I already had black leather paint from when I painted Seraphine’s shoes! Painting was as easy as grabbing a small paint brush and meticulously coating the bowtie with the black paint and letting it air dry. I had to do some touch-ups here and there after the first coat, but other than that. Very simple!

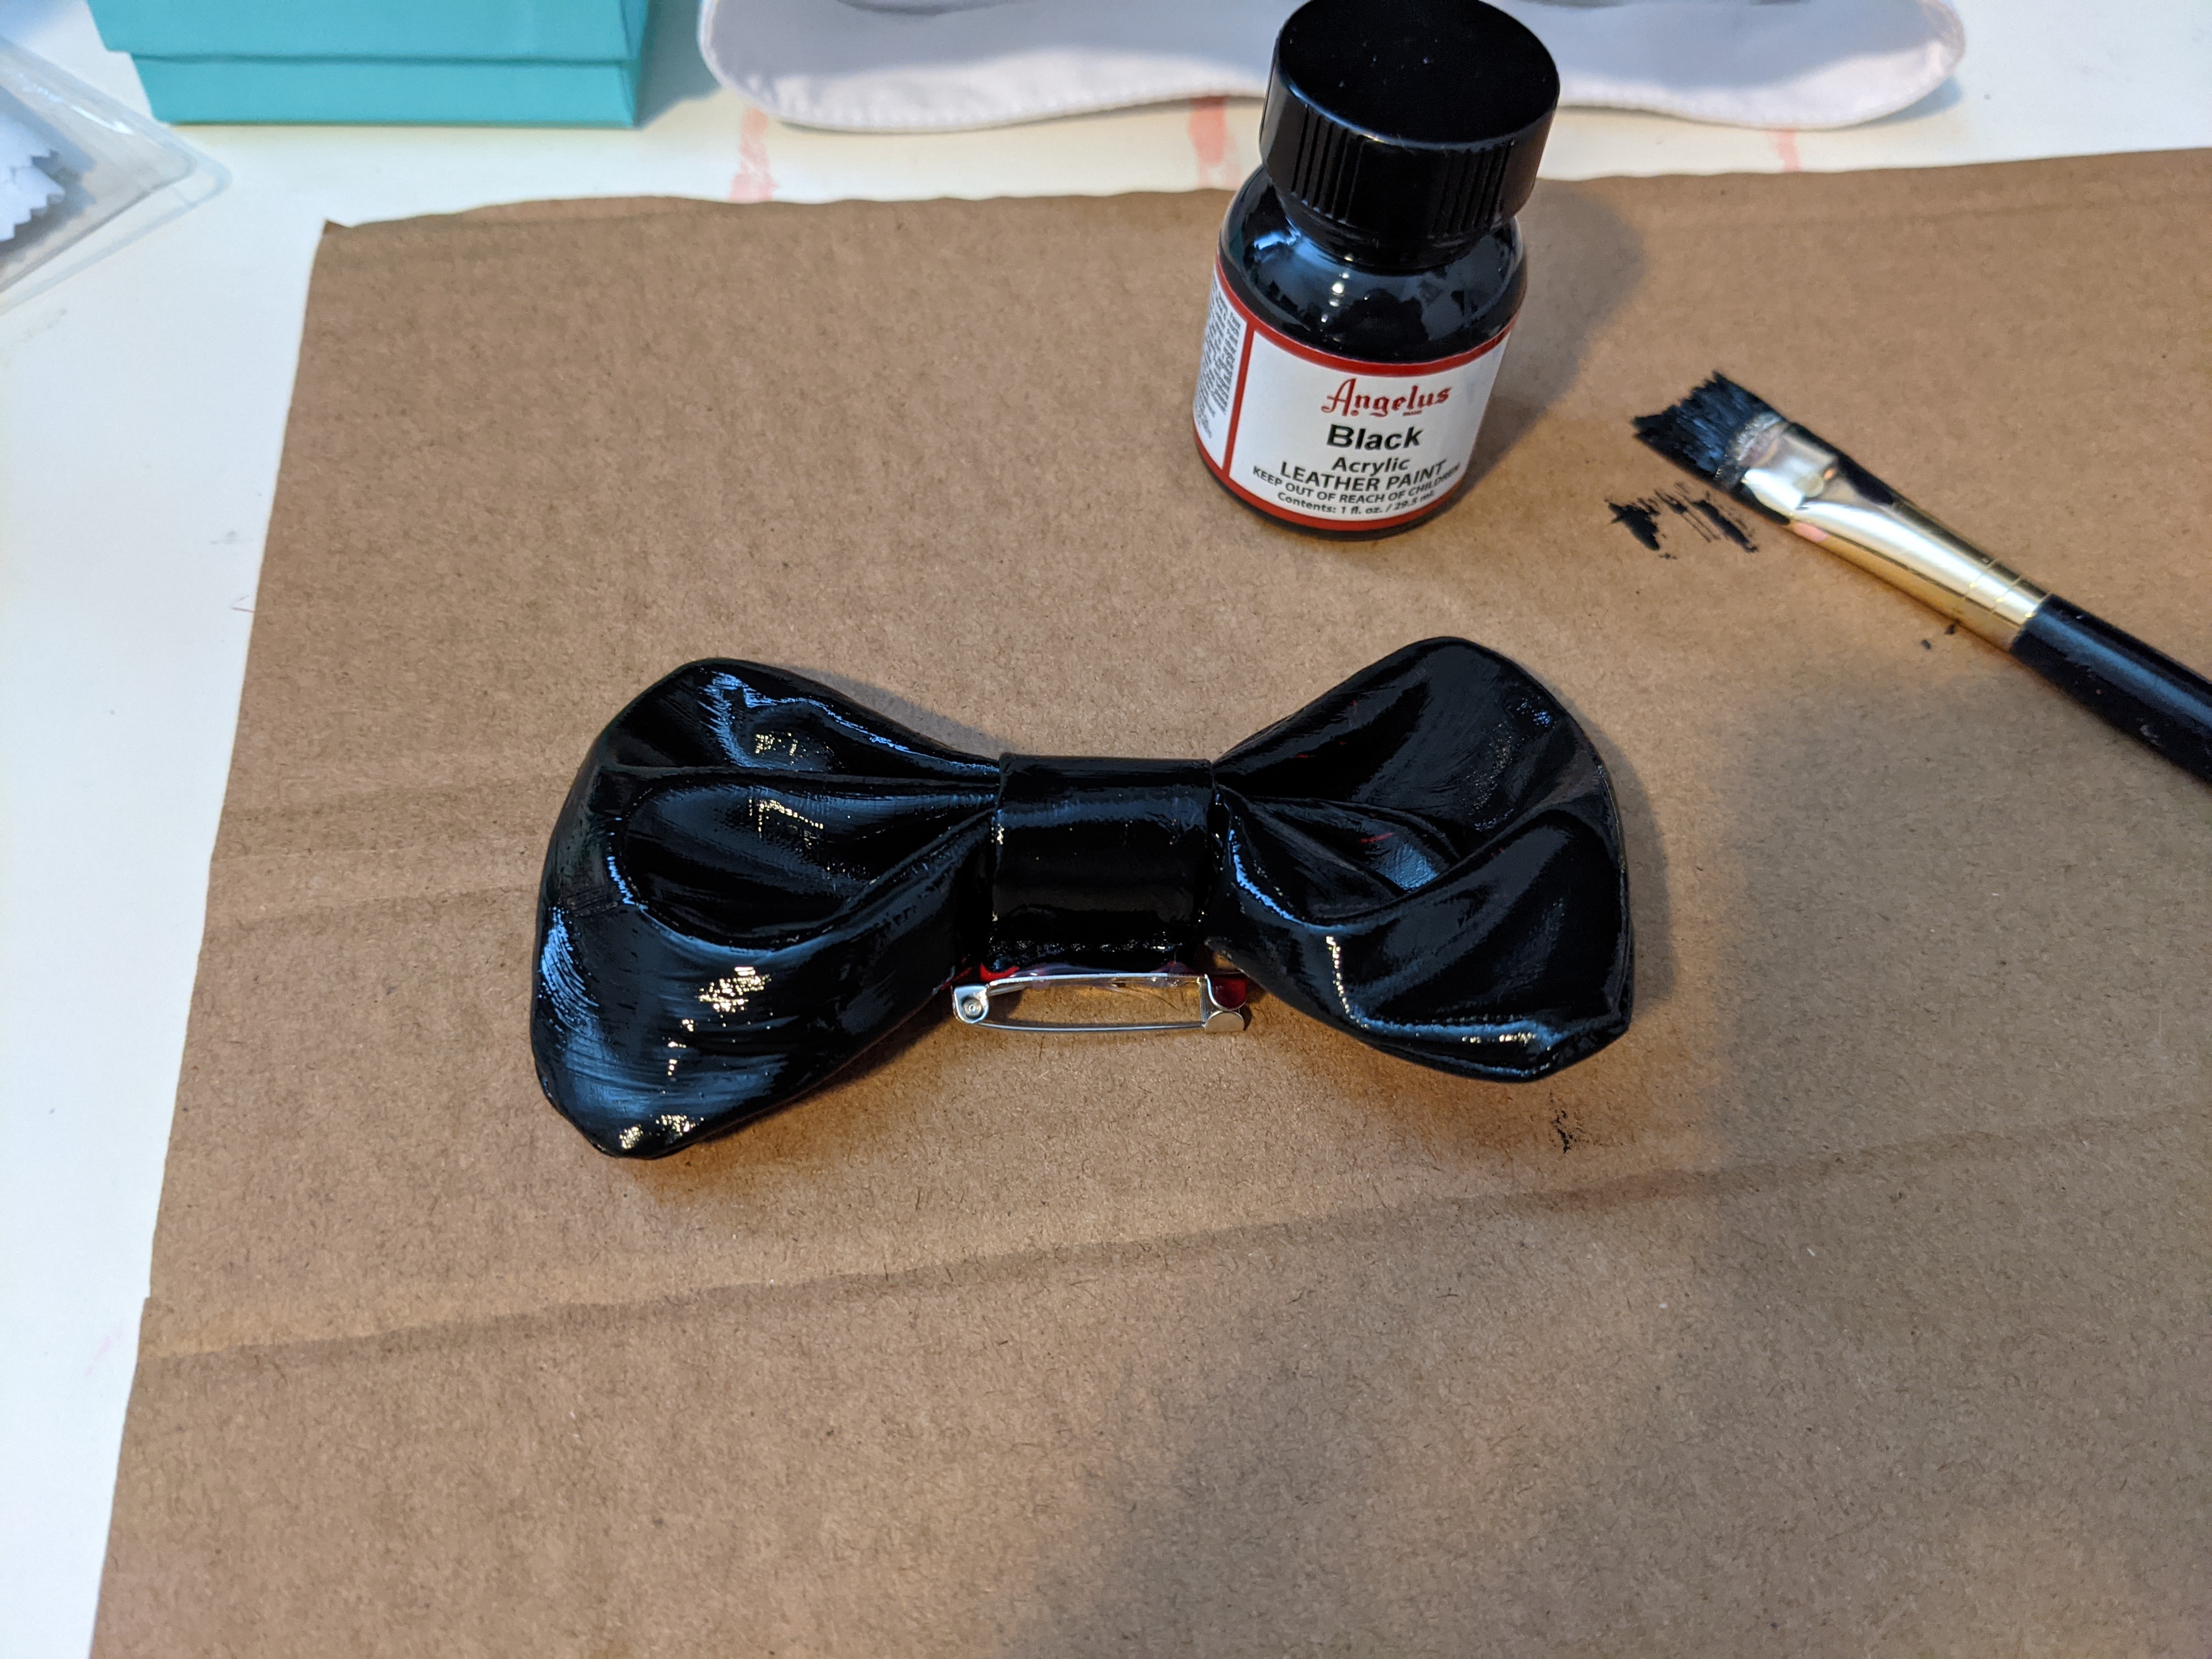
One thing I decided to do was add elastic to the bowtie. This would work in place of the safety pin that had been included. I don’t like how the safety pin makes the bow lay, so I cut the safety pin off. (There was a small piece of fabric it had been glued to that could easily be cut.) Then, I took a piece of elastic, about a foot in length, and threaded it through the middle part of the ribbon. I was lazy and just tied the end pieces together, but you could easily just stitch them together.


Leg ribbons
For the leg ribbons, I did red for the right and white for the left. As always, I used the leftover fabric from the bodysuit.
For both, I cut 1″ strips of fabric along the bias. After getting a few feet of each, I stitched the pieces together. I noticed in the reference screenshots that the honeygirls have their ribbons just tied off in bows at their ankles, so I opted to do the same for mine.


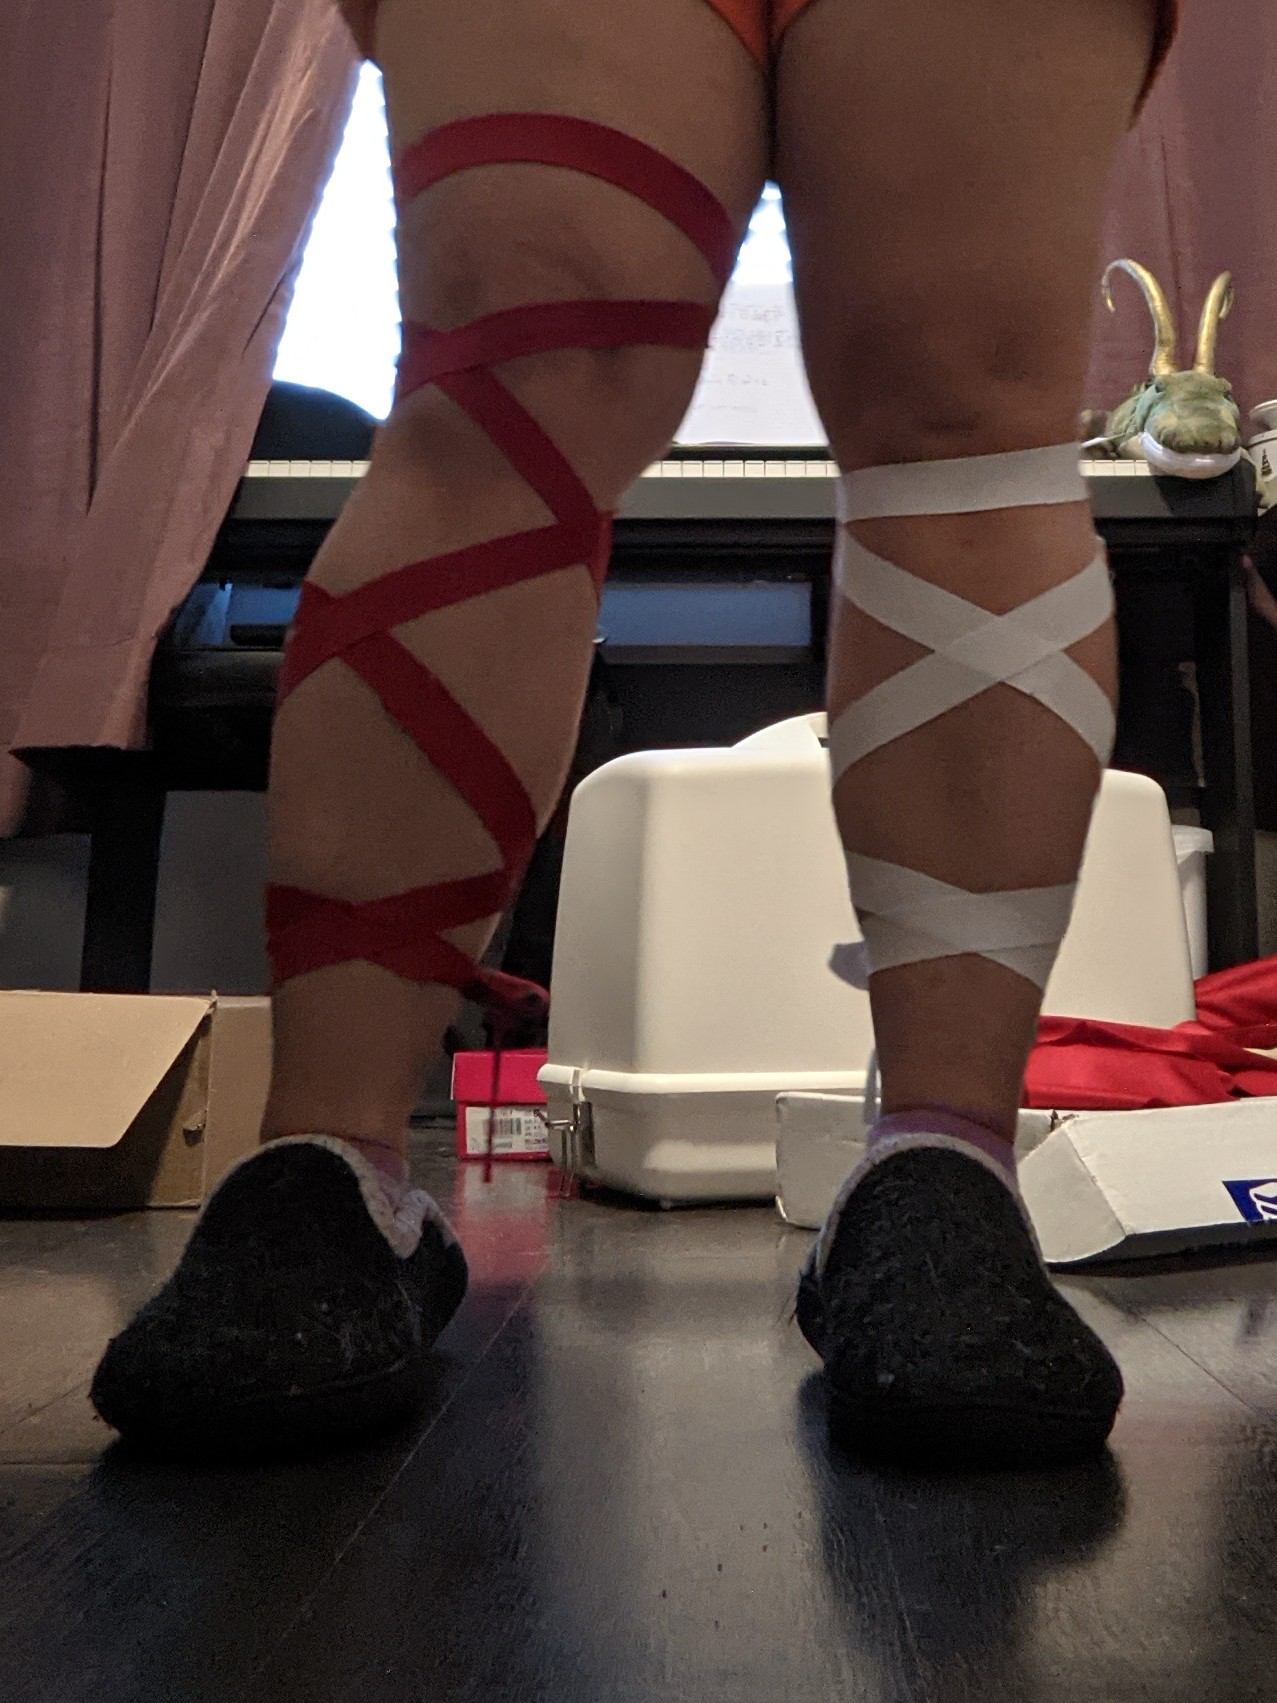
The white calf strips stay on very well. The red ones not as well because they go up to my thighs. I tried using fashion tape to hold it in place, but it doesn’t hold super well because it’s not sticking the fabric to my skin, it’s sticking it to fishnet and dance tights. As of this writing, I plan to try hem tape instead, but I haven’t tried this yet, so I don’t know if it’ll work. In theory it should because it’s meant to attach fabric to fabric. We’ll see! I’ll update this post with my findings!
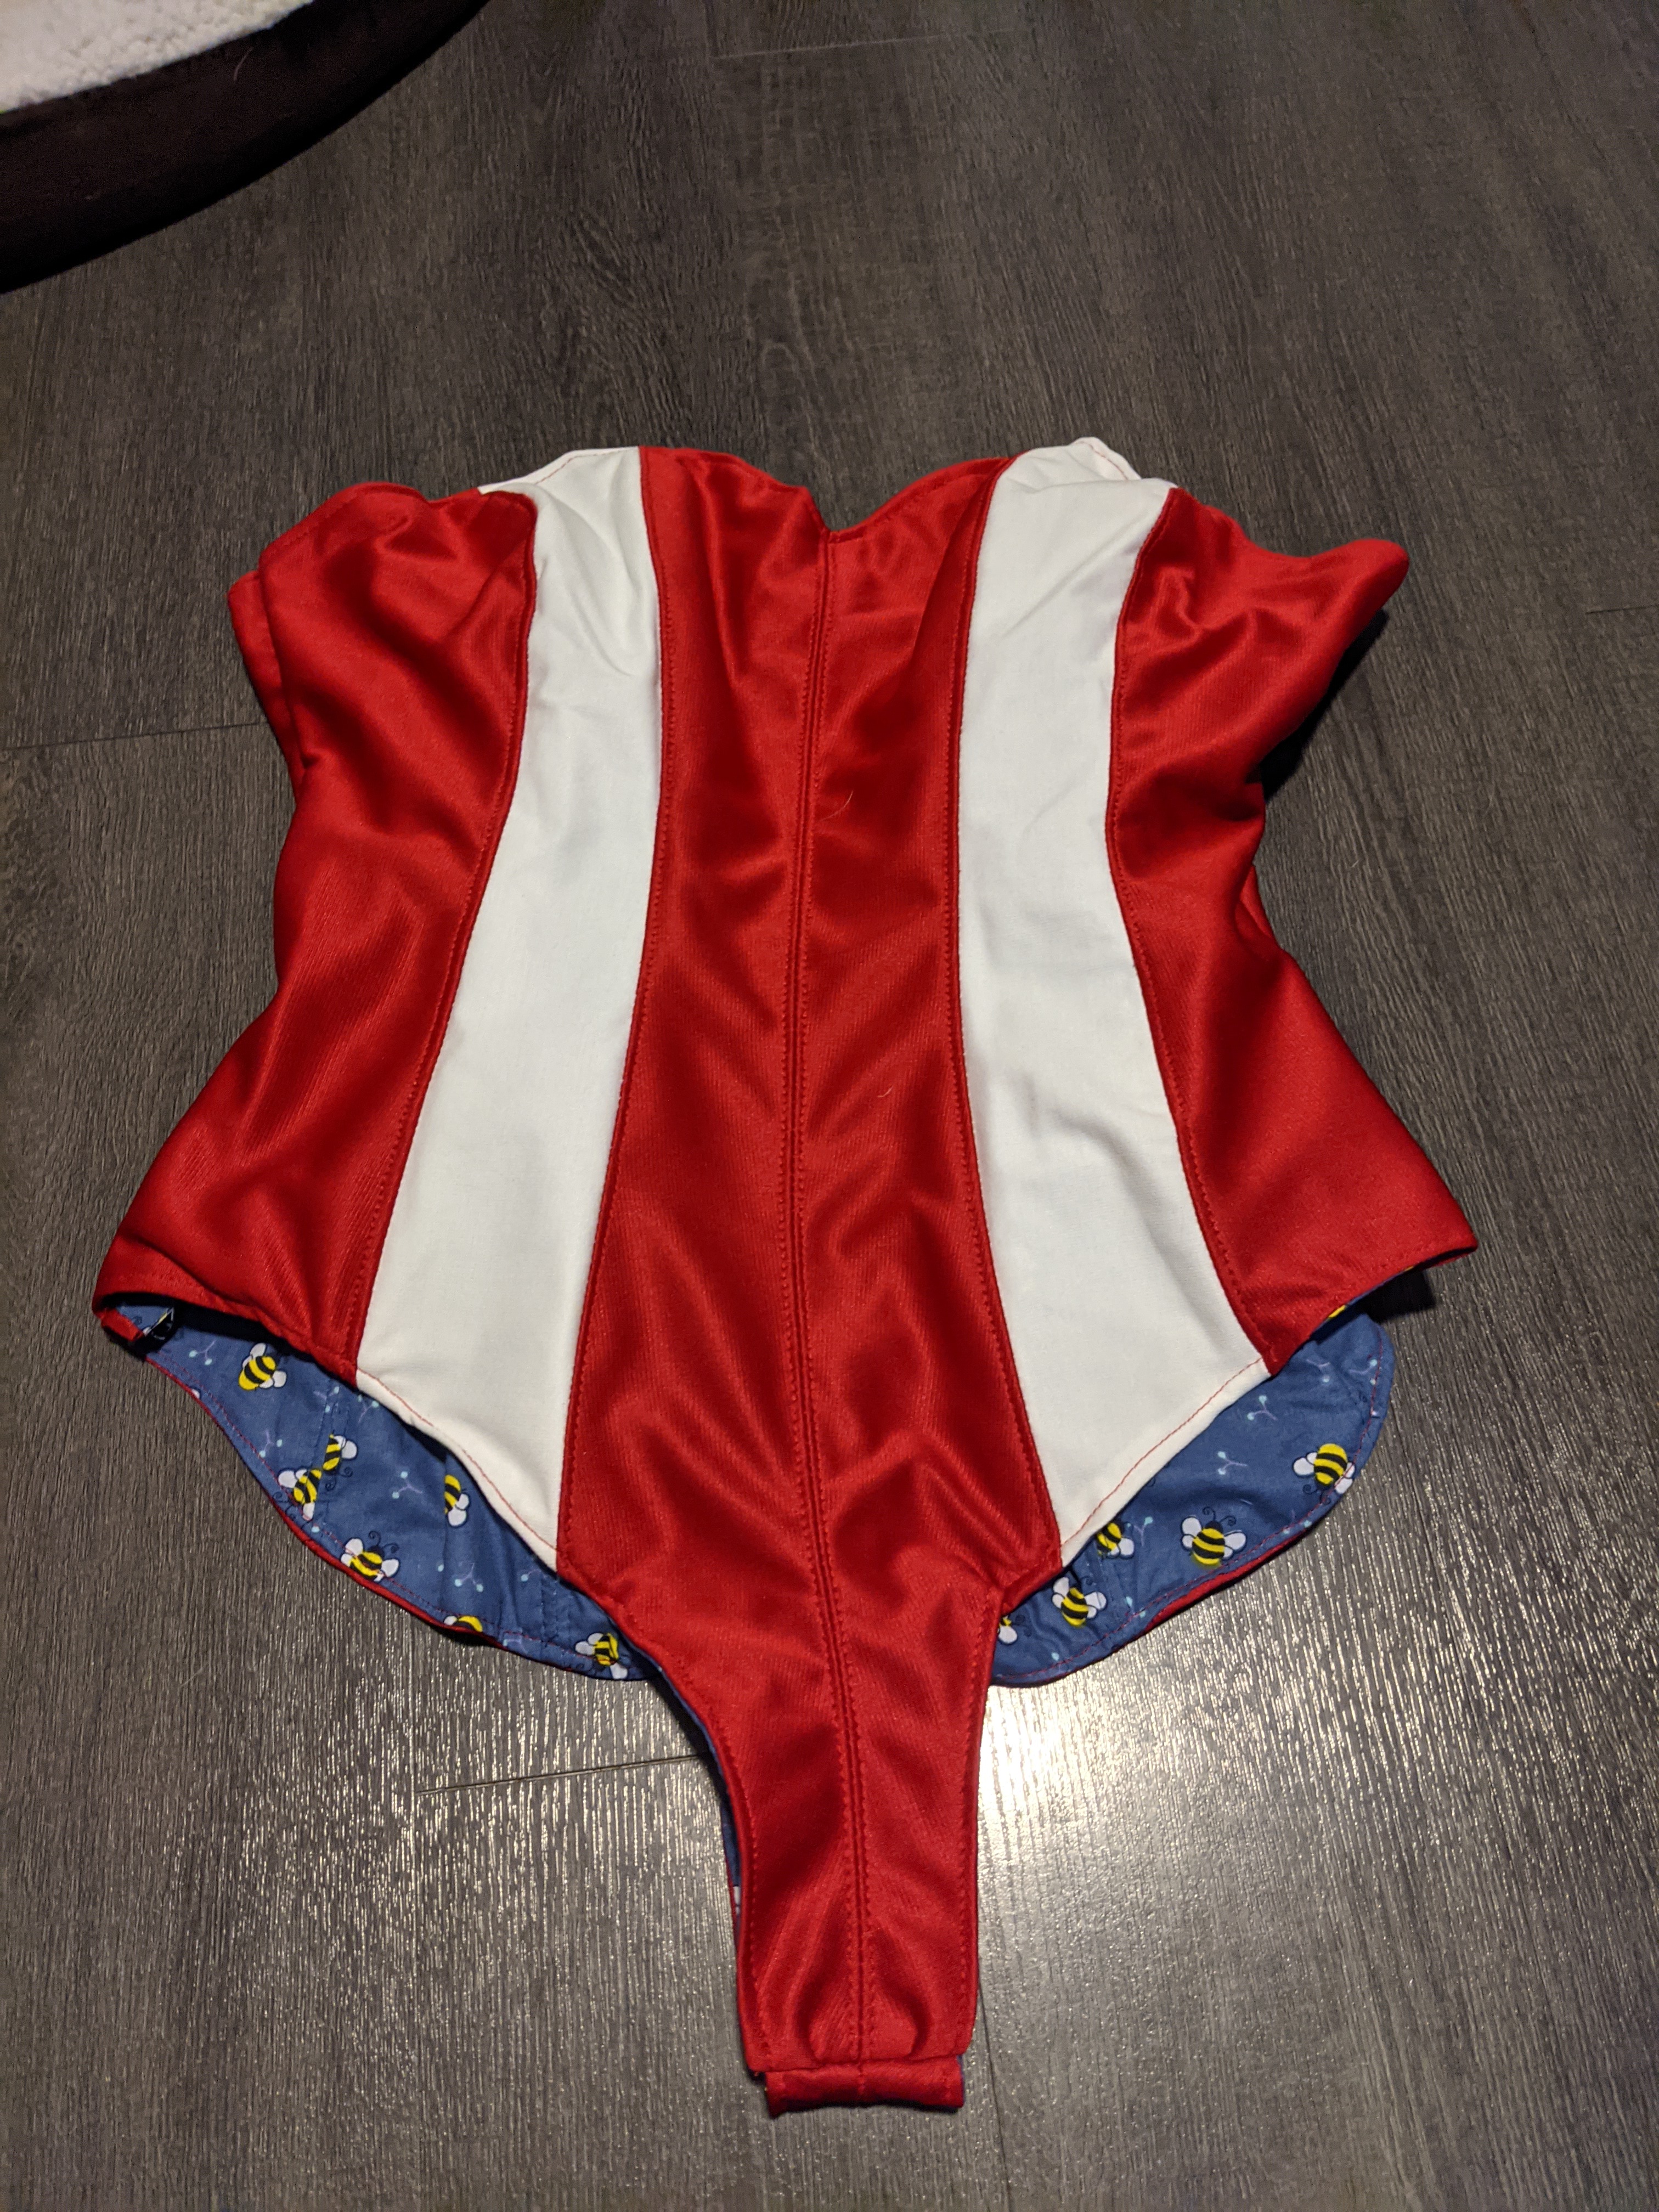
Bodysuit
Now I didn’t make this part of the build, but it is a crucial part of it, so I wanted to mention it.
I want to take this opportunity to thank Fairchild Cosplay for the beautiful bodysuit that I had commissioned from her. Her work is so clean and I absolutely adore the little bumblebee fabric she had used for the lining. If you ever need a sewn cosplay commissioned, you will not be disappointed with Fairchild! I made zero modifications to the bodysuit and used it as is.


Conclusion
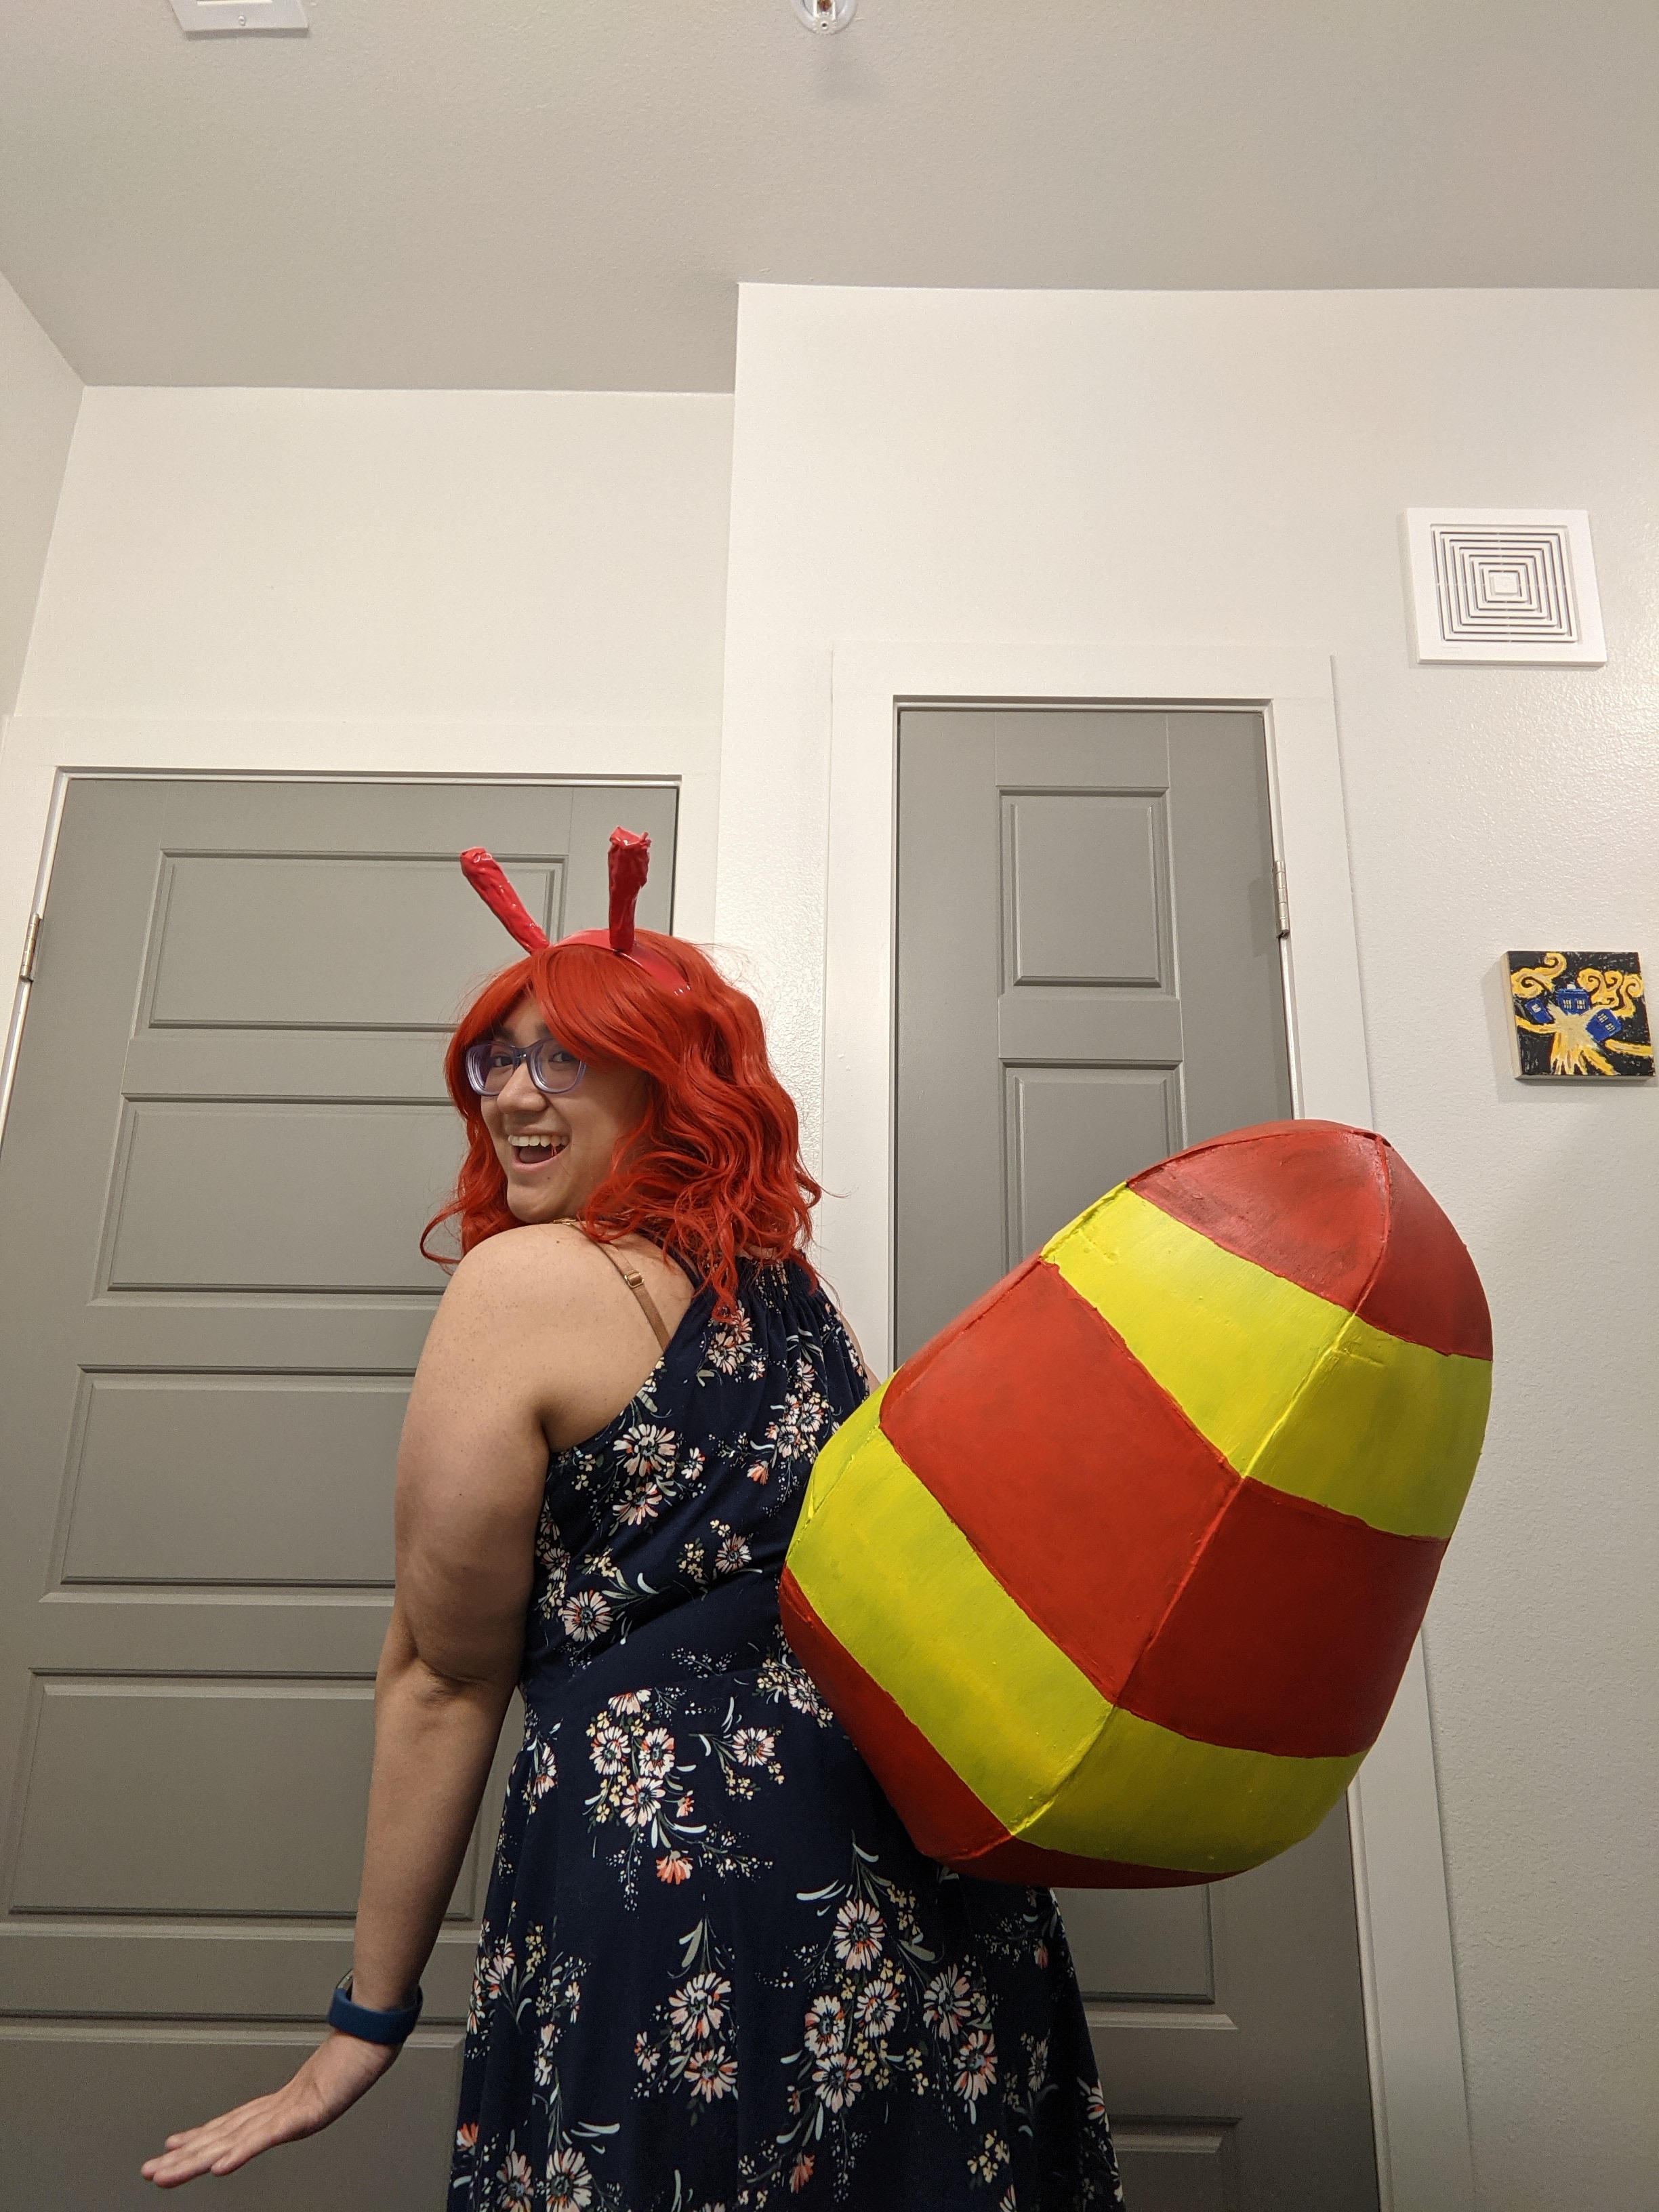
Jollibee Inn Girl was a lot of fun to make and conceptualize. It received amazing, positive feedback everywhere that I posted it. I feel so beautiful in the flattering bodysuit and I feel so cute with my little mini chef hat and antennae.
One of the challenging parts of this build wasn’t even the build itself, but building up the confidence to wear such a sexy ensemble. I hadn’t cosplayed anything so blatantly sexy since Sylveon Bard and I had avoided it for a long time because of what had happened when wearing Sylveon. (I was sexually harassed by our photographer.) So stepping into a sexy cosplay again felt like opening myself up for more of that. I’m thankful to say as of this writing that I haven’t received anything like that since debuting the full cosplay this week. Everyone has been overwhelmingly positive and it’s such a relief to see.
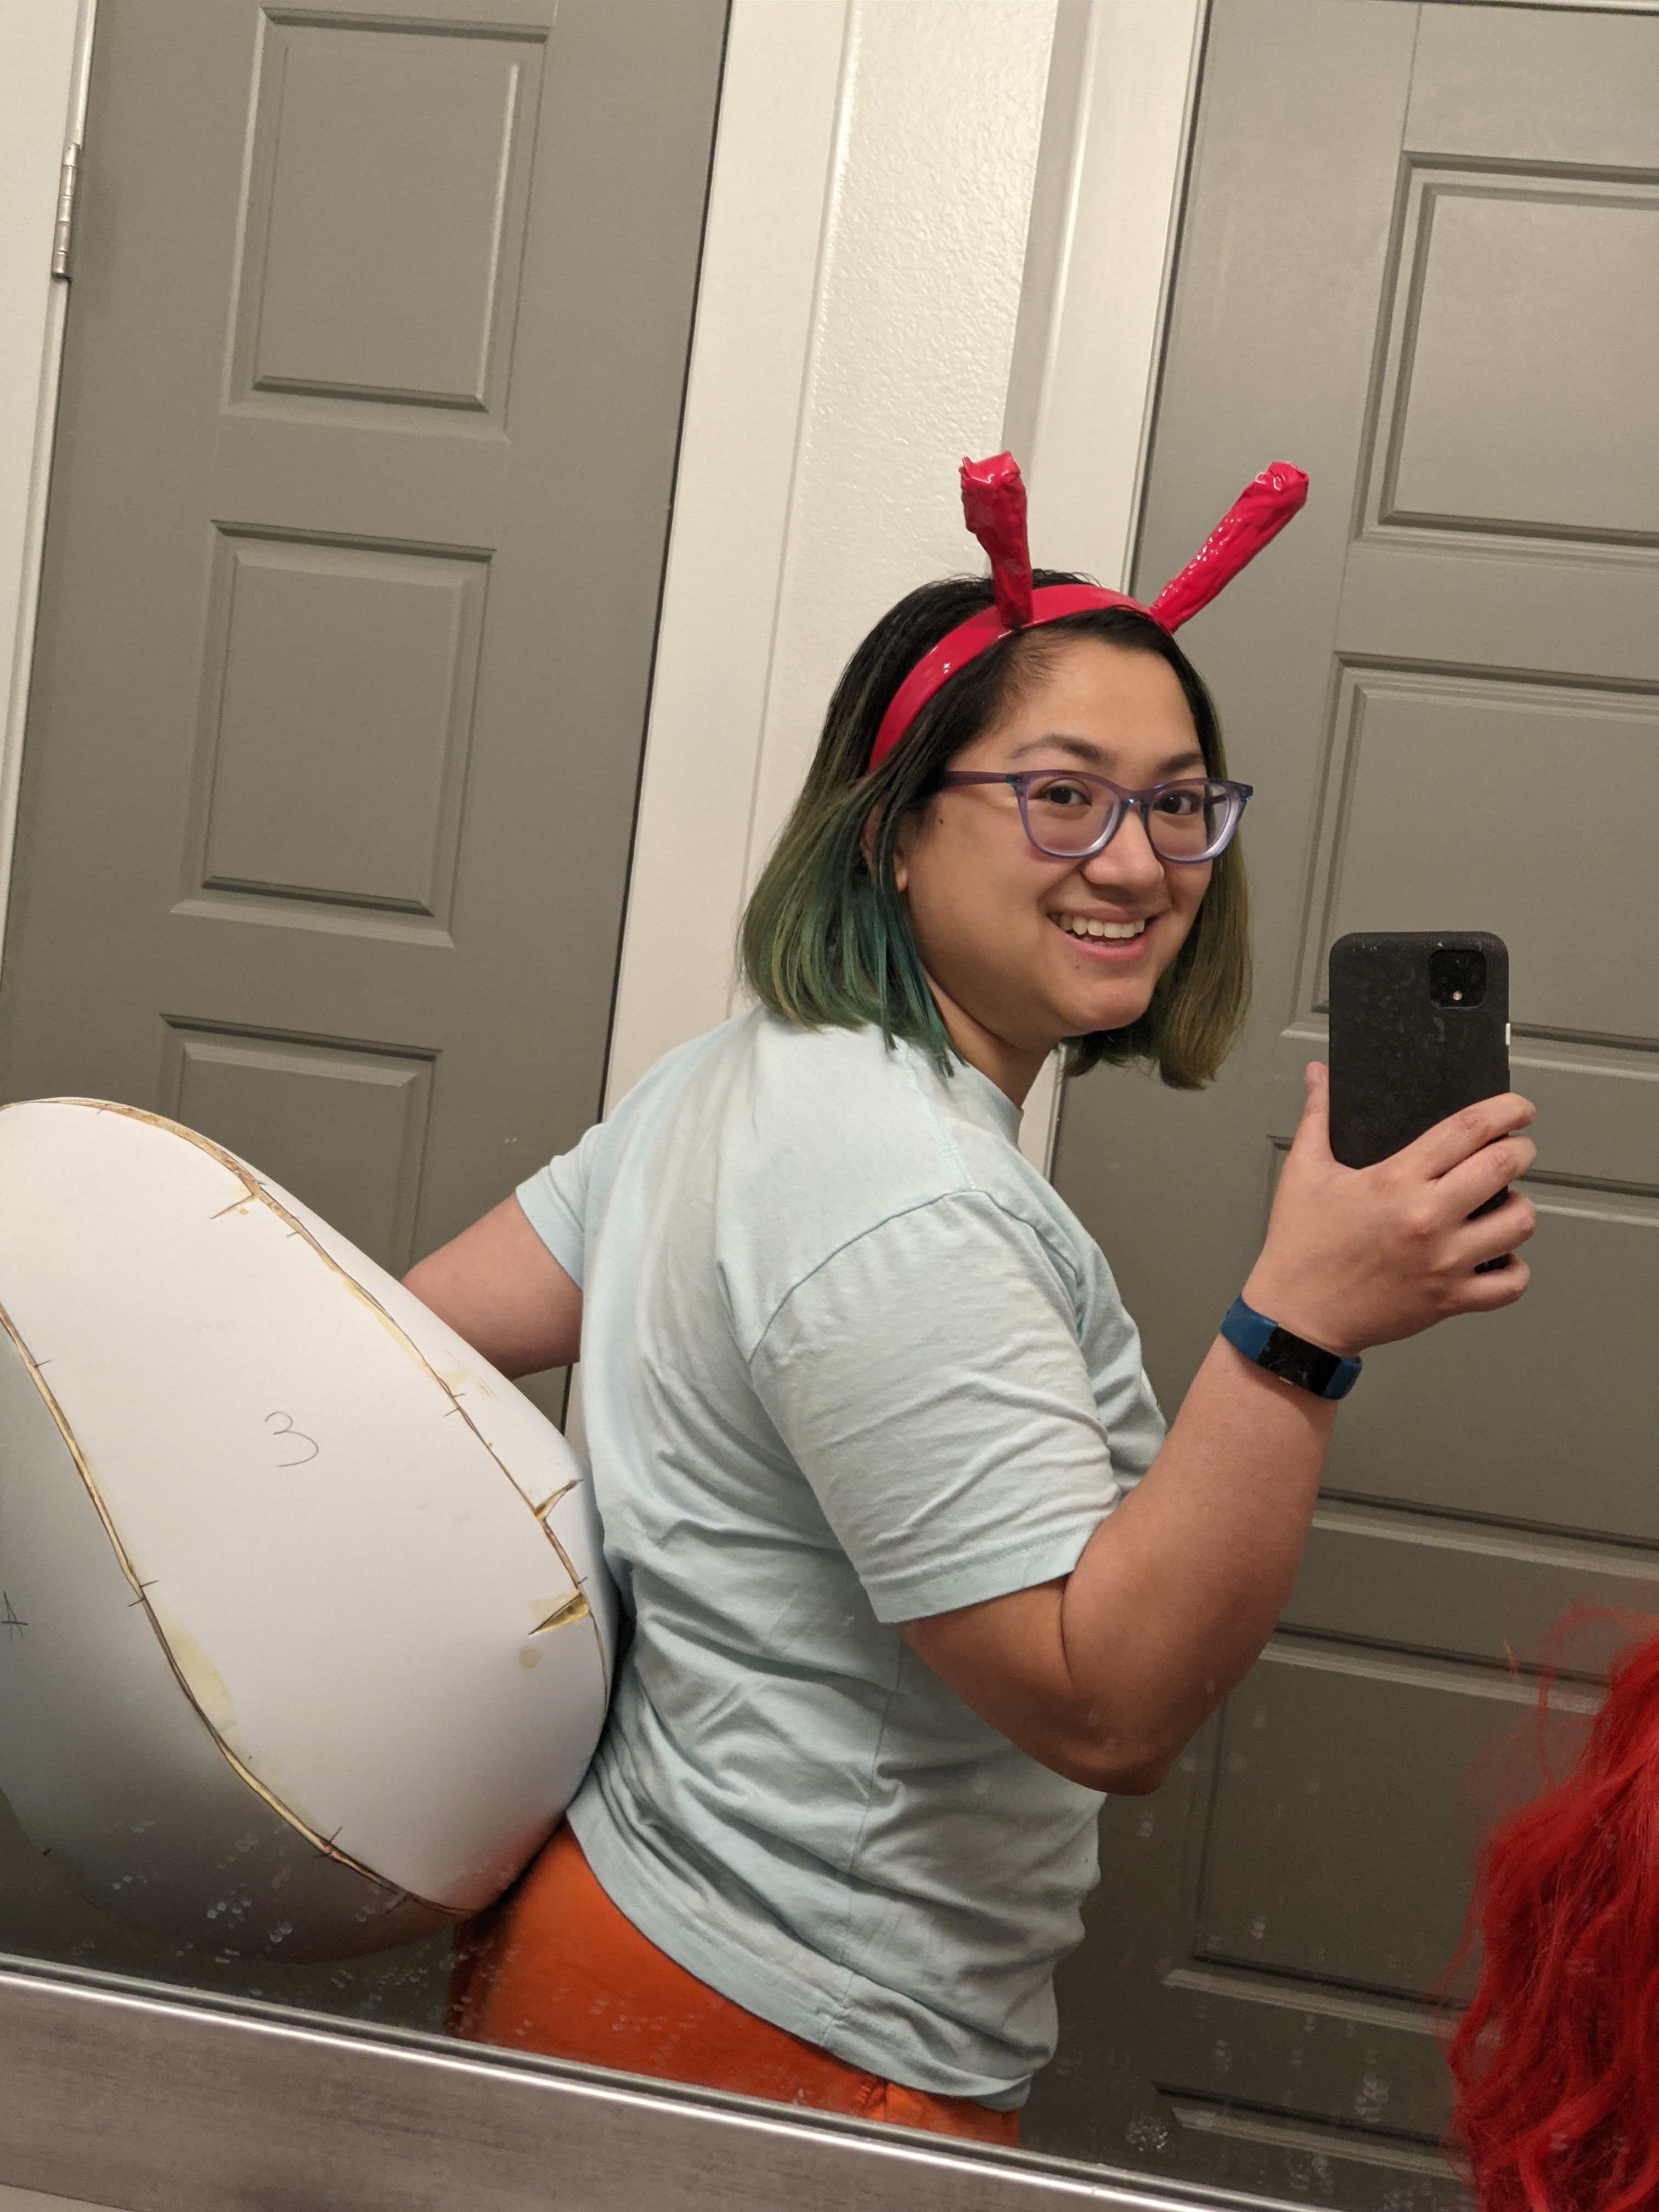
I hope to get some proper photos of this cosplay this coming weekend! (I learned while taking pictures yesterday that this is a very difficult cosplay to self shoot!) I’ll update this post with those pictures once I get them! In the meantime, have some selfies I took yesterday on my phone.


Use my build post as inspiration? Let me know!
If you followed along with my build post to help you make your cosplay, I’d love to see it! Leave me a comment or send me an email at ashweezcosplay(at)gmail(dot)com. If you’re comfortable with it, I’d love to showcase your cosplay photo(s) in the blog! I will of course give you credit and link to any socials you may have.

Leave a comment