

Sylveon is by far my most ambitious cosplay project I’ve taken on. At first I thought it would be because of just how much of my body I’d be exposing, but it turns out there was a lot of hand stitching that required lots of patience on my part.
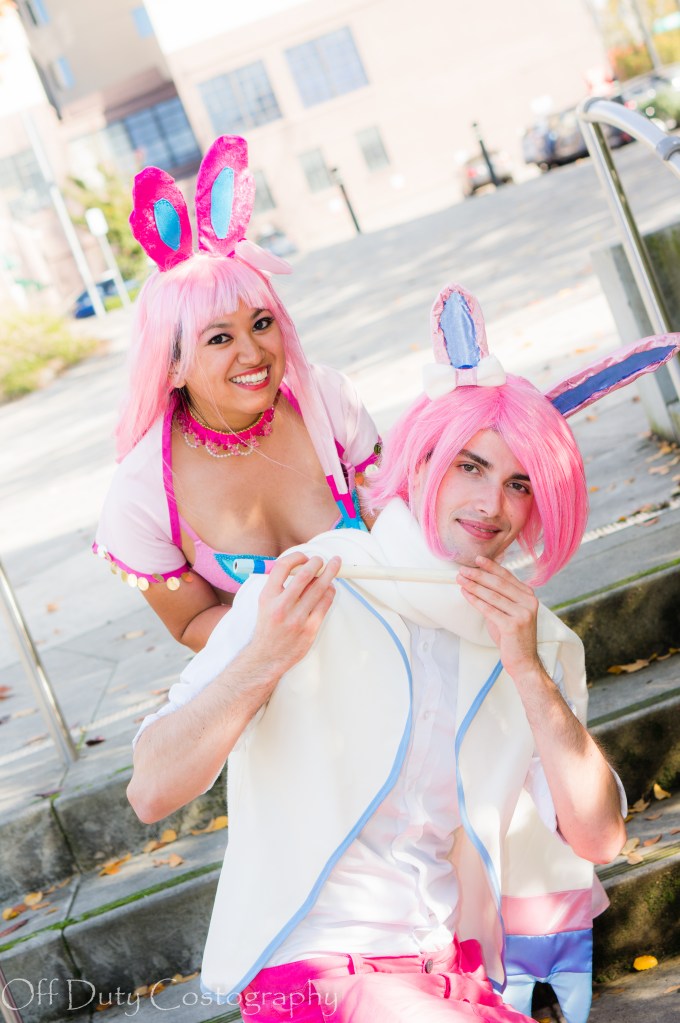
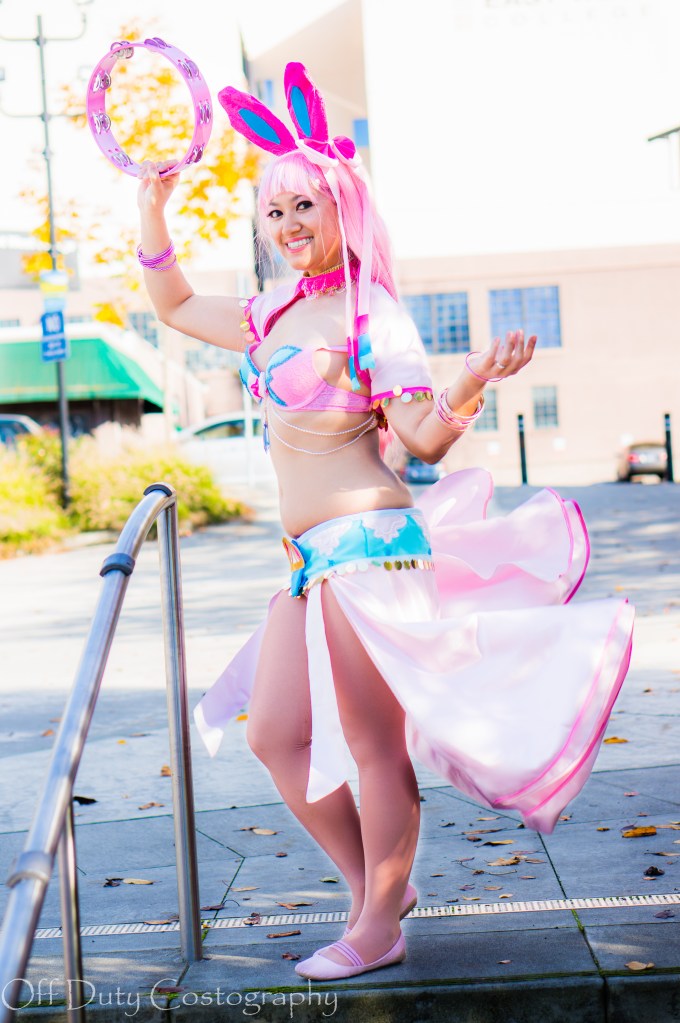
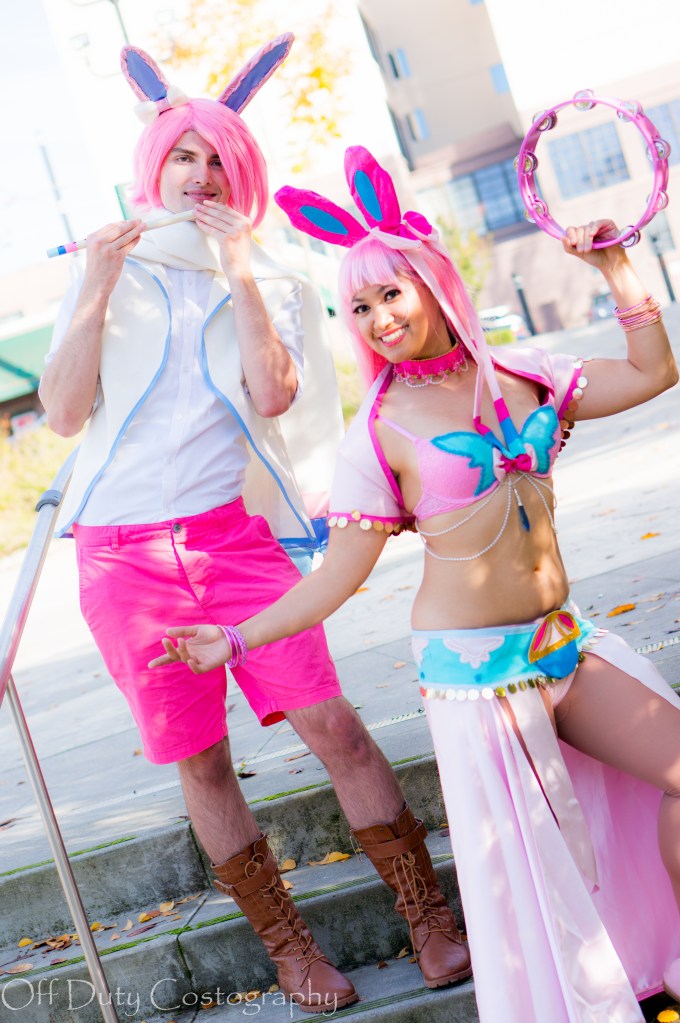
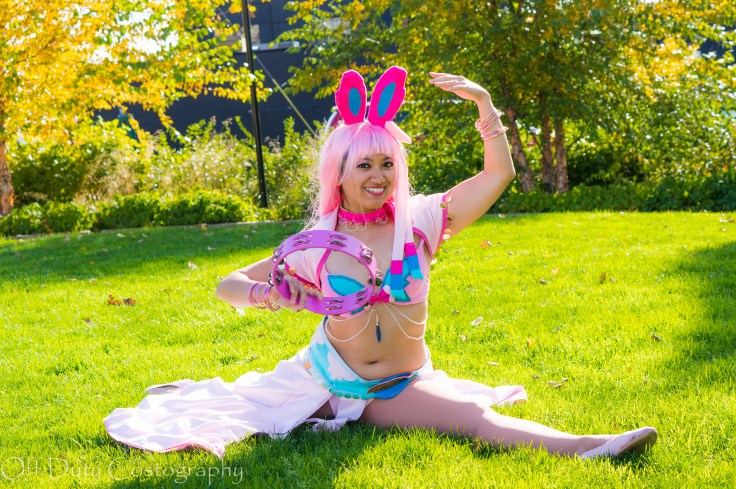
Kumoricon 2016 in Portland, OR by Off Duty Costography (Oct 2016)
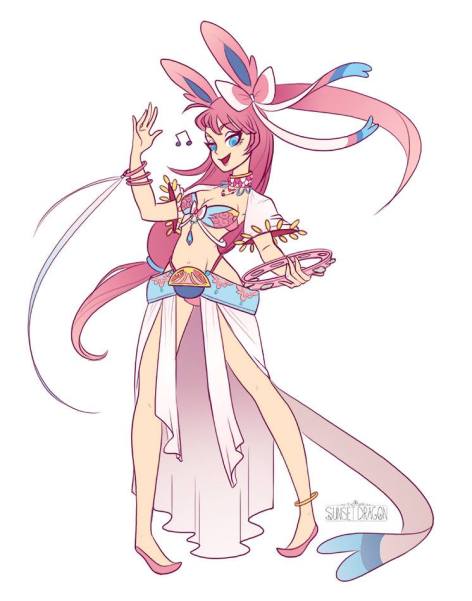 I signed up to cosplay Sylveon to join a DnD Eeveelutions group for Kumoricon. All the designs are based on Sunset Dragon’s concept art. We planned to have two of each design (one female version and one male version for a total of 18 people). I’ve always wanted to join a massive cosplay group and Sylveon was the only female one left. After lots of back and forth, I decided to take the plunge and do it. What was stopping me? A fear of showing off my body? Of people judging me the same way I had judged other scantily clad cosplayers? (I unfortunately used to have that jealous mindset of “That bikini isn’t a real cosplay.” I would soon learn just how much work can actually go into these deceptively simple cosplays.) Taking this as an opportunity to really focus on my craft and also fitness, I agreed to be Sylveon.
The process of making this cosplay was over the span of about three weeks. Every spare moment I had at home was spent on this cosplay. I worked on it early in the morning before work, late into the evenings after work, and all around the clock on weekends. It was both thrilling and exhausting.
Choker | Ears | Shawl | Belt | Bra | Shoes & Accessories
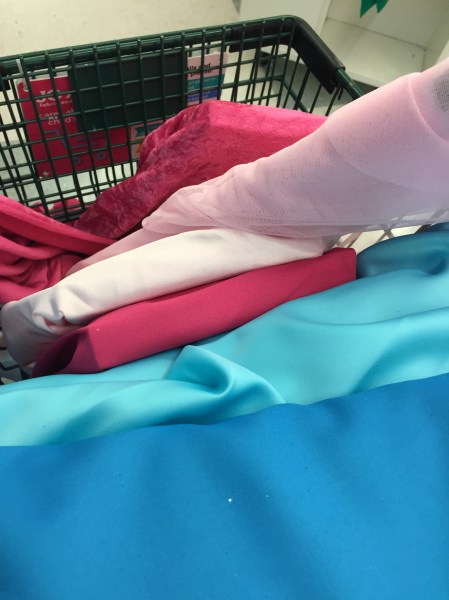 So much pink. All the pink.
I’ve never owned this much pink fabric (or anything) in my life. After leaving Joann’s, it looked like I was gearing up for a baby shower. But the more I worked with the colors, the more I began to fall in love with them. They’re cute and I can be cute too goddamnit!
Choker
I started with an easy task, as I always do when starting a cosplay. Figured I would work on both the choker and ears. For the choker, I found this great gold trim and attached beads to it. It was a long and annoying process but was worth it. The pink beads were part of a trim that included beads already attached to a thin pink ribbon. I did three rows of that for the base and then added some white beads hanging from the bottom of it. To close it, I used a frog closure, that was also gold.
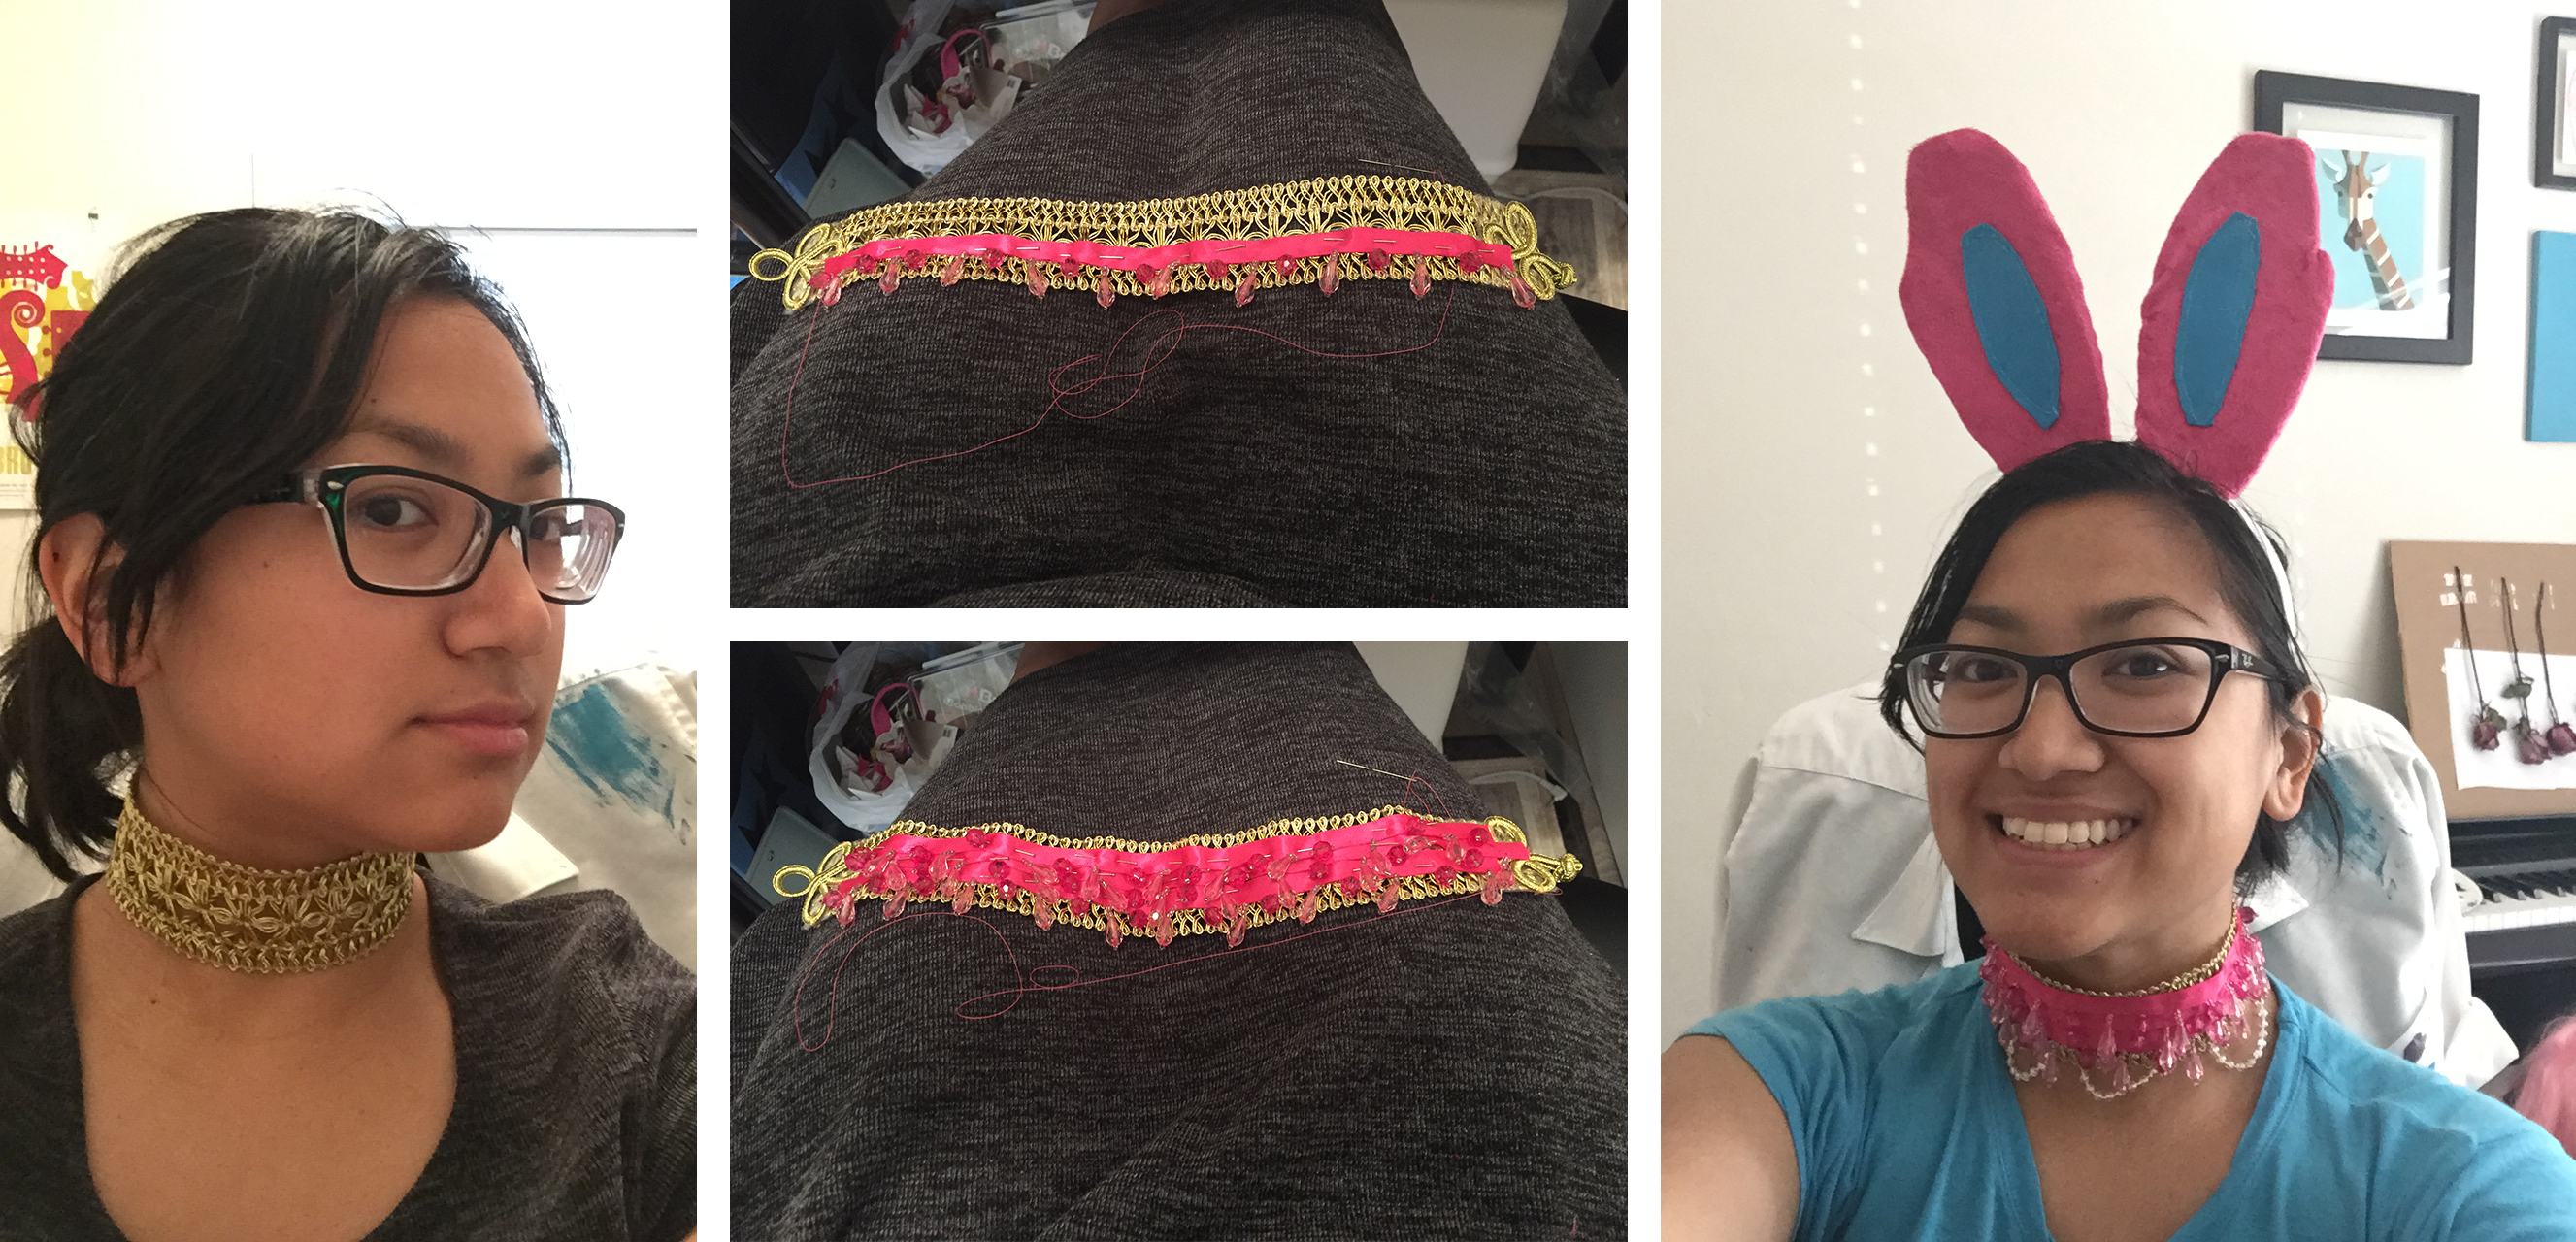
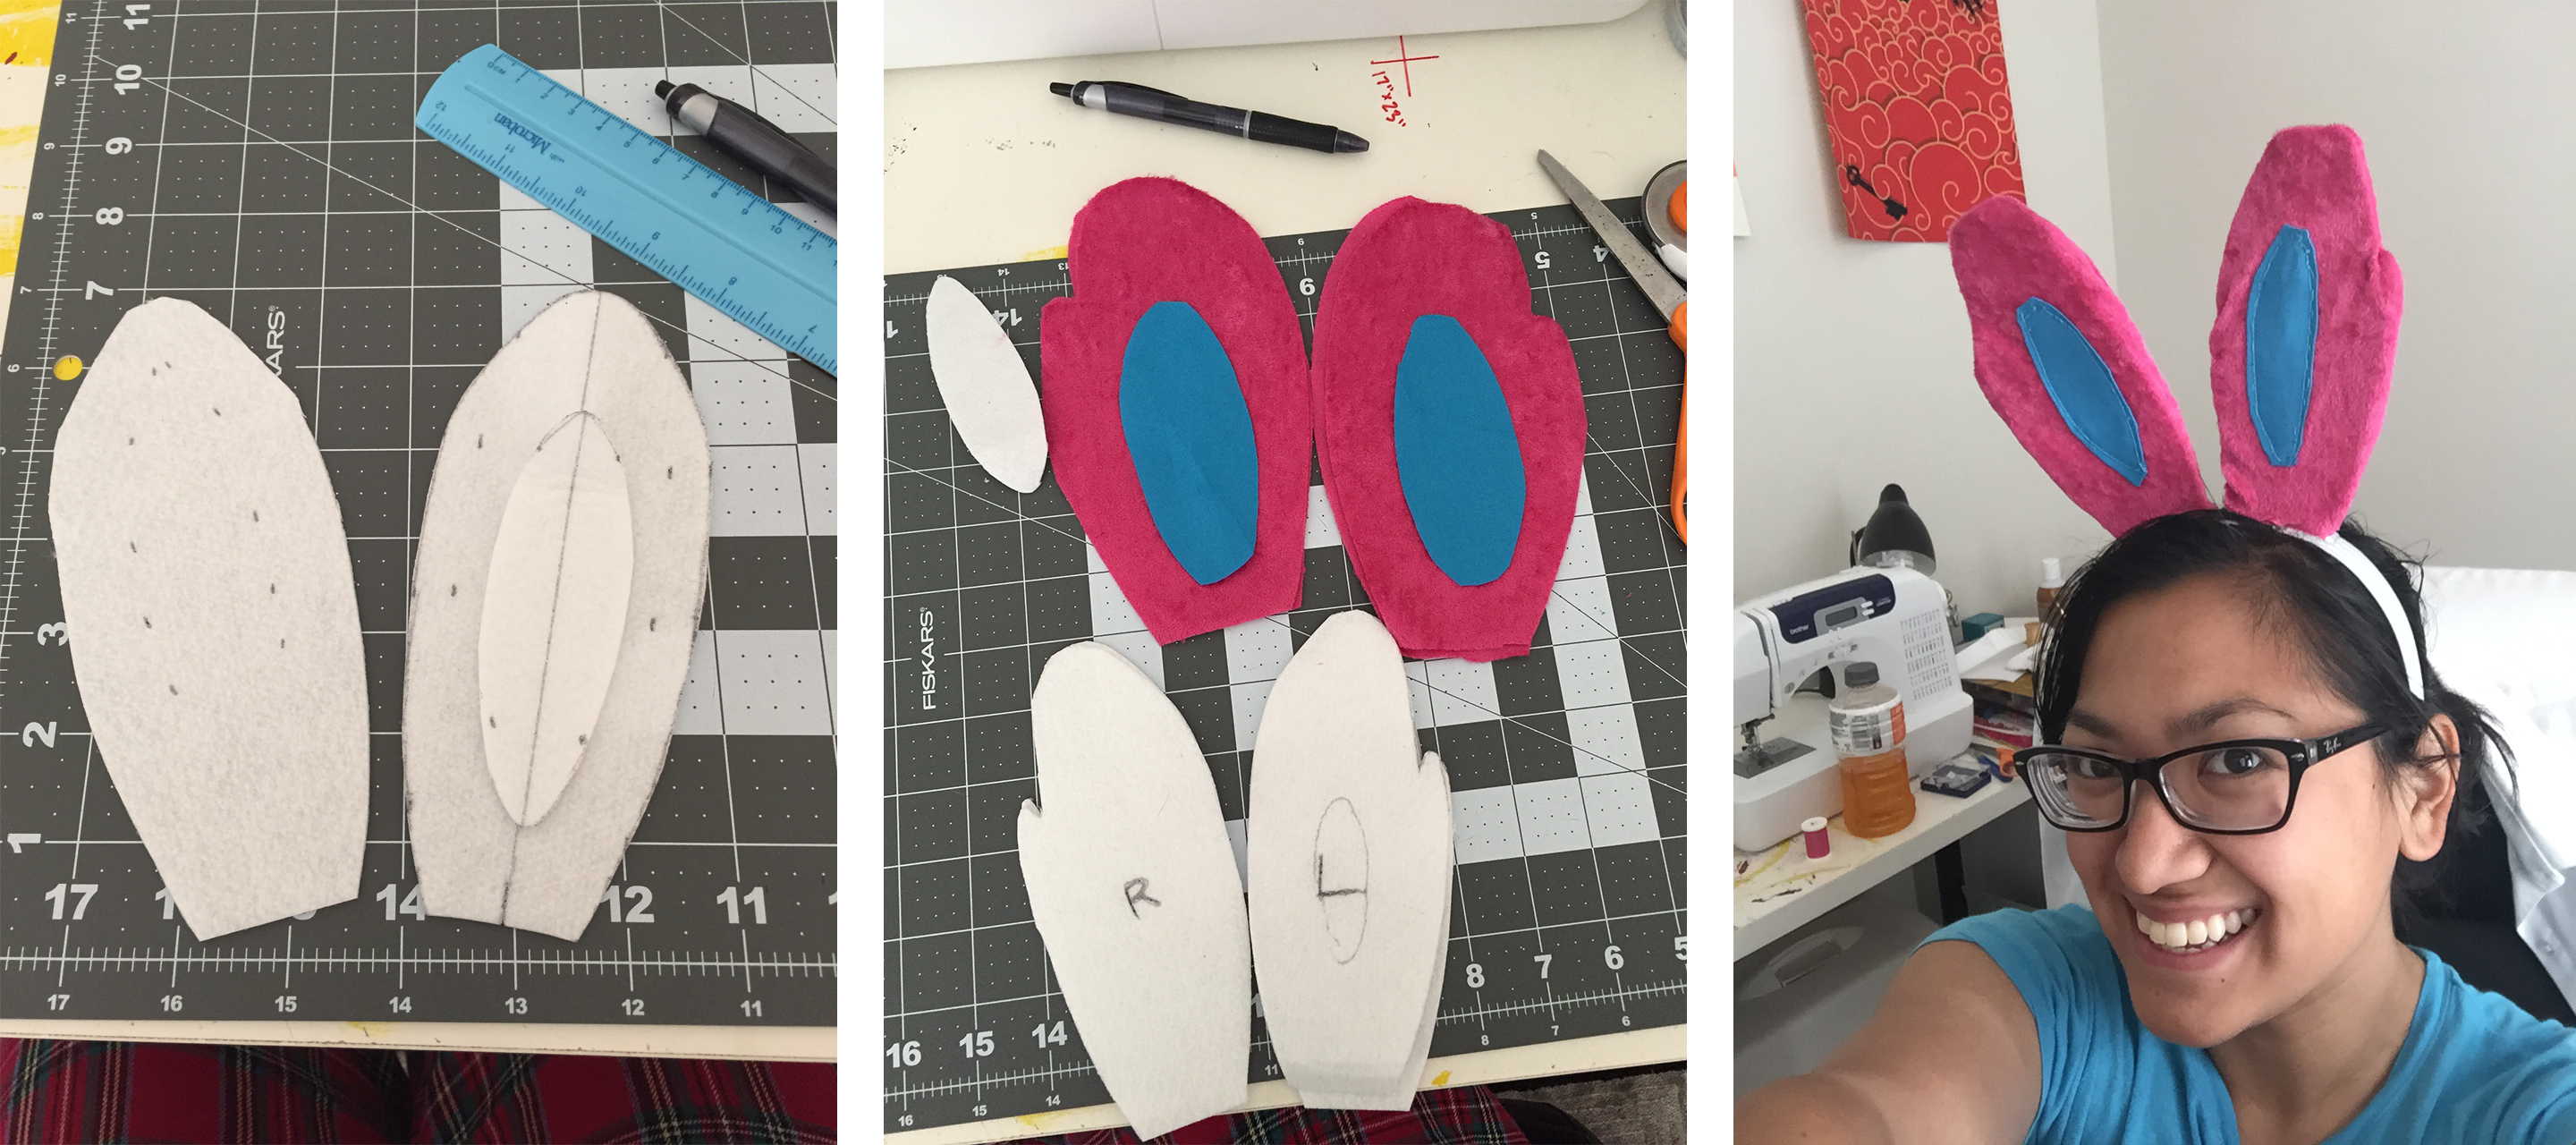
Ears
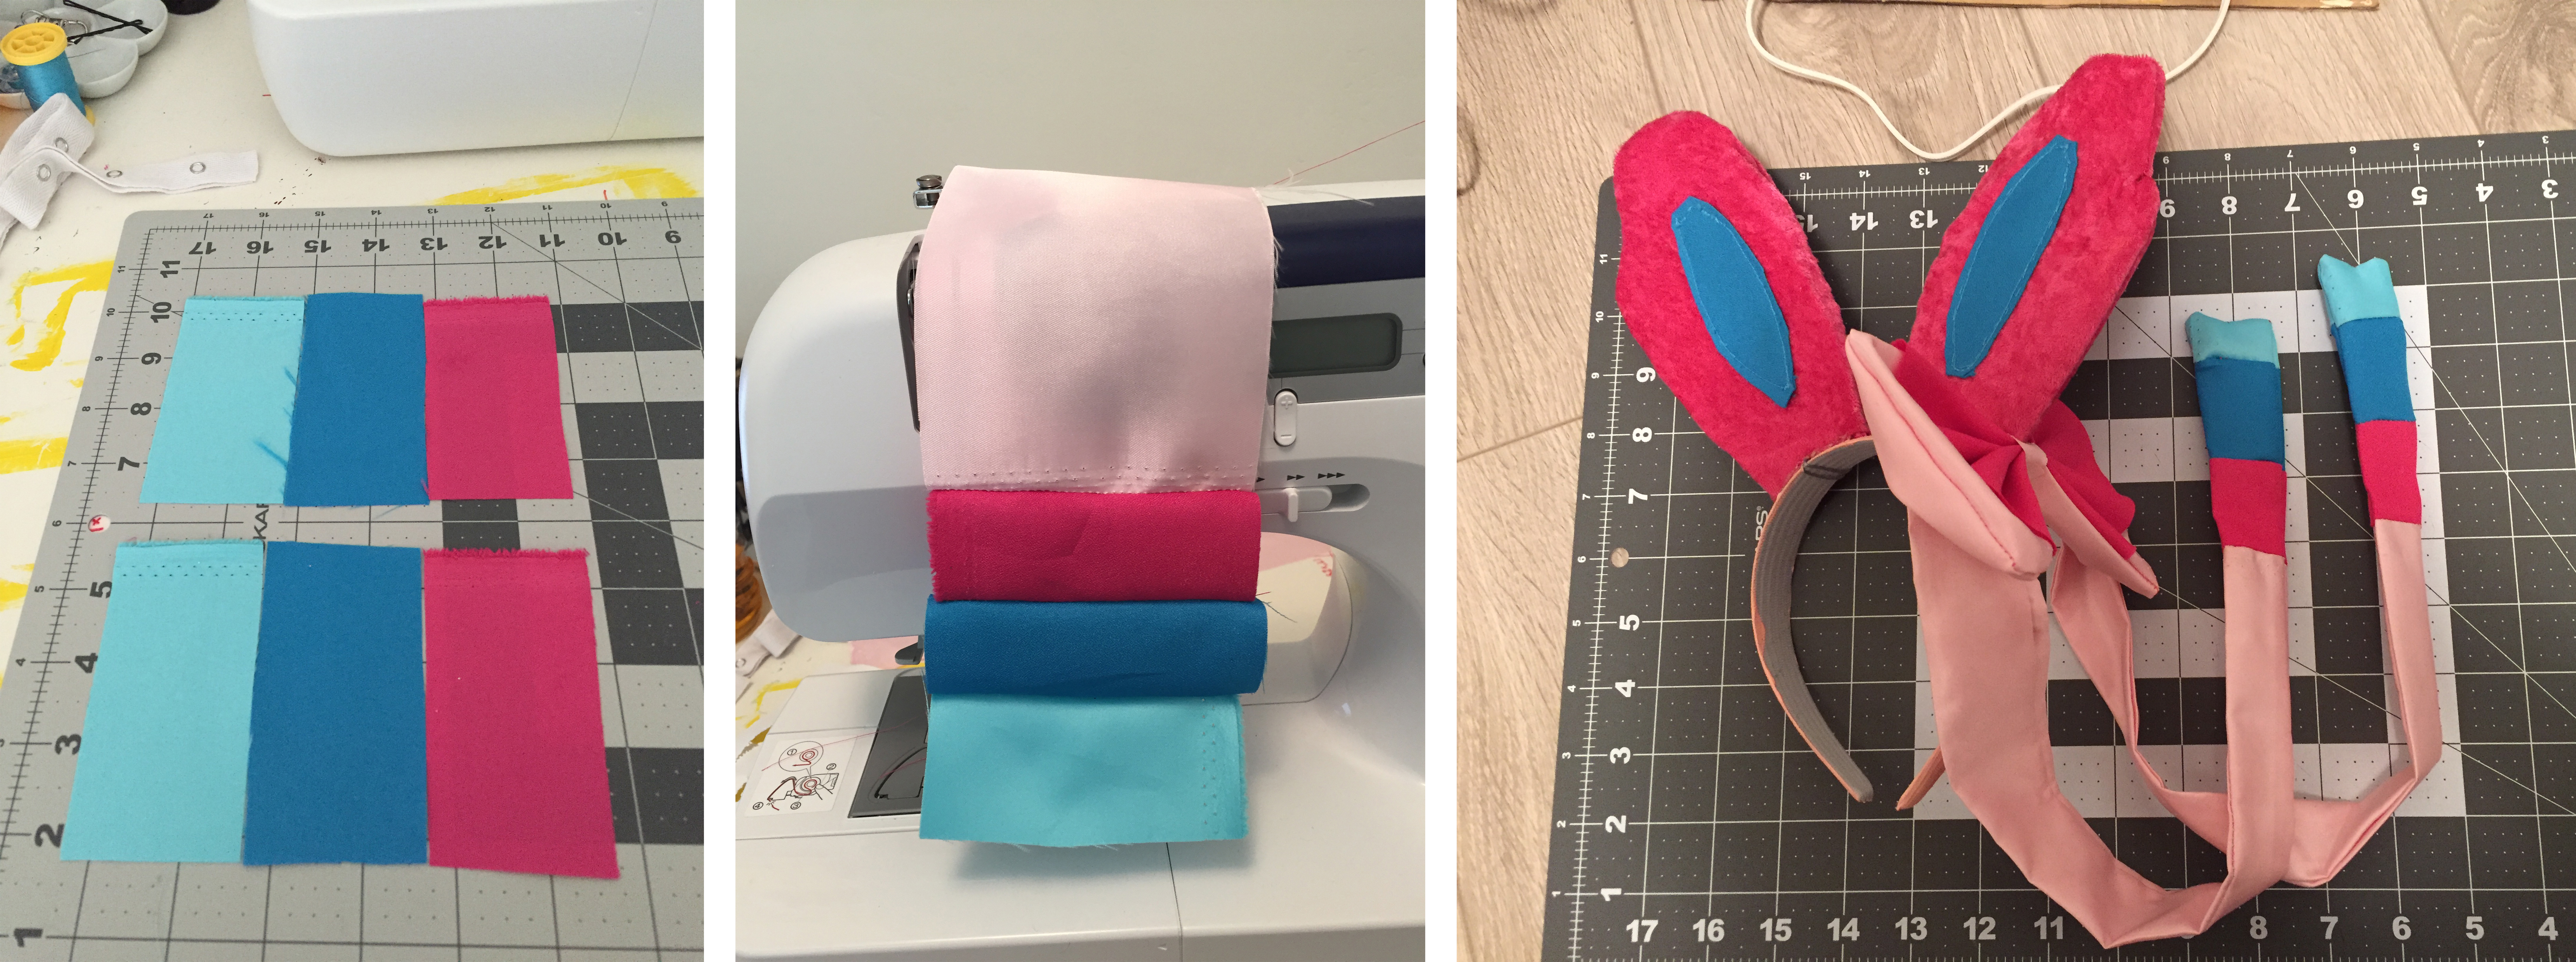
First I measured out the interfacing. I took time to make sure they were symmetrical and a good height proportional to my body. I didn’t want them to be too tall for fear of them flopping over from the weight. After cutting out interfacing (2 sheets per ear), I cut out 4 pieces of pink fabric and 2 pieces of blue fabric. I hemmed the blue fabric, sewed it to the pink pieces, sewed those pieces to the remaining pink pieces (right sides together), then turned the whole thing right-side out. After shoving the interfacing unceremoniously into the fabric, I attached them to the headband using wire and hot glue. If you’re interested in seeing video of this process, I made a tutorial for when I was making more Pokemon ears for a Halloween group costume. Once the ears were attached, I very carefully painted the silver headband pink so that it would blend with the wig better.
Once the ears themselves were done, I had to make the ribbon that would hang from it. I started with a few rectangles of pink and blue fabric for the ribbon ends. I sewed them together and then sewed that to a long piece of light pink fabric for the ribbon. After folding it in half over itself, I sewed it shut. When I reached the end, I made sure to sew in a V design to give it that nice ribbon edge. Once done, I turned it inside out and repeated the process for another strand of ribbon.
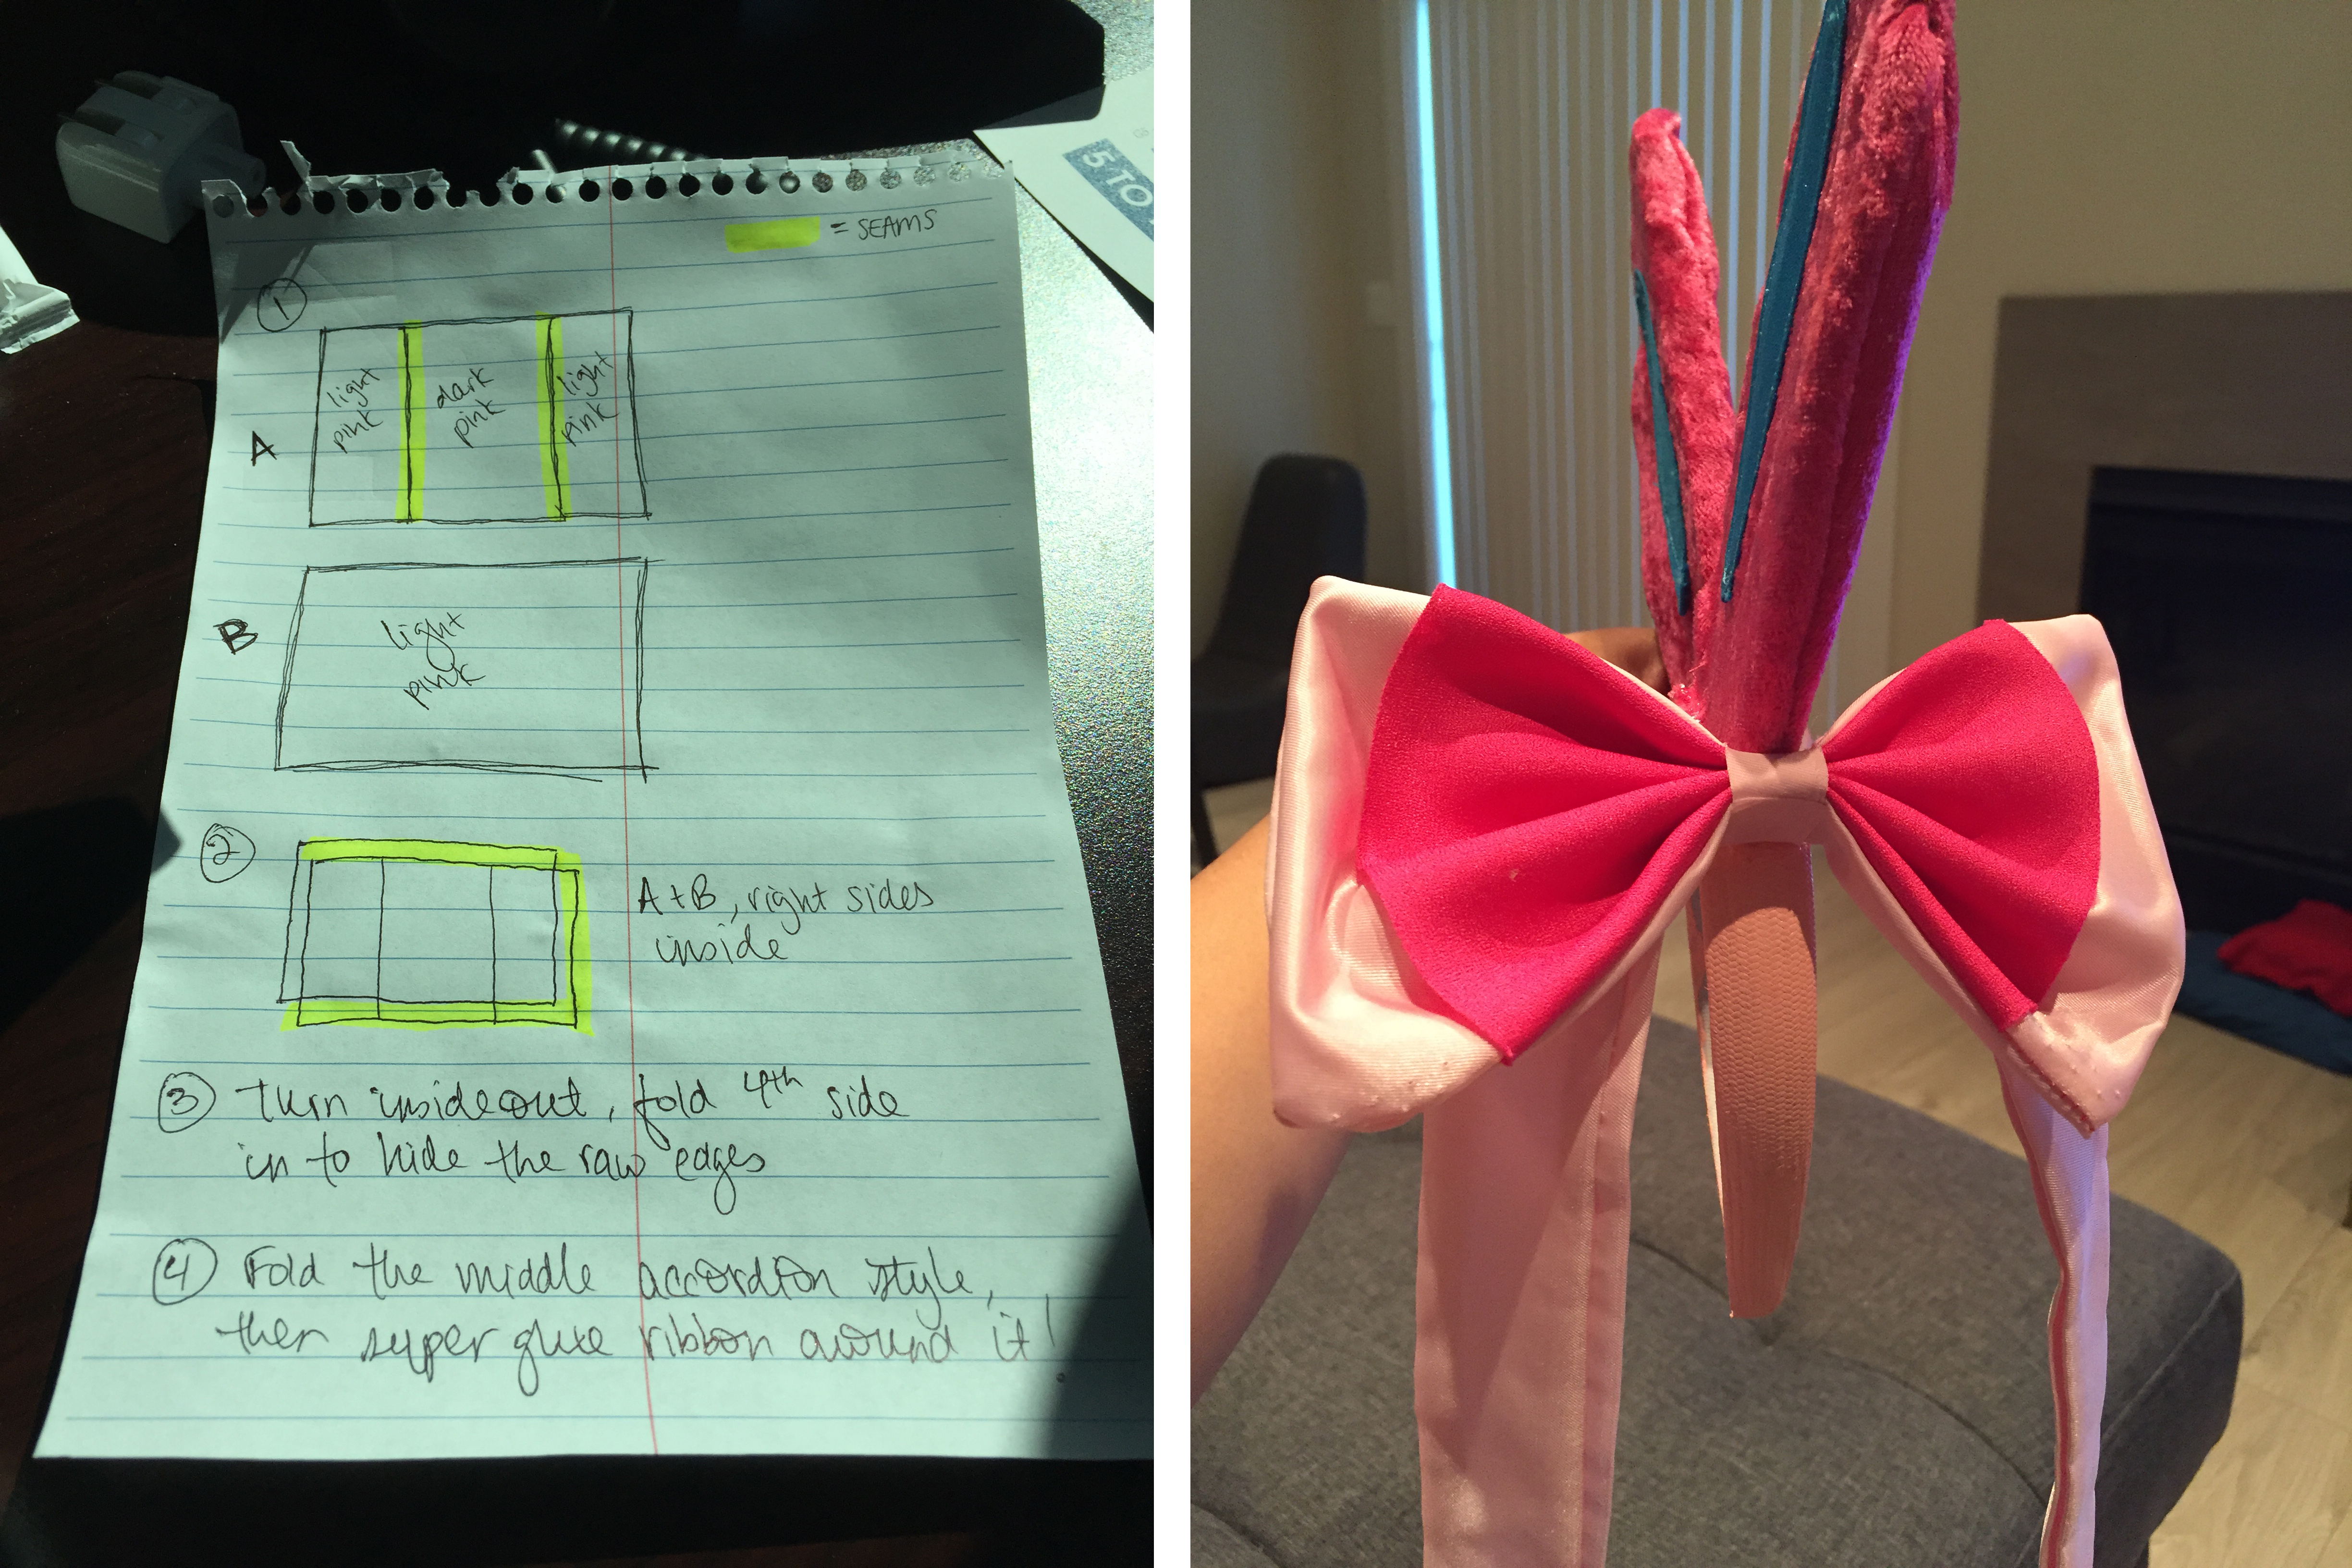
For the bow, I sewed one dark pink rectangle to two smaller rectangles of light pink fabric to work as the front. Then I measured and cut out one light pink rectangle the same height and width as the front piece. I sewed three edge of it shut, then flipped it inside out. I folded the middle of it to give the bow its shape, then wrapped the middle in some pink ribbon I had and hot glue it all shut. For the fourth edge, I folded the raw edges over in on themselves to sort of super glued it shut cause I wasn’t entirely sure how to better finish that edge. Not the best process, but I don’t think you can really tell at all!
Shawl
The shawl was a bit of an experiment really. I wasn’t working with any patterns (although I probably should’ve just looked some up as reference). I had a vague idea that it would be a rectangular piece of fabric that folded in on itself to make sleeves.
This is the part where I wish I had a mannequin or dress form. I don’t, so I had to resort to pinning fabric together and then very carefully trying it on (and pricking myself with the pins a lot in the process). I did this with the lining fabric since I had a lot of it and was okay with cutting it. Once I was happy with the shape and size, I cut the light pink outer fabric in the same way.
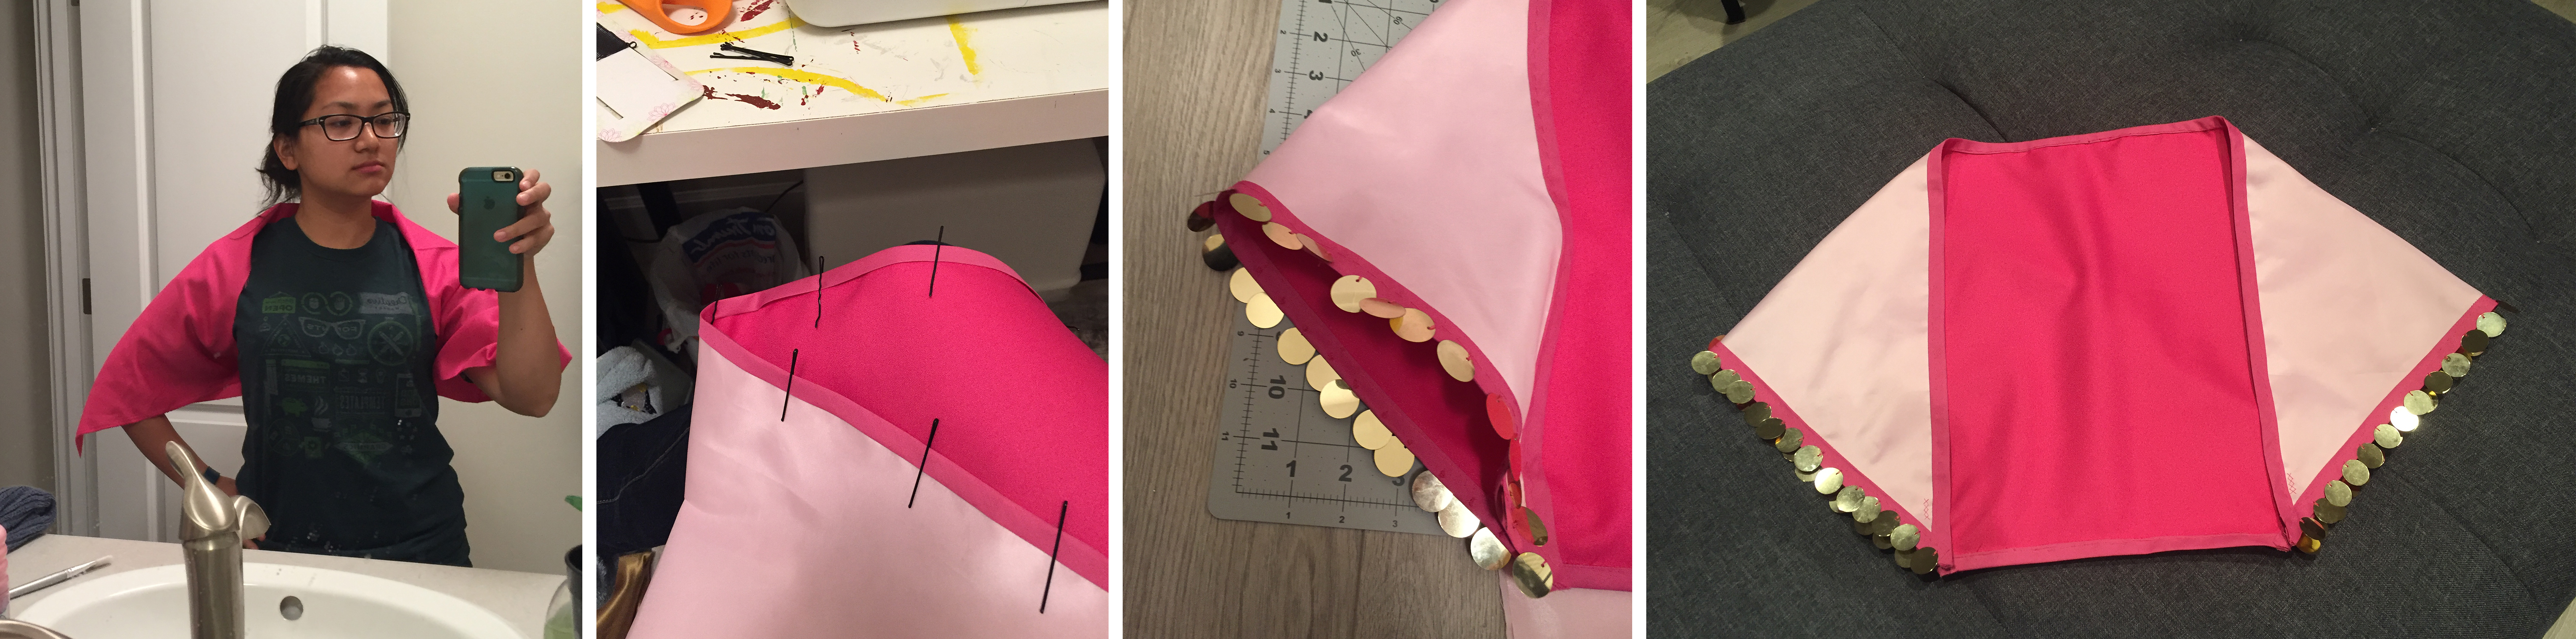
 Before sewing the corners over themselves to make the sleeves, I finished the raw edges on all four sides of this now isoceles trapezoid (not gonna lie, I had to look that up to be sure I was using the right geometry term lol) with pink bias tape. I think it really cleaned it up despite being super time consuming. Because I used double-sided bias tape, I had to hand-stitch the second side because I was sewing through 6 layers of fabric. I didn’t want to risk breaking the needle on my sewing machine, so hand-stitching to the rescue!
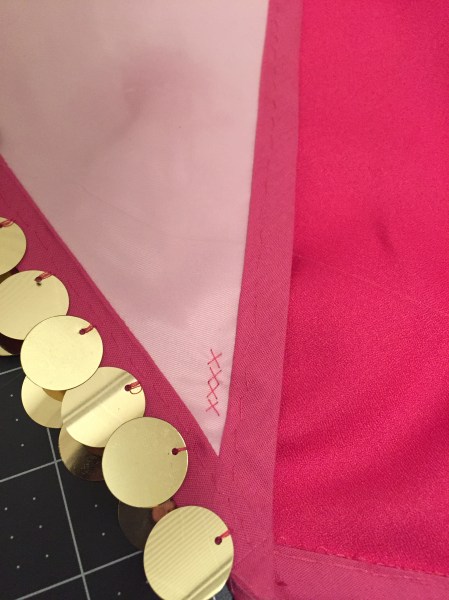
Once I was happy with the bias tape, I hand-stitched the edges together. I sort of just made little X stitches in a couple lines down the side of the corners. Finally, I painstakingly added gold pendants to the entire thing.
Belt
I started with the blue base. I measured out my waist to figure out the length and then figure out how wide I wanted it to be. I cut out 2 pieces of interfacing and 4 pieces of blue fabric. I would’ve liked to just do one long continuous strip for it all but my fabric wasn’t long enough, so a side seam was necessary. I didn’t have to worry about hemming these cause I already planned on finishing everything with bias tape. (Bias tape ALL the things!) so I moved onto the pink pattern.
After drawing out a few different attempts, I managed to get a good paper pattern for the pink pieces, making sure to fold them over so that they’d be symmetrical. The reference picture has the pink pieces at about half the height of the blue belt, so taking this and the length of the belt into account, I worked out that I could fit 6 pink pieces in comfortably on the belt. I cut them out and then meticulously added two strips of white beads to each pink piece, one strand to finish the edge and another to add some more dimension to the belt.

Once the pink pieces were done, I stitched them onto the blue pieces. Up next? MOAR BEADS. I added the little blue dot details to the belt by sewing 7 blue beads under each pink piece. I felt like I was getting better with each one I did, but it still took forever.
 Finally, I had reached the bias tape stage. Or at least, for the top. I sewed (again, by hand for fear of breaking my sewing machine’s needle) light blue bias tape to the top edge of the belt. Then sewed just one side of the bias tape for the bottom edge. I left this open because I intended to tuck the skirt fabric between the bias tape and the belt. So as much as I really wanted to close that bias tape, I had to leave it hanging open until I did the skirt.

For the belt buckle, I put it together with a combination of fabric, interfacing, and this sparkly gold foam I found at Joann’s. The instructions for interfacing say to iron on fabric to an interfacing piece larger than your intended piece, then cut this new piece together into the correct shape. Well, I don’t like doing that for a couple reasons: 1) I can never seem to get the fabric to stick to the interfacing no matter how much I iron 2) cutting the edges exposes the interfacing on the inside, which I didn’t want. So, rather than iron on the interfacing, I hot glued the two pieces of blue fabric to the interfacing. I used a larger circle for the front that I had cut little slits into and folded over the edges. Then for back, I hot glued a piece of blue fabric that was the same size as the interfacing. After getting the blue circular piece done, I carefully cut out holes in the gold foam and using tacky spray to attach the dark and light pink fabric pieces in a sort of stained glass style. Once dry, I hot glued the pieces together.
The skirt was pretty straight forward. It’s two layers of beautiful pink satin fabric that I cut into half circles, much like you would for an A-line skirt. But rather than sew the sides together like you would for a skirt, I just sewed the top pieces into the bias tape of the belt like I had planned. It worked out beautifully! I of course finished the edges with bias tape because come on, you should know me by now.
There are two little strips of pink fabric that hang from the belt too. That was as easy as cutting out the pieces and then finishing the edges with Fray Check. After finishing up all of that, I hand stitched some gold pieces to the bottom of the belt.
I had one slight problem with this belt: it was too loose. At first that was actually intentional; I had wanted it to be one long continuous piece so I could slip it around my legs and sit on my hips without needing a buckle like the one I used for Korra. So that of course meant the belt needed to be wide enough to accommodate my hips and butt.
Unintended consequence: The belt slid off my hips and started to fall down any time I tried to move around.
Failed solution: Add velcro to the interior of the belt and the exterior of the pink underwear I intended to wear. The belt stayed in place but looked strange because there was so much extra belt fabric that it wasn’t laying flat against my body.
 Winning solution: Add snaps to the front that take in the circumference of the belt, then add velcro to the belt and belt buckle so that the belt buckle both attaches easily and hides the fold from the snaps. It worked out really well! Huzzah!
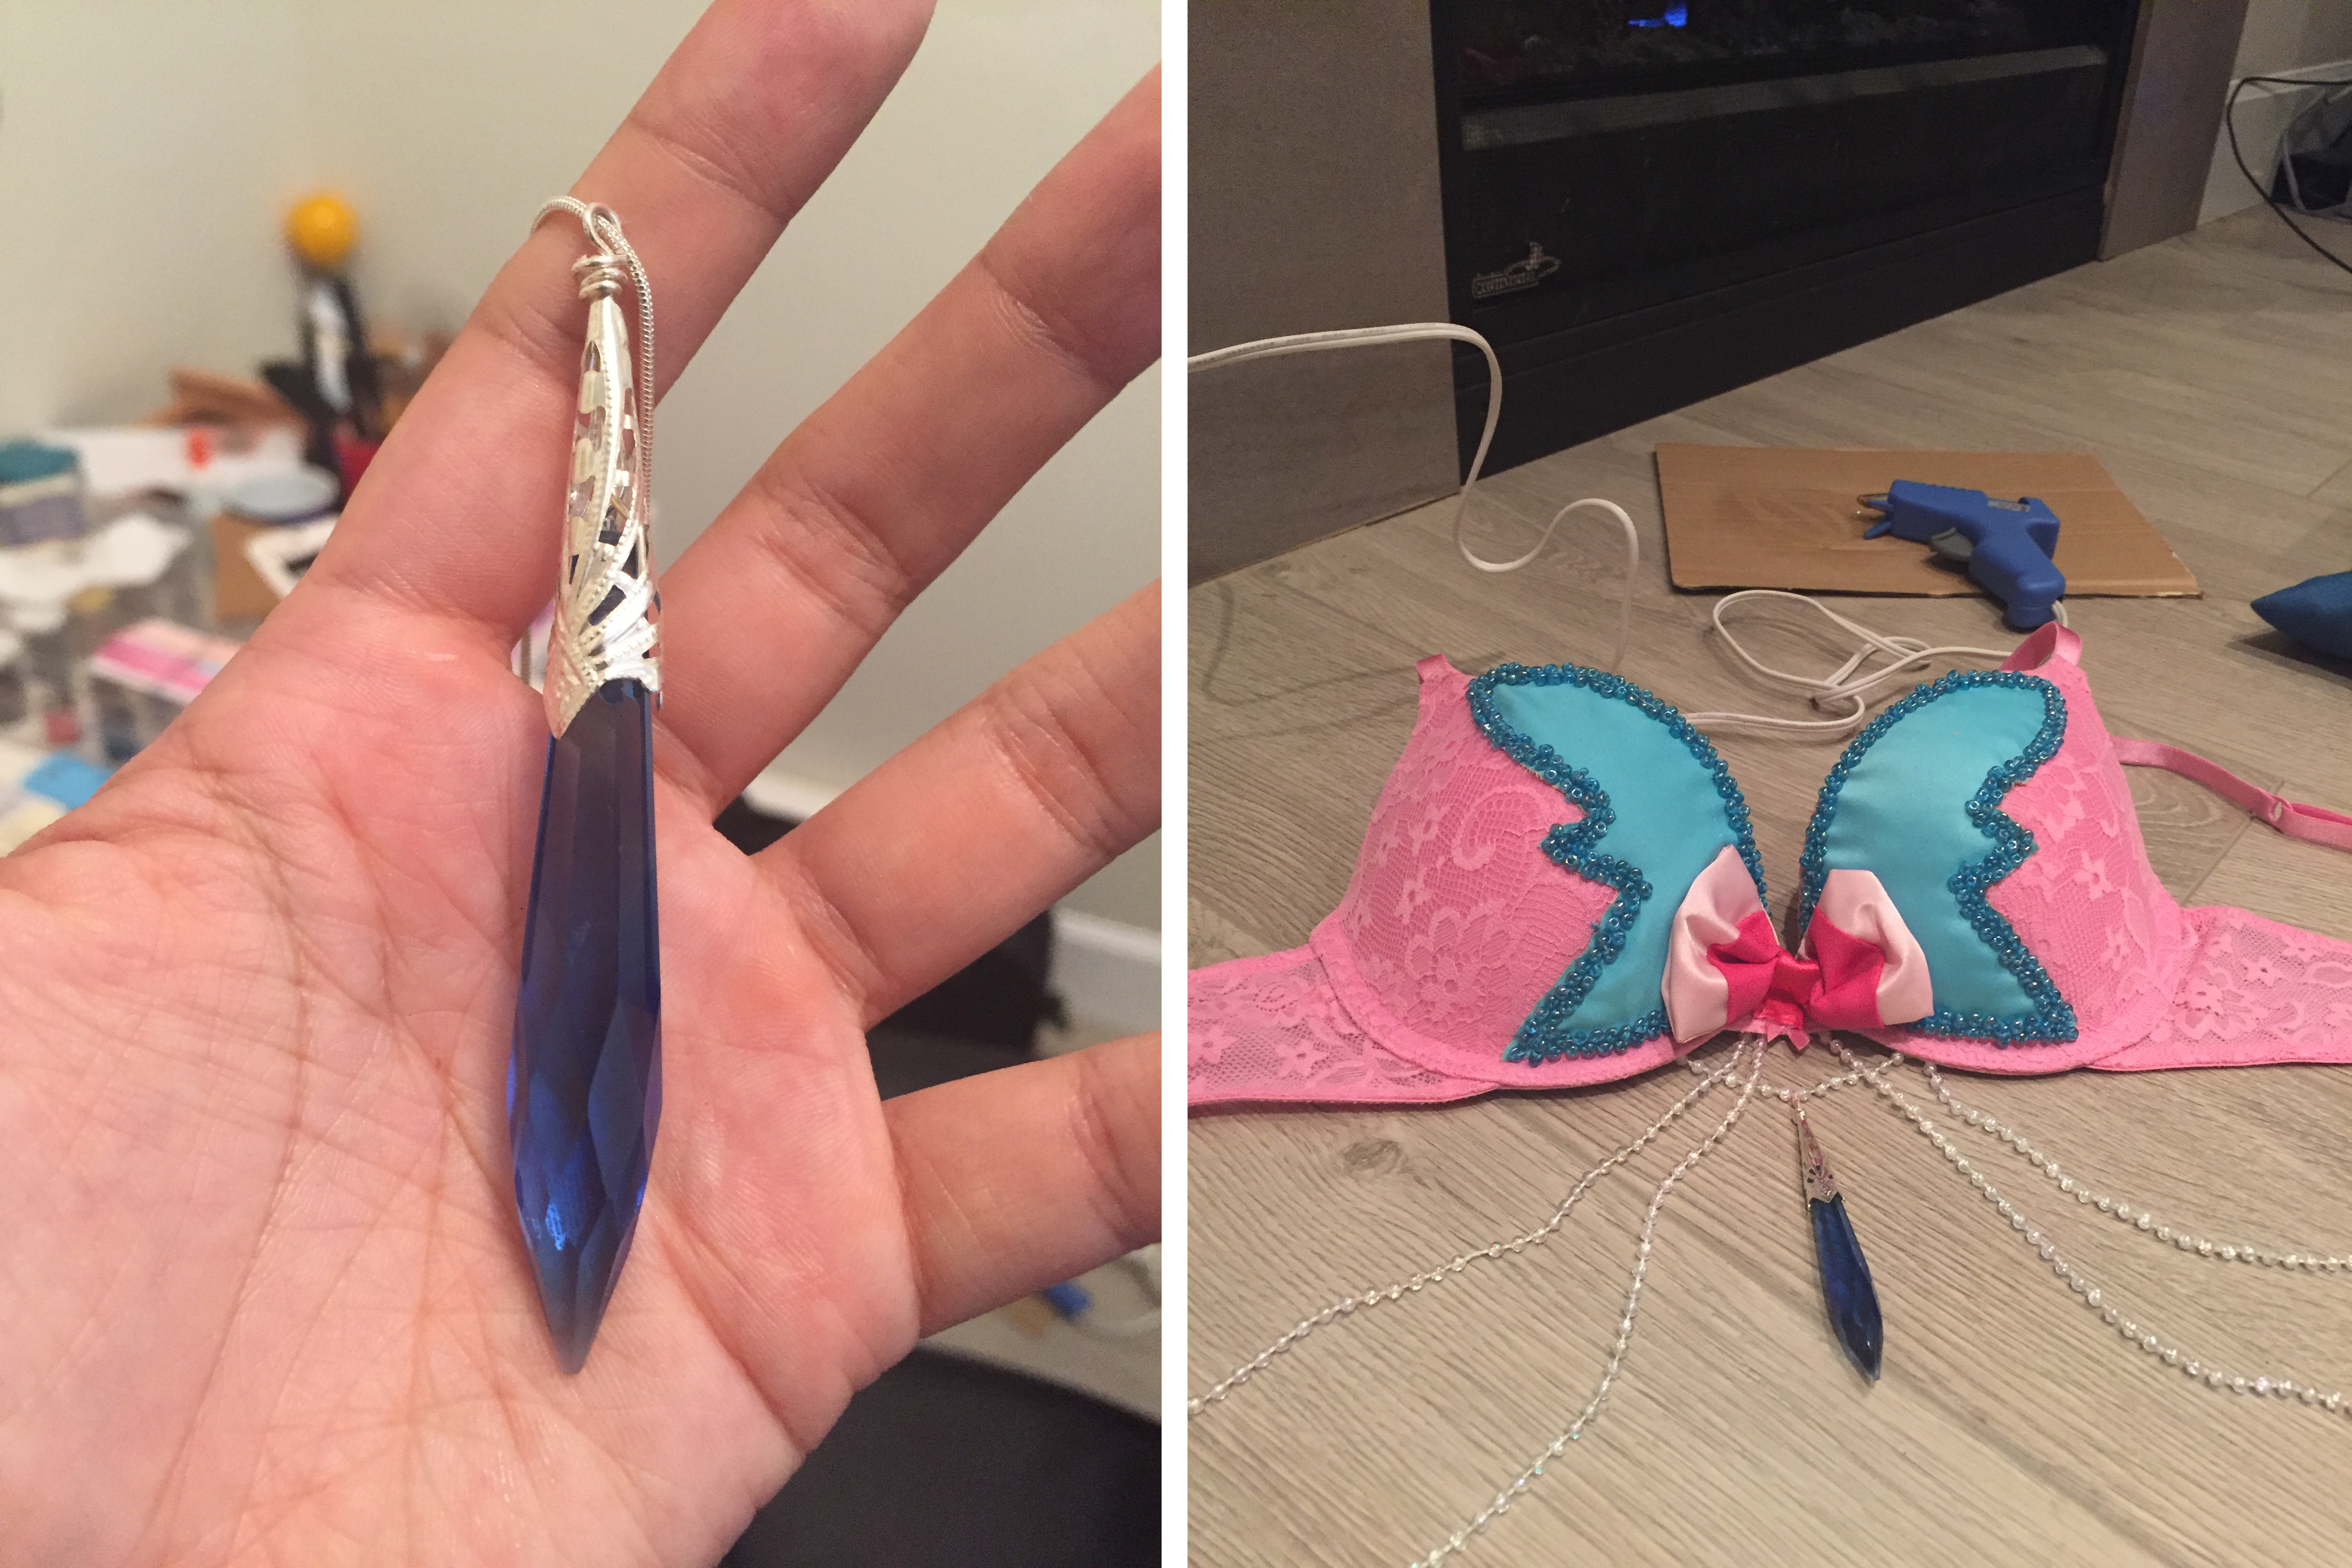
Bra
I finally got to try out a process I’ve seen a lot for cosplay: duct-tape patterns! It was pretty straightforward. I put on layers of duct tape on one side of the bra then drew out the pattern with a sharpie. I attempted to do it with pencil first but trying to use pencil on duct-tape was futile. Once I was happy with the shape, I removed all the duct-tape and cut out my new pattern! I cut out two blue fabric pieces and then, because I apparently hate myself, finished the edges by adding two layers of blue beads to the raw edges. Completing one piece took me 3.5hours. Not kidding! I watched so many episodes of Pokemon while doing these. I can’t tell if bead work is just inherently time-consuming or I’m just super slow at it. Probably a bit of both.
For the blue pendant, I found this really beautiful one on a necklace on Etsy. I was able to remove it off the chain pretty easy and I attached it to a string of white beads that I then sewed onto the bra. I also added a few layers of beads to the sides. (See below right picture). Once that was done, I hot glued the small bow I had made to the bra. Funny thing is this bow was intended for the ears, but I miscalculated and made it too small. But it was perfect for the bra! I used the same process for this bow as I did for the ear bow.
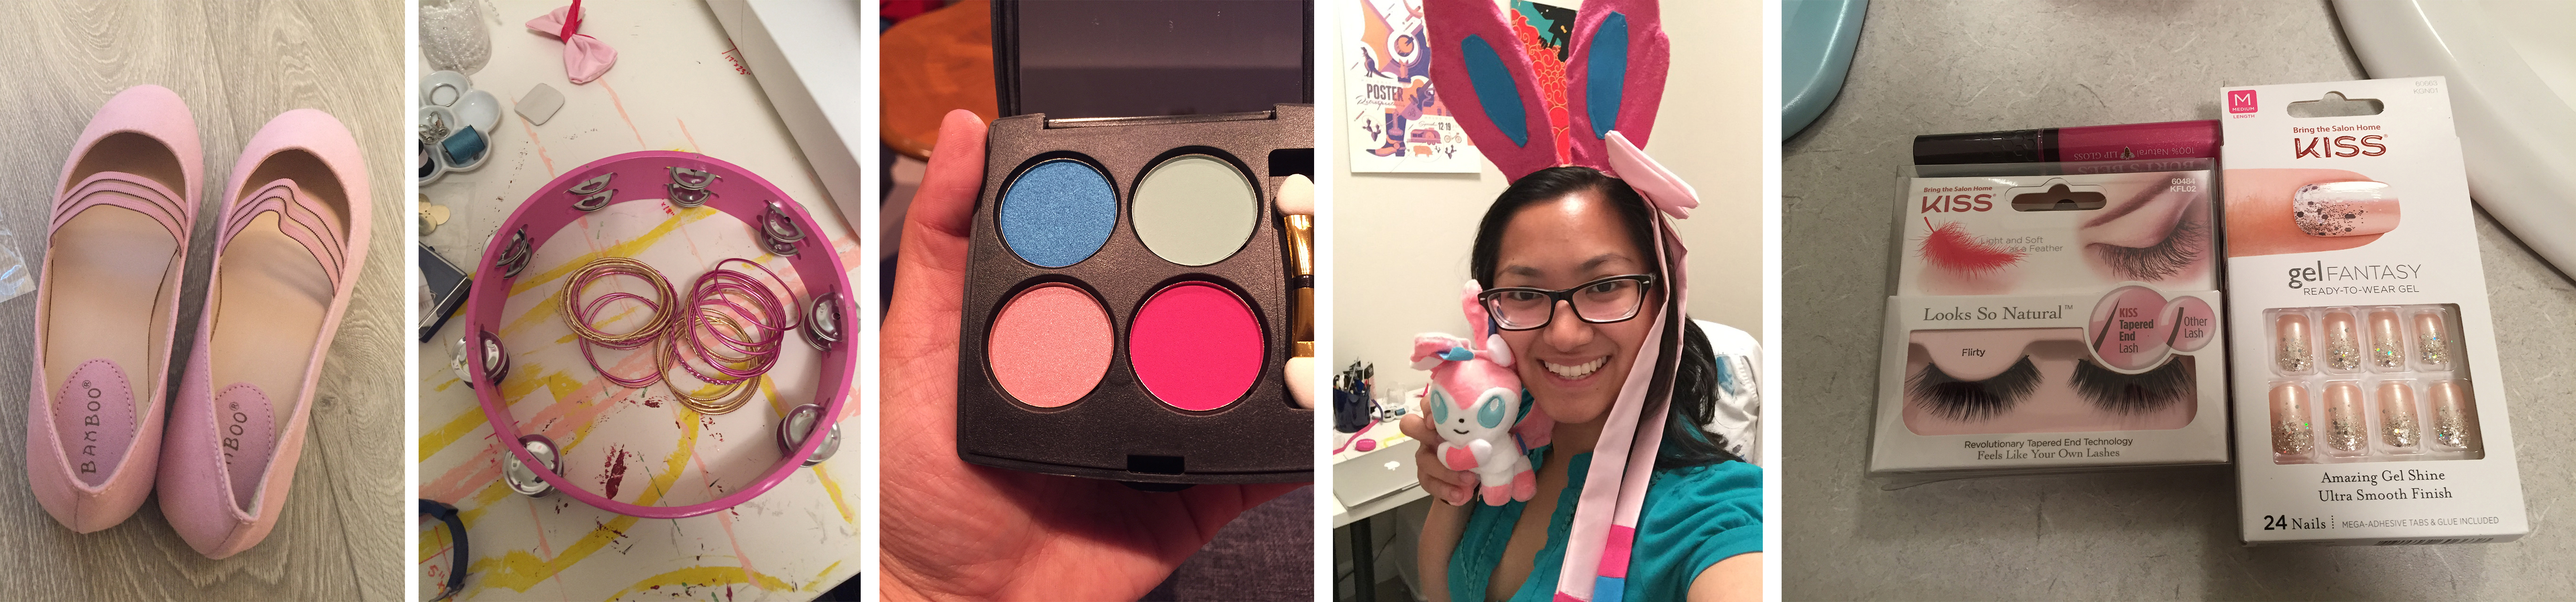
Shoes & Accessories
The rest of the cosplay just consisted of accessories that I bought.
- Shoes: Amazon
- Tambourine: Amazon
- Bangles: Amazon
- Eyeshadow: ArdaWigs
- Sylveon plushie: Etsy
- Fake eyelashes (and adhesive): Safeway
- Pink glittery acrylic nails: Safeway
The pink wig was one I already had from a previous cosplay. I had to detangle it and I used this tutorial to do it.
Conclusion
Sylveon was a whirlwind of fun and bead madness. I loved it and kind of wish I had dragged out the process because I found myself getting so bored the weeks afterwards; I felt like I had nothing to do. I can’t wait to join my giant Eeveelutions group at Kumoricon. It’s been so fun seeing everyone’s progress on our facebook group chat. We scheduled an hour with a photographer to take solo and group pictures so I should have some sweet high-res pictures come October! Hurray! Here are some pictures I’ve taken with the camera+ app on my iphone (it has a pretty decent self-timer feature). Enjoy!
Use my build post as inspiration? Let me know!
If you followed along with my build post to help you make your cosplay, I’d love to see it! Leave me a comment or send me an email at ashweezcosplay(at)gmail(dot)com. If you’re comfortable with it, I’d love to showcase your cosplay photo(s) in the blog! I will of course give you credit and link to any socials you may have.

Leave a comment