

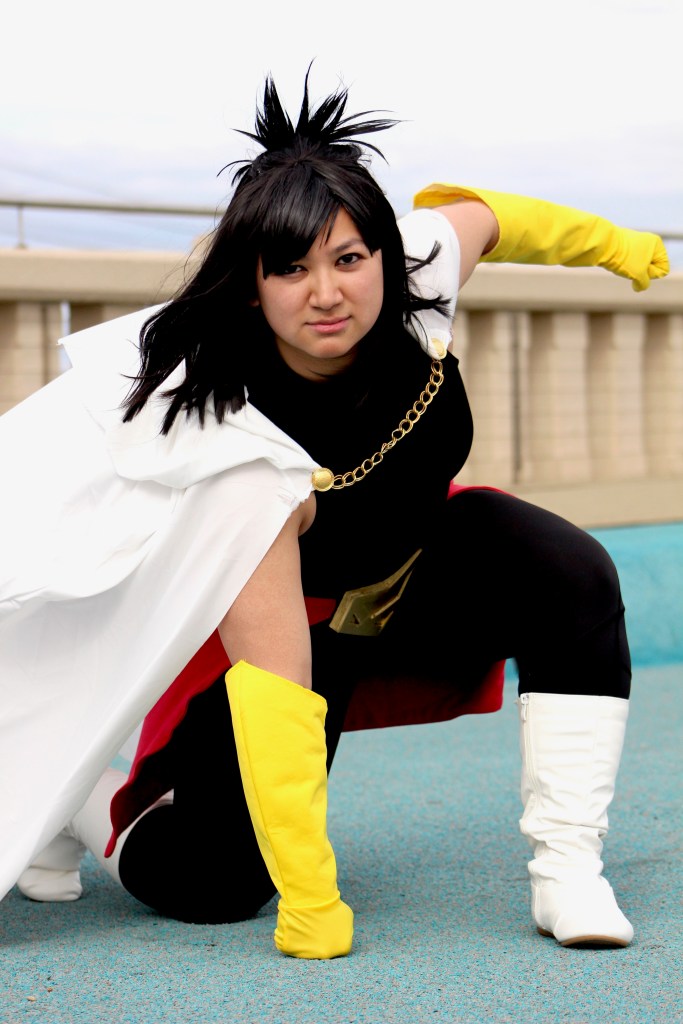
In October 2019, I finally started My Hero Academia. I had heard of it so much but never got around to watching it. The thing that finally pushed me to watch was attending a MHA Jeopardy panel at Animefest that Kasey and Joseph had been in, hosted by Jalitza who I now consider a good friend and who took my pics below!
After binging the show for a whole month, I was caught up to the current episodes of season 4, the latest season. The entire time I watched, I looked for characters to cosplay. Nana stood out. And with My Hero Con just around the corner, I knew I had to cosplay her.


Items I Bought
Items to Make/Modify
- Cape neckline
- Leotard
- Wig
- “Butt cape”
Cape modifications
After measuring the chain to figure out how long I wanted it to be, I used some jewelry needle nose pliers to shorten it. After seam ripping the ribbon tie that came with the cape, I cut small holes where the button would go. At this point I realized just how flimsy the fabric was, so I used eyelets to finish the hole edges. Then, I put the back of the gold button through the small eyelet and carefully threaded one end of the chain through the button hole. I then closed it with the the pliers. I did the same on the other side. This would mean that I wouldn’t be able to detach the chain or buttons, but would rather have to slip the cape over my head. There’s plenty of space however (unliked my Mae cape) so it’s easy to do. The last thing I did with the cape was shorten it by cutting a few inches off the bottom. The original cape didn’t even have it hemmed, so I didn’t bother either. *shrug*

Leotard modifications
I added magnets to my amazon leotard to help keep the cape in place. The chain thankfully was already magnetic, so I didn’t have to make any modifications there; I just needed to add magnets to the leotard. I did this by cutting out 4 small squares of fabric with my pinking sheers, just a little bit larger than the magnets. I then stitched each pair of the squares together, stitching 3 sides of a magnet-sized square with my machine. After slipping the magnet through the little slot, I hand-stitched the last side of the square to enclose the magnet. (I wouldn’t recommend using your sewing machine for the last side as the magnet is likely to stick to your machine!) With both magnets now encased in fabric, I handstitched them to the inside of leotard.
Pro-tip: to make sure I stitched the magnets on correctly with the correct magnetic side, I used different color fabric: black fabric for what you would ultimately see if looking at the leotard from the inside, and a dark blue fabric for where the magnet would make contact with the leotard and eventually stick to the cape’s chain.
Wig
For the wig, I used an old wig I had purchased long ago for a Marcelina Abadeer cosplay. Since then, it got trimmed and was briefly used as a Blake Belladonna wig. Now, it was going to be reincarnated again, this time as a Nana Shimura wig.
First thing I had to do was detangle it. This took about 45 minutes of patient combing with a wide-tooth comb. I didn’t use any products to help detangle it, but I probably should’ve to help save myself time. After that, I trimmed it to the correct length, first cutting it straight just to get all the excess hair lobbed off for later use (more on this in a little bit), then cutting from an angle to fray the edges and clean up the appearance.
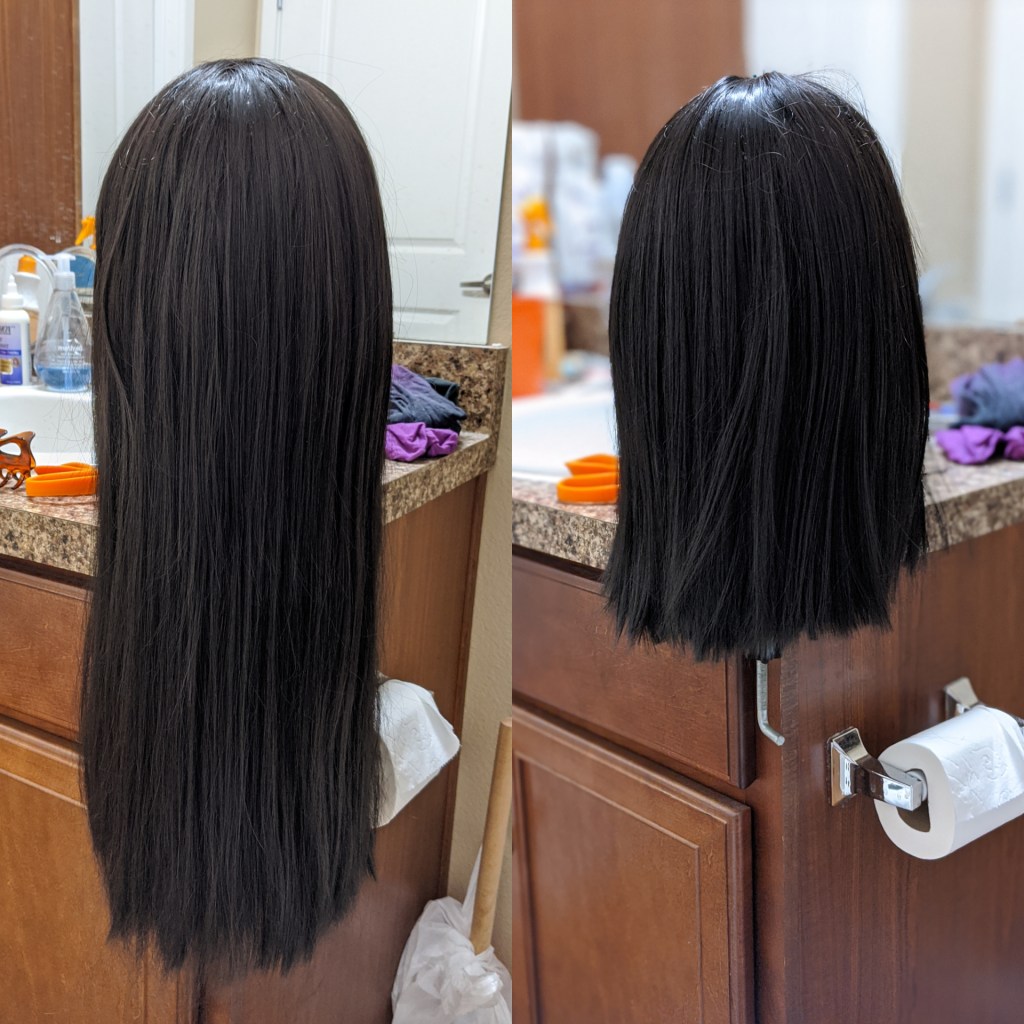
Next was styling. I used this Kinpatsu wig tutorial as inspiration but did not follow it 100%. Rather than cut ALL the hair off the wig just to hot glue it back on, I used the leftover hair from trimming the wig as my wefts. I would need these wefts to cover up parts of the wig cap that would show in the up do.

To add the wefts, I first tied up the hair that would be used for the little bun and clipped it in place, out of the way. Then, referring to Kinpatsu’s tutorial, I hot glued in my homemade wefts to the exposed areas. This took a while and it was a messy job to be honest. In the future, I think I would make sure I had time and money to buy the readymade wefts and then stitch them in. I would much prefer that than gluing. However, I was on a time crunch, so hot glue worked just fine. Once that was done, I let down the bun and put it back up, leaving some extra hair down to cover up the hot glue spots (which wouldn’t have been a necessary step had I stitched wefts in).
The last step was styling her little spikes. I used the elmers glue I had on hand for this part and it was a hot mess. A hot, sticky mess of hair fibers all over my fingers. At first I mixed the glue with water, but by the end of the process, I just accepted my fate and used just the glue for the spikes. There were lots of little frizzies sticking out, so I used scissors and just cut them off once the glue dried. I did the same for the bangs.


“Butt Cape” Construction
Buckle
After designing the buckle in Illustrator, I printed them off, cut them out, and traced them onto EVA foam. (You can find the pattern for the buckle here!) The base is 10mm while the top detail layer is 4mm. I cut the foam, sanded the edges, then hot glued the two pieces together. Once combined, I sanded the edges again so that it looked like one smooth piece. To paint it, I first primed it and let it dry. I spray painted it gold to match the gold buttons and chain in the cape, then weathered it.


Belt
To make her “butt cape” as I lovingly call it, I first put on the leotard and pants I intended to wear so I could get an accurate measurement. I wrapped the belting I had bought around my hips and then marked with pins where it should end and where the buckle should start. I had originally planned to use a parachute buckle (like I had for my Korra butt cape), but it plus the foam buckle was too bulky, so I had to find a different solution.
Using my Korra butt cape as a reference, I cut out the red fabric. The shape for Nana’s is different from Korra’s and I also had to make it longer than Korra’s, which had “shrunk” due to me gaining some weight in the booty area. (Powerlifting squats will do that to you!) The final shape of the cape came out to a rectangle, with the longer side going around my hips. I cut two rectangle pieces out of the red fabric.
To stitch the two pieces together, I stitched along the long top edge (the one that would go around my hips/waist) and then stitched along the long bottom edge. I also stitched along the sides, but not all the way. I stopped about half way through so that I would have an opening to flip the whole thing right side out. After I turned it right side out, I slipped the belting I had measured through it and placed it along one of the stitched edges. This would be where the belt itself would be. After clipping the belting in place, I pinned a line down the fabric to mark where I’d stitch for the belting casing. I stitched the casing and then top stitched along all the edges except the belt/top one, closing up the two openings along the way. I now had a big, top-stitched, red rectangle piece of fabric with two little belt ends.
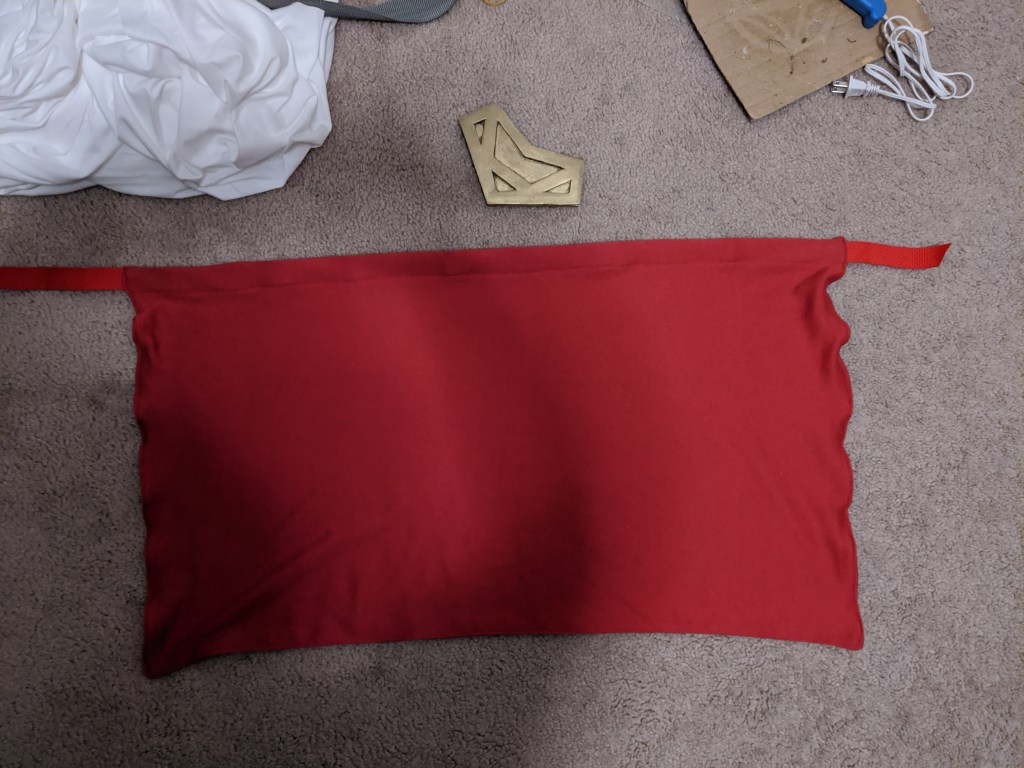
To combine the belt buckle with the cape, I placed the buckle right next to where the red fabric of the cape ended and trimmed the belting to fit behind it. I hot glued it in place and also hot glued the edges for support. Next, for the other side of the belt, I used industrial strength velcro. I stuck on the velcro onto the buckle with the built in adhesive then also followed it up with some hot glue around the edges just to be doubly sure. I then attached the matching velcro side to the belting of the last belt side and finished it with hot glue. Now I had a belt that could easily be attached and detached with velcro.

Conclusion
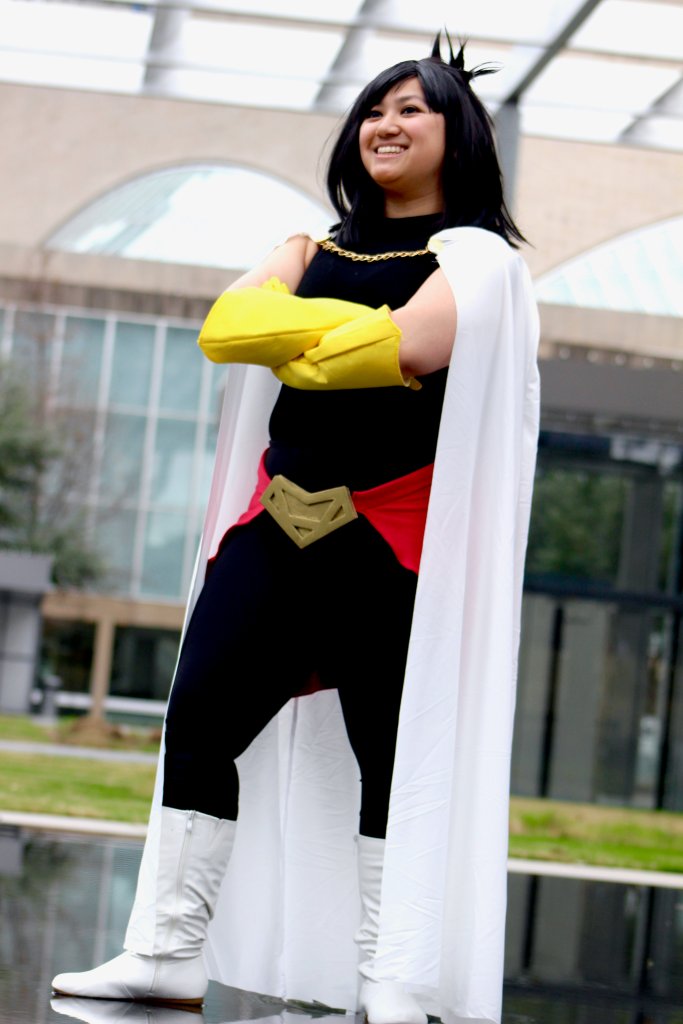
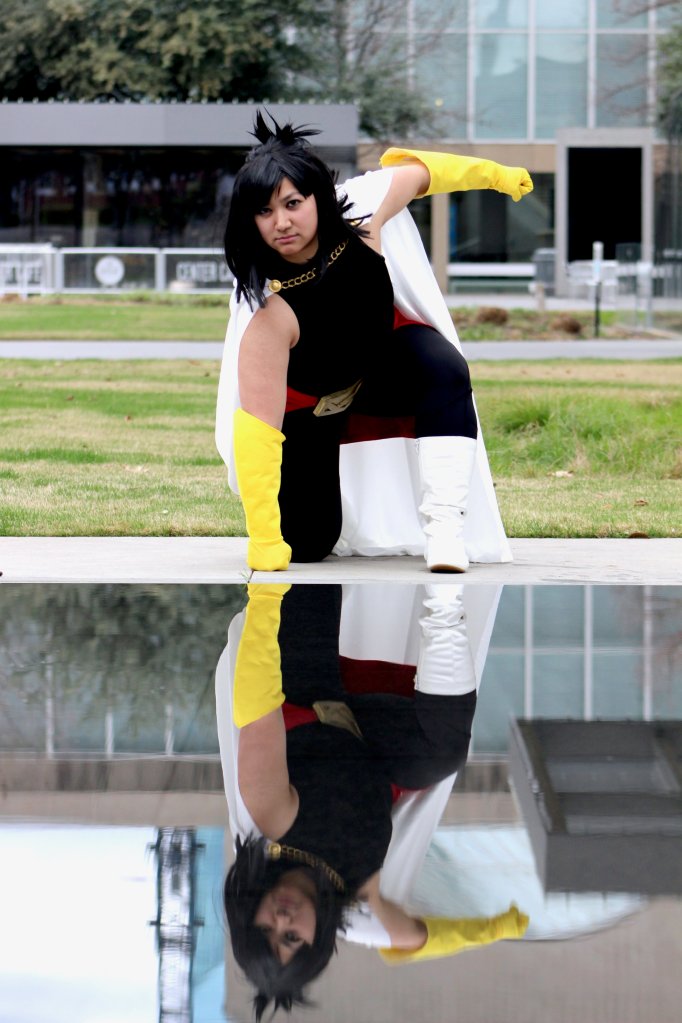
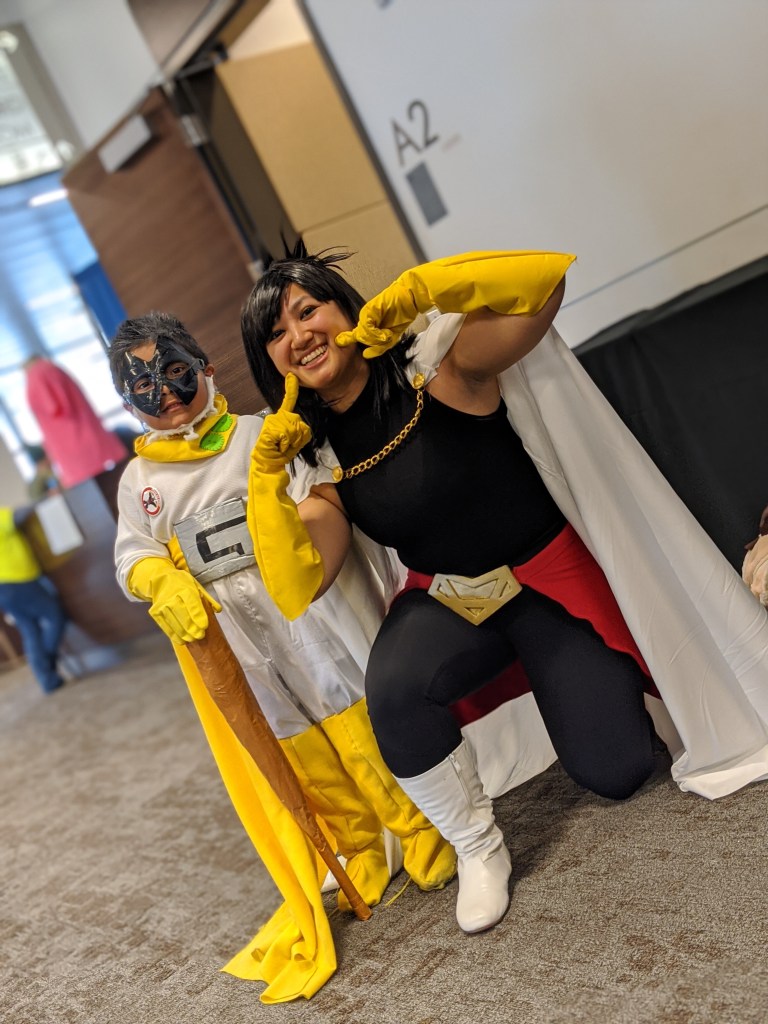
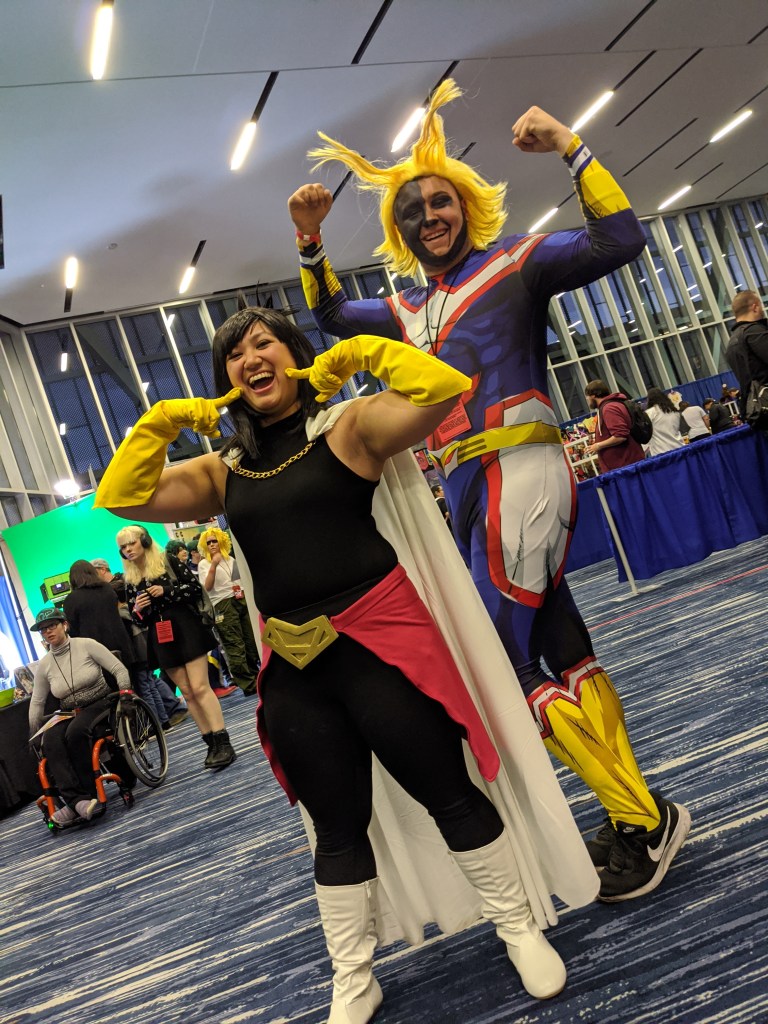
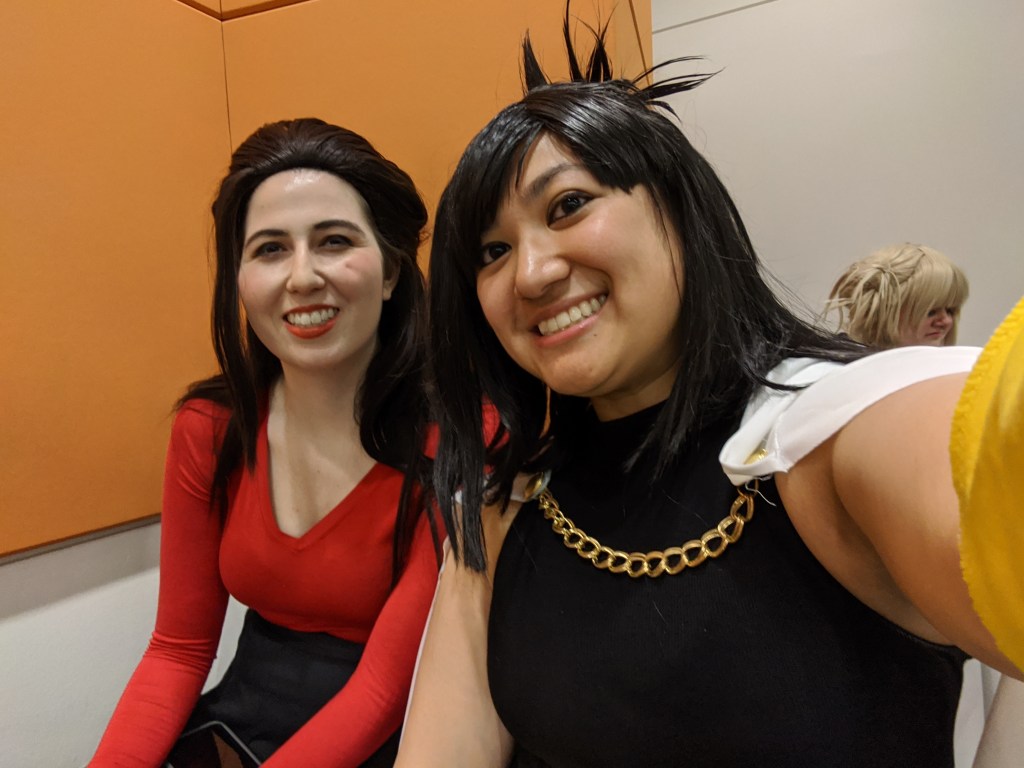
Making Nana was a nice low effort cosplay after the whirlwind that was Maria last year. I liked having something that came together quickly but still required a little personal touch to make it my own. She’s a very comfortable cosplay (with built-in pockets woot) and easily recognizable. I wore her to My Hero Con and got to meet so many amazing MHA cosplayers. Here are a few pics I got at the con!


All For One: @dream_perfectionist_
Gran Torino: ??
“Small” Might and Night Eye: @lancelots_toshi
All Might: @hamsolo5533
Nana: @sensationalgiraffecosplay
Momo: @kaseydidwhat
Ragdoll: @kenkona.xo
Deku: @brandyn.with.a.y
All Might: @infernorune
Use my build post as inspiration? Let me know!
If you followed along with my build post to help you make your cosplay, I’d love to see it! Leave me a comment or send me an email at ashweezcosplay(at)gmail(dot)com. If you’re comfortable with it, I’d love to showcase your cosplay photo(s) in the blog! I will of course give you credit and link to any socials you may have.

Leave a comment