
Overcooked came out in 2016 and was an instant hit. I absolutely loved playing it together with Jason. I’d play it by myself sometimes when I’d get home after work before him cause I loved it so much.
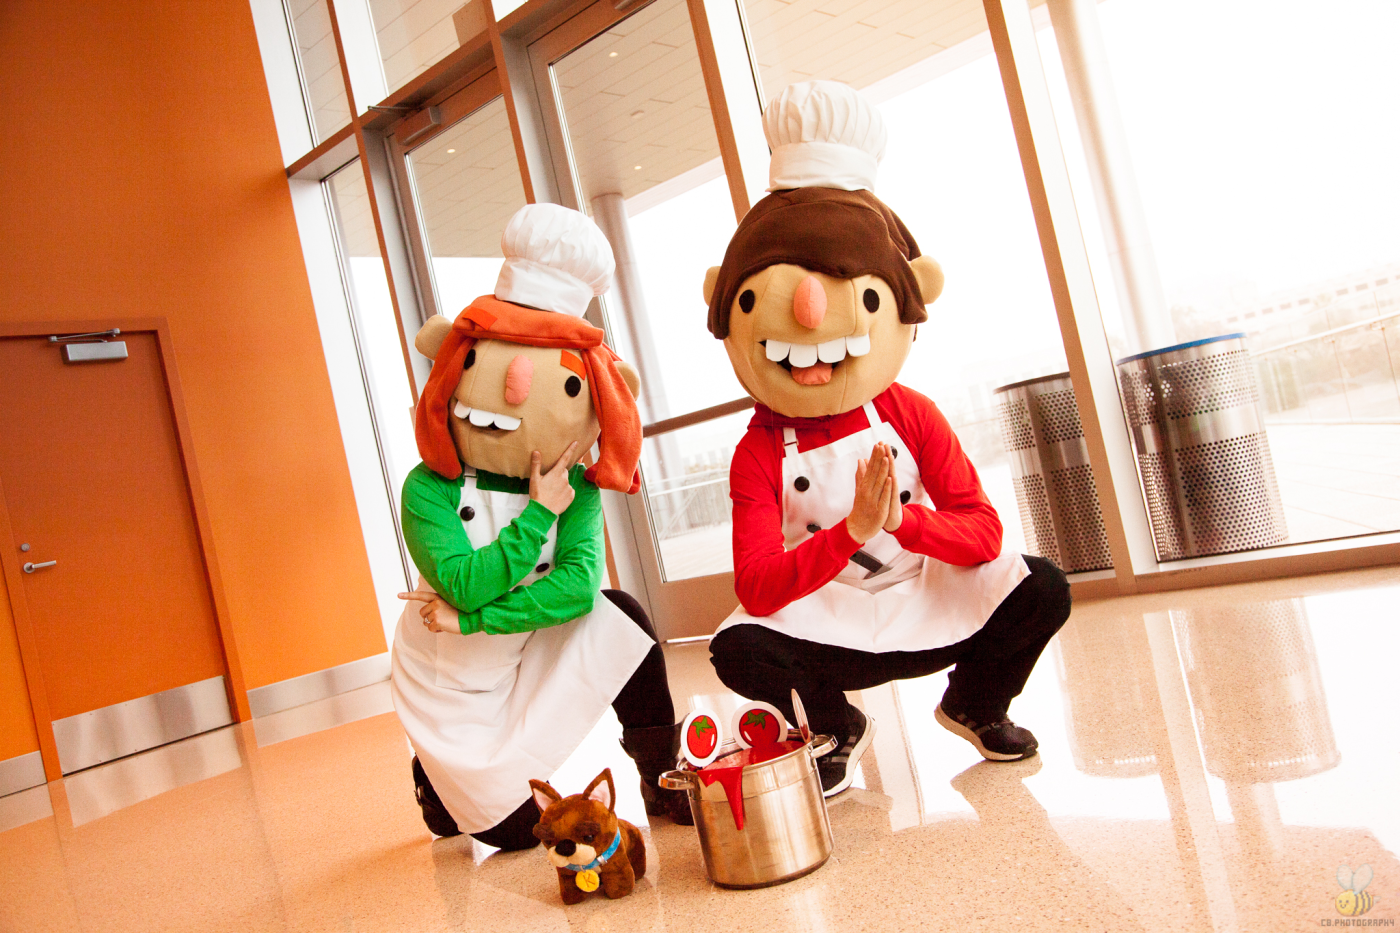
The sequel came out August 2018 and I decided it was time to cosplay some characters from it. Jason agreed to join me. The original plan was for him to be a chef and for me to be Onion King. However, in the months leading up to PAX South 2019, I ended up backing out of being Onion King. The task felt too daunting, considering I had never made a mascot head–let alone full costume–with foam before. So, it came to pass that we both became Overcooked chefs, specifically ones used heavily in promotional materials.


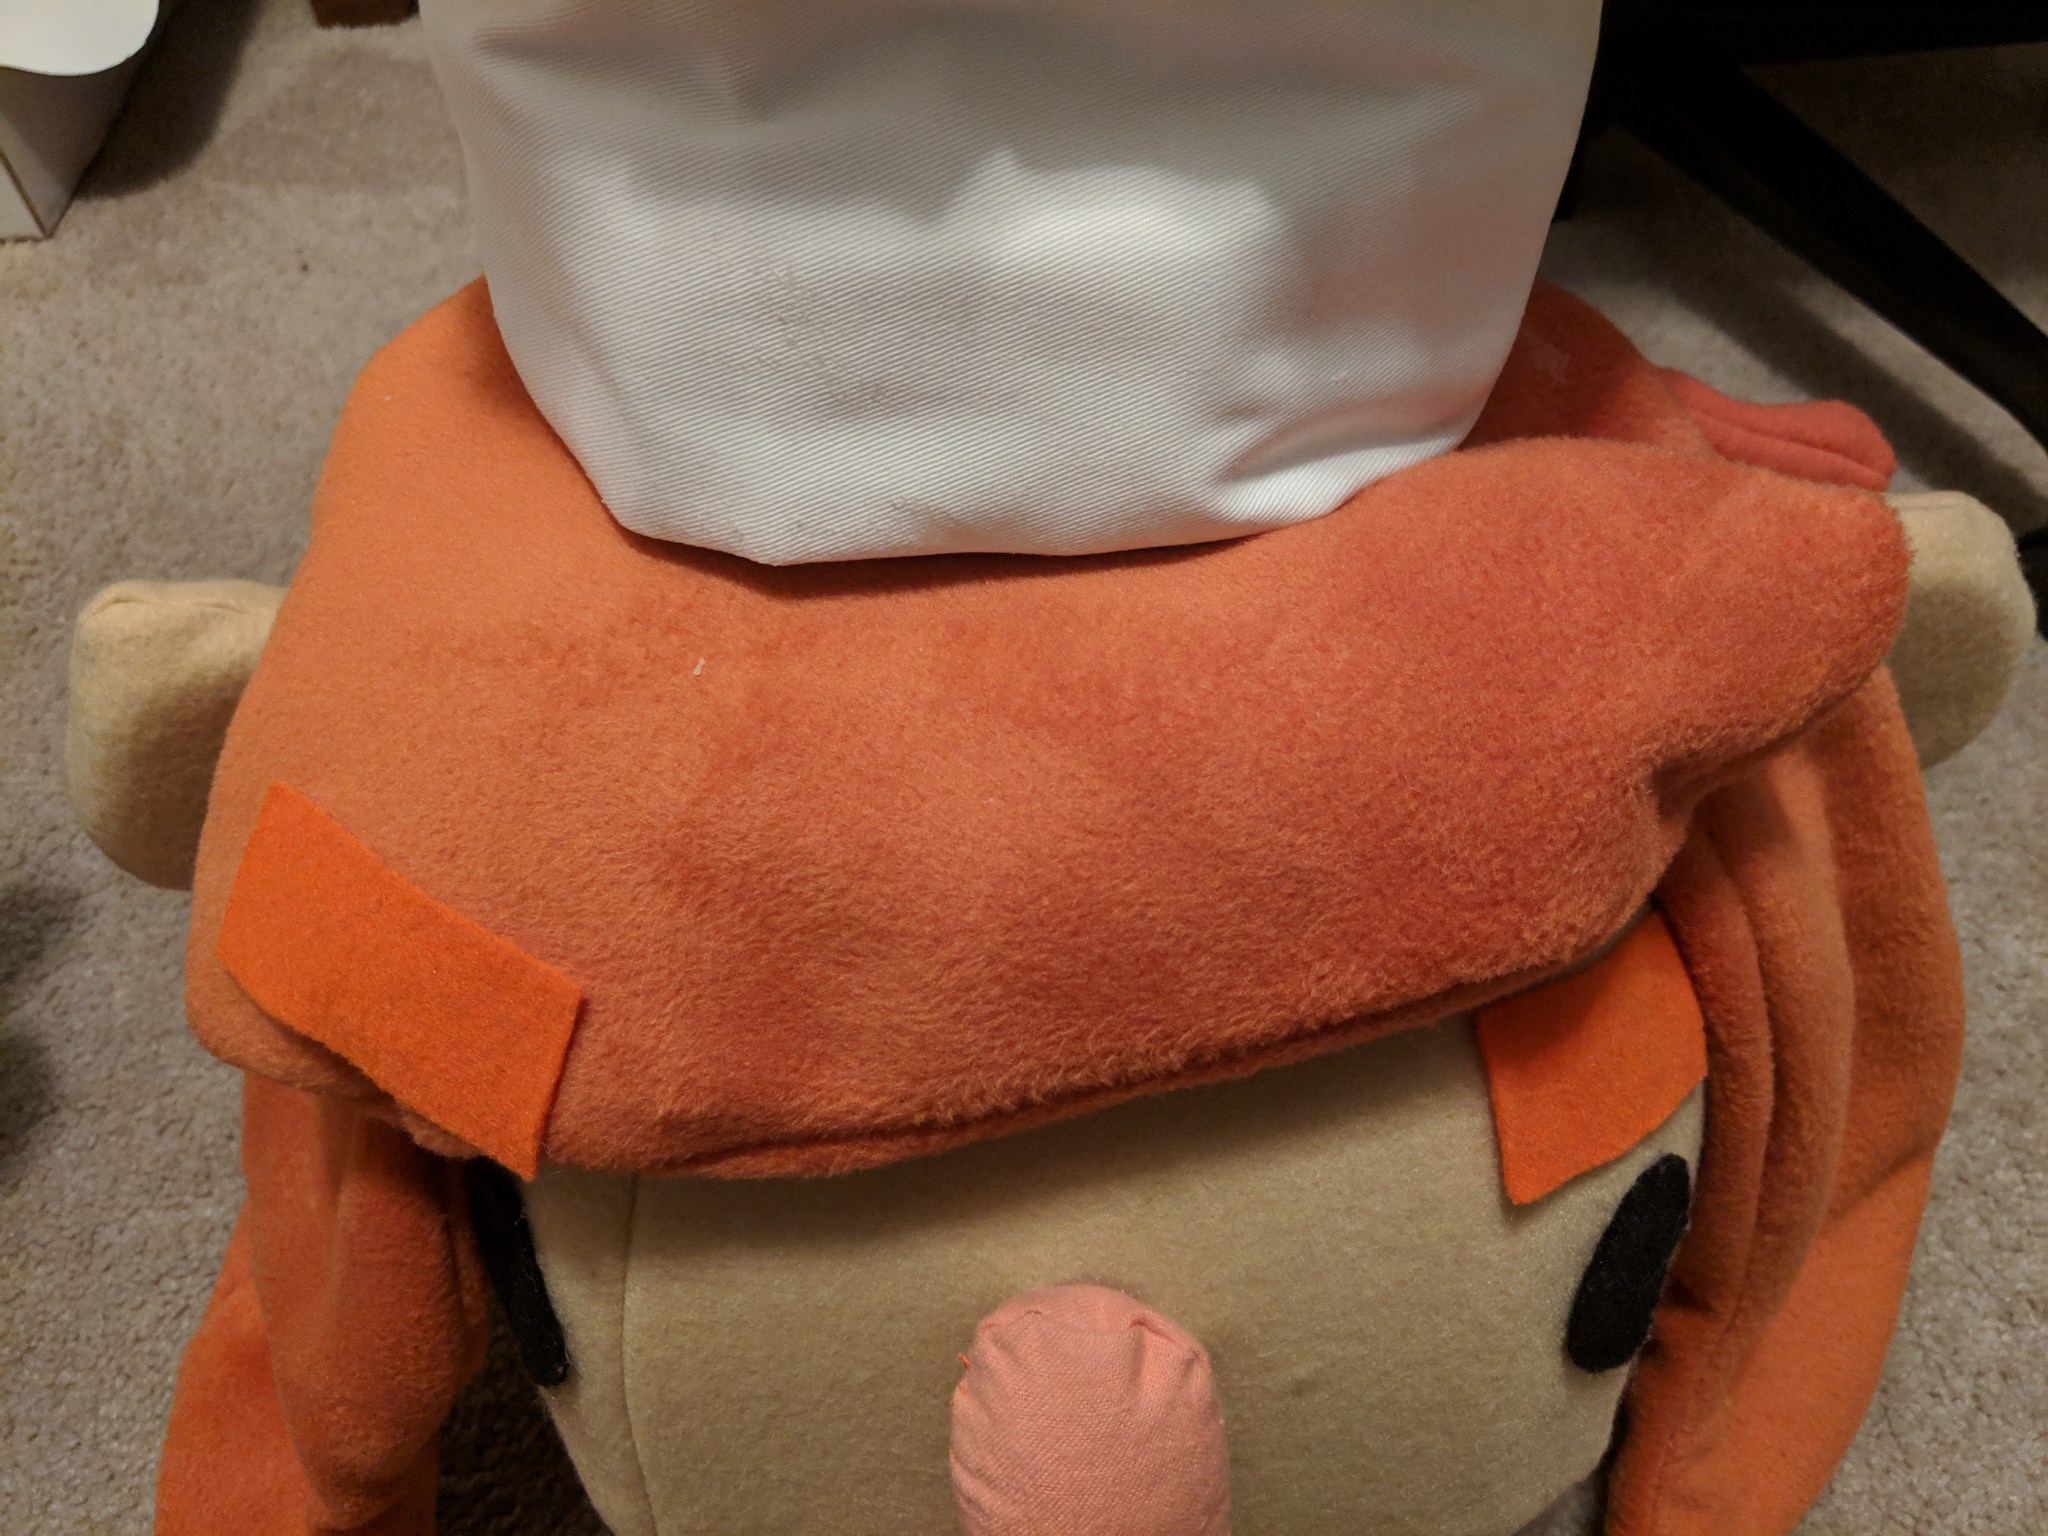
Photo credit to PancakeRemix

This post is going to focus solely on making the mascot heads, as it was a very labor-intensive process with lots of steps. I’ll be going over the rest of the cosplay (props and clothing) in Part II!
What I used*
- Supplies (this is for both my and Jason’s heads, so the amounts may be more than needed for just one head if you’re using this write-up as a tutorial)
- Six sheets of 15×17″x1″ upholstery foam (Joann’s)
- One sheet of 15×17″x2″ upholstery foam (Joann’s)
- One 9×12″ sheet of black felt (Joann’s)
- One 9×12″ sheet of white foam (Joann’s)
- One 8×10.5″ sheet of black buckram fabric (Etsy)
- 1′ of pink fabric (for nose and tongue)
- ~2yds of skin-colored anti-pill fleece
- ~3-5yds of kind of velvety fabric in orange and brown
- Pillow stuffing (Joann’s)
- Thread in matching colors for hair, nose, and skin
- Stabilizer fabric
- Tools and adhesives
- Misc
- Chef hat and apron set (Amazon)
*These are just the brands/stores I use, you can probably find them elsewhere as well.
Feel free to jump to whatever section:
Foam base | Fabric covering | Eyes | Ears | Mouth | Nose | Hair | Hat
After working on my Mae mascot head, I went into this with some confidence, but not a whole lot cause I was going to use a different method. While Mae’s design was flat, the chef’s design is very round. Taking this into account, I decided to use foam instead of cardboard. I used Commander Holly’s mascot cosplay tutorial quite a bit for reference for both of the heads, which I worked on simultaneously.
Foam base
First step was patterning out the foam pieces. There are a couple different ways to get a pattern for a sphere. Mine involved using the duct-tape method on a styrofoam pumpkin. I chose to go with 6 panels.


To scale it up, I made a pattern made of cardboard. Then, I set down some paper on a table–I had to tape together 4 sheets of standard 8.5×11 printer paper to get a sheet big enough–and held my phone with the flashlight on above the paper, with the cardboard pattern in between. By doing this, I could use the shadow of the cardboard pattern to scale up the pattern to the correct size. I scaled the pattern so that it could fit two panels in one 15x17x1″ sheet of upholstery foam.
Once the pattern was made, I traced it out six times onto the 1″ foam (2 per sheet). I cut them out using scissors (I’m not great with an X-acto knife) and then set out to glue them together. This part relied heavily on Commander Holly’s video. (Definitely watch it a couple times to get an idea of what to do. And be sure to use a respirator mask and work in a well ventilated area for this!)
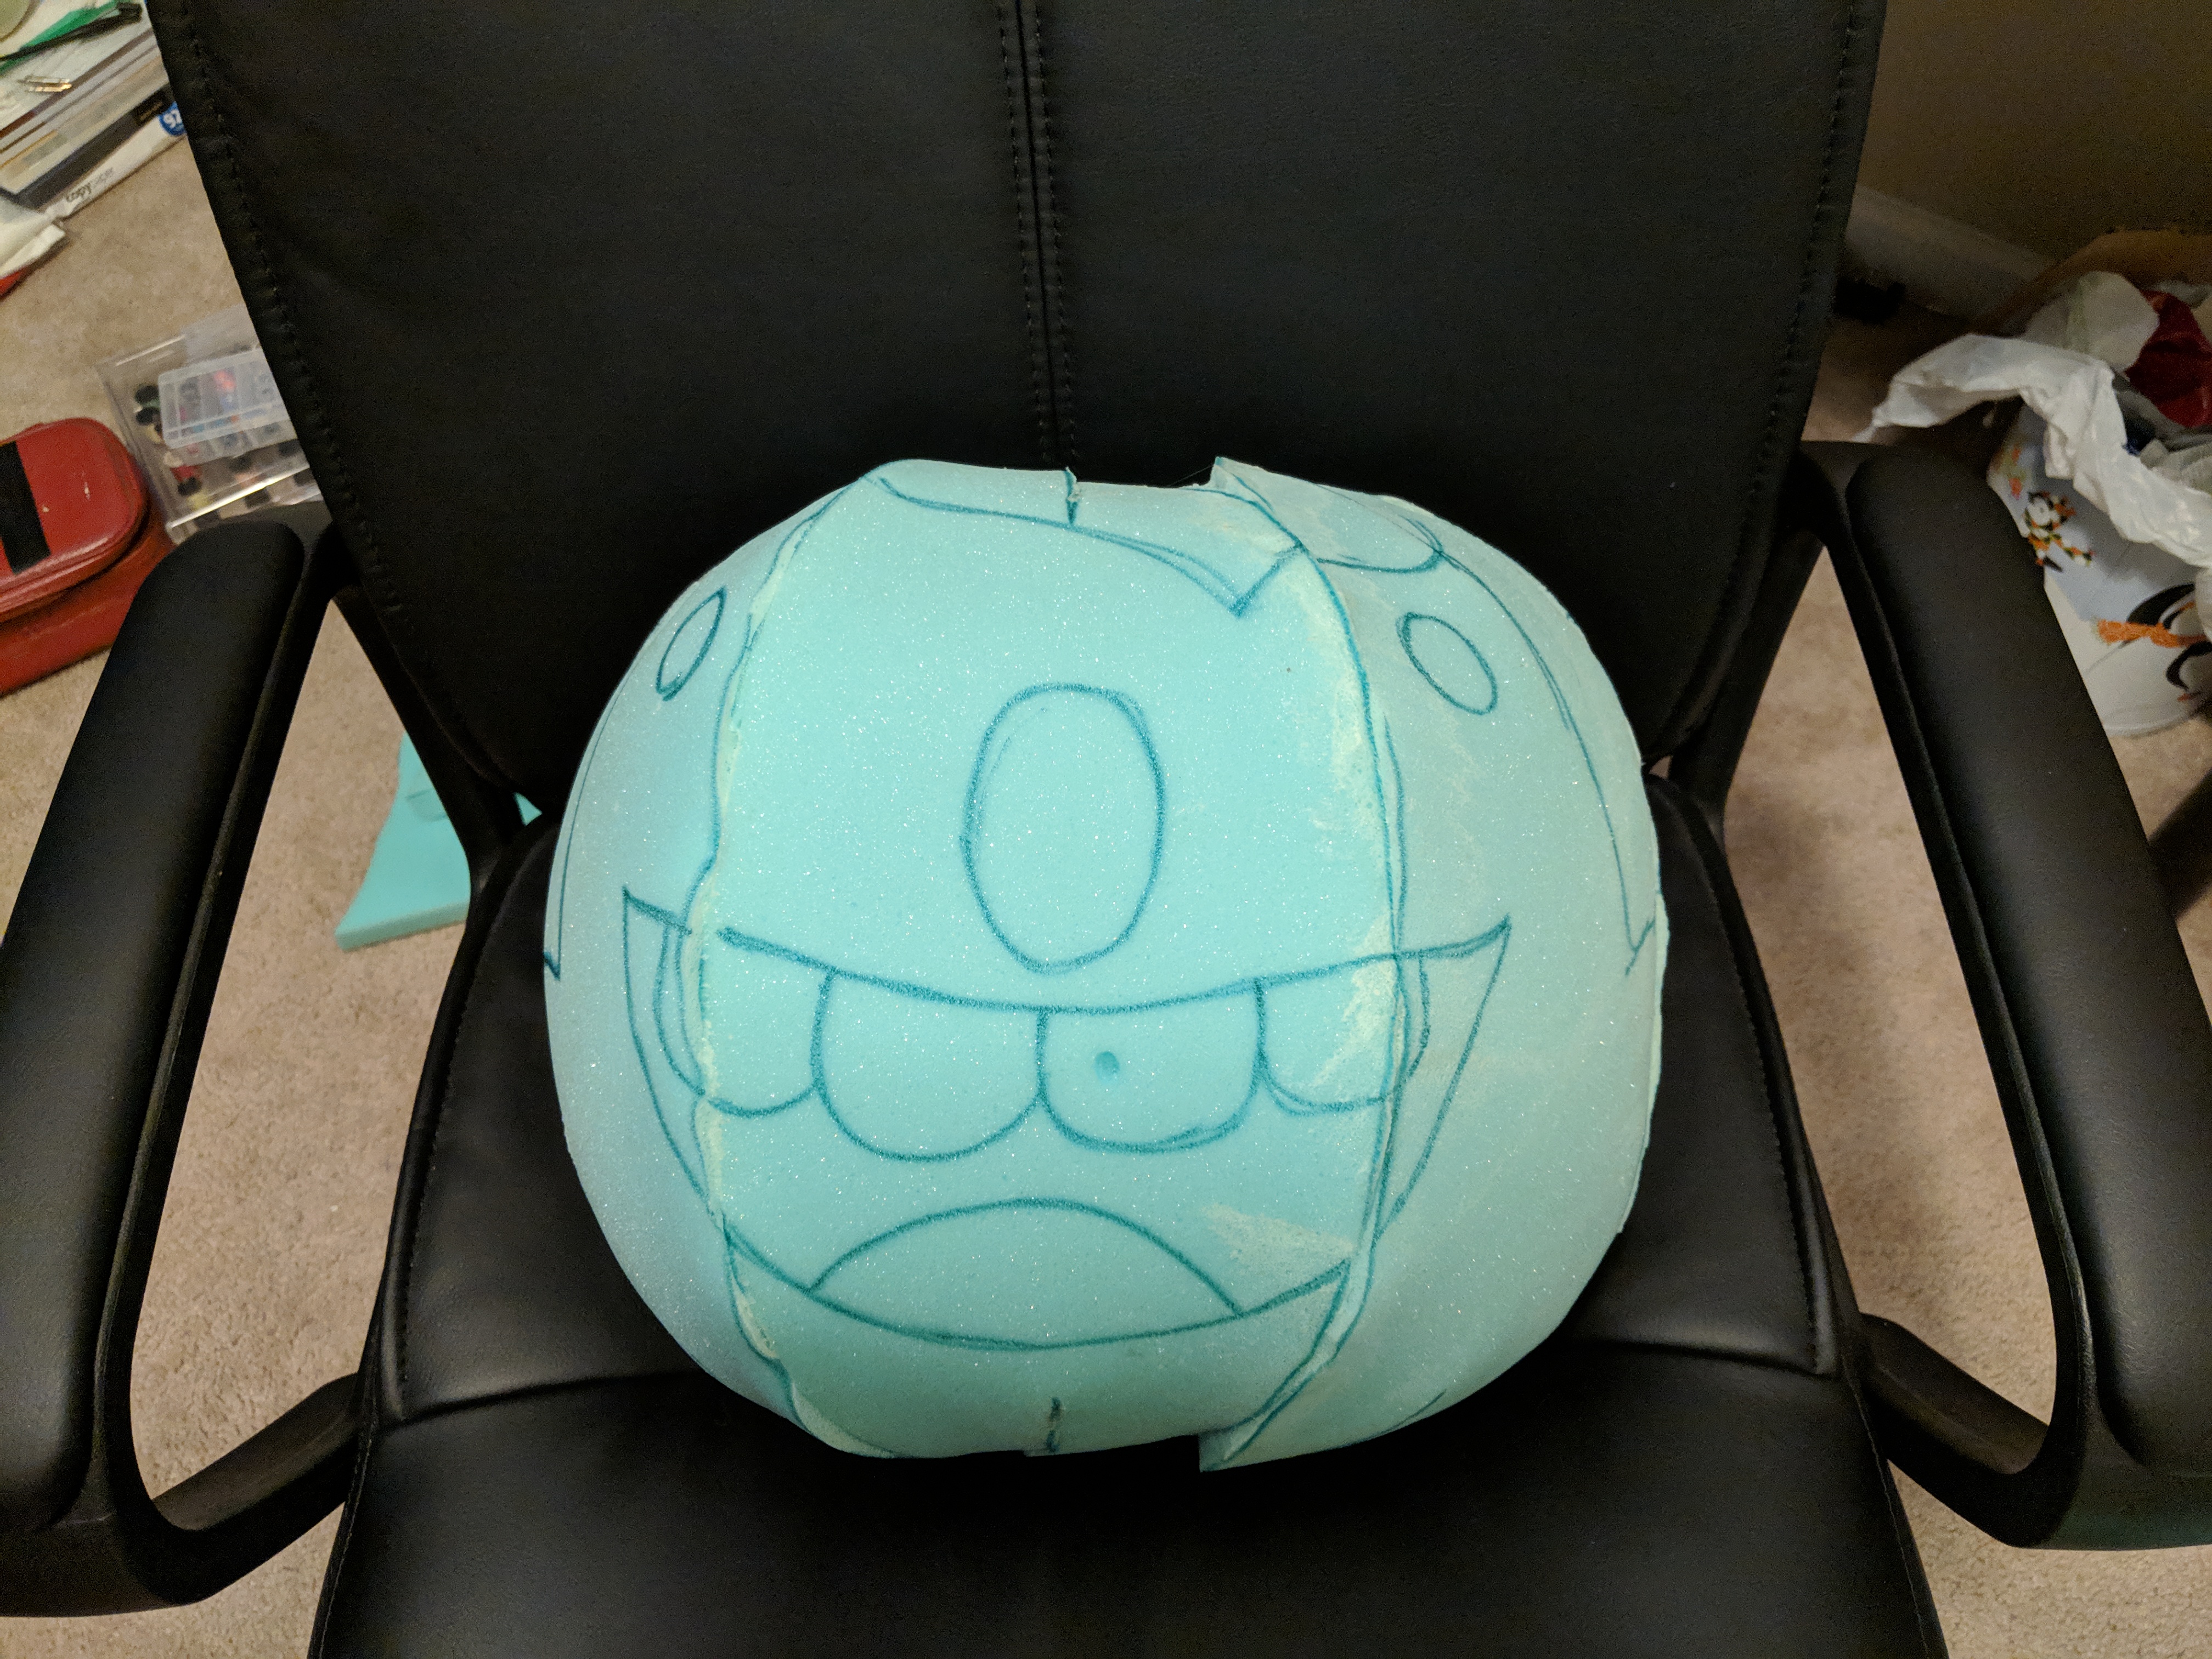
Once the big sphere was done, I cut a hole in the bottom to work as the entry point for Jason’s head. Next up was drawing out with a sharpie where the facial features would go. I referenced lots of different game and promotional art and tried to make everything as symmetrical as possible. These sharpie marks would later be covered with fabric, so the most important part was making sure the mouth placement is good. Once happy with the placement of everything, I cut out the mouth hole, which served as the hole for Jason to see through. After I did all this for Jason’s head, I did it for my own.

Covering foam base in fabric
This next part I did, in hindsight, wasn’t really necessary. I covered both heads with fleece, but not the skin-colored fleece. I thought that doing this would help make sure my sharpie marks didn’t show through the fabric and smooth out my imperfect foam seams. As it turned out, using just the one layer of skin-colored fleece probably would’ve sufficed. I’m honestly not sure. Maybe if I make something similar in the future, I’ll skip this step. But for this project, it was fine.
Covering the heads in skin-colored fabric would require some patterning. I attempted to use the same pattern I did for the foam, but this made the sphere of fabric too small because of the foam’s 1″ thickness adding more surface area. Attempt 2 involved me pinning the skin-colored fleece to one of the foam panels and then cutting it out with a small seam allowance. I used that as a pattern and cut out 5 more. I stitched all the pieces together but left one edge unstitched, which would serve as the opening for slipping everything onto the foam base. Attempt 2’s pattern method seemed to work out nicely and made the fabric fit perfectly. After slipping the fabric over the foam based–with the opening on the back of the head–I hot glued shut the last seam. This last seam was later covered in fabric for the hair, so I wasn’t too concerned with it looking perfect.
Confession time: I actually originally had the opening at the front when slipping on the skin to my head’s foam base. That made for a terrible seam that looked like a scar. I ended up remaking the face on the back of the head (mouth hole and all) and then covered the old face with hair.
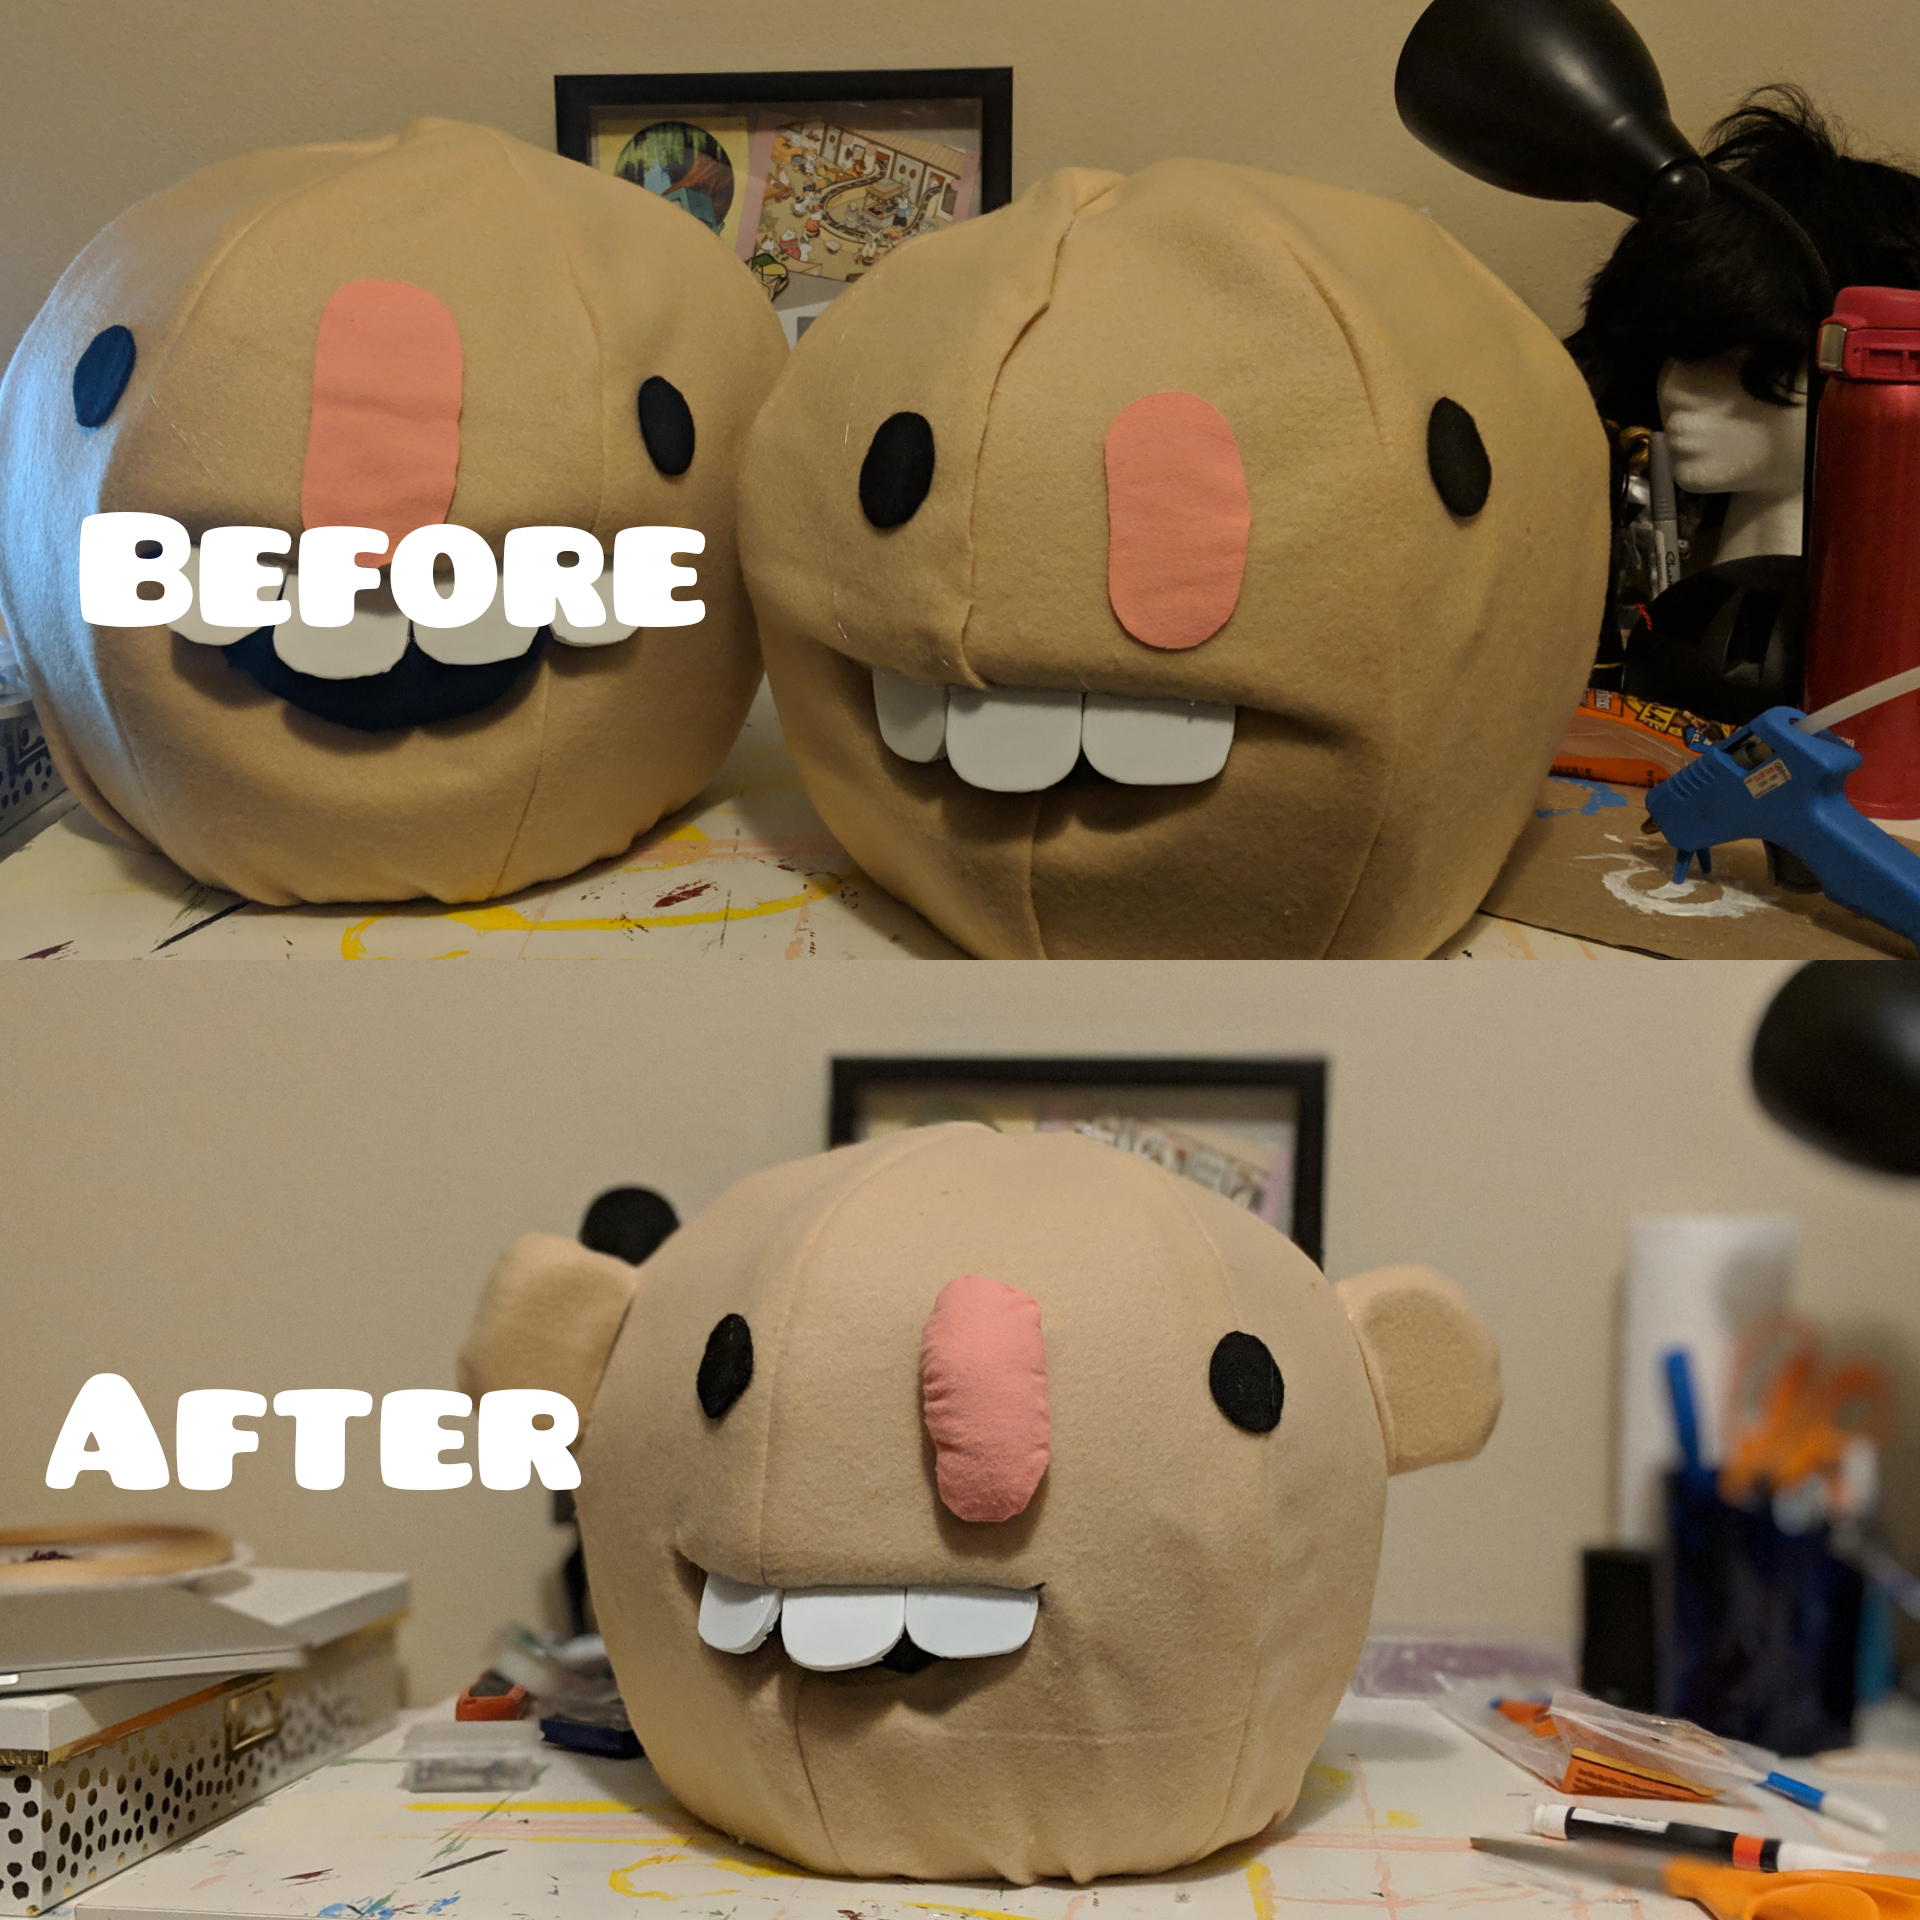
At this point, the mouth hole was now covered with this newly-added fabric, so I carefully cut a slit in the fabric and then hot glued the edges down, exposing the mouth hole.
I now had a terrifying, bald head with no facial features except for a big gaping mouth. The horror.
Eyes
The eyes were as simple as cutting and then hot gluing two circular pieces of black felt (about 1.5″ in diameter). I didn’t bother going with a shiny or round eye and was running out of time. (For my head’s eyebrows, I just cut two small rectangles out of orange felt and hot glued them onto the head once everything else was done.)


Ears
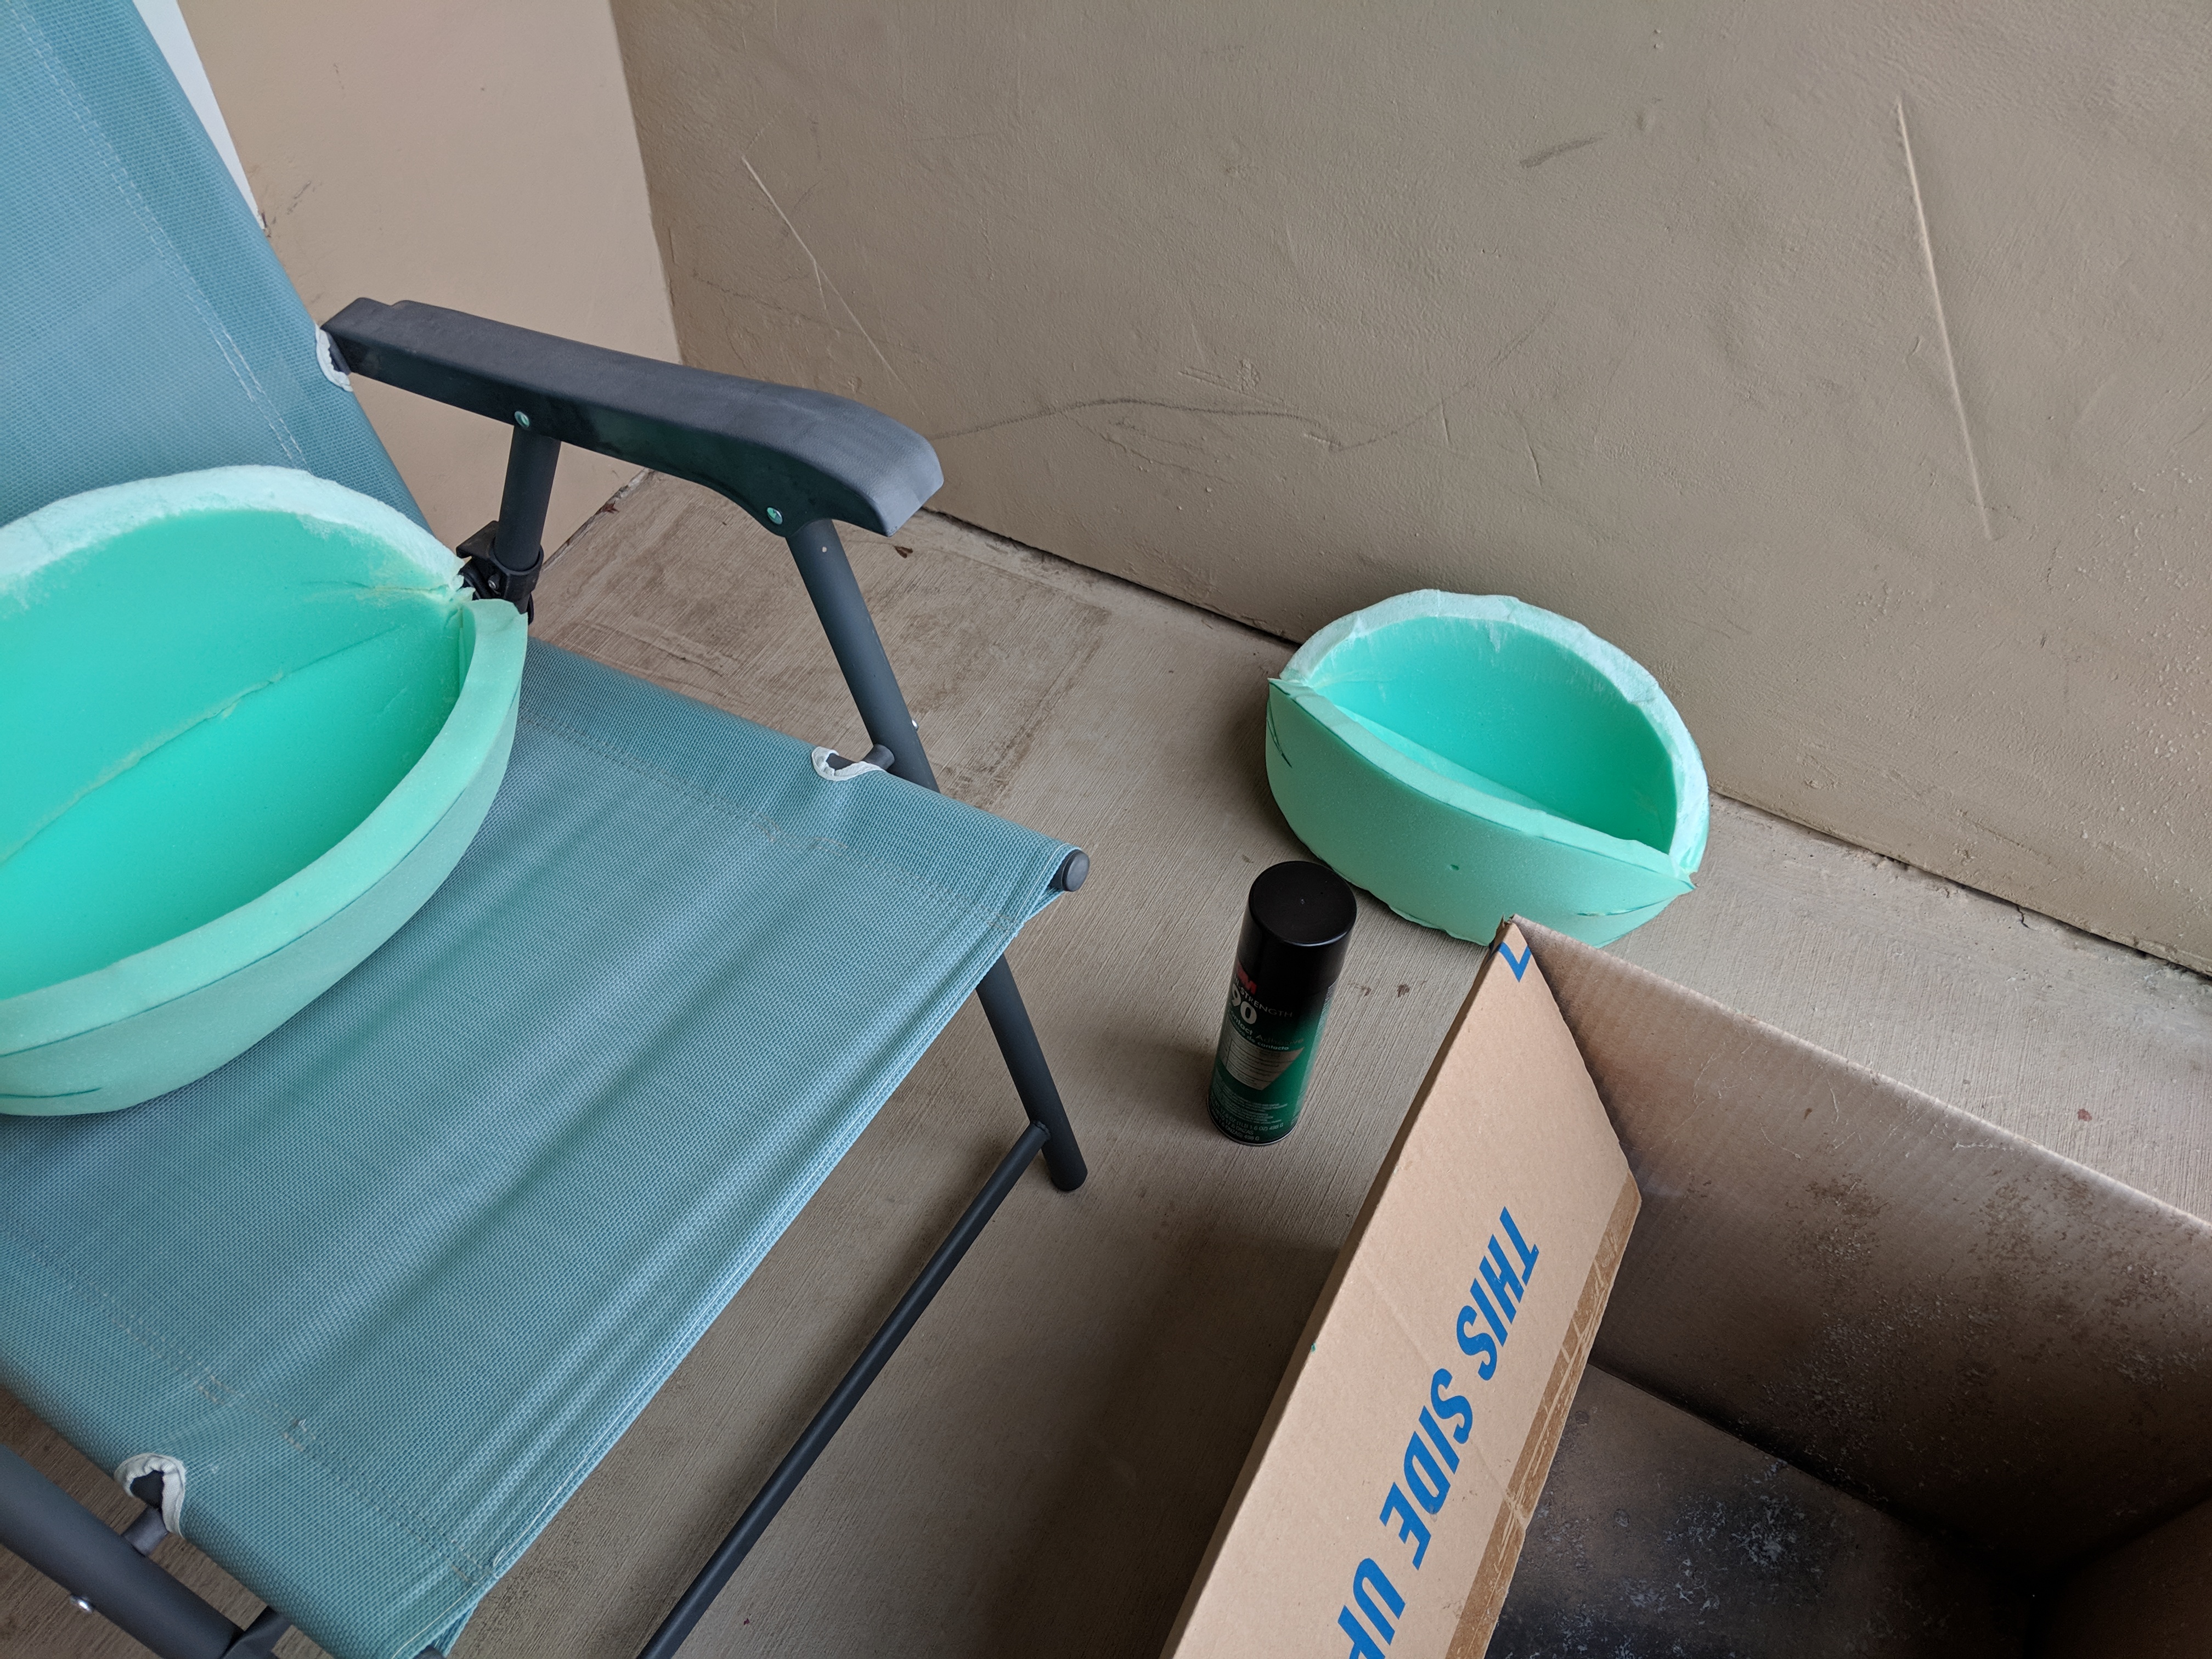
Using leftovers from the 1″ foam that were used for the head base, I cut two small “D” shaped pieces for the ears. I covered them in the same fleece fabric used for the skin of the head by: cutting out two pieces for each ear slightly larger than the foam “D” piece, stitching the curved edge together (leaving the straight edge open), turning it right side out, and stuffing the foam piece in. Attaching was just hot gluing it to the head. I didn’t even have to stitch shut the last edge of the ear cause the exposed foam was what attached to the head, and thus was covered.

Mouth
The mouth hole needed to be covered so no one could see in, so I hot glued black buckram fabric (the same used for Mae) to the interior of the mouth hole.
The teeth were made out of white EVA foam. I cut out 4 for Jason’s head and just 3 for mine. Once cut out, I hot glued them to the roof of the mouth holes.
Jason’s head included a tongue, which I made by using pink fabric (the same used for the noses) and pillow stuffing. Just two sort of oval-shaped pieces stitched together, turned right side out, stuffed, and ladder-stitched shut (or what I will refer to as the “plush method” from here on out). Once the tongue was done, I hot glued it to the mouth hole.


Nose
Jason’s nose would be a bit wider than mine, so I used two different methods for them.
For my nose, I cut out 2 long ovals and then followed the same “plush method” as I did the tongue. Once the tiny nose plush was done, I hot glued it in place.

For Jason’s nose, it required a couple more pieces. Instead of 2 long ovals, I made his “nose plush” by using 4 leaf-shaped pieces (very similar in shape to the panels for the foam base!). This would give it more volume and make it larger/wider. Once happy with its shape and size, I hot glued it on.

Hair
The process for the hair was very different between my long hair and Jason’s shorter hair.
Long hair
My hair is made up of several “hair plushes.” Seven to be precise: one for the bangs and then six “strands” of hair.
For the bangs, I placed a piece of orange fleece on the top of the head and marked with pins where I wanted it to fall. Once happy with that, I cut it out with a small seam allowance. I cut a second piece of fabric identical to the first one and then–you guessed it–I made it into a plush. I used stabilizer when stitching because the fabric I chose slid and shifted all over the place when using the sewing machine.
For the “strands” of hair, I cut out 12 pieces of fabric that were about 3-4″ wide and about 2′ long. I made long zig-zags as I cut to give it the crimped look that the character has in the game. I didn’t bother to ladder stitch the openings shut, because it was going to be covered by the hat. I did not stuff these with pillow stuffing.
The final piece for the hair involved making a cover for the back of the head. I used the same method I did for covering the foam base in skin-colored fabric, but this time only used 3 panels instead of 6. I hot glued this in place to hide the gaps between the hair “strands” and also hide the back skin seam. Once the back cover piece was on, I hot glued the strands and finally the bangs. There was a small bald patch at the top where the strands didn’t quite meet, which would later be covered by the hat.

Short hair
This requires a bit more precision. The final hair pattern would end up being made up of two front pieces and two back pieces.
Similar to how I patterned the bangs for my chef head, I placed the hair fabric onto the head and pinned where I thought the hair in the front should go. This included the sideburns and the little pompadour. I then pinned all the day down the skin fabric’s top seam, which would divide the front from the back. Once this was done, I cut out the piece of fabric (still attached) while adding a small seam allowance. I unpinned it and then cut out a second identical piece.
For the back piece, I did the same thing I did for the long hair except instead of just just using 3 panels, I doubled up so that I could stuff it a little bit. So I used 6 total leaf-shaped pieces stitched together.
Right sides together, I stitched the two front pieces together alongside the front edge, leaving the top seam open. I then stitched the back piece together. It involved stitching two sets of 3 panels together and then attaching those to front pieces. This would serve as our hair plush. The opening was at the back of the head towards the neckline.
I pinned the hair in place on the head so I could see how it all looked and then stuffed it accordingly. I didn’t fill it up all the way because I didn’t want it to be huge, but I did want to give the front pompadour some volume. After, I unpinned the hair plush and started hot gluing the whole thing, starting in the front and ending in the back. I closed up the last seam but simply folding it under and then hot gluing it in place.


Hat

The hat part was easy. I filled the top of it with pillow stuffing so that it always kept its perfect shape. Then, to make sure the brim of it stayed nice and full/flat, I cut a piece of 2″ thick foam in the shape of the bottom of the hat. I tucked that in and then attached the hat to the head via Spray 90. It held up okay during PAX South, but a bit of the edge of the hat wanted to come off, so I’ll have to reinforce with some hot glue before Fan Expo in May.

Conclusion
This process was experimental the entire time. It was a wild ride of hot glue, pins, and pillow stuffing. I’ll share more of my thoughts on the whole cosplay in Part II, which will cover the rest of the costume!
If you have any questions about the process or found any of my notes confusing, please don’t hesitate to leave me a comment and I’ll try to clarify as much as I can!
Use my build post as inspiration? Let me know!
If you followed along with my build post to help you make your cosplay, I’d love to see it! Leave me a comment or send me an email at ashweezcosplay(at)gmail(dot)com. If you’re comfortable with it, I’d love to showcase your cosplay photo(s) in the blog! I will of course give you credit and link to any socials you may have.

With major help from your guide (and from captainholly, and a few tips from fursuit making videos), I made my first major DIY cosplay (that didn’t involve purely just purchasing many items) and made a mascot head of Baron Bunny from Genshin Impact. It took me around two months (and a lot of procrastinating), and it was one of the most scary, freeform, self-directed projects I had ever undertaken of this scale. In the process of making this cosplay, I had also learned how to sew, and how to operate a sewing machine. It’s not an exaggeration that because of this project, I had learned some life skills!
Without your guide, I would have never been able to even start the project. Thank you so much for your work!
omg! I can’t believe I missed this comment. Your mascot head looks amazing! It turned out so good! Absolutely amazing work and I’m so happy that my blog could help you out!