

In February, I started watching the Rooster Teeth show RWBY. It took a few episodes to warm up for me, but I started to really fall in love with the characters, character designs, fight sequences, and story arch. Whenever I watch new shows, I have a tendency to see it through the lens of a cosplayer and look out for characters I might want to cosplay.


RTX 2015 in Austin, TX by Lindsey Tonak (Aug 2015)


PAX South 2016 in San Antonio, TX by Lindsey Tonak (Jan 2016)

Blake was an easy choice. It had been a while since I had done a cosplay and her outfit seemed less complicated compared to other characters’. Not only that, she had that one feature that really helps me: she has the same hair as me. (No wig! Yes!) All I had to do was get some bangs and I’d be good to go. A recipe for success with the end goal of taking my finished Blake cosplay to RTX2015 in August.
Not everything has to be 100% handmade
Sometimes, you just can’t make something from scratch. For instance: shoes. As much as I’d love to learn how to make shoes with my bare hands, I don’t think it’s necessary when I can find a perfectly good pair of boots online.

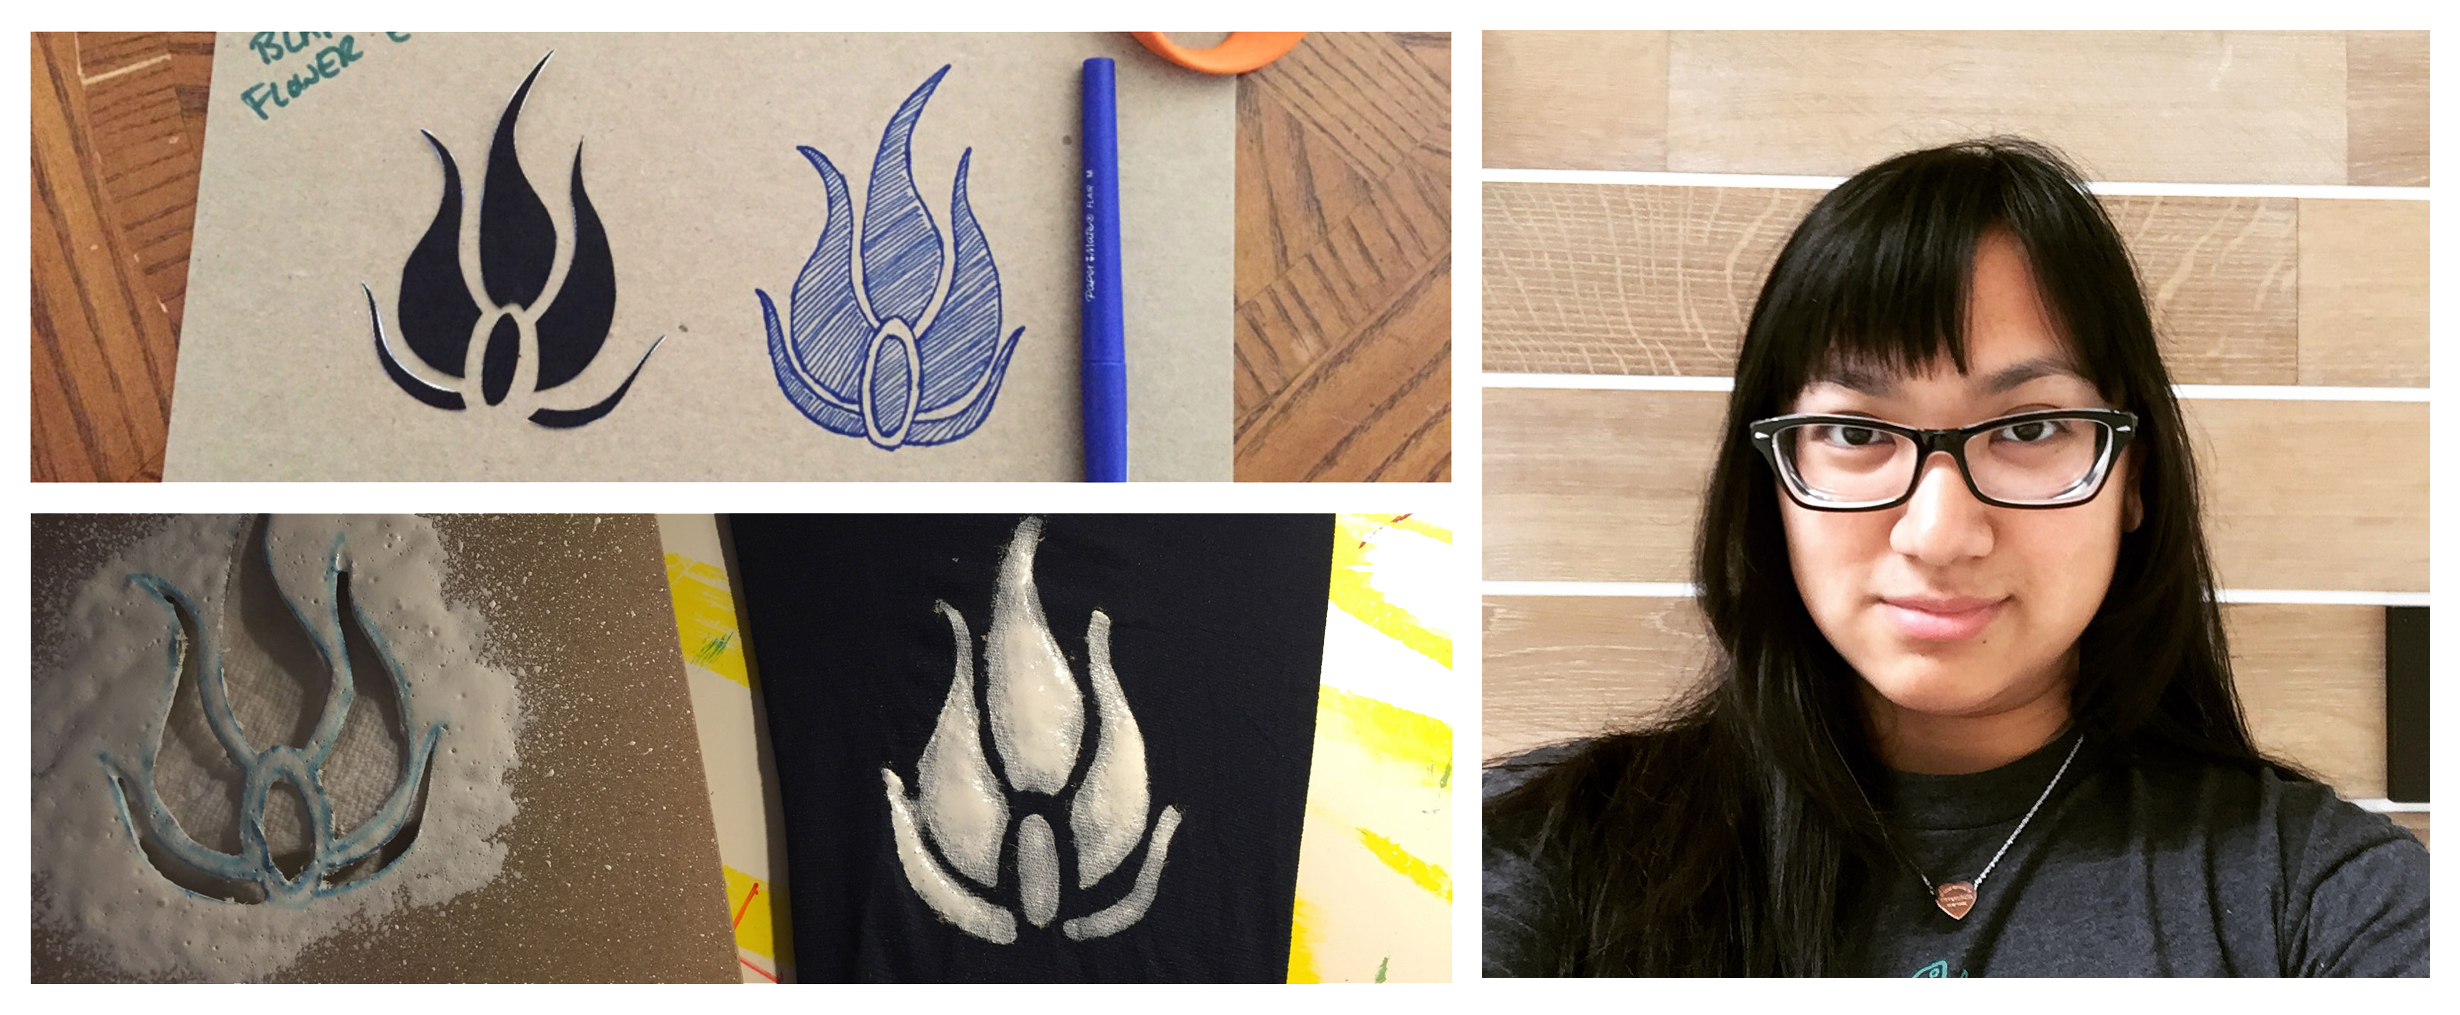
So that meant buying items. I bought pieces of my cosplay from a variety of places, sometimes trying on clothes at the mall and sometimes ordering things online. From there, I started modifying my purchased items and also started growing out my hair. I added the emblem to the tights by printing off the flower emblem from online, cutting it out, then tracing it onto some scrap cardboard. I then used a box cutter to cut out the stencil. To spray the emblem on, I put more scrap cardboard between the layers of tights so that the paint wouldn’t bleed through to the other side. Then I used Repositionable Tacky Spray on the back of the cardboard stencil and glued it in place to the tights. Lastly, I carefully used white Stencil Spray and sprayed on the pattern. I distracted myself from the boring drying process by going with some friends bouldering (oh god my arms were so sore) and came back to repeat the process for the other leg. Eventually, I got a haircut to trim up any split ends and get Blake’s bangs. I also added a temporary seam to the white top I bought from Banana Republic so that it’d be more of a crop top.
If you can’t find one, make one!
Naturally, I wasn’t going to find everything I needed online. Unless, of course, I just bought a readymade cosplay which would take the fun out of the whole process for me. Half of the fun of cosplaying is making it! The other half is wearing it.
Disclaimer: There is absolutely nothing wrong with utilizing the services of awesome people online to commission a cosplay. I know quite a few cosplayers that do commissions and their handiwork is of very high quality and their attention to detail is crucial in a cosplay. By all means, if you are new to cosplay and don’t want to try to make one, pay one of these super cool people to make you one!
I started making the smaller pieces like the bow and arm bands from scratch. The bow has medium interfacing in it so that it’ll always keep its shape. It’s attached to a headband (that I will admit got a bit tight at times, so I would suggest finding a headband that’s the right size for you first). The right armband is made up of two pieces of elastic with a few pieces of velcro. I did this so that I can control exactly where they would fall on my arm. They managed to stay on relatively well during RTX, although I did find myself pulling them up sometimes. The left arm band is one long piece of elastic fabric with a silver armband. The silver bangle is a strip of interfacing covered in silver fabric, then sewed closed to make a ring. It also stayed on quite well during all the activities at RTX.

Unchartered territory: Sewing without a pattern
Up until now, the only piece of clothing I had made from scratch was a skirt. That may come as a surprise to some people to learn that all my cosplays up until this point have been put together by modifying existing clothing. This was in part due to a lack of experience and time. For Blake, I was going to have to make the vest from scratch; there was no way I could find anything remotely close to the vest that I could modify.
This took quite a bit of planning. I did lots of sketching and staring at reference pictures to find out how the vest looked, how long it was in relation to Blake’s body, and what type of fabric would look best. I also did lots of research of other RWBY cosplayers’ vest styles. Some were very true to the show mimicking the style of the top of the vest (the little triangle shapes), but a few used lace for that part. I liked that style a little more, so I chose to go that route, too.
A few important things I noted were:
- Blake’s vest only shows the front of her stomach; it doesn’t show the side.
- The front pieces came to about halfway down her shorts.
- The back coattails came to about 5 inches past the bottom of her shorts.
- The fabric, while thin, was sturdy.
While taking all of this into account and after sketching up the designs and figuring out what pieces and measurements I needed, I had a friend measure me. One thing I made sure I did was wear the white shorts and white top while getting my measurements so that they’d be precise. We double- and triple-checked the measurements and then I started drafting patterns. Thankfully, I keep all my scrap fabric after a project, so I had plenty of spare fabric to use for prototypes.


After both prototypes, I made the final vest, including the lace, button, and elastic straps. On the left, you can see the final product from that one night. You’ll notice that the black elastic shoulder strap is a bit loose and shows some skin between it and the white top. I added snaps to the underside of the straps and on the top of the white shirt so that they could attach neatly. I, however, failed to take a progress picture of adding the aforementioned snaps.
With all the clothes of the cosplay done, it was time to move onto the props.
The internet is your friend
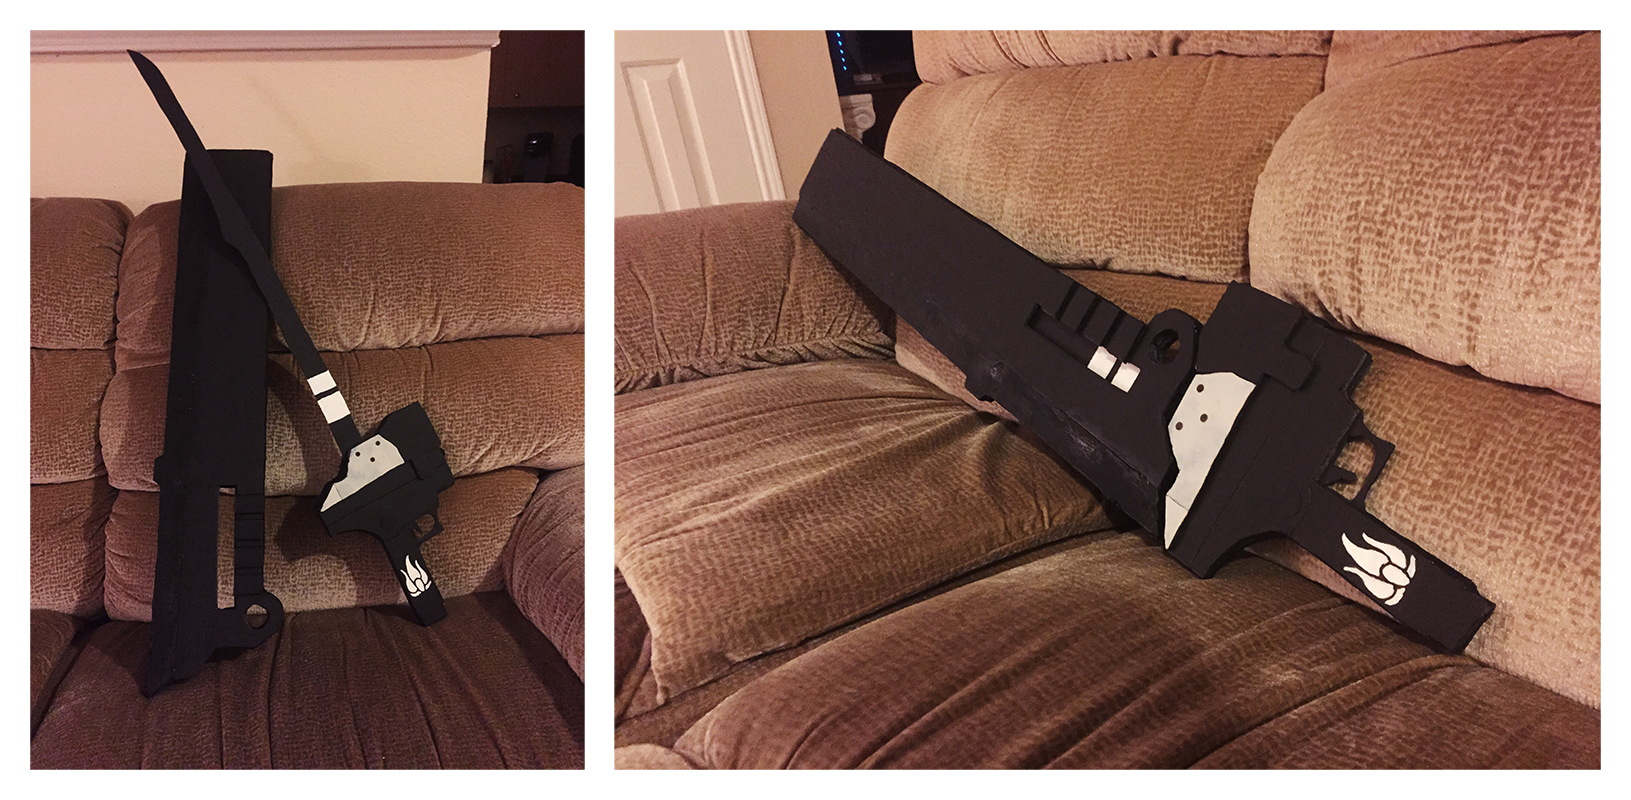
Making cosplays is a lot like having computer problems: Google it and hope for the best. Chances are someone else out there has run into your same problem and can help you along the way. I owe a ton to Tetsuro’s tutorial. He included on his deviantart a PDF that has the pattern for both the katana and the sheath (and not just for the Gambol Shroud, but patterns for all of Team RWBY’s props). And although I didn’t follow Tetsuro’s tutorial/process exactly, it helped to see his method and apply that to what I was doing. His guide and pattern took all the guesswork out of designing my own pattern for the weapon, giving me more time to actually make it.

I started by printing off Tetsuro’s Gambol Shroud pattern, cutting out the pieces, and then tracing them onto black foam board. I cut out the katana and sheath pieces and hot glued everything in place, double-checking each step of the way that the katana would fit snuggly into the sheath. Once all the pieces were glued together, I used drywall spackling on the edges to cover up the “seams.” After letting the spackling dry, I painted over it with black paint and also painted on the white details.
Cosplays can be practical
The last thing I wanted to work on if I had time was Blake’s backpack. Aside: it’s not actually a backpack in the show; it’s more like a metallic magnetic sheet that her Gambol Shroud attaches to. After making a subspace purse for a Ramona Flowers cosplay and seeing how handy that was during a convention, making Blake’s weapon holder into a backpack was a no-brainer. I also noticed that no one else had made one yet, so why not be the first!
Constructing the backpack was a series of me making it up as I went along. Similar to the vest, I spent some time going over reference images, sketching it out from different angles, and measuring for proportion. The backpack was made using interfacing, gray fabric, black bias tape, a purse magnet, and elastic straps. I had some fun star fabric left over from an old project that I used for the lining and also made a pocket to hold my phone. I actually ended up using that pocket more for my wallet than my phone. (Gotta have the phone at the ready for pictures!) I unfortunately made the lining way smaller than the actual backpack (see below) and due to time constraints couldn’t redo it.
The entire time, I was hoping to take the backpack even one step further. I wanted to construct it so that my Gambol Shroud could actually attach to it like in the show. That way, I could’ve been completely hands free (well, except for my water bottle) during RTX. I first tried with magnets to no avail and then attempted something with velcro. In the end, the Gambol Shroud was too heavy to be attached. No worries. I was still very pleased with the final product.

With the clothes and props done, all that was left was waiting for RTX! Thankfully, I had the long and stressful process of moving into a new apartment to distract me.
Conclusion
Overall, this cosplay was a fantastic and very fun project to work on. I did lose some sleep and spent quite a bit of money on it, but I also learned a lot about sewing and prop making that can help with future projects. I don’t know what that future project will be, but I’ll go into it with more experience and knowledge thanks to Blake.
Thank you to anyone at RTX that asked me for a picture or came up to me to talk about my backpack. Moments like those really make all that hard work worth it. I love talking shop with fellow cosplayers or people that are just generally interested in the hobby.
And a special thank you to Lindsey Tonak for taking my wonderful solo pictures! We’ll have to do another shoot one of these days when we’re both not super busy with convention stuff.
Use my build post as inspiration? Let me know!
If you followed along with my build post to help you make your cosplay, I’d love to see it! Leave me a comment or send me an email at ashweezcosplay(at)gmail(dot)com. If you’re comfortable with it, I’d love to showcase your cosplay photo(s) in the blog! I will of course give you credit and link to any socials you may have.

wow.. awesome guide!!
thank you ❤
*taking notes for reference*
Thanks so much! Glad you enjoyed it! Let me know if you have any questions!
I know they most likely don’t sell them anymore, but do you remember the name of the style of boots you bought from ModCloth?
I checked my email receipt from when I ordered them! They were called Move with Moxie Booties. Looks like Modcloth doesn’t sell them anymore.