

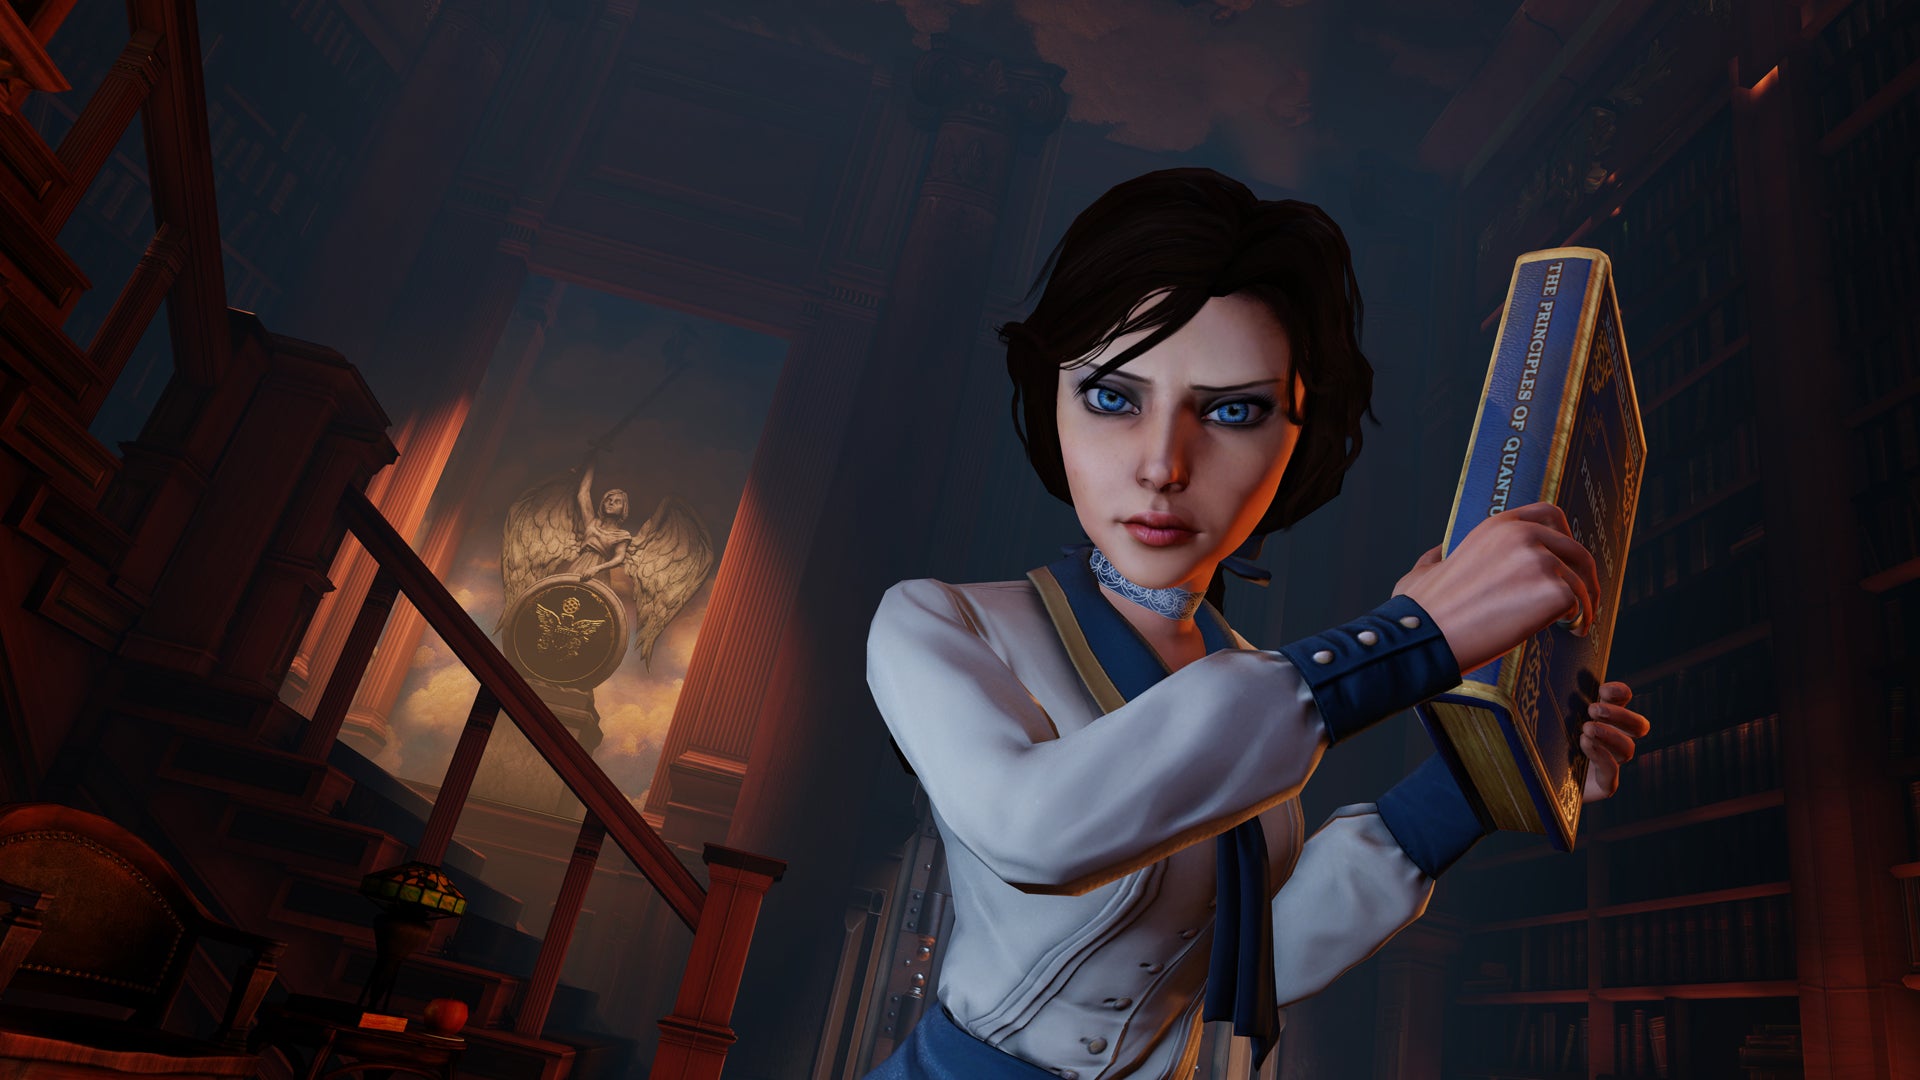
This cosplay was a long time coming. I’ve wanted to cosplay Elizabeth since 2014 and wanted to make a competition-worthy build since around 2017. Every year, I would think of it and never do it because I was too scared I wouldn’t live up to the lofty expectations I had in my head. It took Troy Baker making an appearance at WeebCon this April for me to finally just buckle down and do it.
This won’t be the end of Elizabeth. I still want to do the competition build that I have in my head. But it’s at least a start.
I’ll be honest, I had this draft started back in June and now it’s September. I only just now remembered I never posted this because I know I’ll need to start drafting another build post soon for my Y2Kon cosplay. Oops.


Items I Bought
- White canvas bag (Amazon)
- Brown wig (Amazon)
- White slip (Amazon)
- Black sheer stockings (Amazon)
- 2″ bias tape maker (Amazon)
- Thimble (Joann’s)
What I Already Had
- Brown boots from Maria cosplay
- White button-down shirt
- Choker pendant
- Songbird funko pop
- Bioshock Infinite artbook
Pieces Made & Modified
Unfortunately, I’m having issues with the id tag in WordPress HTML, so I can’t do my usual practice of linking each piece so you can jump down to the relevant section of the post. My apologies!
- Skirt
- Shirt
- Cravat
- Choker
- Medpack
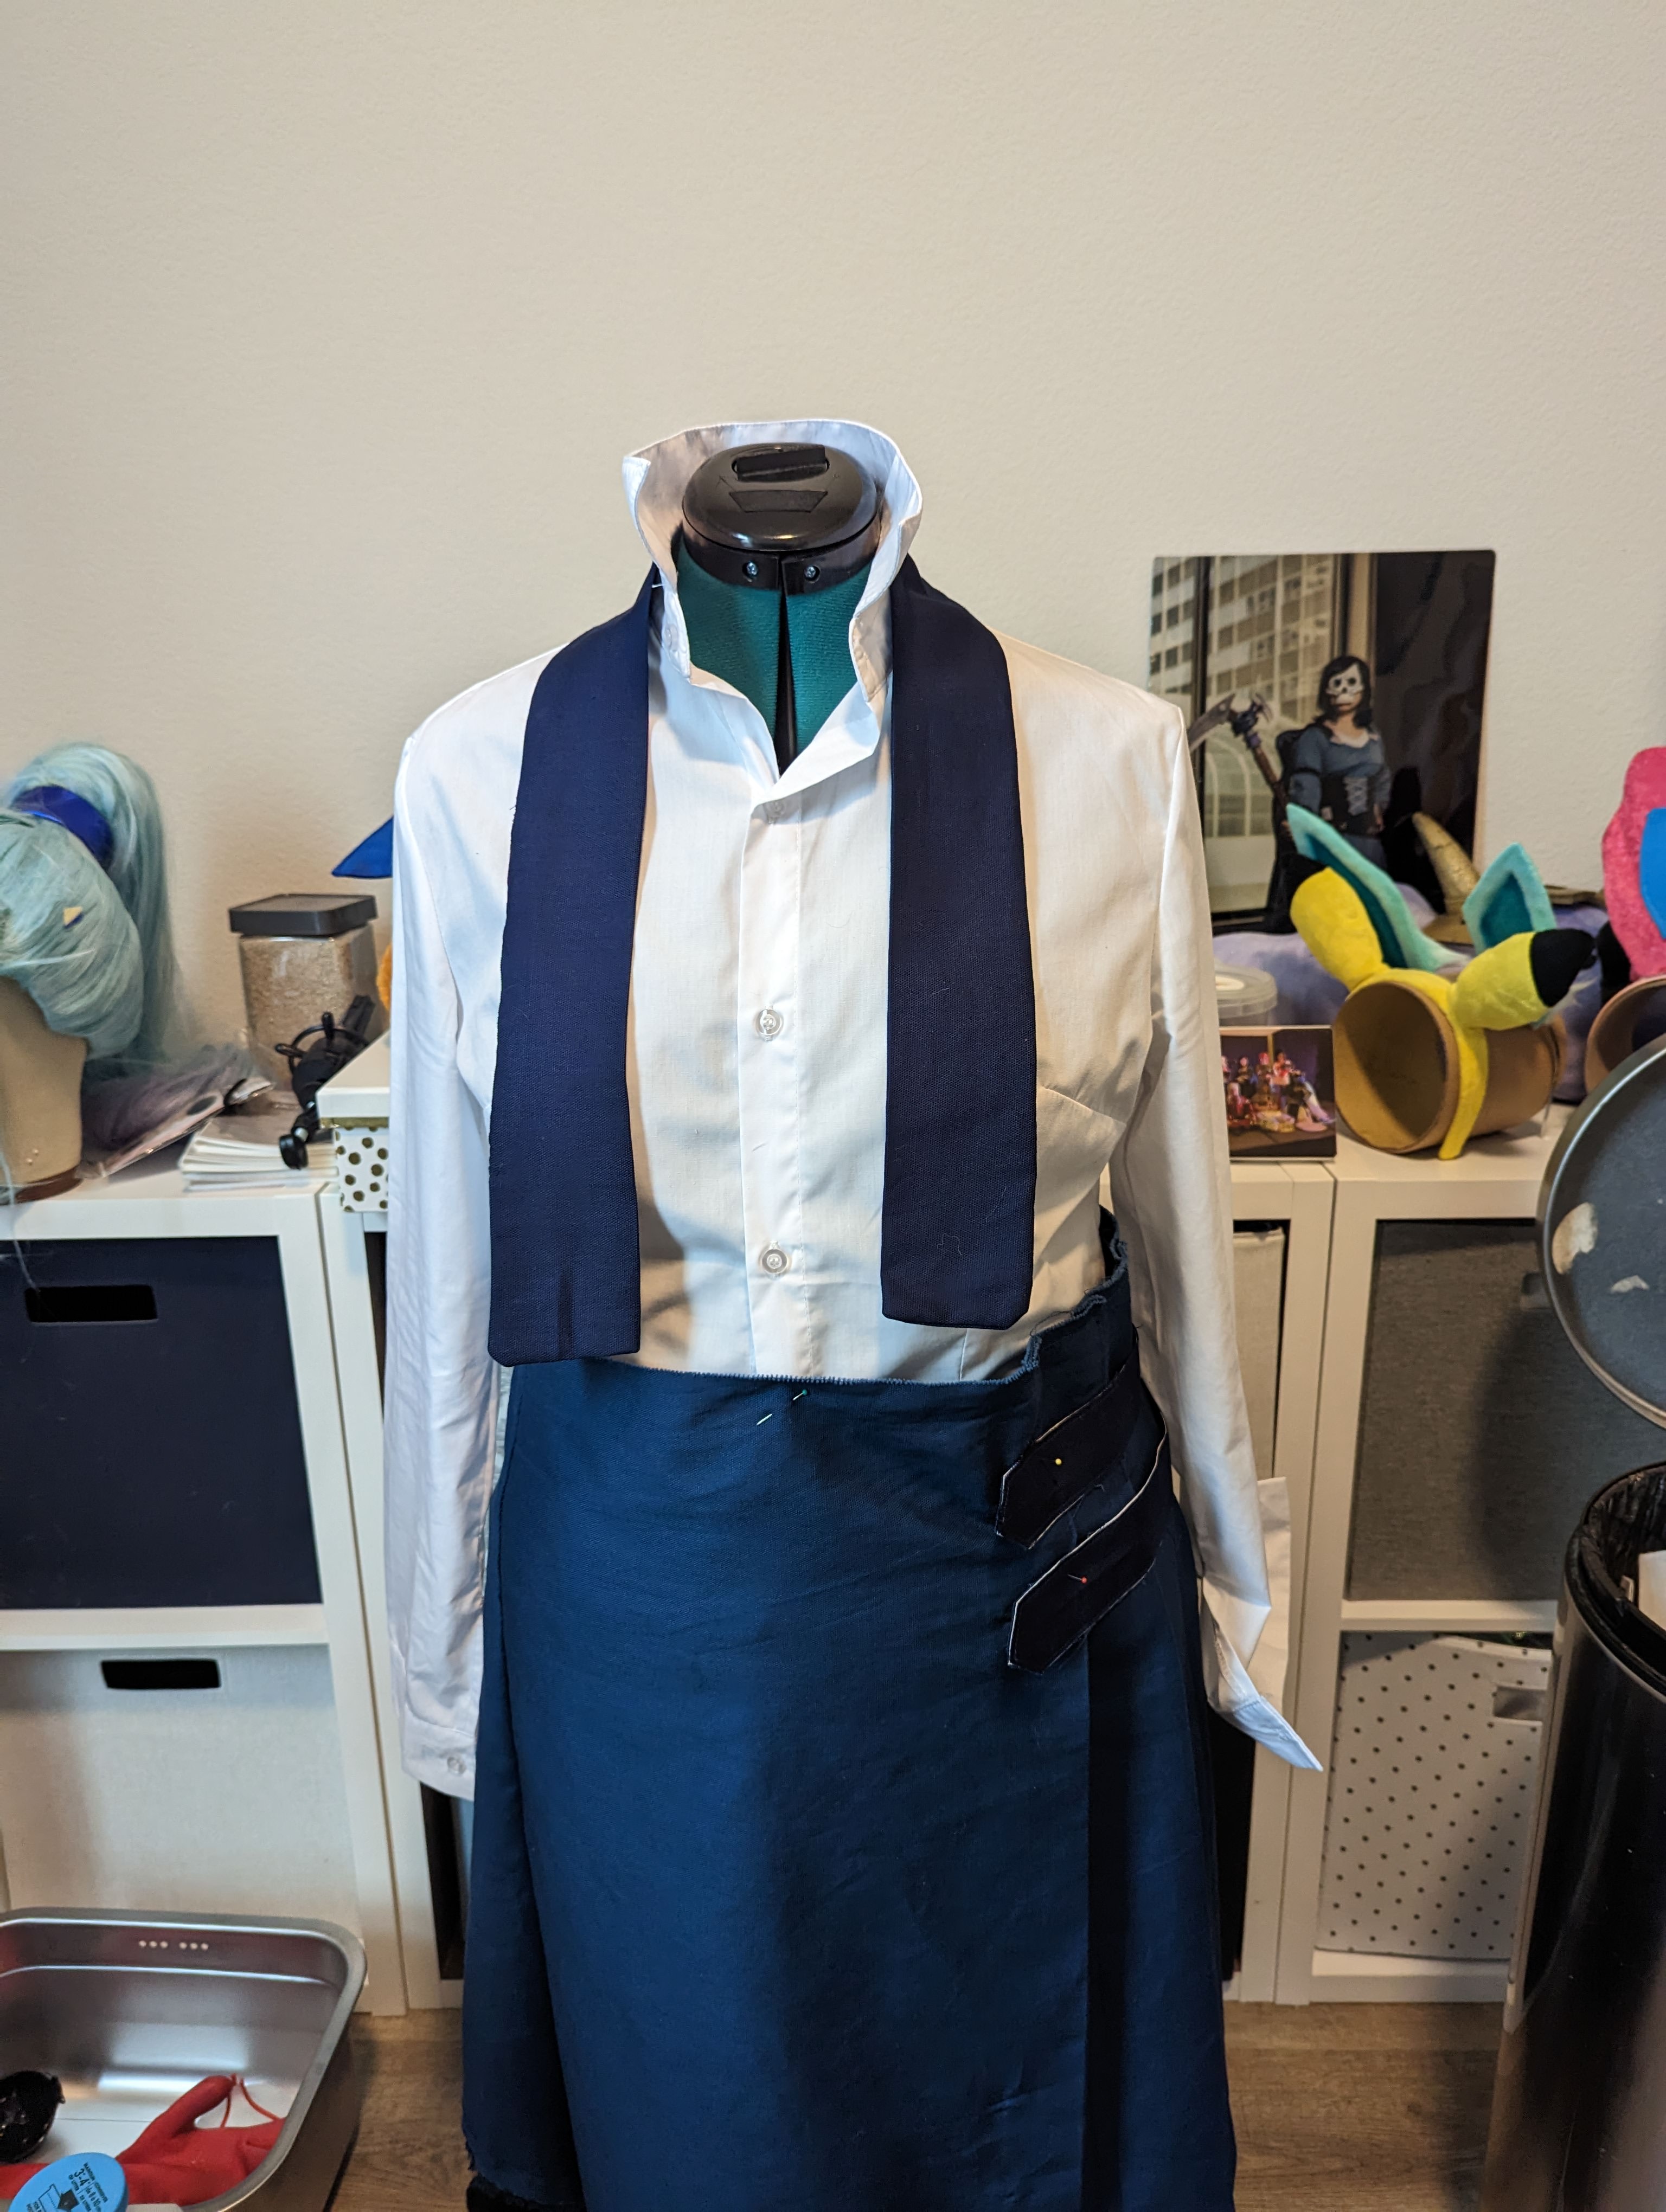
Skirt
I tackled the skirt first as it’s the most distinct part of Elizabeth’s character design. At first, I tried using a pattern but I wasn’t happy with how it was laying, so I scrapped that and draped and pleated instead.
The first step was getting the blue base down. Once I was happy with how it fit, I moved onto the details.


I really wanted to make sure the strap placement was good, so I utilized strips of muslin fabric to mark where everything should go. Once I knew where the straps went, that informed where the buttons would go. Yes, I wanted the buttons to actually be functional and not just decoration!
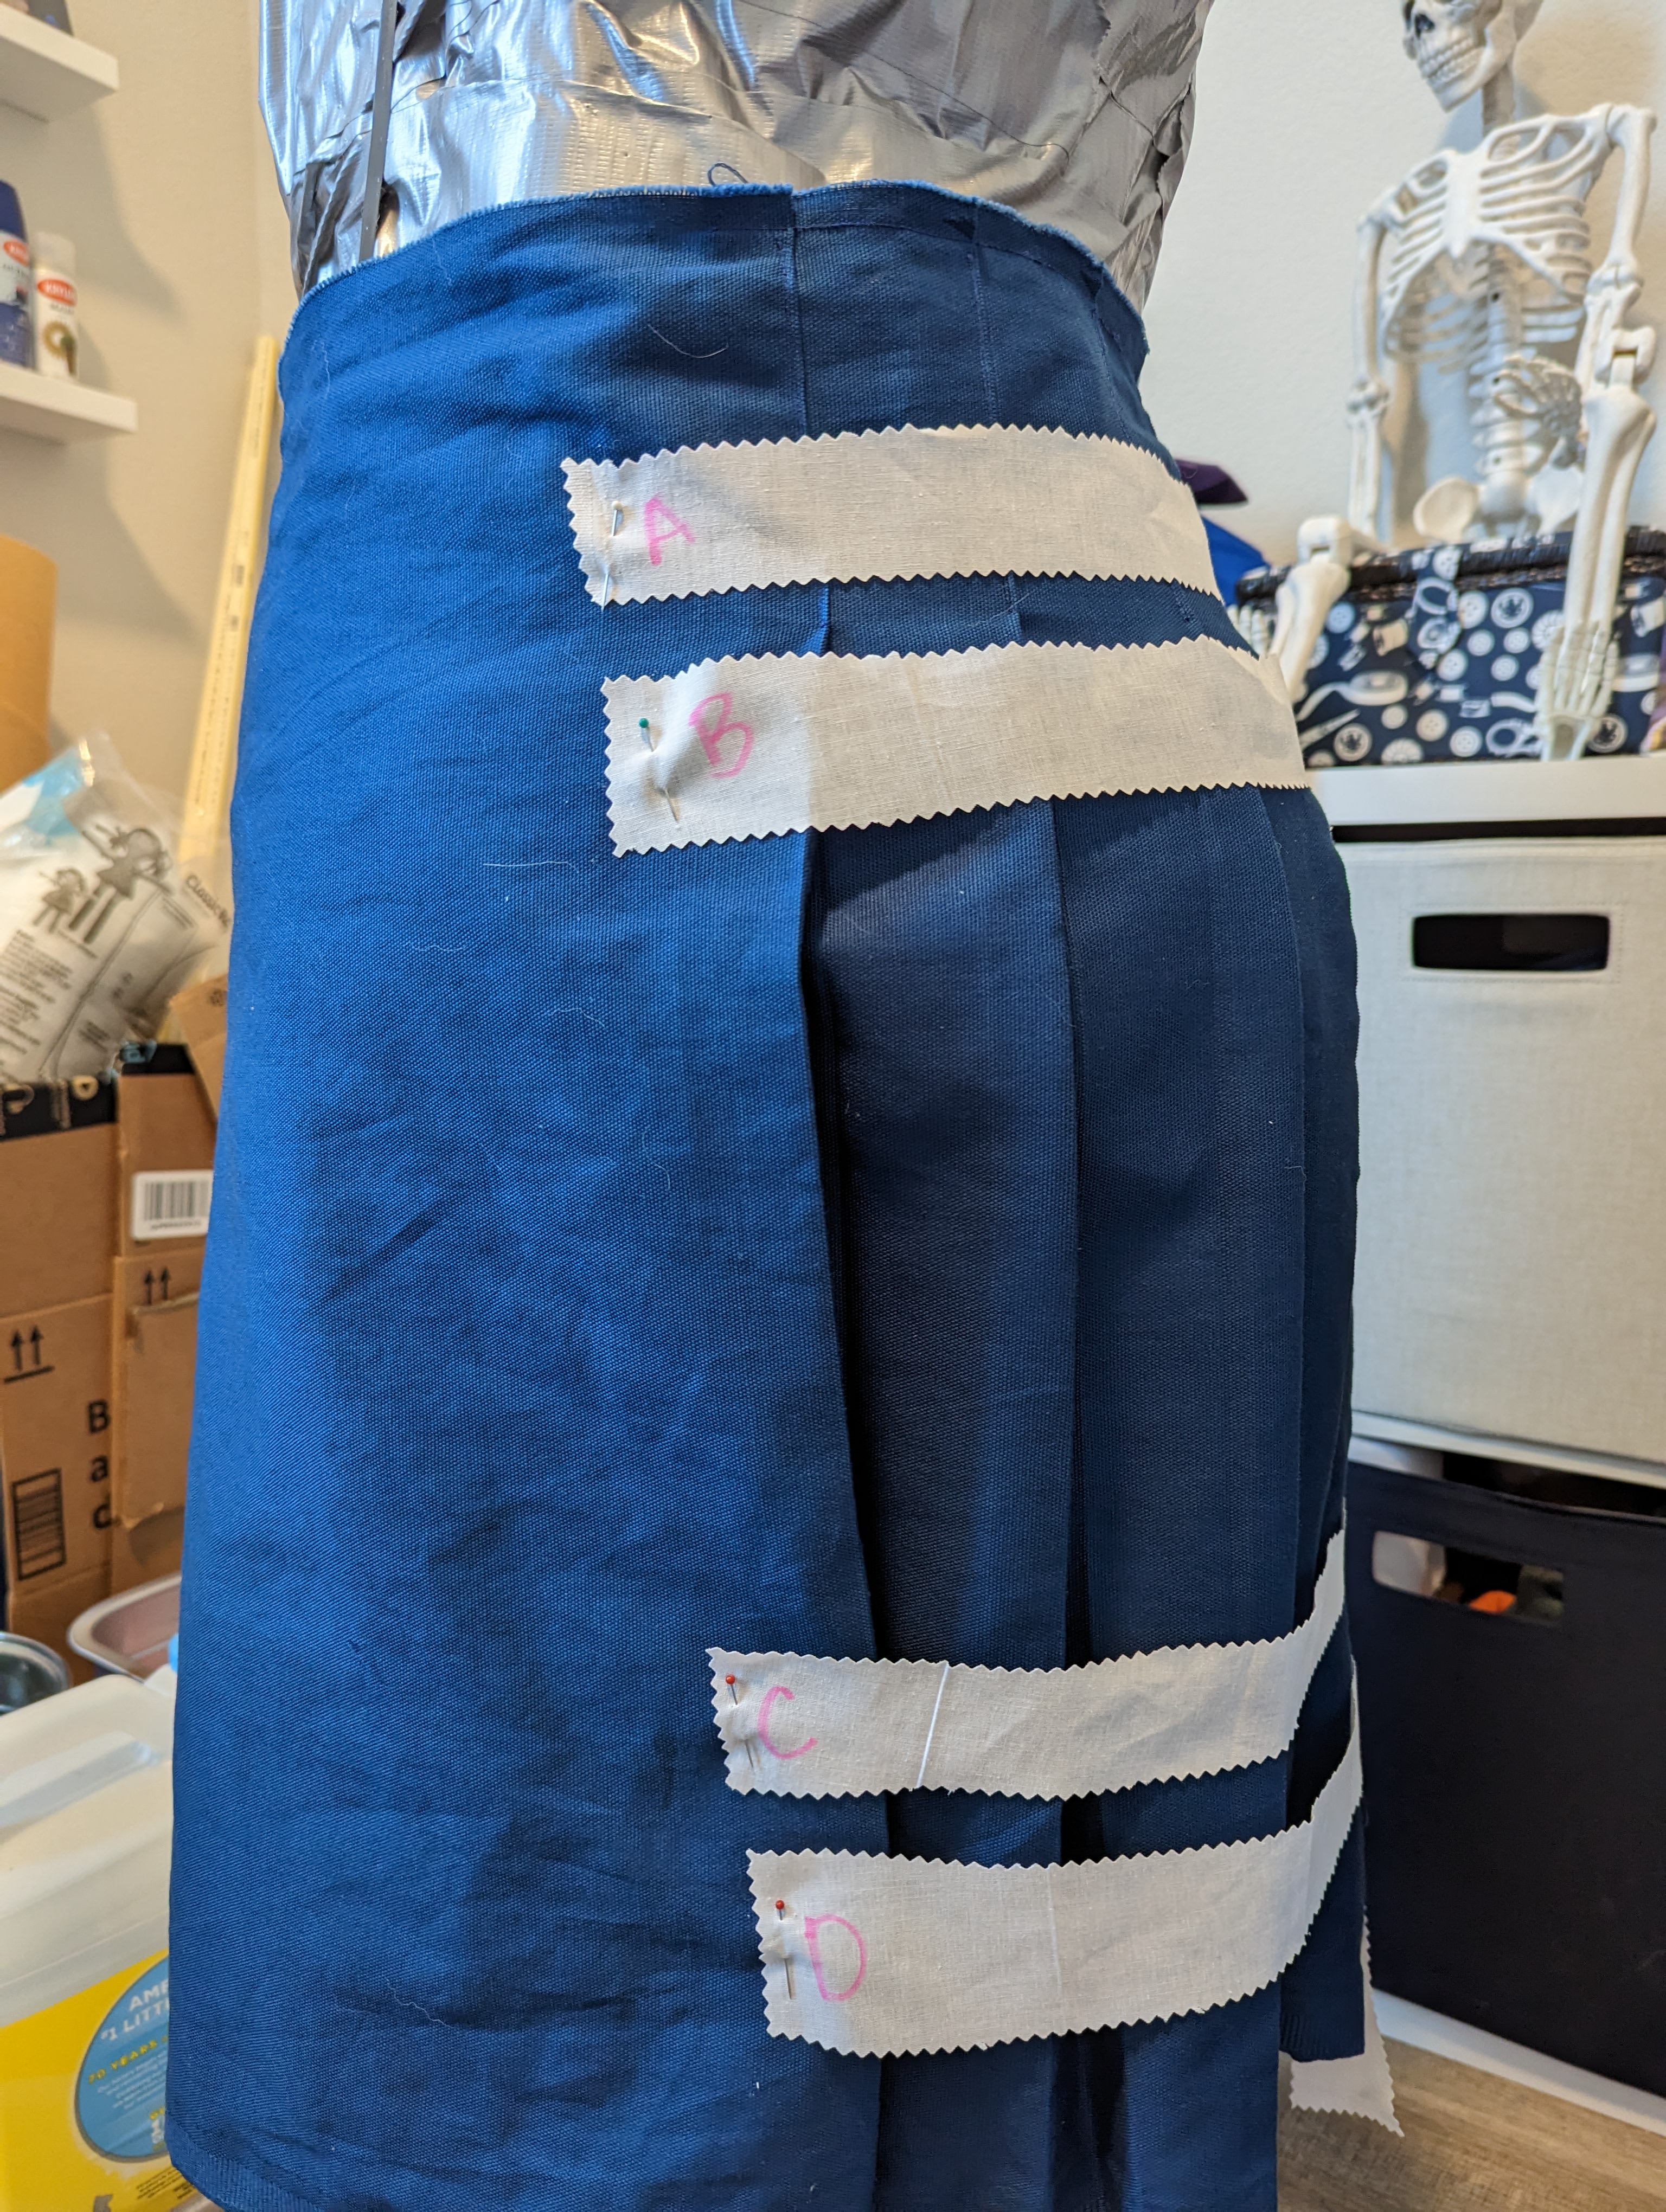

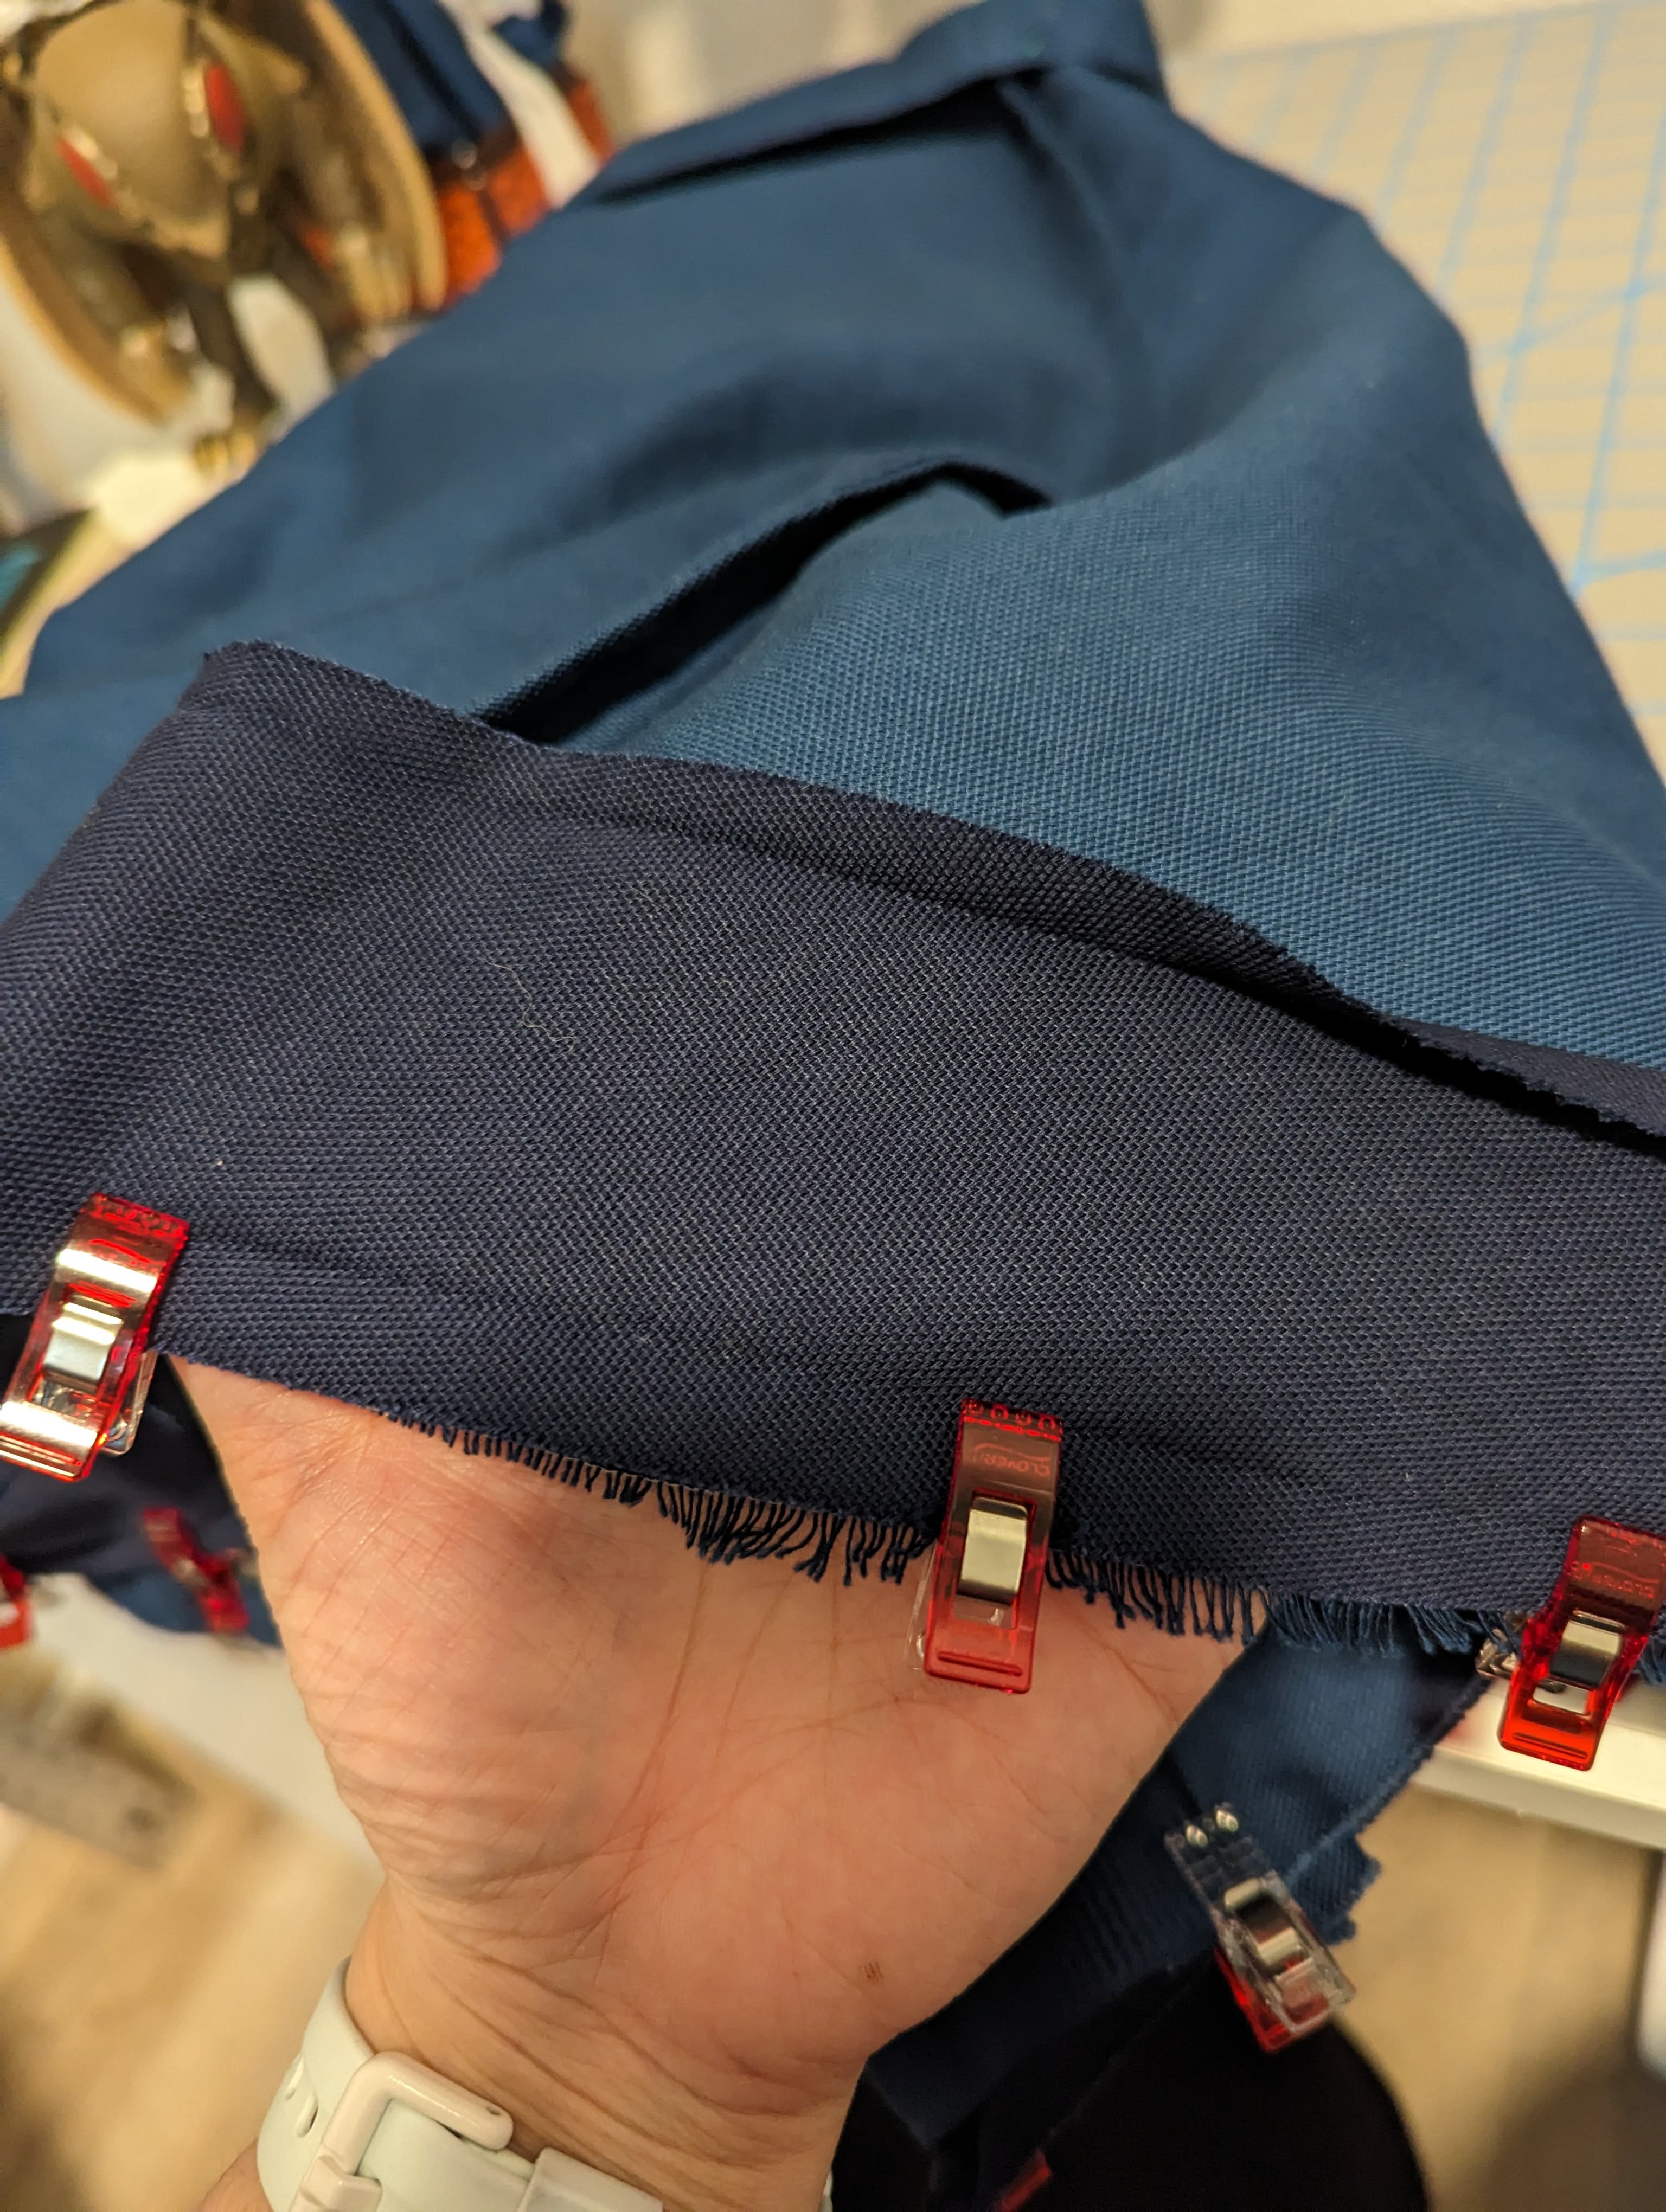
Getting the placement also meant I knew how long to make each strap, since the ones toward the bottom would be longer. I sandwiched buckram between two pieces of blue fabric. The dark fabric served as the fashion fabric while the medium blue served as the back.


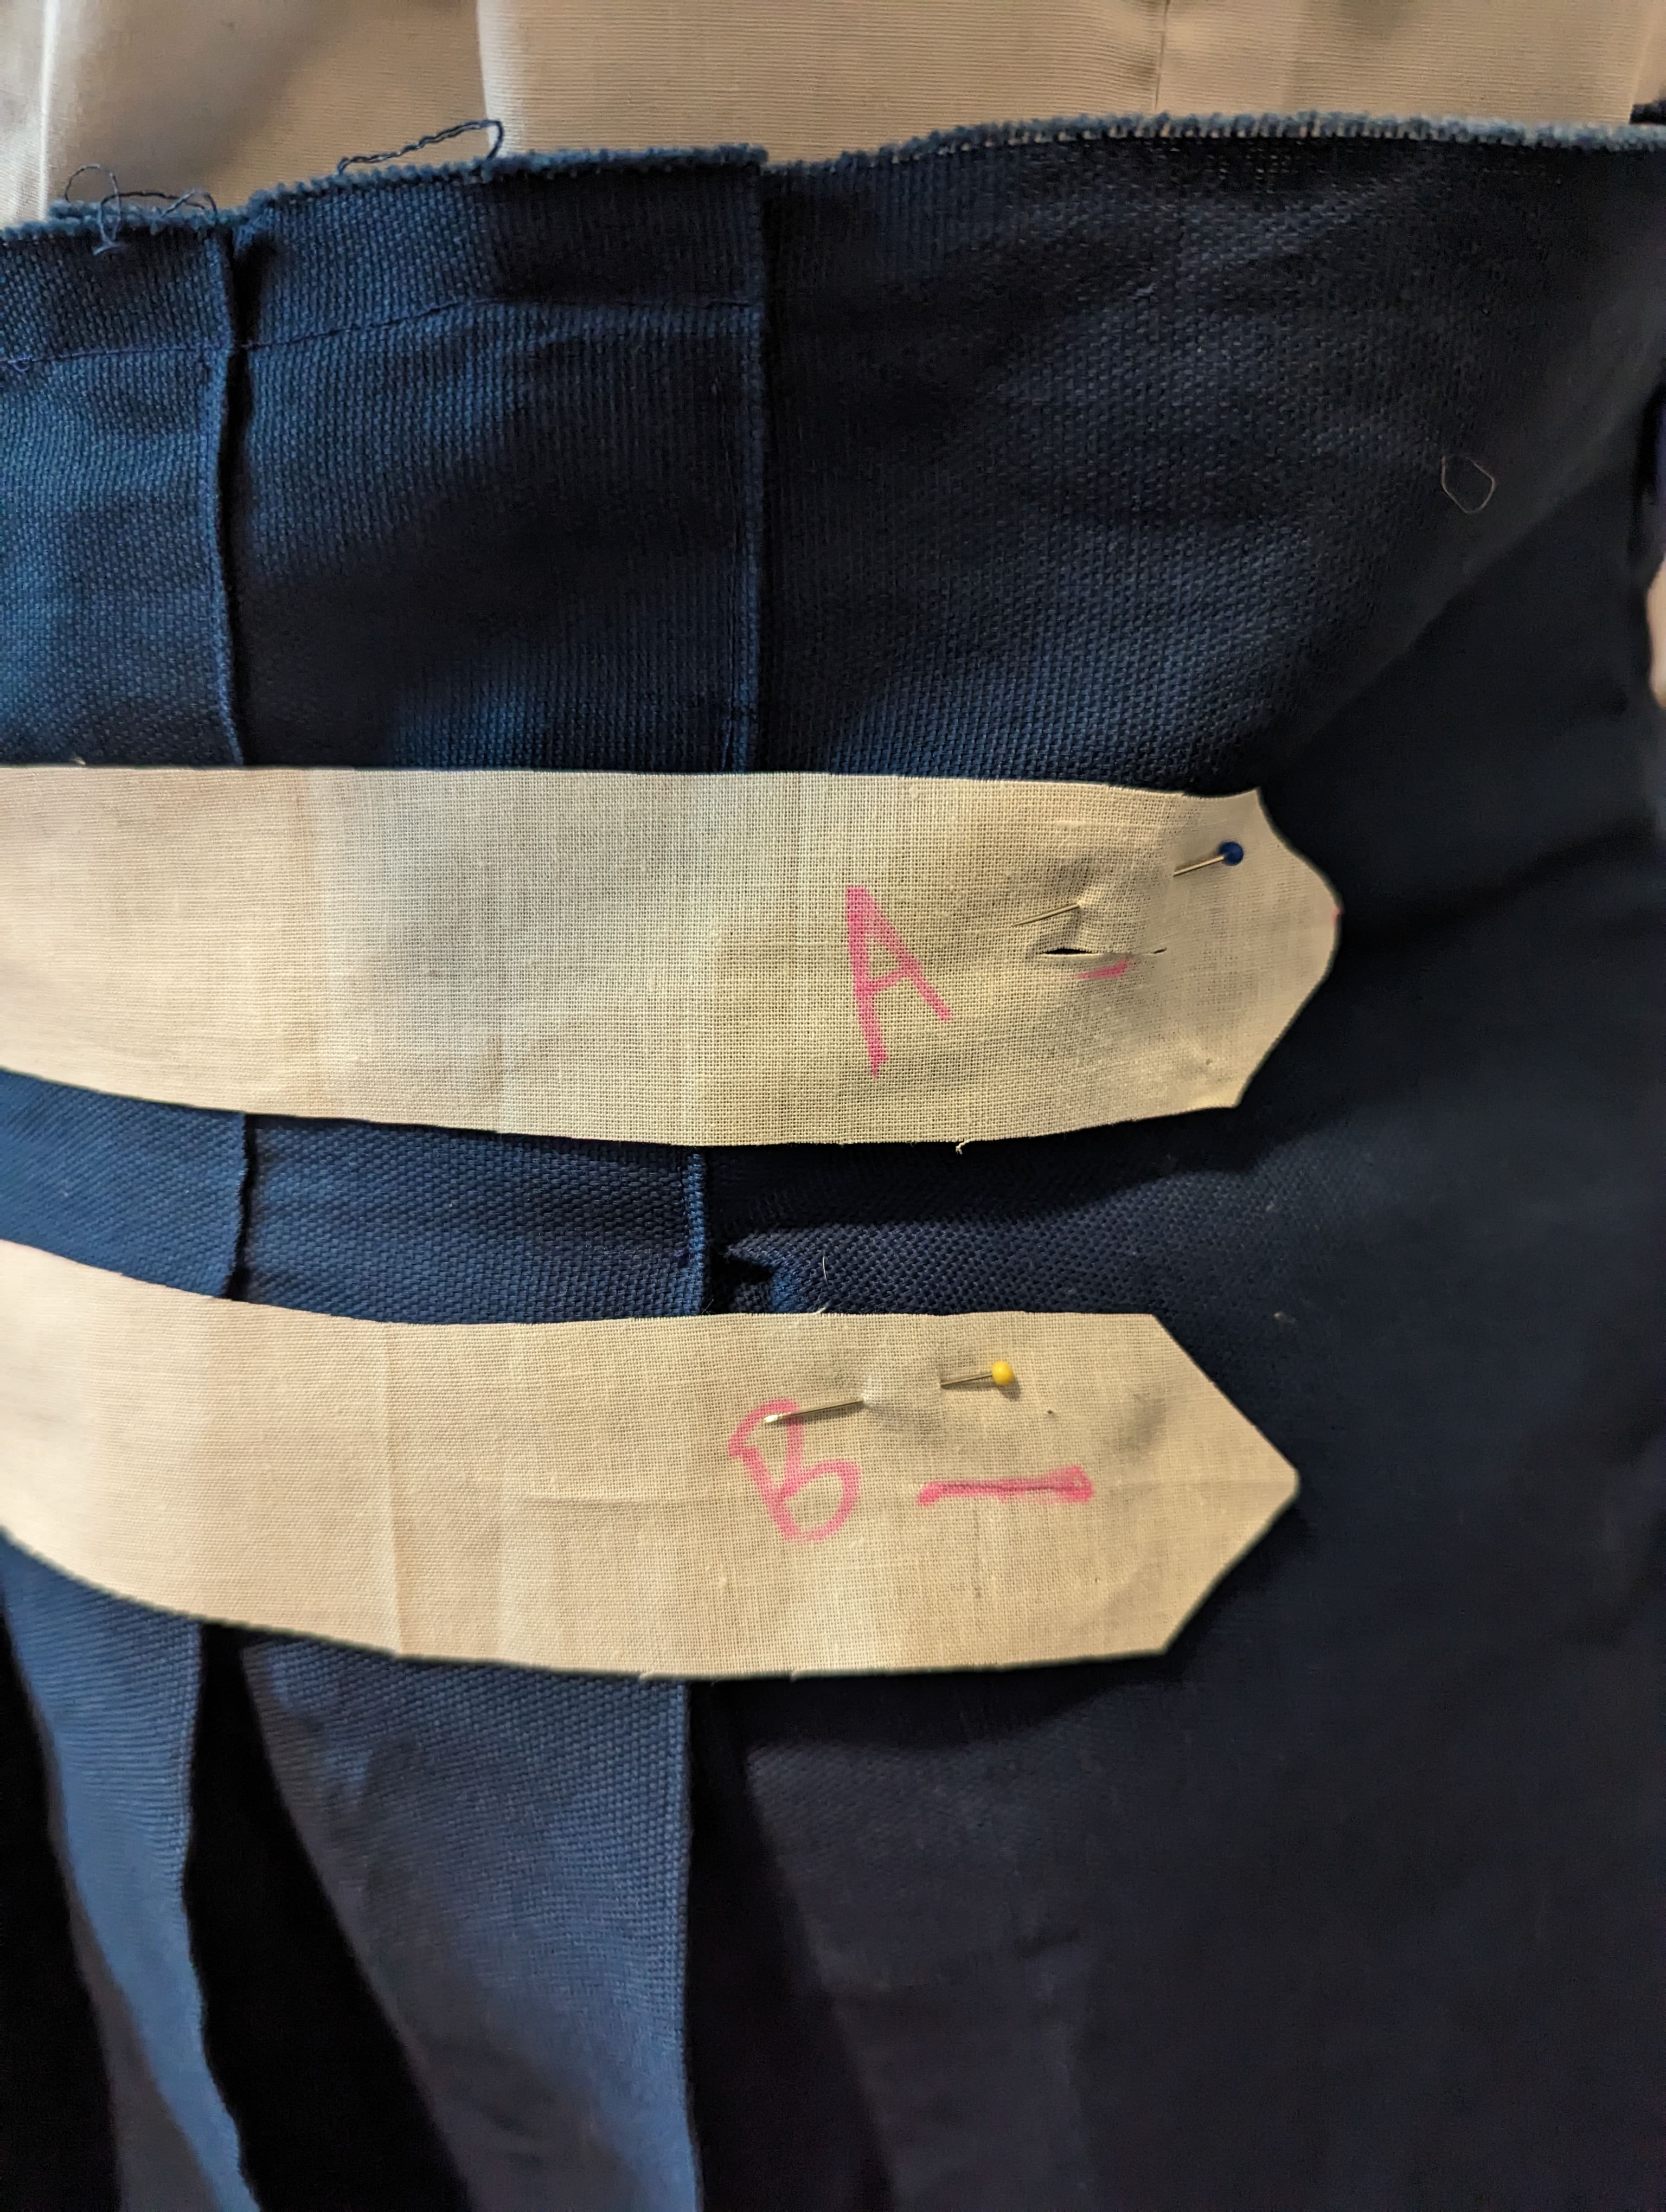
Here’s me using more muslin straps to figure out the placement for the two bottom straps. I really wanted to make sure they were aligned, so I used one strip going down the length of the skirt as a guide line. Then, I used one 2″ strap to serve as the guideline for what would become the trim for the bottom hemline of the skirt. Finally, I used yet another strap to serve as padding between the trim and the bottom-most blue strap. Once all that was determined, I stitched the last two gold buttons in place.


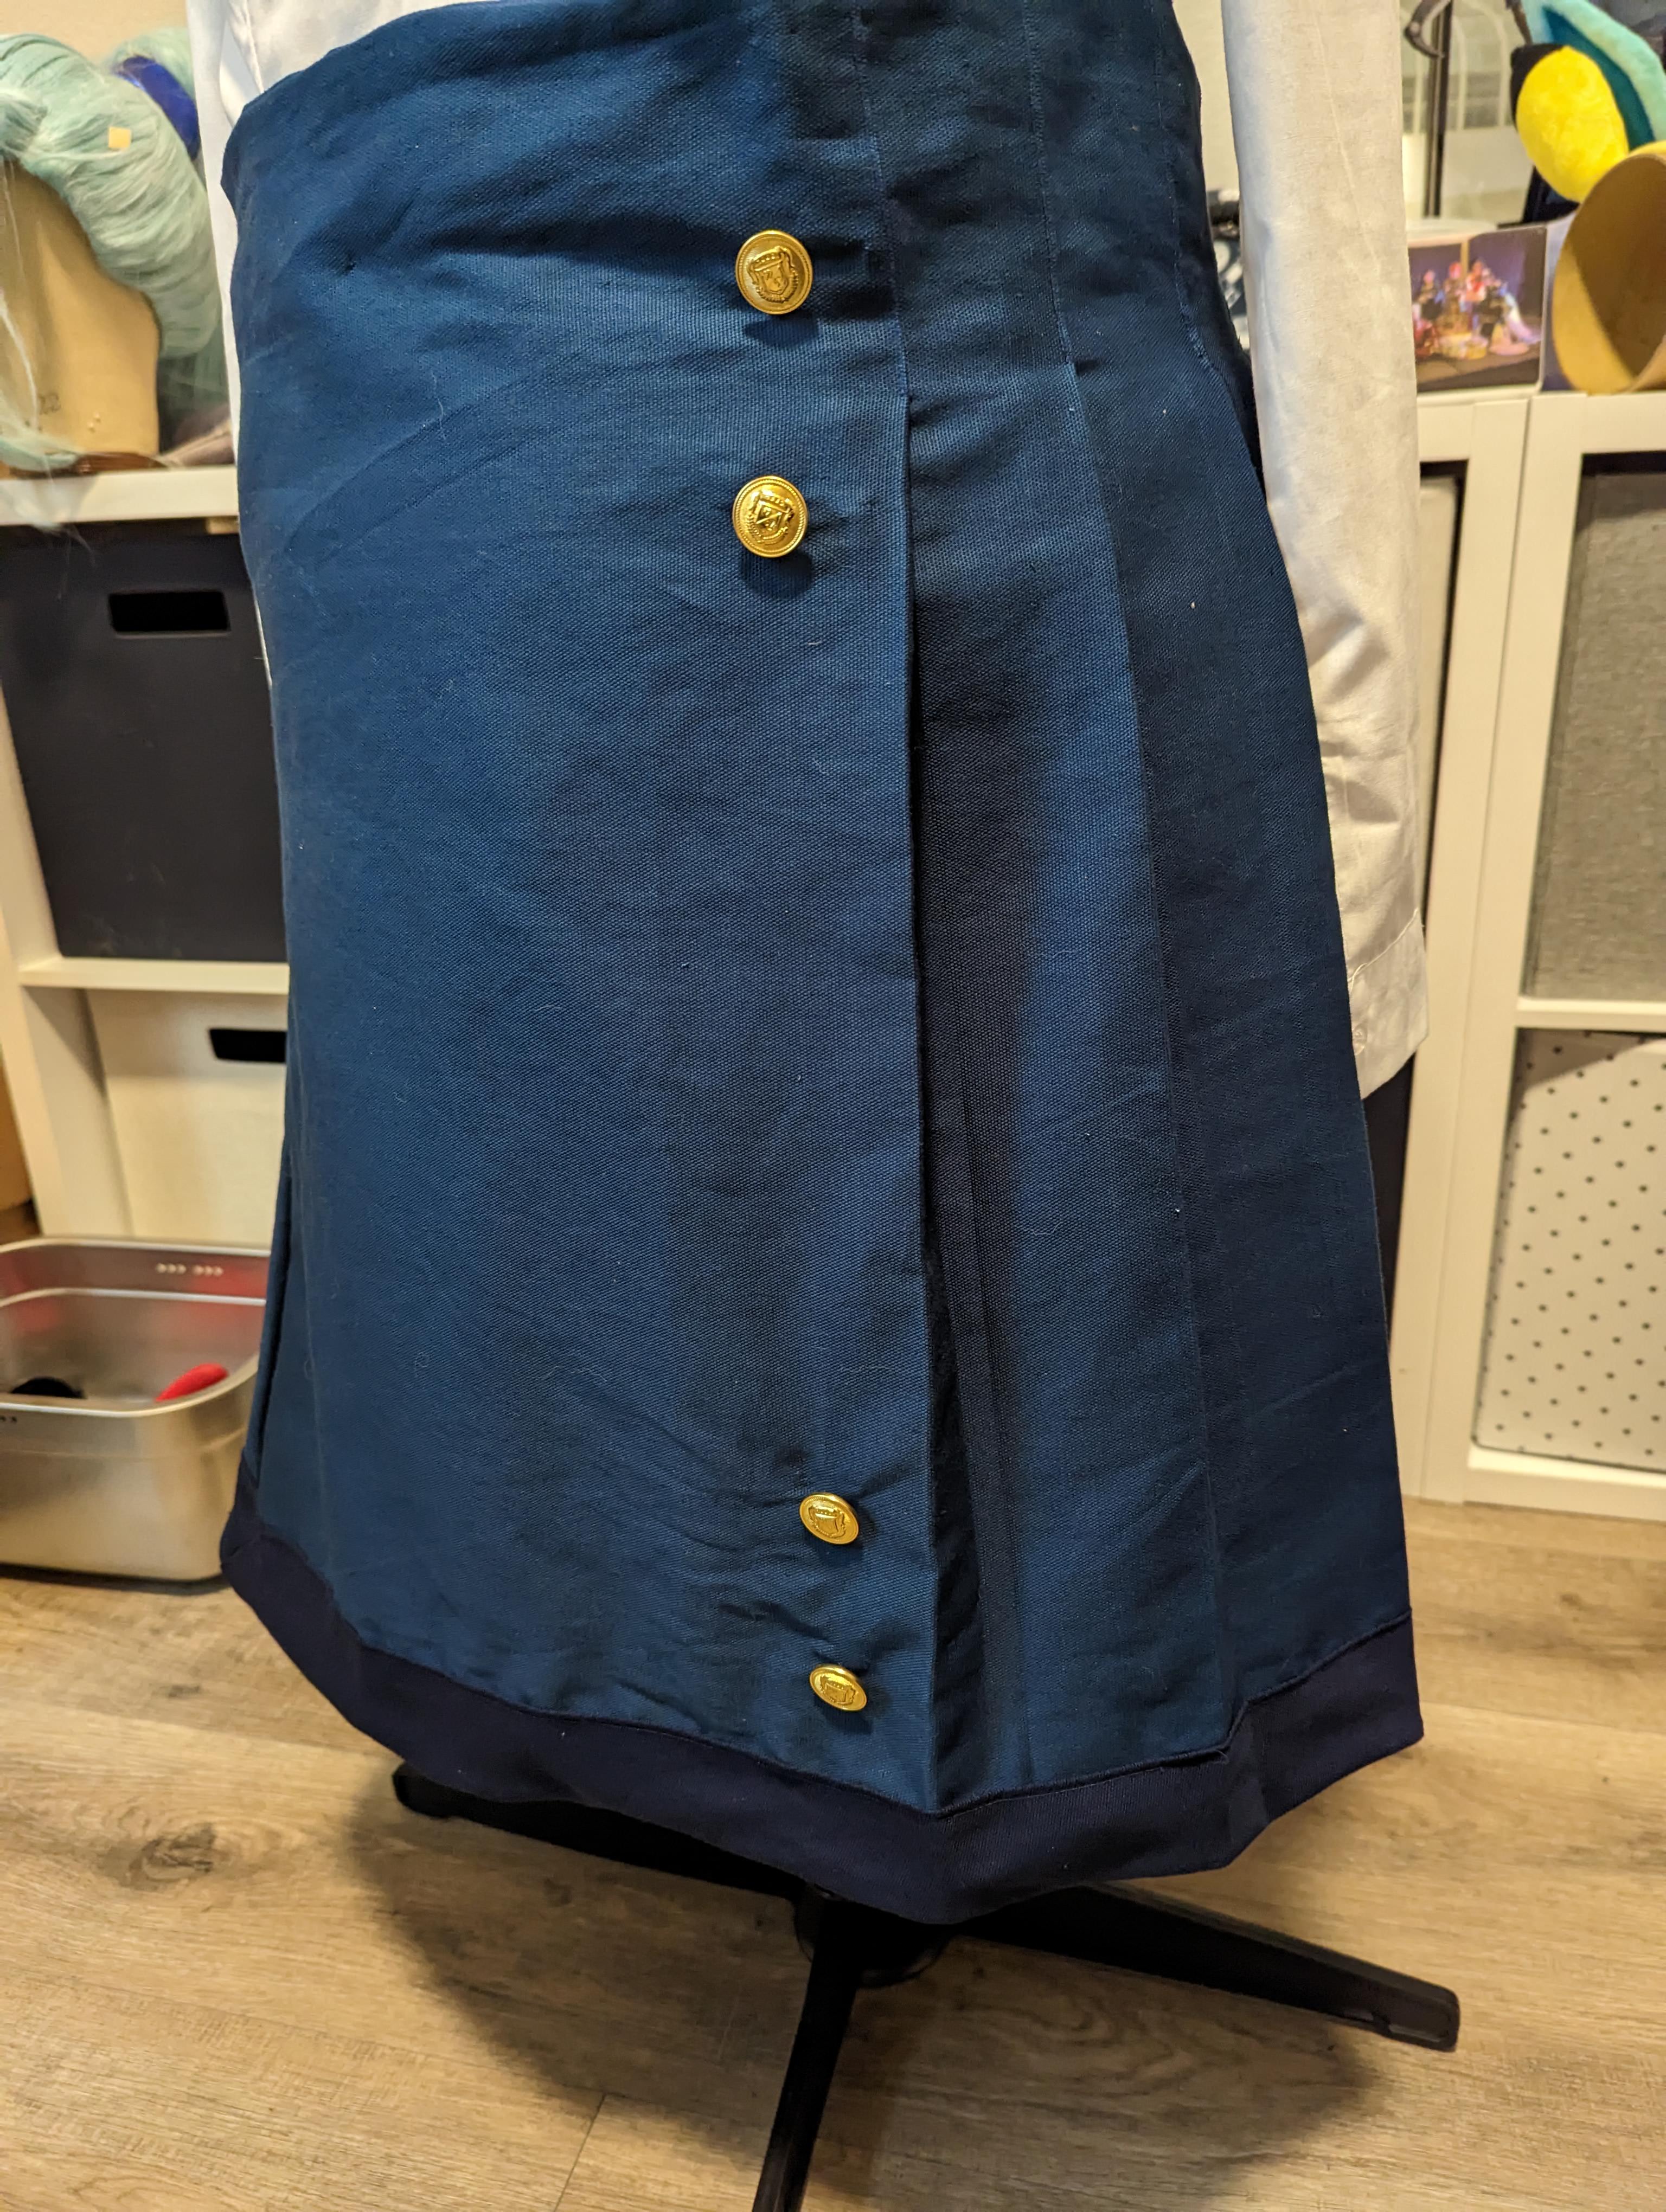
At this point, I took a quick detour to make trim for the bottom hem. I found this great 2″ bias tape maker online and used that to essentially make giant bias tape. Installing it was super easy compared to the bias tape coming up later.


To finish the top raw hem and give it a bit of structure, I made a facing for the skirt. I cut three rectangles based on the panelling of the skirt , finished the edges, stitched it in place, the tacked down the inside so it wouldn’t shift around.

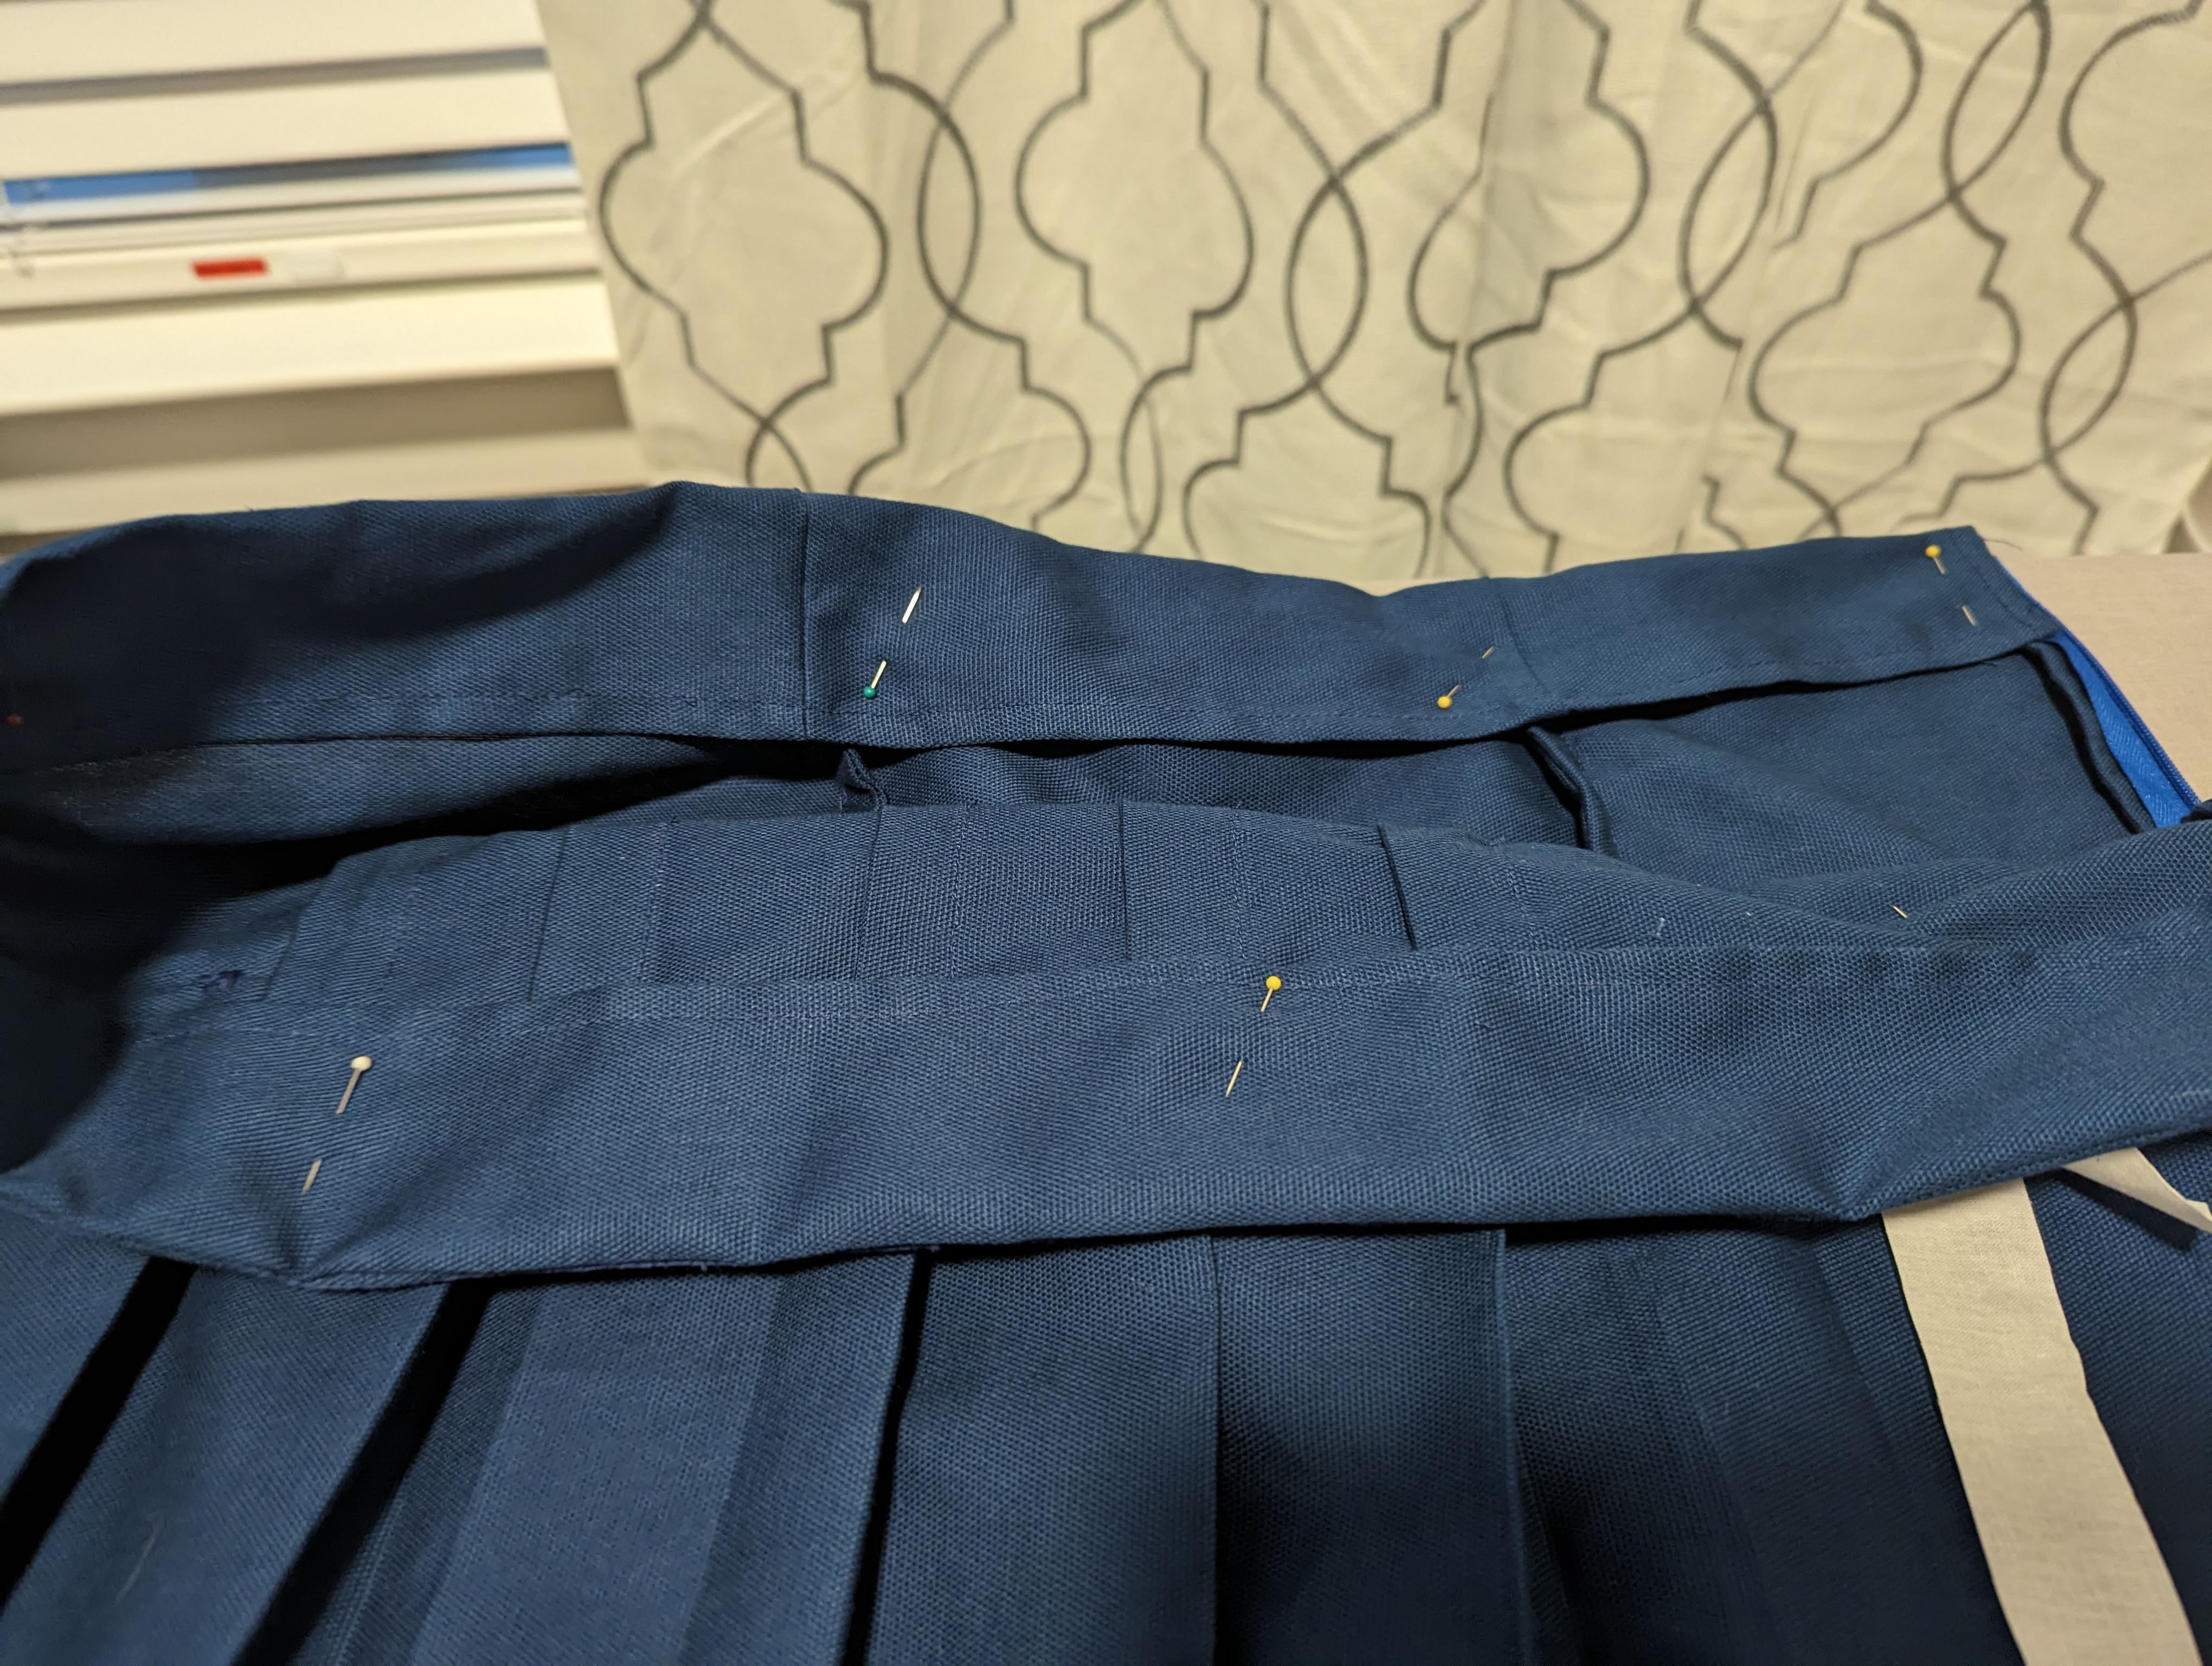
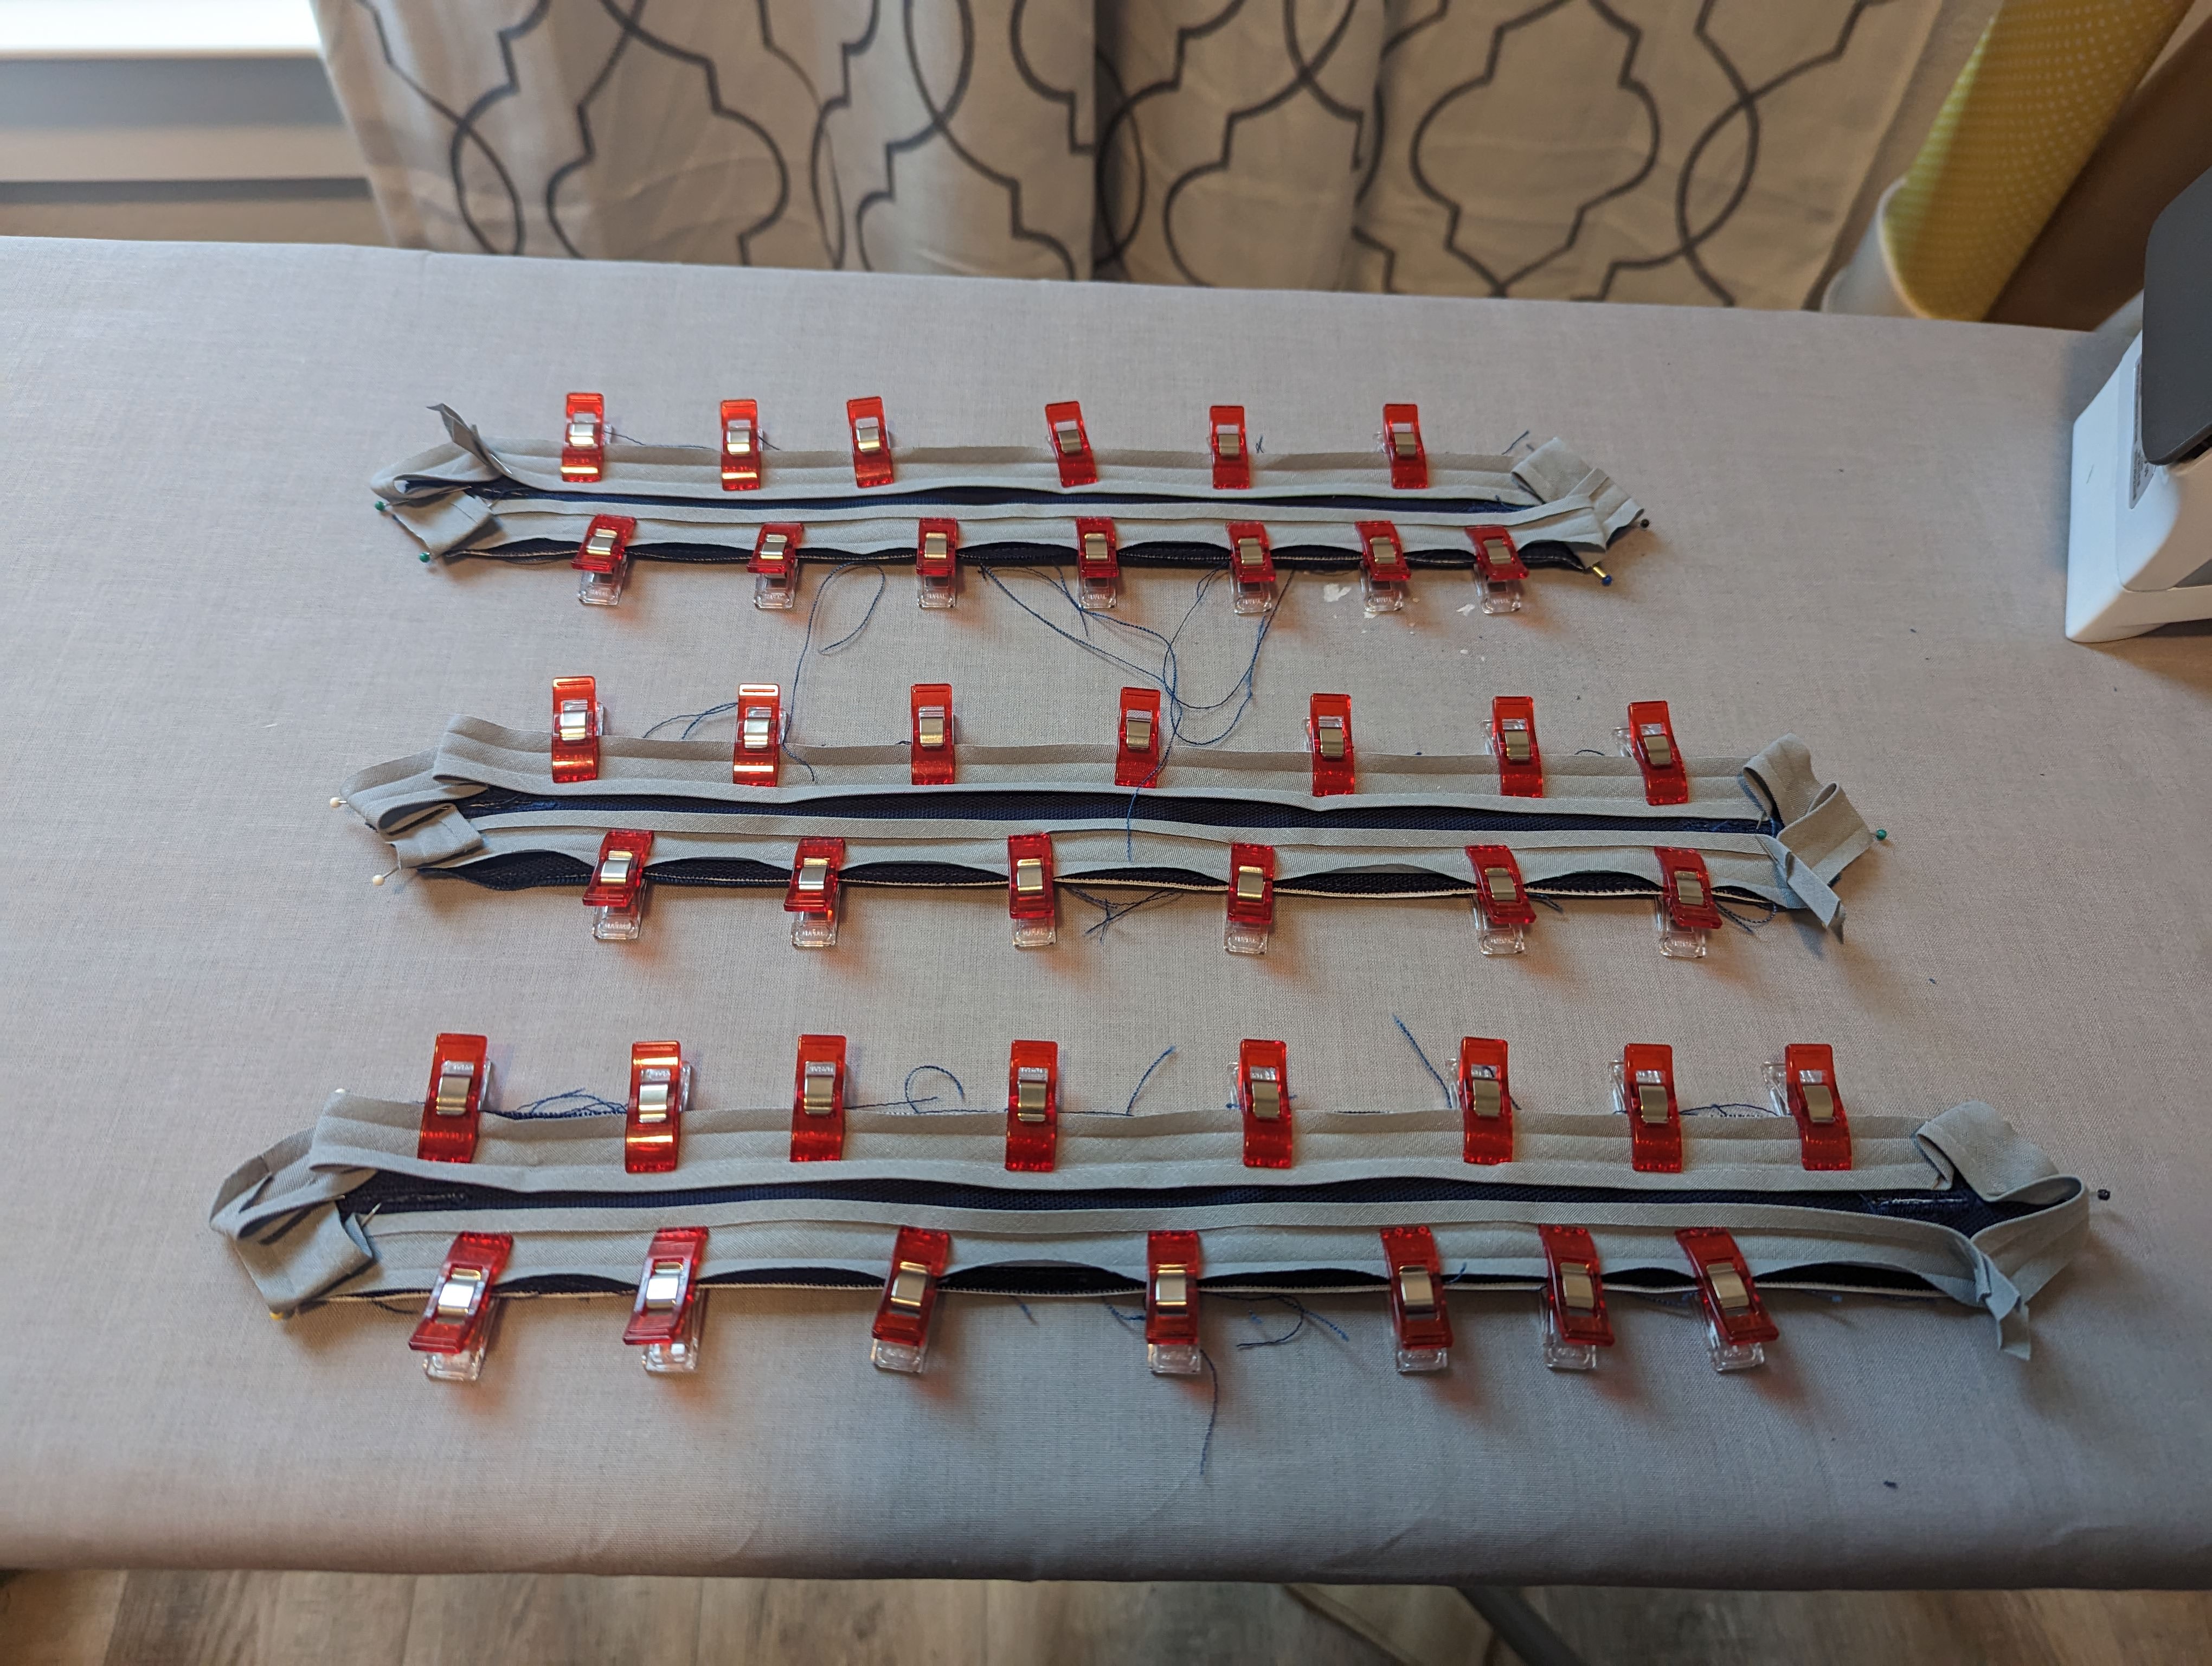
The last step for finishing the skirt was finishing the straps, which meant adding this thin gray bias tape to all the straps. This was so tedious and a much bigger hassle when when I did that giant 2″ wide tape for the skirt hem.


Shirt
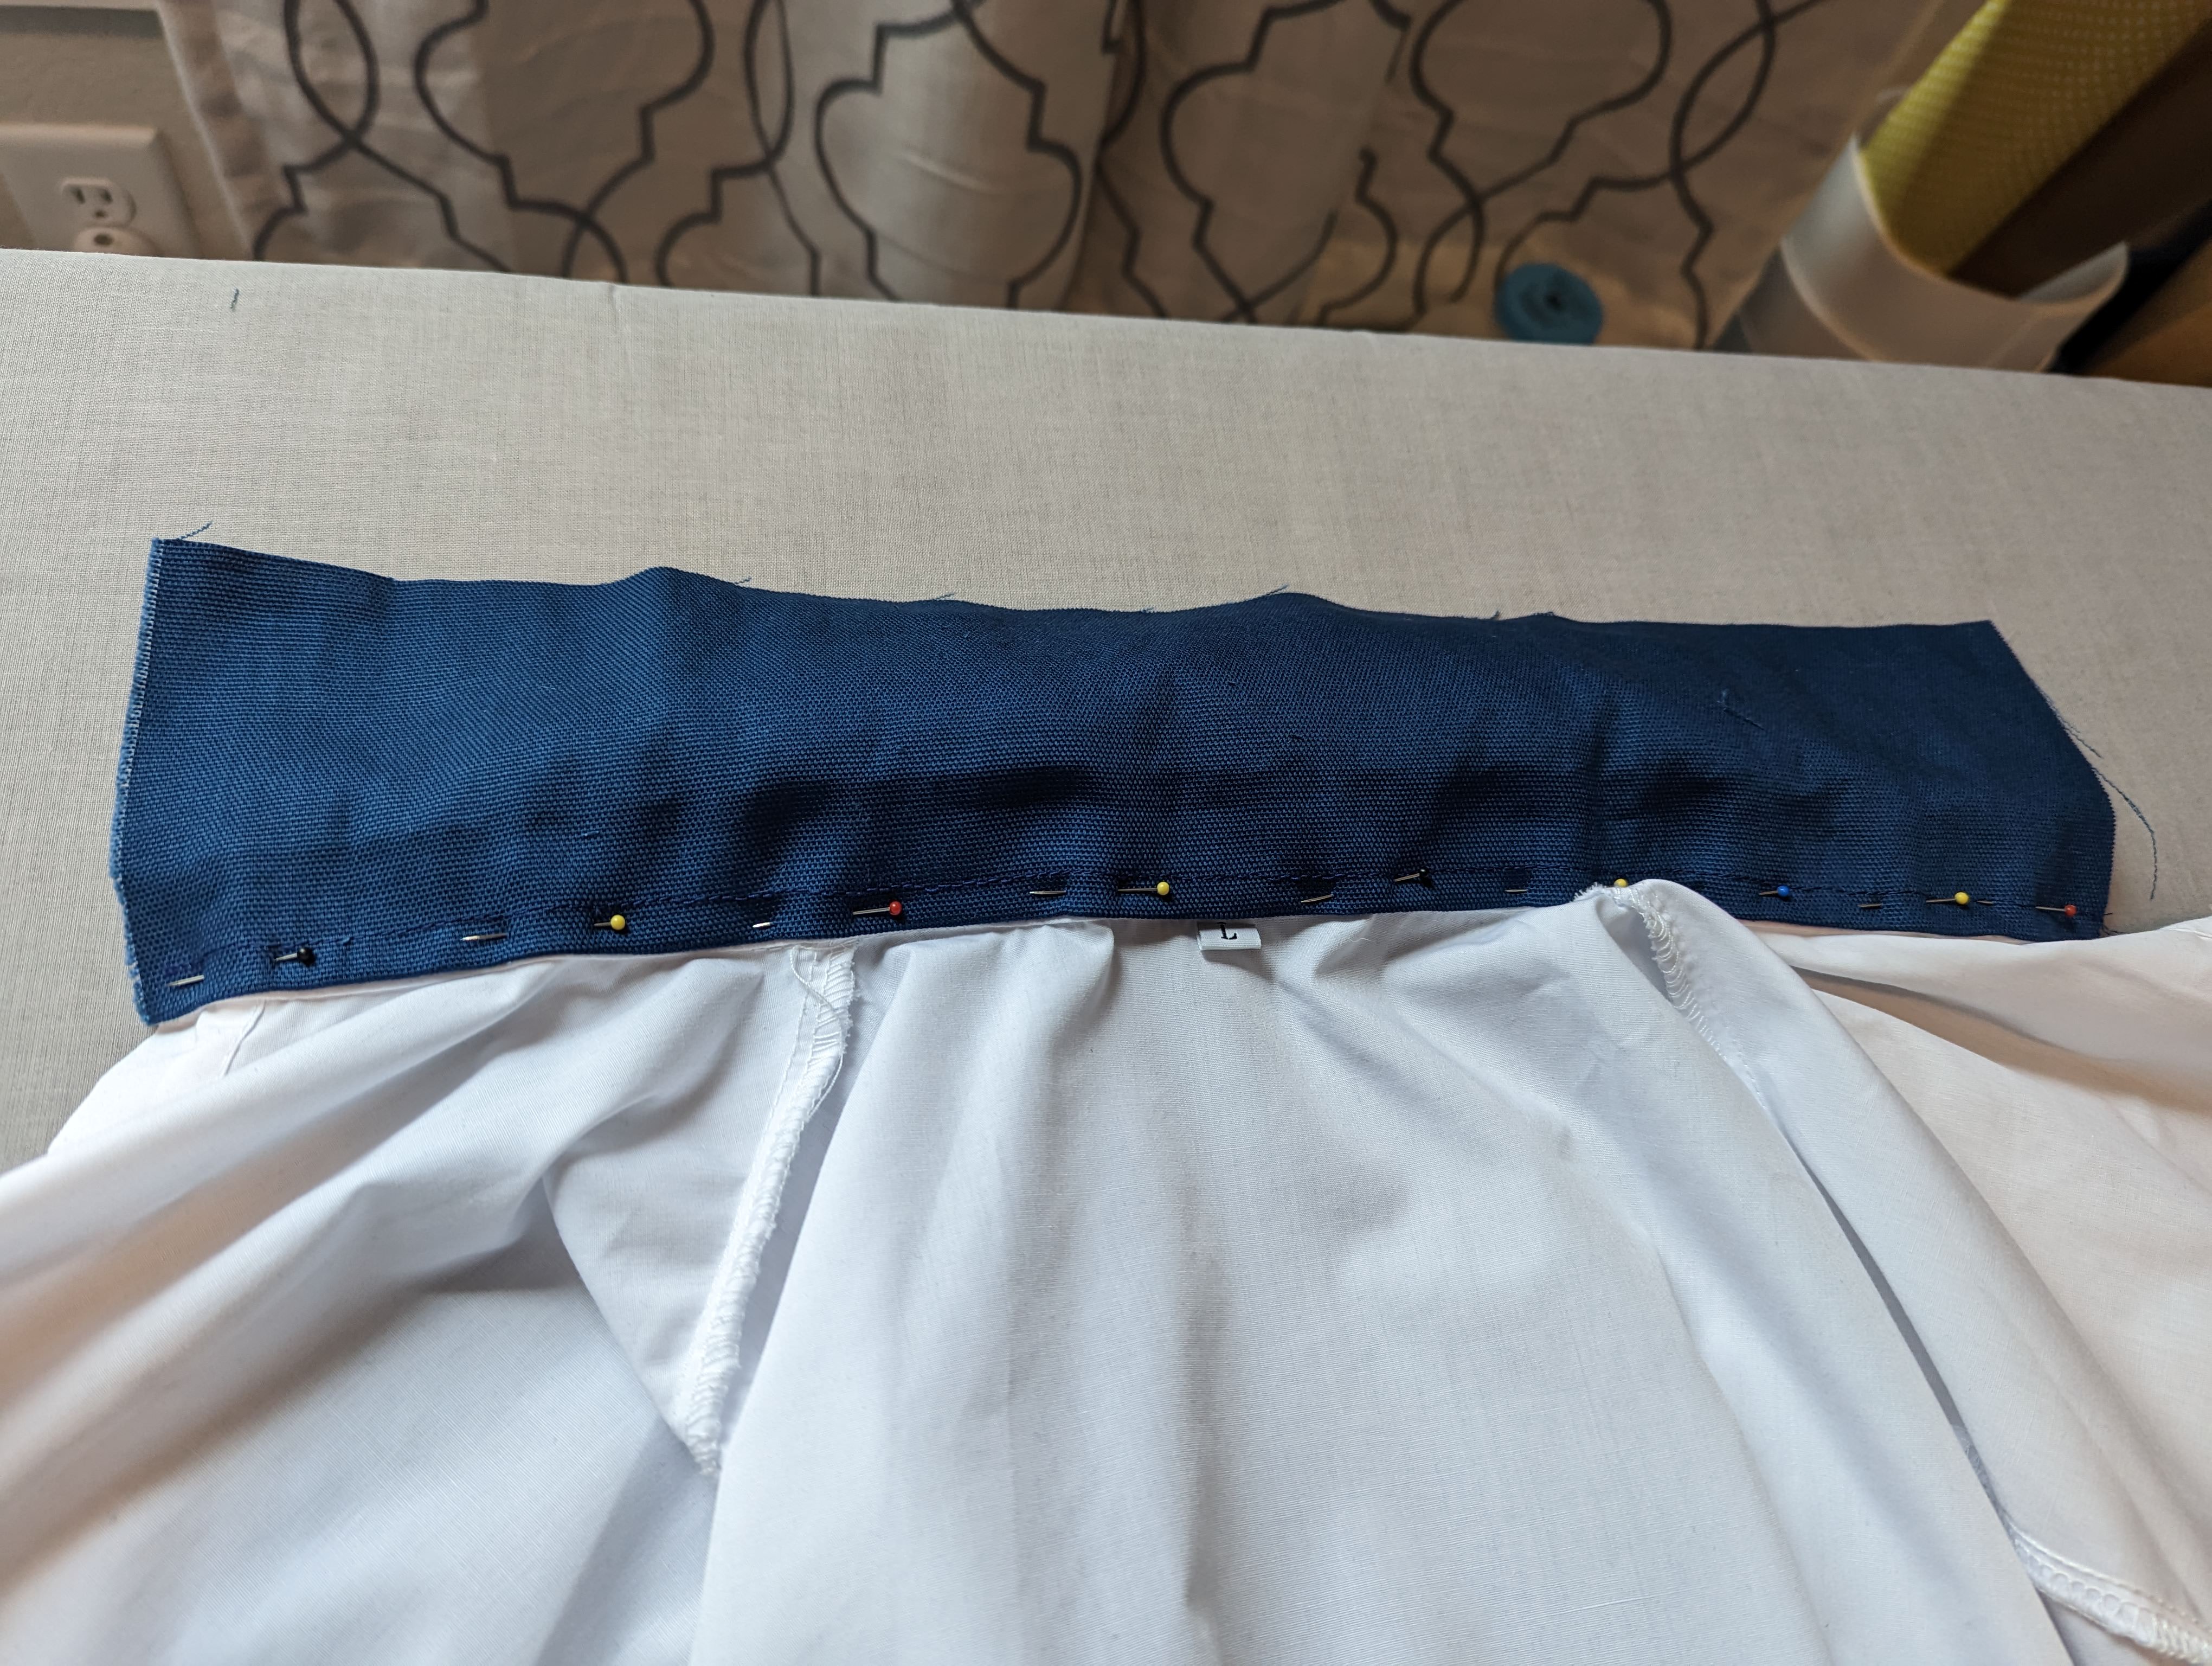
I bought a pattern to do a dress shirt from scratch, but was running low on time. So, I opted to modify an existing shirt I had. This meant covering the collar with my own fabric. I used the same blue fabric used for the skirt base to cover the collar.
After measuring the bottom edge of the collar, I cut out a rectangle of fabric with those measurements plus hem allowance. Then, I folded down the hem, stitched it in place and stitched that onto the collar. Laid flat, I cut the excess fabric knowing this raw edge would be covered with bias tape.

I originally bought fabric for this yellow trim, but decided to save it for if I get around to making the blouse from scratch. So, I used pre-made yellow bias tape to finish the collar.


I would’ve liked to also have also modified the shirt sleeve cuffs, but I had no time and also knew I would be folding up the sleeves anyway. It was a small detail to sacrifice so I could focus on other pieces.
Cravat
The cravat was super simple. Using muslin, I figured out how long and wide the pieces needed to be. Then, from there, it was cutting out two strips of fabric (with hem allowance) stitching them together, turning them right-side out, pressing, and closing the hole with ladder stitching. Easy peasy.


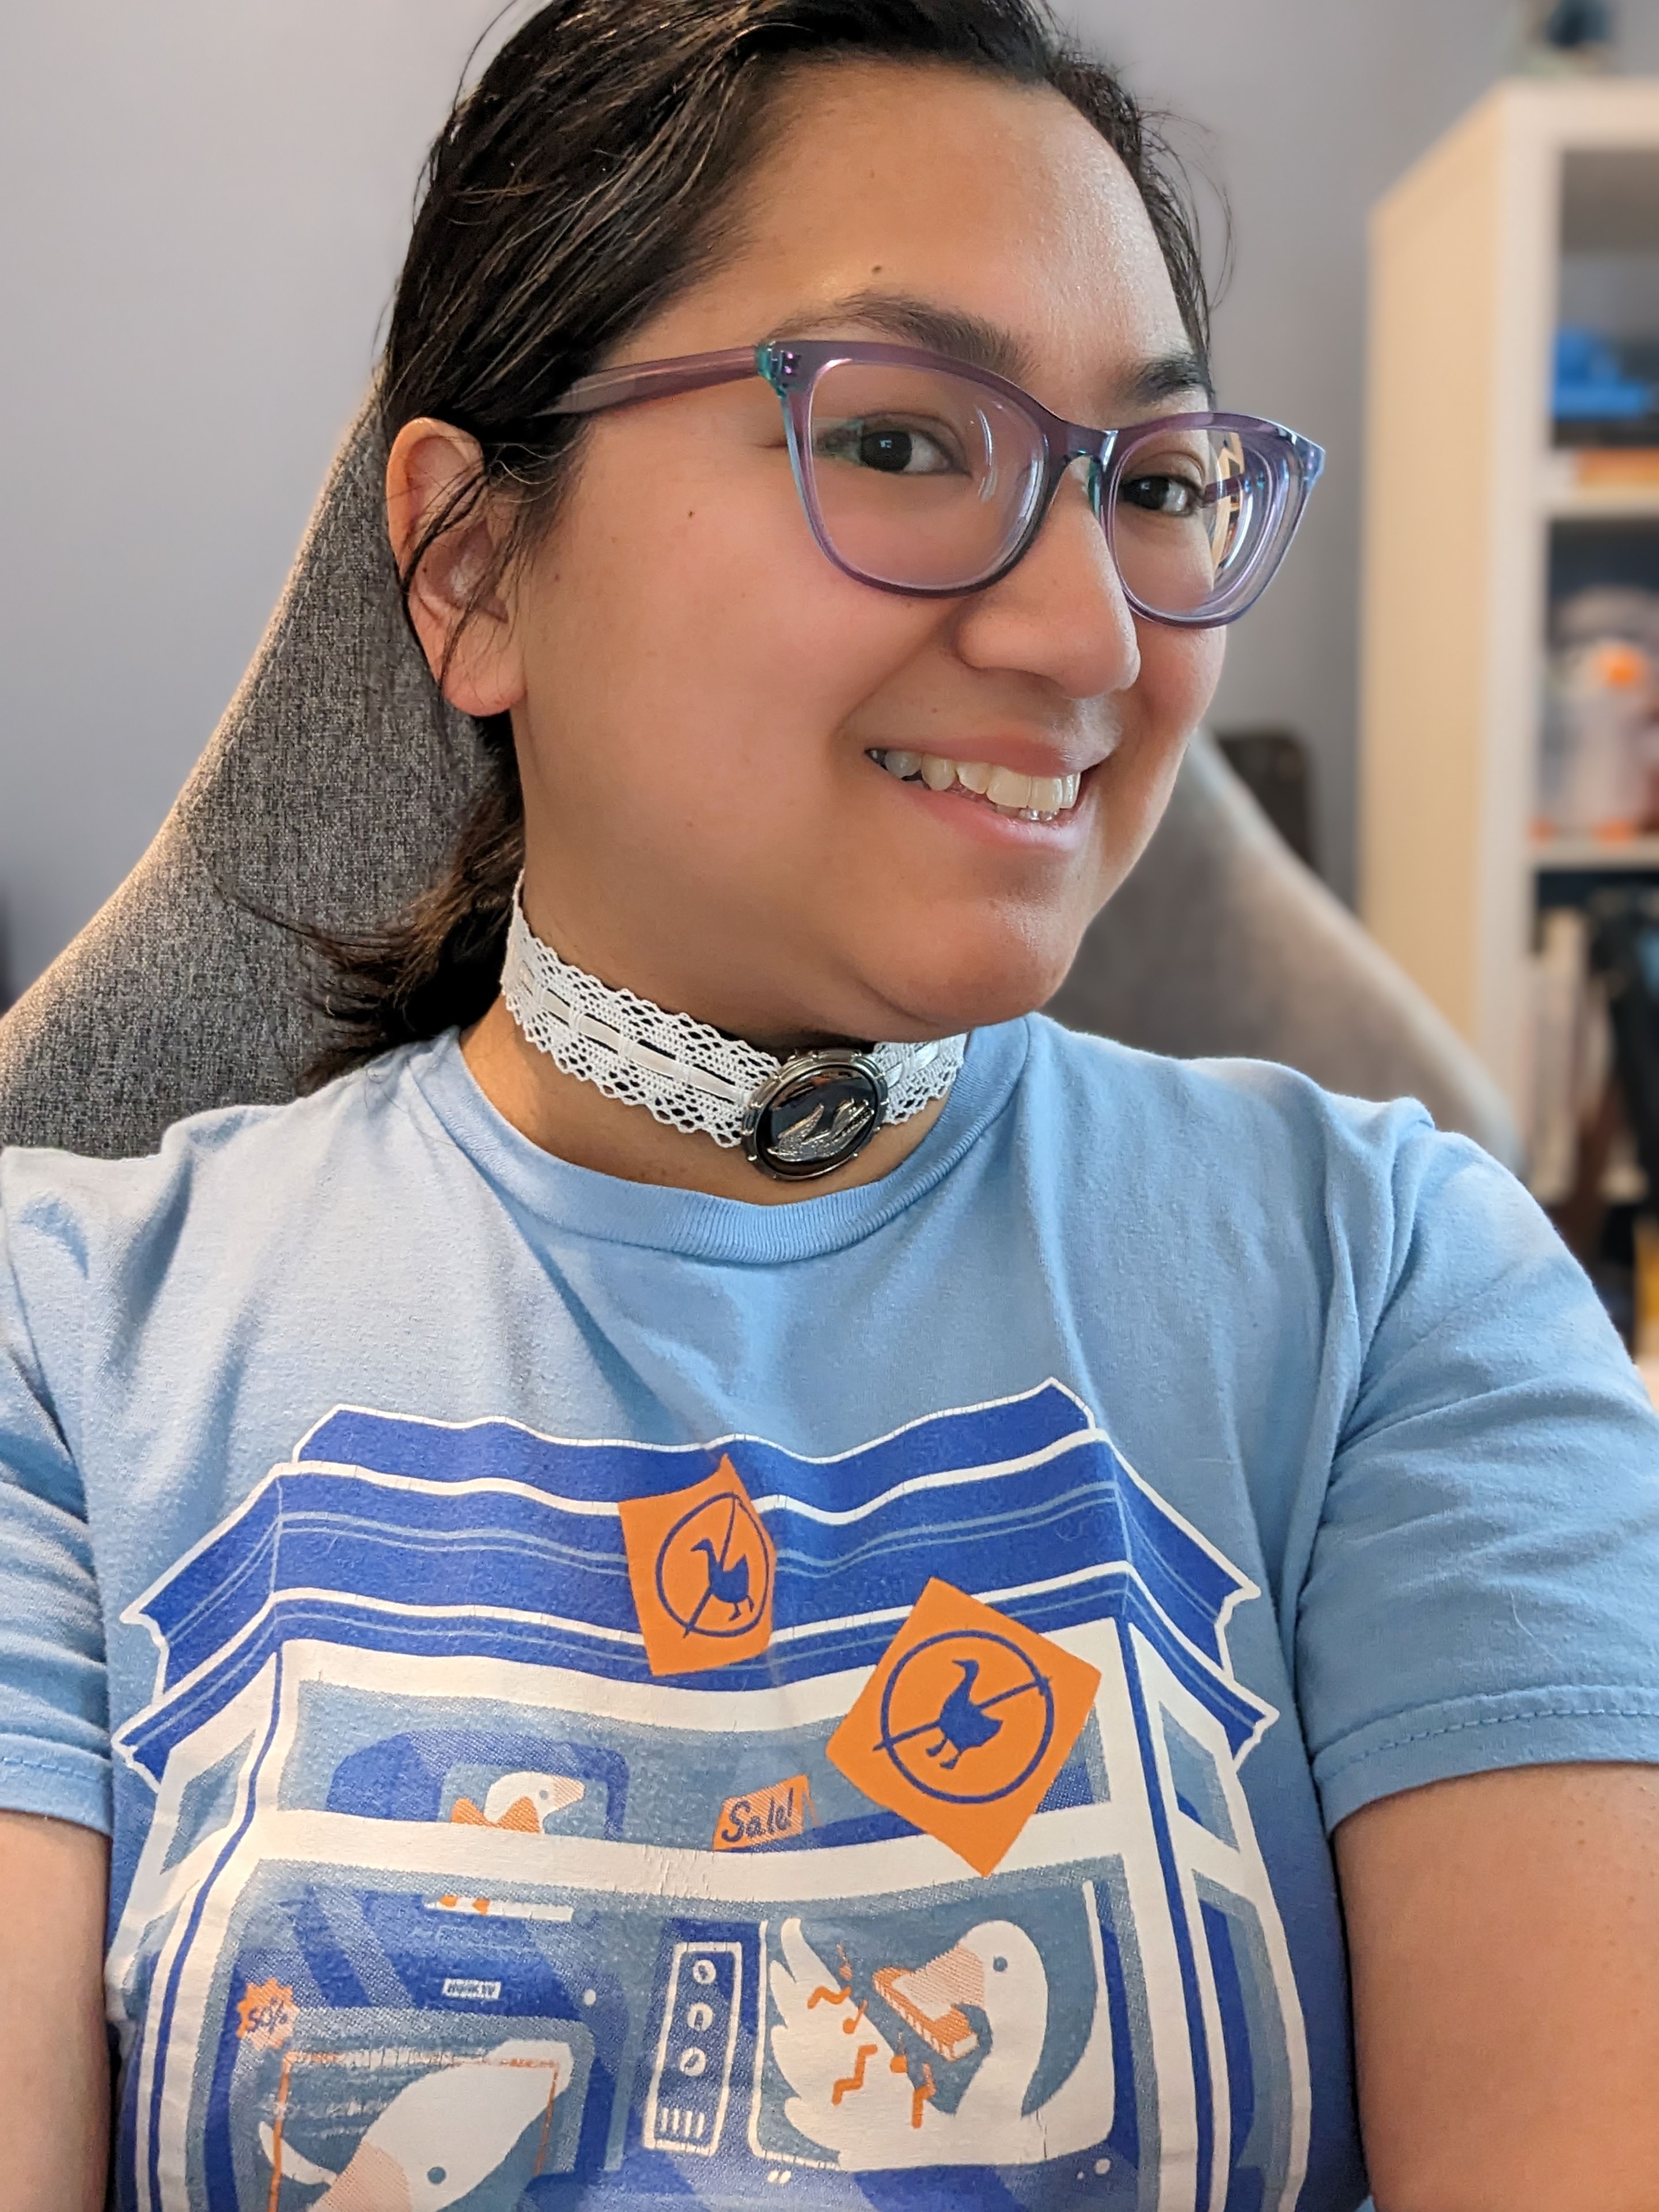
Choker
I had made a choker for my wedding, but it turns out it no longer fits, so I had to make another one. Thankfully, the pendant I had wasn’t permanently affixed to the old choker, so I just removed it and made another choker. I used a strip of white lace and blue ribbon attached to these choker ends.

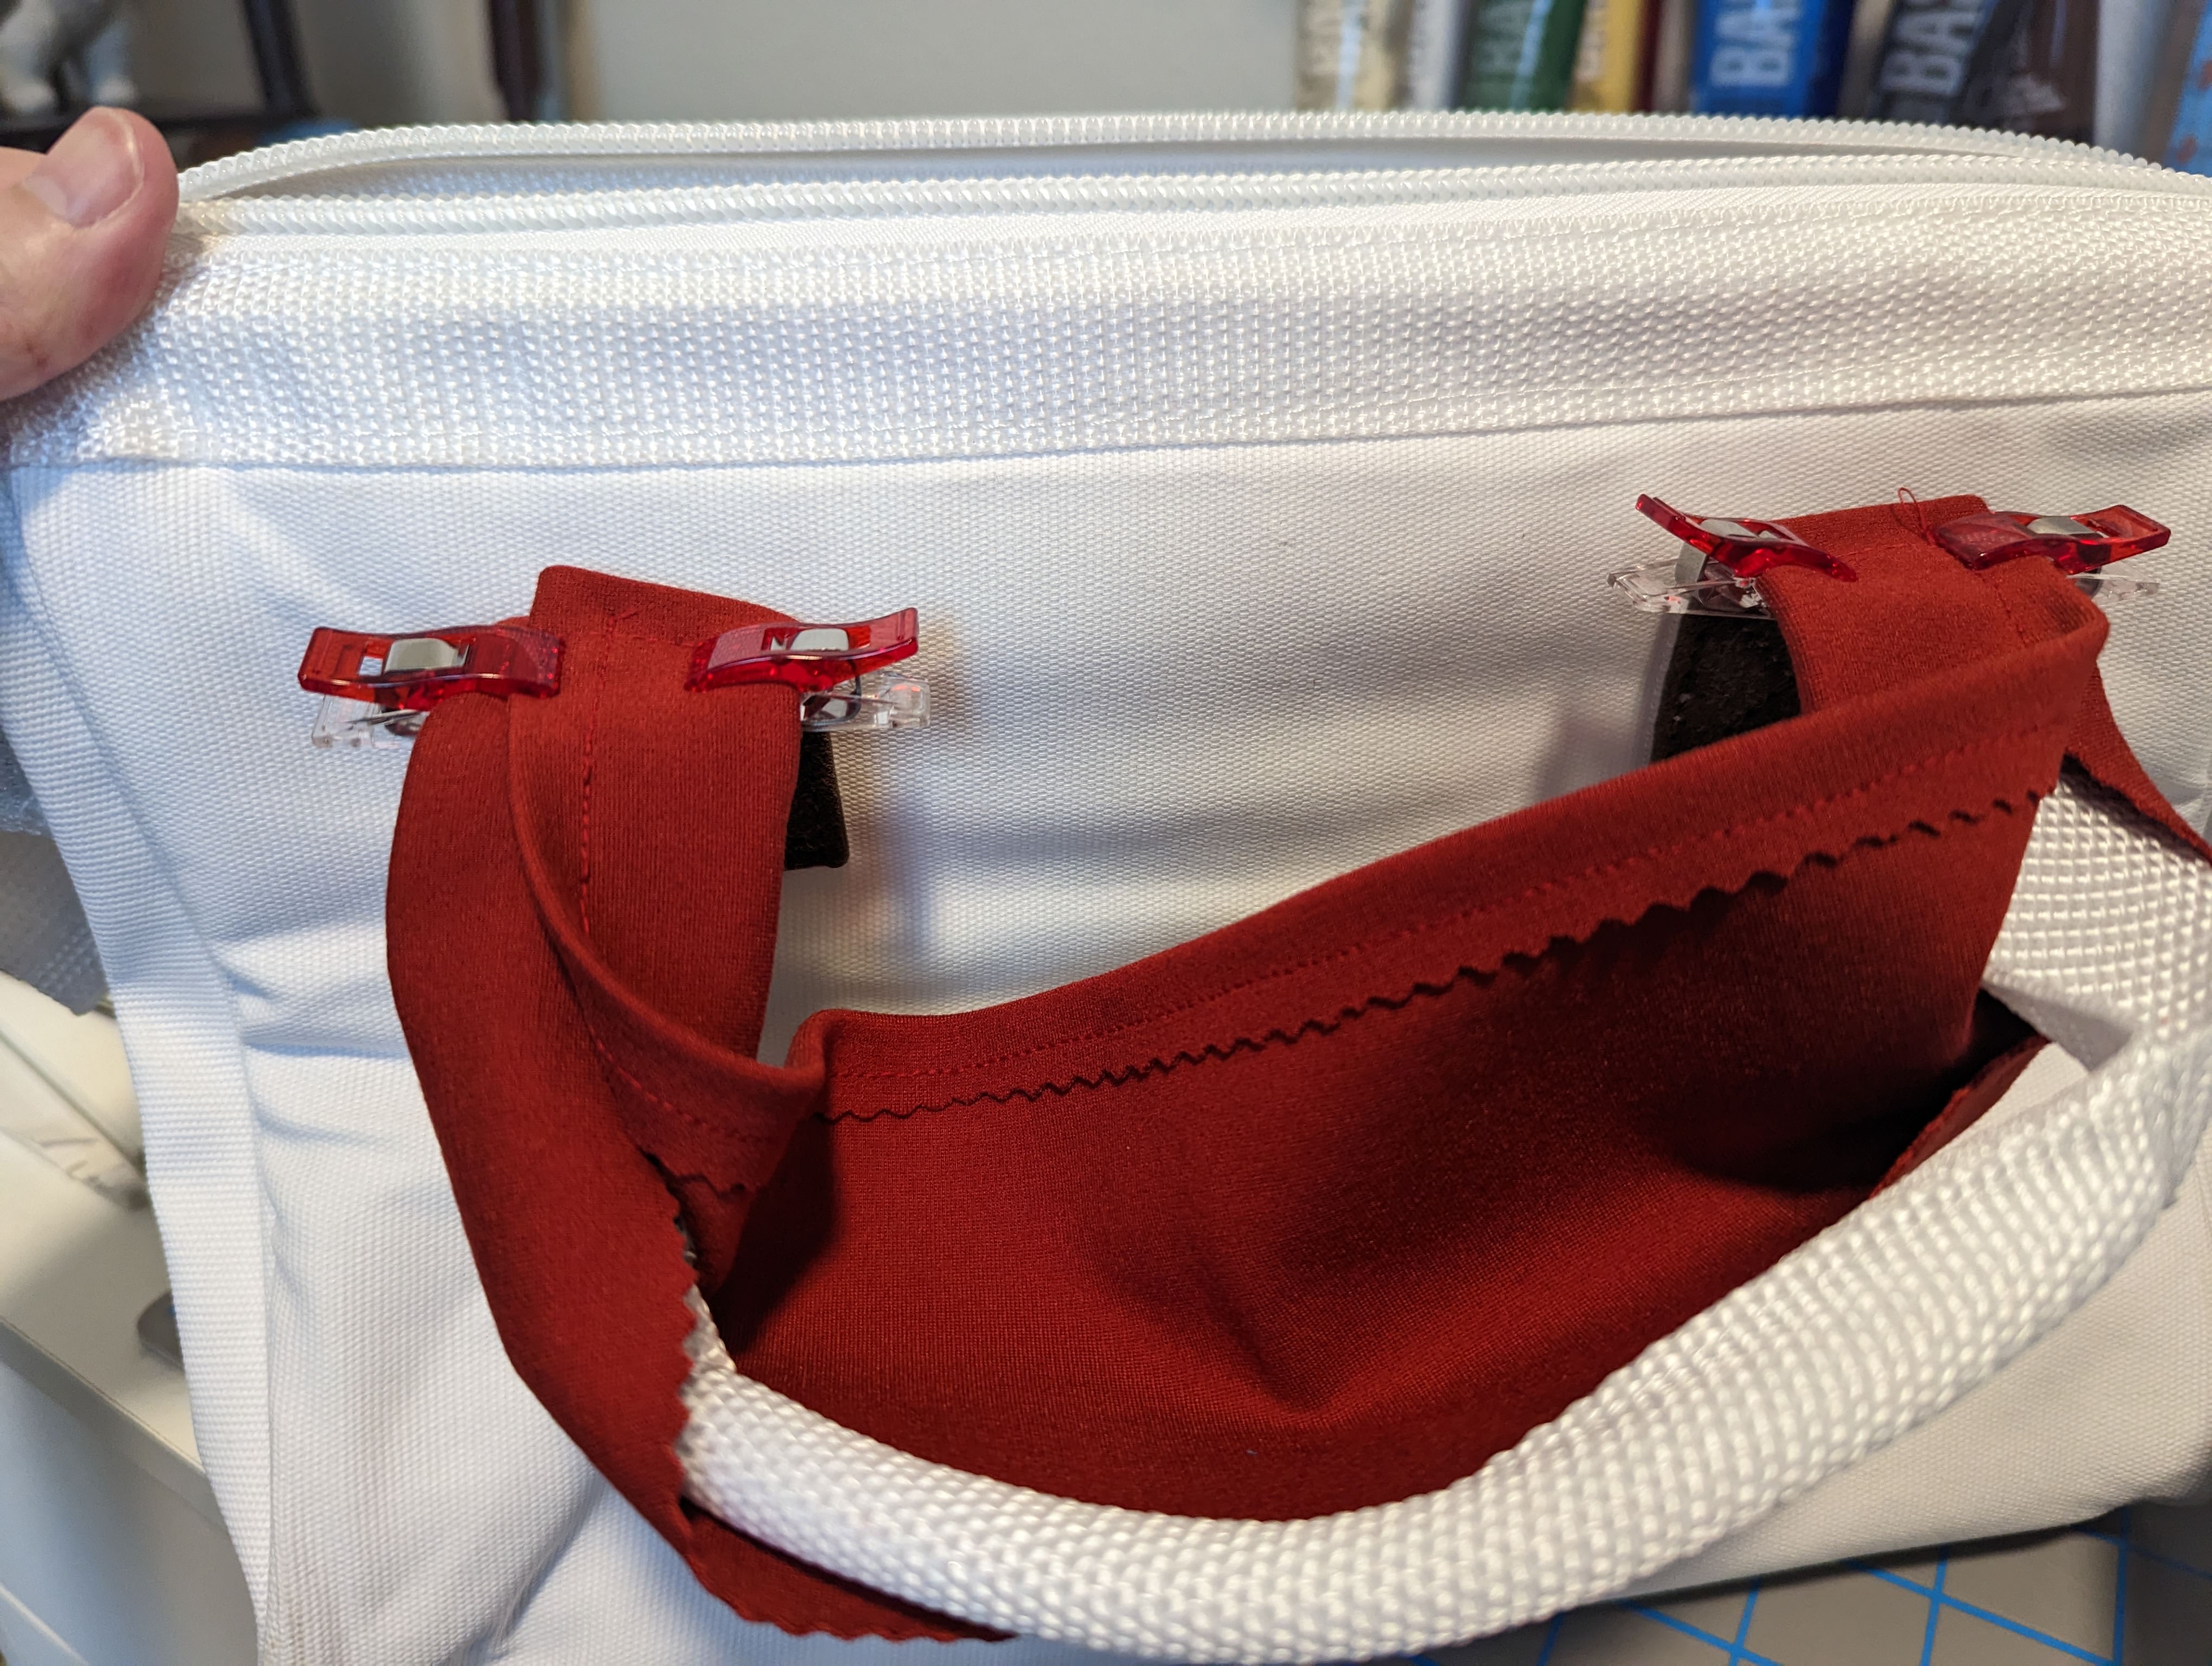
Medpack
I really wanted to do this prop because I had a silly idea for a video I wanted to do with Troy Baker. It’s basically a meme that Elizabeth throws helpful (and sometimes not so helpful) items in-game to Booker/the player. I wanted a video of me throwing this medpack to Troy Baker and was ecstatic when he obliged.
I lucked out by finding this white doctor bag on Amazon. It didn’t have the right straps, but the size and closure was right. Originally, I was going to paint or color over the straps. When that didn’t work, I opted for covering the straps with red fabric.


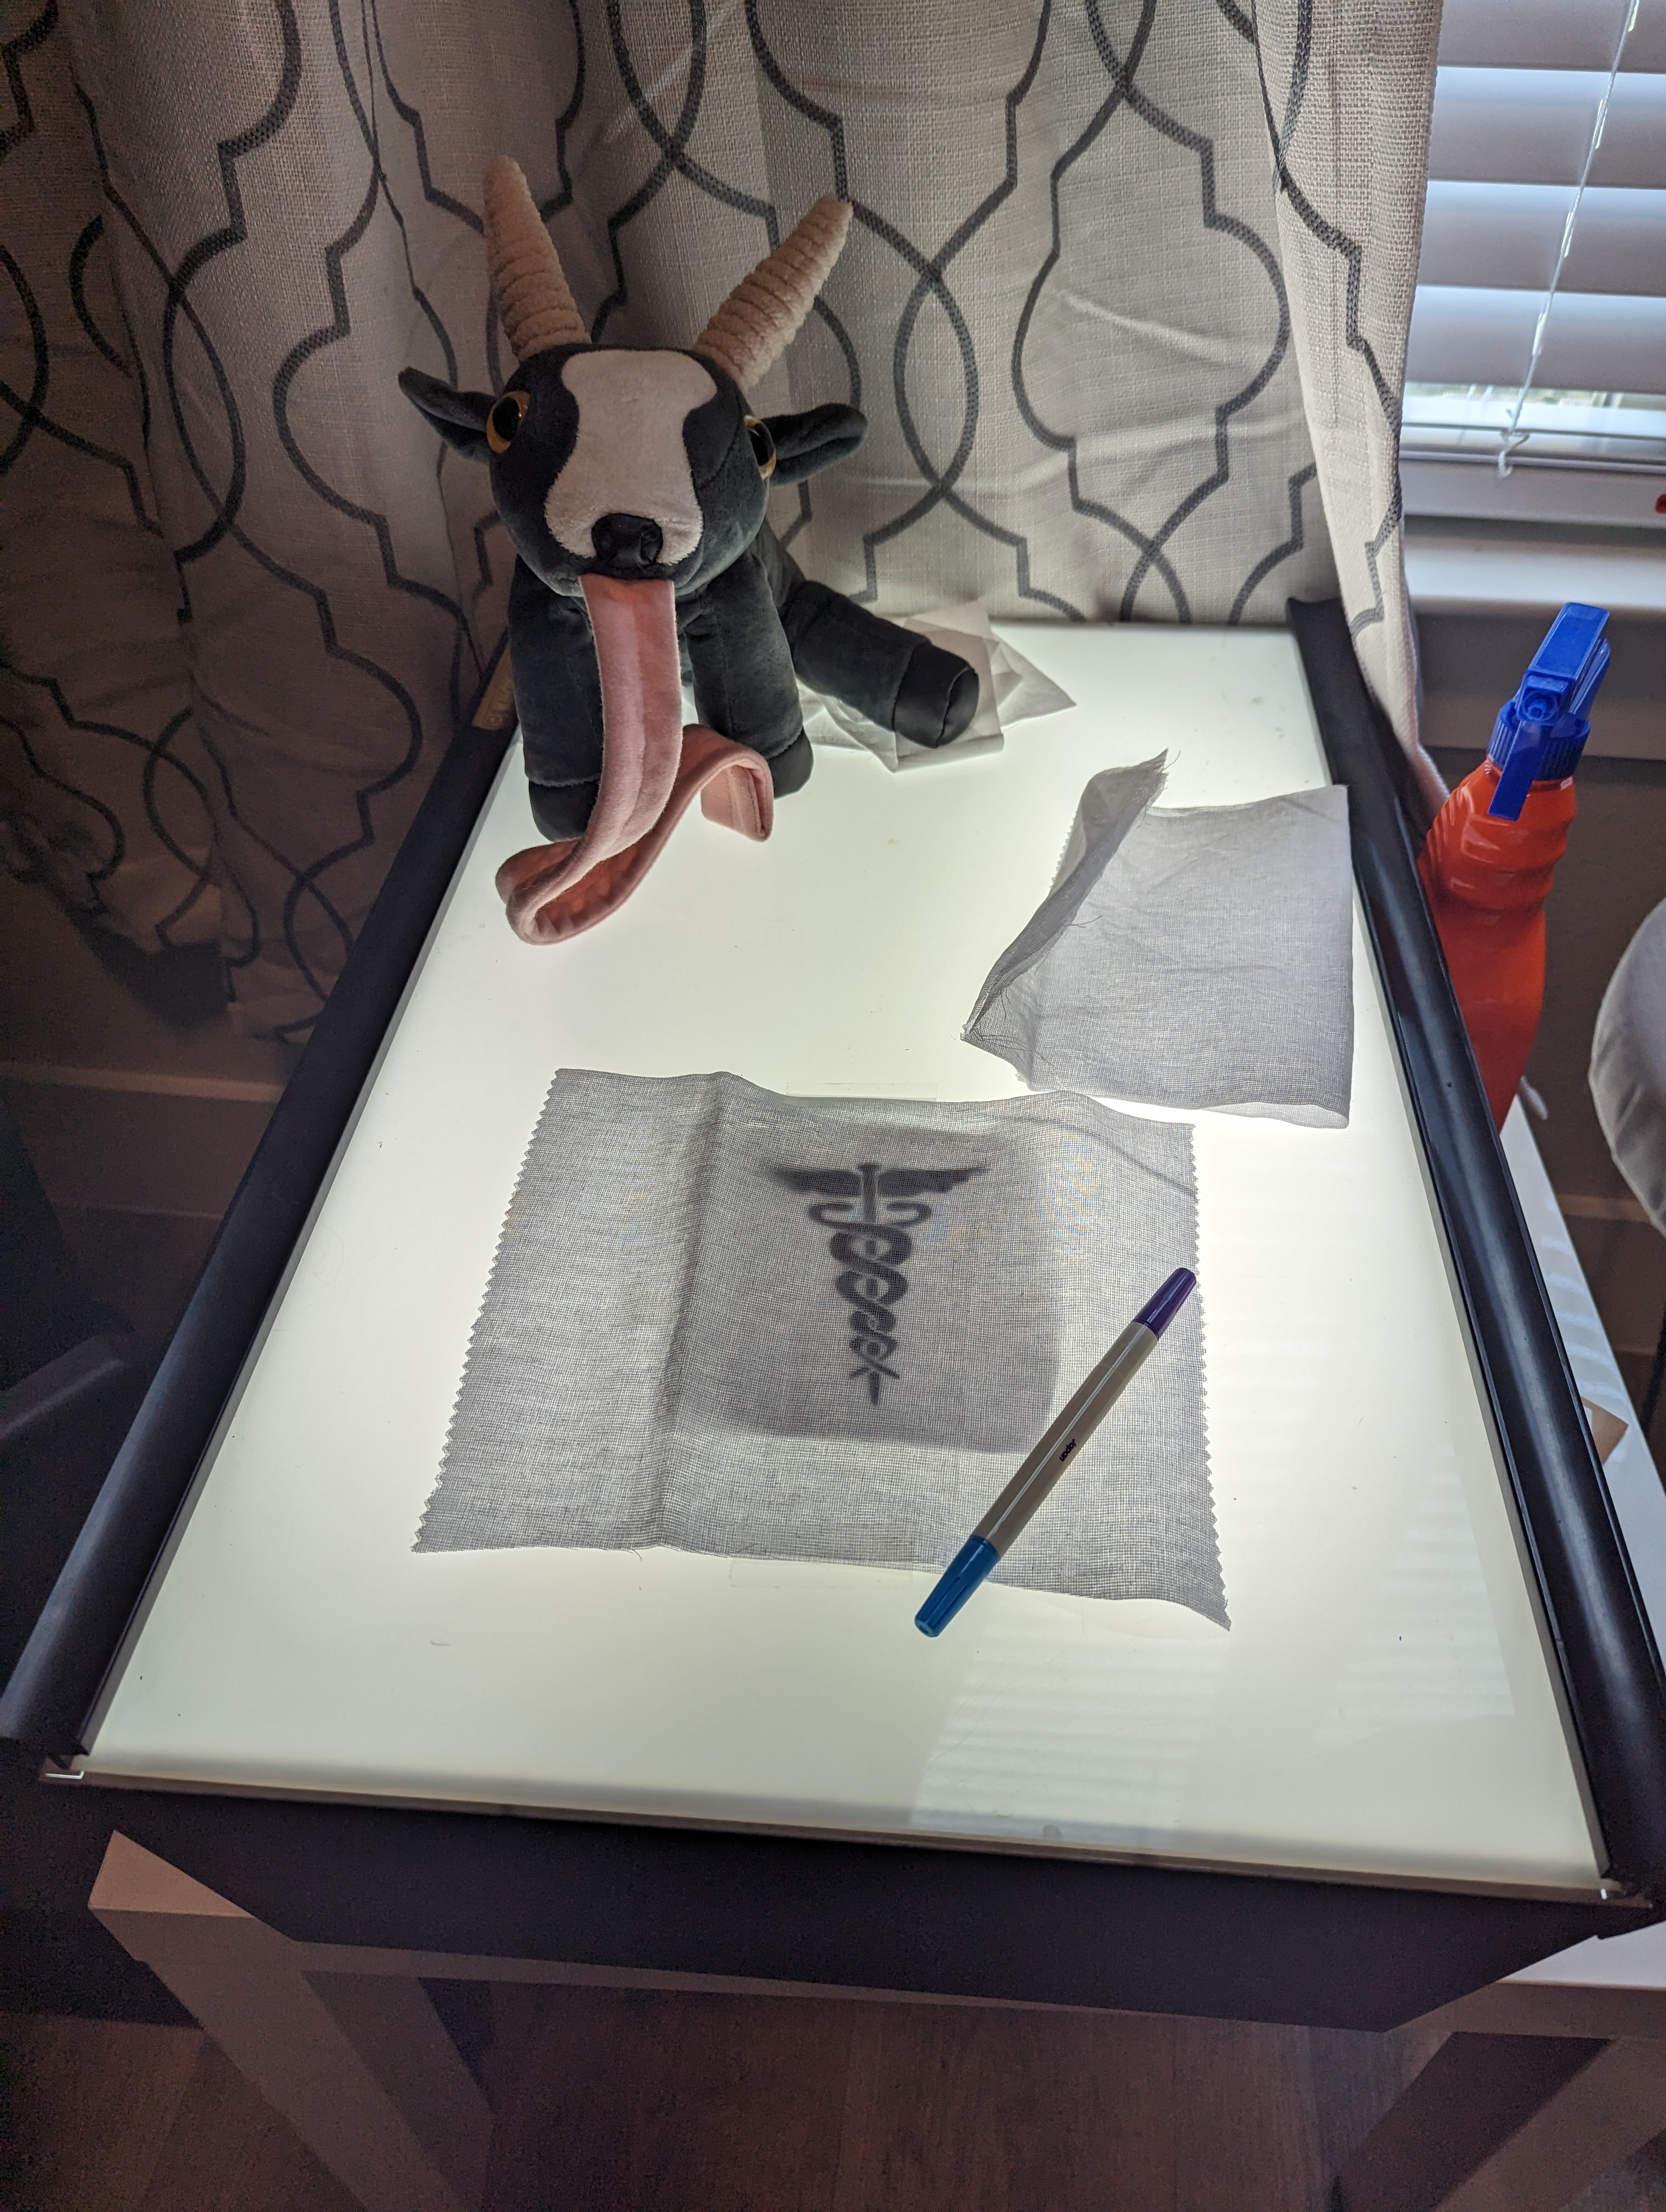
And it’s not an Ashweez cosplay without some embroidery! I recreated the caduceus symbol in Illustrator then had it printed out. After embroidering it twice, I stitched it onto the bag carefully using an upholstery needle.


Conclusion
I’m glad I managed to put together this cosplay together in time to meet Troy Baker. And I’m glad that he went along with my silly video idea (now if only the person in line who took the video had recorded just a second earlier that would’ve been great!)
I still would like to revisit this cosplay and make improvements, specifically her blouse. Since I didn’t have time to make it from scratch, I didn’t get to use the buttons I bought for her cuffs or try out the new folding technique for the front of the top. But I still have that sewing pattern, so I can try again later.
Perfection is the enemy of good. In this one singular instance, con crunching helped get me out of my head and just do the damn thing.


All finished photos by Mehreen Rizvi
Use my build post as inspiration? Let me know!
If you followed along with my build post to help you make your cosplay, I’d love to see it! Leave me a comment or send me an email at ashweezcosplay(at)gmail(dot)com. If you’re comfortable with it, I’d love to showcase your cosplay photo(s) in the blog! I will of course give you credit and link to any socials you may have.

Leave a comment